How to make the best homemade hot chocolate mix. Easy recipe, perfect for gifts in a jar. Makes a rich and creamy hot cocoa that’ll warm you right up.
Homemade hot chocolate mix makes the creamiest cup of hot chocolate, the perfect warm beverage to cozy up with on a cold winter day. Made with only 4 ingredients, it’s also simple and easy to make. And it makes the best hot chocolate cookies!
My middle child, Jaden, and I share a love for homemade hot cocoa. I think it started when he was around preschool age, and I’d mix him up some hot chocolate in his festive little snowman cup.
Ever since, we’ve loved coming in together out of the cold to a teapot full of hot water, a warm mug of homemade hot chocolate, and a handful of mini marshmallows.
Don’t get me wrong… We enjoy our store bought mix. One of our favorites has always been Swiss Miss.
But I really wanted to try making our own hot cocoa mix, so I did a little research and came up with my own recipe for a homemade hot cocoa mix.
Another one of my favorites throughout the winter months, and especially around Christmas, is this homemade hot chocolate with chocolate chips. Only 3 ingredients, and it’s so creamy delicious!
WHERE CAN I FIND THE ACTUAL RECIPE CARD?
If you’d rather skip all of my tips, important info for this recipe, and similar recipe ideas – and get straight to the recipe – just scroll down to the bottom, where you’ll find a printable recipe card.
INGREDIENTS YOU’LL NEED:
Keep in mind, all of the ingredient amounts you’ll need are in the printable recipe card below.
KITCHEN TOOLS AND EQUIPMENT YOU’LL NEED:
Cupcake Scoop – Makes it super easy to scoop the mix into a jar or container.
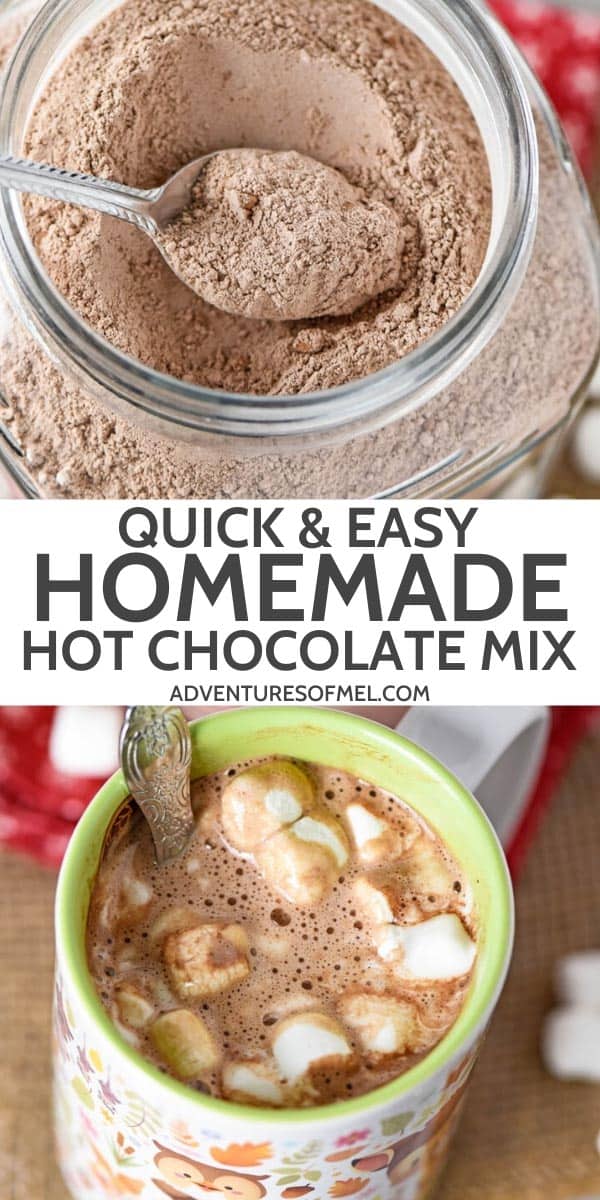
Homemade hot chocolate mix also makes great Mason jar gifts. Grab a pretty Mason jar, fill it with your mix, and maybe add a few mini marshmallow bits for even more yumminess.
Add a pretty gift tag (with mixing instructions) or a holiday recipe card, and a ribbon or bow, and you’ve got a meaningful homemade gift in a jar your recipient will really enjoy.
HOW TO MAKE HOT CHOCOLATE MIX FROM SCRATCH
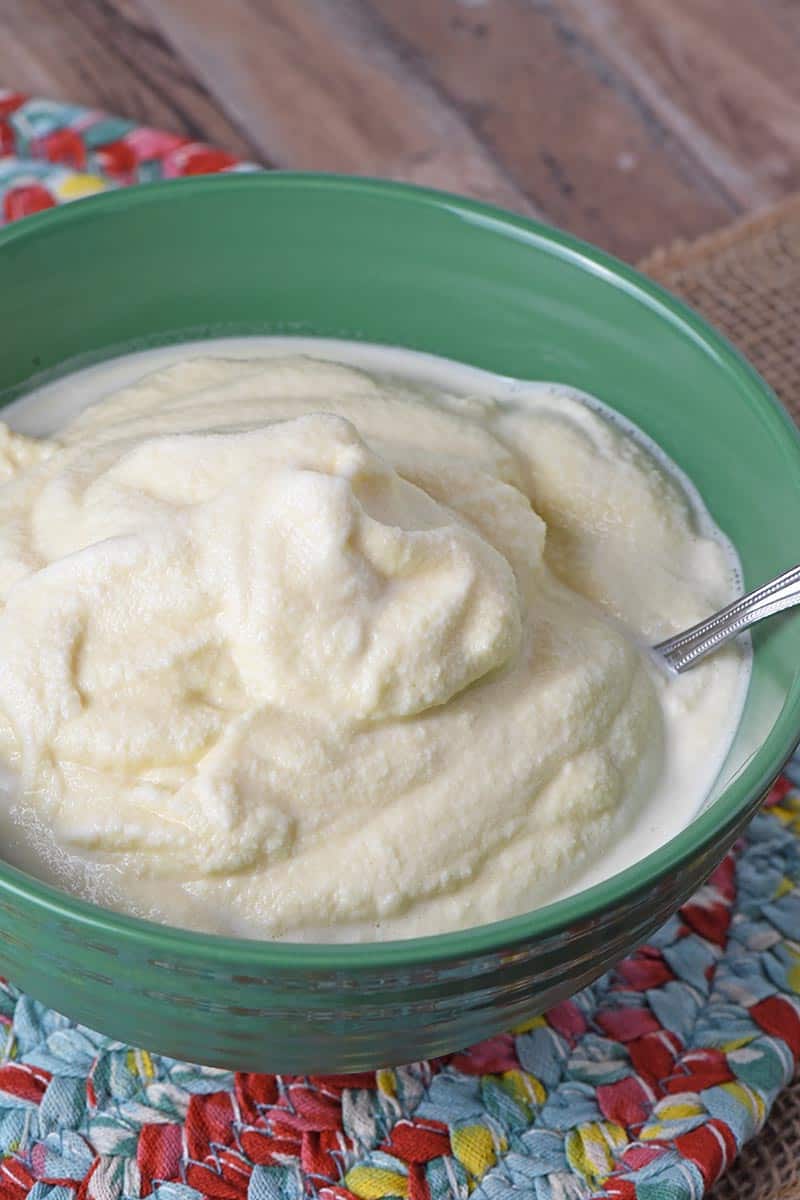
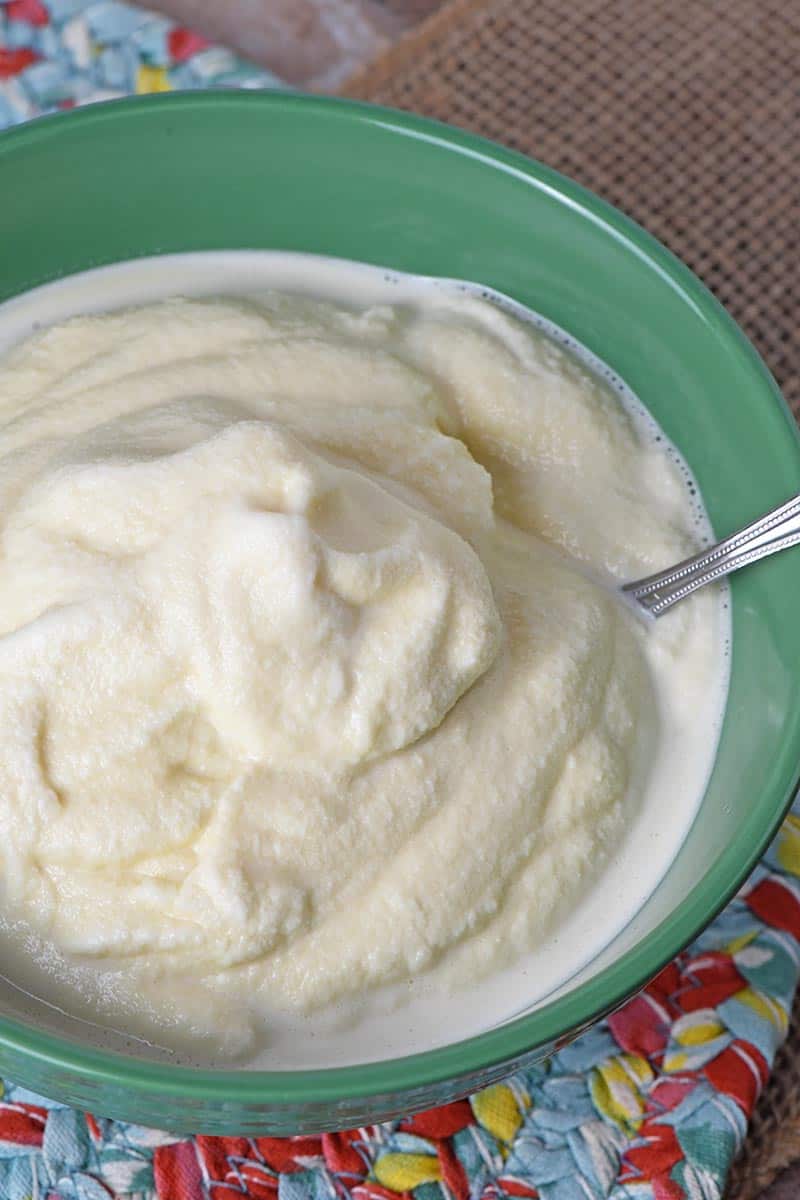
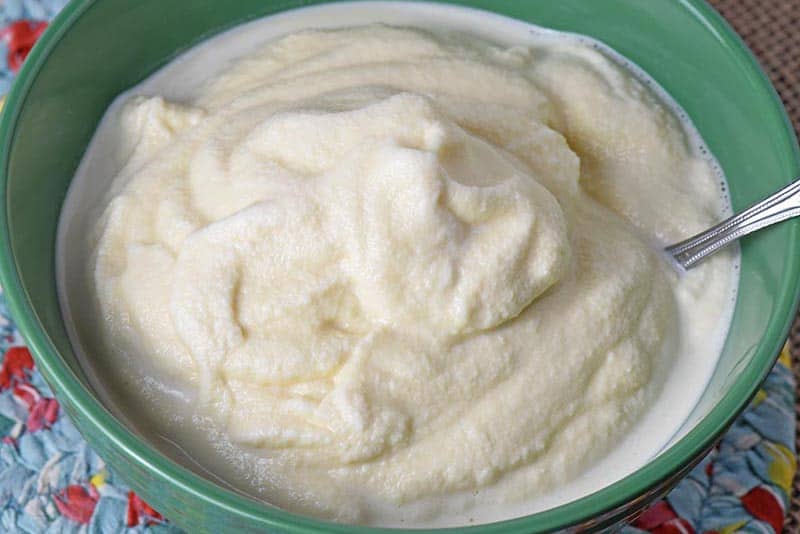
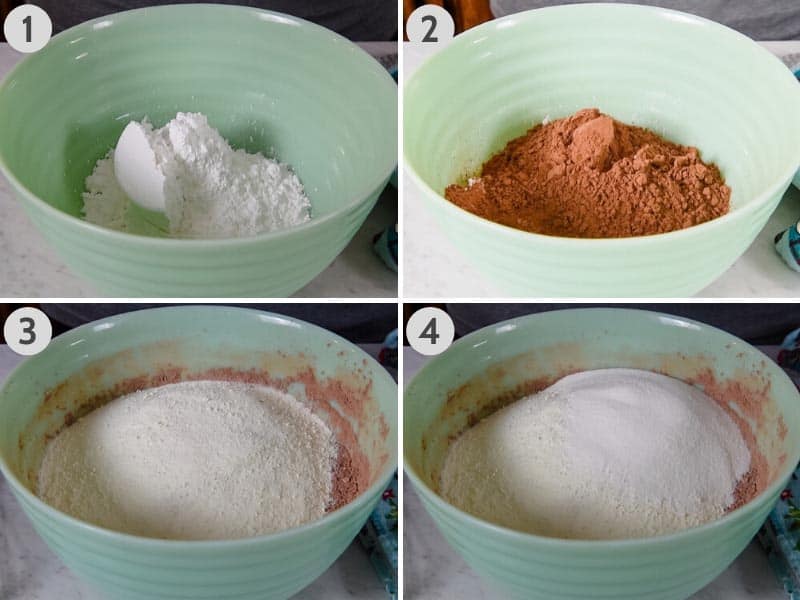
- In a large mixing bowl, whisk together the powdered sugar and cocoa powder to help remove any lumps.
- Add in the dry milk powder.
- Then add the coffee creamer, and whisk everything together ’til mixed well.
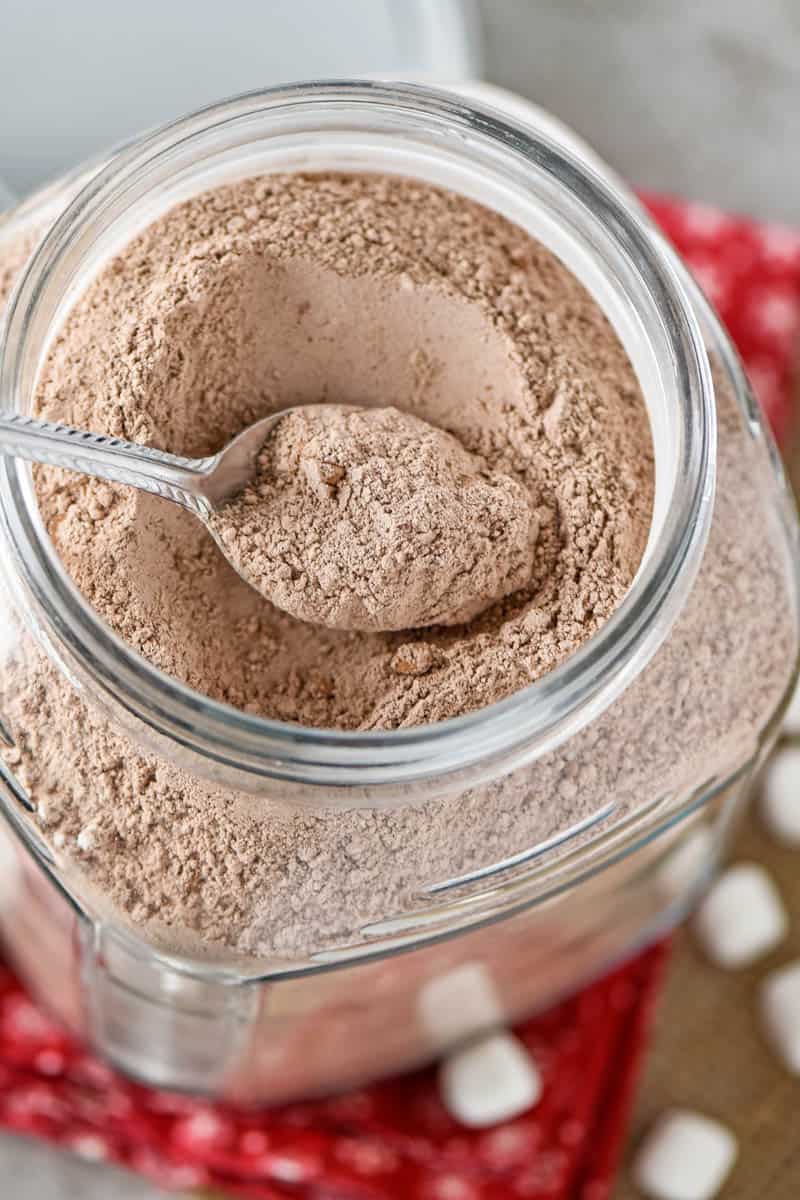
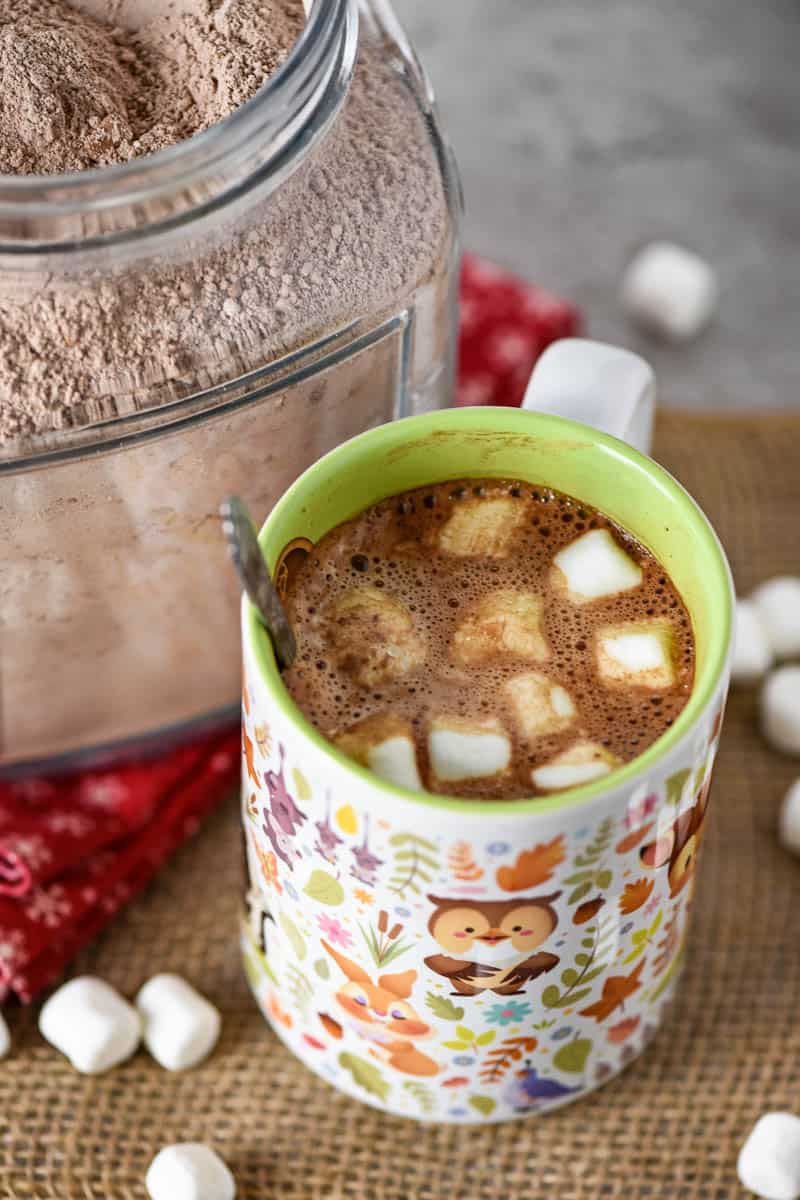
- Add your homemade hot chocolate mix to an airtight container or jar for storage.
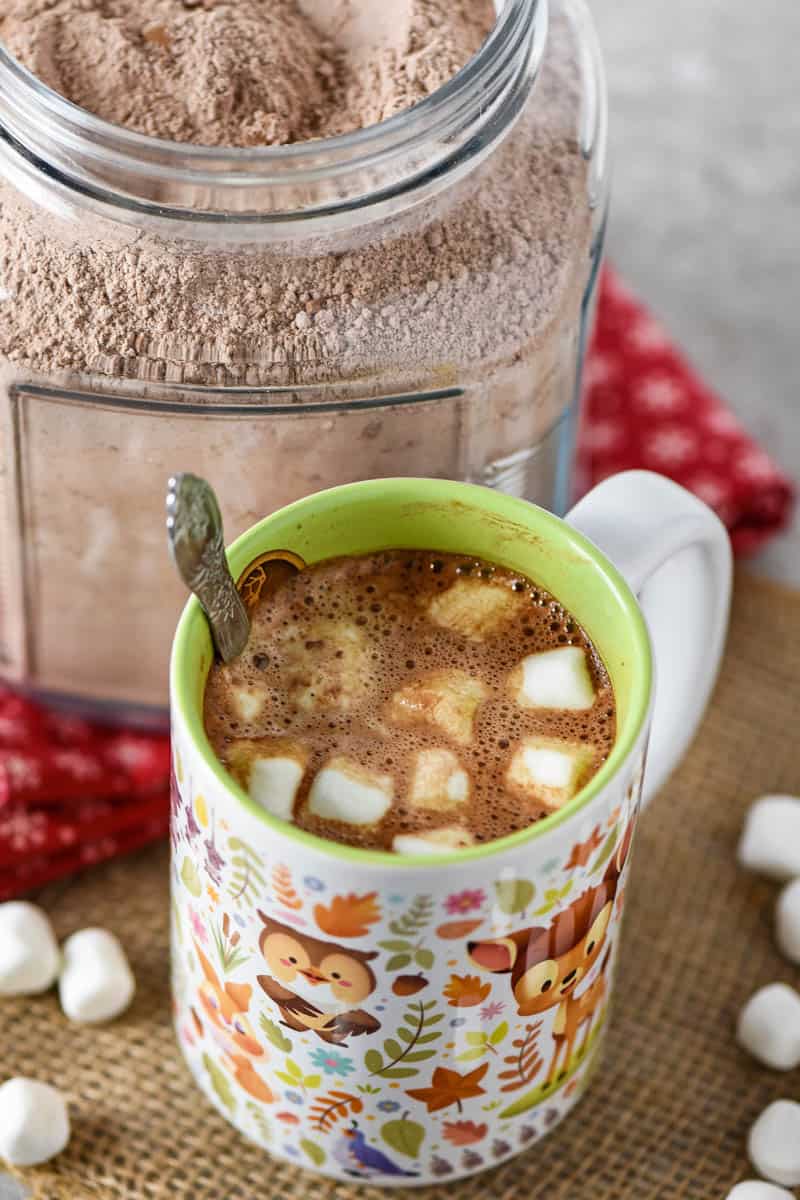
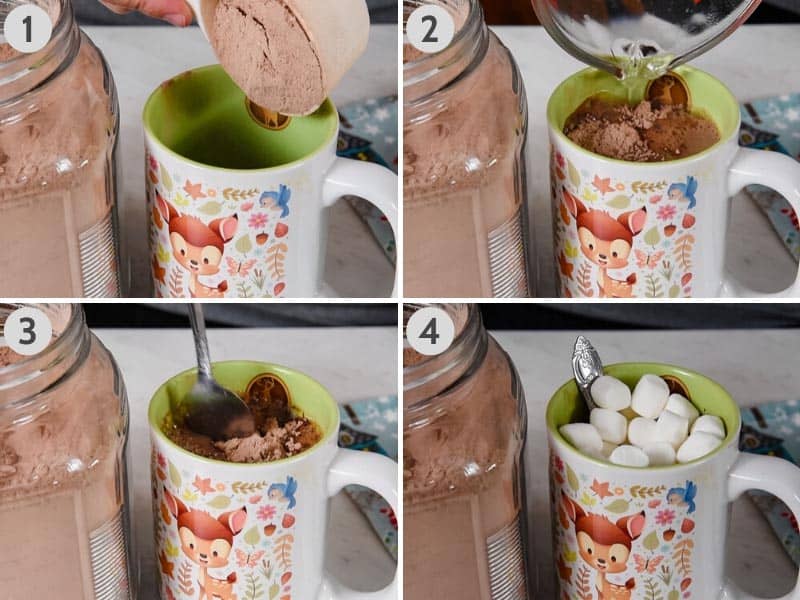
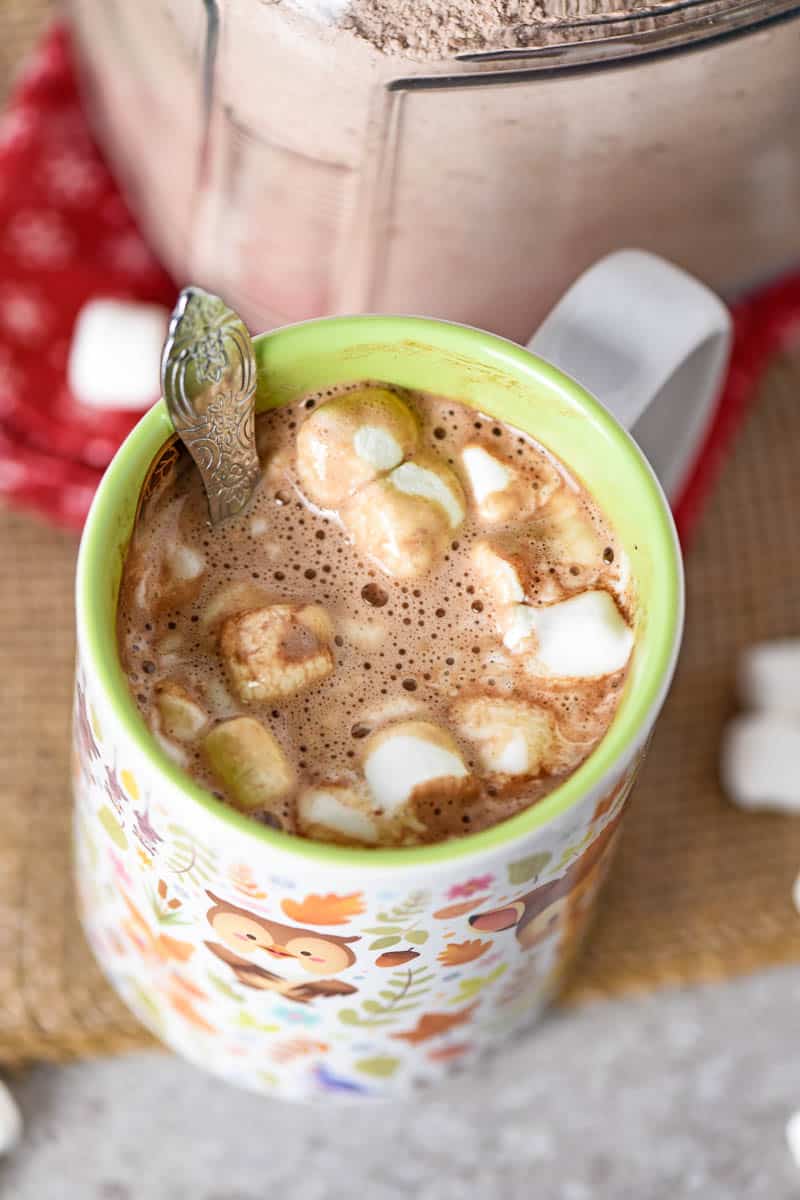
- To mix up a cup of homemade hot chocolate, add 1/2 cup hot chocolate mix to your favorite mug.
- Add 8 ounces hot water to the mix in the mug.
- Stir everything together well.
- Add mini marshmallows or peppermint whipped cream to top it off. You can also add candy canes to make it even more festive.
CAN I USE A CHOCOLATE DRINK MIX INSTEAD OF COCOA POWDER?
No, I wouldn’t recommend doing this, because if you do, you’ll be adding extra sugar and other ingredients to your hot chocolate mix. It will not turn out the way it should and will probably be way too sweet.
IS HOMEMADE HOT CHOCOLATE MIX GLUTEN-FREE?
It really depends on the ingredients you use.
Dry milk can have wheat or the possibility of contamination with wheat. So, you really need to look for a specifically gluten-free instant dry milk powder if you need gluten-free.
Also, watch your cocoa powder, powdered sugar, and coffee creamer to be sure they don’t have any cross-contamination.
MORE FESTIVE BEVERAGE RECIPES:
- Easy Orange Sherbet Punch
- Homemade Raspberry Hot Chocolate
- Sparkling Non-Alcoholic Party Drink with a Touch of Tangerine
- Easy Slow Cooker Mulled Cider
You’ll find even more holiday recipe inspiration on my ultimate list of Christmas recipe ideas.
GET THE PRINTABLE HOT CHOCOLATE MIX RECIPE
If you love this homemade hot cocoa mix as much as I do, please write a 5 star review, and help me share the recipe on Facebook and Pinterest!
CRAVING MORE DELICIOUS RECIPES? Subscribe to my newsletter, and follow along on Pinterest, Facebook, YouTube, and Instagram for all the latest updates!
Homemade Hot Chocolate Mix
How to make the best homemade hot chocolate mix. Easy recipe, perfect for gifts in a jar. Makes a rich and creamy hot cocoa that'll warm you right up.
- Scoop
- 1-Gallon Jar
- 2 cups powdered sugar
- 1 1/2 cups unsweetened cocoa powder
- 3 cups instant dry milk powder
- 1/2 cup French Vanilla coffee creamer
In a large mixing bowl, whisk together the powdered sugar and cocoa powder to remove any lumps.
Mix in the dry milk powder.
- Then add the coffee creamer, and whisk everything together ’til mixed well.
Add the homemade hot chocolate mix to an airtight container or large jar with lid for storage.
To mix up a cup of homemade hot chocolate, add 1/2 cup hot chocolate mix to your favorite mug. Add 8 ounces hot water. Stir everything together well. Top it off with mini marshmallows or whipped cream.
*Do not substitue a chocolate drink mix for unsweetened cocoa powder. If you do, you’ll be adding extra sugar and other ingredients to your hot chocolate mix. It will not turn out the way it should and will probably be way too sweet.
**Dry milk can have wheat or the possibility of contamination with wheat. So, if you need a gluten-free option, you really need to look for a specifically gluten-free instant dry milk powder. Also, watch your cocoa powder, powdered sugar, and coffee creamer to be sure they don’t have any cross-contamination.
6. You can add warm milk instead of hot water. With the milk powder, I find that it’s creamy enough, so I simply add hot water to my mix and stir it up.