Thanks to Land O’Lakes for sponsoring this recipe. All opinions are my own.
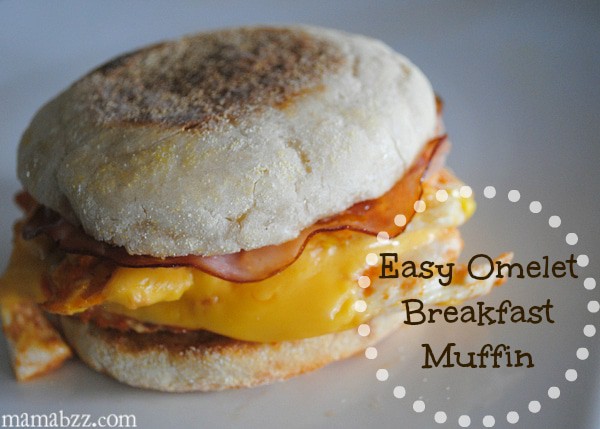
Probably the most important thing to really get our day started right is a good, nutritious breakfast. I’m about to share my husband’s delicious recipe with you for an Easy Omelet Breakfast Muffin…. you’ll never look at breakfast sandwiches the same again after trying this bad boy.
Mmmm, I’m hungry just thinking about it.
First, though, how do you simplify your morning routine, your kitchen, meals, etc.?
We’ve simplified the morning routine by sharing the workload in the mornings. Generally, I’ll get laundry going and get lesson plans written down for the day.
Dan has taken on the chore of making breakfast almost every weekday morning, and I can’t even tell you how much smoother our day goes because of that.
Another way we’ve simplified our kitchen is that we make sure we keep important ingredients and staples on hand, as well as healthy snacks for the boys (within their reach and in a designated spot).
Speaking of ingredients, let’s talk about our easy breakfast recipe. We first made these breakfast sandwiches while camping last summer in the Smoky Mountains; that’s how easy they are.
Below is a printable recipe, without photos, for your convenience.
I JUST WANT THE RECIPE! TAKE ME TO THE RECIPE FOR THIS EASY OMELET BREAKFAST MUFFIN!
If you’d rather skip all of my cooking tips, important cooking info for this recipe, and similar recipe ideas – and get straight to this delicious omelet breakfast muffin recipe – just scroll down to the bottom, where you’ll find a printable recipe card.
Tips for how to make an Easy Omelet Breakfast Muffin
Start by gathering your ingredients…. eggs, Pineapple Ham (or any type of ham will work), salsa, cheese, Land O Lakes® Butter with Canola Oil, and English muffins.
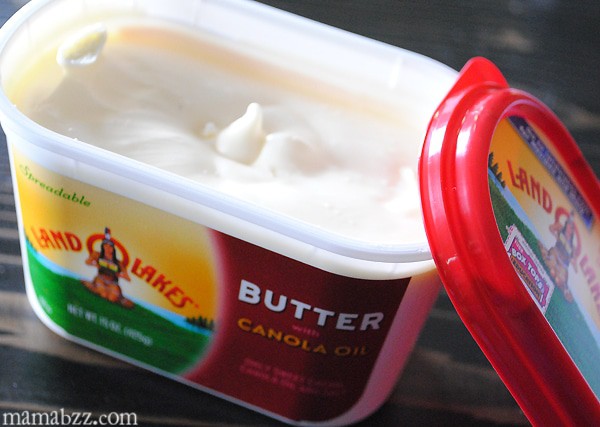
Start by adding a bit of Land O Lakes® Butter with Canola Oil to your skillet, letting it sizzle and melt.
The great thing about this butter is that it’s made with only 3 simple ingredients: sweet cream, canola oil, and salt. Don’t you just love the sound of sweet cream?
Did you notice they’re all easy to read ingredients? It contains no artificial ingredients, definitely a plus, something we’re becoming more and more conscious of as we buy groceries.
I also like that it’s made by Land O’Lakes, a farmer-owned cooperative that’s been around for more than 90 years.
When the butter has melted, add eggs, one by one, also breaking the yolks.
After the eggs have cooked somewhat, add a spoon of salsa to each one.

Finish cooking each egg until it’s well done, and add cheese to melt.
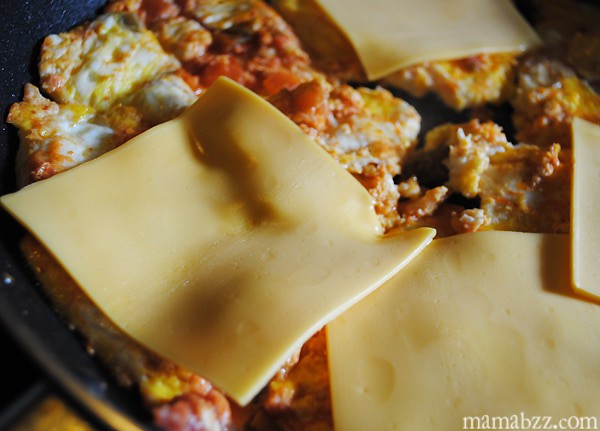
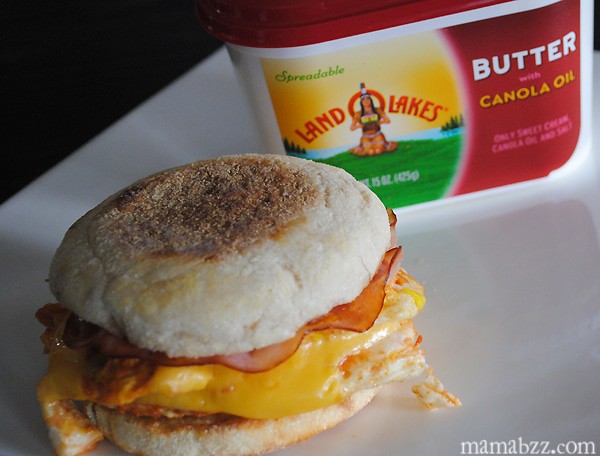
Once cheese is melted and eggs are fully cooked, remove from skillet, and set aside in a warm spot. Add ham to skillet, just warming ’til slightly crisp around the edges.
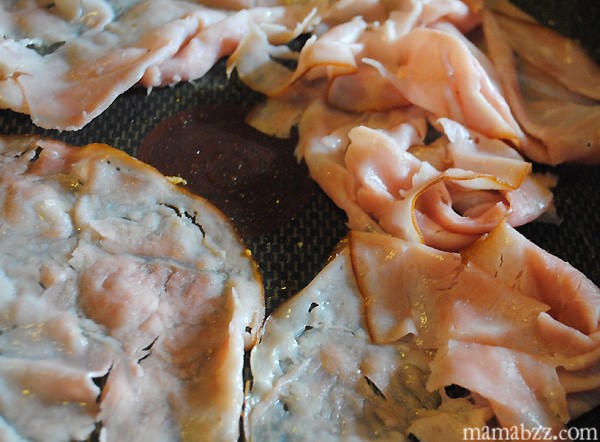
Meanwhile, toast English muffins, adding easily spread Land O Lakes® Butter with Canola Oil to each toasted muffin.
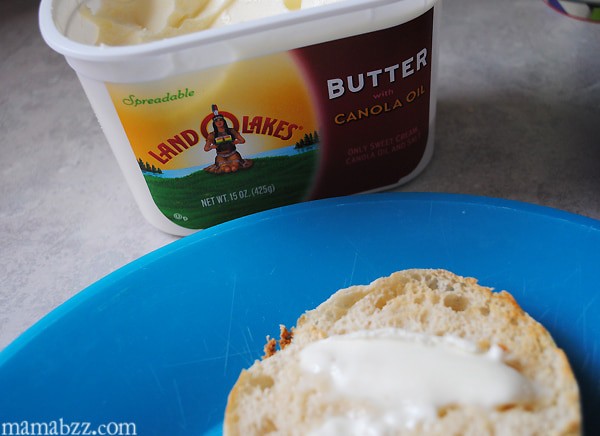
That’s another great thing about this butter is that it’s spreadable right out of the refrigerator. It’s oh so creamy and tastes so good.
Once you’ve buttered your English muffins, add cheesy omelets and a thin slice of warmed ham, forming a breakfast sandwich fit for a queen.
This is definitely one of our favorite easy breakfast meals; it’s so quick and easy to make. Plus, we’re not starving by 10 am. It’s very filling.
It could also be made healthier by only using egg whites, just another option.
Hungry for more easy breakfast ideas?
Bacon, Egg, and Cheese Breakfast Muffin Cups
Low Carb Sausage Egg Muffins
McDonald’s Egg McMuffin (Copycat)
Cheesy Baked Frittata with Ham, Peppers, and Tomatoes
Easy Omelet Breakfast Muffin

Cheesy delicious omelet sandwich made with eggs, salsa, cheese, and English muffins. Family favorite breakfast idea!
- 4 large eggs
- 4 slices ham (we love using pineapple ham)
- 4 tablespoons salsa
- 4 slices American cheese
- 4 tablespoons salted butter
- 4 whole English muffins
- Start by adding a bit of Land O Lakes® Butter with Canola Oil to your skillet, letting it sizzle and melt. When the butter has melted, add eggs, one by one, also breaking the yolks. After the eggs have cooked somewhat, add a spoon of salsa to each one. Finish cooking each egg until it’s well done, and add cheese to melt.
- Once cheese is melted and eggs are fully cooked, remove from skillet and set aside in a warm spot. Add ham to skillet, just warming ’til slightly crisp around the edges.
- Meanwhile, toast English muffins, adding easily spread Land O Lakes® Butter with Canola Oil to each toasted muffin. Once you’ve buttered the English muffins, add cheesy omelets and a thin slice of warmed ham, forming a breakfast sandwich fit for a queen.
- This sandwich could also be made healthier by only using egg whites, just another option. Serve and enjoy!


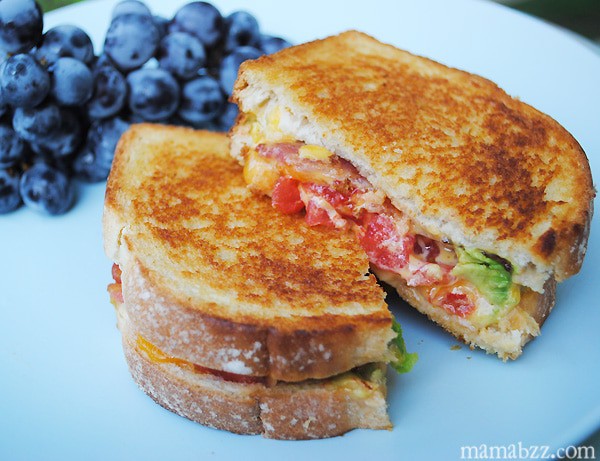
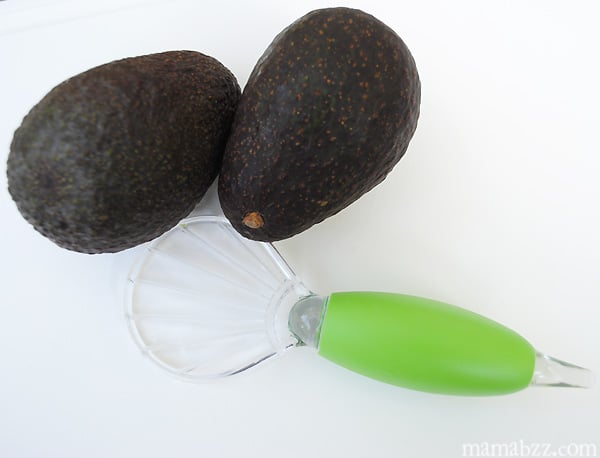 This slicer made pitting and slicing the avocados an easy peasy process. The hook on the end of the handle helps you to remove the avocado pit.
 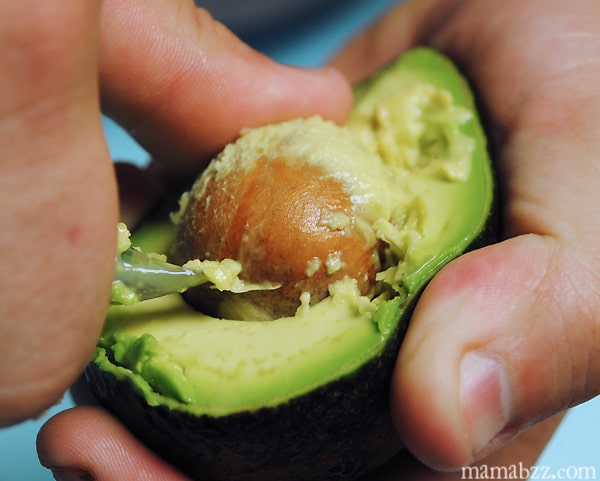 Then you just run the slicer down the skin of the avocado through the meat of the fruit, and you have a sliced avocado.
 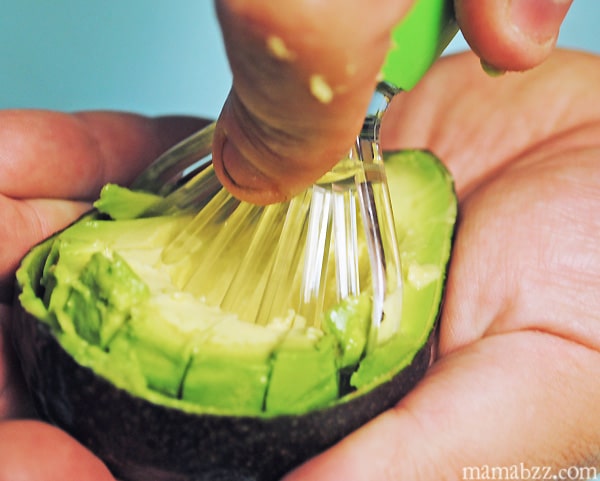 The tool is quite sturdy and something we’ll probably be using quite a bit in our kitchen, as we’re always eating avocado on our sandwiches or making guacamole.
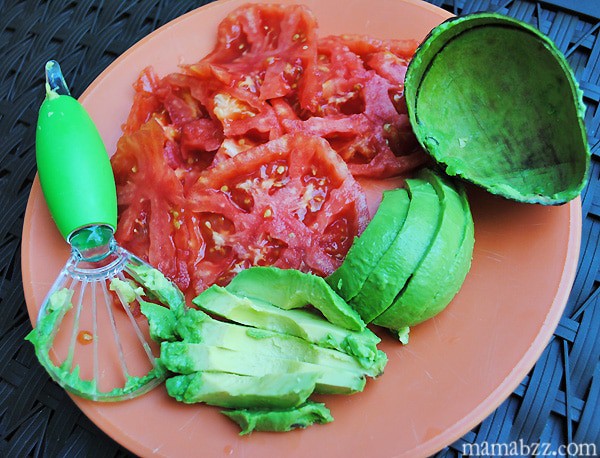 Putting this sandwich together is super easy, and you start with two slices of sourdough bread. Butter the outsides; I used to butter the insides too on all my grilled cheese, but I don’t do that anymore…. trying to be a bit more health-conscious. Fire up the griddle, and place one slice of bread on the griddle. Add a few slices of Cheddar Cheese, then tomato, avocado, and a slice of American Cheese. Sandwiching the tomato and avocado between the two cheeses ensures that everything will be wrapped together in ooey, gooey goodness. Finally, add a few slices of bacon, already cooked.
 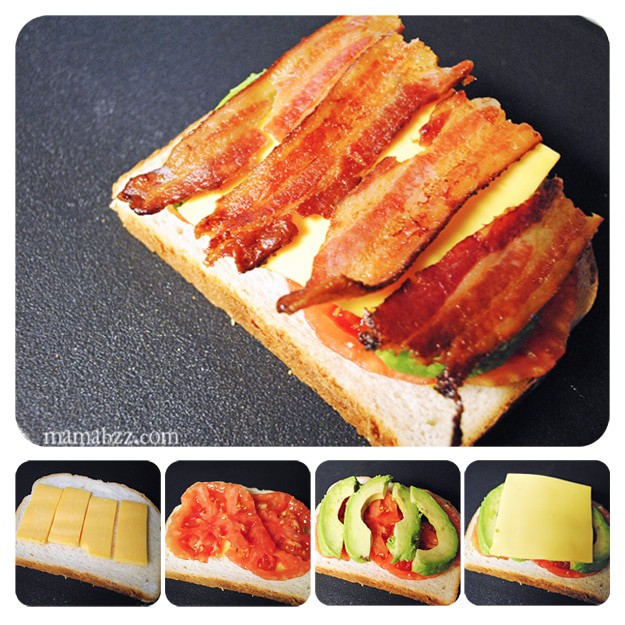 Top it off with your other slice of buttered sourdough, and cook until golden brown and cheeses are melted and gooey.
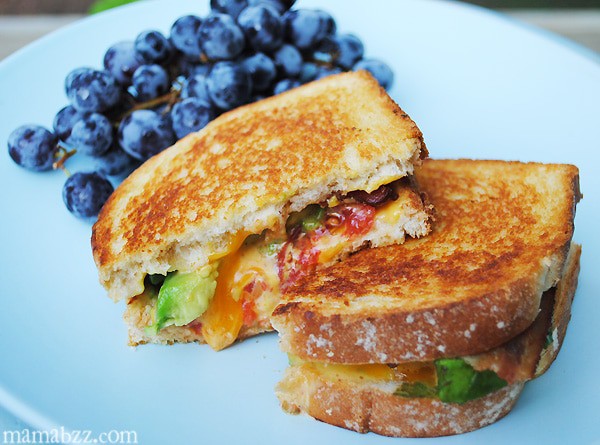
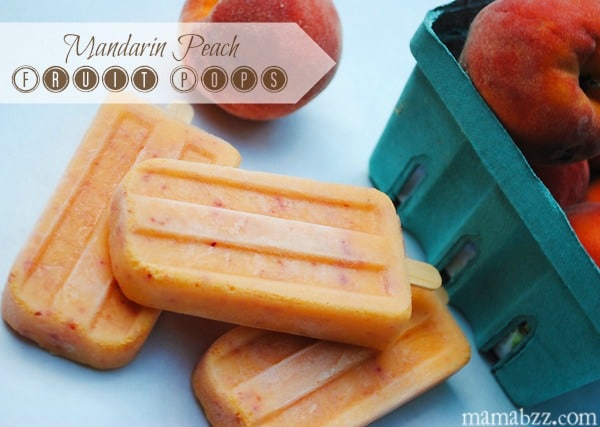
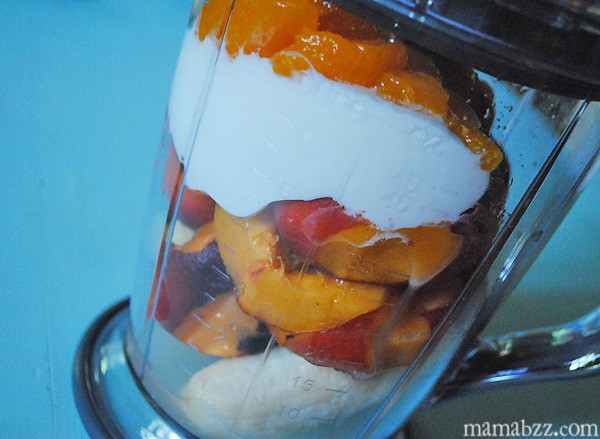 I added a banana, peaches, a fruit cup of mandarin oranges, about 1/2 cup of Greek Yogurt, and 1-2 tsp of sugar. I kept the peeling on the peaches, so we locked all those awesome nutrients into these ice pops. Blend everything together, making it into a nice liquidy mixture. Then pour into popsicle molds. I highly recommend
 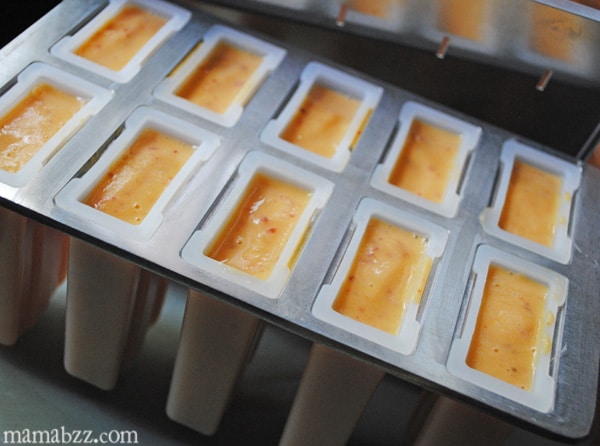 Set your popsicles in the freezer, and leave for however long they need, usually a few hours. Then remove pops from the freezer, and enjoy.
 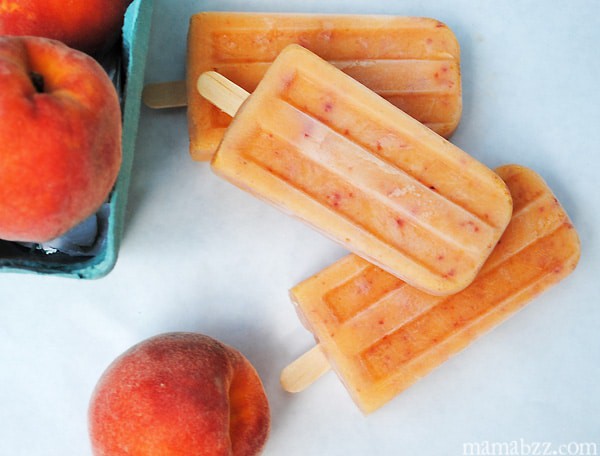 These have been delicious, and my kids are still enjoying them.
 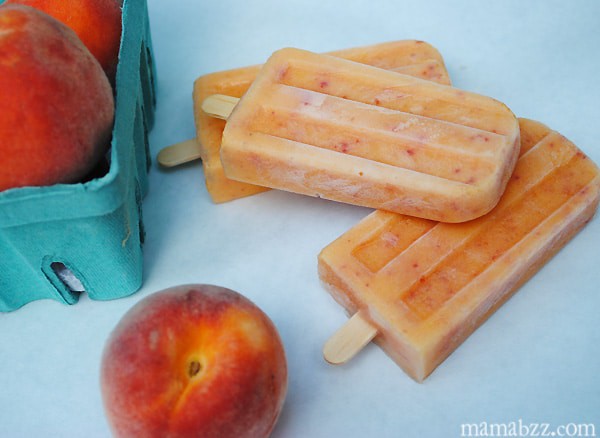 More recipes and experiments with homemade popsicles to come!
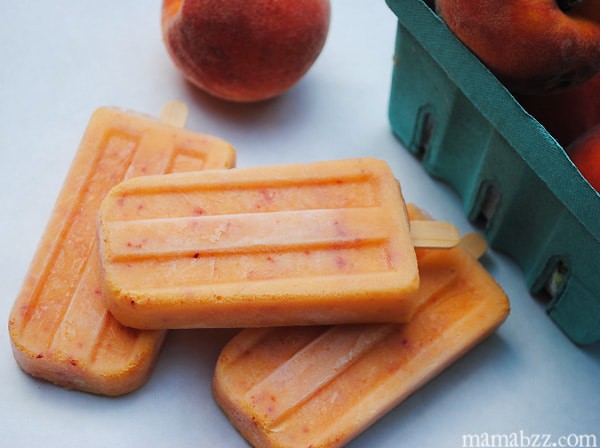


 Below, you’ll find a printable recipe, without photos, for your convenience.
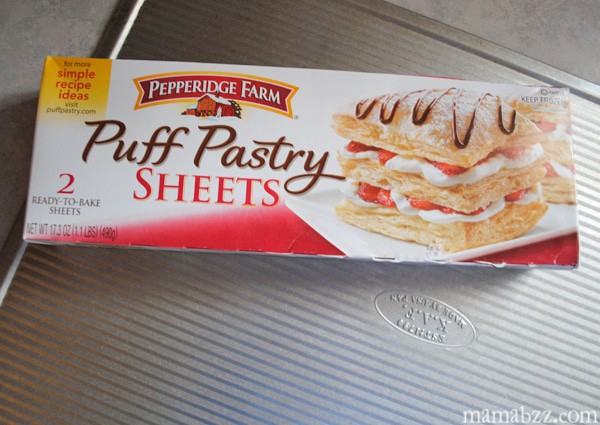 Place pastry sheet on a baking sheet, and bake according to package directions, until golden brown.
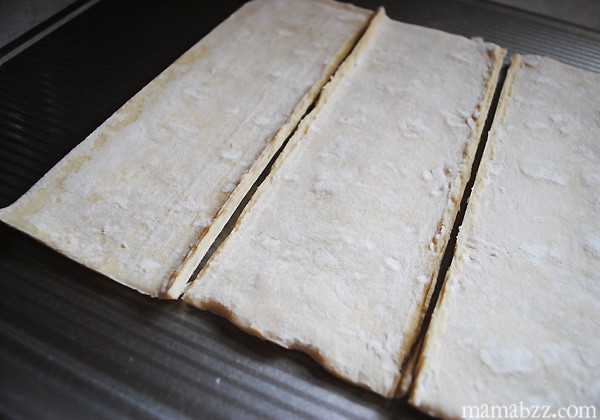 While that’s baking, wash and prepare all your fruit; I like to let mine soak in a vinegar/water mixture.
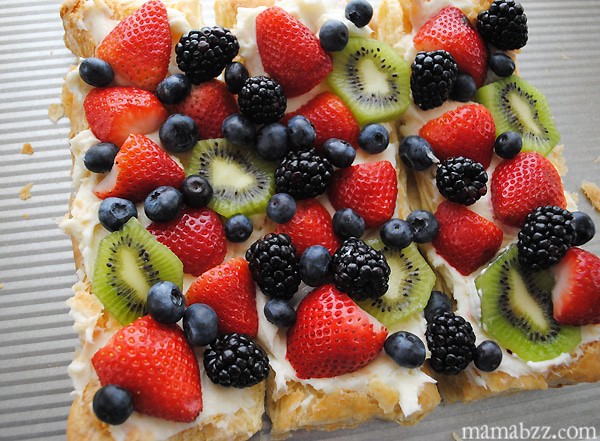
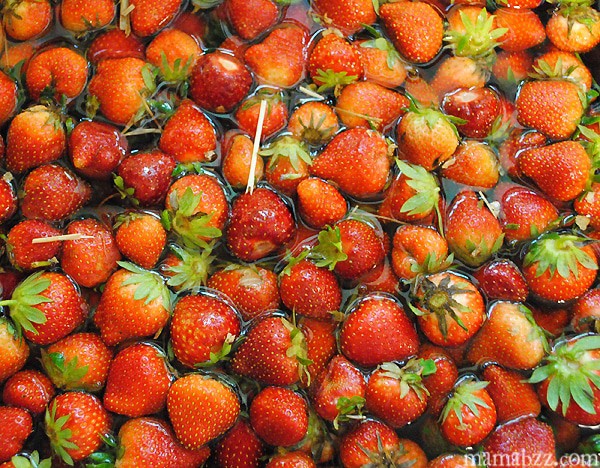
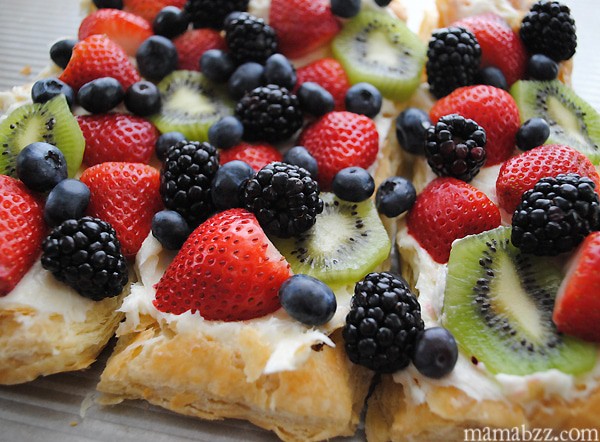
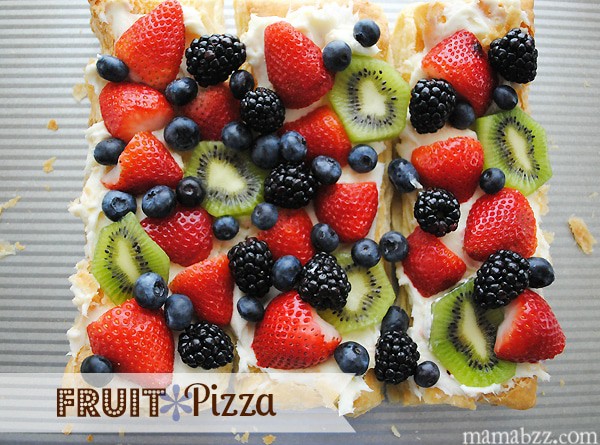
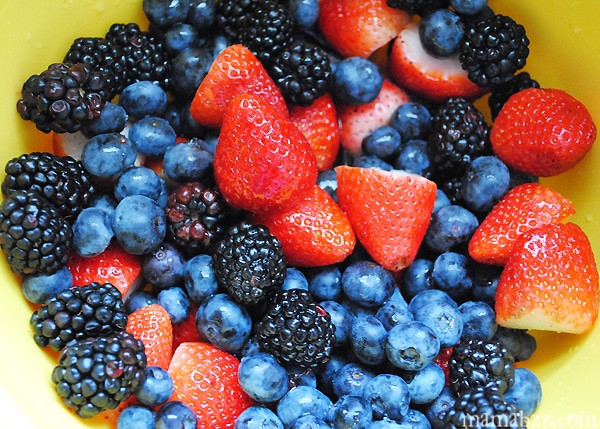 We use blueberries, strawberries, blackberries, and kiwi.
 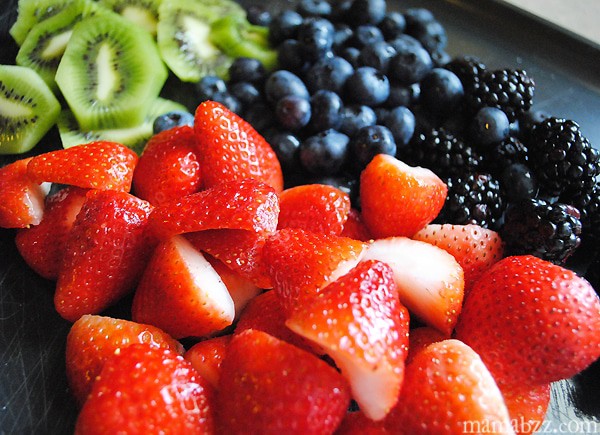 Mix cream cheese and powdered sugar together.
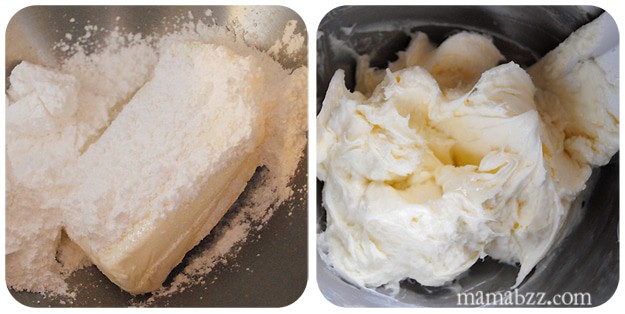 Once puff pastry has fully baked and cooled, spread cream cheese mixture onto puff pastry; this is tricky, because the pastry is very flaky.
  Finally, just add fruit, as desired. Add as much fruit as your family prefers. We like to pile ours up. The more colorful, the better.