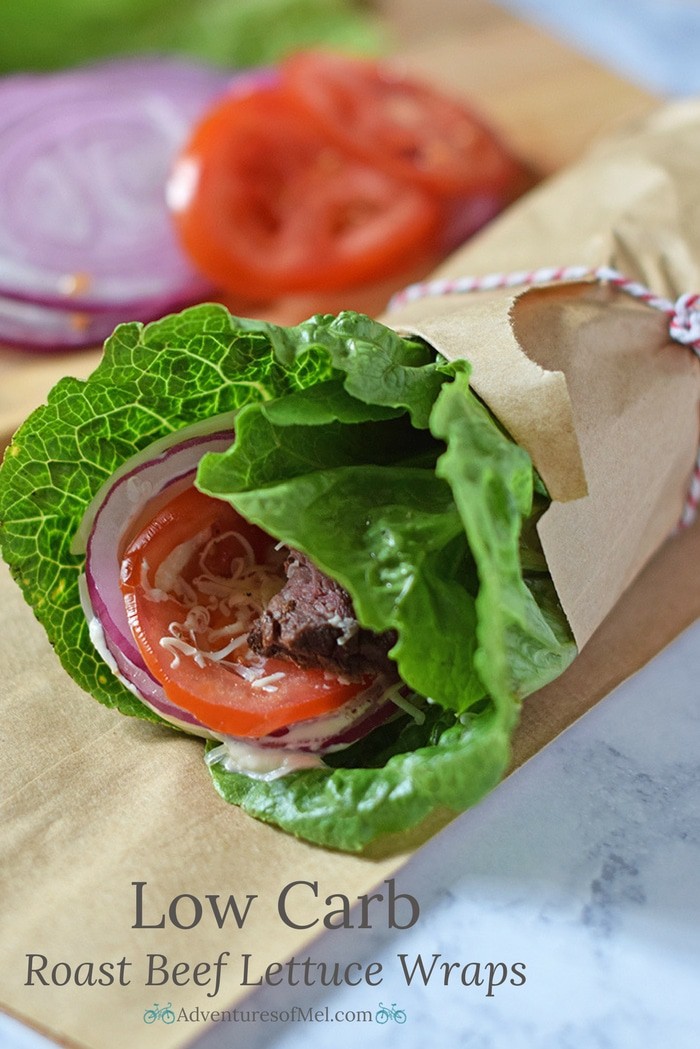
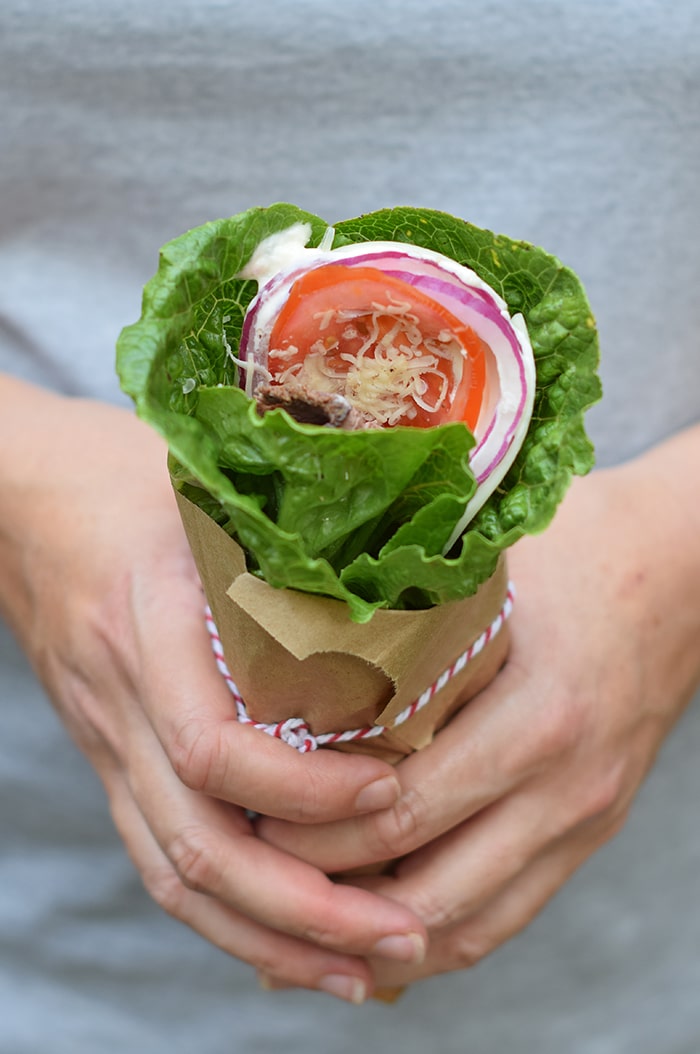
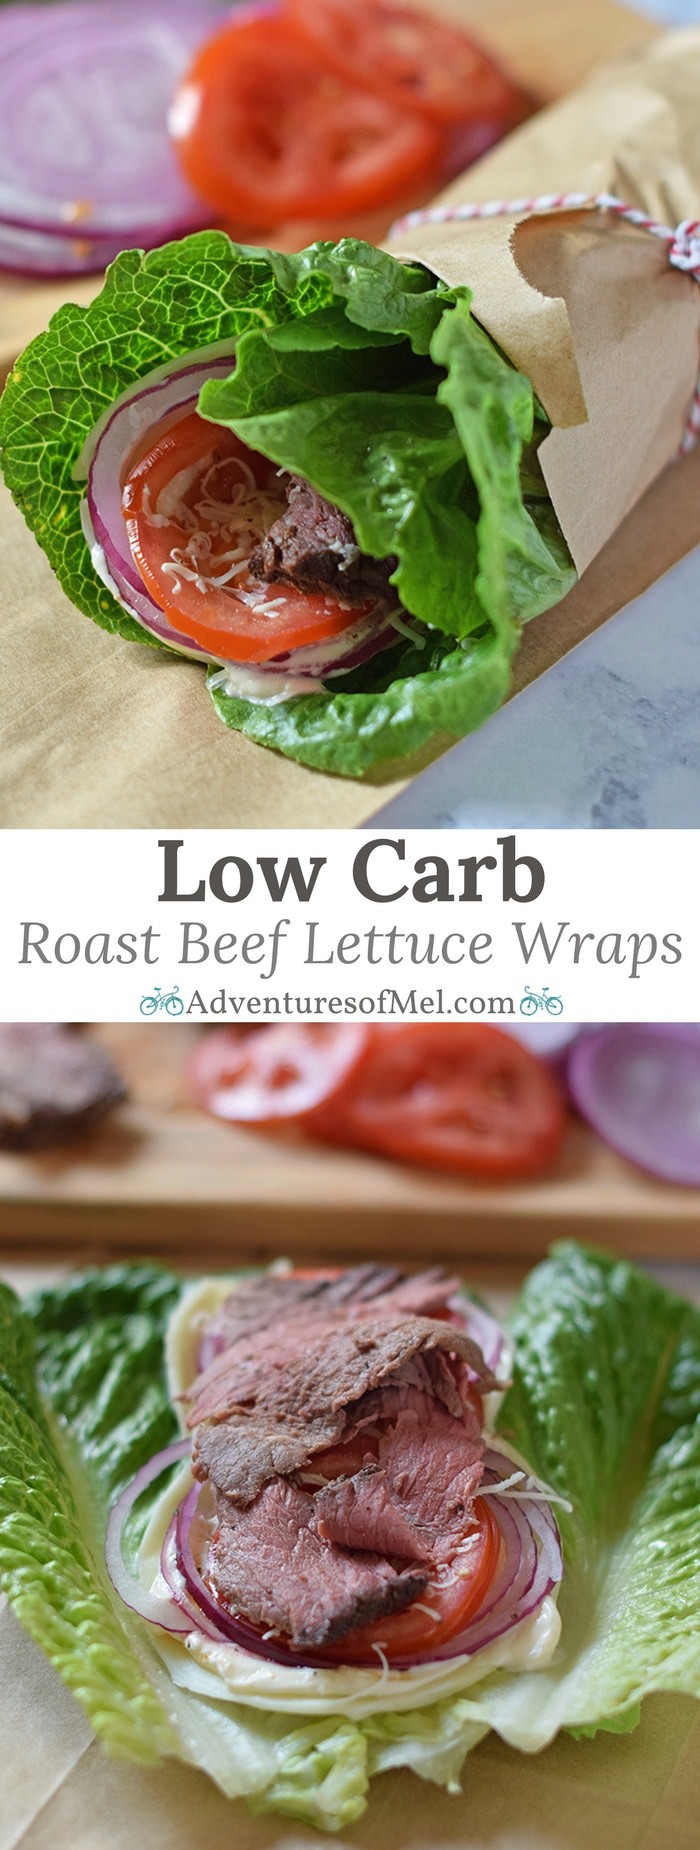
Low Carb Roast Beef Lettuce Wraps are a copycat recipe inspired by a Jimmy John’s favorite, the Unwich. Only a few ingredients and 10 minutes to make!
Roast beef lettuce wraps are an easy, delicious, low carb lunch idea. I’ve grown quite fond of Jimmy John’s Unwich, with all the goodness wrapped up in giant crunchy lettuce leaves.
Our boys love a good lettuce wrap too. With Dan looking for more low carb options, this has been an easy way for us to still enjoy a deliciously jam packed sandwich in wrap form.
Learn how to make Low Carb Roast Beef Lettuce Wraps.
Let’s pile together a quick lunch of roast beef lettuce wraps, shall we? All you need are a few ingredients.
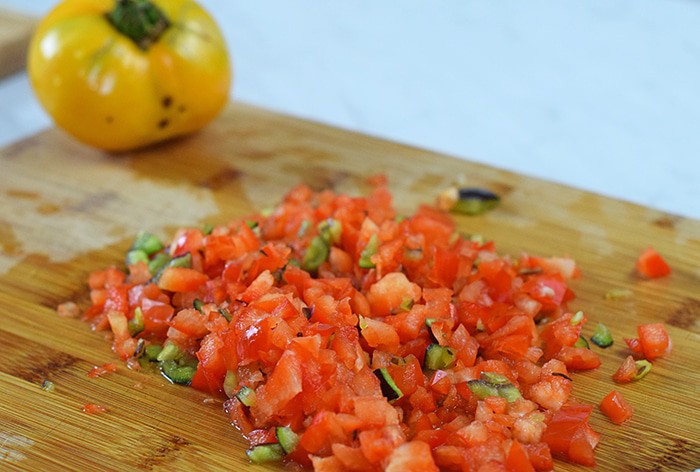
First things first, wash the lettuce and tomatoes. You can use iceberg lettuce or a good romaine lettuce. I used large romaine leaves, and they worked just fine. I will say this, though… The crunchier the lettuce, the better.
Slice the tomato and onion into thin slices.
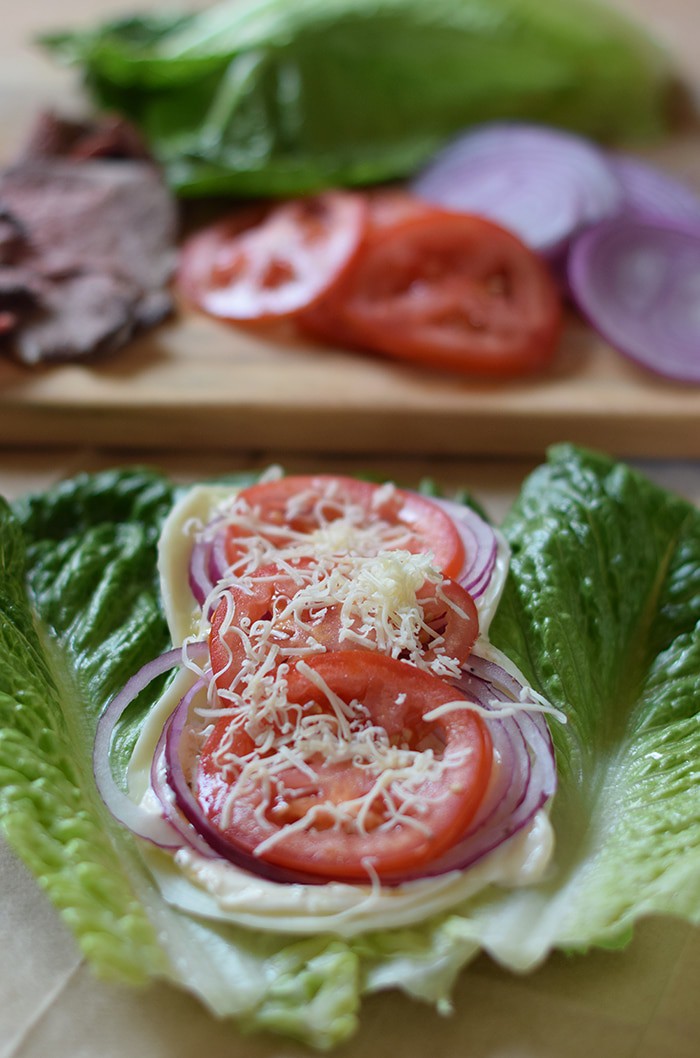
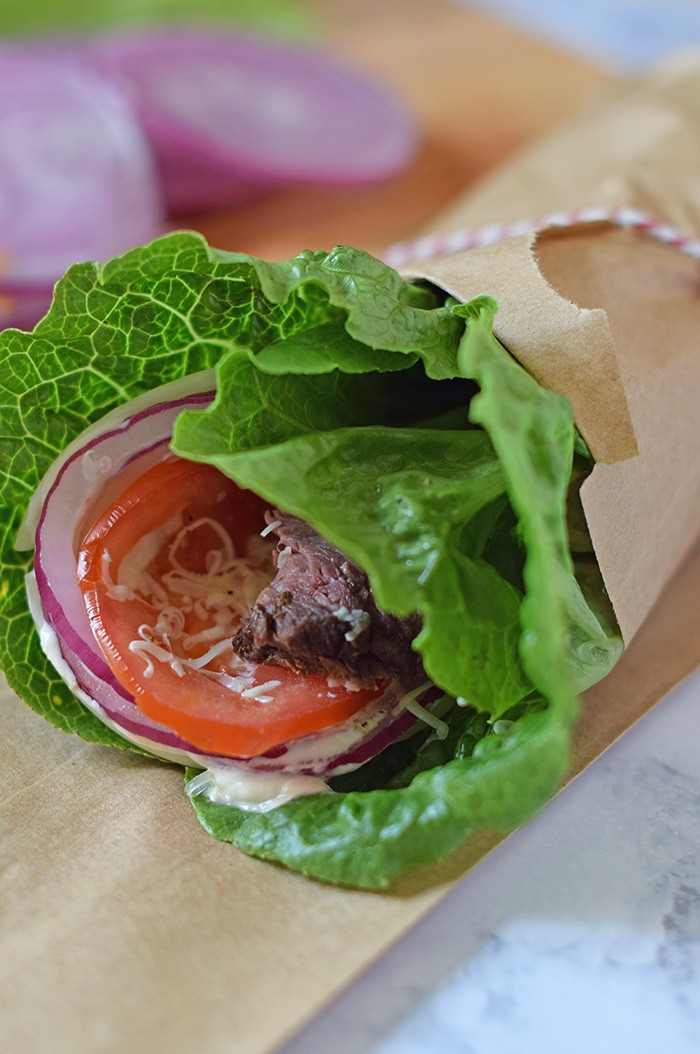
Lay the lettuce leaves out onto a piece of parchment paper, staggered or fanned out with half of each leaf on top of the leaf underneath. Add 2 slices of provolone cheese. Spread the mayo, along with the Italian dressing, over the cheese. Add onion and tomato slices.
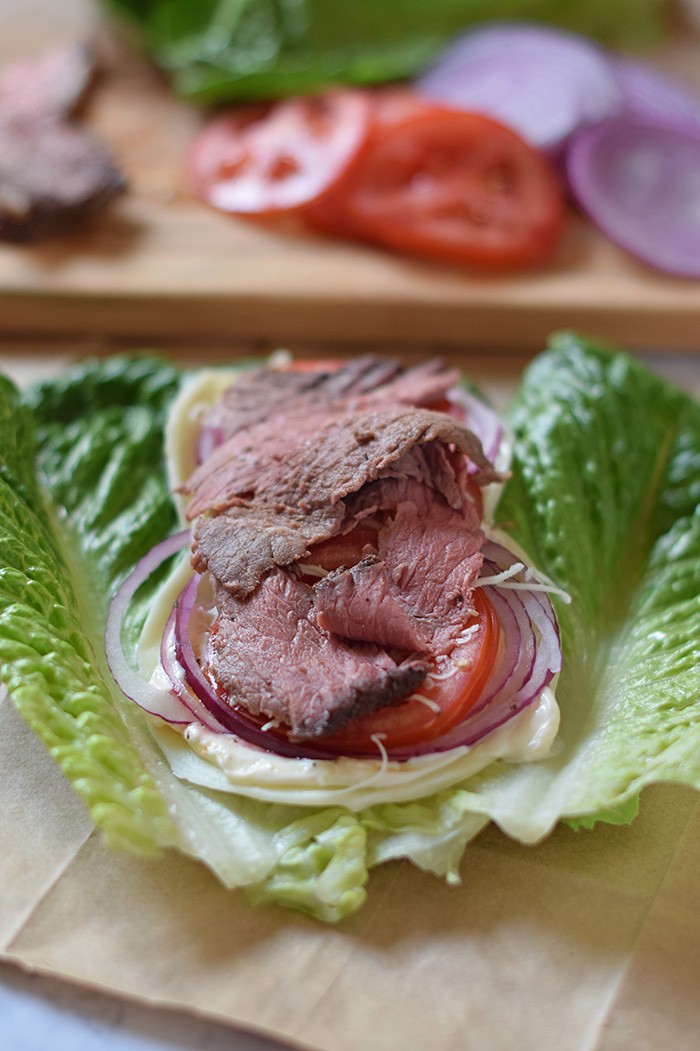
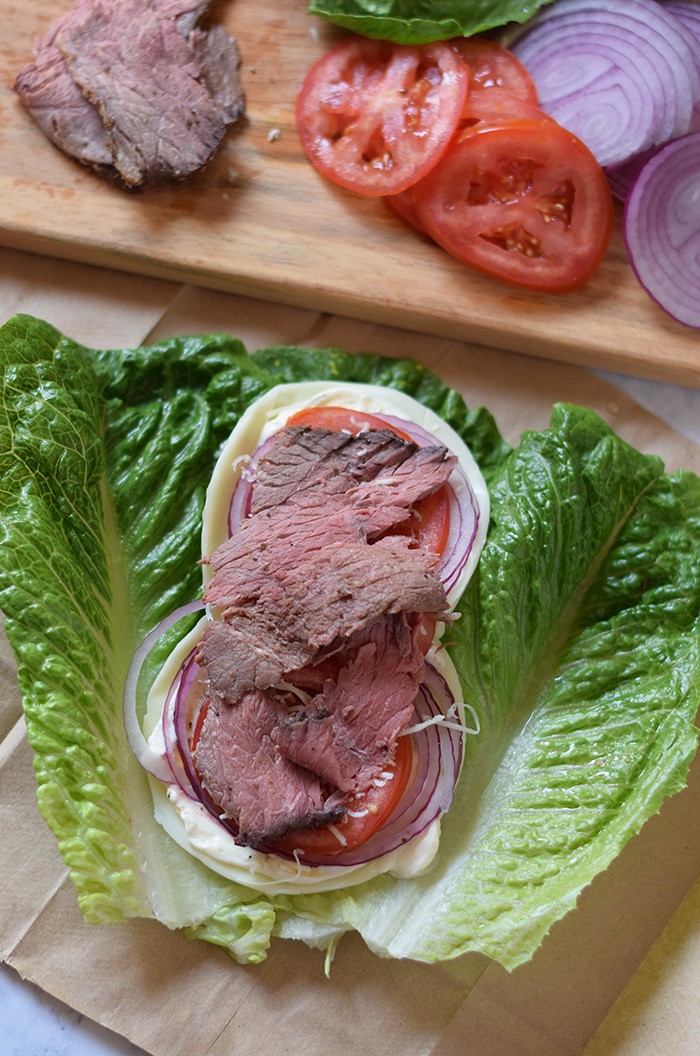
Shred the cheddar cheese on top of the tomatoes. Then add the roast beef.
Finally, wrap up your lettuce wrap, using the parchment paper to help hold it all together. You can even tie a string around it to hold it in place.
Grands Mini Supreme Pizzas are a quick and easy dinner recipe with Grands Biscuits, pizza sauce, veggies, cheese, and pepperoni.
Grands Mini Supreme Pizzas are an easy dinner idea, perfect for the back to school season. I love it when dinner can be made in a pinch. Don’t you?
My kids love it when we have mini pizzas for lunch too. Since we homeschool, we’re always looking for quick and easy lunch ideas.
Learn how to make Grands Mini Supreme Pizzas.
Grands Mini Supreme Pizzas require only a few ingredients, though you can add or take away ingredients as you wish. Most supreme pizza does have sausage, but I chose to leave that out this time ’round.
Your first step is to wash and chop your veggies, including peppers and a fresh tomato. An onion is optional; I’m finding more and more lately that I have to be in the mood for onion.
Sauté the peppers in a tablespoon of butter for 3-4 minutes, or until they begin to soften. Then remove from heat and combine with the chopped tomato; set aside for now.
Shred your cheese next; I love to use a special pizza cheese we get at our butcher shop, but mozzarella will do.
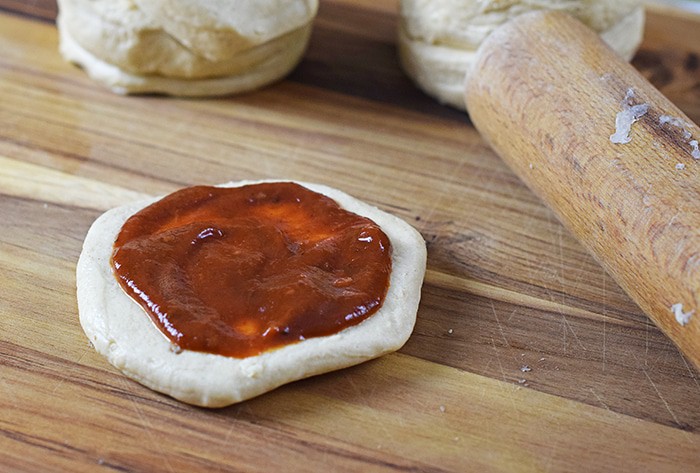
Press or roll each Grands biscuit out to a flatter round, about an inch thick; you can use a rolling pin. (Tip: It helps to spray your surface with cooking spray before rolling out the biscuits.)
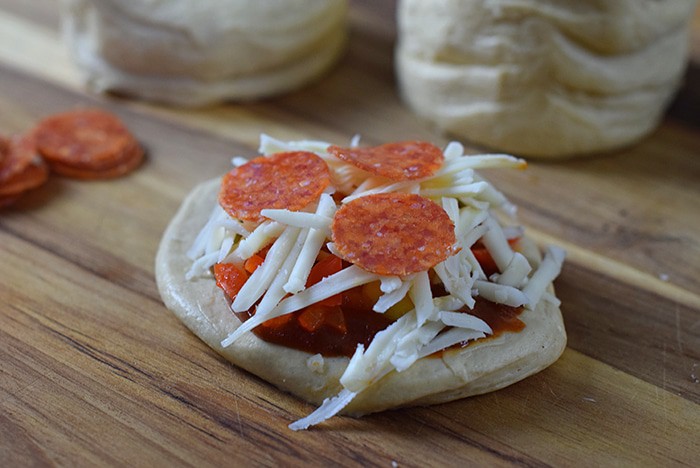
Top with pizza sauce. Then add pepper and tomato mixture, cheese, and pepperoni. Place each mini pizza on a cookie sheet using a flat spatula/flipper. Sprinkle with basil.
Bake the Grands Mini Supreme Pizzas at 375° for about 15 minutes or until bottoms have turned a golden color and cheese is melted. Serve while warm; they pair really well with a good salad.
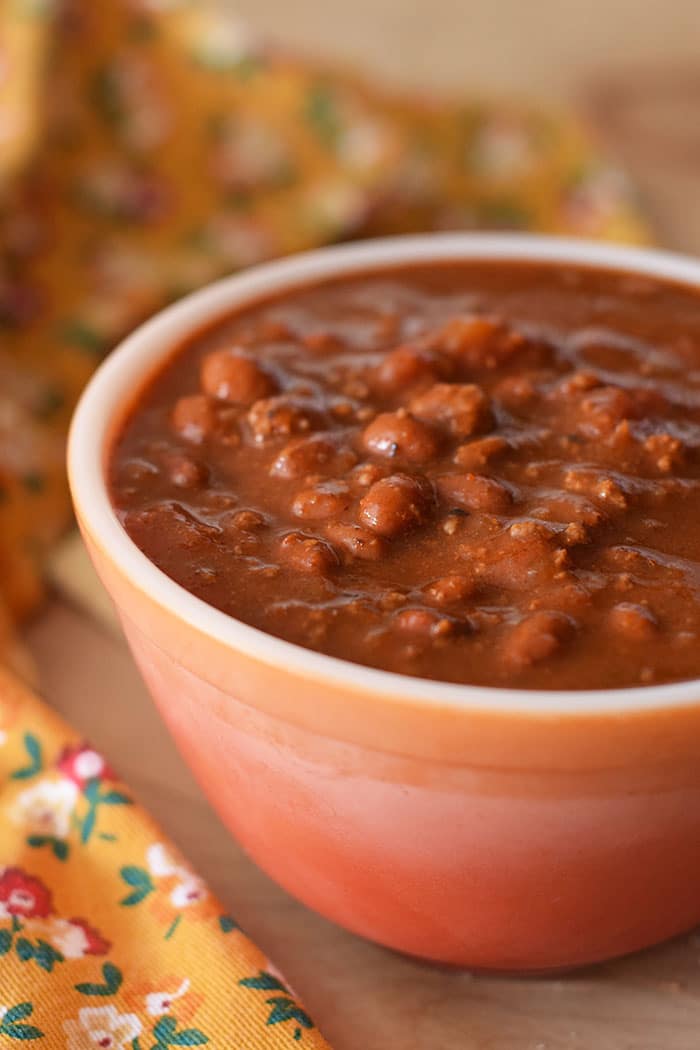
Chili and cornbread together is one of my all-time favorite meals; in fact, the whole family loves it. Of course, easy Instant Pot chili is even better because it makes dinner prep that much simpler.
Back in the day we used to make a vegetarian chili using soy crumbles. I’m not sure what I was thinking. My guys really didn’t like soy crumbles, but I’d “heard” they were healthier.
I’ve since come to find out that soy is really not that good for you, especially when you have thyroid issues (as I do). And to be quite honest, we love our meat.
We eat more of a low carb, high fat diet these days (most of the time… some of us still get a few carbs in). And ground beef is now a healthy addition to our Instant Pot chili.
We’ve been making this chili for awhile. I personally love a nice skillet cornbread with this chili.
And we’ve been known to serve it with tortilla chips if we don’t have cornbread.
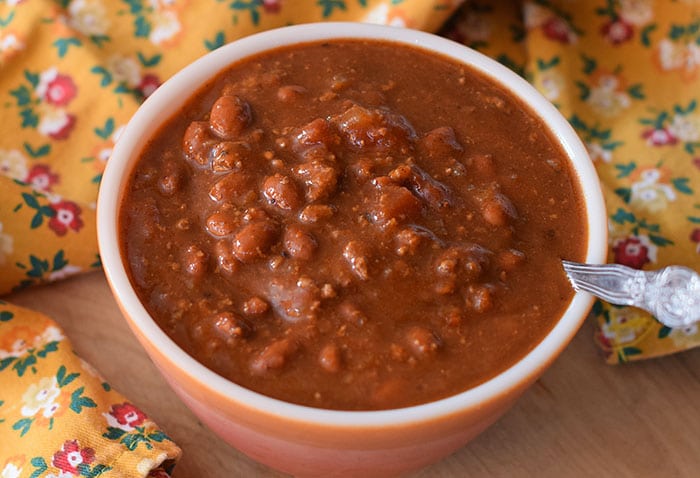
But for the most part, we enjoy it with a dollop of sour cream and a bit of shredded cheddar. Sometimes I even use this chili to make the best loaded chili cheese fries.
If you love a warm bowl of chili, you’ll love this recipe. It’ll warm your heart and soul like no other. Below is the printable recipe. Enjoy!
This chili also makes a tasty addition to your next Baked Potato Bar. And it would make and excellent chili dip.
Learn how to quickly use your Instant Pot with our Instant Pot Quick Start Guide, filled with practical tips, Instant Pot recipes, accessory ideas, and more!
Print the Recipe for Easy Instant Pot Chili
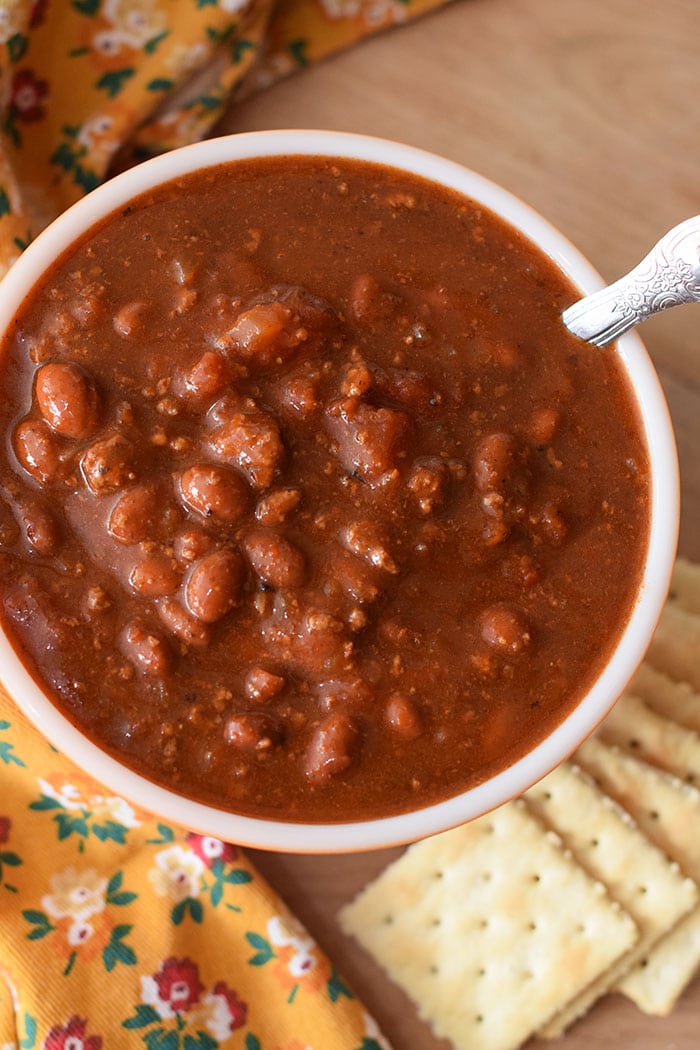
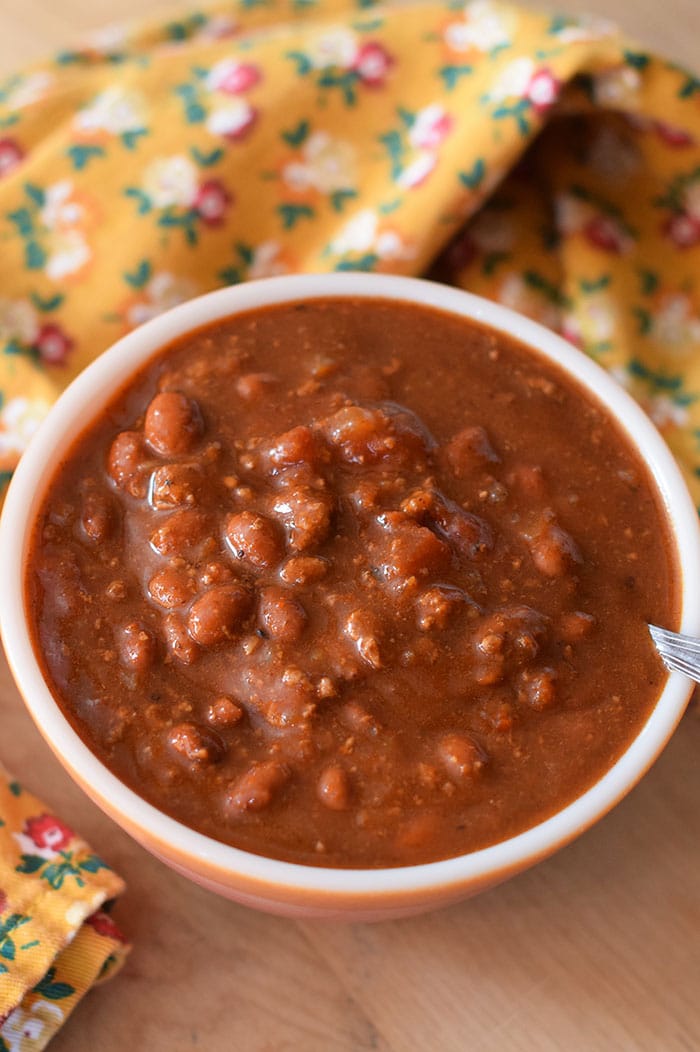
Easy Instant Pot Chili
Chilly nights call for a nice hot bowl of homemade Instant Pot chili to warm your heart and soul. Best served with cornbread and a dollop of sour cream.
Instant Pot
1 tablespoon salted butter
1 medium yellow onion (minced)
1 pound ground beef
32 ounces chili beans
14.5 ounces diced tomatoes
16 ounces tomato sauce
1 tablespoon molasses
3 tablespoons chili powder
Using the Sauté function on the Instant Pot, melt the butter right in the pot.
Then sauté the onion in the butter, 'til it starts to soften.
Stir the ground beef in with the onion, cooking 'til the meat is browned.
Add in the chili beans, diced tomatoes, tomato sauce, molasses, and chili powder, stirring everything together.
Put the cover on your Instant Pot, seal the vent, and set it to cook for about 10 minutes.
Once it's cooked, let it naturally release pressure.
Serve with sour cream, shredded cheese, and whatever else your heart desires.
main dish, Soups & Stews
American
chili, chili recipe, easy chili recipe, easy Instant Pot chili, Instant Pot chili
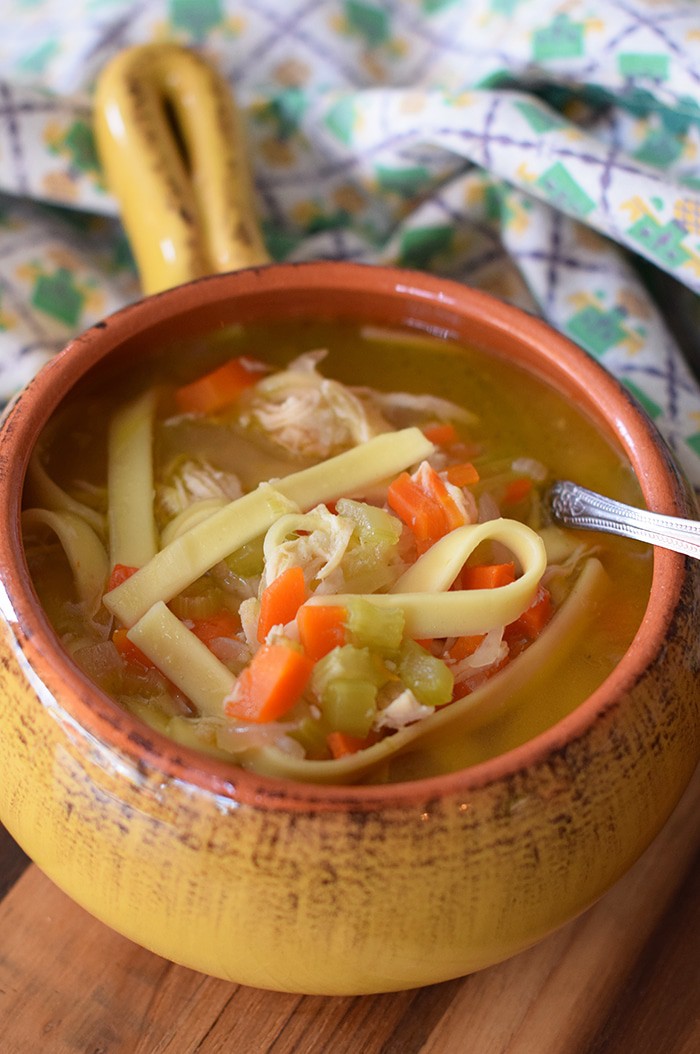
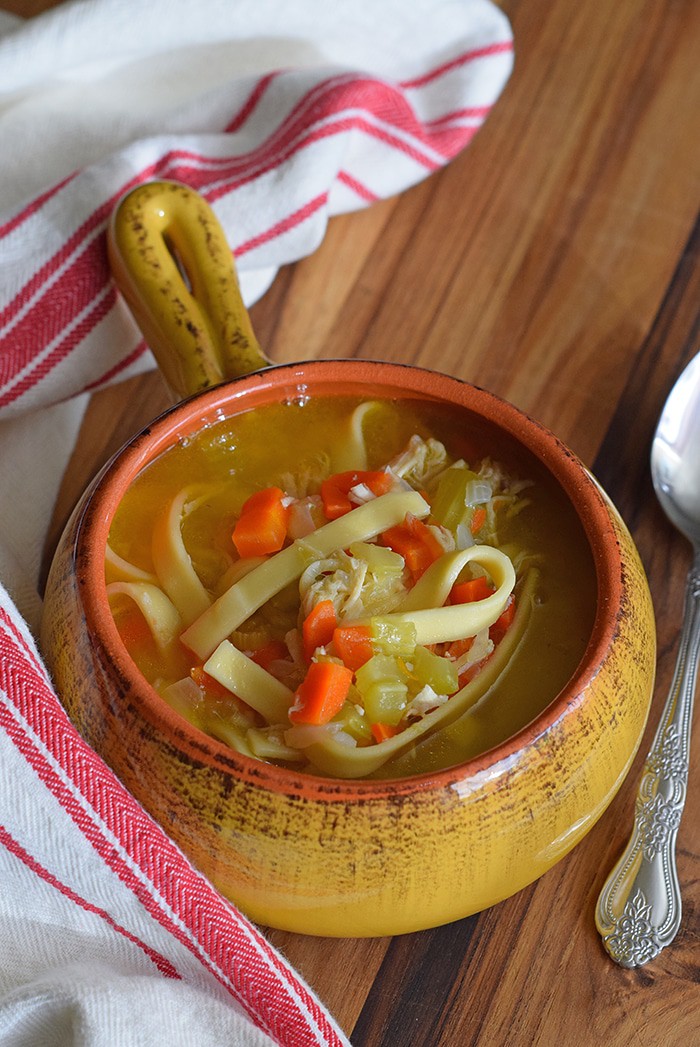
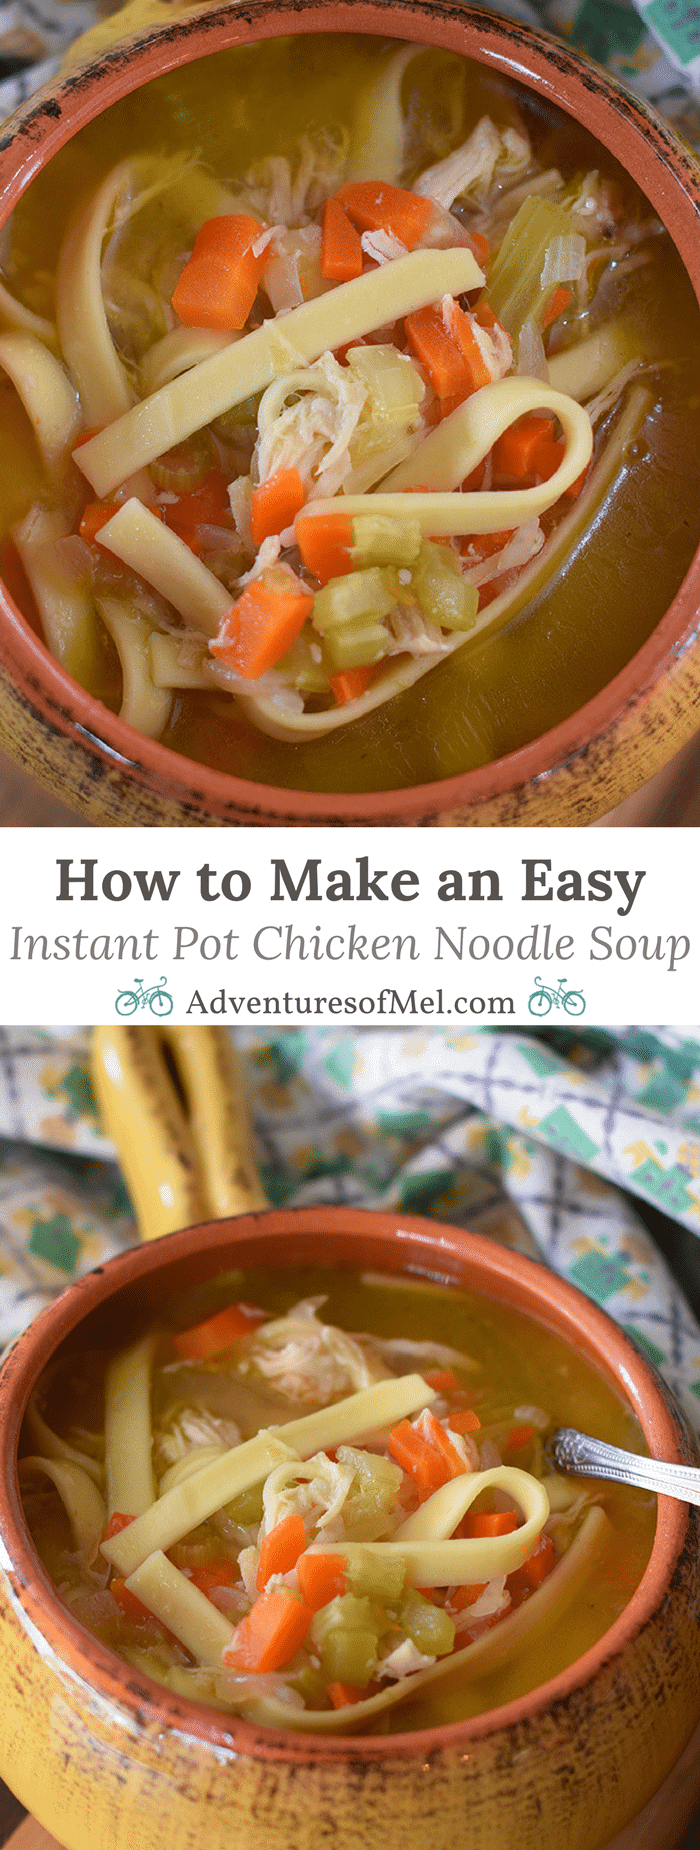
Cold and flu season has descended upon us like a million bats out of you know where. Our oldest has the flu as I write this, which means it’s time for a little TLC with homemade Instant Pot chicken noodle soup.
I don’t know if it’s because it’s chicken noodle soup or because it’s made in the Instant Pot. But I do know that it’s become one of my favorite soups, especially this time of year.
What Is It About Soup?
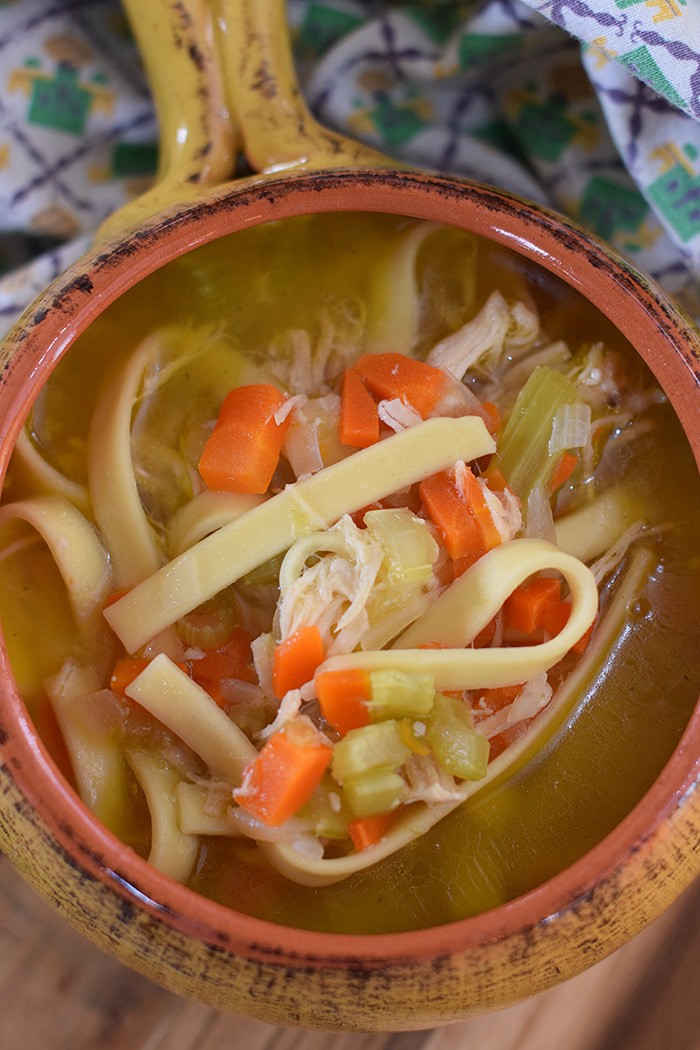
There’s just something about chicken soup when you’re sick. It’s soothing, it’s delicious, it’s piping hot, and it’s full of good wholesome nutrition.
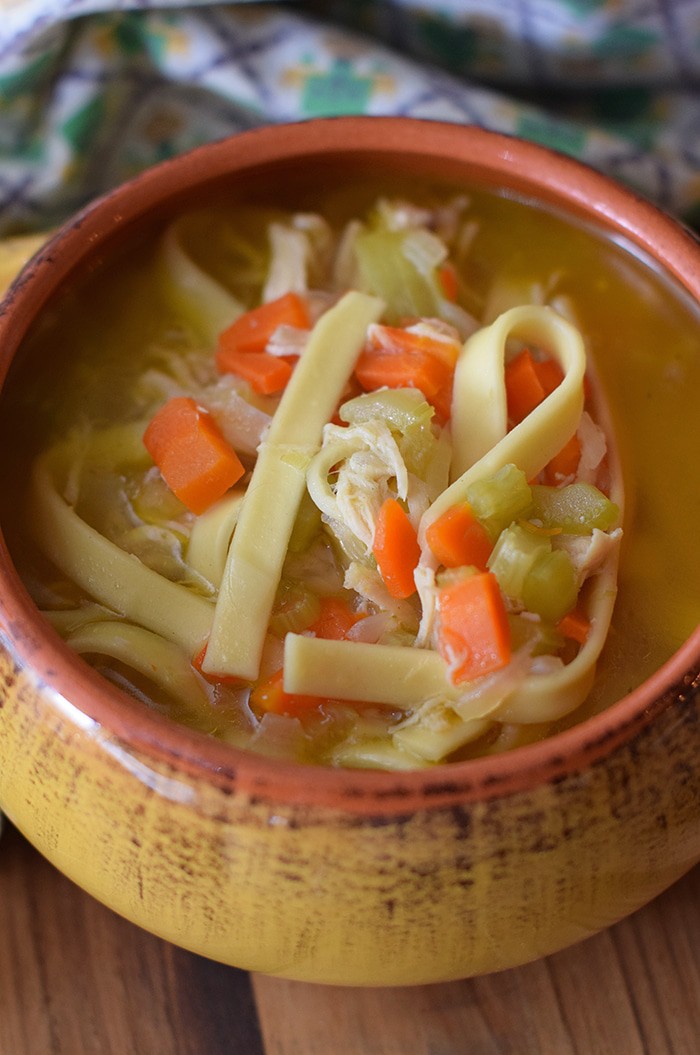
We prefer to make it homemade. We used to stock up on cans of chicken noodle soup every fall, but then we started making more homemade soups because canned got to be so expensive.
When we tried canned again for a quick meal, it just didn’t taste good anymore. Our taste buds had gotten accustomed to home cooked soup right from our very own kitchen.
You might think homemade is time-consuming and difficult to make. But not so, especially when you make it in the Instant Pot (or even a good old-fashioned slow cooker).
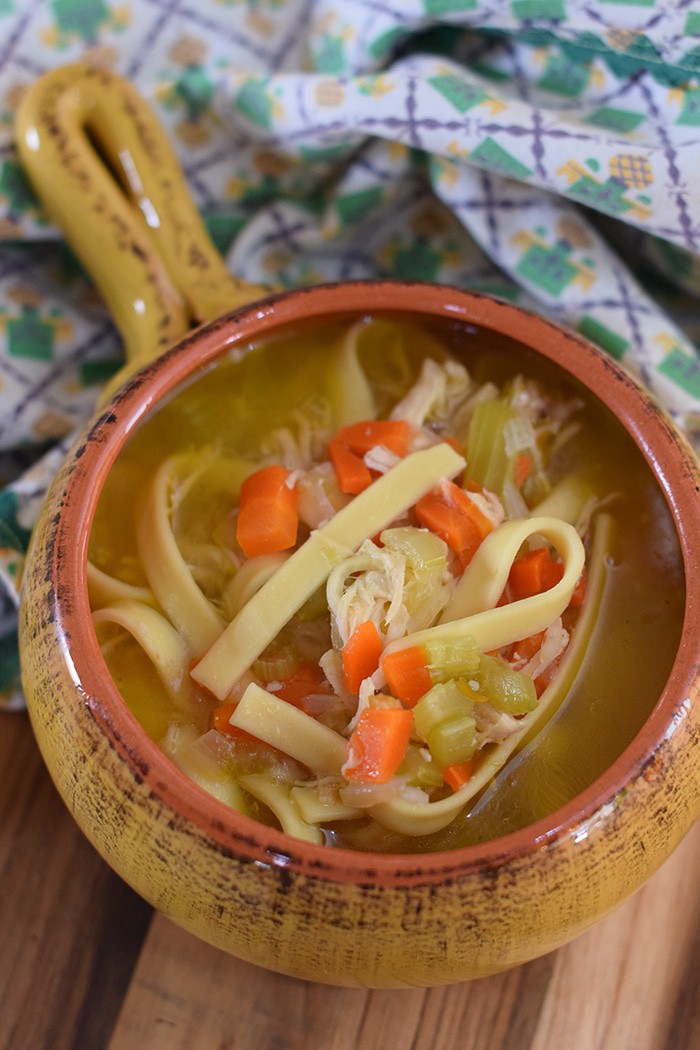
There are a few veggies to chop for this soup, but you can chop them ahead of time to save you even more time and energy. And you could always make a batch of this soup and freeze it for when you need it.
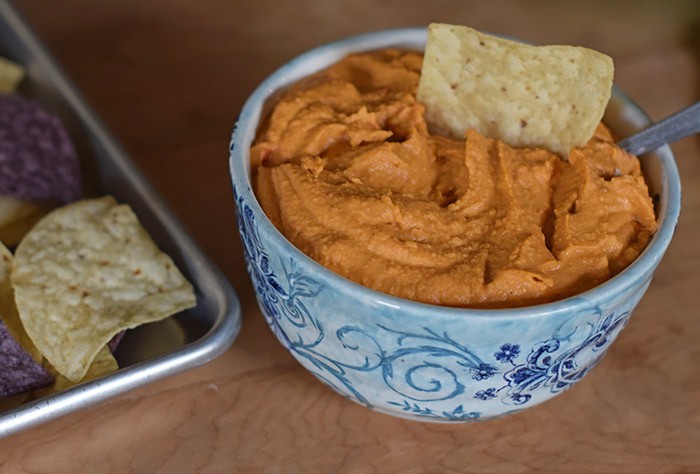
Usually, when we’re going out to eat, we’re going for Mexican. Loaded nachos are a favorite all ’round, as is a nice snack of roasted red pepper hummus.
I’ve got a delicious recipe for you that will make you re-think ever using refried beans again.
Want a camping version of these chicken nachos? Try our campfire nachos recipe!
We had a crazy busy week last week. We had a week filled with doctor’s appointments, a midwife appointment, minor surgery for Dan, and more, not to mention homeschooling and work.
We’re trying to get as much done and meet as many commitments as we possibly can before this baby boy arrives. But by the time the end of the week arrived, we were all beat and needed something super easy to snack on, not to mention something fairly easy to eat for dinner.
As I mentioned, we love roasted red pepper hummus.
We’ll eat it with crackers, tortilla chips, pita bread… It’s a favorite snack around here but also tends to be a bit pricey, meaning we don’t always keep it on hand.
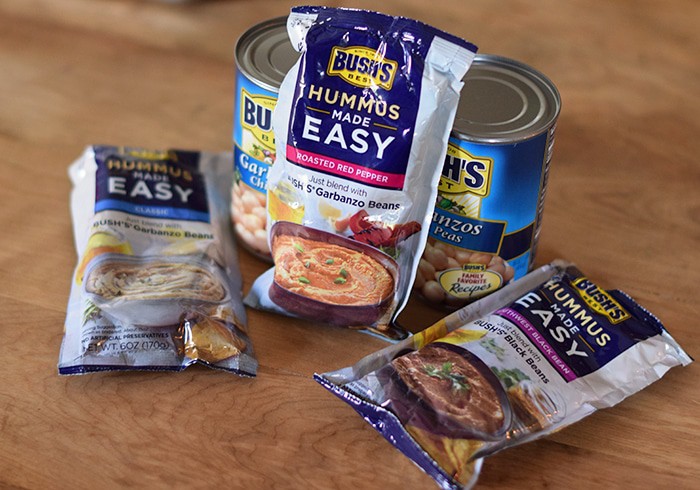
But that has changed since we’ve been introduced to Bush’s Hummus Made Easy. Available at Walmart in 3 delicious flavors (Classic, Roasted Red Pepper, and Southwest Black Bean), it’s also friendly to our budget.
Not only that, but it’s easily made in literally seconds, I kid you not.
All you need is a can of beans, the pouch of hummus, and a food processor or blender (I used my Ninja).
We chose to use Bush’s Garbanzos (or Chick Peas), which happened to be conveniently located right next to the Hummus Made Easy pouches in the store, to mix up a batch of Roasted Red Pepper Hummus Made Easy.
And you know what? In my opinion, it tastes better than the stuff that’s already pre-mixed and packaged in the deli. And it’s cheaper! Win win!
On top of that, it has no artificial preservatives, and it’s made with real ingredients like olive oil, tahini, roasted red bell peppers, and spices.
Even more importantly, it meets my official taste tester’s seal of approval.
I really like how versatile it is. There are a ton of recipes on the Hummus Made Easy site, and when I saw a recipe for a 7 layer dip and perused Pinterest just a bit for even more inspiration, I knew I wanted to make some sort of nachos, leading me to the idea of Loaded Nachos, only without refried beans and made with hummus instead.
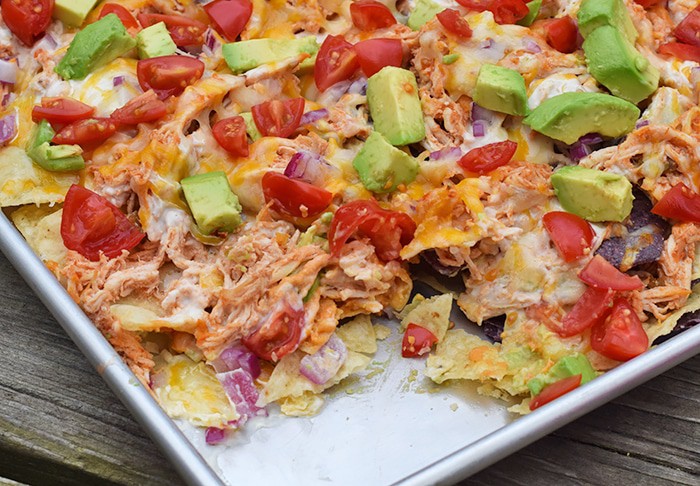
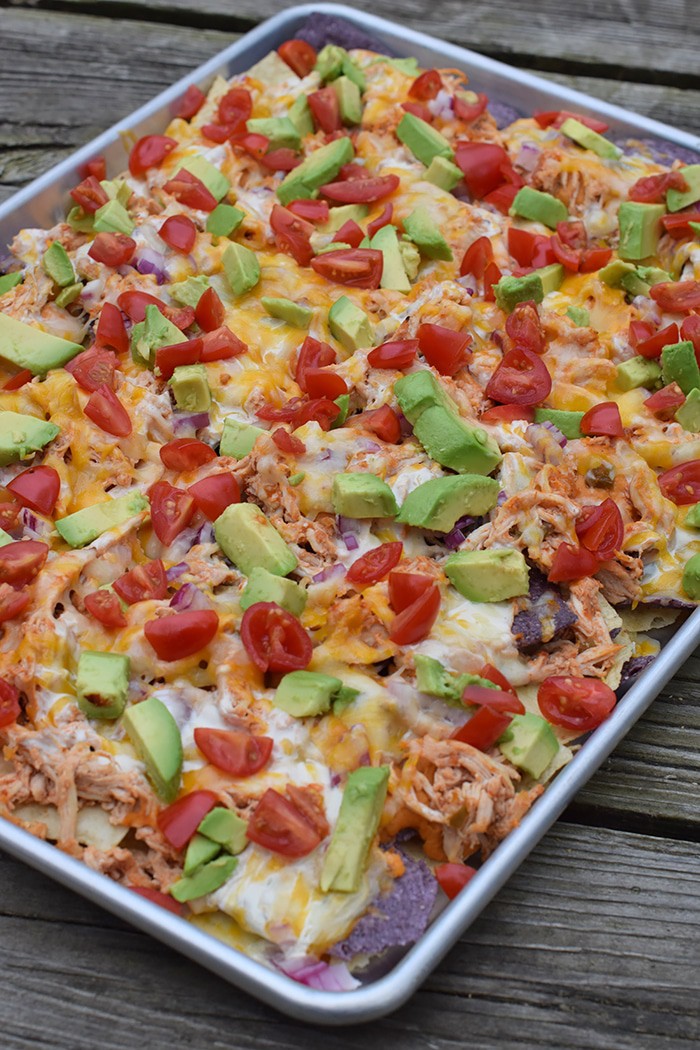
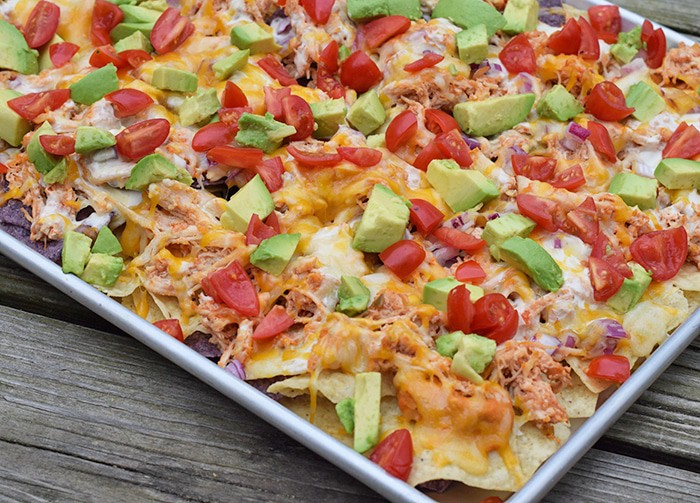
Honestly, these nachos are all about the layering. You have a layer of tortilla chips, dollops of hummus…
… then a layer of delicious Instant Pot Taco Chicken, white queso, a bit of lime juice and red onion, cheese, tomatoes, and avocado. Mmmm…
That layer of Roasted Red Pepper Hummus Made Easy makes all the difference in the world. It adds a flavor that you just can’t get otherwise.
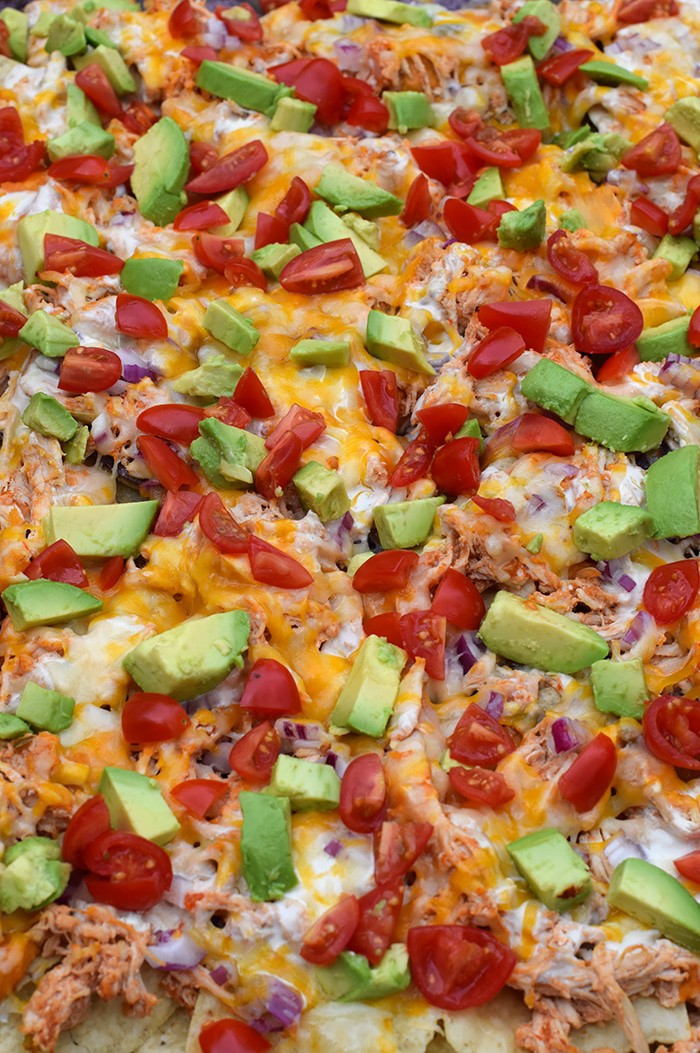
These nachos were the most flavorful nachos I’ve ever made; they were far from your typical, boring nachos.
Just thinking about it is making me crave them all over again. Pregnancy cravings are no joke.
Looking for more delicious appetizer and snack recipes?
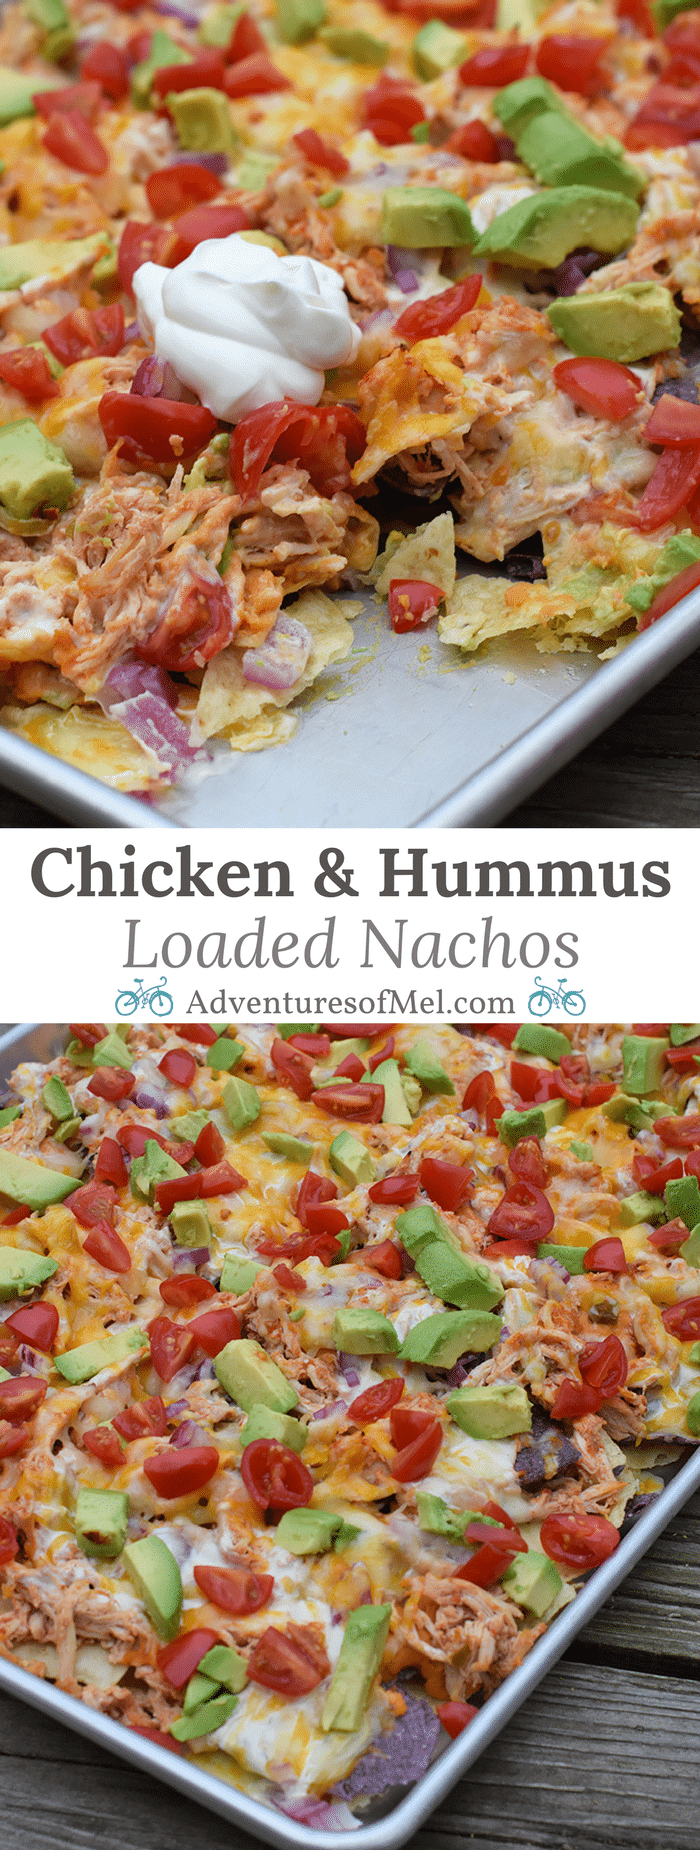
Make the most flavorful loaded nachos with chicken and roasted red pepper hummus, along with other favorite ingredients like cheese, tomatoes, avocado, and more.
Blue and white tortilla chips
1 pouch Bush’s Roasted Red Pepper Hummus Made Easy
1 can Bush’s Garbanzos
2 chicken breasts (cooked and shredded)
1/2 cup Picante
1 lime (just a squeeze of juice)
1/2 cup white queso
1/2 medium red onion (minced)
4 oz. cheddar (shredded)
4 oz. Colby Jack (shredded)
Tomatoes
Avocado
Sour cream
Mix Bush’s Hummus Made Easy and Garbanzos, according to package directions.
Layer a generous amount of blue and white tortilla chips on bottom of sheet pan.
Add dollops of hummus around on top of tortilla chips.
Mix cooked, shredded chicken with Picante and spread around on top as a third layer.
Squeeze lime juice all around on chicken.
Spoon white queso all around on nachos.
Scatter minced red onion as yet another layer.
Add shredded cheeses, spreading evenly across nachos.
Bake at 325° for about 10 minutes, maybe a little longer if cheese isn’t melted.
Remove from oven and add your favorite toppings, like tomatoes, avocado, sour cream, and salsa.
Serve and enjoy!
Note: These nachos can also be refrigerated and later warmed back up in the oven; if warmed in the oven, it brings the crunchiness of the nachos right back. Yum!
Can’t make the nachos just yet? Go ahead and pin them for later! They’ll be waiting when the craving hits.
Also, note that you can follow the hashtag #HummusMadeEasy on social media for even more ideas, recipes, and inspiration surrounding Bush’s Hummus Made Easy.
Need a dinner idea that’ll get your whole family around the table tonight? I partnered with Bertolli® to share a delicious recipe for Creamy Tortellini Alfredo.
When it comes to dinnertime, I’m just going to be honest. We don’t always sit down at the table together. Some nights we sit on the couch. It’s true. A recent conversation with other moms in our homeschool group gave me food for thought, no pun intended. That conversation, coupled with the opportunity to create a Tuscan-inspired, spring-inspired Alfredo dish, really motivated me to clear the table of all the school books, all the pencils and markers, and all the tests and papers. In the end, this Creamy Tortellini Alfredo was the clincher in bringing us back to the family table.
The mission: “Bring Tuscany to your Table”… It has been a lifelong dream of mine to some day visit Tuscany. I’ve only ever seen photos of this beautiful place; in fact, the calendar above my desk is filled with beautiful photos of Tuscany. I can imagine that it must be a very peaceful part of Italy with rolling hills and luscious, beautiful colors… warm and inviting. I can only imagine what the food must be like; I’m certain if I ever visited Tuscany, I’d probably never want to leave.
It’s that same peaceful feeling that I wanted to bring to our family meals (you know, the one when you stare into the photo on your calendar and imagine you’re there breathing in the scents, warm sun shining down, a slight breeze wisping hair about your face). The dinner table should be something to look forward to, a place to catch up, a place to be at home.
Creating a simple yet warm, inviting table scape was my first priority. And you know, for a table to be inviting, it doesn’t have to be fancy. I’m quite certain I only own 1 complete set of place mats. So, I chose to go the eclectic route, mixing and matching. Adding a plate, silverware, and glasses for each person came next. Of course, what table would be complete without a beautiful centerpiece? For this simple centerpiece, I grabbed my pruning shears and went out to the back yard to cut a few flowers. We have a bush that’s filled with beautiful pink blooms right now, and a mason jar makes the perfect vase for fresh cut flowers.
After clearing the table and setting it up for the meal, it’s time to make dinner. Again, dinner doesn’t have to be complicated. In fact, this dinner was so simple, easy to make, and delicious, we all agreed it’s going to become a regular meal.
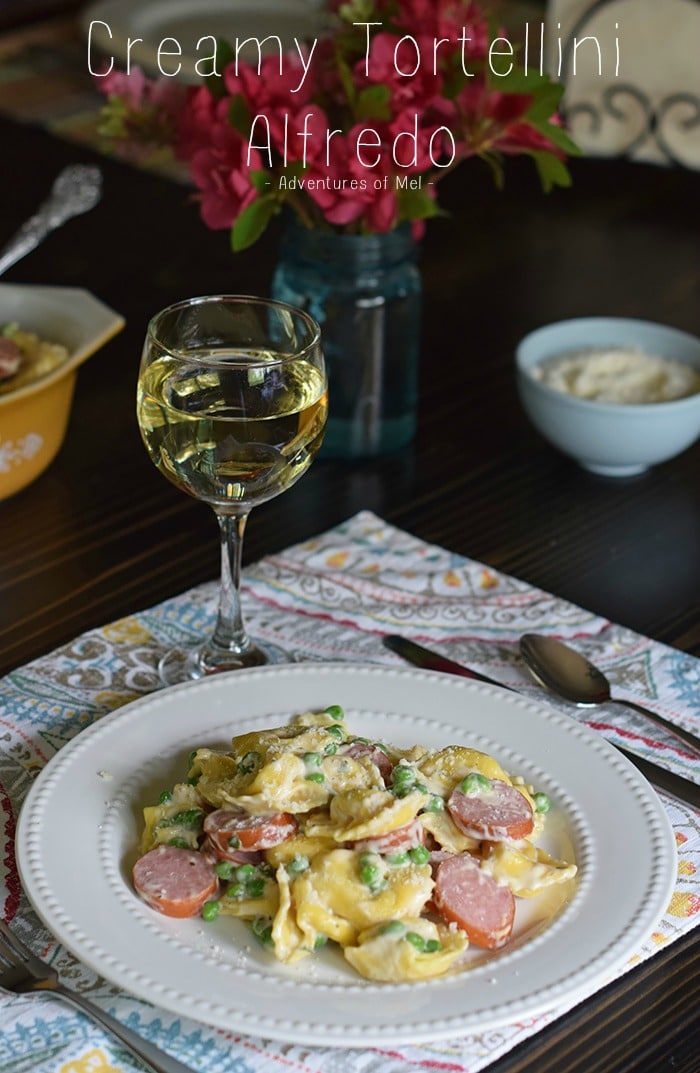
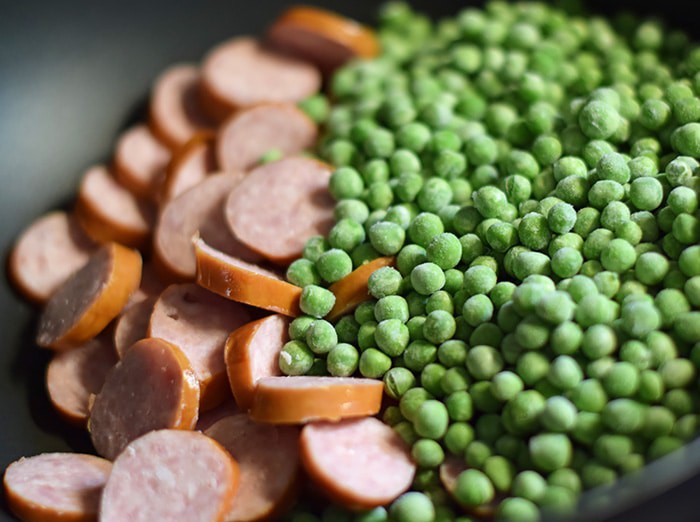
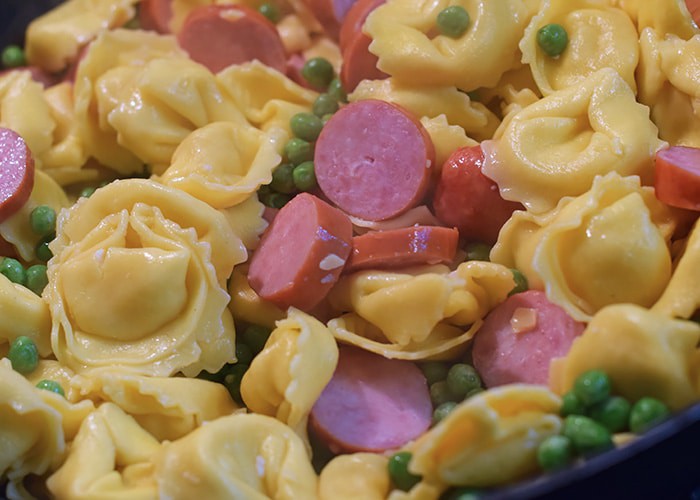
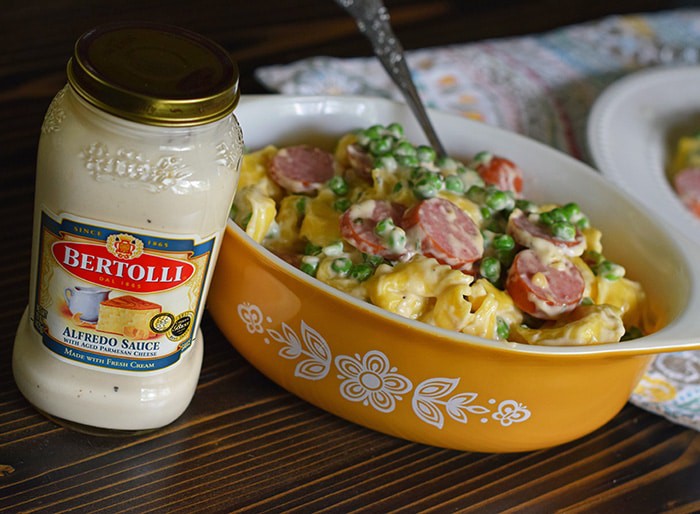
Creamy Tortellini Alfredo is a rather quick meal. Creating a simpler meal just means you have more time together as a family. To make this dish, cook the tortellini according to package directions. Slice the sausage links and add to a skillet, along with the peas. Once the tortellini has been cooked and drained, add it in with the peas and sausage. Add a jar of Bertolli® Creamy Alfredo Sauce, along with basil; mix together well. Cook for 15-20 minutes, or until the ingredients are well heated.
This pasta is so delicious with a little Parmesan sprinkled on top. Since we don’t like wine, we paired our pasta with a little bit of sparkling grape juice… It was delicious! It was one meal that even our picky 7 year old loved; he actually asked for seconds and not dessert. How often does that happen?!
Bring your family back to the dinner table with a spring inspired, Tuscany inspired recipe for Creamy Tortellini Alfredo, a simple family dinner recipe that takes very little time to make, giving you more time with the ones you love.
1 pkg. frozen cheese tortellini
8-10 oz. fresh or frozen peas
1 pkg. smoked sausage link
1 jar Bertolli Creamy Alfredo Sauce
1 tsp. basil
Parmesan cheese
Cook tortellini, according to package directions.
Slice smoked sausage link/s.
Add peas and sausage links to large skillet.
Drain tortellini and add to skillet, along with Bertolli Creamy Alfredo Sauce.
Add basil and mix ingredients together in skillet.
Cook on low to medium heat for 15-20 minutes, or until heated through.
Serve with Parmesan cheese sprinkled on top. Enjoy!
Viva Bertolli® and join me in celebrating delicious Italian food, friends and family. Felice Anniversario and Buono Appetito! Visit Bertolli on Facebook, Pinterest and Twitter for more inspirations and ideas to bring Tuscany to your table.
How will you “Bring Tuscany to your Table”? Do you have a special moment to commemorate?
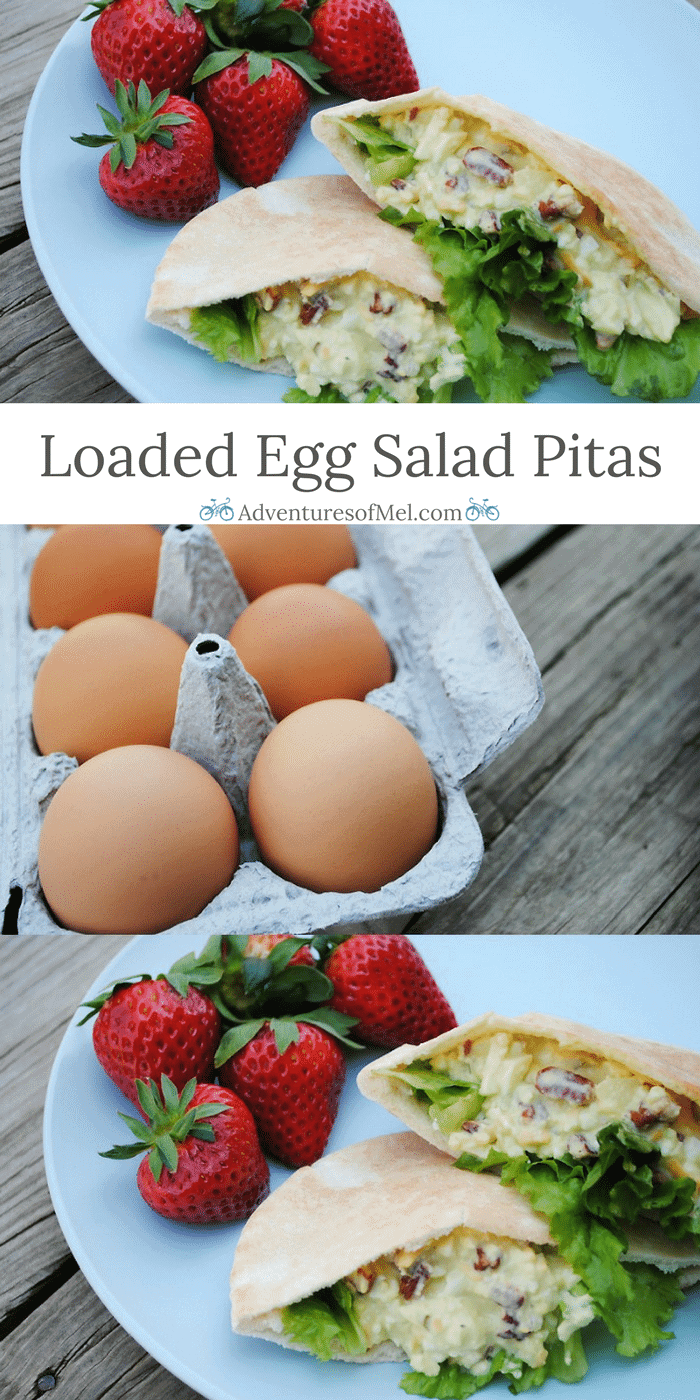
Ready for a spring picnic but not sure what to pack in your picnic basket? Loaded Egg Salad Pitas make a delicious lunch or picnic, and they’re a great way to use up leftover hard boiled eggs.
In addition to hard boiled eggs, I added a few extra ingredients. My grandma used to make tuna salad and chicken egg salad with a host of fresh ingredients, from apples to pickles and pecans.
She had 2 long rows of pecan trees in her front yard, so she always had pecans sitting around in a pan waiting to be cracked or bags full of pecans already stored away in the freezer. I miss those pecan trees.
That’s kinda where my cravings led me with this egg salad, back to the good ole days.
Below you’ll find a printable recipe. Serve this egg salad up with a flat bread or sandwiched in a pita, and you’re all set. I’m getting hungry just thinking about it. I hope you enjoy!
Loaded Egg Salad Pitas
Got leftovers? Maybe you have a few leftover hard boiled eggs sitting in your fridge. Use them to make Loaded Egg Salad Pitas, a delicious picnic food and pure perfection in your lunch box.
6 hard boiled eggs
1 apple
1 avocado
½ small red onion
½ cup pecans
4-5 bread & butter pickles
1/2 cup shredded Cheddar
¼ cup pickle juice
¼ cup mayo
Pita bread
Lettuce leaves
Boil eggs and peel; crumble.
Wash, peel, and chop apple.
Wash, peel, and slice avocado
Mince onion.
Chop pecans and pickles.
Shred Cheddar cheese.
Mix together eggs, apple, avocado, red onion, pecans, pickles, Cheddar, pickle juice, and mayo in a medium-sized bowl.
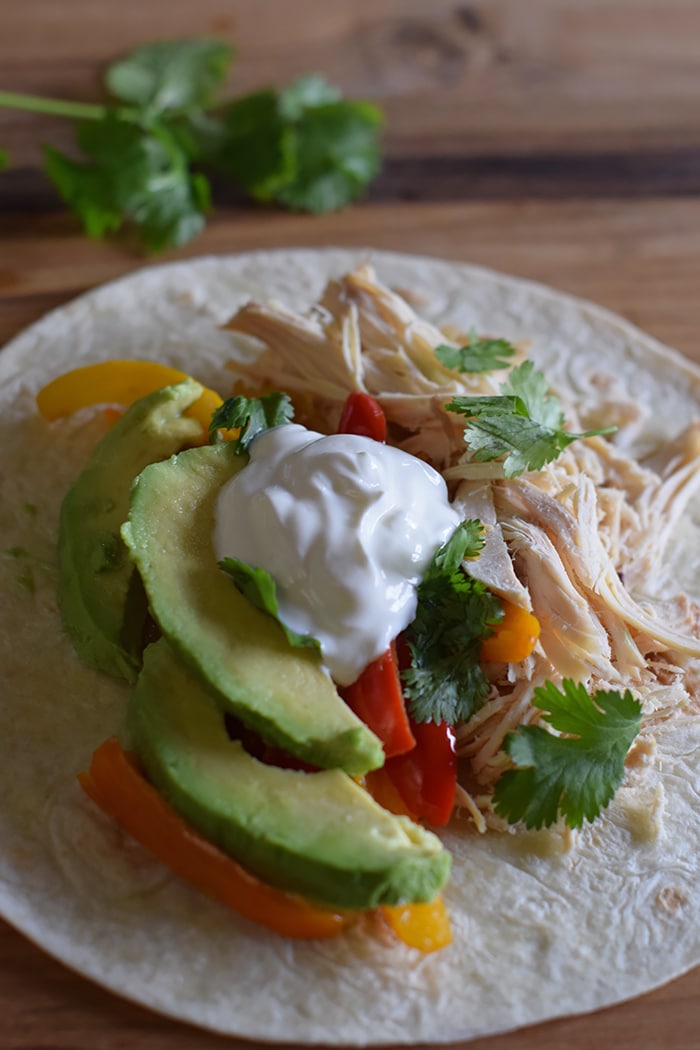
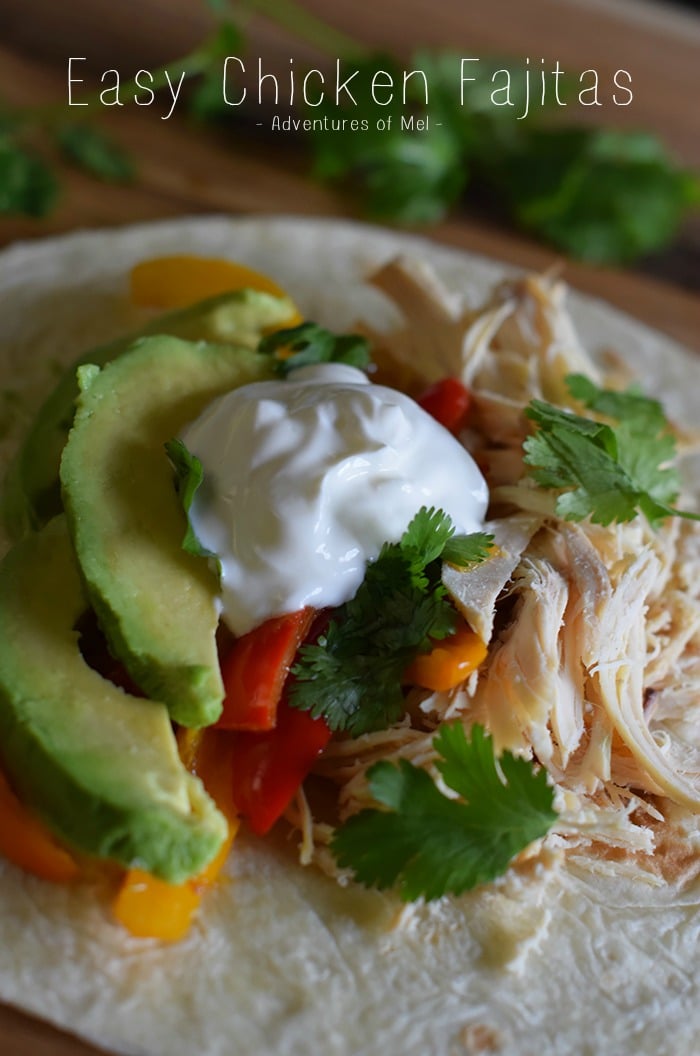
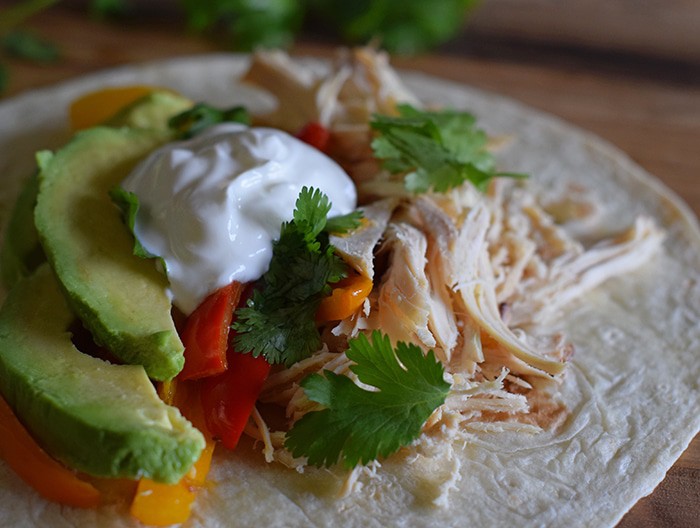
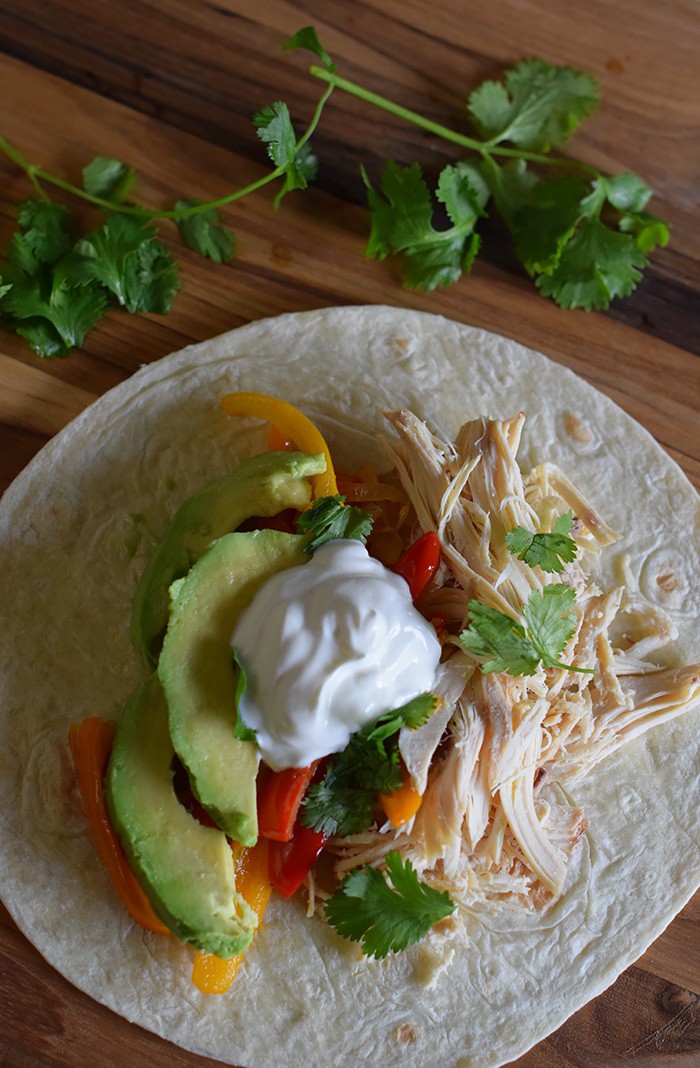
Chicken Fajitas are a simple, easy-to-fix meal that can also be quite healthy, depending on the ingredients you choose to add. Hint: Fruit Salsa is the best!!
When it comes to making meals with chicken, I really like to buy a whole chicken and then stretch it as far as I can for other meals. Sometimes I’ll even buy a whole chicken, cook it, and keep on hand a few days for sandwiches (so much better and healthier than lunch meat), chicken salad, and more.
Our favorite way to cook a whole chicken is by using the slow cooker. Plop that chicken in, add a few seasonings of choice, add some chicken broth, and you’ve got a tasty dinner.
To make fajitas, all you need are a few ingredients besides the chicken.
You’ll need peppers and onions, avocados, cilantro, tomatoes, tortillas, and if you want… sour cream, salsa with basil, mango peach salsa or yogurt.
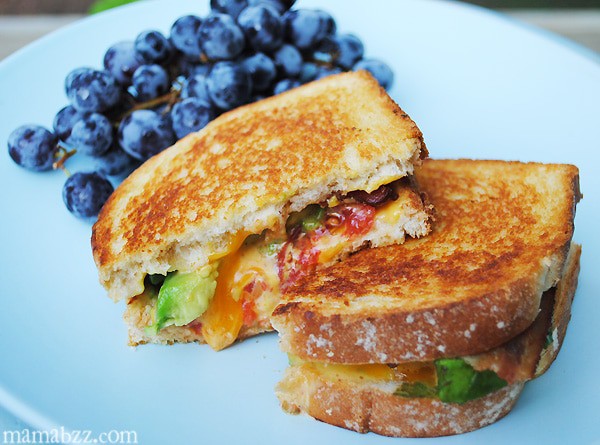
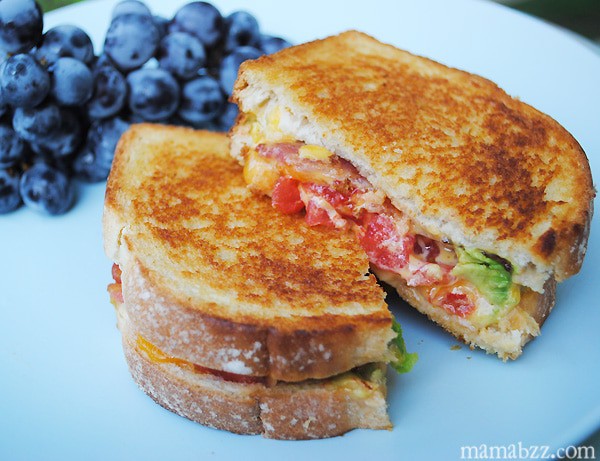
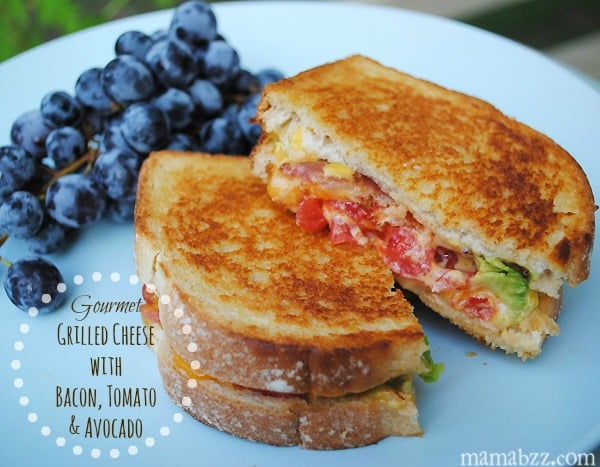
There is no other comfort food quite like a really good grilled cheese, and this grilled cheese is no exception with its tantalizing tastes of melted Cheddar, American, bacon, freshly sliced tomato, and avocado. This sandwich probably beats all the grilled cheese I’ve ever made. It’s kinda funny because a year ago, I didn’t really like avocado; it just wasn’t one of my favorite foods at all. This summer it’s like my tastes have reawakened, and I can’t get enough of it.
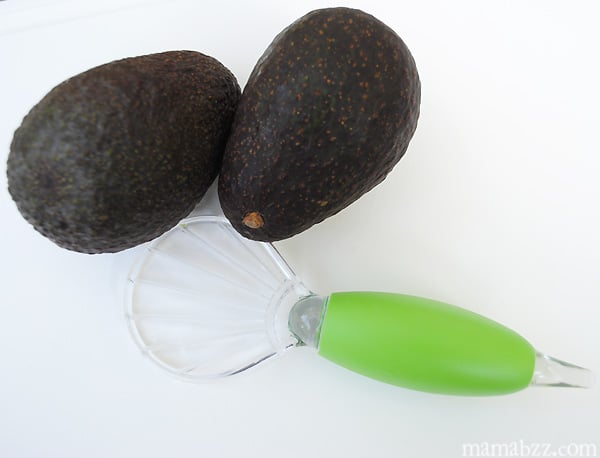
Of course, I couldn’t have made this grilled cheese without my handy Avocado Slicer from Good Cook. This slicer made pitting and slicing the avocados an easy peasy process. The hook on the end of the handle helps you to remove the avocado pit. Then you just run the slicer down the skin of the avocado through the meat of the fruit, and you have a sliced avocado. The tool is quite sturdy and something we’ll probably be using quite a bit in our kitchen, as we’re always eating avocado on our sandwiches or making guacamole.
So, how do you make this delicious grilled cheese? See below for a printable recipe. You’ll want to cook the bacon beforehand; we like to bake ours. Then, of course, get your tomatoes and avocados ready to go. Putting this sandwich together is super easy, and you start with two slices of sourdough bread. Butter the outsides; I used to butter the insides too on all my grilled cheese, but I don’t do that anymore…. trying to be a bit more health-conscious. Fire up the griddle, and place one slice of bread on the griddle. Add a few slices of Cheddar Cheese, then tomato, avocado, and a slice of American Cheese. Sandwiching the tomato and avocado between the two cheeses ensures that everything will be wrapped together in ooey, gooey goodness. Finally, add a few slices of bacon, already cooked. Top it off with your other slice of buttered sourdough, and cook until golden brown and cheeses are melted and gooey.
This sandwich is delicious and best served with your favorite fruit on the side and maybe a handful of chips. Enjoy!
Gourmet Grilled Cheese with Bacon, Tomato, and Avocado
How to make grilled cheese with tantalizing flavors of melted cheddar, American, bacon, freshly sliced tomato, and avocado.
2 slices sourdough bread
1 tablespoon salted butter
1 slice cheddar cheese
1 slice American cheese
2 tomato slices
1/2 large avocado (sliced)
2 slices bacon (cooked)
Cook bacon beforehand; we like to bake ours. Prepare tomatoes and avocados by peeling and slicing tomatoes, then pitting and slicing avocados.
Start with two slices of sourdough bread. Butter the outsides. Heat griddle, and place one slice of bread on griddle. Add a few slices of Cheddar Cheese, then tomato, avocado, and American Cheese. Finally, add a few slices of bacon, already cooked. Top sandwich off with second slice of buttered sourdough. Cook until golden brown and cheeses are melted and gooey.
Serve with side of favorite fruit and maybe a handful of chips.
Sometimes the hot summer weather calls for an easy recipe that’s lighter on the tummy yet delicious at the same time. We enjoy our favorite open-faced chicken salad sandwich or tuna salad, but it’d been awhile since we’d made chicken salad.
My grandmother, my dad, and my mom used to make tuna/chicken salad with all kinds of good ingredients like apples, nuts, and more. We decided to get a little funky with it and add some crunch to the salad.
Below is a printable recipe without photos, for your convenience.
The first step was to boil our eggs and get our crunchy ingredients chopped up. We chopped up green onions, purple onion, and an apple.
Then we opened our chicken and drained it; we used Applewood Smoke Chunk Chicken.
When the eggs were done, it was time to smash them up really well.
Finally, we mixed all the ingredients together in a bowl.
Then we added Miracle Whip to give the salad a creamy, tangy texture/flavor.
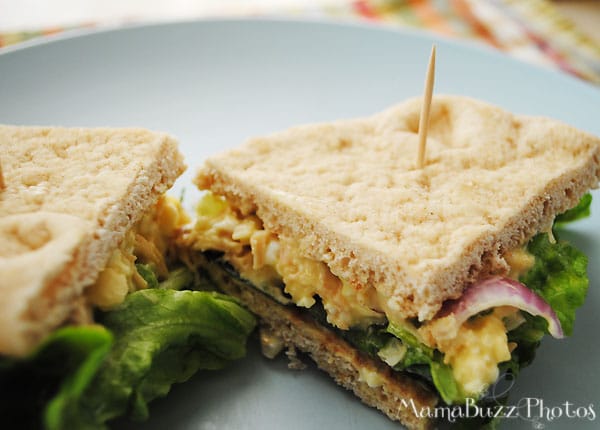
Finally, we applied the mixture to pita slices with lettuce. Dan also added mustard to his pita sandwiches.
Next time we might even add chopped up pecans…. but for now, this was light and de-lish! Perfect for a summer meal or even an end of the summer party. Enjoy!
Crunchy Chicken Salad Pitas
Mix up a light, delicious dinner, filling pita pockets with a crunchy and flavorful chicken salad filled with apples and nuts.
12.5 ounces chicken (shredded)
4 large eggs (boiled, peeled, and smashed)
1/4 cup green onions (chopped)
1/4 cup purple onion (minced)
1 apple (cored and chopped)
1/2 cup Miracle Whip
1/2 cup pecans (optional)
Chop green onions, purple onion, and an apple. Open chicken and drain it.
Mix all ingredients together in a bowl, including nuts if you choose. Add Miracle Whip to give the salad a creamy, tangy texture/flavor. Finally, layer on pita slices with lettuce. You can add mustard for extra flavor, if desired.
Dinner Ideas, lunch, sandwiches
American
chicken salad pitas
(Disclosure: I was not compensated for this post in any way. This recipe and all views/opinions remain honestly and solely my own.)
How to make easy Pringles chicken, breaded with your favorite flavor Pringles chips. It’s tender yet crispy, delicious, and easy to make, perfect for lunch, dinner, snack, or appetizer!
This crunchy, delicious, yummy treat is a family favorite, especially when paired with chicken dipping sauce. Think Pringles chicken nuggets, but I also like to call them Chicken Pringlers.
Dinner with Pringle chicken is always a huge hit, and I love that you can make it with different flavors.
Ingredient and Substitution Notes:
You really only need 4 ingredients to make Pringles coated chicken…
Pringles – You can use whatever flavor you want. We’ve used regular and cheese. We’ve even used gluten-free versions of these tasty chips.
Seasoned Salt – This just gives extra flavor to the chicken and the crispy coating.
Boneless Skinless Chicken Breasts – You can also use thigh meat, which gives a juicier, sometimes more tender, chicken nugget. Many prefer to use wings, as well.
Buttermilk – You can use regular buttermilk, you can mix up buttermilk powder into liquid, or you can make your own buttermilk with the same measure of milk but add a tablespoon of vinegar.
How to Make Pringles Chicken
A big plus is that this Pringles chicken recipe is so easy to make. Before getting started, be sure to pre-heat the oven to 400°F and grease a 16×20 baking sheet, so everything’s ready to go.
Here’s how to bread the chicken and bake it…
First crush the Pringles, using a gallon bag and rolling pin or a food processor. Then add the crushed chips or potato crisps to a gallon bag with the seasoned salt, seal the bag, and shake it around to mix.
Cut the chicken breast into small 1-2 inch nuggets.
Dip the nuggets in the buttermilk.
Then place the nuggets, 2-3 at a time, into the gallon bag, and shake them around to coat them with the Pringles chip breading.
Place the nuggets in a single layer on a baking sheet.
Then bake the Pringles crusted chicken at 400°F for about 20 minutes, or ’til they’re cooked thru. At this point, you can remove them from the oven and let stand, uncovered, about 5-10 minutes to crisp up even more.
Serve it with your favorite chicken dipping sauce, with fries or salad on the side.
Pringles breaded chicken is really good and has such a delicious flavor. I can’t wait to try making it again with more flavors like Barbecue or Dill Pickle.
Expert Tips and Recipe FAQ’s
Can I cook chicken nuggets in the air fryer?
While I prefer to make this oven baked chicken, you can also use an air fryer to make Pringles fried chicken. Just pop it in the air fryer for the appropriate amount of time for fried chicken to cook internally and crisp up.
Can I make Pringles chicken tenders instead of nuggets?
Sure! Yes, you totally can make this into tenders; just cut the chicken into longer strips rather than nuggets.
I love when chicken salad sandwiches are on the menu because they’re easy to make and usually hit the spot.
If you try this recipe, why not leave a star rating in the recipe card right below and/or a review in the comment section further down the page? I always appreciate your feedback. You can also follow me on Pinterest, Facebook, Instagram, and YouTube. And subscribe to my email list too!
Crispy Pringles Chicken
How to make easy Pringles chicken, breaded with your favorite flavor Pringles chips. So crispy, delicious, and easy to make!
5.2 ounces Pringles chips
1 tablespoon seasoned salt
2 pounds boneless skinless chicken breasts
1 cup buttermilk
Pre-heat the oven to 400°F and grease a 16×20 baking sheet.
Crush the Pringles, using a gallon bag and rolling pin or a food processor.
Then add the crushed chips or potato crisps to a gallon bag with the seasoned salt, seal the bag, and shake it around to mix.
Cut the chicken breast into small 1-2 inch nuggets.
Dip the nuggets in the buttermilk.
Then place the nuggets, 2-3 at a time, into the gallon bag, and shake them around to coat them with the Pringles chip breading.
Place the nuggets in a single layer on a baking sheet.
Then bake the Pringles crusted chicken at 400°F for about 20 minutes, or 'til they're cooked thru. At this point, you can remove them from the oven and let stand, uncovered, about 5-10 minutes to crisp up even more.
Serve with your favorite chicken dipping sauce, with fries, or salad on the side.


 This slicer made pitting and slicing the avocados an easy peasy process. The hook on the end of the handle helps you to remove the avocado pit.
 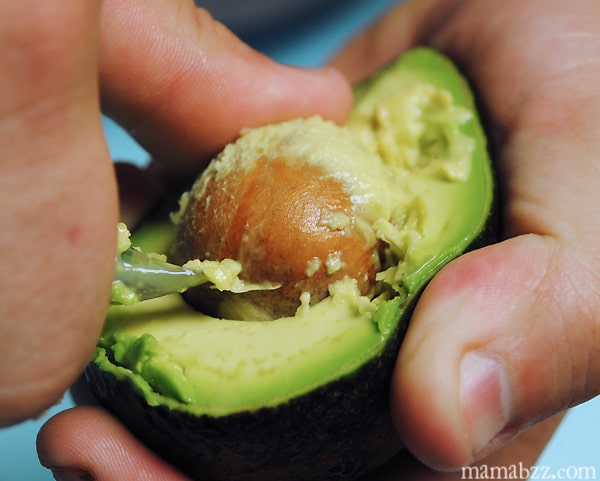 Then you just run the slicer down the skin of the avocado through the meat of the fruit, and you have a sliced avocado.
 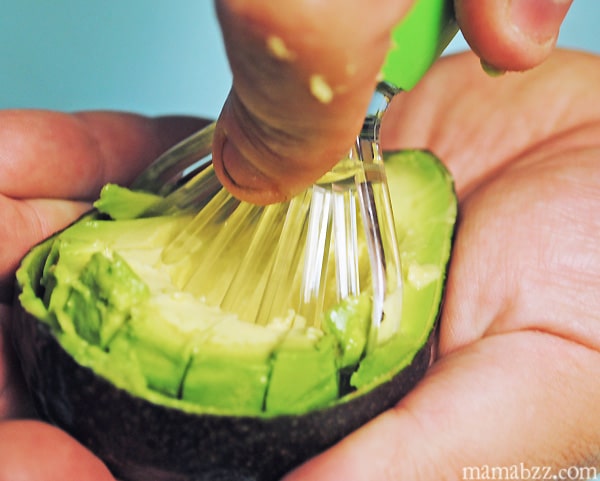 The tool is quite sturdy and something we’ll probably be using quite a bit in our kitchen, as we’re always eating avocado on our sandwiches or making guacamole.
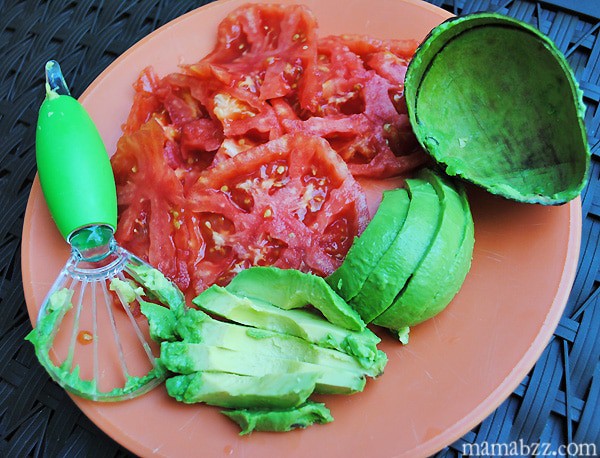 Putting this sandwich together is super easy, and you start with two slices of sourdough bread. Butter the outsides; I used to butter the insides too on all my grilled cheese, but I don’t do that anymore…. trying to be a bit more health-conscious. Fire up the griddle, and place one slice of bread on the griddle. Add a few slices of Cheddar Cheese, then tomato, avocado, and a slice of American Cheese. Sandwiching the tomato and avocado between the two cheeses ensures that everything will be wrapped together in ooey, gooey goodness. Finally, add a few slices of bacon, already cooked.
 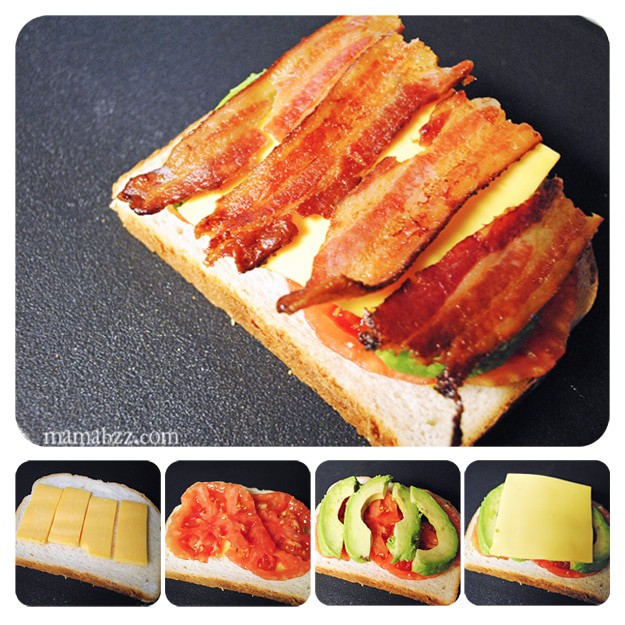 Top it off with your other slice of buttered sourdough, and cook until golden brown and cheeses are melted and gooey.