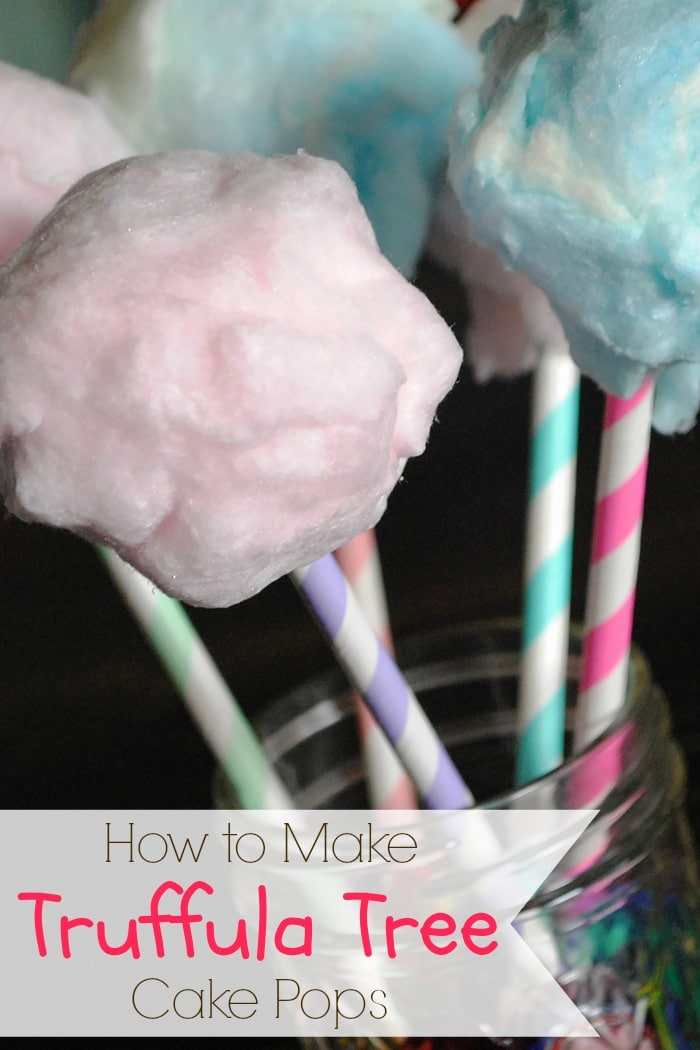
If you’ve watched Dr. Seuss’ The Lorax, you’ve seen those beautiful, colorful, cloud-like Truffula Trees. Well, back when I was in my cake pop making craze, I racked my brain for a creative cake pop idea. That’s when I remembered Earth Day…. and then I thought of The Lorax and how perfect Truffula Tree cake pops would be for this occasion. So, I set out to try to create these whimsical trees, in cake pop form.
The process is quite simple, really. Anyone could make these. Below, you’ll find a printable recipe for the chocolate cake pops. The first step was to mix up my cake pop dough and heat up my Babycakes Cake Pop Maker. I chose to go the easy route in actually baking these cake pops, since I wasn’t sure how my process of creating the bushy trees would go.
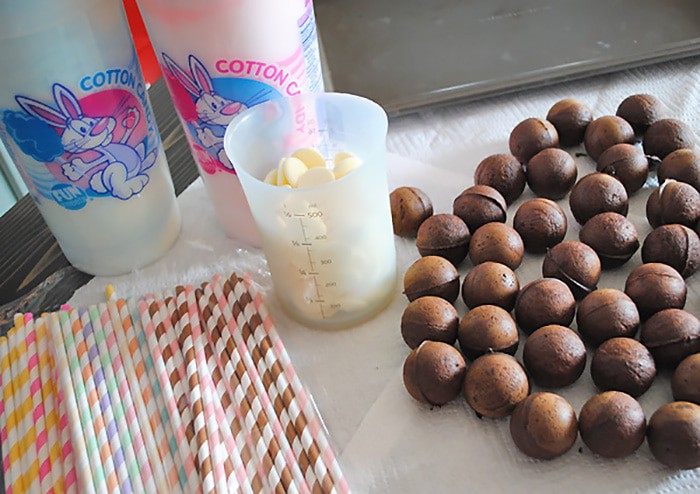
You’ll need a few supplies, including the following:
Cake pop dough (follow my recipe below)
Pastry bag
Candy Melts (I recommend Wilton)
Paper Straws
Cotton Candy (in as many colors as you can find)
After mixing the dough, add a bit of dough to a pastry bag, which I’ve found to be the easiest way to add dough to the reservoirs in the cake pop maker. Follow your cake pop maker’s instructions for baking the cake balls. When the cake balls are baked, let cool on a paper towel. Once they’ve cooled, place on a cookie sheet in the freezer for about 10 minutes or until chilled well.
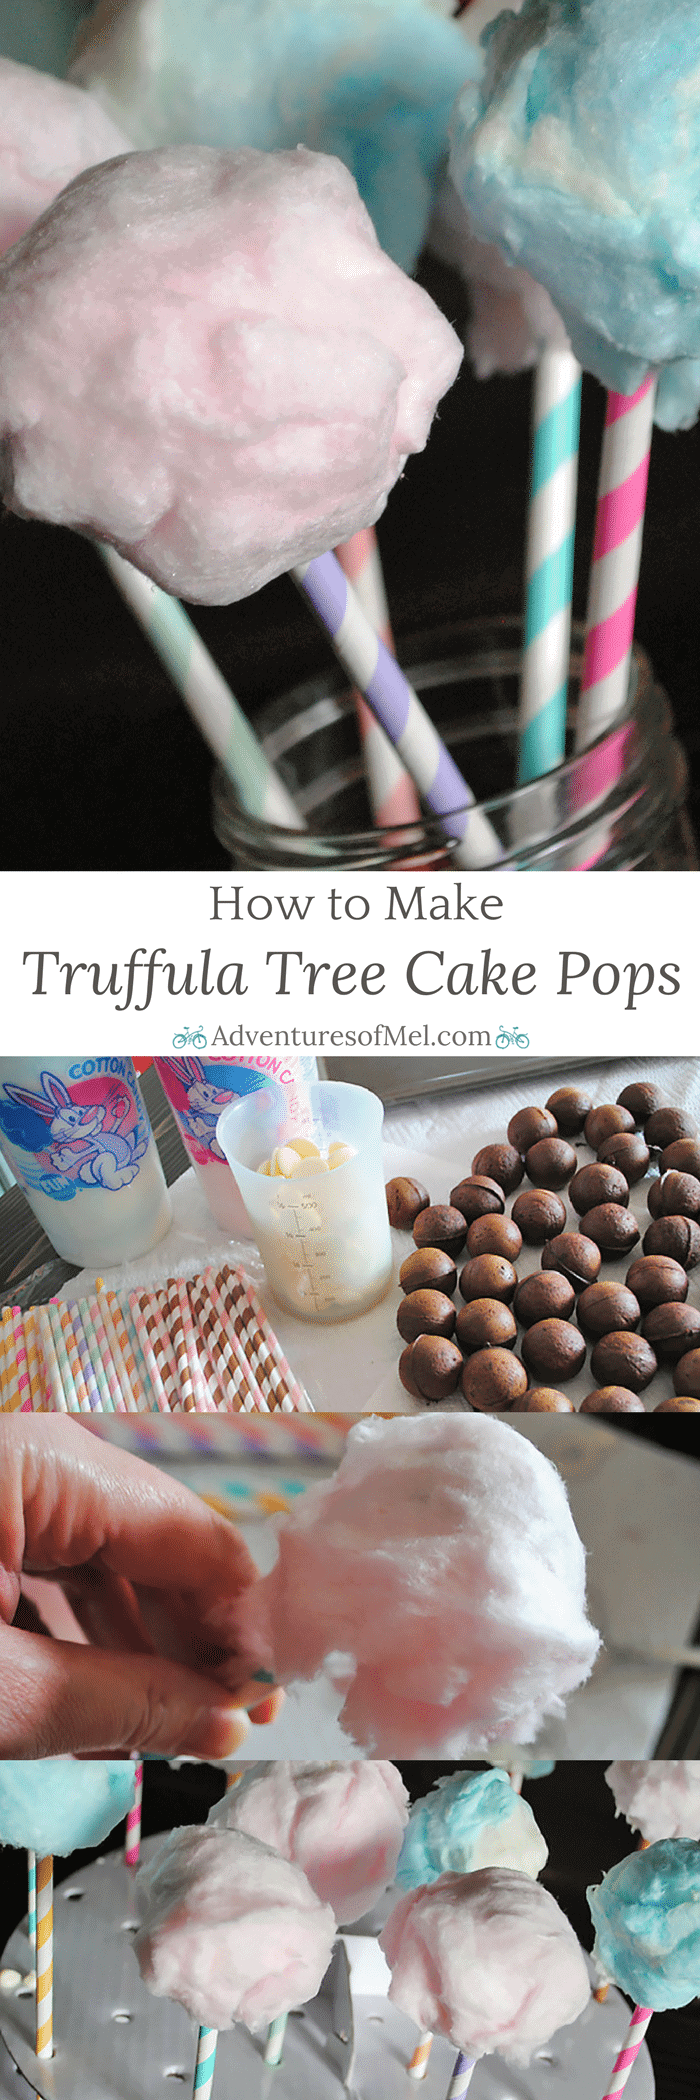
Now it’s time for decorating. Dip a paper straw in melted candy melts, and insert the straw into a cake ball. Continue to dip the cake pop in the candy melts until coated well.
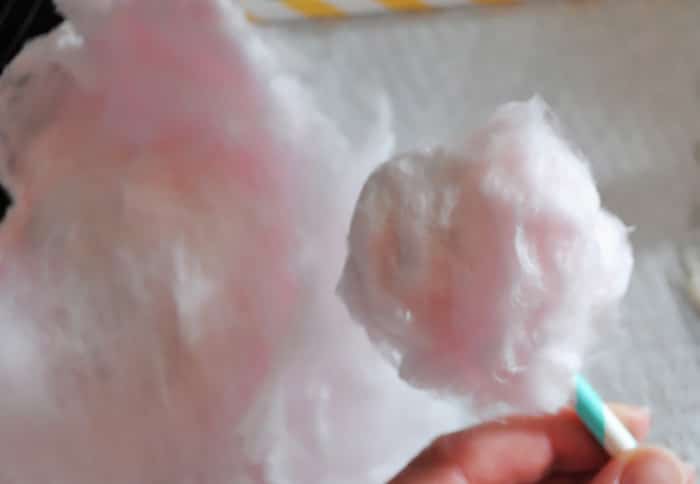
Place the cake pop in a stand, and prepare a piece of cotton candy by pulling it and stretching it apart just a bit. Then wrap the cake pop while candy coating is still fresh. The cotton candy will stick to the candy coating and become your very own Truffula Tree. Be aware that the cotton candy will dry out and begin to harden when left out for a longer period of time; so you’d probably want to complete the steps of coating your cake pops and wrapping in cotton candy right before your party or event.
These turned out so cute, and my boys absolutely loved them. They’d be perfect for an Earth Day celebration or even that next birthday party.
Below you’ll find a printable recipe. Enjoy!
Like this recipe? Go ahead and Pin it!
Chocolate Truffula Tree Cake Pops
Inspired by Dr. Seuss’ The Lorax, make your own Truffula Tree Cake Pops, using cotton candy. Just in time for Earth Day or even a fun snack to add to your list of Dr. Seuss birthday party ideas.
1 chocolate cake mix
2 eggs
1 pkg. chocolate pudding mix
1/2-1 cup milk (in place of water on cake mix pkg.)
1 bag candy melts
6 cups cotton candy
Mix all ingredients together, making sure your batter is fairly stiff, about the consistency of brownie batter. Do not add oil to the mixture.
When cake batter is ready, add a little bit at a time to a pastry bag; this will make for easier filling of the cooking reservoirs in the cake pop maker.
Heat up the cake pop maker, and wait for the green light to show that it’s ready.
Give a light coating of cooking spray to each cooking reservoir in the cake pop maker; fill each reservoir with about 1 tablespoon of cake batter, trying not to overfill. Lower the lid on your cake pop maker, latching it shut. Then wait approximately 4-6 minutes per batch of cake balls.
Use a pot holder to lift the lid because it can be quite hot to the touch. Use the provided fork to lift each cake ball out of the maker and onto a place to cool.
Before decorating, place cake balls into the freezer for about 10 minutes.
To decorate your cake balls as Truffula Trees, use candy melts and cotton candy. Melt the candy melts according to the directions on the package. Then remove cake balls from the freezer, and start decorating.
Take a cake pop stick, dip it into the melted candy, and insert into the cake ball.
Then dip each cake pop into the melted candy, coating well and allowing excess candy to drip before placing upright.
Place each cake pop into a cake pop stand.
Wrap your cake pops in cotton candy before the candy coating dries.
Serve immediately after adding cotton candy and enjoy!
Cakes & Cupcakes
American
chocolate cake pops, chocolate truffula tree cake pops, truffula tree cake pops
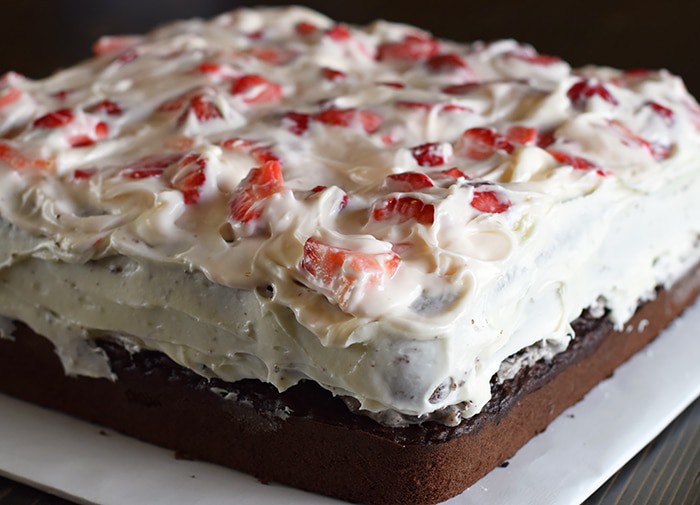
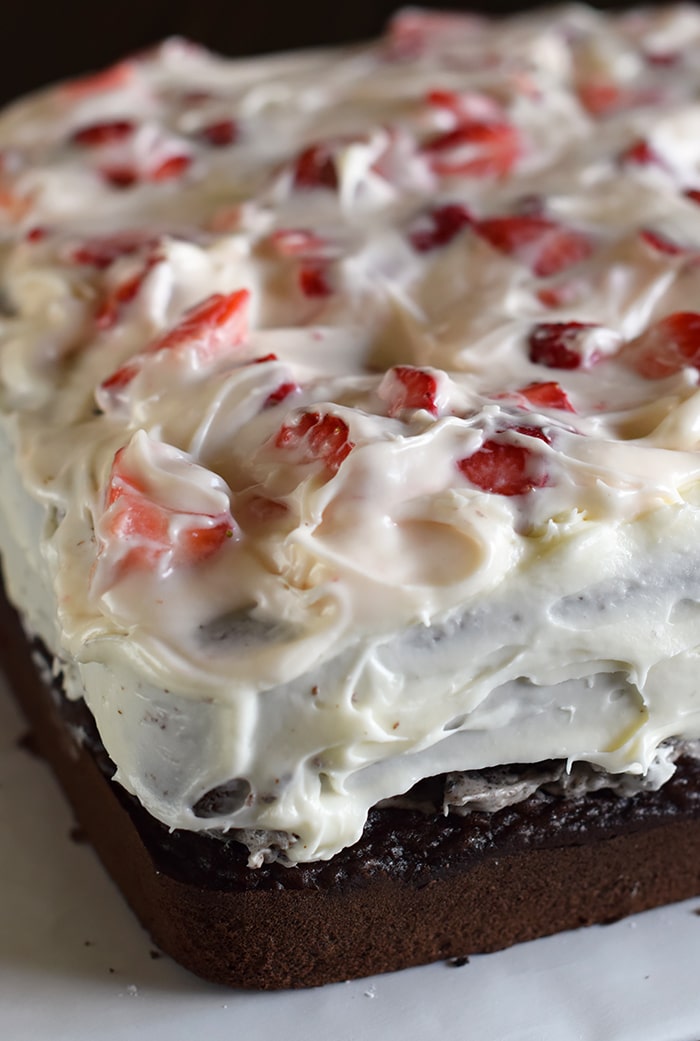
That’s right! We have another Minecraft Cake for all you Minecraft fans. Only this time we added Oreos, cream cheese, and strawberries into the whole shebang.
This particular cake is based on Cake from the Minecraft game. Jacob started talking about making it a little while ago, and we began to think about how we’d make this epic cake.
Between this and the grass block Minecraft cake recipe, this one is my personal favorite. It’s so easy, and it’s so creamy delicious.
The Oreos and the strawberries really make the cake. And let me tell you, it vanished into thin air.
How do you make this cake? Well, the good thing is it’s super easy, and you really don’t need any special cake decorating supplies beyond a cake slicer/leveler, a knife for smoothing on the frosting, and (2) 9-inch cake pans, which you can pick up at just about any home or craft store, if you don’t already have them.
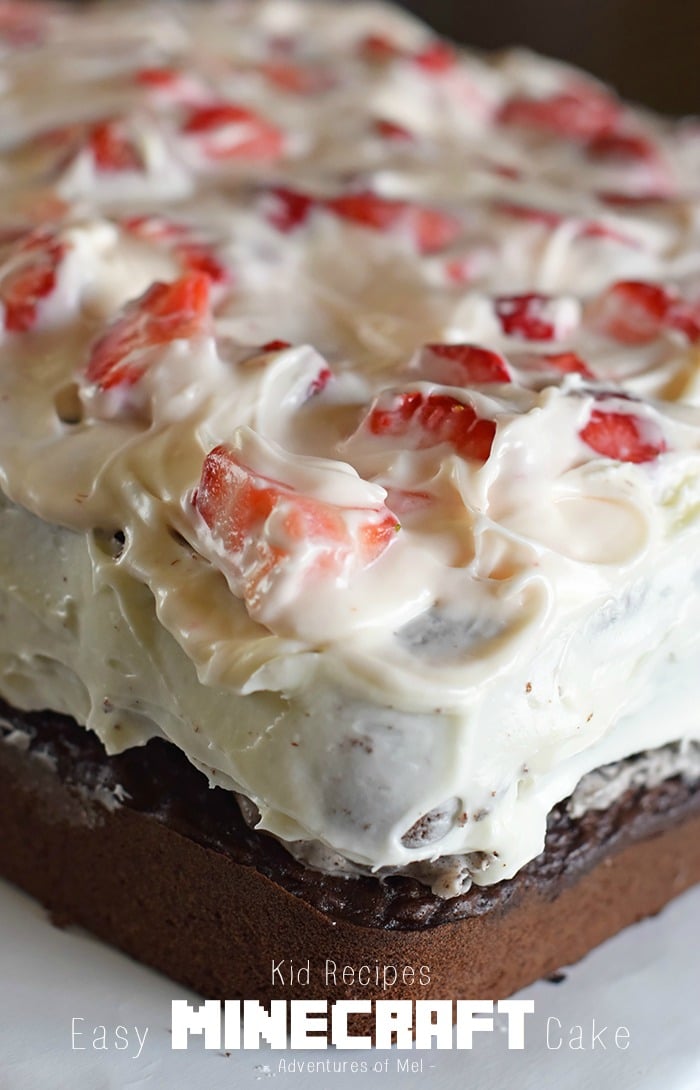
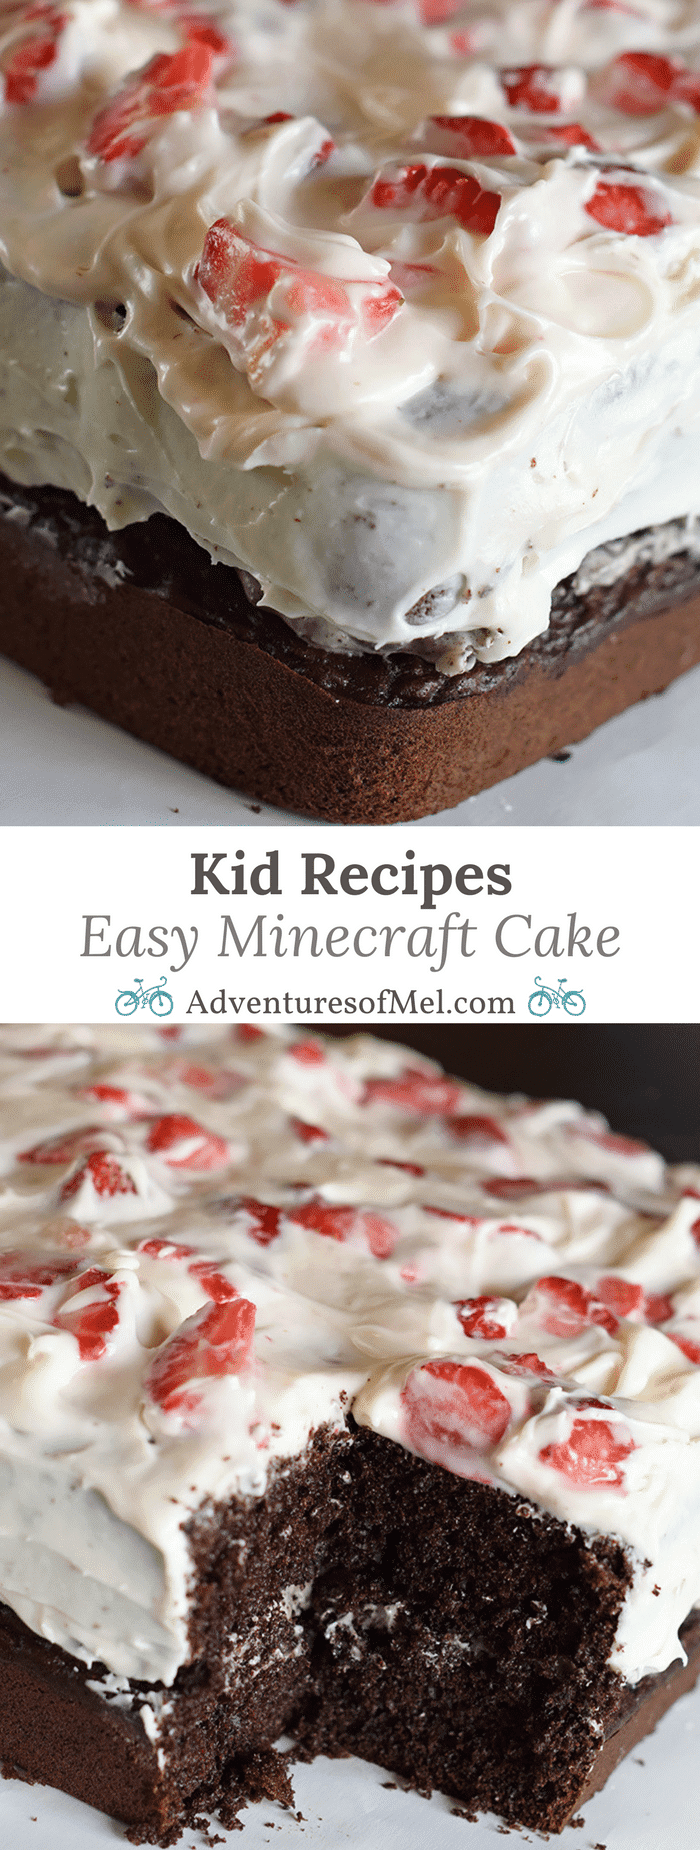
Making a Minecraft cake that’s easy to make was super important to me when making this cake. I wanted it to be a non-overwhelming, simple, easy cake that anyone could make in a heartbeat, perfect for a birthday, a Minecraft party, or any celebration. And honestly, you don’t even have to call it a Minecraft cake; for those who aren’t into Minecraft, it’s still really scrumptious.
How to Make an Easy Minecraft Cake
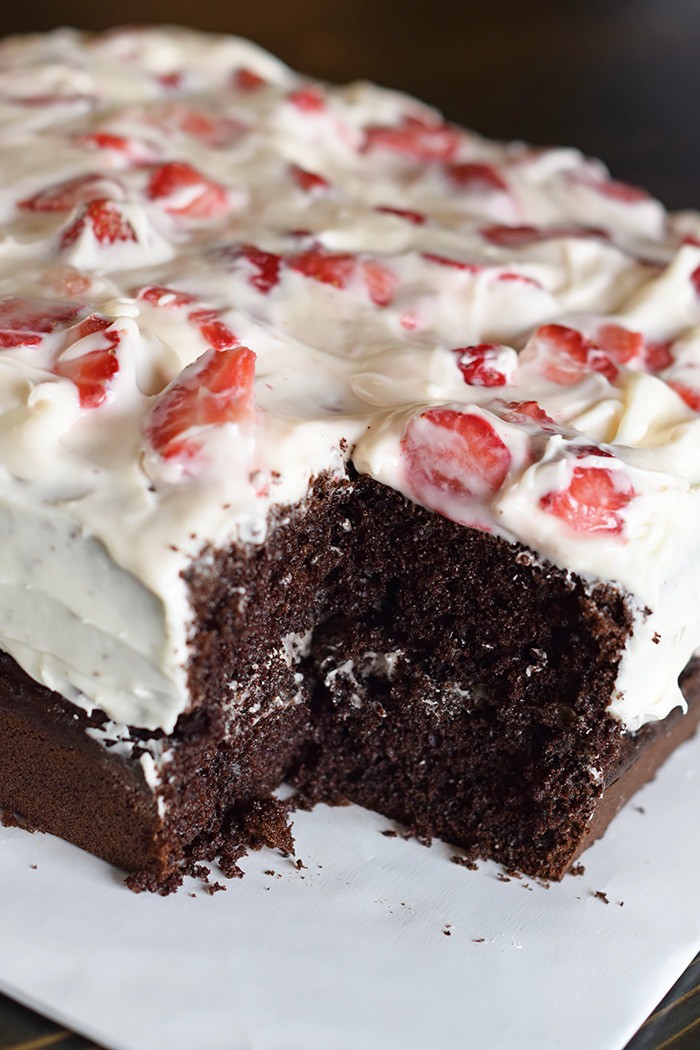
We used 2 Dark Chocolate Fudge cake mixes. Just bake both cakes according to the directions on the package.
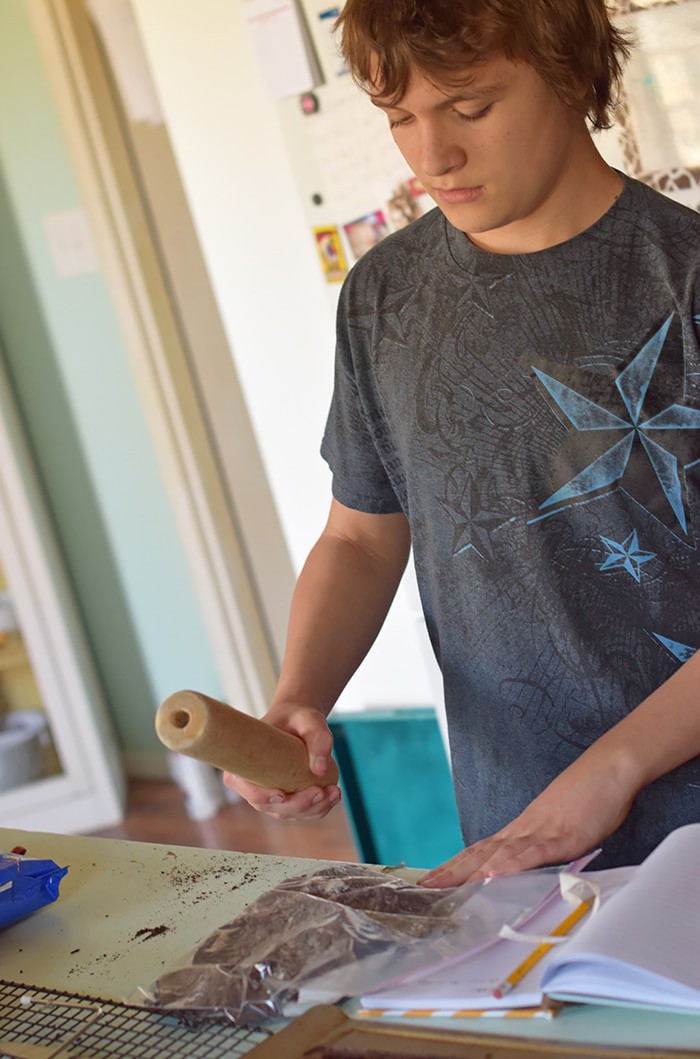
For the frosting, we mixed up a simple cream cheese frosting, then divided it in half. Half the icing was mixed with crushed Oreos. The Oreo cream cheese frosting goes between the two cakes as a middle layer of frosting. Add the top layer of cake, sandwiching the cake layers together. After smoothing a bit of the plain frosting onto the top sides of the cake, the other half of the frosting is mixed with strawberries. The strawberry cream cheese frosting goes on top of the cake to mimic the look of Cake.
Kids can easily make this cake with the supervision and help of an adult. There’s really no neatness or perfection factor to how this cake should look… You can really just have fun with it.
How to make an easy Minecraft cake with a simple cake mix recipe that doubles as a fun kid recipe. Add in Oreos, cream cheese, and strawberries. But be warned! It’s such a scrumptious cake, it will vanish into thin air!
Cake:
2 chocolate cake mixes
Other ingredients per cake mix box/directions
Frosting:
2 8- oz. boxes cream cheese
4 tbsp. salted butter (softened)
1/2 tsp. vanilla
4 cups powdered sugar
5-6 large strawberries (washed and sliced/chunked)
12 Oreos (crushed)
Mix cake mixes and bake according to package directions.
When baked, allow cakes to cool completely.
Use cake slicer/leveler to even out top of each cake square.
Mix cream cheese, butter, vanilla, and powdered sugar to make frosting.
Divide frosting in half.
Add Oreos to half of frosting. Mix well.
Add Oreo cream cheese frosting to top of one cake layer and spread evenly.
Top with the second cake layer, so you now have a double-layer cake.
Use a little bit of plain cream cheese frosting to smooth on the top sides of the cake.
Add sliced/chunked strawberries to rest of frosting.
Smooth strawberry cream cheese frosting onto top of cake.
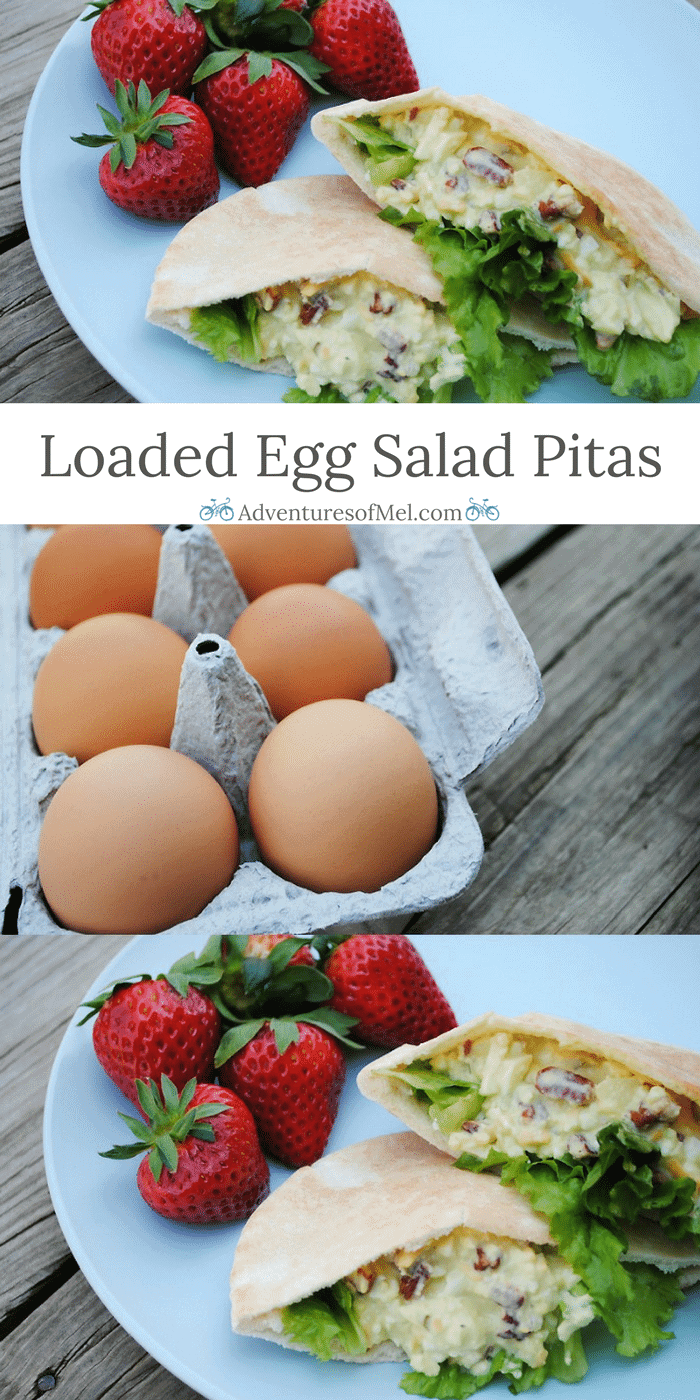
Ready for a spring picnic but not sure what to pack in your picnic basket? Loaded Egg Salad Pitas make a delicious lunch or picnic, and they’re a great way to use up leftover hard boiled eggs.
In addition to hard boiled eggs, I added a few extra ingredients. My grandma used to make tuna salad and chicken egg salad with a host of fresh ingredients, from apples to pickles and pecans.
She had 2 long rows of pecan trees in her front yard, so she always had pecans sitting around in a pan waiting to be cracked or bags full of pecans already stored away in the freezer. I miss those pecan trees.
That’s kinda where my cravings led me with this egg salad, back to the good ole days.
Below you’ll find a printable recipe. Serve this egg salad up with a flat bread or sandwiched in a pita, and you’re all set. I’m getting hungry just thinking about it. I hope you enjoy!
Loaded Egg Salad Pitas
Got leftovers? Maybe you have a few leftover hard boiled eggs sitting in your fridge. Use them to make Loaded Egg Salad Pitas, a delicious picnic food and pure perfection in your lunch box.
6 hard boiled eggs
1 apple
1 avocado
½ small red onion
½ cup pecans
4-5 bread & butter pickles
1/2 cup shredded Cheddar
¼ cup pickle juice
¼ cup mayo
Pita bread
Lettuce leaves
Boil eggs and peel; crumble.
Wash, peel, and chop apple.
Wash, peel, and slice avocado
Mince onion.
Chop pecans and pickles.
Shred Cheddar cheese.
Mix together eggs, apple, avocado, red onion, pecans, pickles, Cheddar, pickle juice, and mayo in a medium-sized bowl.
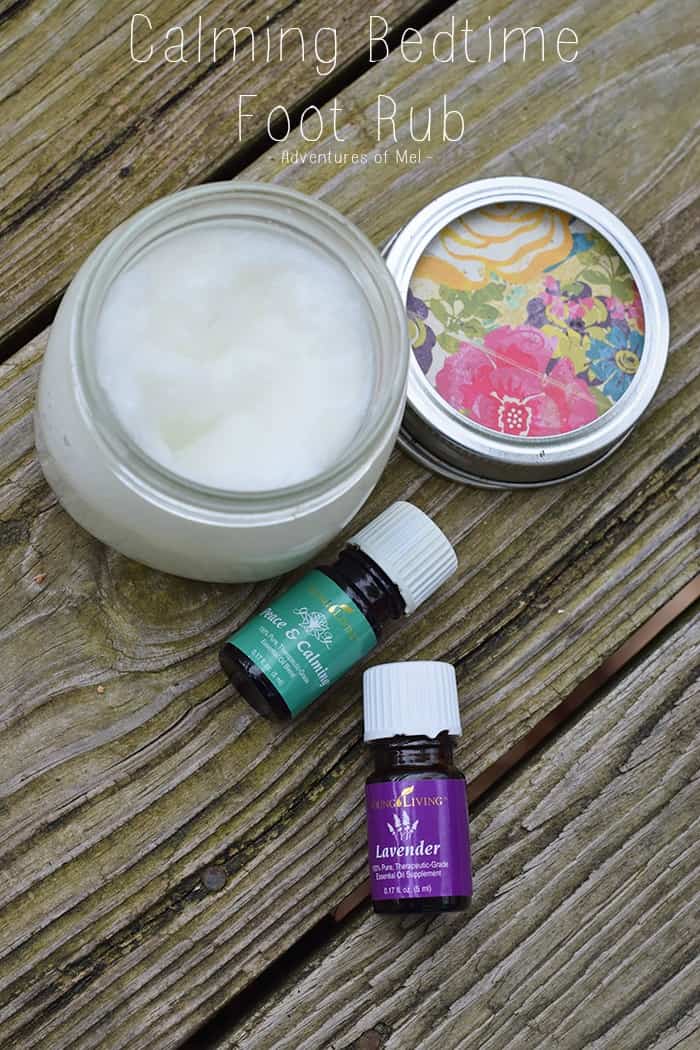
Bedtime… that magical time of night when the kids are finally quieted down for the night, and the house is quiet with hardly a sound save the snoring of the dog and the click click click of the cat’s claws on the hardwood floor. It’s usually the time of night where I finally have a few moments to take care of myself. Life is busy! Introducing essential oils into my family’s life has led me to make a calming bedtime foot rub made with both Peace & Calming and Lavender oils. And let me tell you, I L-O-V-E it!
I’m sharing the printable recipe with you down below… This is a super simple rub to make, and it involves coconut oil. The moisturizing properties of the coconut oil make it a great solution for rough, calloused feet. But then you mix it with a little Peace & Calming and Lavender, and you’ve got a lovely foot rub that’s perfect for bedtime.
Natural ingredients and knowing exactly what’s in my foot rub make it a winner. Not only do I use it for myself, but I love rubbing Jaden’s feet with it before bed; it gives us time to talk, and he loves having his feet rubbed.
Grab the recipe below, so you can make your own.
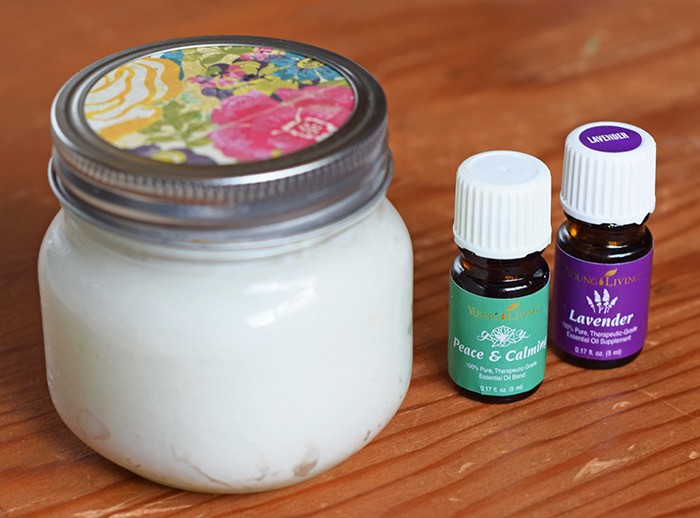
Calming Bedtime Foot Rub
Mix coconut oil with a little Peace & Calming and Lavender, and you’ve got a calming bedtime foot rub that’s perfect for calloused, restless feet.
6 to 8 ounce jar with lid
Mixing bowl
Measuring cup
3/4 cup coconut oil
10 + drops Peace and Calming essential oil
5 + drops Lavender essential oil
Add coconut oil to dish.
Add at least 10 drops of Peace & Calming. I tend to be pretty thrifty with my oils, but you can definitely add more if desired.
Add at least 5 drops of Lavender oil. Again, you can add more if desired.
Mix well. The rub stores well in a jam or jelly jar.
Rub on your feet and legs before bedtime.
(Disclaimer: Everything I share about essential oils on Adventures of Mel is based on personal experience and has not been approved by the FDA. Please do your own research, and never use essential oils in a way that would make you uncomfortable. Also, take special caution for those pregnant or nursing, as well as children. Read the full disclaimer…)
(Disclaimer: Everything I share about essential oils on Adventures of Mel is based on personal experience and has not been approved by the FDA. Please do your own research, and never use essential oils in a way that would make you uncomfortable. Also, take special caution for those pregnant or nursing, as well as children. Read the full disclaimer…)
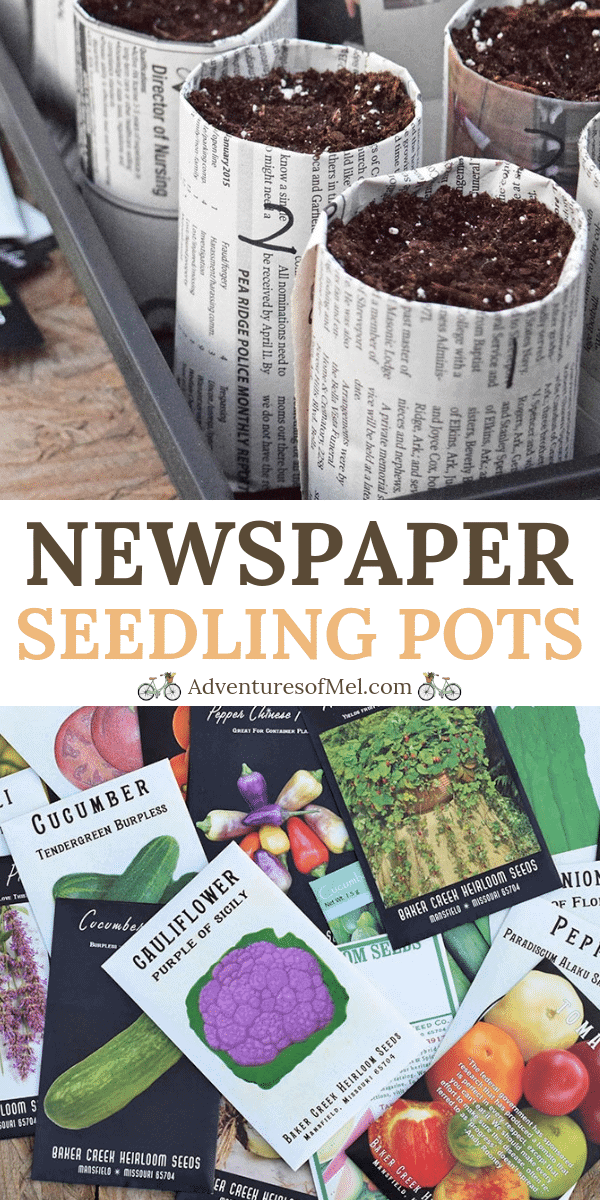
How to make your own newspaper seedling pots for starting seeds indoors, along with tips and ideas for soil, supplies, and growing plants from seed.
We’ve already begun starting seeds indoors for the coming growing season. Seed starting is a process that requires planning, good timing, and a li’l tender loving care.
We’d learned some time ago, in one of our gardening groups, that newspaper makes great little seedling pots… Not only that, but it’s a great way to re-purpose newspaper.
I’m a huge fan of re-purposing. In fact, I even re-purposed this vintage tractor seat to make a tractor seat bucket that’s perfect for weeding and working with plants in the garden.
While we don’t actually pay for a newspaper anymore, we still have newspaper laying around, not to mention newspapers are only 50 cents apiece at our local convenience store.
So if you’re trying to save money with your garden, newspaper can be much cheaper than seed starter pots.
It also makes compostable or biodegradable pots. So it’s good all the way around.
By the time we’re done, our dining room will probably be filled to the gills with trays of seedlings waiting to be planted.
Tips for How to Start Seeds Indoors
When it comes to starting seeds, a lot depends on the types of plants you’re wanting to grow. Here are a few general tips for starting seeds.
Make sure the seed starting containers they grow in give them plenty of space, and pot up if needed.
Don’t overwater your seedlings, which can lead to fungi, like damp-off, which thrives in a too-wet environment.
Ensure that your seedlings are fed well, whether the fertilizer is in the potting mix or you feed with an all-purpose fertilizer.
Make sure the seedlings have plenty of light. You may even consider using grow lights.
Kinda along the same lines as light, give your seedlings plenty of warmth (80-90 degrees) when they need to sprout, but don’t keep it too warm after they have sprouted (70-80 degrees).
When your seedlings are growing, brush your hand against them to strengthen and exercise them, preparing them for the real world.
And you may think I’m a li’l cuckoo, but… Talk to your seedlings. Play music for them. They like company, and they will thrive even more with a little tender loving care and attention.
Seed Starting Supplies for Starting Seeds Indoors
You really don’t need that many seed starting supplies, especially if you’re using newspaper; in fact, it’s more affordable than people think.
With a little creativity and re-purposing, you can save a LOT of money.
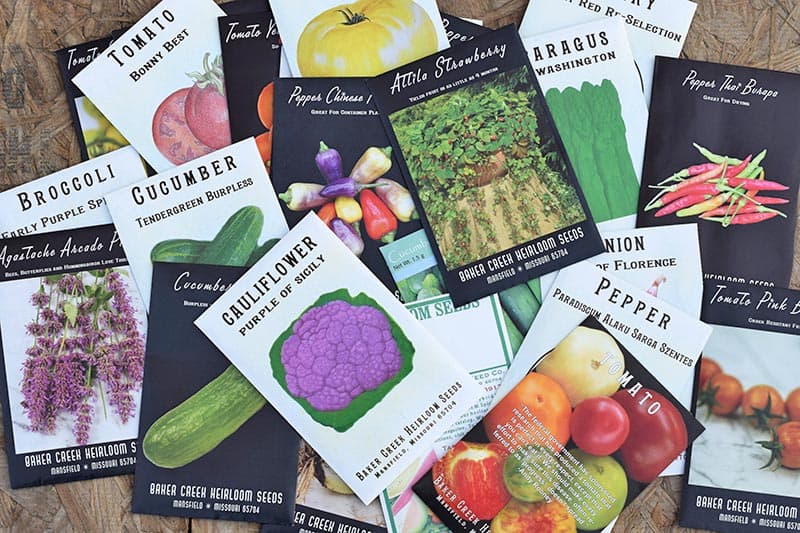
Seeds – We prefer heirloom seeds because then we can harvest our seeds and re-plant the next year.
Newspapers – How many depends on how many seedlings you plan to grow.
Potting Mix – This will probably be the most expensive item on your list.
Water
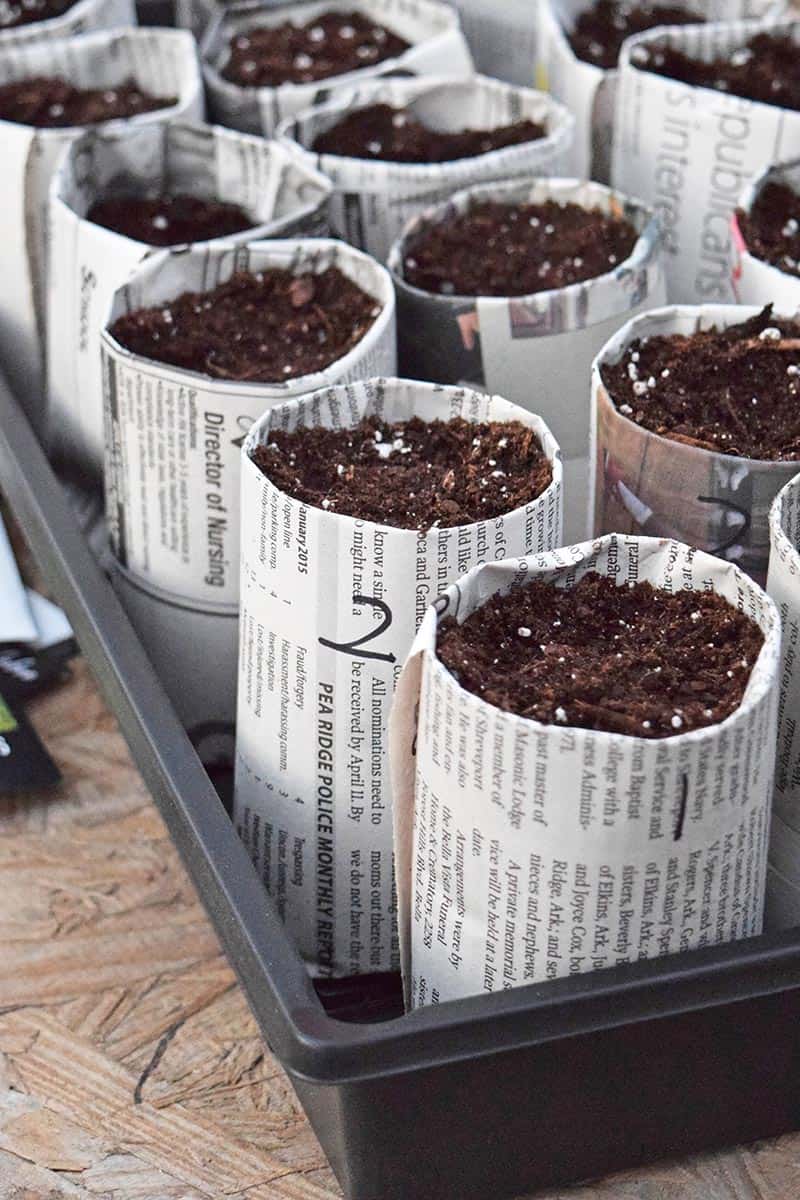
How to Make Newspaper Seedling Pots
Making newspaper seed pots is so simple. If there are a few of you working together, you can start an assembly line and help each other, making the process go by even more quickly.
To make a paper pot planter…
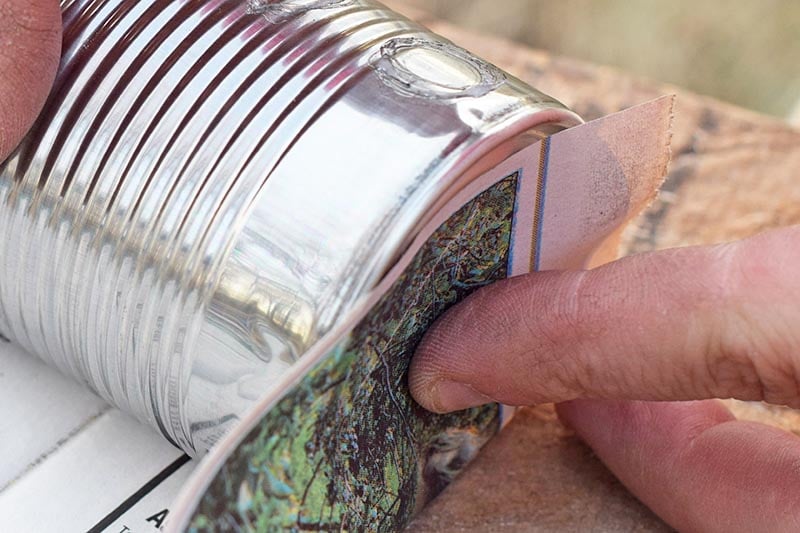
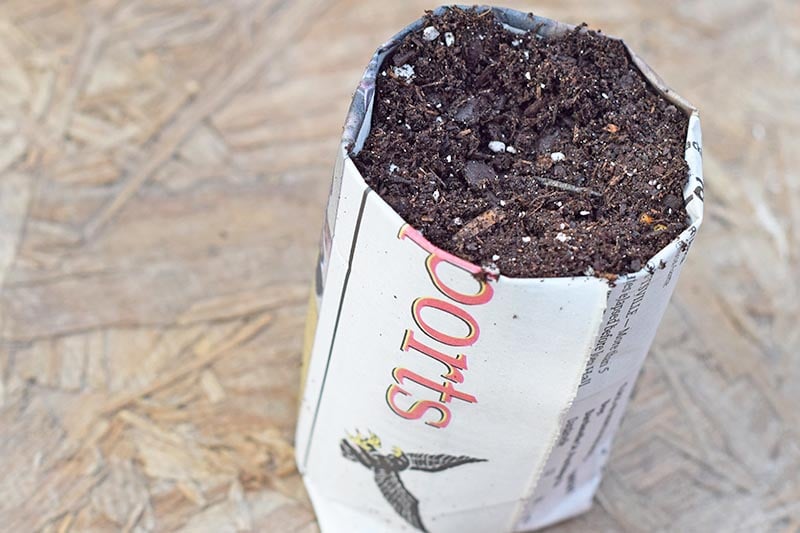
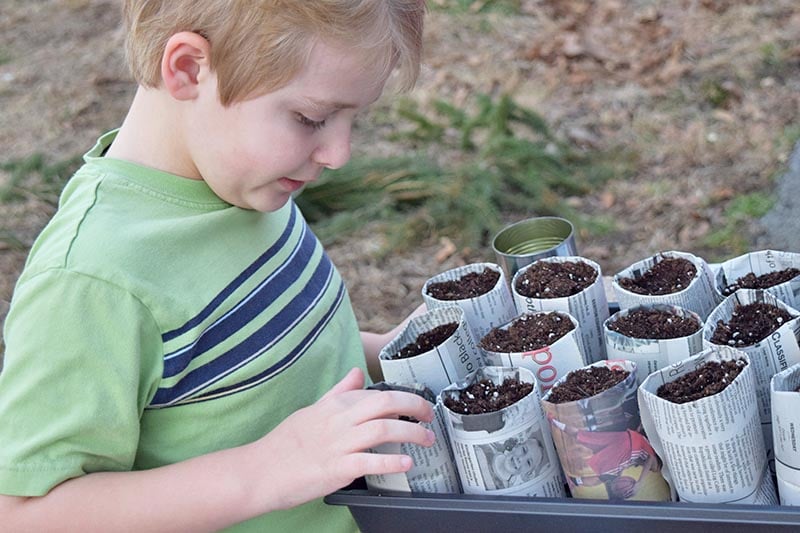
Take a regular-sized tin can and use that to measure and roll the newspaper into a sort of pot.
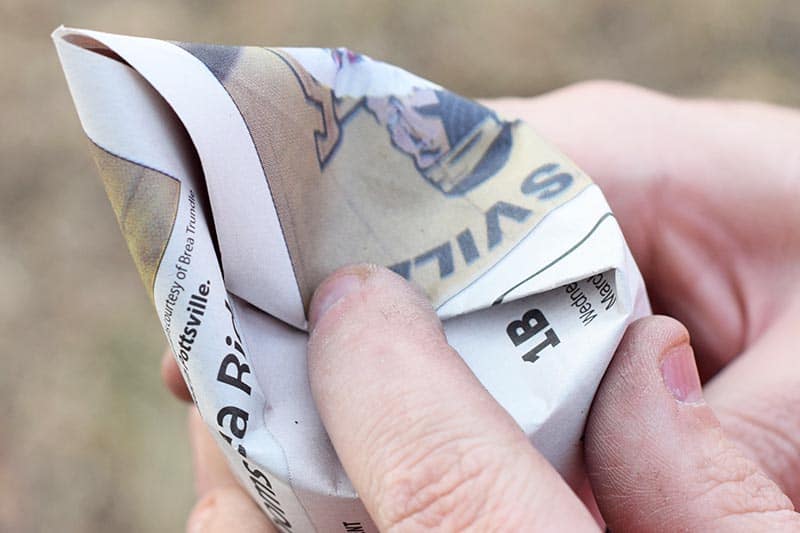
Fold your bottom end up, closing it in. Then fold your top down over the top, creating a crease so it’s easier to fold down once you remove the can.
Unfold that top fold and remove the can from your seedling pot.
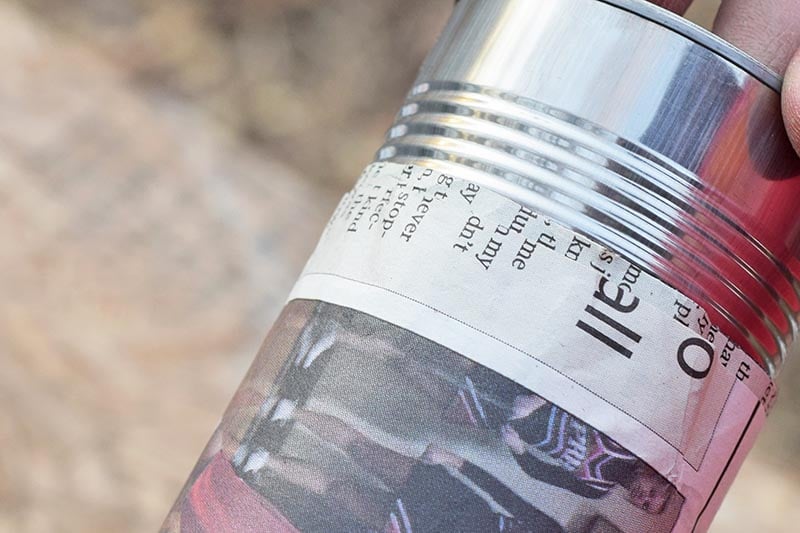
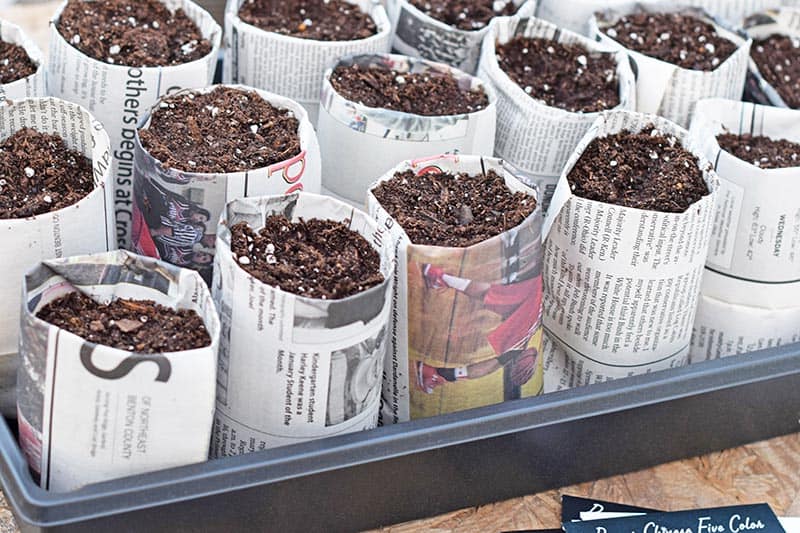
Following that crease, fold the top back down. Fill each newspaper seed starter pot with dirt.
Then place the seedling pot in a seed starting tray. You should be able to fit at least 20 pots in one seed starter tray; you definitely want the tray, so when you water the seeds, it can hold the excess water.
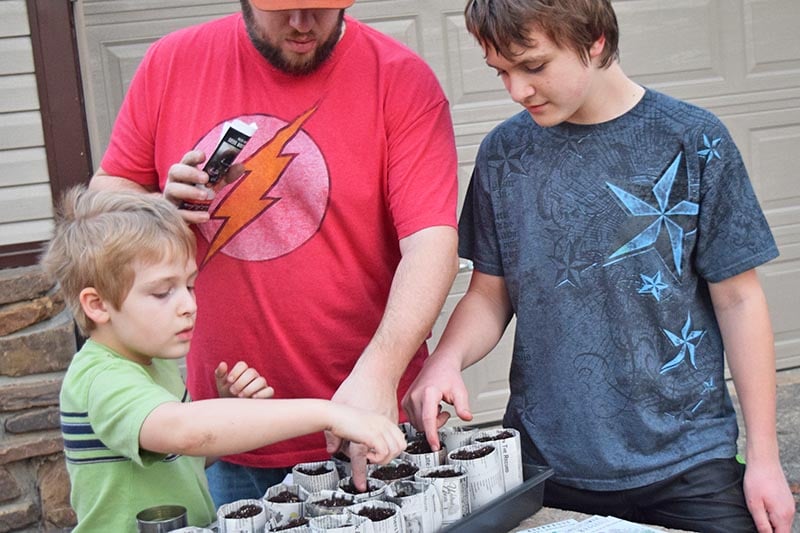
Things to Keep in Mind When Planting Seeds
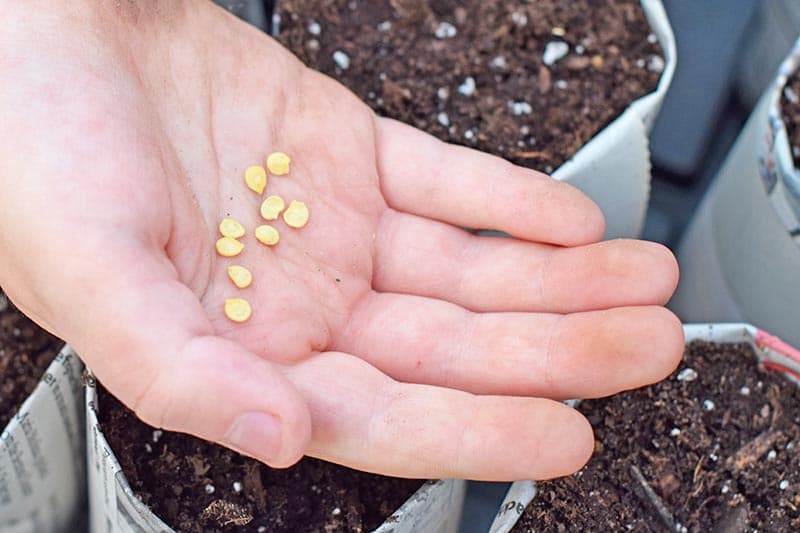
Once you have your pots made and filled with potting mix or seed starting mix, it’s time to plant your seeds. This is where our boys got a little more involved.
You’ll want to make sure to follow the instructions on the back of each individual seed packet when growing plants from seed. Reasons I mention this…
Different seeds have different planting depths.
Some seeds may do better if started outdoors rather than indoors.
Growing times and when to start seeds may differ. You’ll need to factor in frost date, best times to grow each type of plant, the rate seedlings grow, germination time, the time it will take for the plants to mature, etc.
So, be sure to read the seed packets before you ever start planting.
Once your seeds are planted, be sure to water the seedlings, and place them in a sunny spot indoors. This will keep them safe and happy.
If you find this seed starting tutorial helpful, please share it with your friends on Facebook and Pinterest! If you make the newspaper seedling pots, be sure to share that you tried it on Pinterest. I love when readers share feedback!
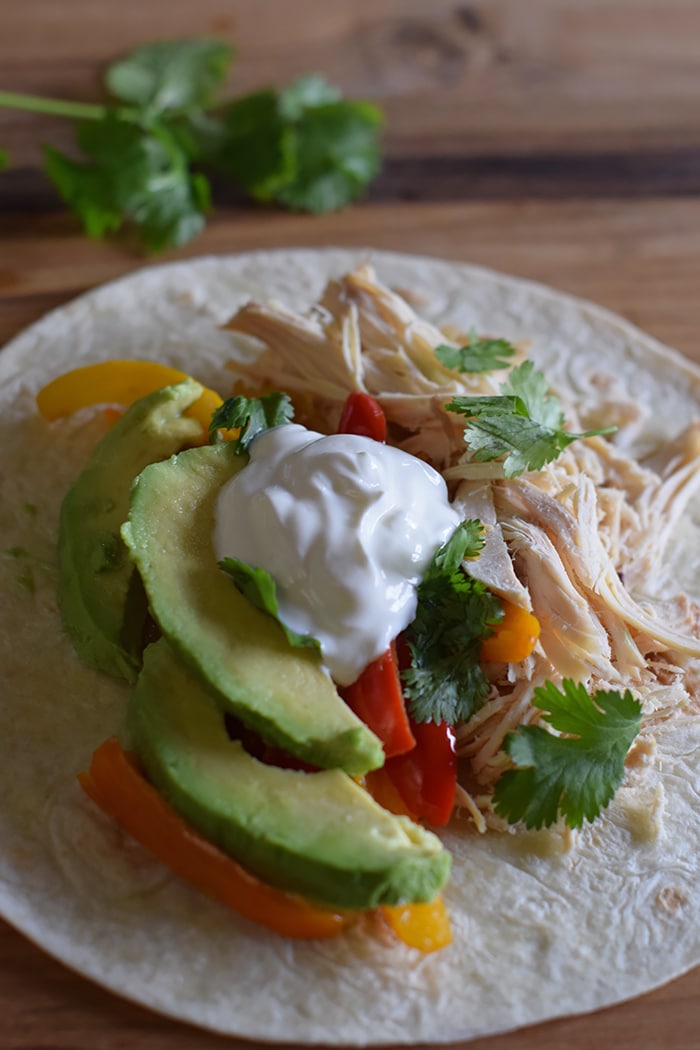
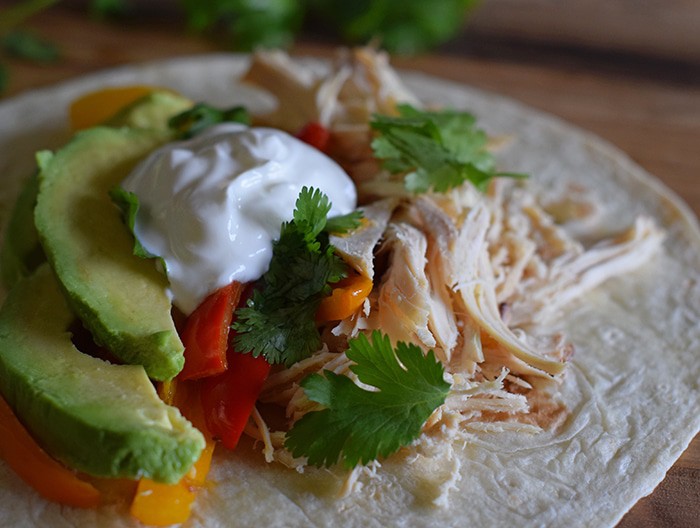
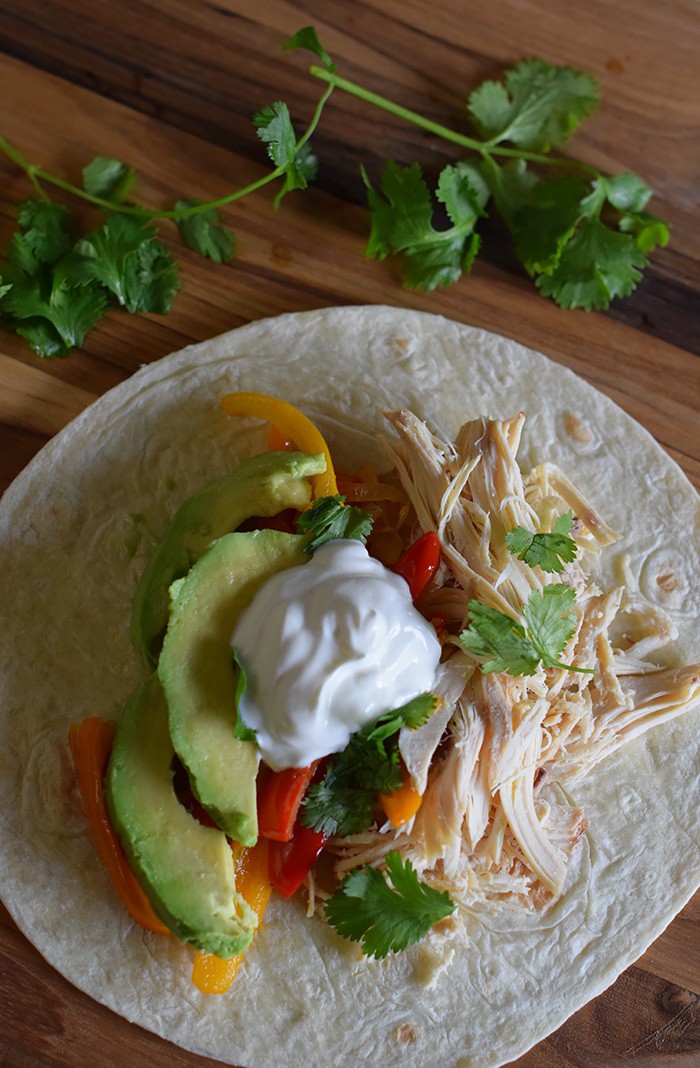
Chicken Fajitas are a simple, easy-to-fix meal that can also be quite healthy, depending on the ingredients you choose to add. Hint: Fruit Salsa is the best!!
When it comes to making meals with chicken, I really like to buy a whole chicken and then stretch it as far as I can for other meals. Sometimes I’ll even buy a whole chicken, cook it, and keep on hand a few days for sandwiches (so much better and healthier than lunch meat), chicken salad, and more.
Our favorite way to cook a whole chicken is by using the slow cooker. Plop that chicken in, add a few seasonings of choice, add some chicken broth, and you’ve got a tasty dinner.
To make fajitas, all you need are a few ingredients besides the chicken.
You’ll need peppers and onions, avocados, cilantro, tomatoes, tortillas, and if you want… sour cream, salsa with basil, mango peach salsa or yogurt.
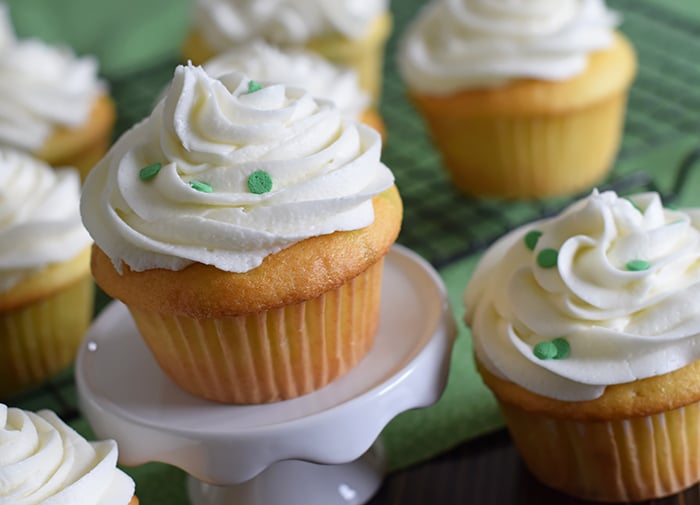
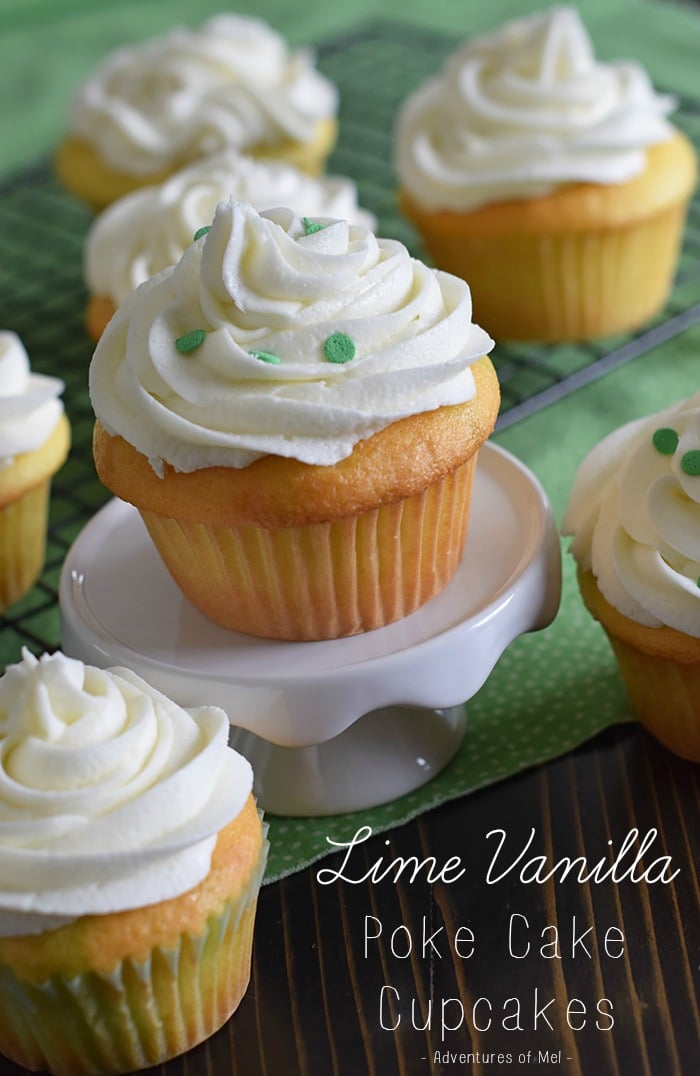
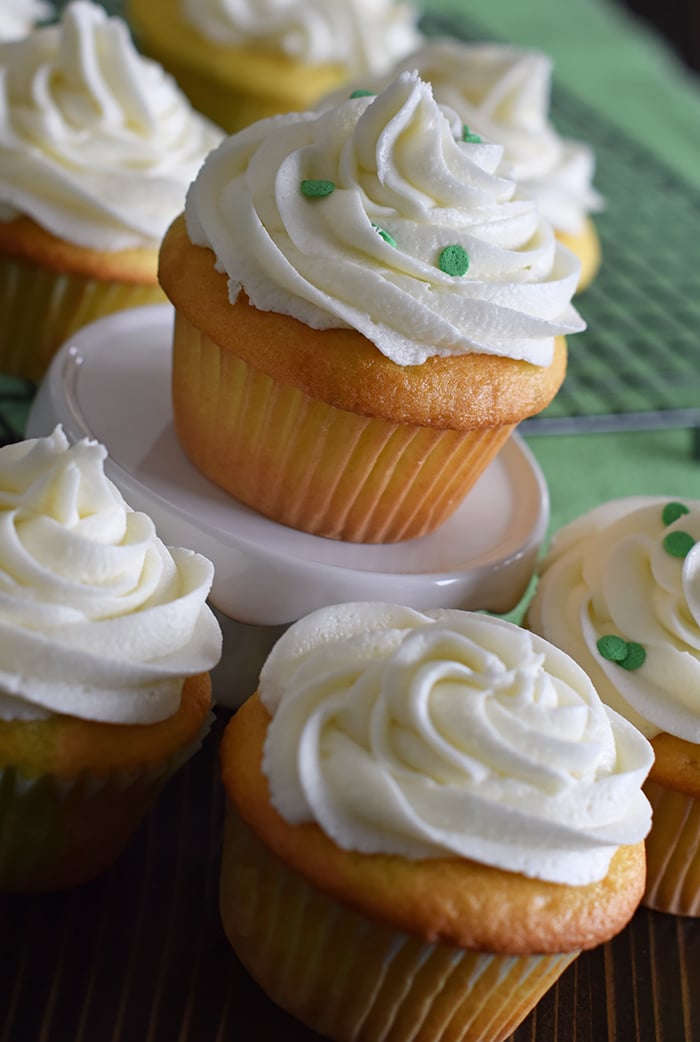
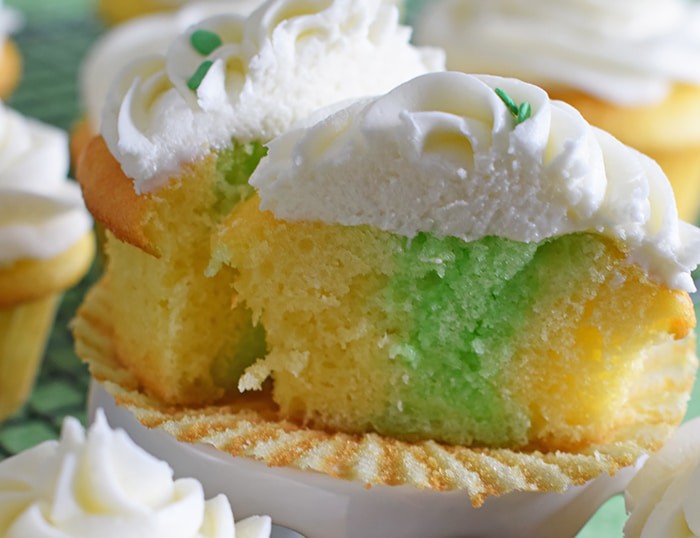
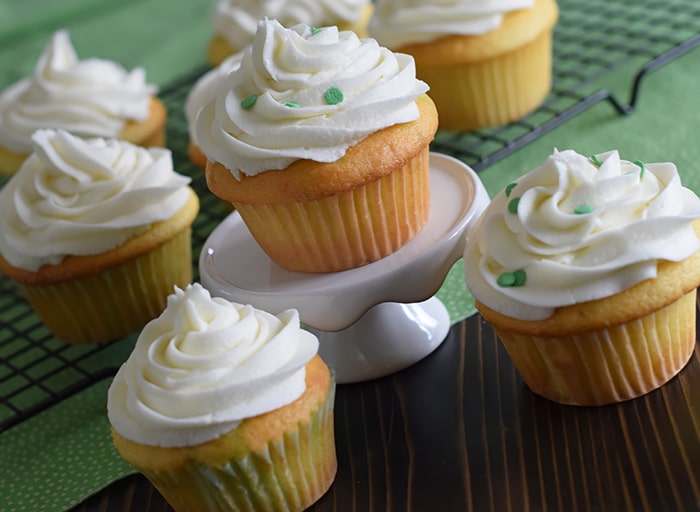
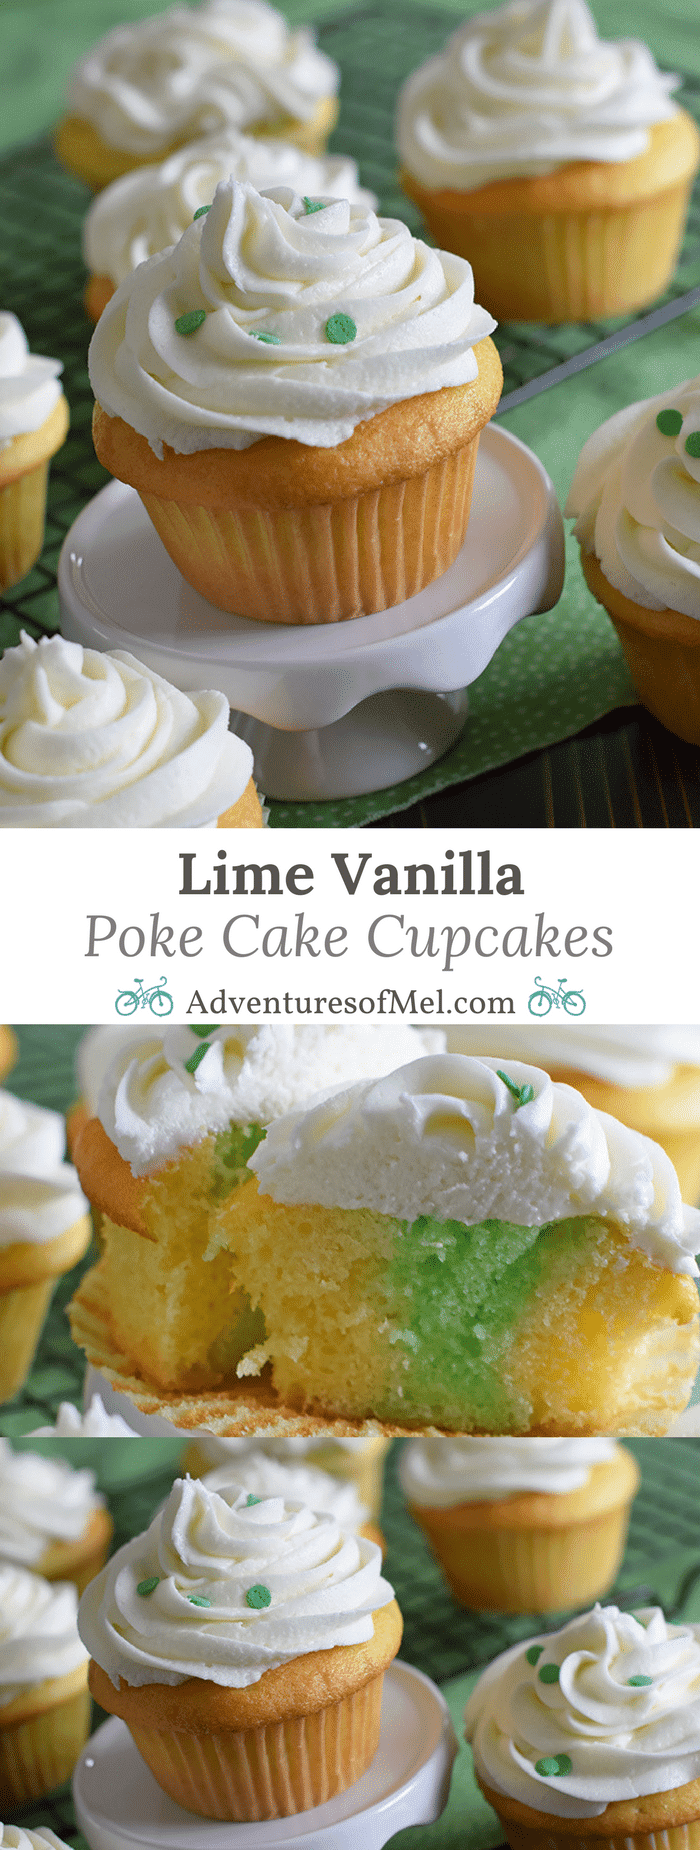
Learn how to make Lime Vanilla Poke Cake Cupcakes, kinda like Jello cake, with buttercream frosting. These scrumptious cupcakes bring just a hint of green for a festive St Patrick’s Day or any day really.
My mom used to make poke cake, or Jello cake as we called it, every spring and summer. It seemed to be one of her favorite things to make, and all of us loved when she made it, especially when she made lemon poke cake.
She’d pour cherry or strawberry Jello over the cake and top it off with whipped topping. Then she’d put it in the fridge and let it get ice cold. It was such a refreshing dessert and so scrumptious!
With her cake in mind, I decided to kinda take a different twist and make poke cake cupcakes. I think these may become a regular favorite, because even my non sweets loving husband loved these.
These cupcakes could be made any time of year with any flavor of Jello… though I did purposely use lime, so we could have green for St. Patrick’s Day. They’re super easy to make.
I JUST WANT THE RECIPE! TAKE ME TO THE RECIPE FOR LIME VANILLA POKE CAKE CUPCAKES!
If you’d rather skip all of my cooking tips, important cooking info for this recipe, and similar recipe ideas – and get straight to the scrumptious lime vanilla poke cake cupcakes recipe – just scroll down to the bottom, where you’ll find a printable recipe card.
TIPS FOR HOW TO MAKE LIME VANILLA CUPCAKES
Yes, you can make these homemade, but using a cake mix just saves time; it’s quick and easy.
Once your cupcakes have baked, remove from the oven and let them sit for 10-15 minutes.
Then poke the middle of each cupcake with a fork just a few times. Add 3-4 small spoons of Jello over the middle of each cupcake, being careful not to let it run down the sides; it actually will soak into the cupcake if you’ve used a fork to poke holes in it.
It will give each cupcake a surprise green color in the middle, perfect for St. Patty’s Day.
The lime combined with the vanilla is pretty yummy too.
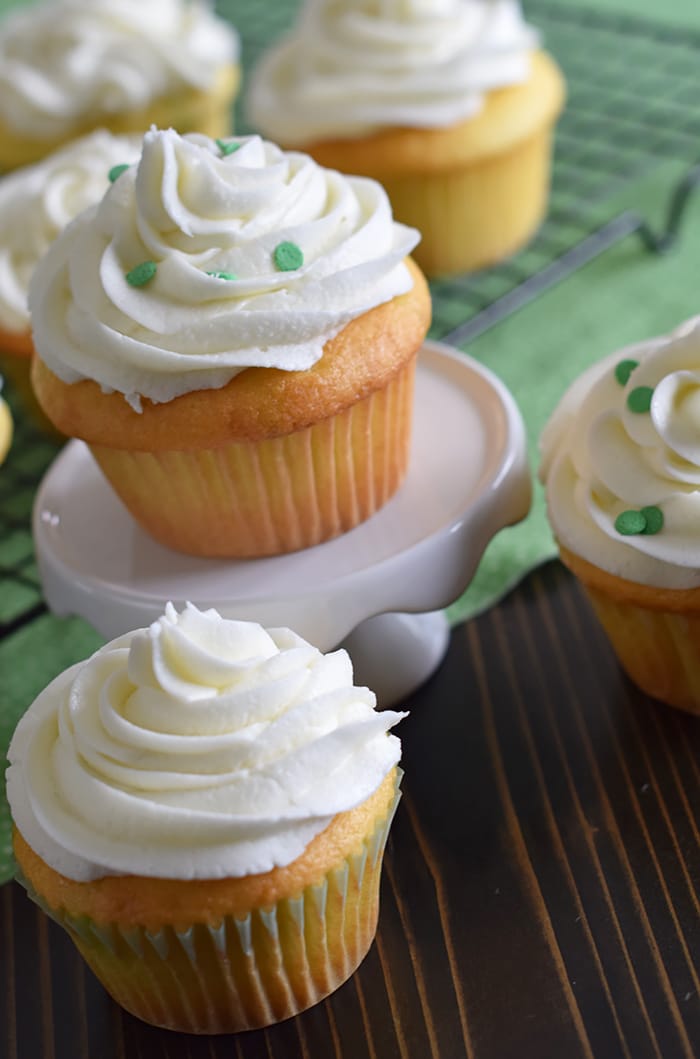
Finally, when the cupcakes have completely cooled, add the best buttercream frosting for a scrumptiously creamy dessert.
Once they’re frosted, chill them in the fridge.
When you’re ready for dessert, serve and enjoy!
LIME VANILLA POKE CAKE CUPCAKES RECIPE
If you love this lime vanilla poke cake cupcakes recipe as much as I do, please write a 5 star review, and help me share the recipe on Facebook and Pinterest!
CONNECT WITH ADVENTURES OF MEL!
Be sure to follow me on social, so you never miss a post!
Learn how to make Lime Vanilla Poke Cake Cupcakes, kinda like Jello cake, with buttercream frosting. These scrumptious cupcakes bring just a hint of green for a festive St Patrick’s Day or any day really.
Poke Cake Cupcakes:
1 French Vanilla cake mix
1 cup water (boiling)
3 ounces Lime Jello
1/2 cup water (cold)
3 cups buttercream frosting
Mix cake mix and bake according to package directions.
When fully baked, remove from oven and let cool 15-20 minutes.
Meanwhile, mix Jello with boiling water; then add cold water, mixing well.
Poke top middle of each cupcake with fork, 4-5 times.
Slowly pour 3-4 spoons of Jello mixture over middle of each cupcake, careful to not let it run over the sides.
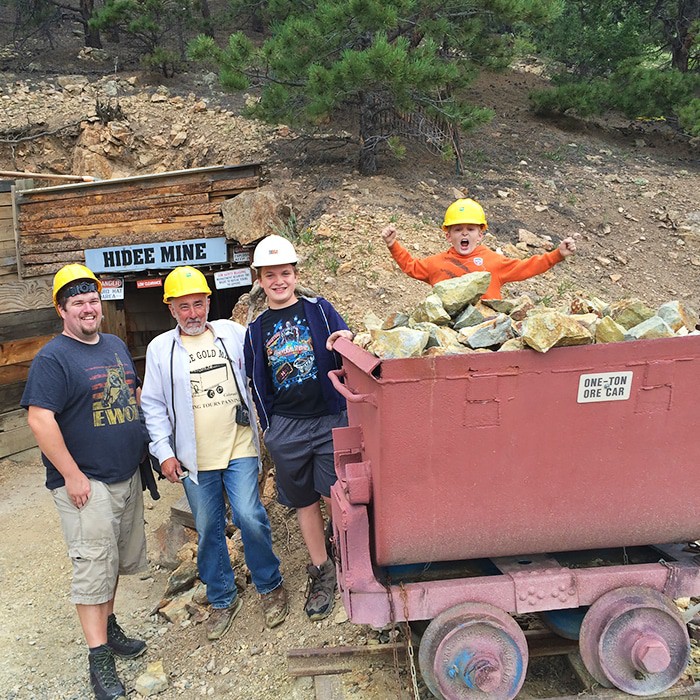
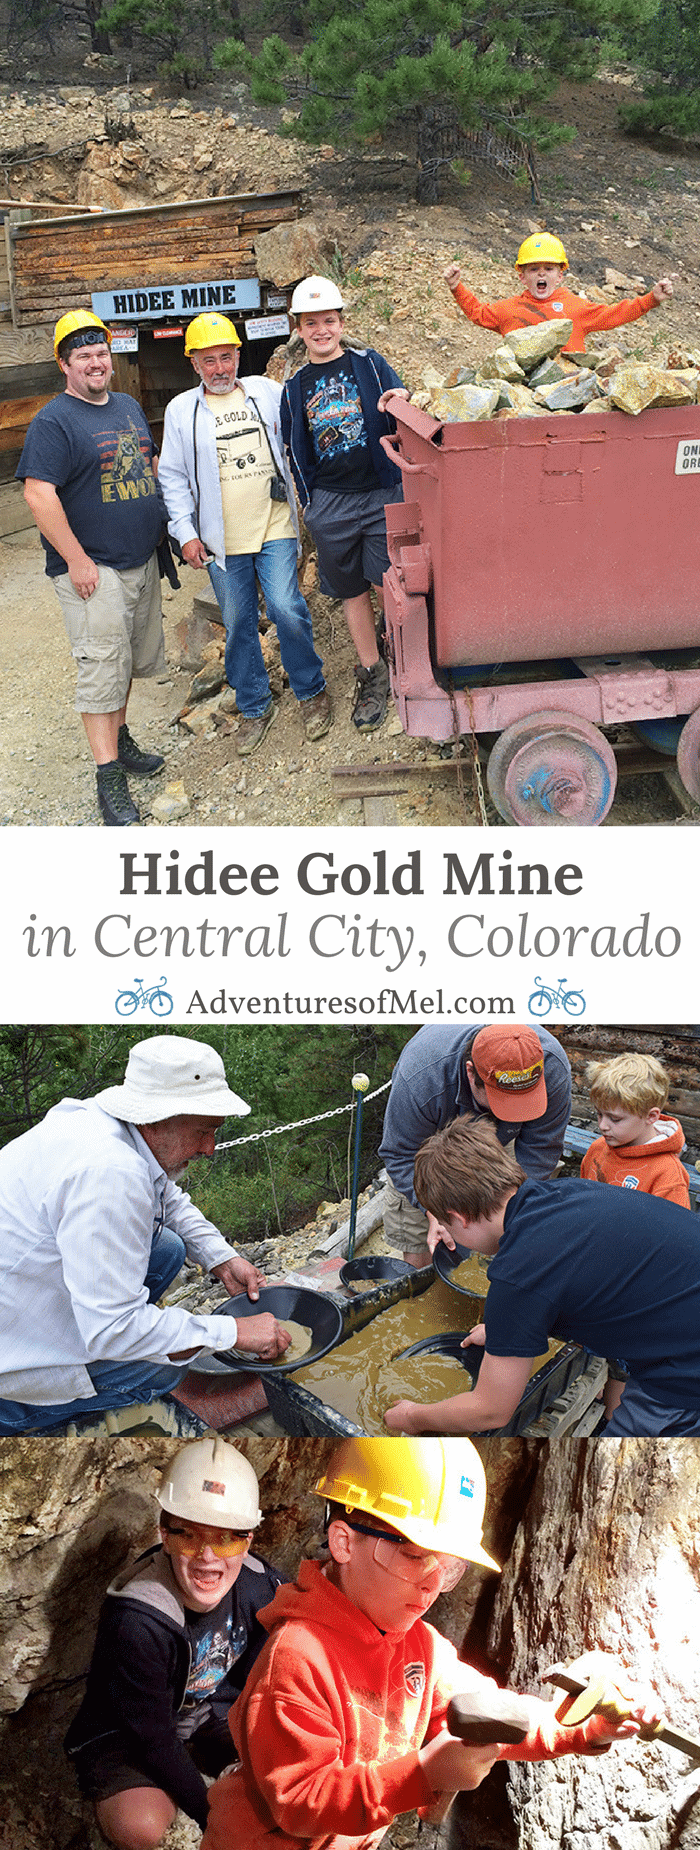
A stay in Colorado last summer led us on the adventure of a lifetime. We knew that Gilpin County was mining country, but we had no idea the vast number of mines that are located there, not to mention the number of shafts all around. As we got to know the area more, we decided to take a mining tour. We weren’t sure which one to take but eventually decided on a visit to Hidee Gold Mine. Let me tell you, it was an experience we’ll never forget.
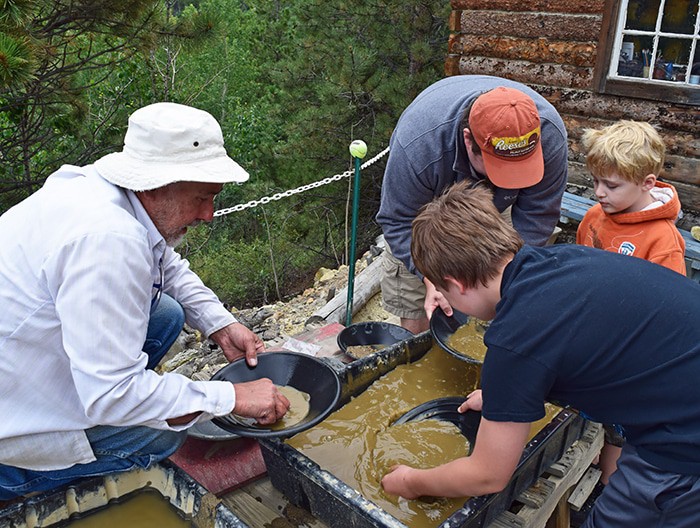
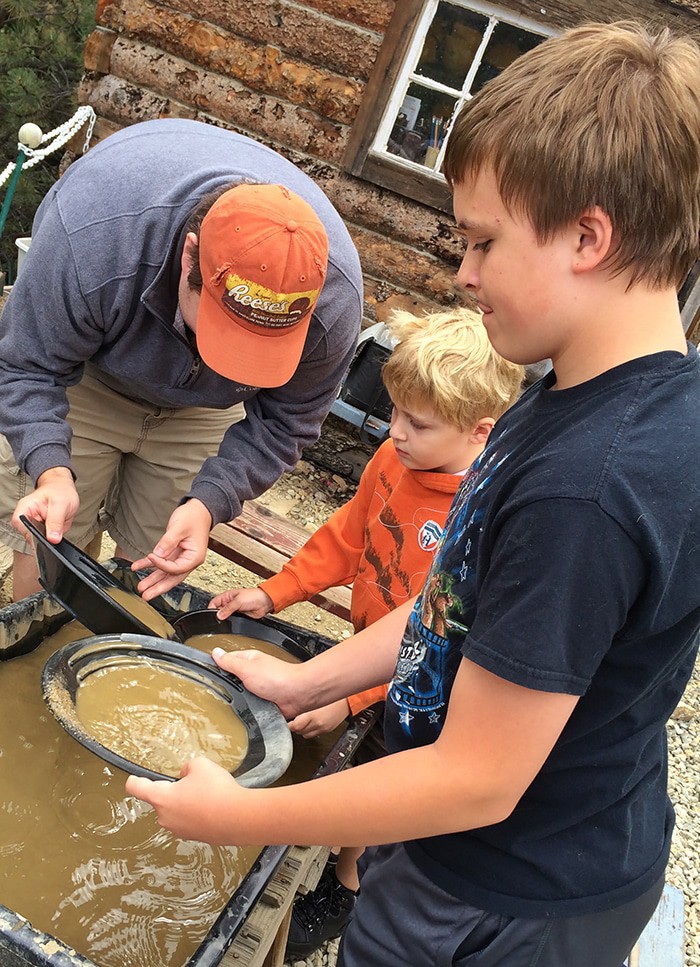
Panning for Gold
When we arrived, our tour guide, John (or Boomer as my kids affectionately called him… they love the Wilderness Family), led us to where we could pan for gold. Benches and tables were set up with crates of water and pans. He taught us how to pan for gold and what to look for.
They had a setup quite like a miniature town in the Old West, quite the photo opp really.
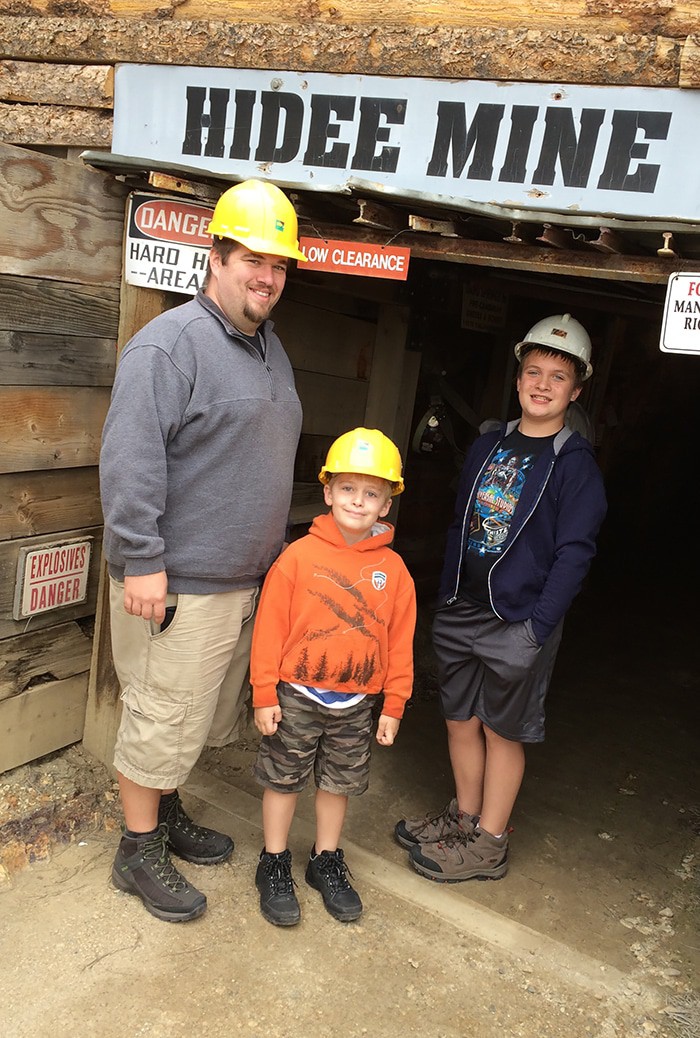
Tour of the Mine
After awhile, we were outfitted with hard hats and set off on our journey under the ground. The mine was quite slippery in places, so we took it slow, stopping at different “checkpoints” to listen as John recounted stories and other facts about mining and more.
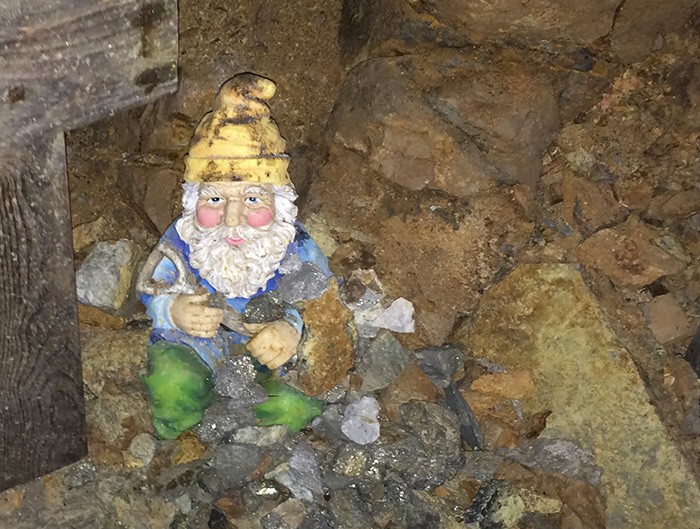
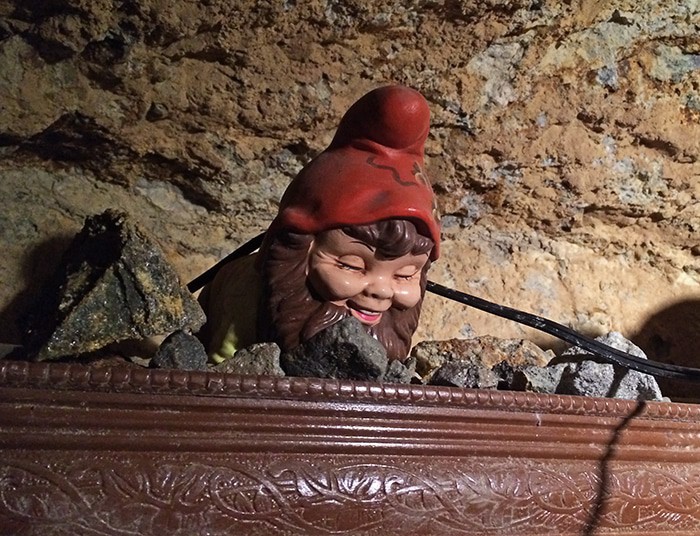
Along the way, we had many a poignant reminder of the dangers involved in mining… Upon entering the mine, just a little ways back in, we came upon a makeshift bench with Tommyknockers, a kind of cross between Irish leprechauns and English and Scottish brownies. Miners believed these spirits mined right alongside them. Some miners were afraid of them; others thought the knocking that came before a mine collapse or cave-in was the work of Tommyknockers, trying to warn them. There was opportunity to leave gifts or favors for the Tommyknockers. There are a lot of stories surrounding these mythical creatures.
As we continued on into the mine, we were introduced to different pieces of equipment, learned all about mining methods and local geology, learned about the dangers of mine shafts all over the mountains (which, I’ll admit, made me a little paranoid the rest of the trip), and also learned a lot about the history of mining and of this particular area. John, a veteran miner, shared so many real life stories with us.
As told by John, most miners would work until they had enough gold to pay for a meal and any other needs or wants… Then they’d head into town, Central City or Black Hawk, both filled with casinos, restaurants, and hotels. Each day’s work would provide just enough gold to get them through to the next.
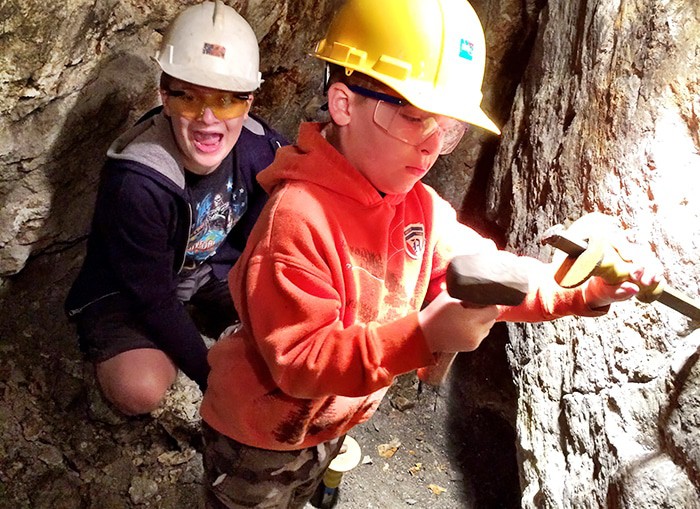
Mining the Vein
As we neared the 5 foot glittering gold vein, we went down a set of stairs where we picked up mallets or hammers and chisels and set to work mining for gold. This was probably our favorite part of the entire tour. The boys had a blast. We chiseled away at the vein, knocking chunks of gold ore off the floor and walls. If you looked up, you could see all the glittering beauty… I could only stare in awe.
John told more stories and helped us learn the best techniques for harvesting the gold. It was an amazing experience. He had little baggies for our treasures, and he would actually add to the boys’ baggies as we kept on hitting mallet to chisel.
Things to Know Before You Go to Hidee Gold Mine
There are a few things you need to know before you visit the mine.
Take cash or check. We actually had to run back into Central City for cash; thankfully, a casino about a mile away had the closest ATM.
Don’t listen to your GPS. Take the Central City Parkway, and look for the Hidee Gold Mine sign around Mile Marker 6.3. We learned this the hard way… funny story.
You may want a light jacket. It’s a little chilly in the mine, about 45°, not too bad.
Wear long pants and closed-toed shoes with good traction. Parts of the mine can be quite slippery, and if you’re down on your hands and knees with hammer and chisel… you’ll want long pants.
You may want a separate pair of shoes to change into after the tour, just in case. Your shoes will likely get quite muddy.
Check their hours. They’re open for tours June to October.
Tour space is limited, so calling ahead may be a good idea.
Tours are about 1 1/2 hours long.
There’s really not a lot of stooping required. We were able to stand completely upright for most of the tour.
Group tours and reservations are available. Educational discounts are given to school and university groups.
Touring the mine was a really affordable activity for our family of four. We paid right around $70 to $80 altogether, and it was well worth the cost.
They do have a small gift shop on site, as well.
It was one of the most memorable activities from our simple vacation. Upon leaving the mine, we took a few photos together and with John. When we walked away and got back in the car, none of us could shut up about how awesome this was. Mining for gold with a veteran miner equals an experience none of us will soon forget.
Growing up, I remember my mom would make donuts, just out of the blue. Now that I’m grown and I know what goes into creating a recipe, I really think she had to be in the mood to make the donuts because donut making didn’t happen very often. It seemed like they were a LOT of work.
Her favorite kind of donuts were the ones you dipped in sugar while they were still warm. Mmmm, so good! Eventually, I may have to try those.
But lately, my chocolate tooth (aka, sweet tooth with a chocolate fetish), has been craving chocolate donuts big time. I probably shouldn’t oblige said chocolate tooth, but it had to happen sooner or later.
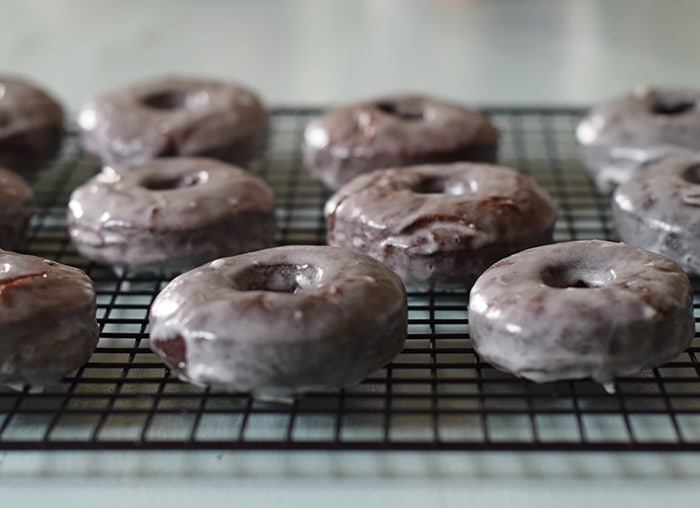
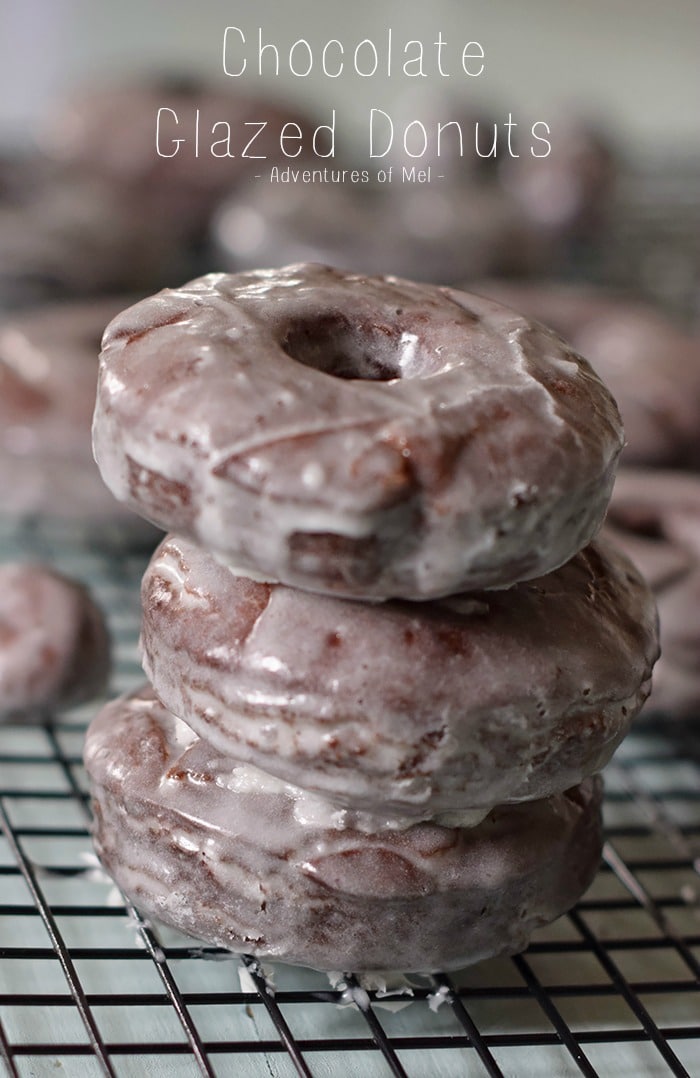
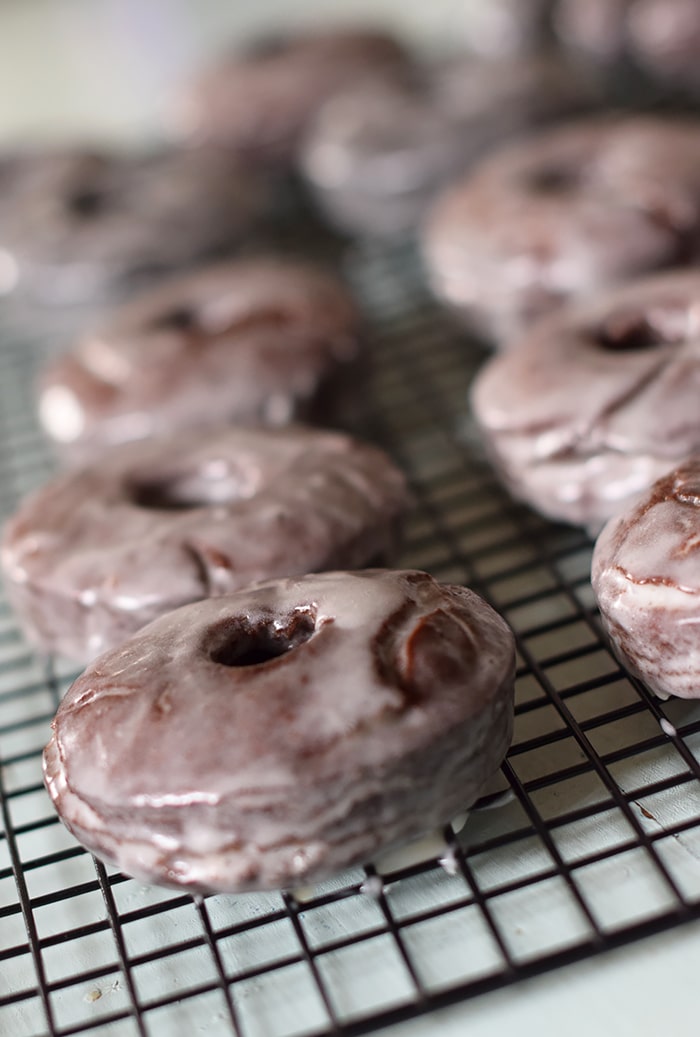
The result of my cravings? These yummy chocolate glazed donuts.
Chocolate donuts don’t last long in the Lockcuff household; in fact, they disappear rather quickly.
Lucky for me, these were super easy to make.
Ingredients do include sour cream, and they have a more cake-like, whoopie pie type of texture. I really want to make them just a bit lighter next time, but they really are quite yummy just the way they are.
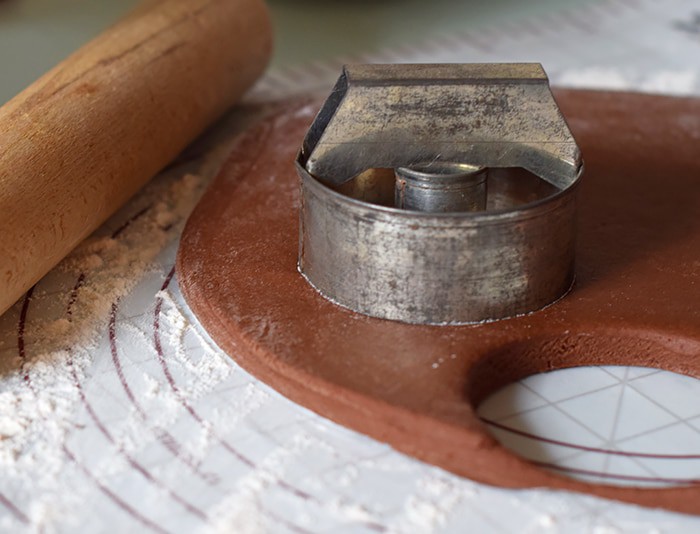
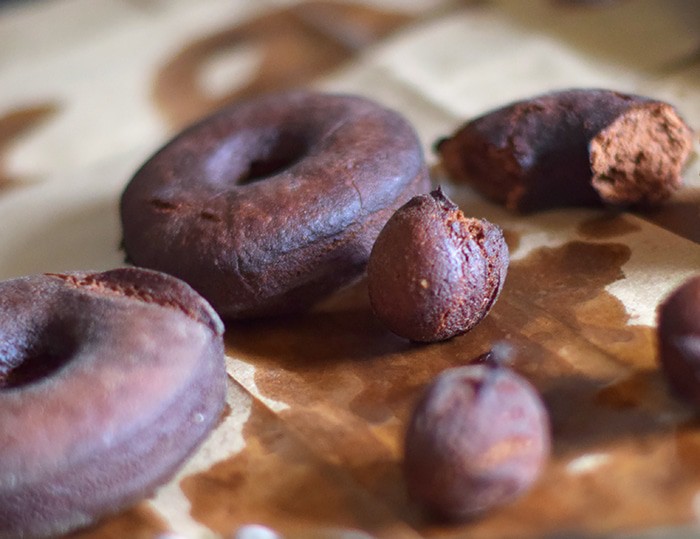
After rolling out the dough and cutting each donut, we used a wok to fry the donuts.
Then after draining the donuts on paper bags, I dipped them in a simple powdered sugar glaze while still a bit warm (but cool enough to handle).
Let them drip on a wire rack, and eventually the glaze will harden to a deliciously sweet, slightly crispy outer covering on the surface of each donut. Yummo!
Grab the recipe for glazed chocolate donuts that are easy to make. These tasty treats definitely disappear in a hurry with our boys. Yum!
Large Mixing Bowl
Rolling Pin
Donut Cutter
Brown Paper Lunch Bags
Wire Rack
Donuts:
2 tablespoons unsalted butter (softened)
3/4 cup cane sugar
1 large egg
1/2 teasoon vanilla extract
1 cup sour cream
2 1/2 cups all-purpose flour
3/4 cup unsweetened cocoa powder
2 teaspoons baking powder
1 1/2 teaspoons salt
Canola oil (for frying)
Glaze:
2 tablespoons salted butter (softened)
1/2 teaspoon vanilla extract
1/4 teaspoon almond extract
2 cups powdered sugar
1/4 cup whole milk
In a large mixing bowl, cream or mix together the unsalted butter and sugar.
Add the egg, vanilla extract, and sour cream to the creamed mixture, mixing well.
In a separate mixing bowl, sift or whisk together the dry ingredients, including the flour, cocoa powder, baking powder, and salt.
Add the dry ingredients to the creamed mixture, mixing well.
Roll the dough out on a floured surface to about 1/2 inch thickness.
Cut the donuts with a donut cutter or cup.
Heat 1-2 inches of canola oil in a large skillet over low to medium heat.
Fry each donut in the hot canola oil, cooking one side for 2-3 minutes, then turning to cook the other side another 2-3 minutes, or 'til done.
Drain the donuts on paper that will absorb the excess grease; brown paper lunch sacks work great!
To make the glaze, mix the softened butter, vanilla extract, almond extract, powdered sugar, and milk in a small mixing bowl. The glaze needs to be a thinner consistency, so it may require a bit more milk.
While still warm but cool enough to handle, dip the donuts in the glaze, and allow them to drip dry on a wire rack.
Serve with a mug of cold milk or a nice cup of hot coffee.
Have a mouse in the house? Or perhaps a family of mice has taken up residence, coming and going as they please?
Been there, done that.
Years ago, we lived in an old farmhouse that had so many nooks and crannies the mice could come in; if I remember right, we even had a pack rat that lived in the attic at one time.
Dan and I got so tired of constantly having to clean out our kitchen cabinets after finding evidence of the nasty little buggers, that we began researching natural solutions.
We’d tried it all, traps and sticky traps… Dan was even threading sewing thread into peanut butter on the traps at one point.
The mice wised up to his tricks, though. We were desperate to get rid of the problem. That’s when we stumbled upon a super simple mice repellent.
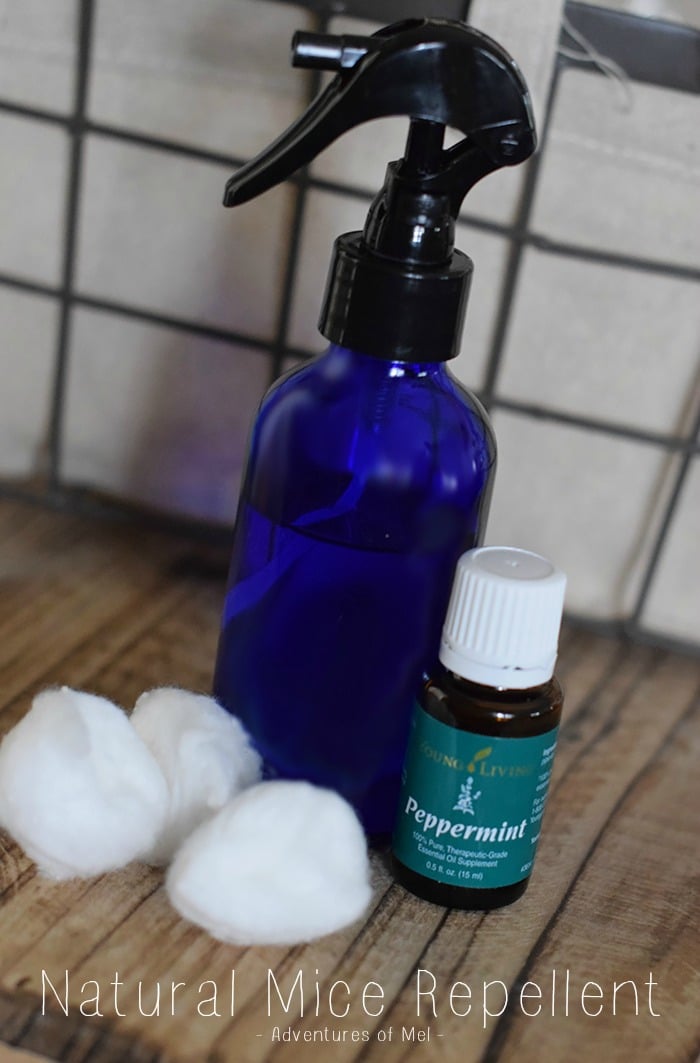
Now I need to caution you here. It’s important to use pure Peppermint Oil, NOT extract; we originally found a bottle at our local health food store, though now we use Young Living… As long as it’s pure peppermint oil and not extract.
But there’s something about the scent of the oil that helps to keep them at bay. I’ve read that it masks their pheromone trails, so other mice are not attracted. I’ve also read that peppermint oil irritates a mouse’s nasal passages.
Either way, we’ve used this method for a long while now, and we keep supplies handy in our working prepper pantry. It not only helps as a mouse repellent, but it also makes your home smell like a candy cane. If you like the scent of Christmas, you’ll love it.
Natural Forms of Mice Repellent
There are a few natural ways to help repel mice…
1. Use steel wool. Stuff any small crevices or holes with steel wool. From what we could tell, mice can squeeze through the tiniest of holes or cracks. Once they’ve found a place to get in, they’re relentless.
2. Place cotton balls with a couple drops of Peppermint Oil around your home, wherever you feel the mice may be coming in, or where they like to hang out.
3. Spray a Peppermint Oil/water mixture around the entrances to your home, or again, wherever you feel the mice may be coming in. Of course, you may want to test it on a small area first, especially if spraying on trim or walls. You also don’t want the mixture to be too diluted, or the scent will not help to deter. I was so paranoid that I would end up spraying base boards, door jambs, thresholds, and any areas I was suspicious of, especially the threshold of the door leading into the garage.
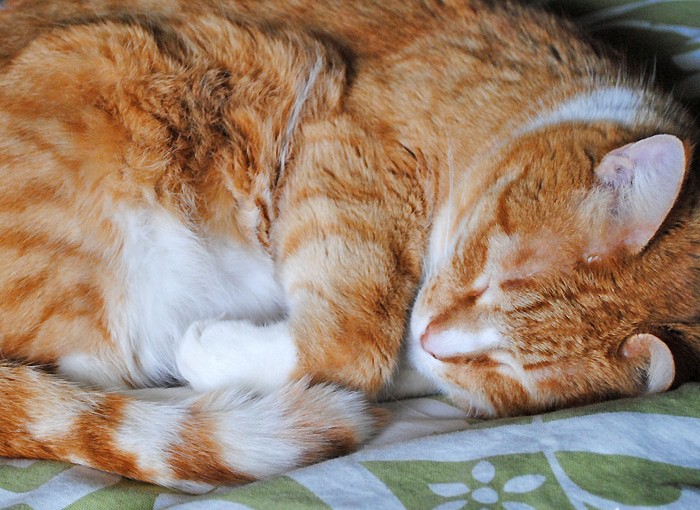
4. Of course, you could always get a cat too. Harold’s been pretty good at keeping the mice away, though he is getting quite lazy in his old age. Shhh, don’t let him know I said that. In all seriousness, a cat can be the best form of mice repellent.
(Disclaimer: Everything I share about essential oils on Adventures of Mel is based on personal experience and has not been approved by the FDA. Please do your own research, and never use essential oils in a way that would make you uncomfortable. Also, take special caution for those pregnant or nursing, as well as children. Full Disclaimer…)
I’m so excited to start a new adventure here on this li’l blog of mine. The older Jacob gets (Jaden too), the more I realize how much we still have to teach him.
Cooking is one of those skills he really enjoys and also one skill I’d love for him to have when he eventually leaves the nest and begins his own life adventures. He chose to take a cooking class at homeschool group, and he absolutely loves it. He’s been brimming with ideas.
For now, you may see a few older recipes we’ve enjoyed in the past; but every so often, we’ll share a new kid-friendly recipe.
It’ll be Jacob’s creation, along with a bit of my guidance, but mostly his own; sometimes Jaden might jump in too. He’ll come up with what we’re making, and we’ll share it here.
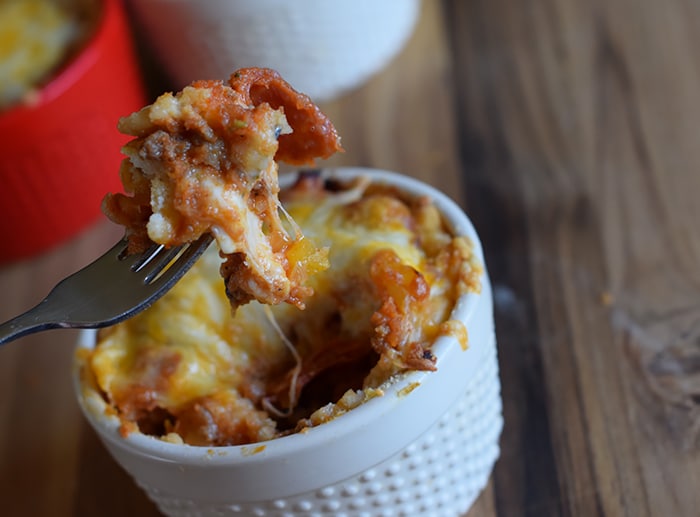
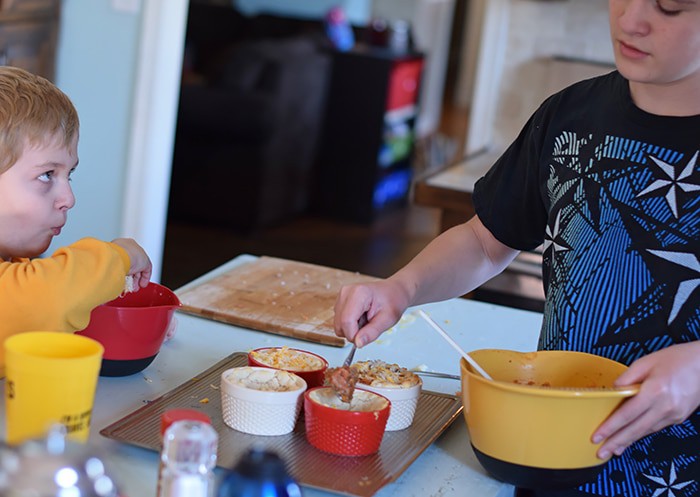
Mmmm, this is such a yummy dinner, and the kids love it. Jacob actually made this for us a couple of months ago.
It was so delicious we decided to make it again, but with just a few tweaks. This time he wanted to add sausage, zucchini, and peppers.
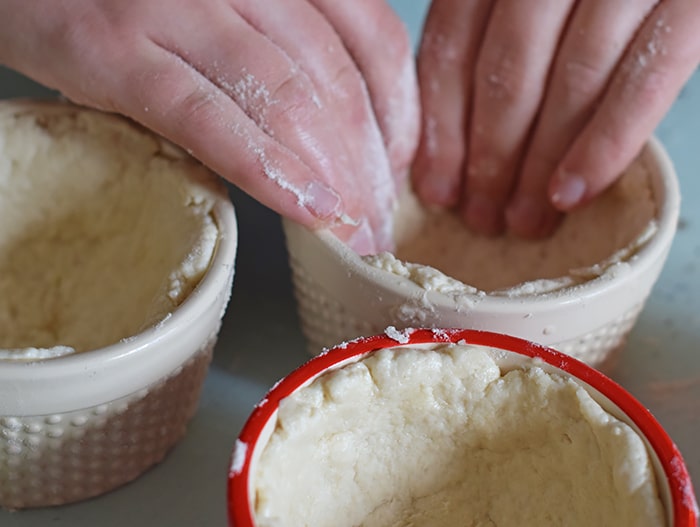
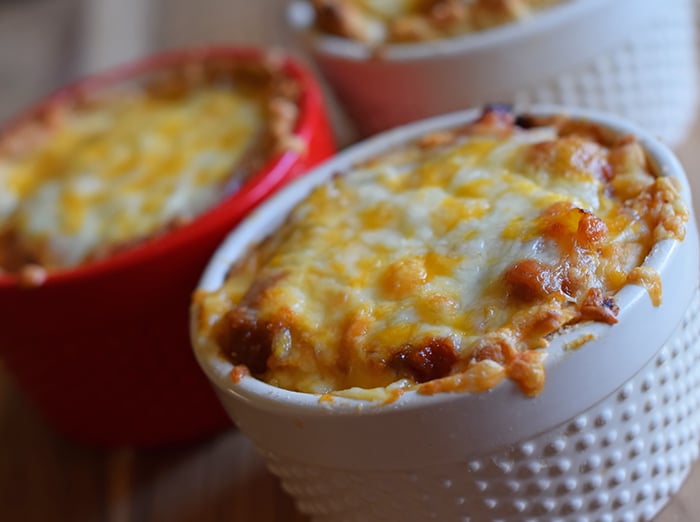
This definitely gave him the opportunity to practice his chopping skills. We made individual pot pies in little ramekin dishes, but you could even make this in one big casserole dish.
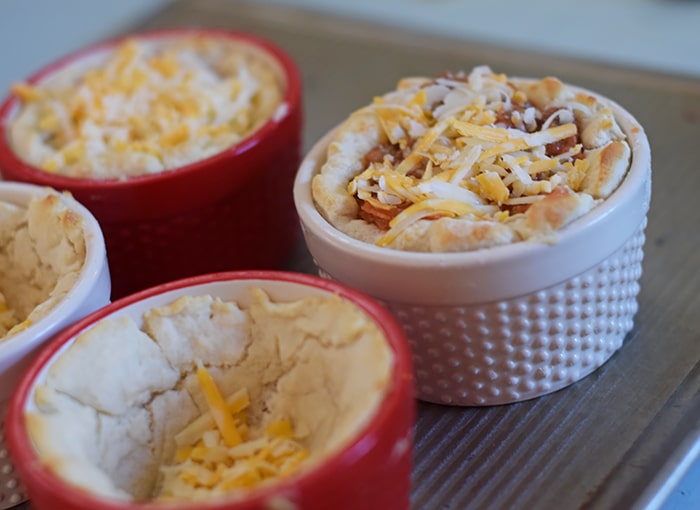
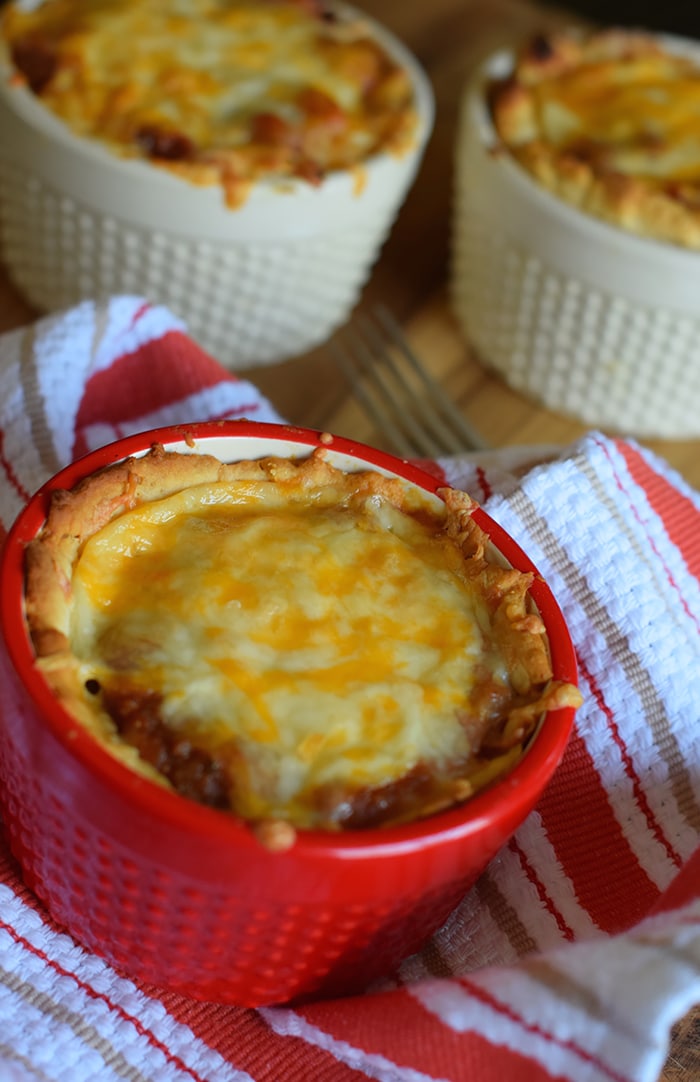
Once our sauce was finished, we layered cheese and sauce in the half-cooked biscuit crust. Then we baked each pizza pot pie according to the instructions below.
Our new adventure will feature recipes that, hopefully, your kids will enjoy making too. It’s a little inspiration when meals get boring and you need a little help livening things up. Kids always help liven things up, right?
Below you’ll find a printable recipe. Grab the kids, gather all your ingredients, and get cookin’! Enjoy!
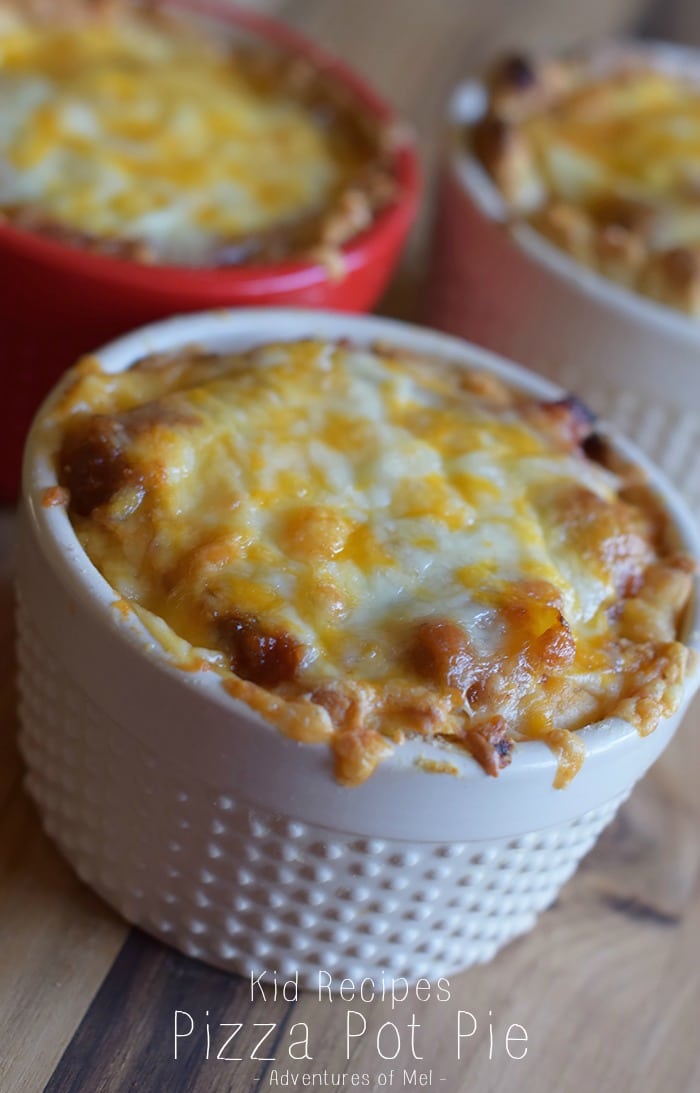
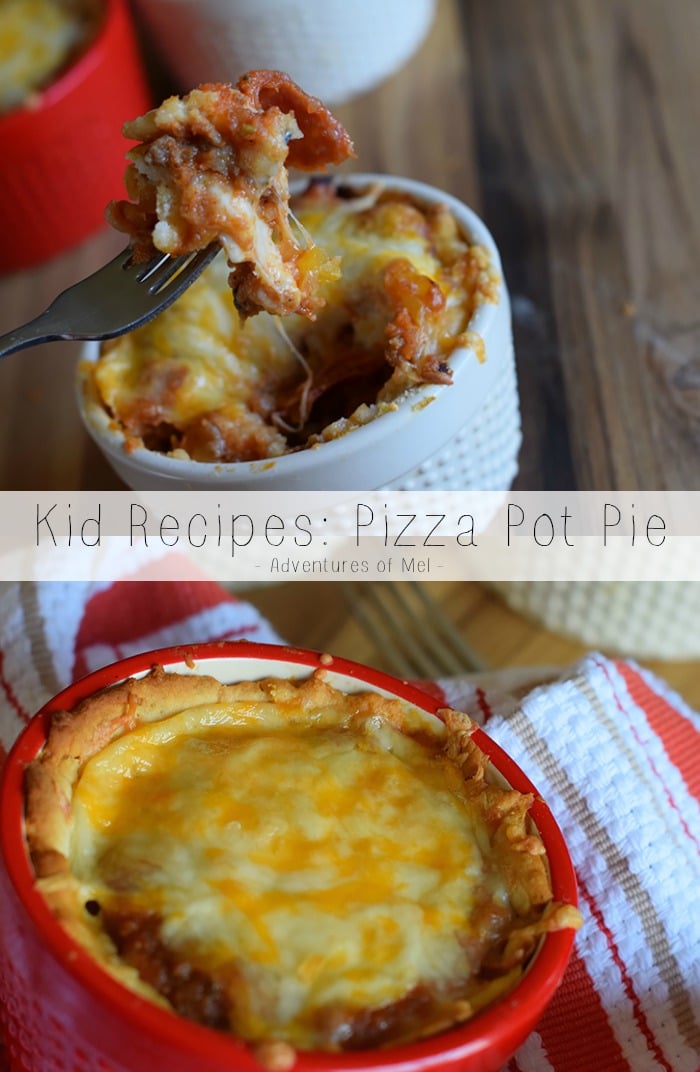
Kid Recipes: Pizza Pot Pie
Cooking with kids, coupled with yummy recipes for kids, equals quality time AND a yum-licious meal like Pizza Pot Pie. Let a kid loose in the kitchen, and there’s no telling what delicious concoction he’ll come up with. Kid friendly recipes, like this pizza casserole, make the best family meals.
Crust:
2 1/4 cups biscuit mix
2/3 cup skim milk
Sauce:
1 tbsp. butter
1/2 small onion (minced)
1/4 large red pepper (minced)
1/4 large yellow pepper (minced)
1/4 large orange pepper (minced)
1 lb. Italian sausage (cooked & crumbled)
3 oz. pepperoni (chopped)
1 zucchini
2 to matoes
1 small can tomato sauce
1 tsp. basil
1/2 tsp. garlic powder
1/2 tsp. Italian seasoning
1 tbsp. brown sugar
1 tsp. salt
1/2 tsp. black pepper
Topping:
1/2 cup mozzarella
1/2 cup Colby Jack
Pre-heat oven to 400°. Grease 4-5 ramekins.
Mix crust ingredients together well. Press into greased ramekins, pressing into bottom and up sides of each dish.
Bake at 400° for about 5-10 minutes.
Meanwhile, cook Italian sausage, crumbling as it browns. When fully cooked, remove from skillet and set aside.
Sauté onion and peppers in melted butter for 1-2 minutes, or until tender.
Add sausage to peppers and onion mixture in skillet; turn heat to low.
Purée zucchini (peeled) and tomatoes in small food processor.
Mix puréed mixture with tomato sauce, seasonings, brown sugar, salt, and black pepper.
Add pepperoni and 1 1/2 cups sausage/pepper/onion mixture to sauce.
Add sauce and shredded cheese to biscuit crusted ramekins. Layer cheese, adding to bottom of dish and top.
It’s confession time, though anyone who really knows us already knows this… We couldn’t really give a flip about football. Gasp! I know, right? It’s true.
I mean, here we are right smack dab in the middle of Razorback country, and we couldn’t care less about what the score is. Anyone who asks us how the game went gets that famous deer in the headlights look. I kid you not.
That being said, we do like zipping through the DVR to watch the Superbowl commercials. One of my personal favorites is the VW commercial with little Darth Vader using “the Force” to magically start the car. You know the one, right?
And even though we may not enjoy the big game, we do love us some easy appetizer recipes and snacks, in honor of the big game, of course. Or maybe that’s just our excuse.
Every year Superbowl Sunday is my excuse to make a few of our favorites, including Creamy BBQ Chicken Dip. Yum!
This year I decided to switch it up by creating pinwheels inspired by our favorite dip. Pinwheels… Aren’t they the most scrumptious snacks ever?
These pinwheels may be bite-sized, but they pack a delicious, flavor-filled punch. Add a little lettuce for a bit of green, and you’ve got an appetizer your guests will love.
For me, there’s just something about the combination of barbecue sauce and Ranch dressing. I love mixing the two.
Below, you’ll find a printable recipe.
Whether or not you celebrate Game Day, don’t miss out on an excuse to make and enjoy a great snack.
And since they make such a great party appetizer, I’m definitely adding this recipe to my list of favorite Christmas Recipes. Enjoy!
Chicken dip pinwheels may be bite-sized, but they pack a delicious, flavor-filled punch. Add a little lettuce for a bit of green, and you've got an appetizer your guests will love.
1 large chicken breast (cooked and shredded)
1/3 cup barbecue sauce
1/4 cup Ranch dressing
1 cup shredded Cheddar
5 medium taco-sized tortillas
1 – 8 oz. pkg. cream cheese
Lettuce leaves
Mix barbecue sauce, Ranch dressing, Cheddar, and shredded chicken in small bowl.
Spread cream cheese evenly onto each tortilla.
Add layer of lettuce leaves onto each tortilla. Then add layer of chicken mixture.
Roll each tortilla up as tightly as possible. Slice into 1-in. thick slices, or pinwheels.
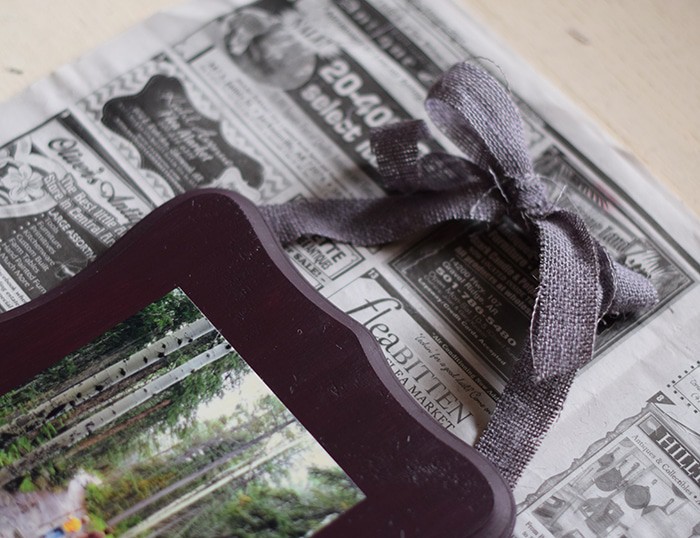
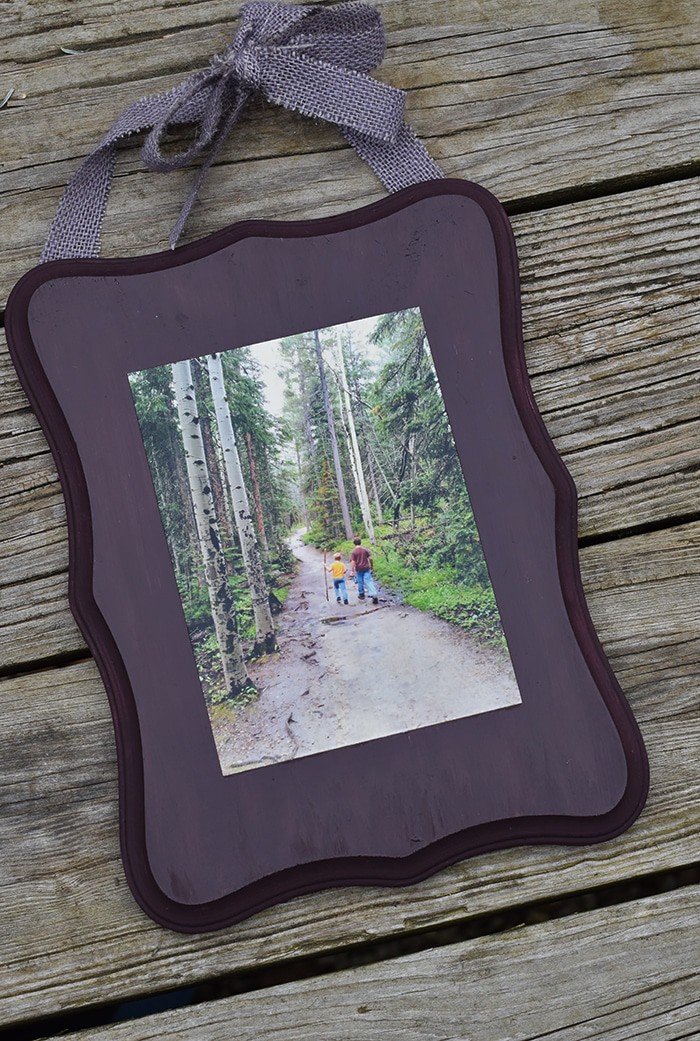
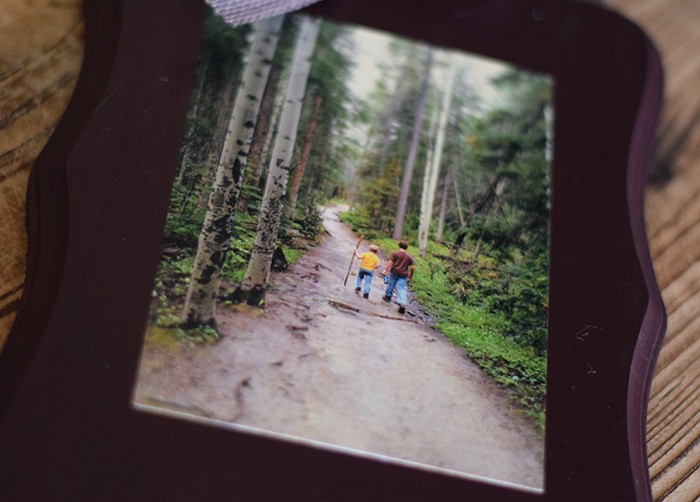
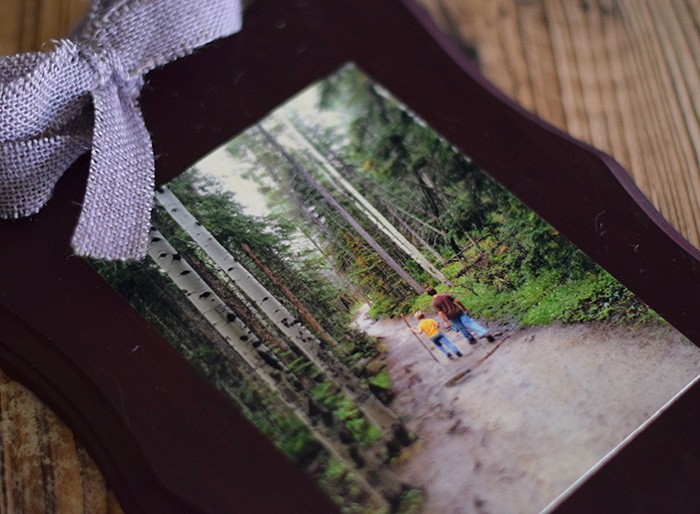
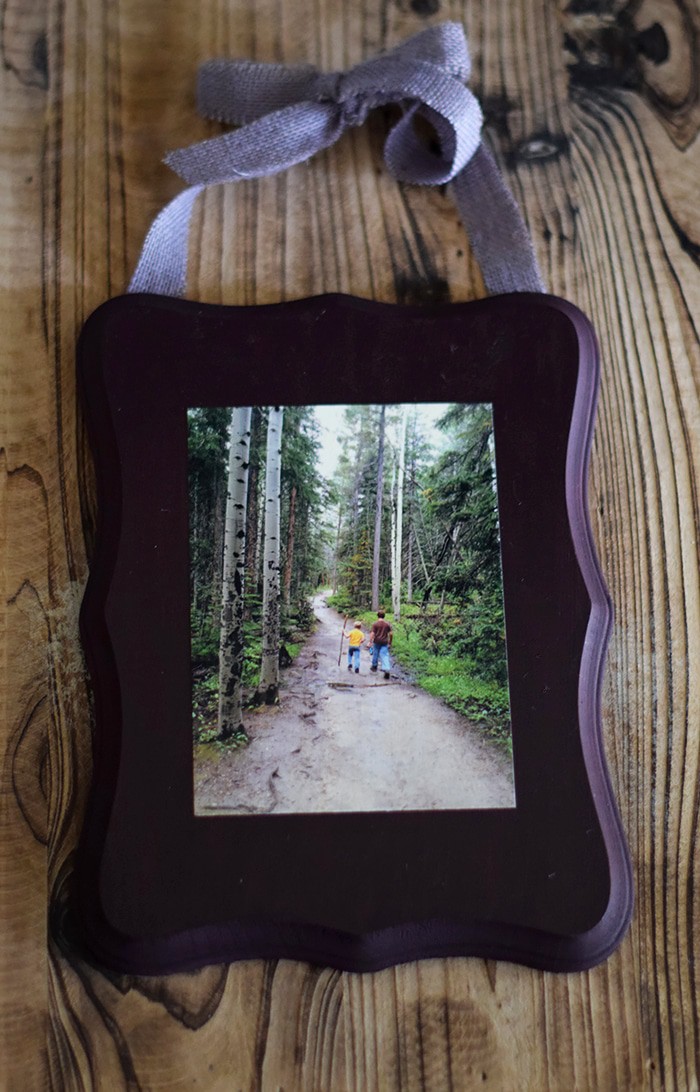
Photos and Mod Podge make the ultimate team when it comes to crafting. This is a project I’ve kinda been sitting on for quite awhile. I’d made a similar photo craft for a wedding gift (of course, with a different photo) a couple of months ago. When I found this picture in our Colorado photos, I knew it was the perfect one to either put onto a canvas or create a photo on wood Mod Podge craft. After pricing photo canvases, I opted for the latter. With a fairly cheap wooden plaque, a self-printed photo, a bit of Mod Podge, and a scrap of burlap, I now have a memory to hang on the wall.
I love mine so much; of course, I have to share how to make it. Below are the supplies you’ll need and instructions for creating your own.
Supplies Needed
Wood plaque in desired size
Photo
Antique Matte Mod Podge
Sponge brush
Burlap ties
Staple gun
Instructions
The project is actually really simple. Once you have your plaque and your photo, place photo in desired position, and apply Mod Podge according to instructions on bottle. Apply to back of photo, set in place, and then apply to front of photo and plaque. I applied 2 coats of Mod Podge, at least 20 minutes apart, making sure to let the first coat dry well before applying more. A sponge brush works really well. Once you’ve finished applying all coats of Mod Podge, let dry for 24 hours.
Create burlap ties about 1-2 feet in length, depending on how long you want the ties to be when hanging the plaque on the wall. Staple each tie to back of frame, one on the left hand side and one on the right hand side. Bring ties together and tie in a bow. This will be the hanger for your photo plaque.
And that’s it! Easy peasy. I really love decorating with photos, especially photos from trips we’ve taken together.
Old family photos also add a touch of “home” to your home being surrounded by all the memories and people you love.
Want more ideas for Mod Podge crafts? I heart Mod Podge! Be sure to follow me on Pinterest!
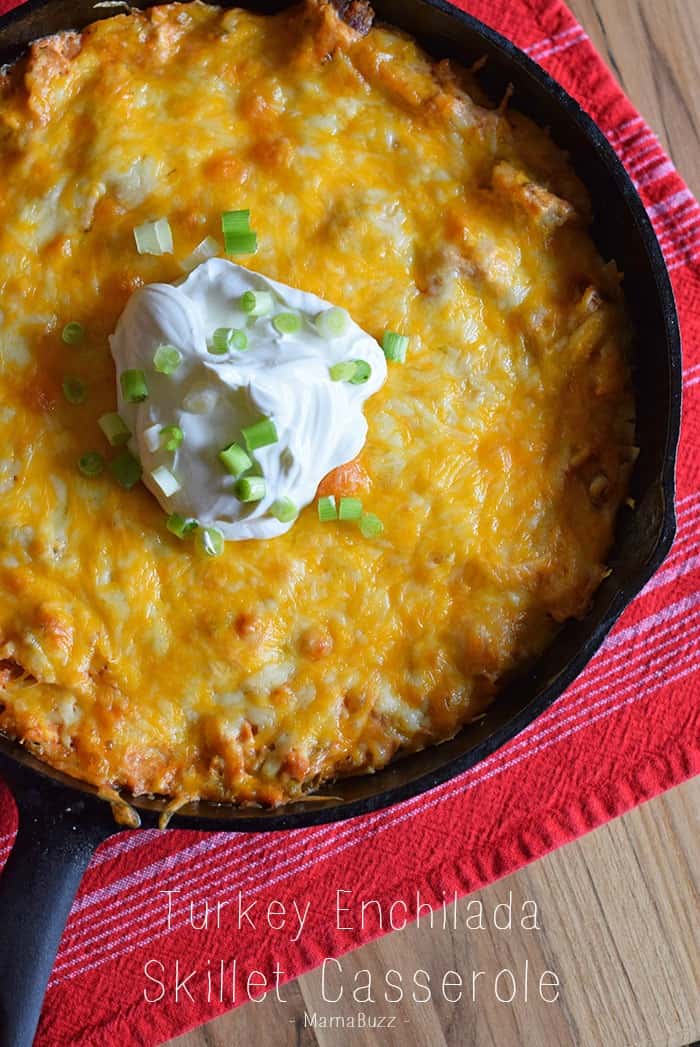
When it comes to Mexican food, I could probably eat my weight in it, I’m not even kidding. My guys get tired of asking me where I want to go out to eat, if and when we do go out…my choice is always Mexican.
That’s pretty much the reason why anytime I make a whole chicken (or, in this case, a turkey), chicken enchiladas are a must with the leftovers.
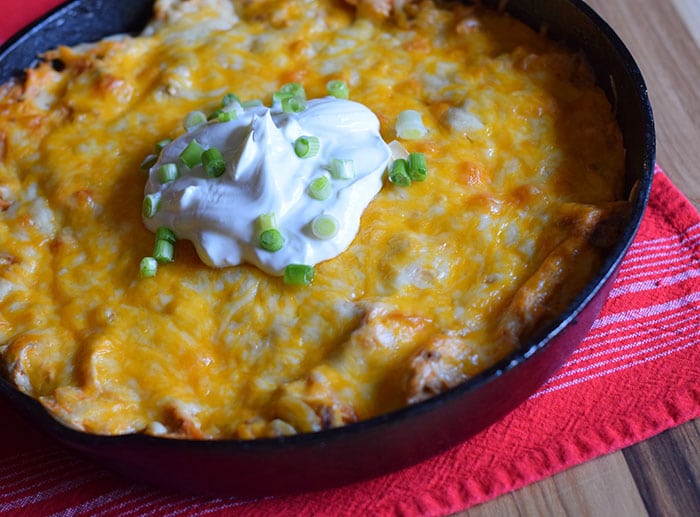
I’ve shared a slow cooker chicken enchilada casserole recipe in the past, but this recipe is quite a bit different with fresher, slightly healthier ingredients. This skillet casserole is super easy to make; you basically layer all the ingredients together in an iron skillet and bake.
Don’t you just love cooking in an iron skillet? I didn’t realize how much I love it until more recently.
An iron skillet is so versatile, not to mention photogenic. I almost feel like I’m going back to my days on the farm when I bring out the iron skillet.
The one thing I wanted to eliminate from this casserole was cream soup.
There are some ingredients that are easier to eliminate than others, but I found success by substituting sour cream. It was a tip I picked up via Heavenly Homemakers; they have an entire list of substitutions you can make for cream soups.
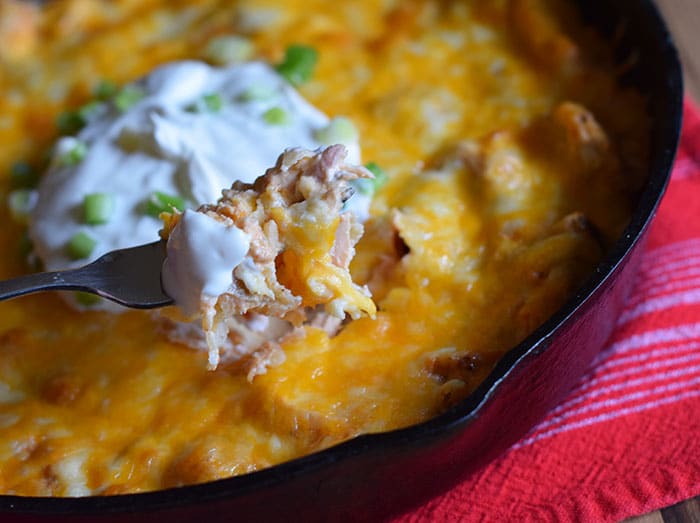
I think this casserole was even better with the sour cream than with the cream of chicken soup I usually use. If you want low-fat, you could even go that route with the sour cream. If you like creamy enchiladas, you’re sure to love this recipe.
The recipe is fairly simple to make.
Sauté the onion and green chilies.
Add in the cream cheese, sour cream, and salsa.
Add shredded turkey. Mix together well.
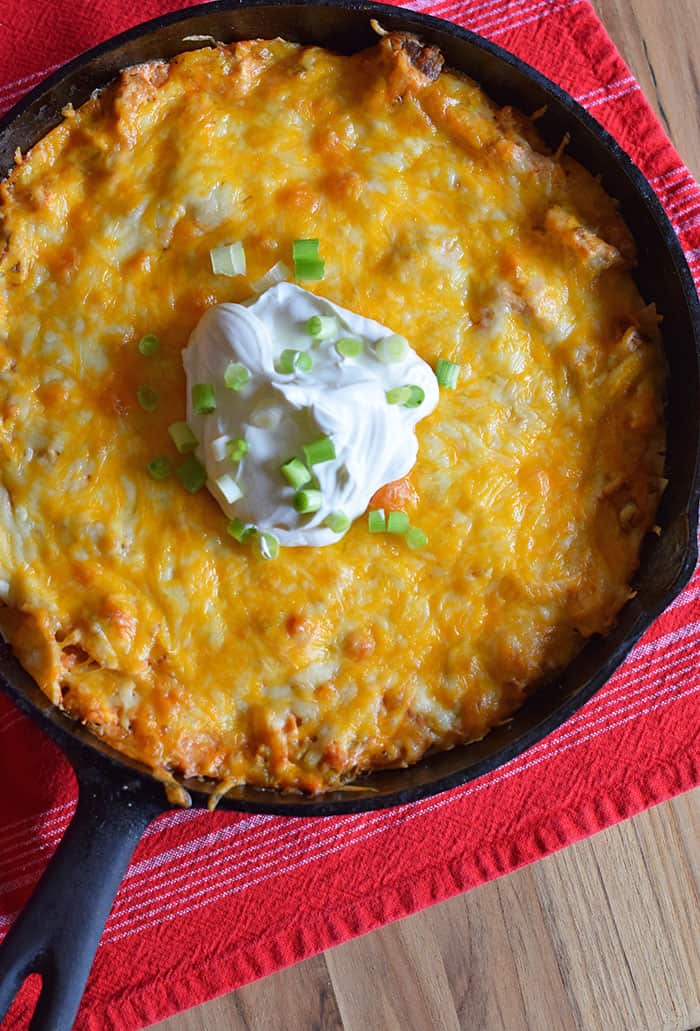
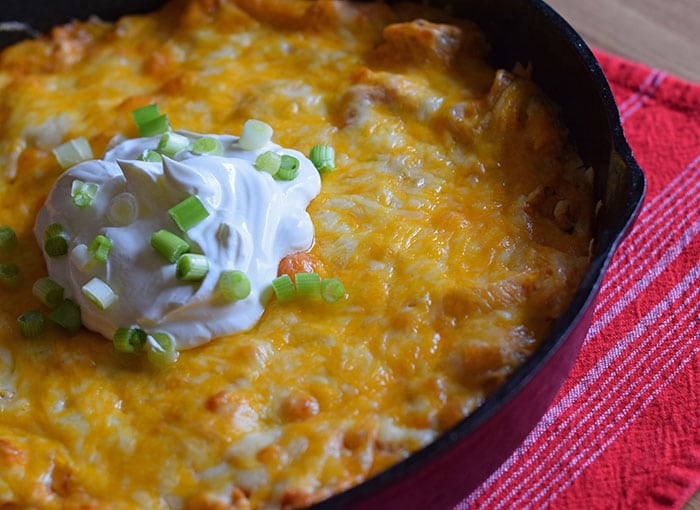
Then layer everything in the skillet.
Serve with sour cream, green onions, tomatoes, and anything else you prefer.
A printable recipe, including full instructions, is available below. Use up those leftovers in a very enjoyable way!
Turkey Enchilada Skillet Casserole
Turkey enchilada skillet casserole is super easy to make; just layer all the ingredients together in a cast iron skillet and bake.
1 tbsp. salted butter
1/2 large onion (finely chopped)
1 – 4 oz. can chopped green chilies (drained)
1 – 8 oz. pkg. cream cheese
1 cup sour cream
3/4 cup chunky salsa
3 cups shredded turkey (or chicken)
2 cups Extra Sharp Cheddar cheese (shredded)
1 1/2 cups Colby Jack cheese (shredded)
10 small corn tortillas (sliced into strips)
Pre-heat oven to 350°.
Melt butter in skillet. Sauté onion for 5 minutes.
Add green chilies and sauté for 1 minute.
Add cream cheese and let melt. Add sour cream and salsa, stirring to combine.
Add shredded turkey, mixing well with other ingredients. Keep warm.
Shred cheese and set aside.
Stack corn tortillas and slice in half. Then cut into 1-inch strips.
Begin layering ingredients in iron skillet. Begin with thin layer of creamy turkey mixture. Add layer of tortilla strips, then a thicker layer of creamy turkey mixture, then cheese. Repeat layers, starting with tortilla strips and ending with cheese.
Bake at 350° for 30-45 minutes, or until cooked thru and cheese is melted.
Serve with sour cream, green onions, tomatoes, and whatever else you enjoy with enchiladas. Enjoy!
Love Reese’s? You’ll love chocolate peanut butter hearts. These heart shaped peanut butter candies covered in melted chocolate make the best Valentine’s Day treats!
Special holidays like Valentine’s Day always mean heart shaped peanut butter cups. While I’ve tried to master copycat versions of Reese’s peanut butter cups, I think this is probably the closest I’ve ever gotten.
These chocolate covered peanut butter hearts make a yummy Valentine for anyone (provided they don’t have a peanut allergy), be it family, friends, or even your neighbors.
Speaking of Valentines, here’s another fun way to celebrate Valentine’s Day… Make a triceratops Valentine box to hold all your special Valentines!
Ingredient Notes:
Let’s look at a few of the ingredients…
Salted Butter – I always recommend real butter over margarine. Anything less than real butter will change the texture of the finished candies.
Powdered Sugar
Creamy Peanut Butter – You can use chunky if you like a little more crunch to your peanut butter cups.
Graham Crackers – These will need to be crushed. I like to put the crackers in a Ziploc bag and roll over them with a rolling pin to crush them. You can also use a food processor.
Chocolate – While you can use candy melts, I recommend using real chocolate. Ghirardelli Melting Wafers are among my favorite melting chocolates; it’s becoming one of my favorite brands of chocolate for baking and sweets because the chocolate’s just so creamy and rich, full of flavor. Chocolate chips also work well.
How to Make Chocolate Peanut Butter Hearts
The hearts are easy to make, though the dipping process can be a little messy. If you’d rather no dipping, you’ll enjoy this buckeye bars recipe.
Make the Heart Shapes
In a large mixing bowl, mix together the butter, powdered sugar, and peanut butter.
Add the crushed graham crackers to the peanut butter mixture, mixing well.
To create the heart shapes, roll out the peanut butter filling on a lightly floured surface with a rolling pin; roll to about 3/4 inch thickness.
Cut heart shapes with a small heart shaped cookie cutter.
How to Melt the Chocolate for Dipping
Depending on the chocolate you decide to use, you can melt it a few different ways:
Melt it using a double boiler on the stove – This is basically a pan inside of another pan with boiling water in the bottom pan. It allows for more even melting without burning, and it also keeps the chocolate warm for dipping.
Melt it in the microwave – This is usually the route I go. Just follow package directions.
Also, depending on the type of chocolate used, some people like to add shortening or paraffin wax to their chocolate as it melts. This allows for a thinner coating and stretches your chocolate a little further.
How to Dip Peanut Butter Hearts
Dip the hearts in chocolate, using your fingers, tongs, or a candy dipping tool. Once you do a few, you start to get a knack for it, and it becomes easier.
Drip off excess chocolate after dipping, and place the candies on a wax paper covered cookie sheet.
Place the chocolate dipped candies in the fridge to chill, so the chocolate coating can harden.
If you try this recipe, why not leave a star rating in the recipe card right below and/or a review in the comment section further down the page? I always appreciate your feedback. You can also follow me on Pinterest, Facebook, Instagram, and YouTube. And subscribe to my email list too!
Chocolate Peanut Butter Hearts
Love Reese's? You'll love chocolate peanut butter hearts. Heart shaped peanut butter candies covered in chocolate make the best Valentines!
6 tablespoons salted butter (melted)
2 cups powdered sugar
1 cup creamy peanut butter
3 whole graham crackers (crushed)
1 pound chocolate
In a large mixing bowl, mix together the butter, powdered sugar, and peanut butter.
Add the crushed graham crackers to the peanut butter mixture, mixing well.
To create the heart shapes, roll out the peanut butter filling on a lightly floured surface with a rolling pin; roll to about 3/4 inch thickness.
Cut heart shapes with a small heart shaped cookie cutter.
Add the chocolate to a microwave-safe measuring cup or bowl; and melt, starting at 30 seconds, then stirring every 15-20 seconds, 'til melted and smooth.
Dip the hearts in chocolate, using tongs or a candy dipping tool. Once you do a few, you start to get a knack for it, and it becomes easier.
Drip off excess chocolate after dipping, and place the candies on a wax paper covered cookie sheet.
Place the chocolate dipped candies in the fridge to chill, so the chocolate coating can harden. Serve when ready!
The holidays bring so much excitement and child-like wonder…it’s a happy time of year and a time when we especially take family traditions very seriously.
It’s not just about the big day and presents under the tree. It’s about being together and sharing this experience as a family.
We have a few fun traditions including new jammies and a holiday movie like Christmas Vacation on Christmas Eve.
It’s definitely the holiday treat making season, as well; one of my favorite traditions is making hot chocolate, filling our travel cups, and heading out to see the lights.
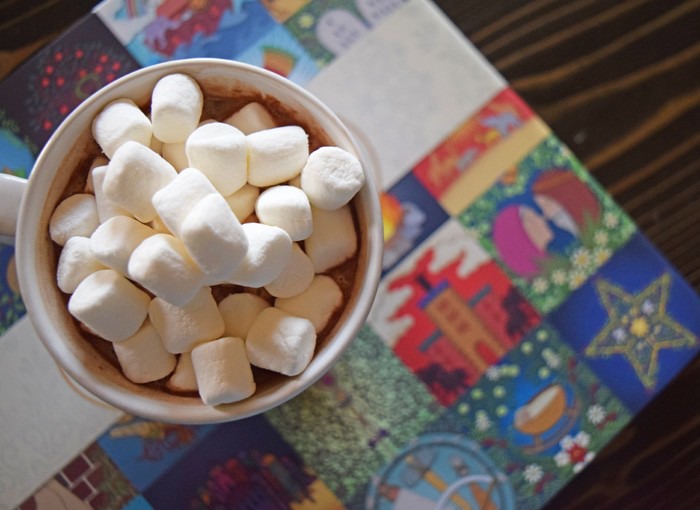
With beautiful holiday lights in mind, I decided to try making homemade hot chocolate. The boys love hot cocoa, and it’s just a given any time it snows or it’s cold outside. It’s kinda become our thing; it’s a way for me to let them know I care, a way to share something we all love.
They love it when I put the tea kettle on, pull out the hot cocoa and marshmallows, and prep our favorite cups. Jaden loves a reindeer cup, and Jacob has his glass mug.
This particular recipe is very rich, very chocolatey. We love adding a little creamer to our hot chocolate, but it’s not something we always have on hand.
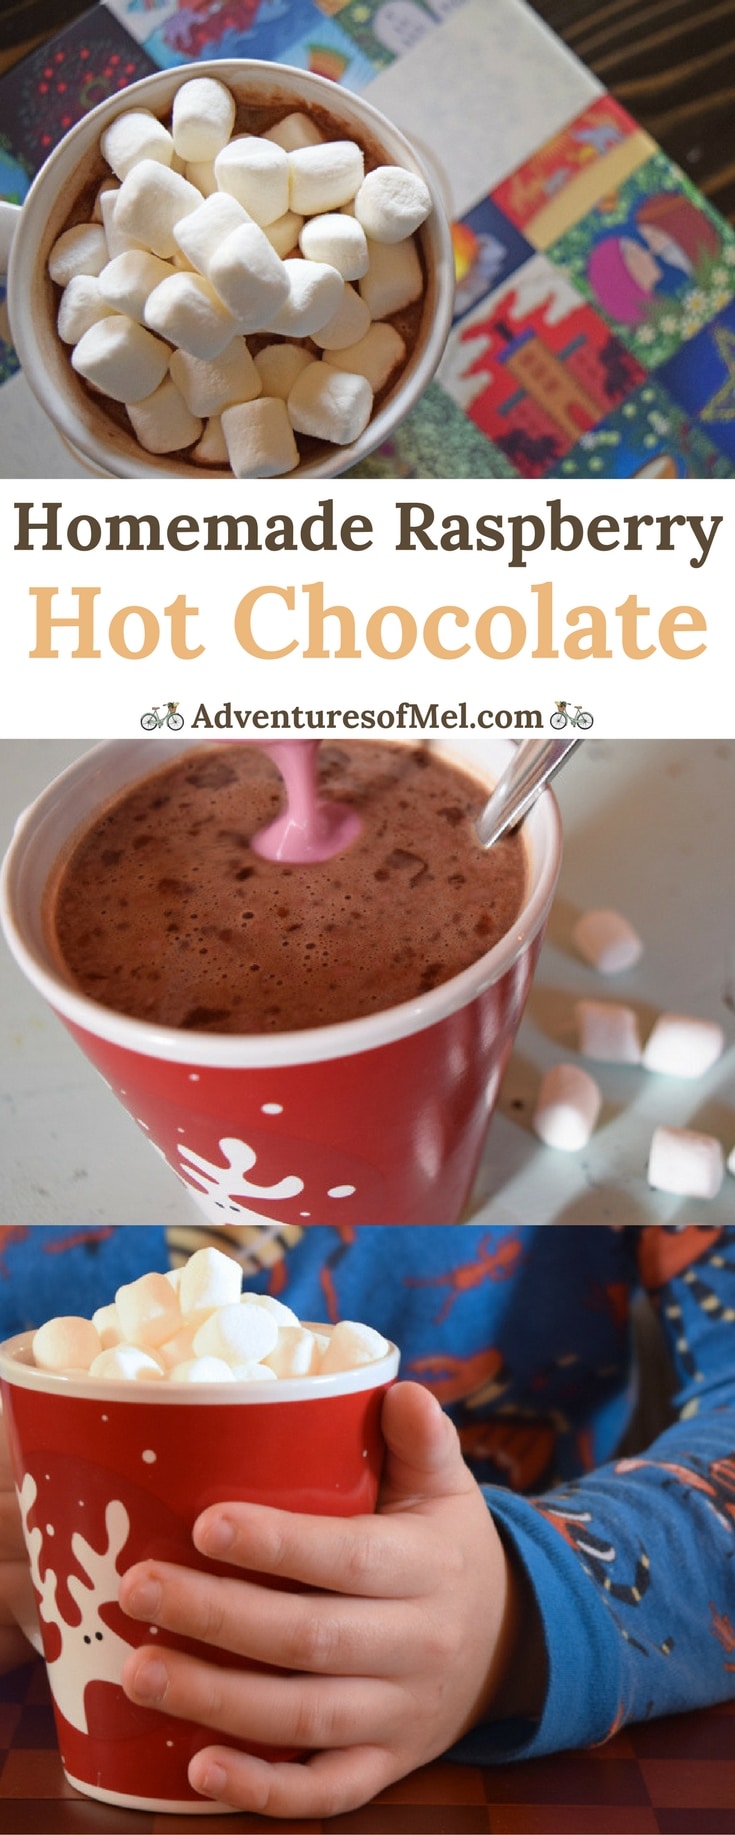
So, we did a li’l something different with that too. I made a homemade raspberry creamer. Ooo la la! It’s so good! Frozen raspberries, a little Half & Half, a little sugar, and you have your own homemade creamer.
Of course, don’t forget the marshmallows or whipped cream. Personally, I love to stack my cup with loads of mini mallows. So yummy!
Tonight if we’re not out viewing the beautiful holiday lights in our neck of the woods, I think I may just sit down with my boys, a cup of homemade chocolatey goodness, and a good book.
Daily acts of care don’t always have to involve housework, after all… Sometimes they involve reading a good book together, taking a few to remember why we celebrate this wonderful holiday season.
Whirlpool® has launched the Every day, care™ Project, highlighting simple acts of care that can change or light up your world. Little acts, such as laundry, cleaning, washing the dishes, reading a good book together, or even making a warm, homemade cup of chocolatey goodness can make a difference in the lives of those we care about and love. Click here to take a look at the Every day, care™ website to see how daily acts of care can change your world.
Pin this recipe to save it for later!
Homemade Raspberry Hot Chocolate Recipe
Warm up with a delicious cup of homemade chocolatey goodness. Homemade raspberry hot chocolate recipe.
Raspberry Creamer
12 oz. frozen raspberries
2 cups Half & Half
1/4 cup granulated sugar
Hot Chocolate
3 cups Half & Half
10 oz. Semi-Sweet chocolate chips
10 oz. Milk chocolate chips
1 tbsp. vanilla extract
Raspberry Creamer
Thaw raspberries and add to blender/food processor with Half & Half and sugar.
Purée mixture.
Run mixture through colander or strainer to remove all seeds.
Hot Chocolate
Add Half & Half, chocolate, and vanilla to saucepan and cook on medium heat, stirring constantly to avoid scorching.
Cook until chocolate melts and mixture is hot, probably about 20 minutes.
Pour into cups for serving.
Add a spoonful or two of homemade raspberry creamer. Add marshmallows or whatever else you like in your hot chocolate.
Enjoy!
Drinks
American
beverages, drinks, homemade raspberry hot chocolate, hot chocolate, hot cocoa, raspberry hot chocolate, raspberry hot cocoa, warm beverages, warm drinks
Over the years we’ve had our favorite Christmas recipes in the form of candy, cookies, cakes, and more.
I used to love these little almond crescent cookies that I’d buy around the holiday season. Yes, they were store bought cookies, even came in a box.
In fact, if I remember right, they were Keebler cookies. They were oh so scrumptious.
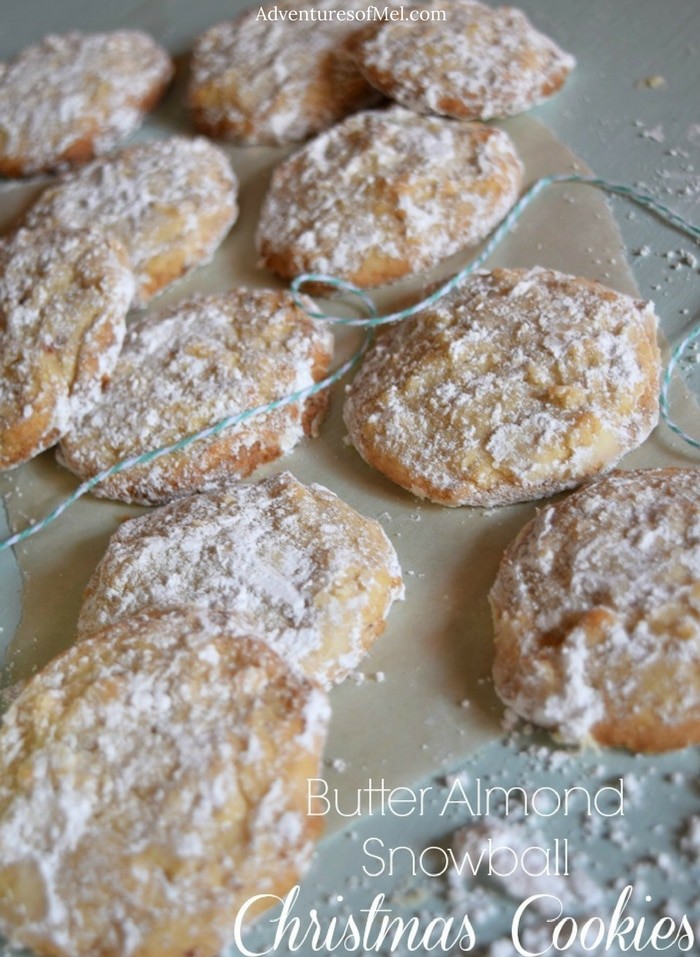
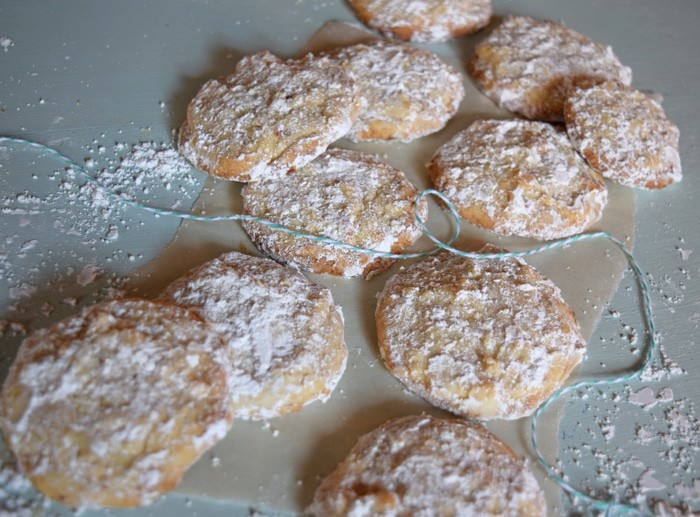
Since I haven’t seen them in awhile, I thought I’d try making my own version, only in a round cookie shape vs. a crescent. I think I have a new favorite Christmas cookie recipe.
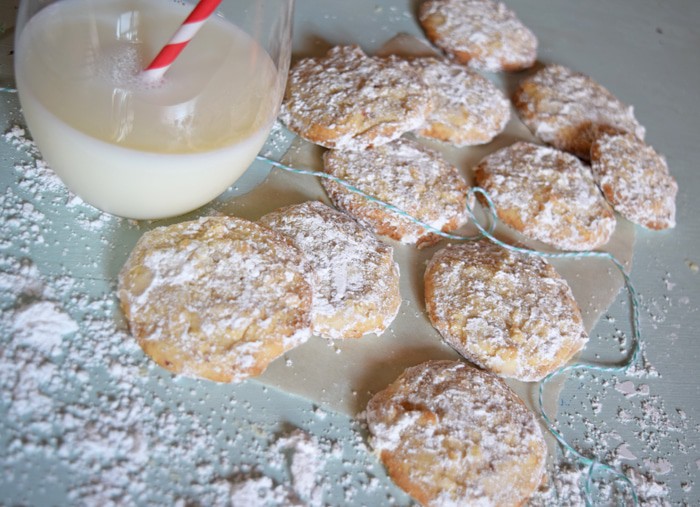
These have a much more buttery taste than your typical sugar or almond cookie…I was going for a really buttery, almond-y flavor with these cookies. They have a crunchy edge, but depending on how long you bake them, they’re very chewy in the center.
The powdered sugar is the secret to the pure yumminess of these cookies. I swear, they melt in your mouth, so de-lish!
They don’t take a lot of ingredients, a win-win for a Christmas cookie, meaning they’re quite simple to make.
You’ll find the printable recipe below. If you happen to bake them, drop me a line and let me know how you like them. Enjoy!
Pin this recipe and save it for later!
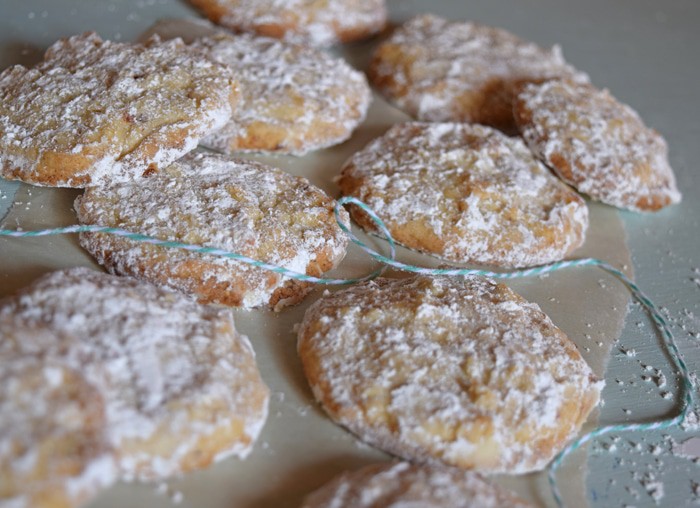
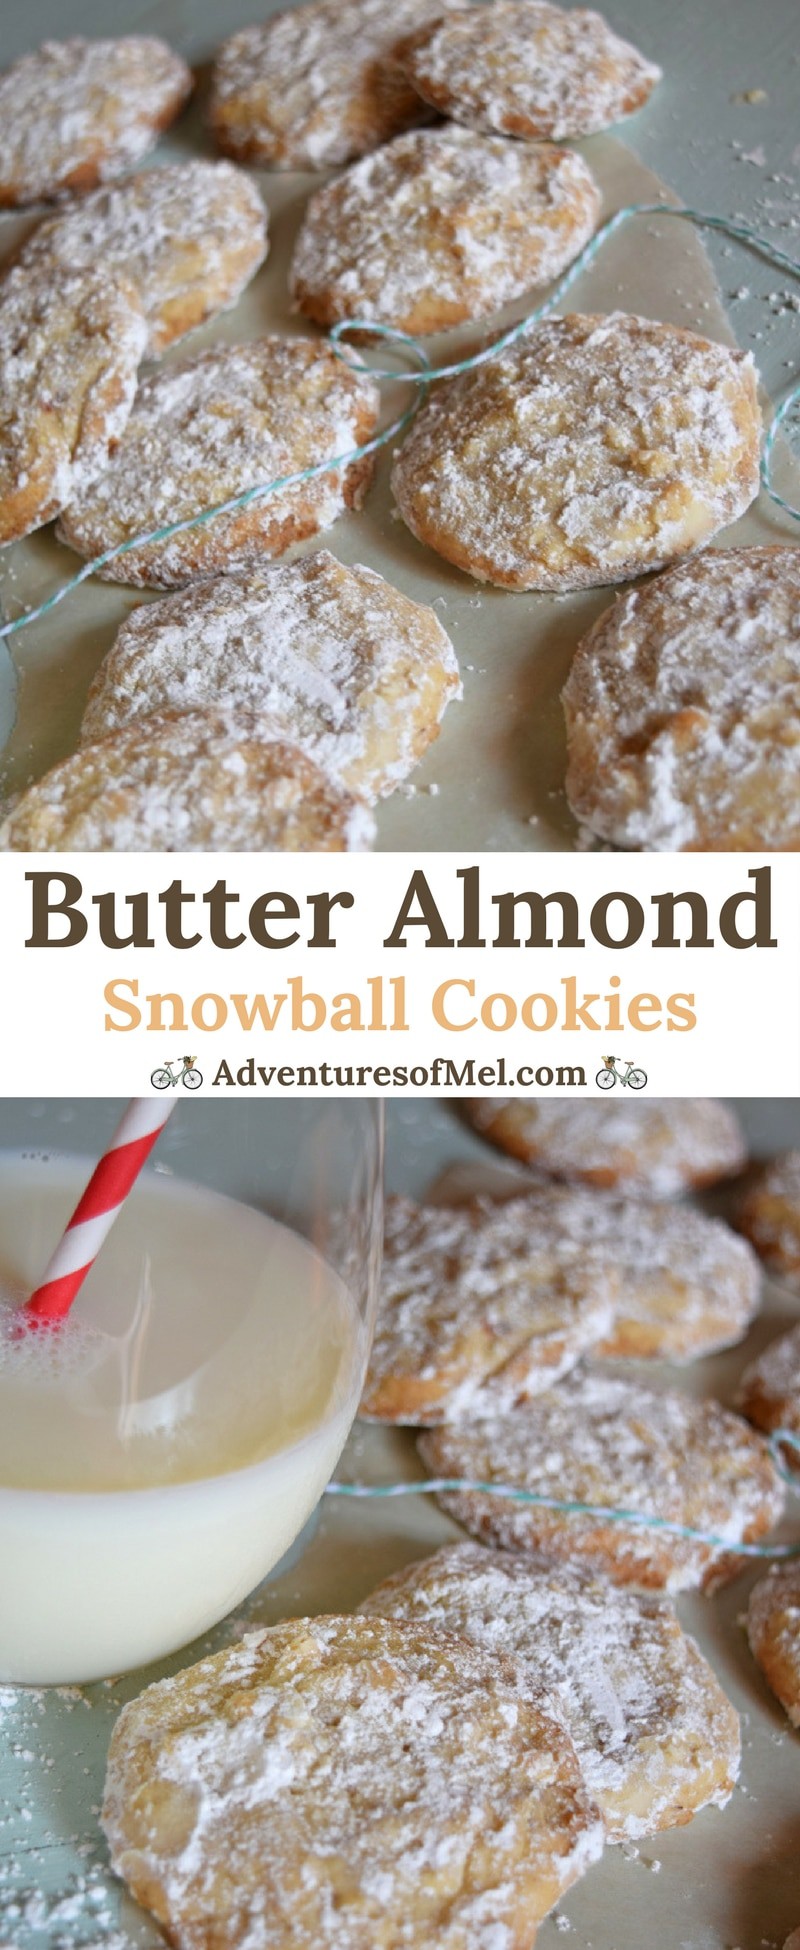
Butter Almond Snowball Cookies
Butter Almond Snowball Cookies, one of my favorite Christmas cookies ever. Dusted with powdered sugar for a melt in your mouth goodness like no other dessert.
1 cup unsalted butter (softened)
1 cup cane sugar
1 large egg
1 teaspoon vanilla extract
1/2 teaspoon almond extract
1 3/4 cups all-purpose flour
1 teaspoon baking powder
1 teaspoon salt
1 cup finely chopped almonds
1 cup powdered sugar (for dusting)
Pre-heat the oven to 400° F.
In a large mixing bowl, cream or mix together the softened butter and sugar.
Add the egg, vanilla extract, and almond extract, mixing well.
In a separate mixing bowl, sift or whisk together the flour, baking powder, and salt.
Add the dry ingredients to the creamed mixture, mixing well.
Add the finely chopped almonds, mixing well.
Drop the dough by tablespoonfuls onto an un-greased cookie sheet.
Bake at 400° F for 10 to 12 minutes, or until the edges of the cookies begin to turn golden. Remove them from the cookie sheet, and place them on a wire rack to cool.
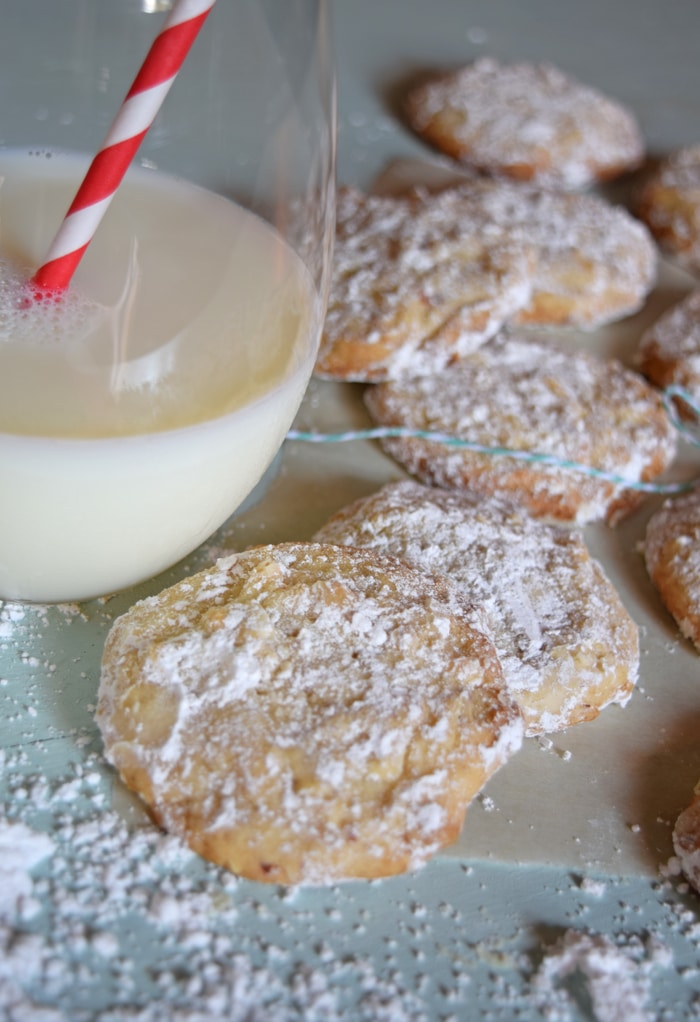
When the cookies have mostly cooled but are still slightly warm, dust them in powdered sugar, making sure each cookie has a good coating of powdered sugar.
Serve with a mug of ice cold milk, hot tea, or coffee.
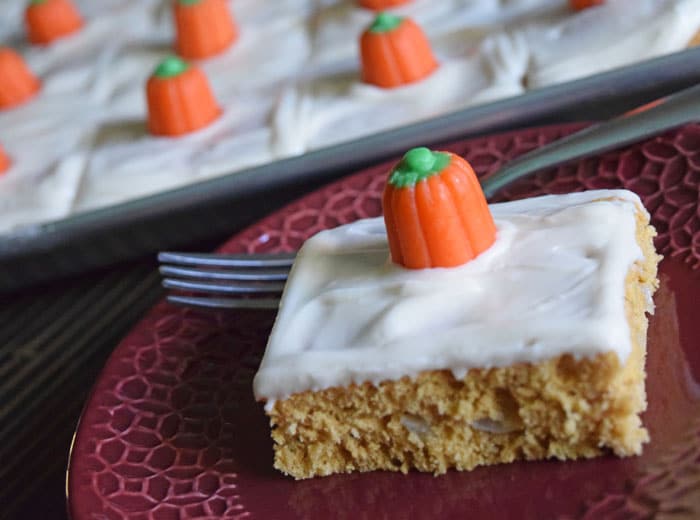
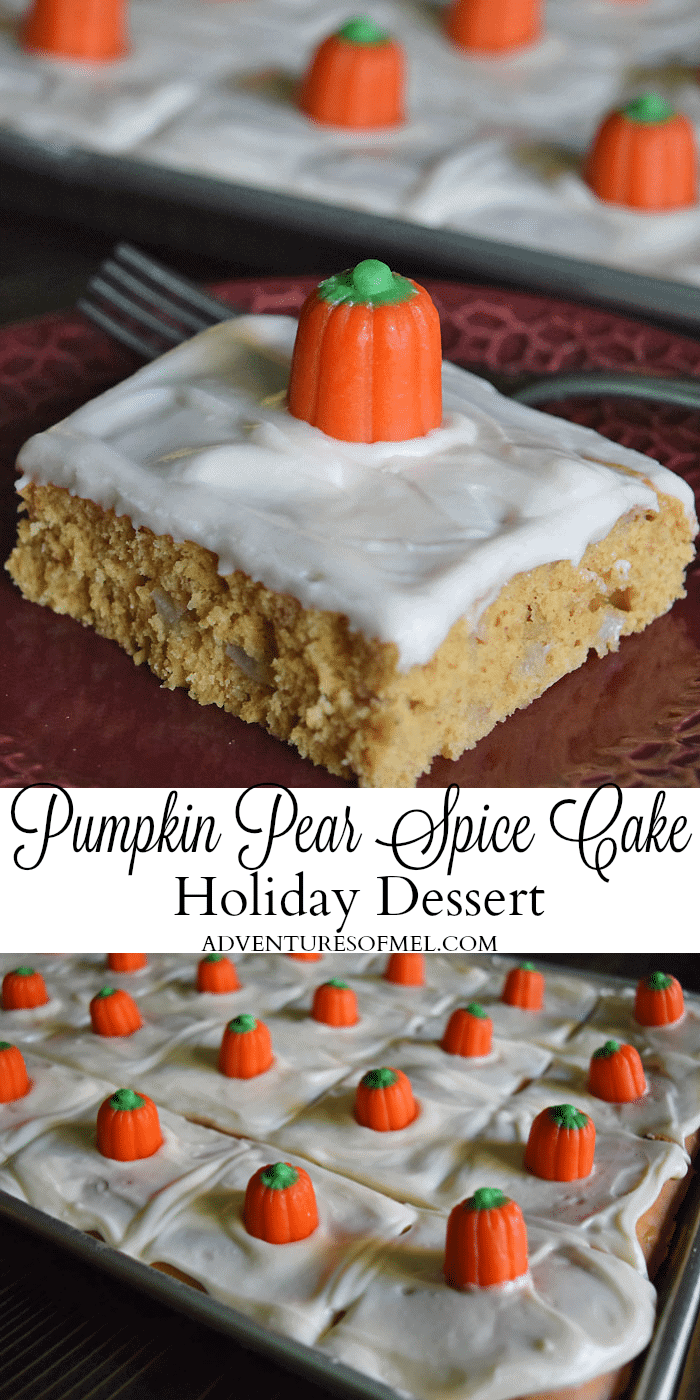
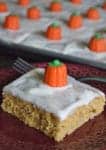
Pumpkin Pear Spice Cake includes just a few of my favorite ingredients.
The holidays are a joyous time. Family, friends, holiday parties and get-togethers, delicious food, decadent holiday desserts.
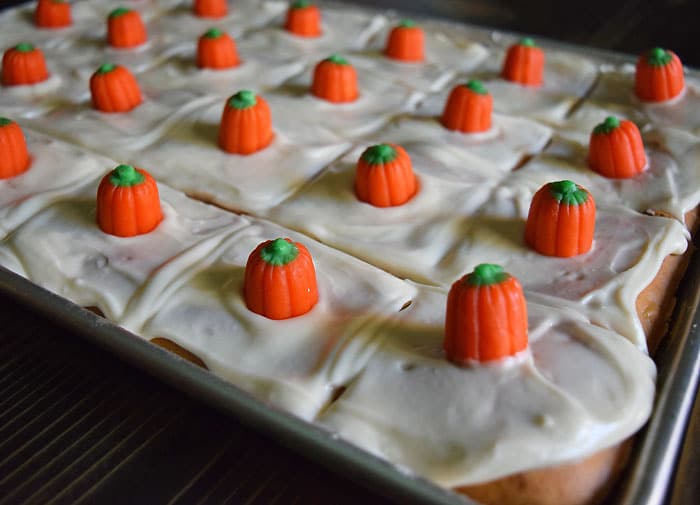
A sheet cake is also a nice alternative to the traditional pumpkin roll or pumpkin pie. It adds a bit of variety, and I’d wager that it’s a bit easier or simpler to make too.
I’m looking forward to making this again for Thanksgiving.
My boys have been begging me to make it again. There’s just something about the combination of flavors…
It’s a scrumptious dessert perfect for the holiday season.
Below you’ll find a printable recipe. Enjoy and Happy Thanksgiving!
Pumpkin spice pear cake is a scrumptious holiday dessert, perfect for Thanksgiving dinner. Get the recipe for this delicious, easy to make, sheet cake.
Cake:
1 cup cane sugar
2 large eggs
1/2 cup pumpkin
1 teaspoon lemon juice
1/2 cup whole milk
3 cups all-purpose flour
2 teaspoons baking powder
1 teaspoon baking soda
1 teaspoon salt
1 1/2 teaspoons pumpkin pie spice
1 teaspoon ground cinnamon
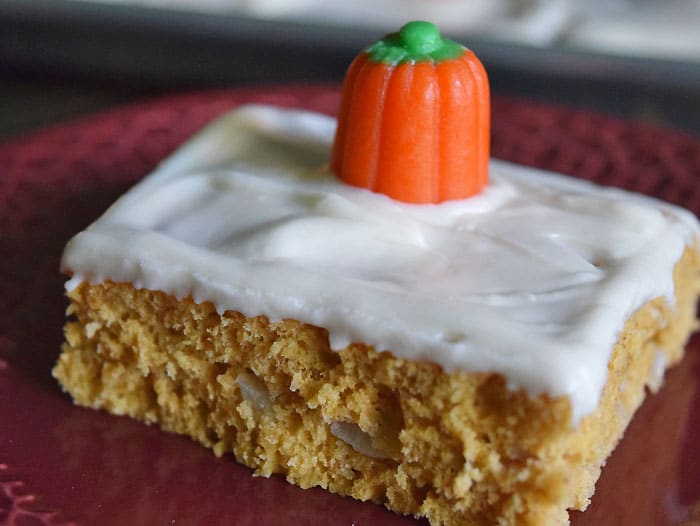
2 medium pears (washed, peeled, and diced)
Frosting:
8 ounces cream cheese (softened)
2 tablespoons salted butter (softened)
1/4 teaspoon vanilla extract
1/4 teaspoon caramel extract
2 cups powdered sugar
24 mellowcreme candy pumpkins
Cake:
Pre-heat the oven to 375° F; grease and flour a 16×10 sheet cake pan.
In a large mixing bowl, mix together the sugar, eggs, pumpkin, lemon juice, and milk.
In a separate bowl, whisk together the dry ingredients, including the flour, baking powder, baking soda, salt, pumpkin pie spice, and cinnamon.
Add the dry ingredients to the wet ingredients, mixing well.
Add the diced pear to the mixture, mixing well.
Spread the batter into the greased sheet cake pan, spreading it evenly in the pan.
Bake at 375° F for 20-25 minutes, or until a toothpick, inserted in the center, comes out clean and cake begins to turn golden.
Remove the cake from the oven, and allow it to cool completely.
Frosting:
Whisk the cream cheese and butter together 'til smooth and creamy.
Add the vanilla extract, caramel extract, and powdered sugar to the cream cheese mixture, mixing everything together well.
Spread the creamy frosting on top of the cooled cake.
Slice the cake and add candy pumpkins to the top of each slice; then serve!
Refrigerate the cake when not being served or eaten.
Sigh, my slow cooker…it’s my best friend when the weather starts to get a little chilly and days start to get insanely busy due to the holidays, school stuff, appointments, work meetings, or whatever else happens during the course of a week.
I’ll freely admit it…My name is Mel and I love my slow cooker.
I don’t know if I could live without my slow cooker. It makes such delicious things and only requires a minimal amount of work from me to do so.
It’s better than a Rosie (am I dating myself here? Jetsons?). It’s better than chocolate (wait, maybe not). It’s definitely better than slaving over a hot stove after a loooooonnnnngggg day, can I get an amen?
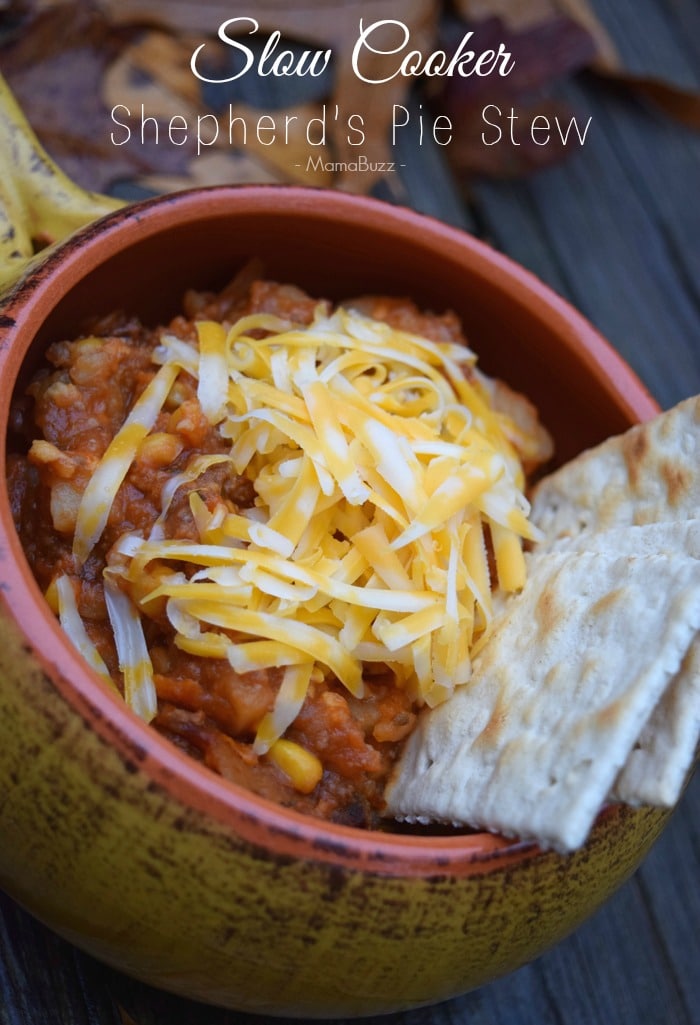
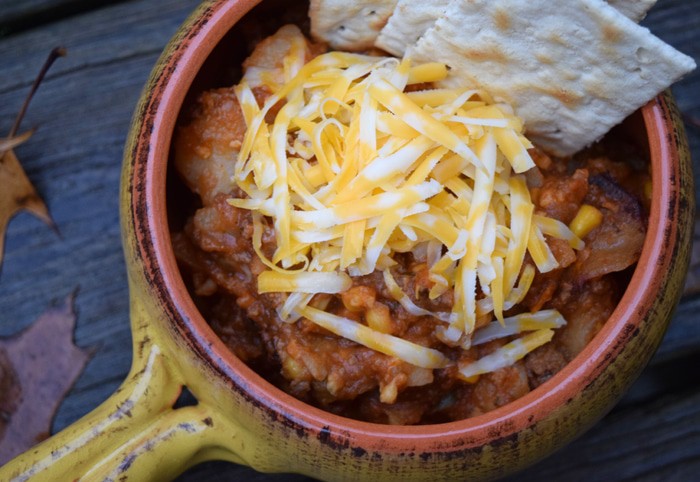
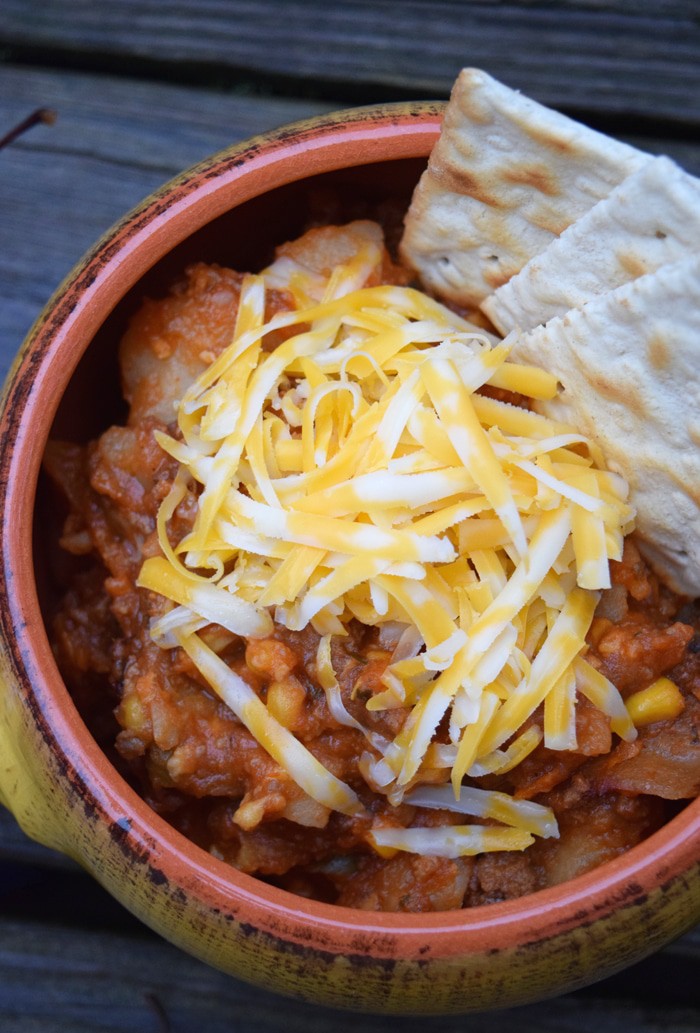
Yeah, I may be a little obsessed with my slow cooker, but it does make delicious things like this Shepherd’s Pie Stew.
This recipe kinda happened by accident, but now that I think about it, some of the best things happen by accident. I wanted to make Shepherd’s Pie in the slow cooker, but instead it turned into a sort of hearty stew that won our hearts.
Chock full of veggies, like my favorite vegetable soup with V8, and meaty deliciousness… This stew is a must try.
Below you’ll find the printable recipe. Enjoy!
Slow Cooker Shepherd’s Pie Stew
How to make a delicious slow cooker recipe for Shepherd's Pie Stew. Sometimes an accident turns into something delicious.
4-5 large potatoes (washed, peeled, & chunked)
1-16 oz. soup mix frozen veggies (basically, a mixed veggie good for soup)
1 can creamed corn
1 lb. ground beef (cooked & drained)
1-24 oz. jar spaghetti sauce
Salt & pepper
1 cup shredded Colby Jack (shredded)
1/2 to 1 cup Cheddar (shredded)
Prepare potatoes and add to slow cooker.
Cook ground beef in skillet. Cook well and drain. Add to slow cooker.
Add rest of ingredients to slow cooker, minus the cheese. Mix together well.
Cook on low for 4-6 hours. 20-30 minutes before serving, add shredded cheese. Replace lid and finish cooking.
Once cheese is melted, serve and enjoy!
Soups & Stews
American
shepherd’s pie soup, shepherd’s pie stew, slow cooker recipes, slow cooker shepherd’s pie stew, slow cooker stew
Looking for more slow cooker recipes? Follow me on Pinterest!
You know you’ve been there. You buy a bunch of fruit (pears, in this instance) just because it’s on sale; you have the best of intentions for it. You tell yourself the kids will eat it all for snacks or lunch sides; you may even have plans for baking.
Then a week or so later, you start to notice the fruit basket isn’t emptying quite as fast as you’d hoped. In fact, the pears now need eaten or used before they completely rot away. Story.of.my.life.
While my kids do eat loads of fresh fruit, it’s never as much as I’d hoped or thought they might eat when I buy a bunch of stuff that’s on sale. Life happens, we get busy, and the basket still sits there…full of fruit just waiting to be eaten or used up before it ruins.
The situation definitely calls for something homemade. And muffins or sweet breads are one of the easiest, most delicious things to make with fresh fruit.
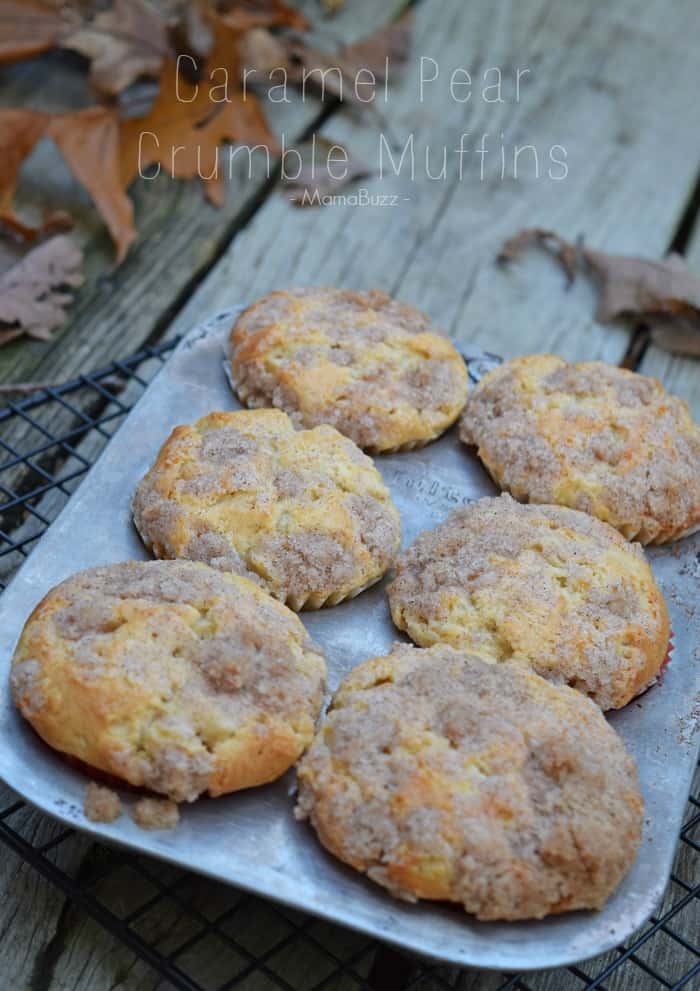
These particular Caramel Pear Crumble Muffins are probably the most delicious muffins I’ve had in awhile. So tasty and my guys loved them too.
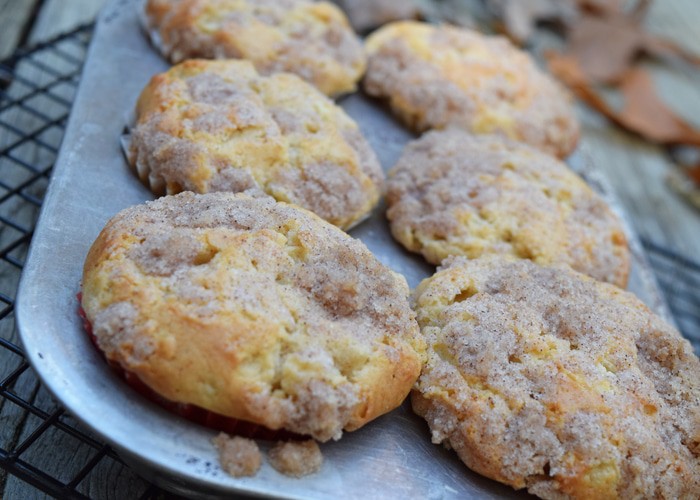
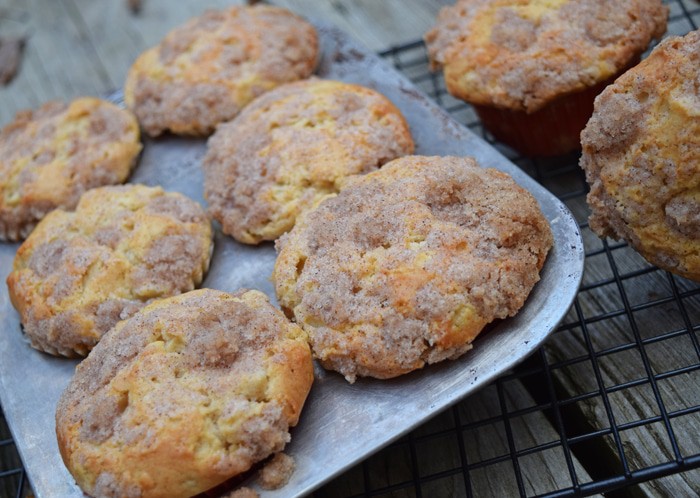
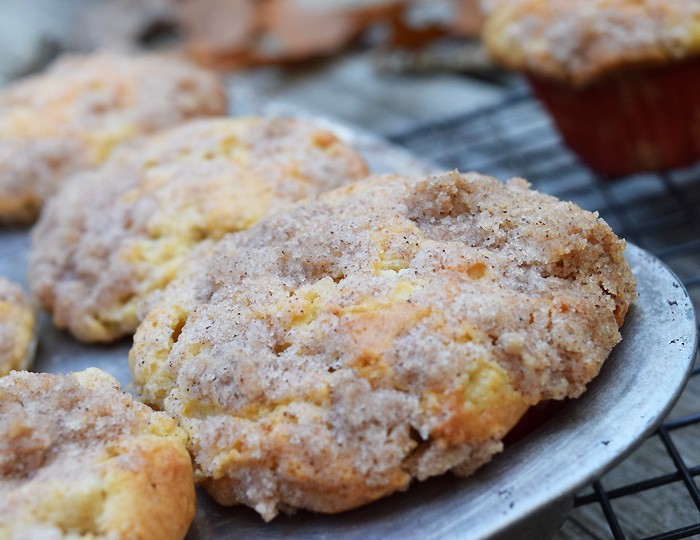
The muffins themselves have a hint of caramel and spice. The topping is a mixture of cinnamon, sugar, and butter; it gives a crunchy sweetness to the muffin.
Below you’ll find a printable recipe. Bake up a batch, slather with a little bit of butter, and enjoy!


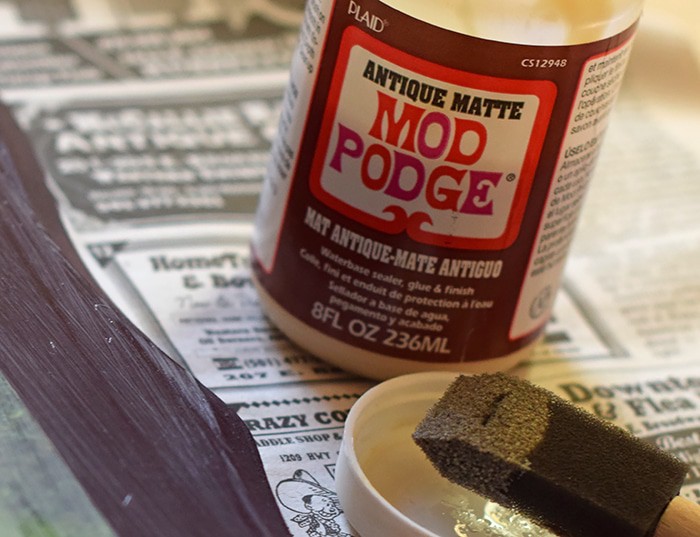 Apply to back of photo, set in place, and then apply to front of photo and plaque. I applied 2 coats of Mod Podge, at least 20 minutes apart, making sure to let the first coat dry well before applying more. A sponge brush works really well.
  Once you’ve finished applying all coats of Mod Podge, let dry for 24 hours.
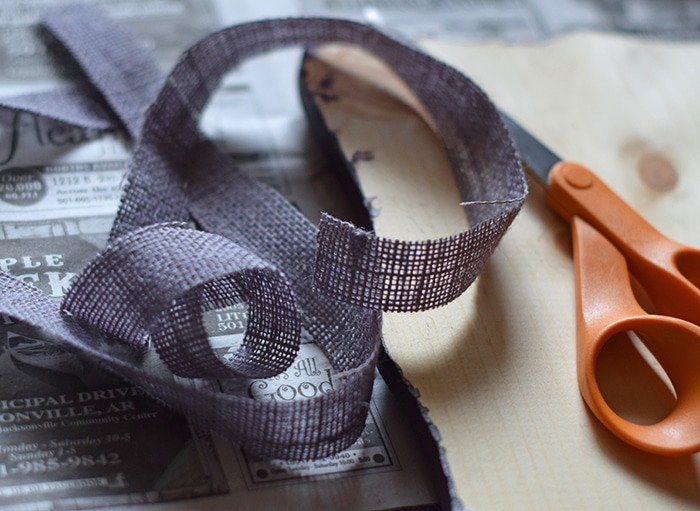 Staple each tie to back of frame, one on the left hand side and one on the right hand side.
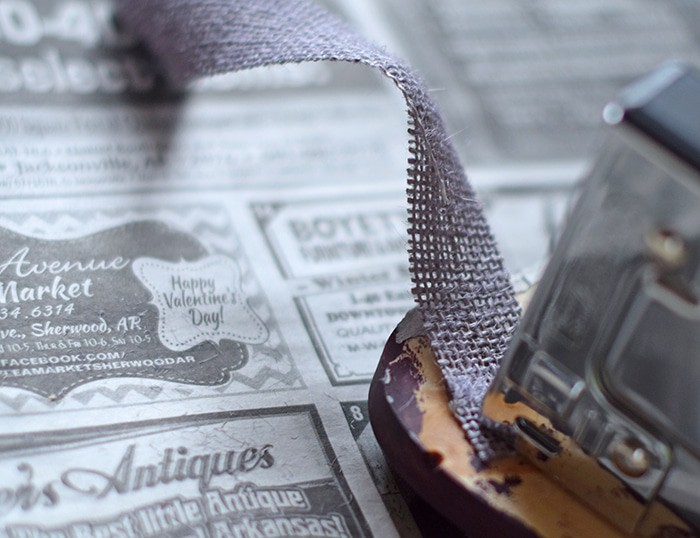 Bring ties together and tie in a bow. This will be the hanger for your photo plaque.