My sweet tooth sometimes gets ahold of me and won’t let up until I satisfy that craving for whatever particular sweet treat I’m craving at the moment. I like to think I get it honest, per my grandmother, who had a mean sweet tooth.
But let me tell you, moderation is key and plays a role in this recipe… Bite-sized treats are perfect when trying to satisfy a craving yet still not gorge oneself on sweet goodies from above.
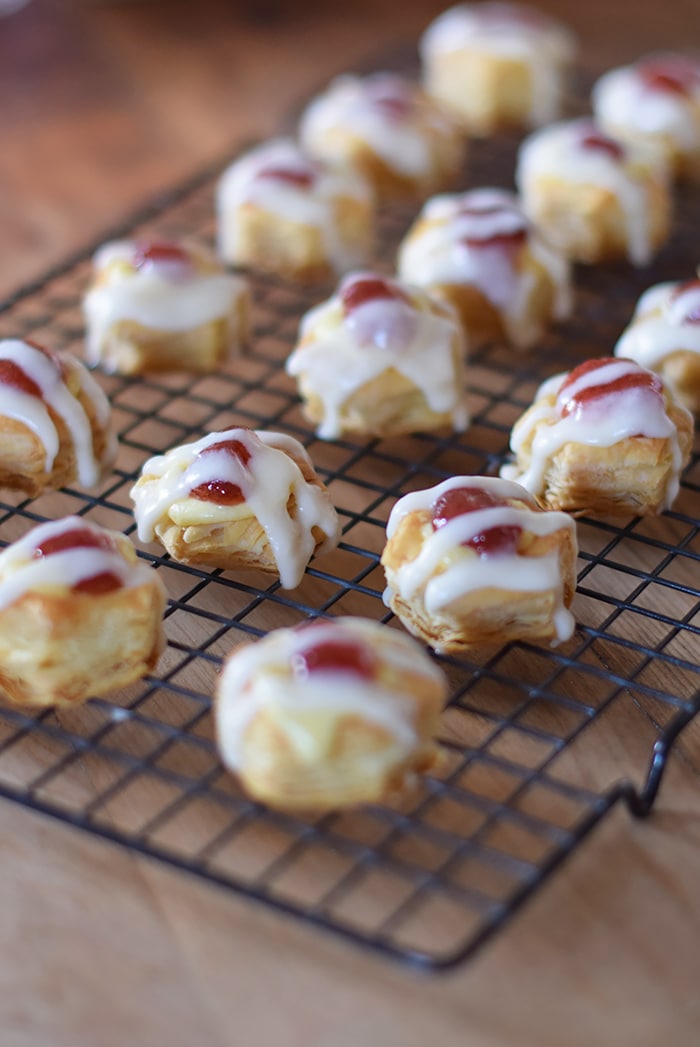
When I cooked this up, I knew I wanted something similar to a cheese danish. Shopping for ingredients led me to these itty bitty Puff Pastry Cups.
Aren’t they cute? They are awesome! I totally see cream puffs in our future with these bad boys.
These bite-sized morsels of creamy cheesecake-esque goodness are delightfully easy to make, and here’s how.
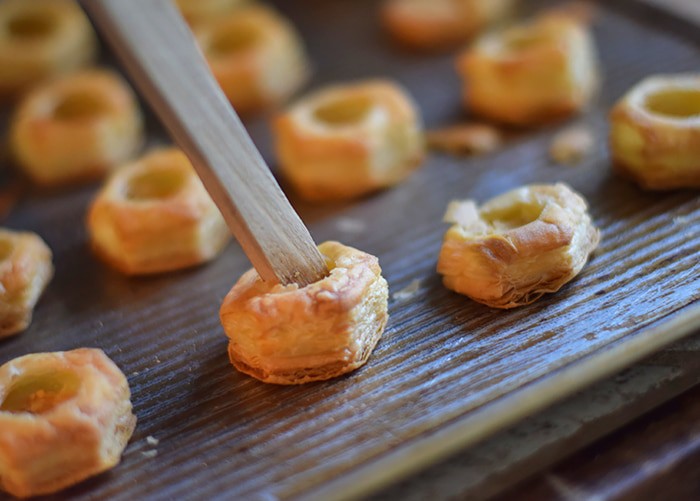
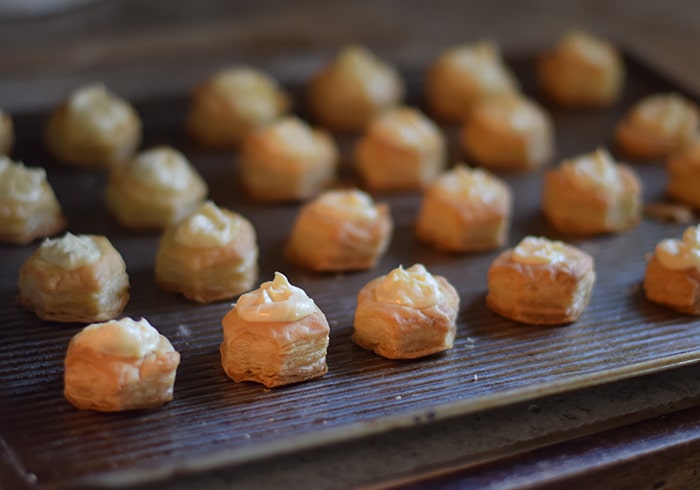
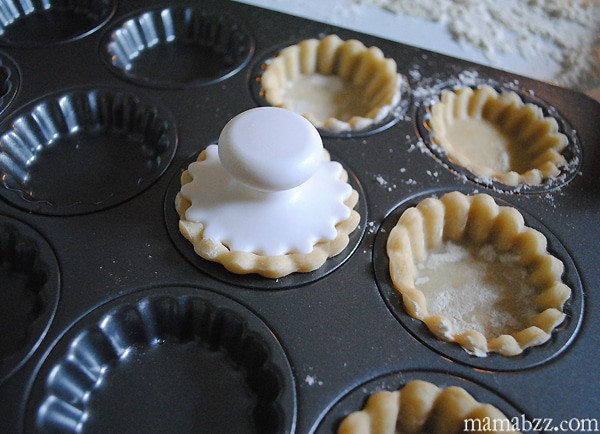
First things first, bake the Puff Pastry Cups according to package directions. When done, after about 20 minutes, immediately remove from oven and press center of each cup down with the tip of a wooden spoon handle. Then fill each cup with a spoonful or dollop of the cream cheese filling you mixed up while they were baking. Bake again for about 15 minutes at a lower temp (exact instructions are in the printable recipe below).
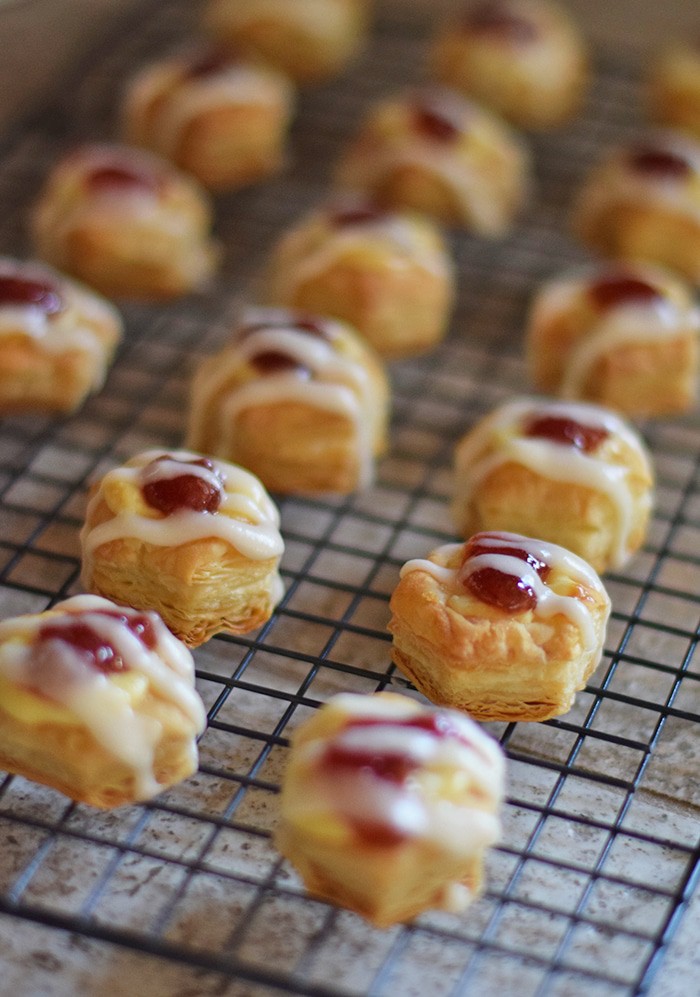
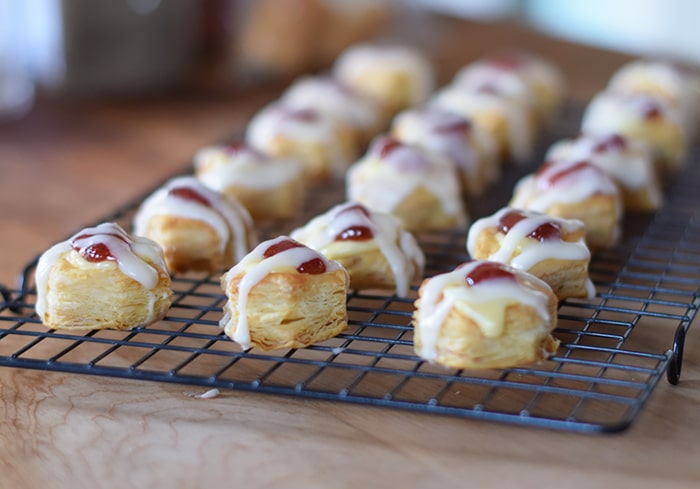
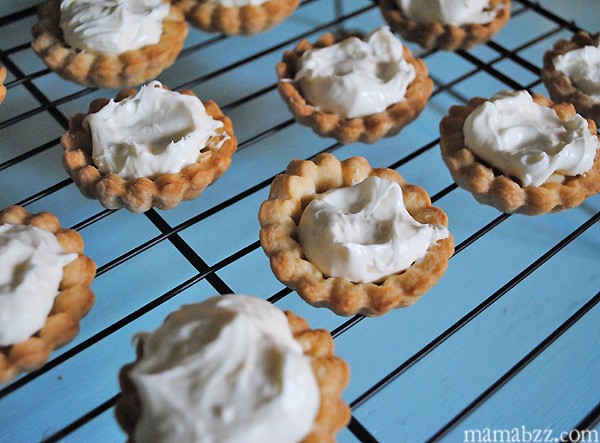
Once filling is set, remove from oven and allow to cool for 5-10 minutes. Then top with a small dollop of strawberry jam, and lace with a simple powdered sugar icing. Of course, store them in the fridge until ready to serve.
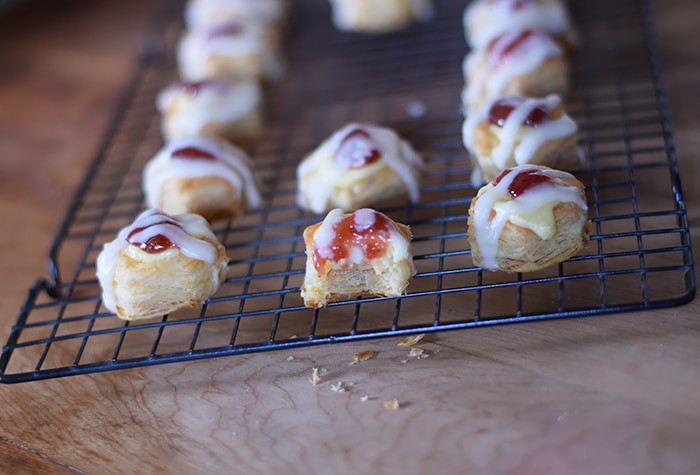
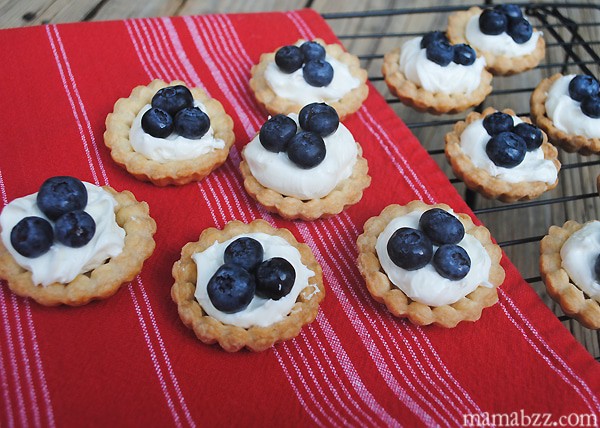
They’re so scrumptious! I love the mini size… It’s the perfect amount of sweet to satisfy that craving yet not overdo. Moderation…

Below you’ll find the printable recipe. Enjoy!
Can’t make it just yet? Pin it for later!
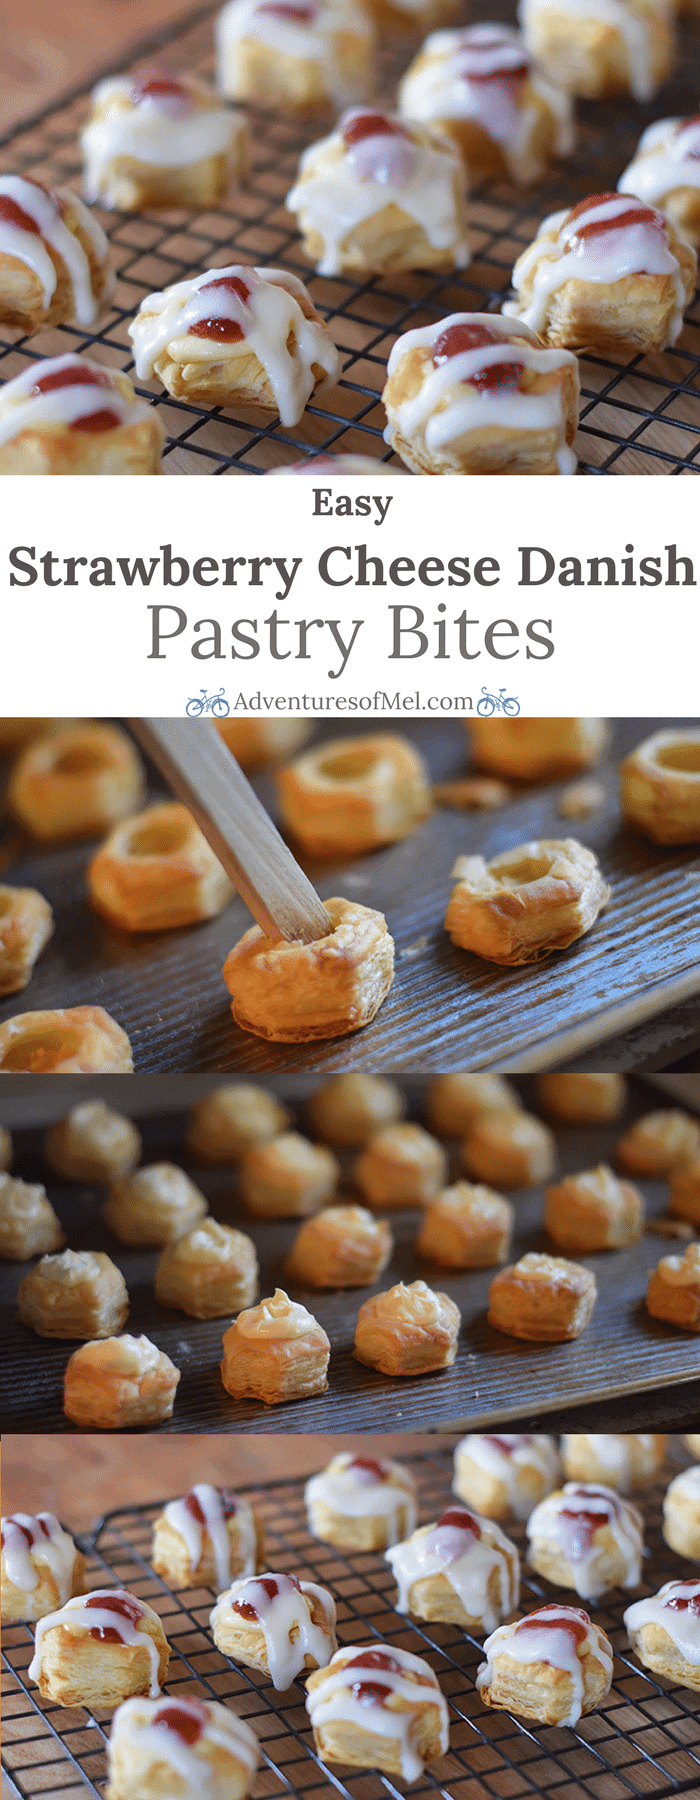
Easy Strawberry Cheese Danish Pastry Bites
Satisfy your sweet tooth with Easy Strawberry Cheese Danish Pastry Bites. Made with bite-sized Puff Pastry Cups, they’re so easy to make and so delightfully scrumptious, allowing for moderation, as well!
Pastry Bites:
- 1 pkg. Pepperidge Farm Puff Pastry Cups
- 1 8 oz. pkg. cream cheese
- 3 tbsp. granulated sugar
- 1/2 tsp. vanilla
- 1 egg yolk
- Strawberry jam
Icing:
- 1-2 tbsp. salted butter (melted)
- 1/2 tsp. vanilla
- 1 cup powdered sugar
- 5 tbsp. heavy whipping cream
- Set Puff Pastry Cups on ungreased cookie sheet. Follow package directions, baking at 400° for about 20 minutes.
- Meanwhile, mix cream cheese, sugar, vanilla, and egg yolk ’til smooth and creamy.
- When done, remove Pastry Cups from oven and immediately press center of each cup down with tip of wooden spoon handle.
- Spoon cream cheese mixture into each cup, adding a small dollop in each.
- Bake at 350° for 15 minutes or until filling is set.
- Remove from oven and allow to cool for 5-10 minutes.
- Top each danish with small dollop of strawberry jam.
- Mix icing ingredients together until smooth and creamy. It will have a thin consistency.
- Drizzle each pastry bite with icing.
- Store in fridge ’til ready to serve.
- Serve and enjoy!
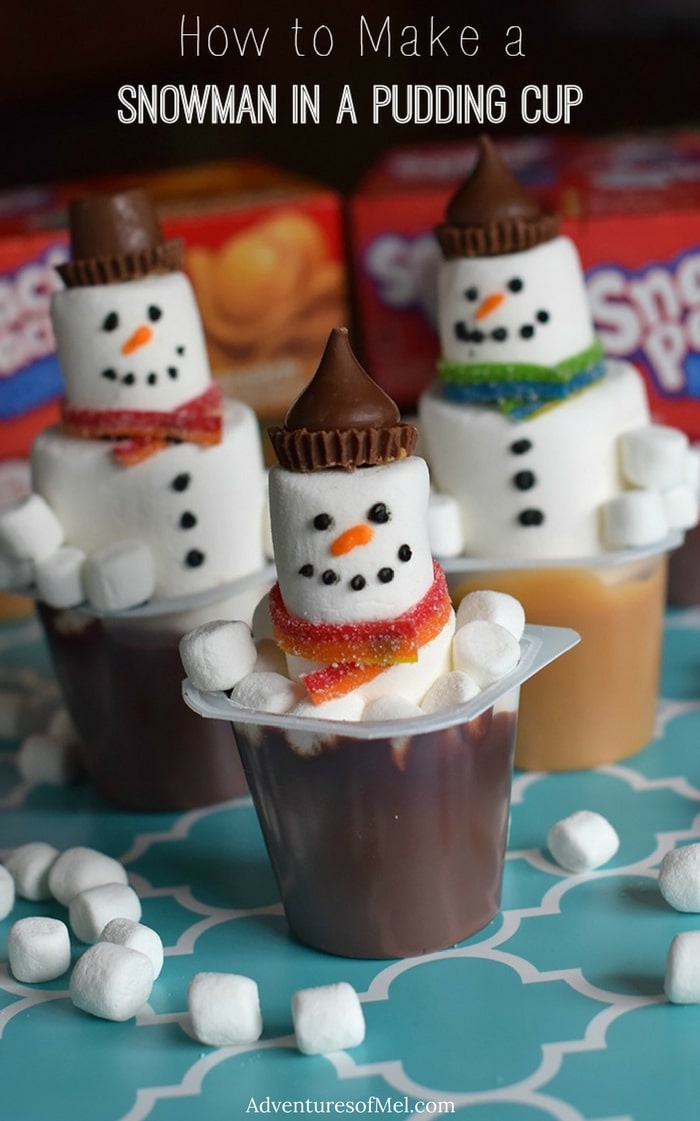
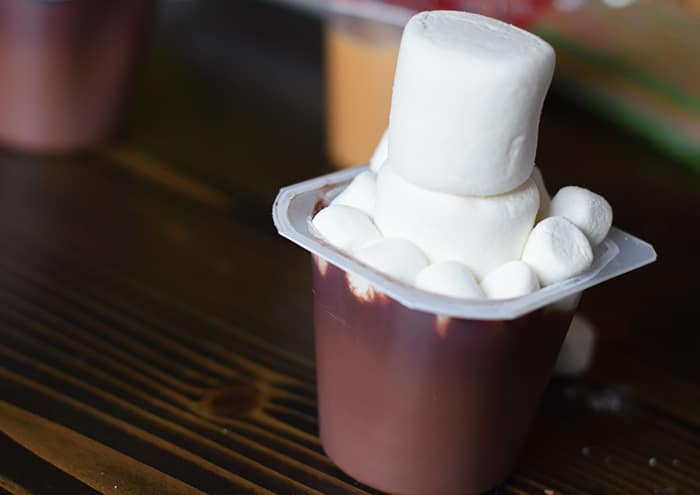
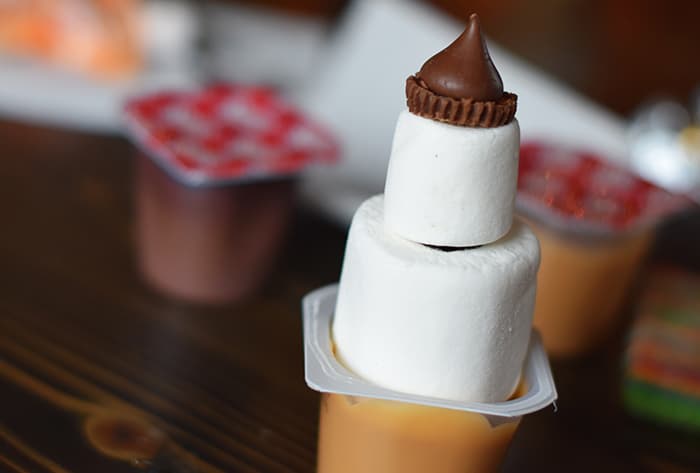
 Then add the marshmallow, pressing onto frosting.
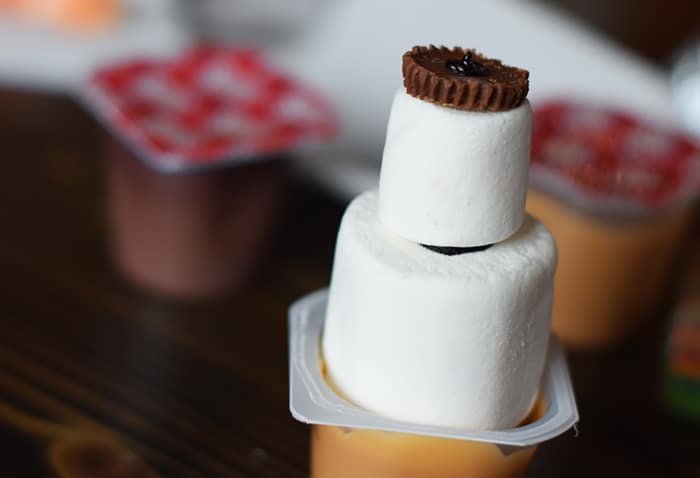
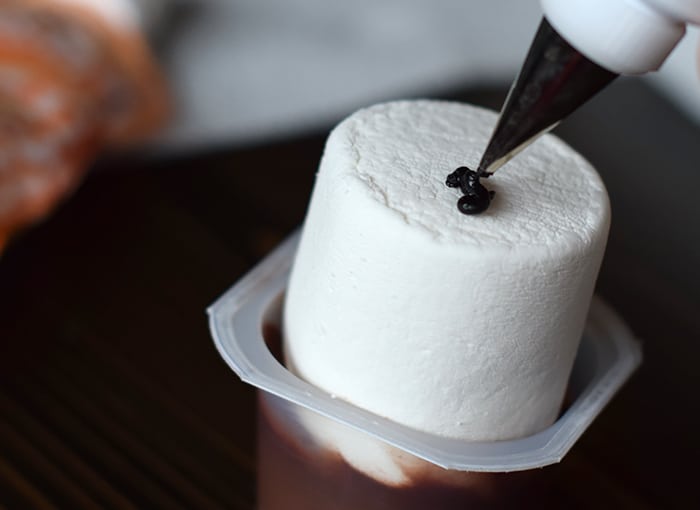
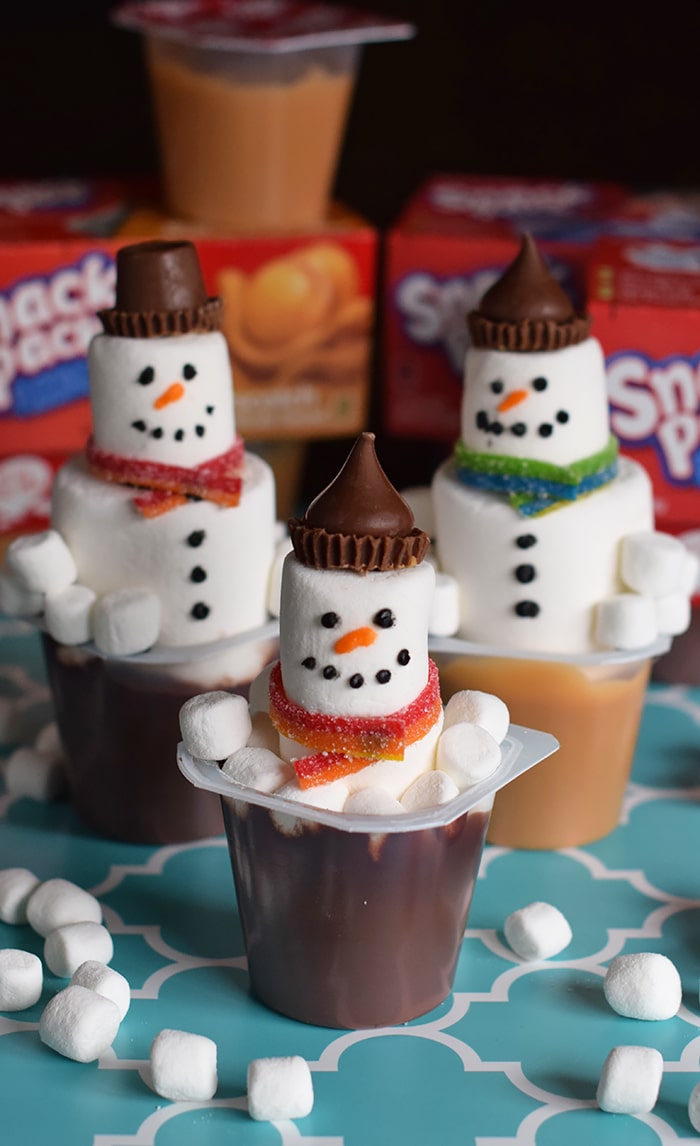
 Use black frosting for coal eyes and a smile; orange frosting works well for a carrot nose. Add a scarf, using fruit rope or candy rope, with a dot of frosting to hold the scarf together. Black frosting makes cute little buttons down your snowman’s front.
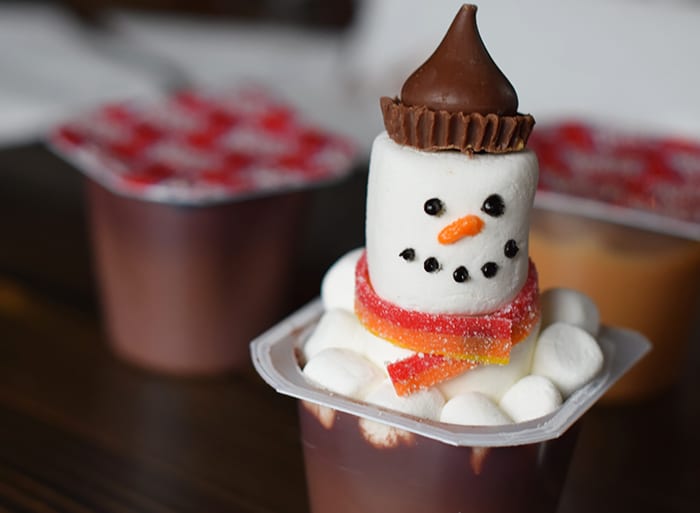 Jaden even added things like earmuffs (with mini marshmallows) and a tie to his snowmen.
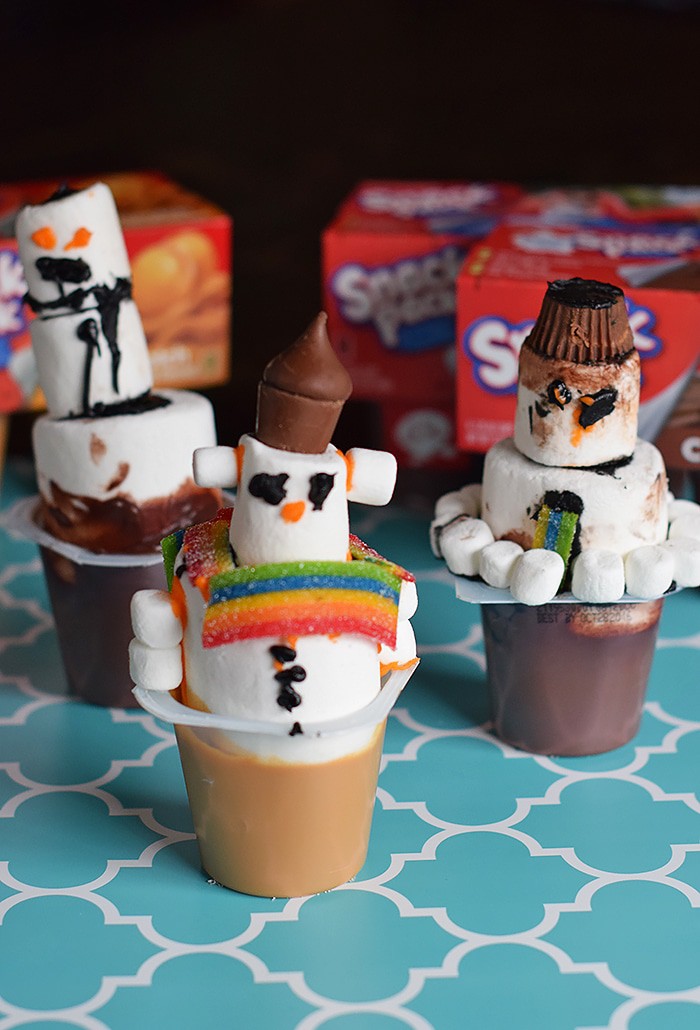
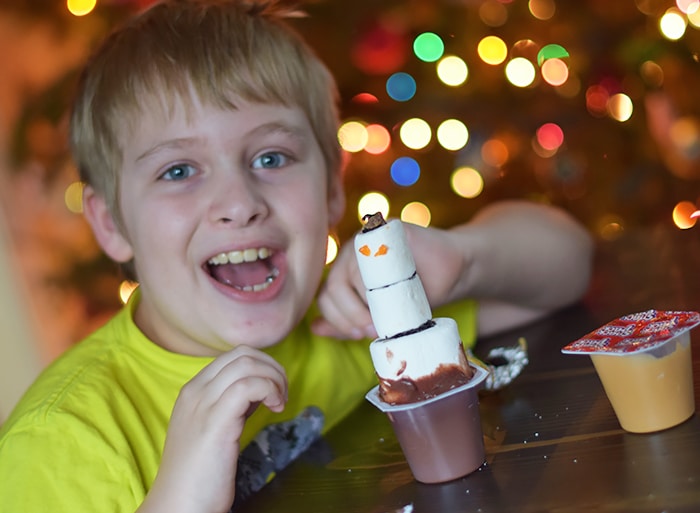 Isn’t that what it’s all about? Spending time together, just enjoying the moment and making a fun memory that will last a lifetime. Oh and, of course, eating the results of your work when finished. Eating as you go can be quite fun too!
 This winter, take a moment to slow down and enjoy a tasty and fun treat with the kids. Snack Pack® comes in a variety of flavors and offers endless mix-in opportunities the kids can help prepare. Each serving of Snack Pack is fortified with as much calcium as an 8-oz glass of milk,* so you can feel good about serving your kids Snack Pack. For mix-in inspiration, visit Snack Pack on Pinterest (


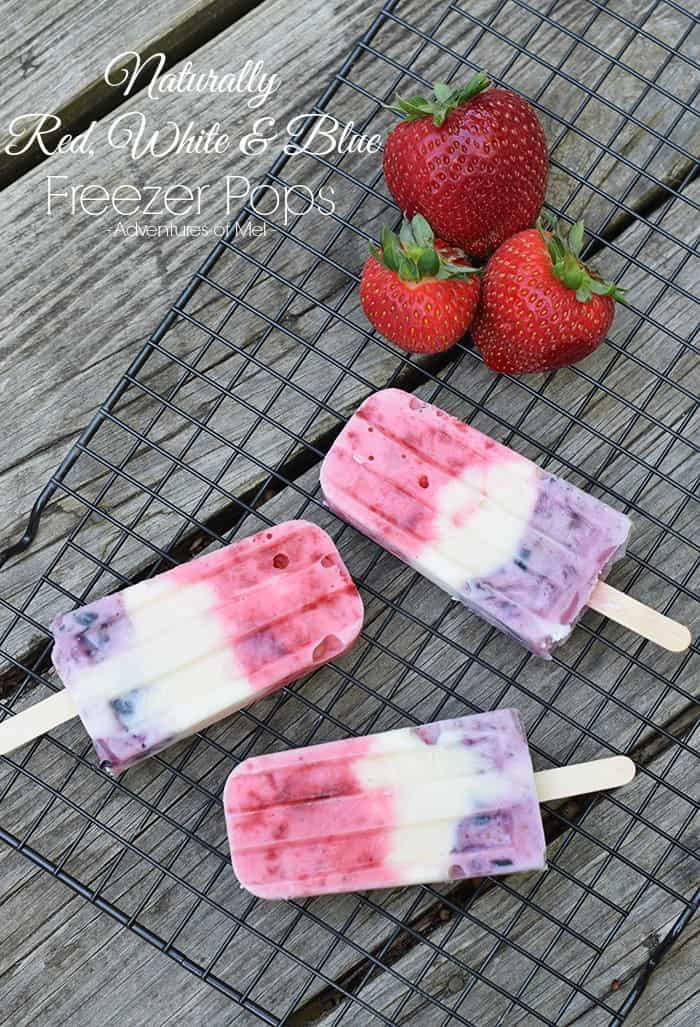
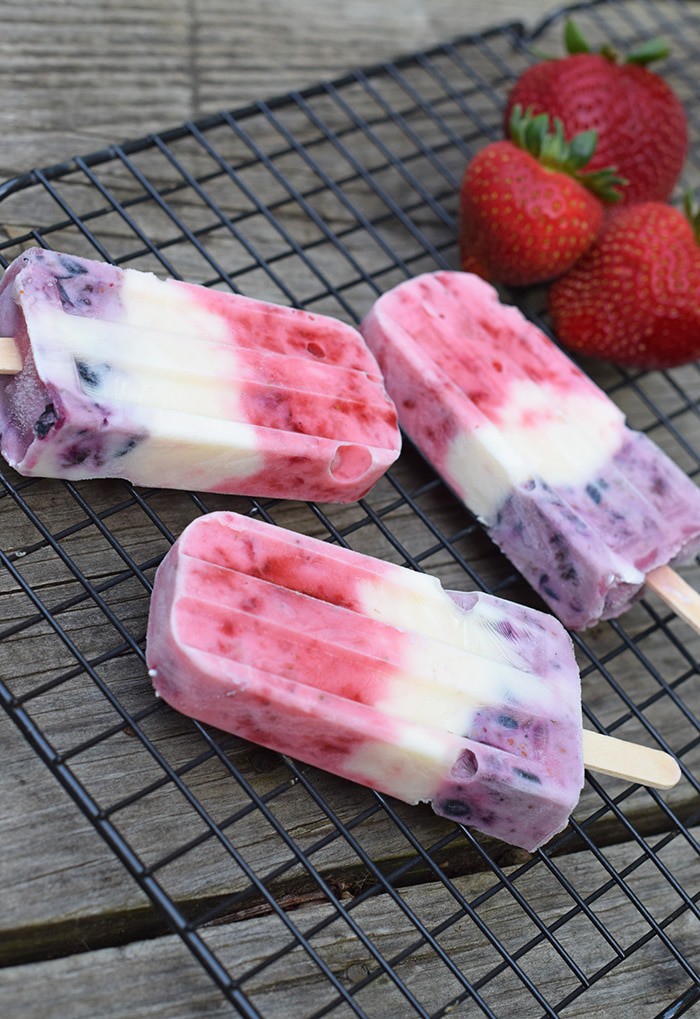
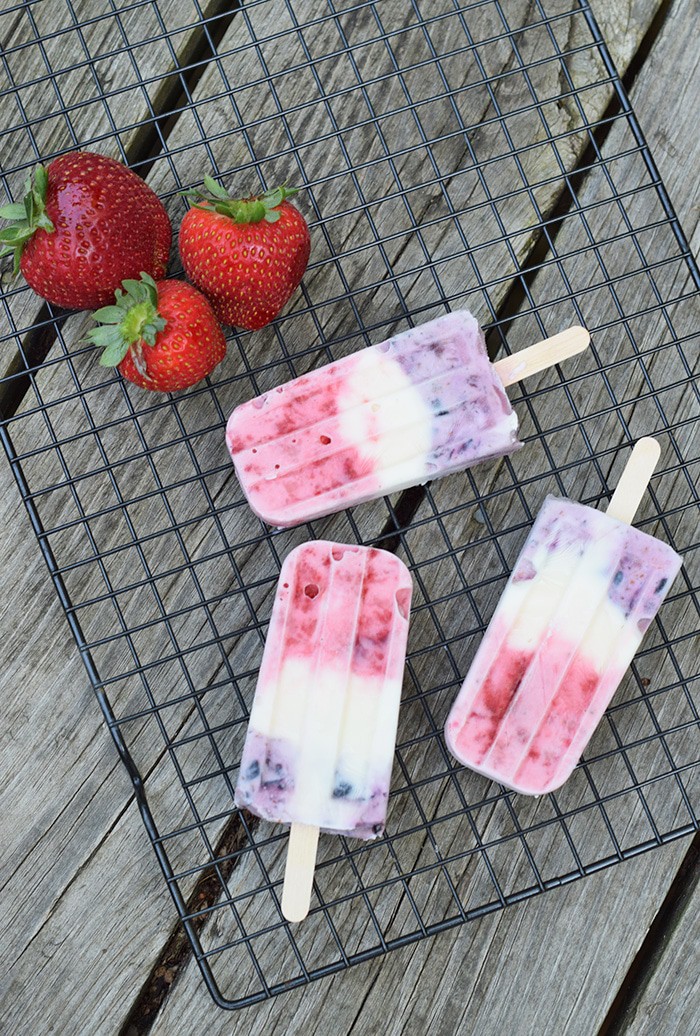


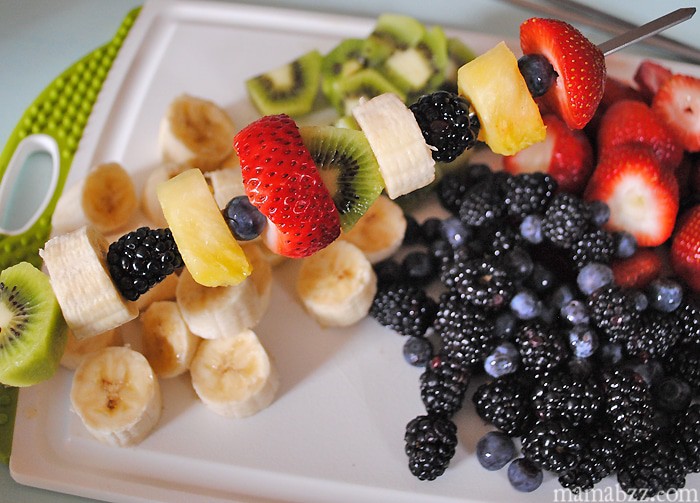
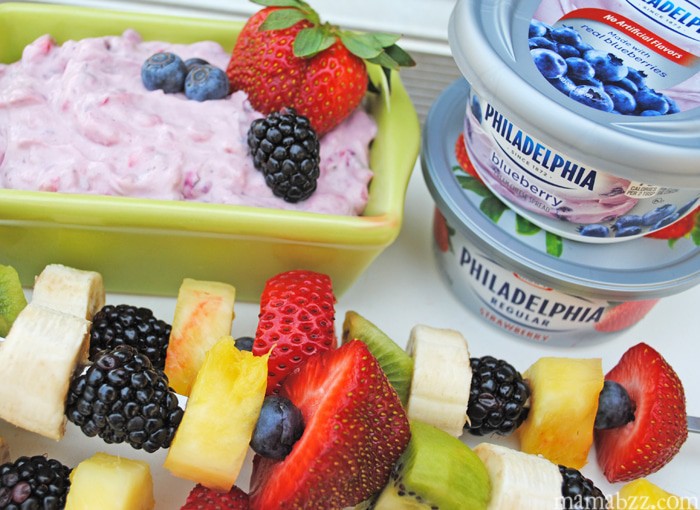

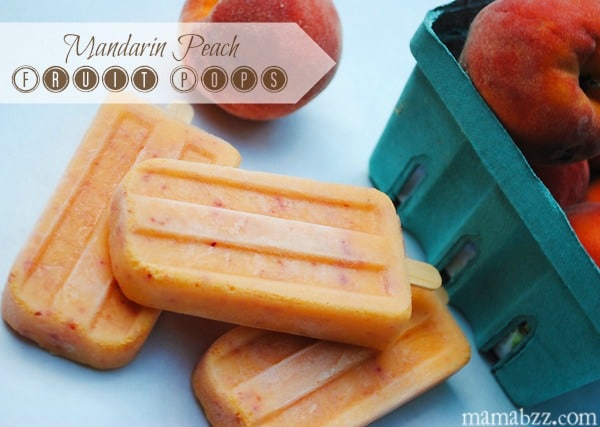
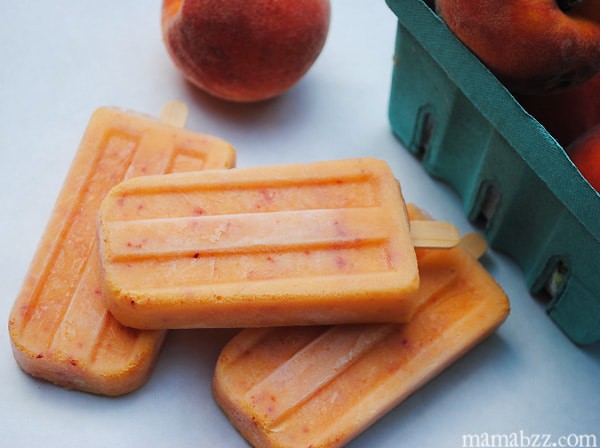
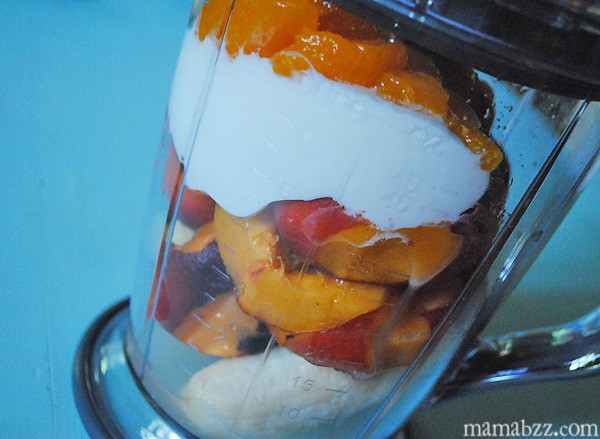 I added a banana, peaches, a fruit cup of mandarin oranges, about 1/2 cup of Greek Yogurt, and 1-2 tsp of sugar. I kept the peeling on the peaches, so we locked all those awesome nutrients into these ice pops. Blend everything together, making it into a nice liquidy mixture. Then pour into popsicle molds. I highly recommend
 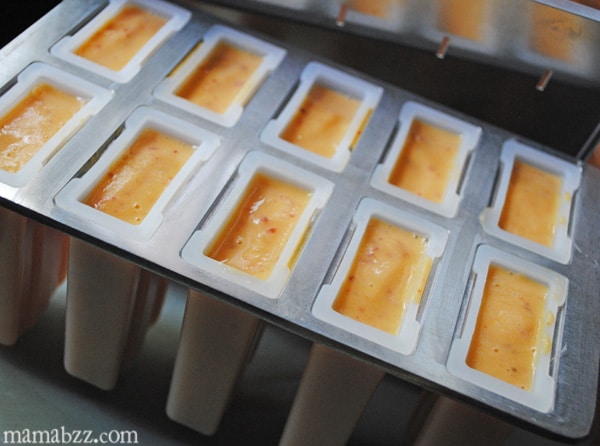 Set your popsicles in the freezer, and leave for however long they need, usually a few hours. Then remove pops from the freezer, and enjoy.
 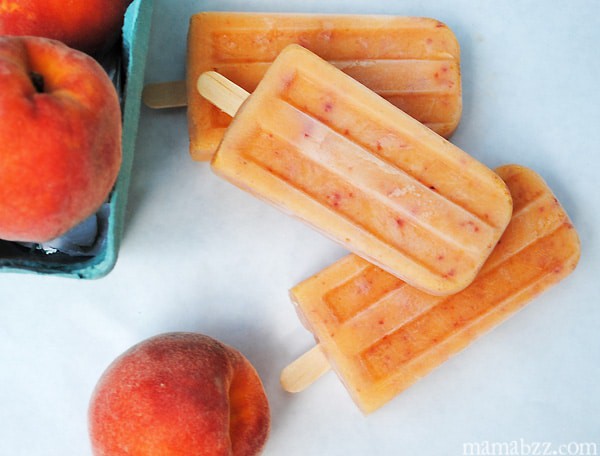 These have been delicious, and my kids are still enjoying them.
 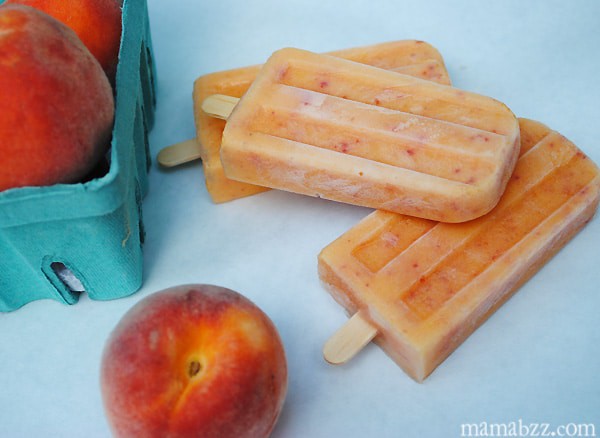 More recipes and experiments with homemade popsicles to come!