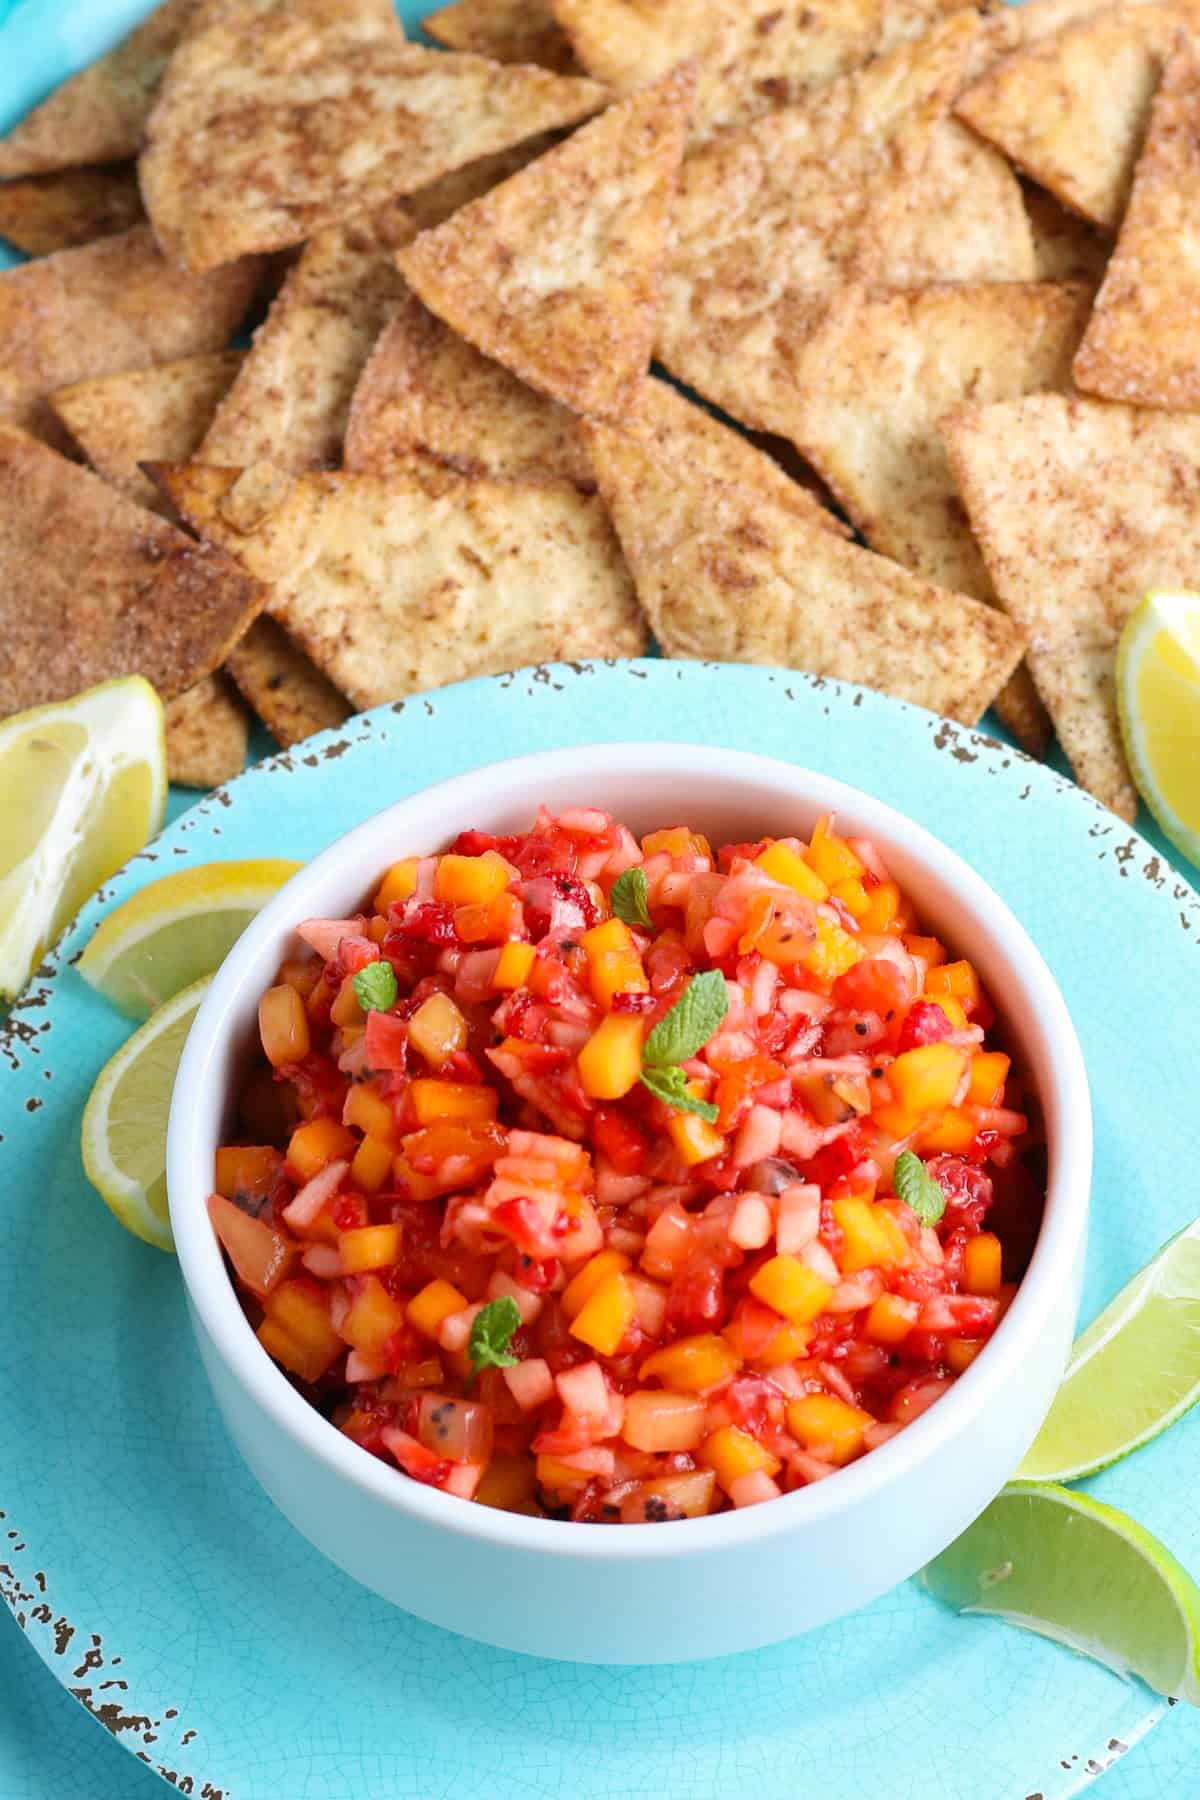
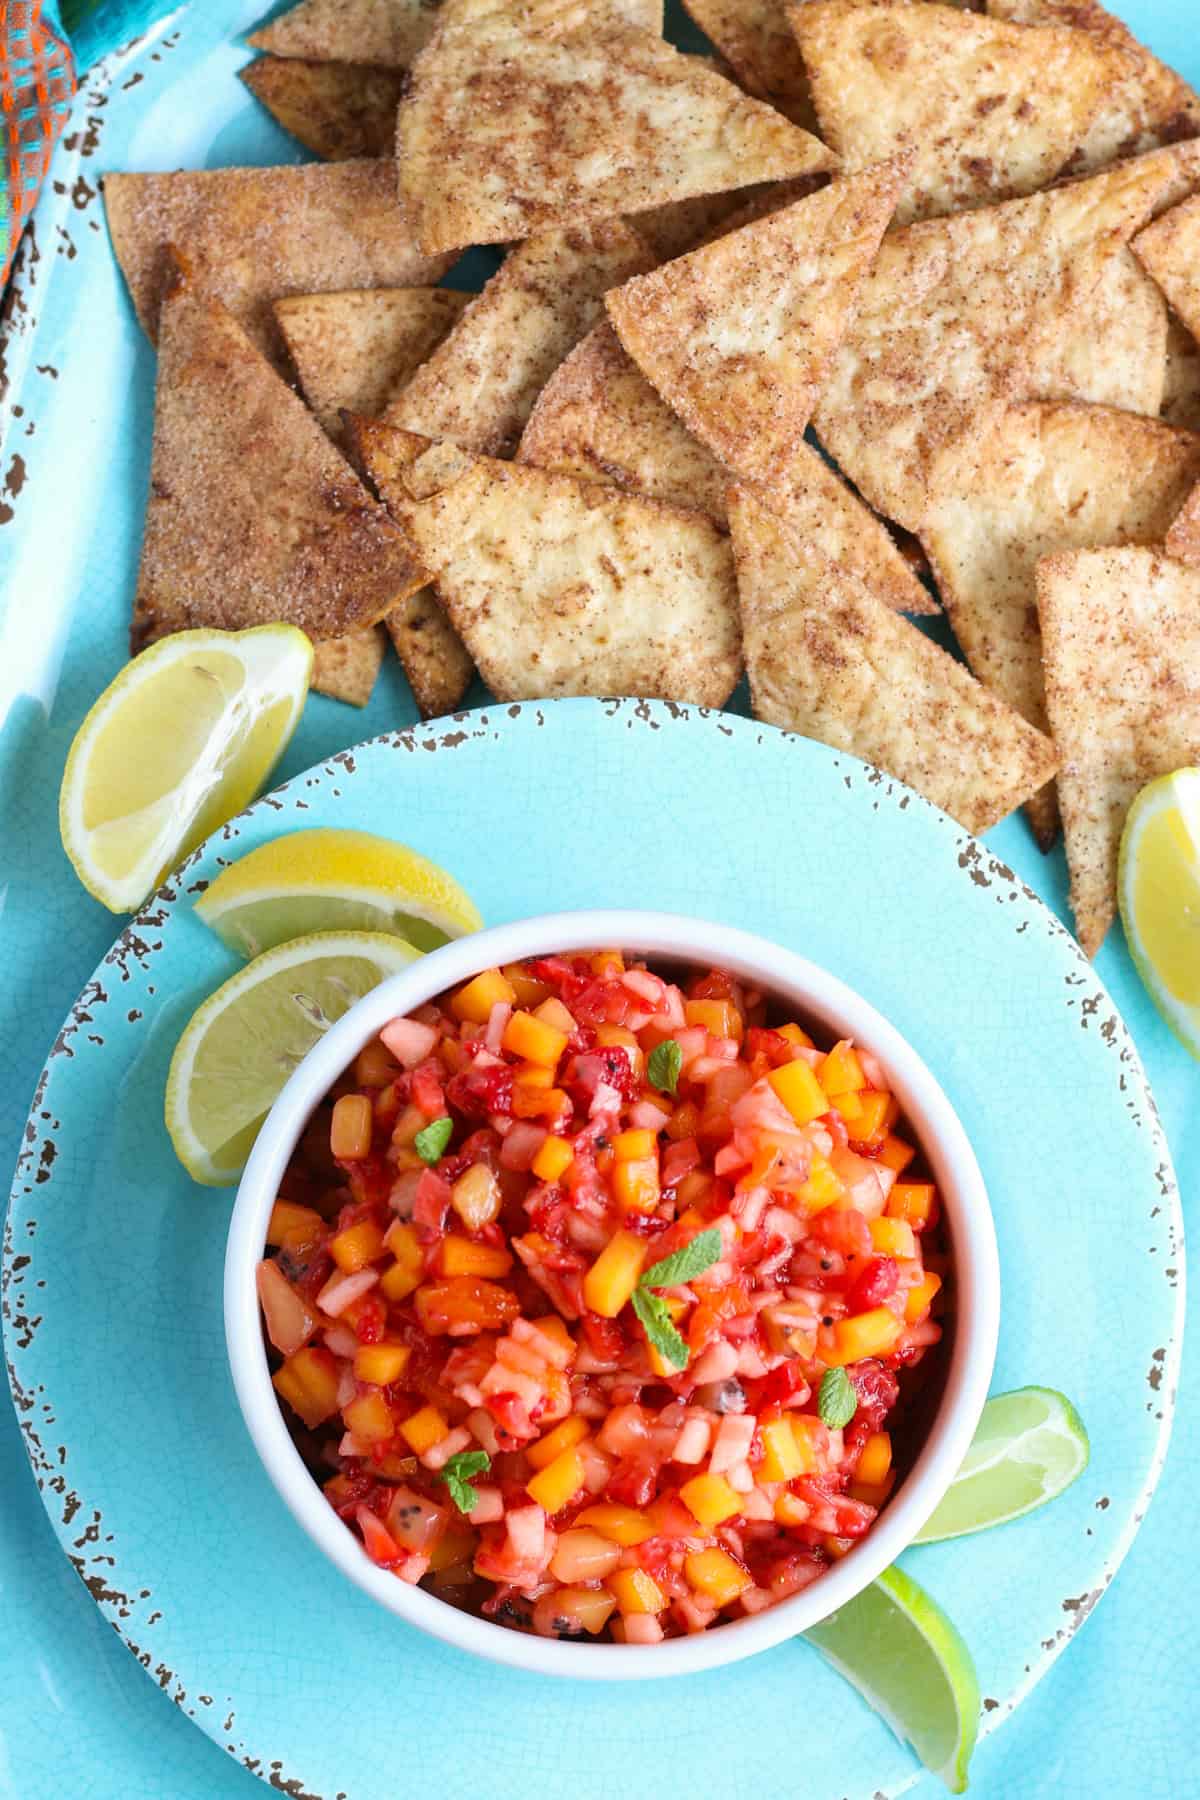
How to make sweet and delicious homemade fruit salsa with crispy cinnamon tortilla chips, juicy strawberries, mangos, kiwis, raspberries, apples and apricots. Simple and easy fresh fruit salsa recipe that makes a healthy snack or appetizer for summer picnics, parties and potlucks.
Summertime is almost upon us, which means I’m craving fresh salsa. Last year I made this mango peach salsa, and I liked it so much that I decided to try making my own fruit salsa recipe. I’m happy to report that this recipe has been a big hit with the whole family, including the kids!

This recipe can be served as more of a dessert with crispy cinnamon chips, or you can pair with all your favorite proteins and savory dishes. Fruit salsa is so easily customizable, and you can add or take away so many different fruits and herbs based on your own preferences. This recipe is packed full of essential vitamins and nutrients, and there’s no sugar. It makes a super healthy snack or side dish!
Ingredients & Substitutions Notes
In this recipe, I’ll show you how to make a deliciously sweet and juicy fruit salsa, and then we’ll make crispy cinnamon chips to go with it.
Fruit Salsa Recipe
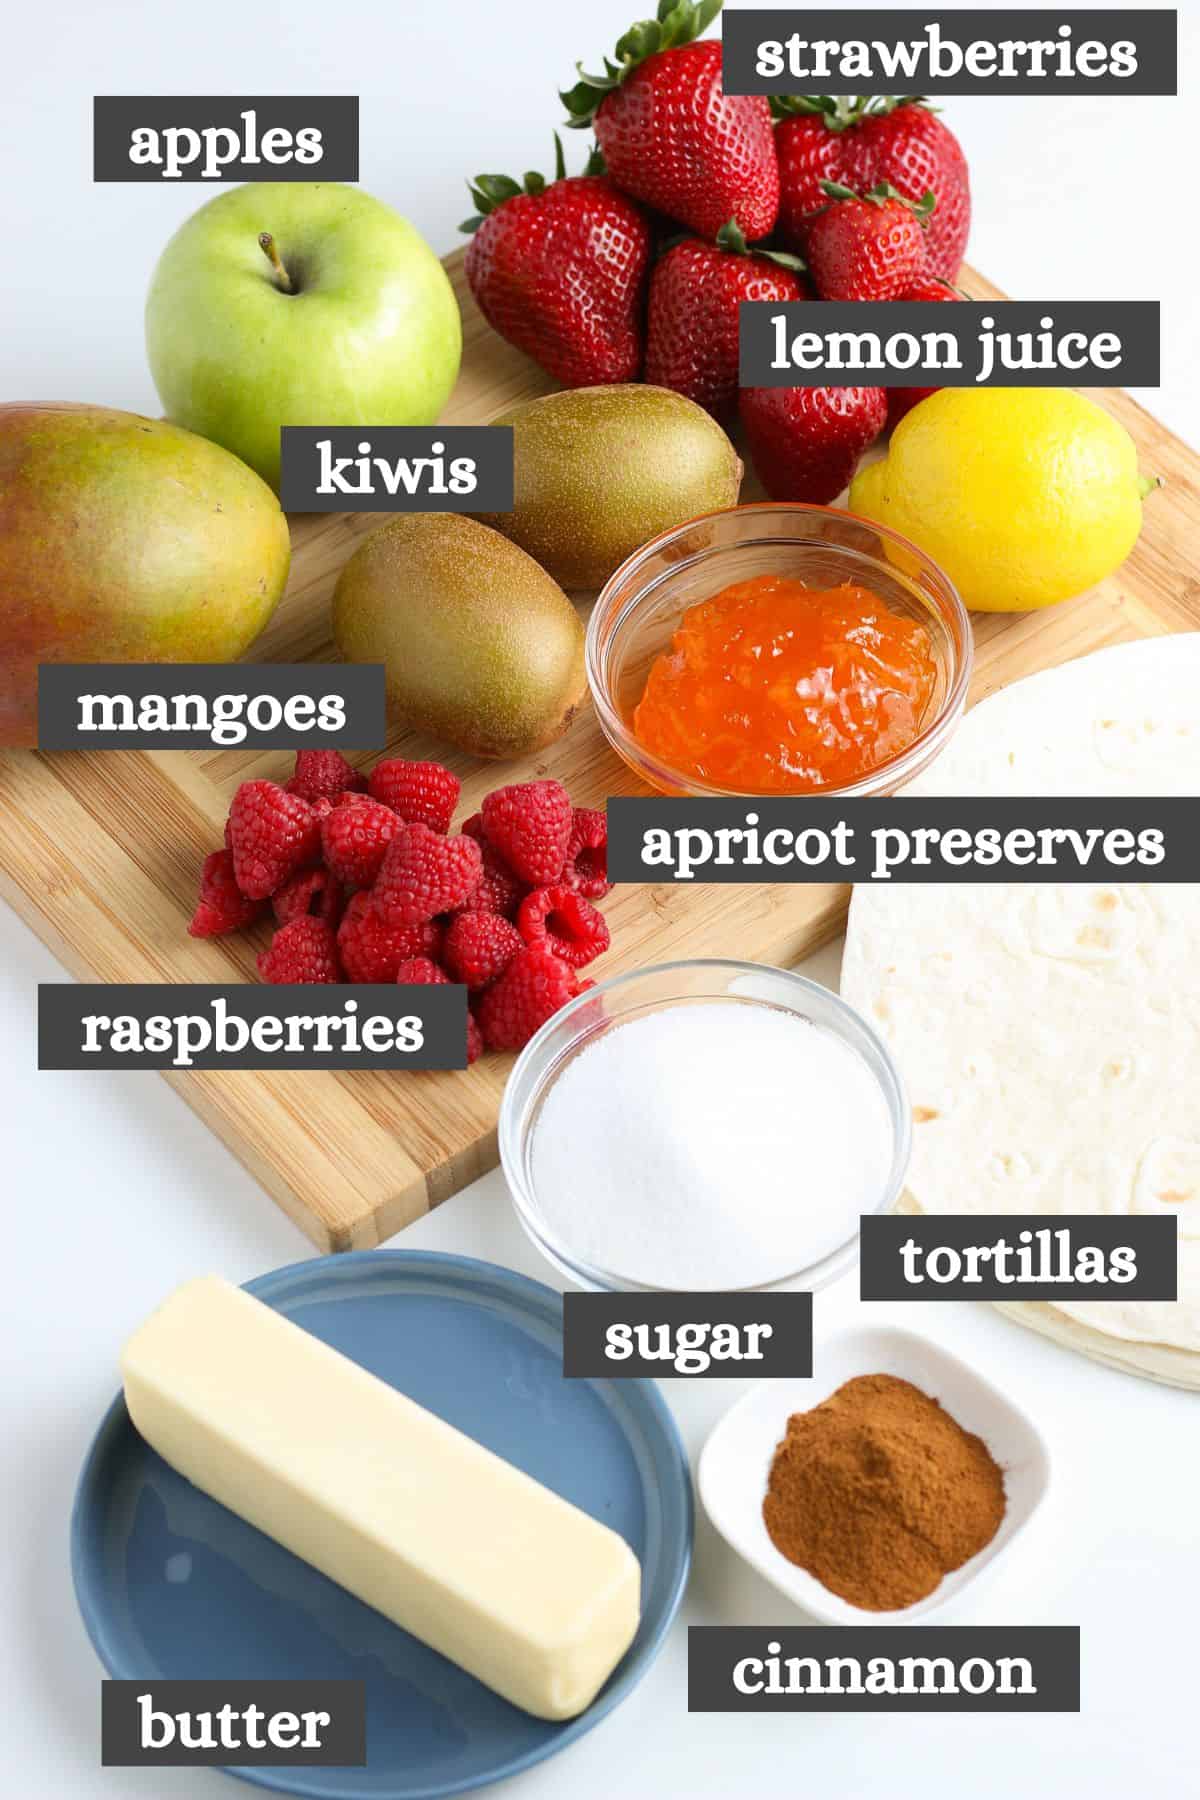
- Fruit – For this recipe, I used diced Granny Smith apples, diced mangoes, diced strawberries, peeled and diced kiwis, and halved raspberries. You can add or take away fruit based on your own preferences. For best flavor and keeping qualities, I recommend using fruit that is as fresh as possible, but you can use canned fruit in a pinch. Just don’t use frozen fruit to make fruit salsa, or else you’ll create a mushy, nasty mess!
- Lemon Juice – Fresh-squeezed lemon juice is always best, but for the sake of ease, I just use bottled lemon juice from the grocery store!
- Apricot Preserves – I always like to add a little bit of apricot preserves to balance out all the different flavors, and it also helps to keep your fruit salsa fresh for longer. If you don’t have apricot preserves on hand, use peach preserves or orange marmalade instead.
- Herbs – Fresh mint makes an appealing garnish for fruit salsa.
Crispy Cinnamon Chips
- Flour Tortillas – Flour tortillas are cheap, and they make the best cinnamon chips with fruit salsa.
- Butter – I prefer salted butter, but unsalted butter will work just fine if that’s all you have on hand.
- Cinnamon & Sugar – Of course, you’ll need cinnamon and cane sugar to make your cinnamon tortilla chips!
How to Make Fruit Salsa With Cinnamon Chips
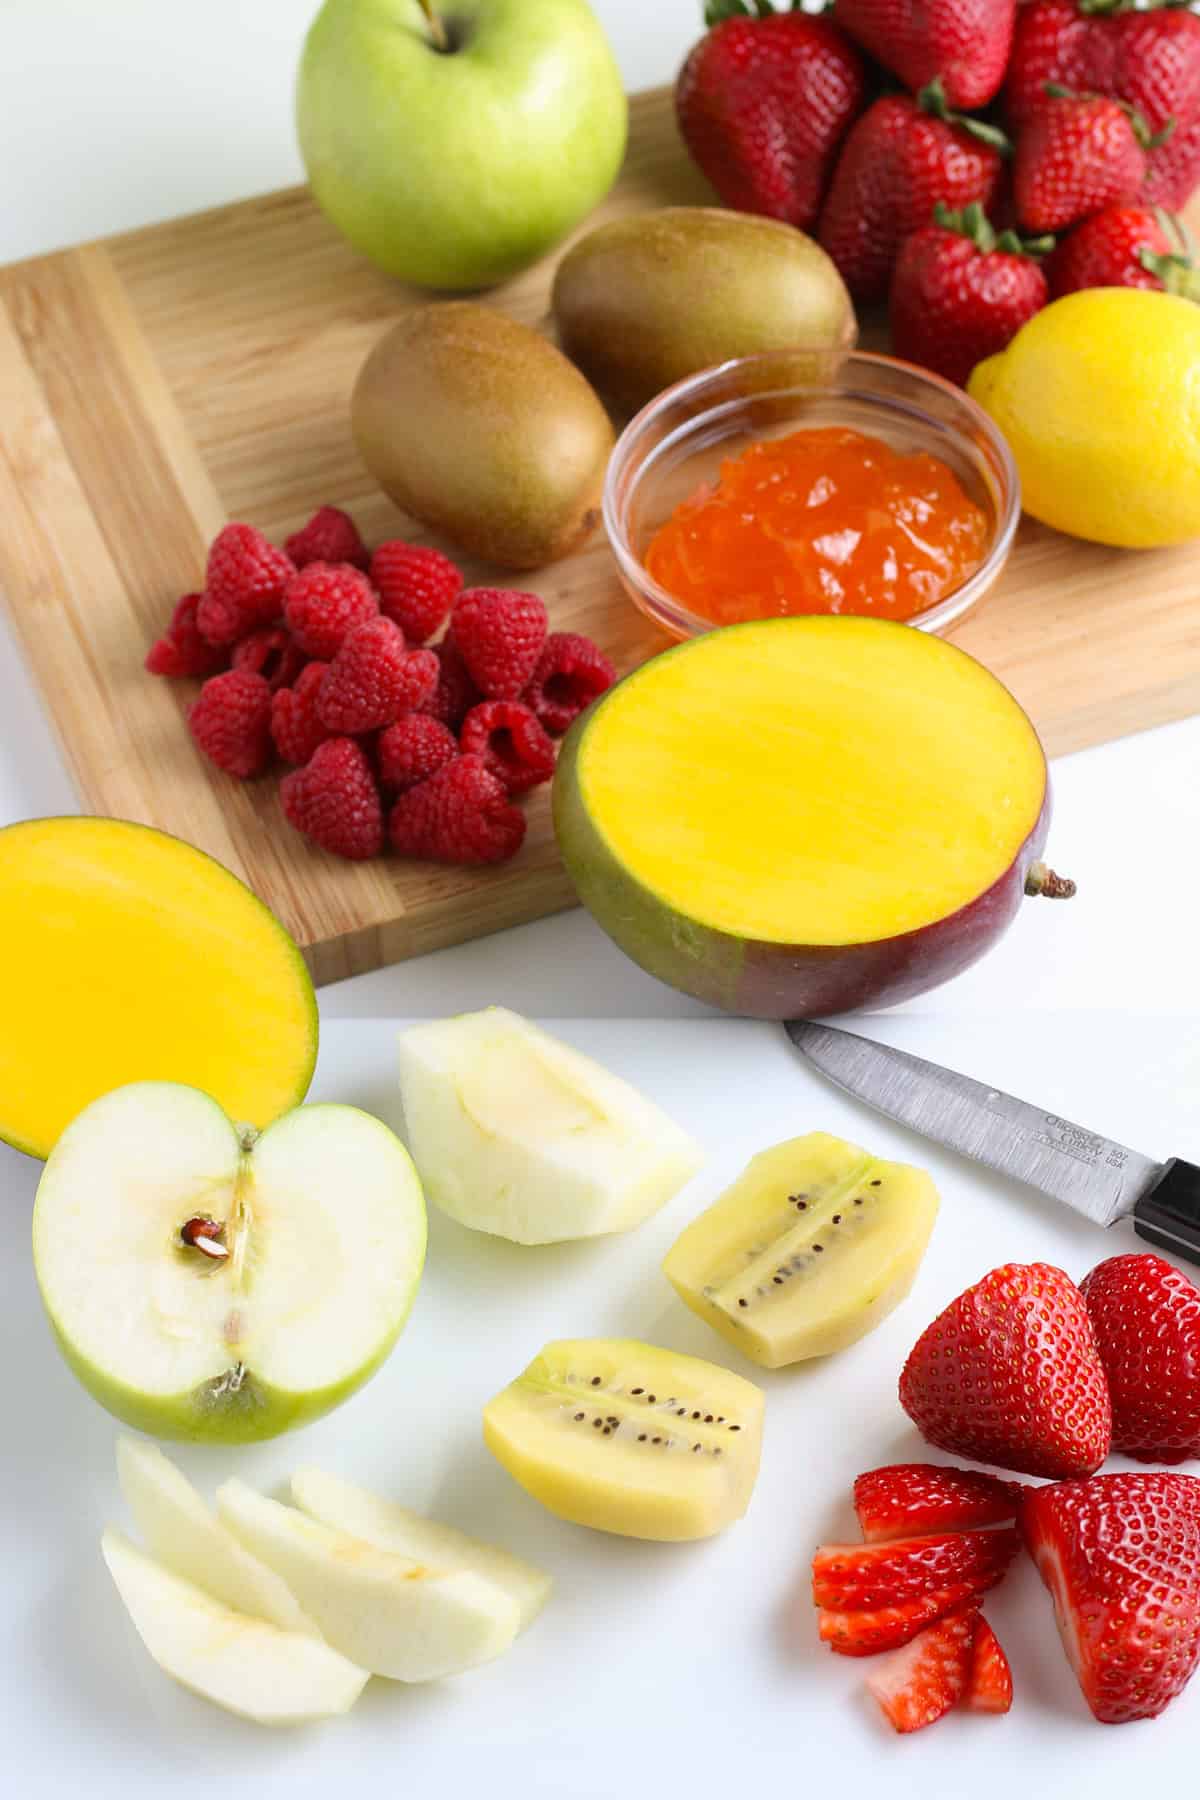
Before getting started, use a kitchen knife to dice up the apples, mangoes, strawberries and kiwis on a large cutting board. Then slice the raspberries into halves or quarters.
How to Make Fruit Salsa
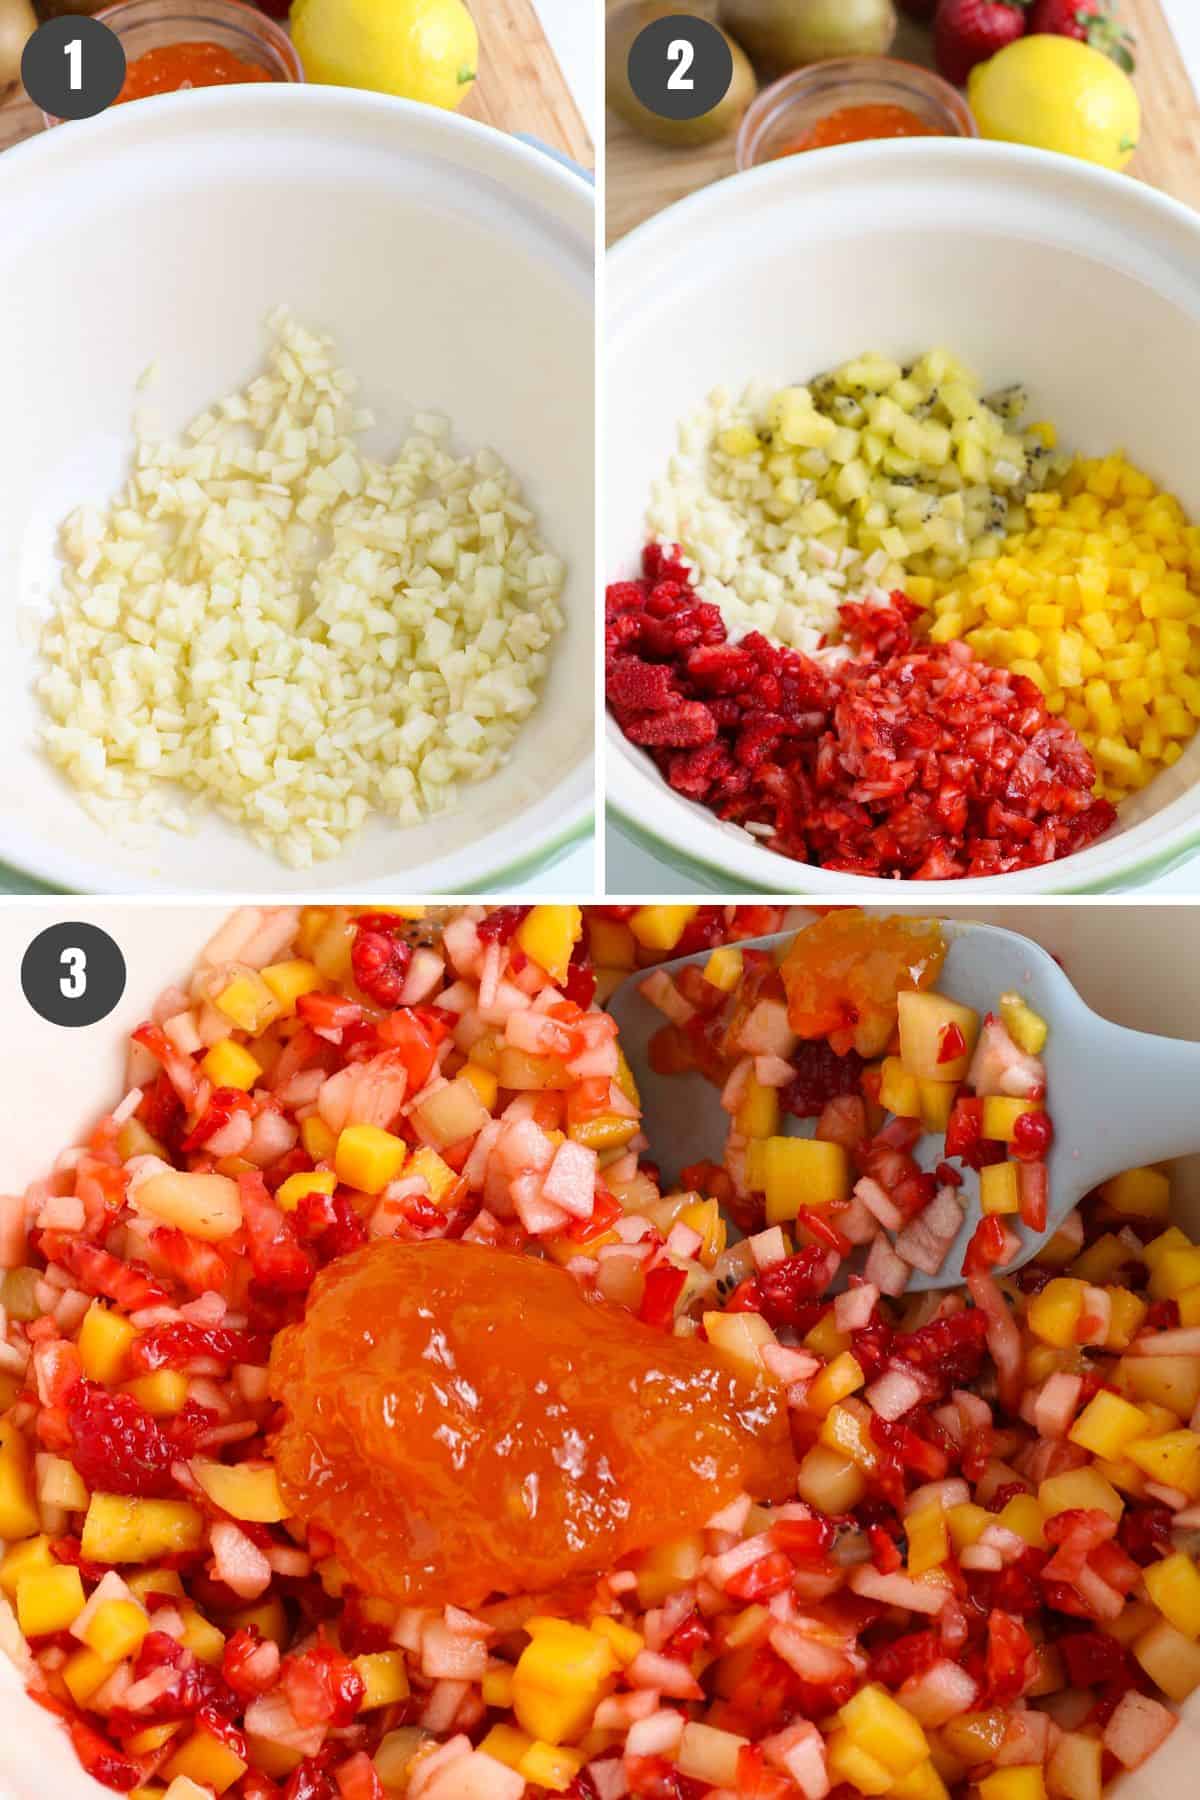
- Start by adding the diced apples and the lemon juice to a large mixing bowl, stirring to combine.
- Add all of the remaining fruit to the large bowl, stirring again ’til well combined.
- Next, add the apricot preserves, mixing everything together well.
Cover your salsa with plastic wrap or aluminum foil, and let it chill in the refrigerator for at least 15 minutes before serving. Now you’re ready to make homemade cinnamon crisps to go with it!
Crispy Cinnamon Chips Recipe
Before making your cinnamon chips, preheat the oven to 400ºF. Line a baking sheet with parchment paper or a reusable silicone baking mat instead.
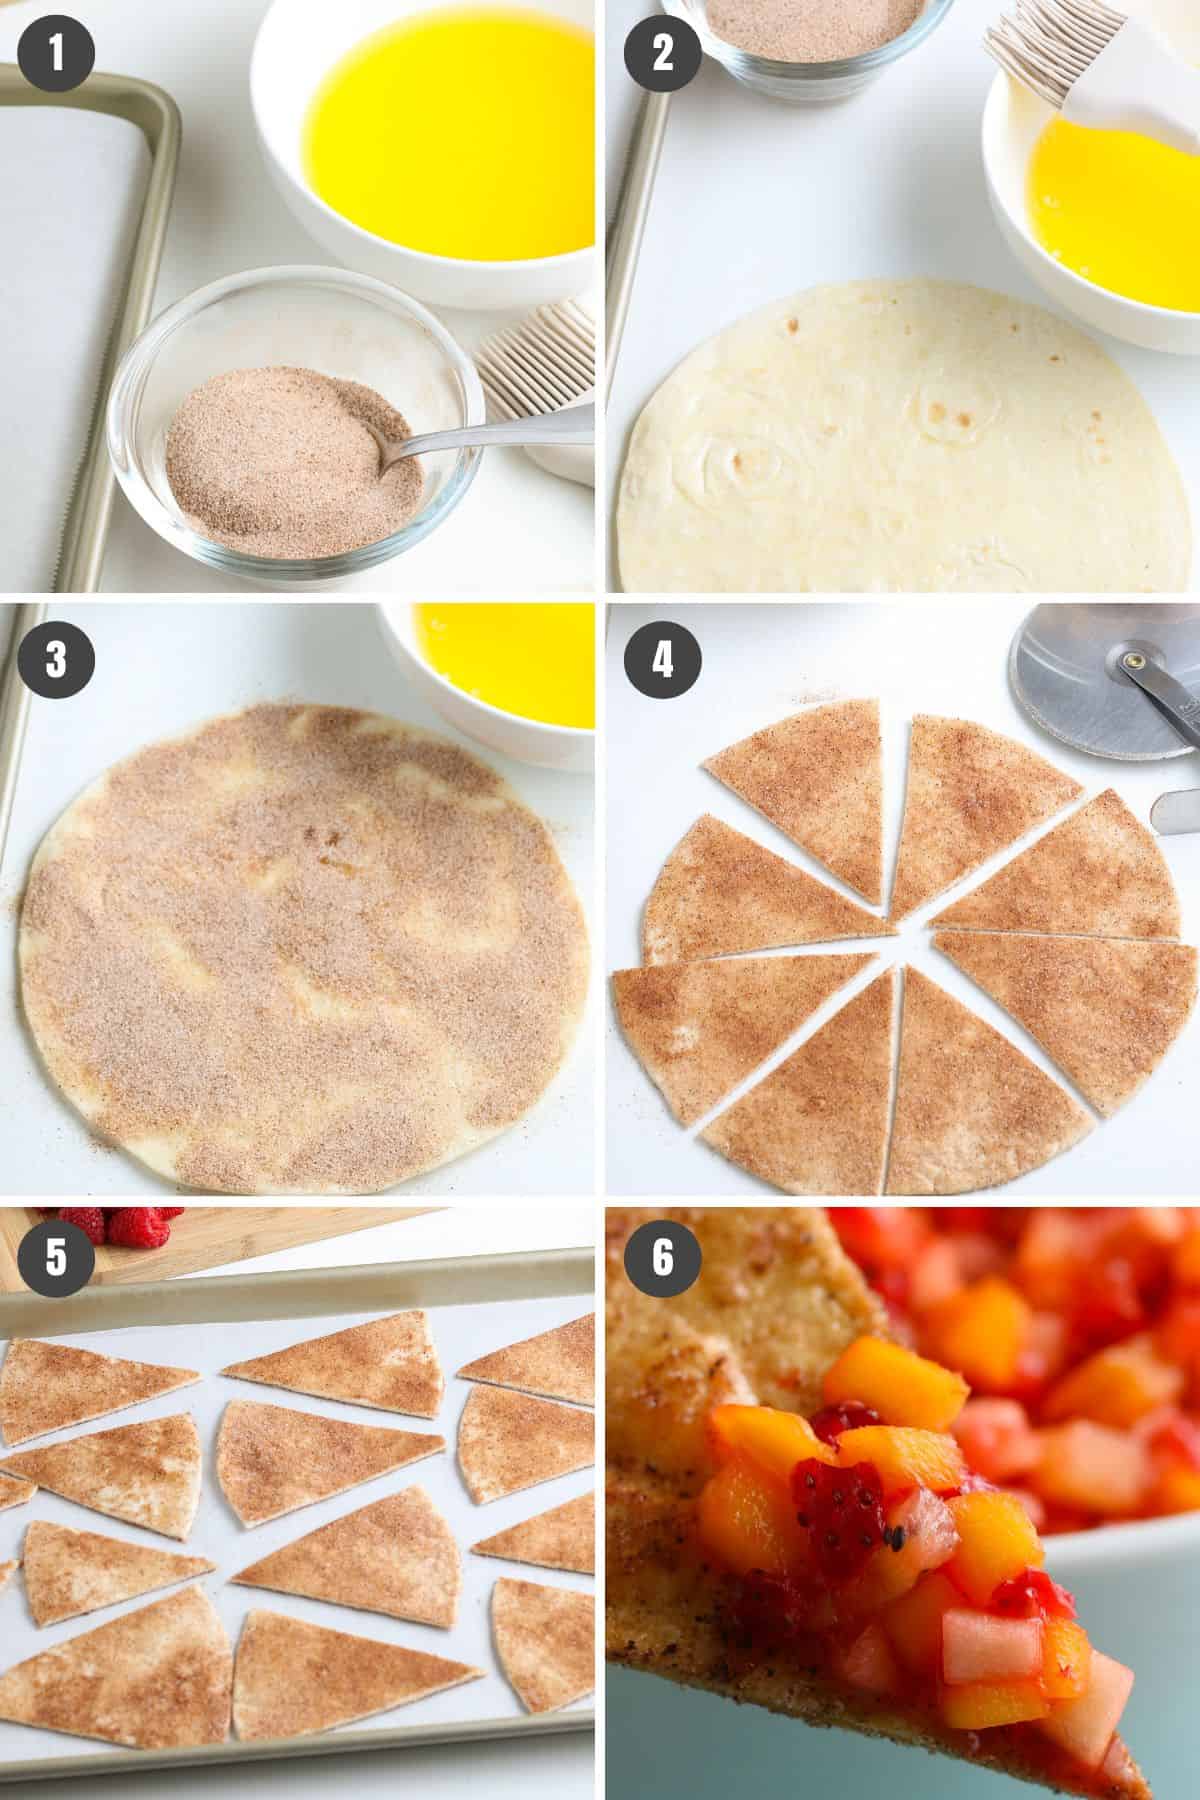
- First, use a fork to combine both the sugar and cinnamon together in a small mixing bowl.
- Melt butter in the microwave for about 30 seconds, or ’til completely melted. Then use a basting brush to brush it onto both sides of the tortillas.
- Sprinkle the buttered tortillas with the cinnamon and sugar mixture that you mixed up in the first step.
- Use a pizza cutter or large knife to cut the cinnamon tortilla chips into triangles.
- Place each cinnamon crisp onto a large baking sheet, and bake them at 400ºF for 3-4 minutes. Flip each chip, and let them continue to bake for another 3-4 minutes, or ’til golden brown.
- Serve and enjoy with your new favorite salsa recipe!
What to Serve With Fruit Salsa
Not sure what to serve with your homemade fruit salsa? Here are a few ideas…
- You can pair fruit salsa with any protein, including baked chicken legs, garlic parmesan chicken skewers, pork tenderloin and pork chops.
- Fruit salsa also goes great with seafood! I’m thinking fried crappie, Instant Pot salmon, grilled fish fillets and shrimp kabobs.
- We make tacos and loaded nachos almost every week, and I always put a little salsa on mine. These shredded chicken tacos are my favorite, but you can also make fish tacos. And don’t forget about chicken fajitas!
- Serve your fruit salsa on a bed of creamy chicken enchiladas or chicken quesadillas. Your options are endless.
Expert Tips and Recipe FAQ’s
Yes, all of the ingredients in this recipe are naturally gluten free. That said, I always recommend checking your ingredient labels over to ensure that they are truly gluten free.
Fruit salsa is best eaten fresh, but thanks to the lemon juice and apricot preserves, you can store this recipe in an airtight container in the refrigerator for up to 3 days before it will start to go bad.
Personally, I always just make this recipe fresh since it’s so quick and easy. You may can your own fruit salsa, but I would recommend using a tested canning recipe. There are lots of salsa recipes for canning out there to use. That said, you can most definitely freeze this recipe instead!
Yes, you can freeze any salsa. Store leftovers in an airtight container or freezer bag in the freezer for up to 2 months. Let thaw out in the refrigerator overnight before you’re ready to eat.
Recipe Variations
- This recipe makes a sweet fruit salsa, but if you like a spicy fruit salsa, try adding some jalapeños, habaneros, poblano peppers or cayenne pepper. Although they’re not really spicy, you can also add bell peppers.
- If you like onions, give diced sweet onions or just regular onions (for a little bit of kick) a try.
- Add more fruit! Think peaches, blueberries, pineapples, watermelon, cantaloupe, bananas or grapes.
- You can also add other herbs, like basil, cilantro, lavender and thyme.
If you try this recipe, why not leave a star rating in the recipe card right below and/or a review in the comment section further down the page? I always appreciate your feedback. You can also follow me on Pinterest, Facebook, Instagram, and YouTube. And subscribe to my email list too!
Fruit Salsa

Make sweet and delicious fruit salsa with cinnamon chips. Simple & easy fresh fruit salsa recipe that makes a healthy snack or appetizer!
- Kitchen Knife
- Cutting Board
- Large Mixing Bowl
- Plastic Wrap
- Baking Sheet
- Parchment Paper
- Small Mixing Bowl
- Pizza Cutter
Fruit Salsa
- 2 Granny Smith Apples (diced)
- 2 tablespoons Lemon Juice
- 1 Large Mango (diced)
- 1 cup Strawberries (diced)
- 2 Kiwis (peeled and diced)
- 1/2 cup Raspberries (halved)
- 1/4 cup Apricot Preserves
- Mint (for garnish)
Cinnamon Chips
- 5 Flour Tortillas
- 1/2 cup Salted Butter
- 4 tablespoons Cane Sugar
- 2 teaspoons Ground Cinnamon
How to Make Fruit Salsa
Before getting started, use a kitchen knife to dice up the apples, mangoes, strawberries and kiwis on a large cutting board. Then slice the raspberries into halves or quarters.
Add the diced apples and the lemon juice to a large mixing bowl, stirring to combine.
Add all of the remaining fruit to the large bowl, stirring again 'til well combined.
Next, add the apricot preserves, mixing everything together well.
Cover your fruit salsa with plastic wrap or aluminum foil, and let it chill in the refrigerator for at least 15 minutes before serving. Now you're ready to make homemade cinnamon crisps to go with it!
Crispy Cinnamon Chips Recipe
Before making your cinnamon chips, preheat the oven to 400ºF. Line a baking sheet with parchment paper.
First, use a fork to combine both the sugar and cinnamon together in a small mixing bowl.
Melt butter in the microwave for about 30 seconds, or 'til completely melted. Then using a basting brush to brush it onto both sides of the tortillas.
Sprinkle the buttered tortillas with the cinnamon and sugar mixture that you mixed up in the first step.
Use a pizza cutter or large knife to cut the cinnamon tortilla chips into triangles.
Place each cinnamon crisp onto a large baking sheet, and bake at 400ºF for 3-4 minutes. Flip each chip, and let them continue to bake for another 3-4 minutes, or 'til golden brown.
That's it! Serve and enjoy with your new favorite fruit salsa recipe.
How do you store fruit salsa?
You can store this recipe in an airtight container in the refrigerator for up to 3 days before it will start to bad.