Category: Main Dishes

  • Oven Roasted Pork Roast Recipe

    Oven Roasted Pork Roast Recipe

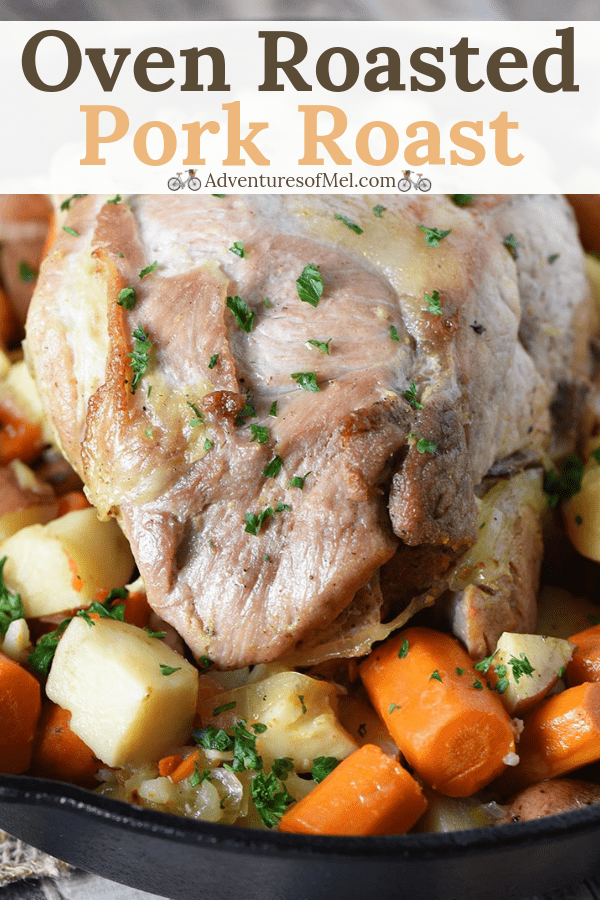
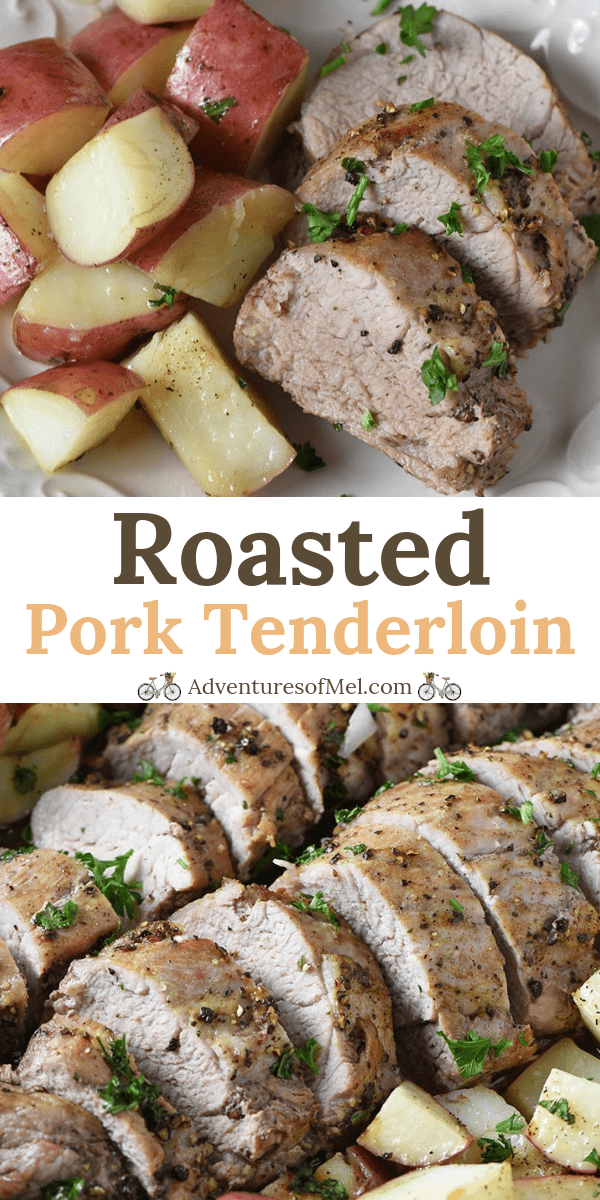
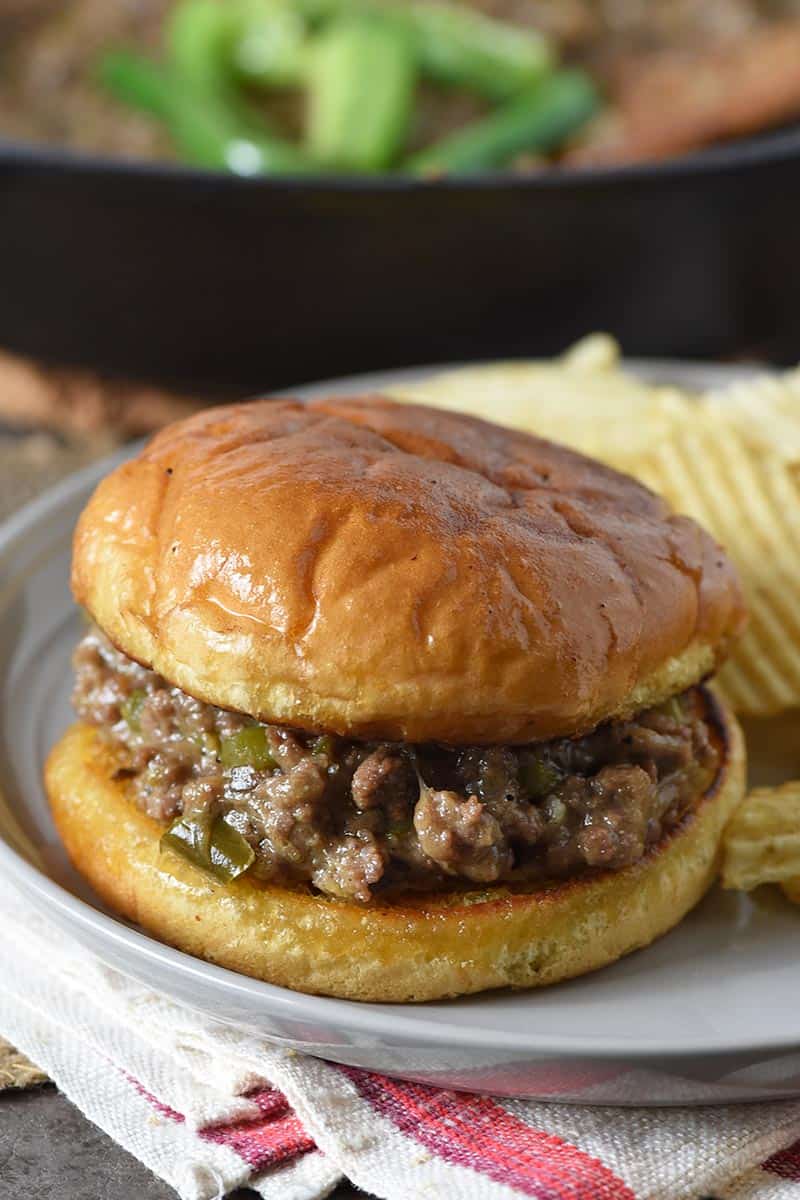
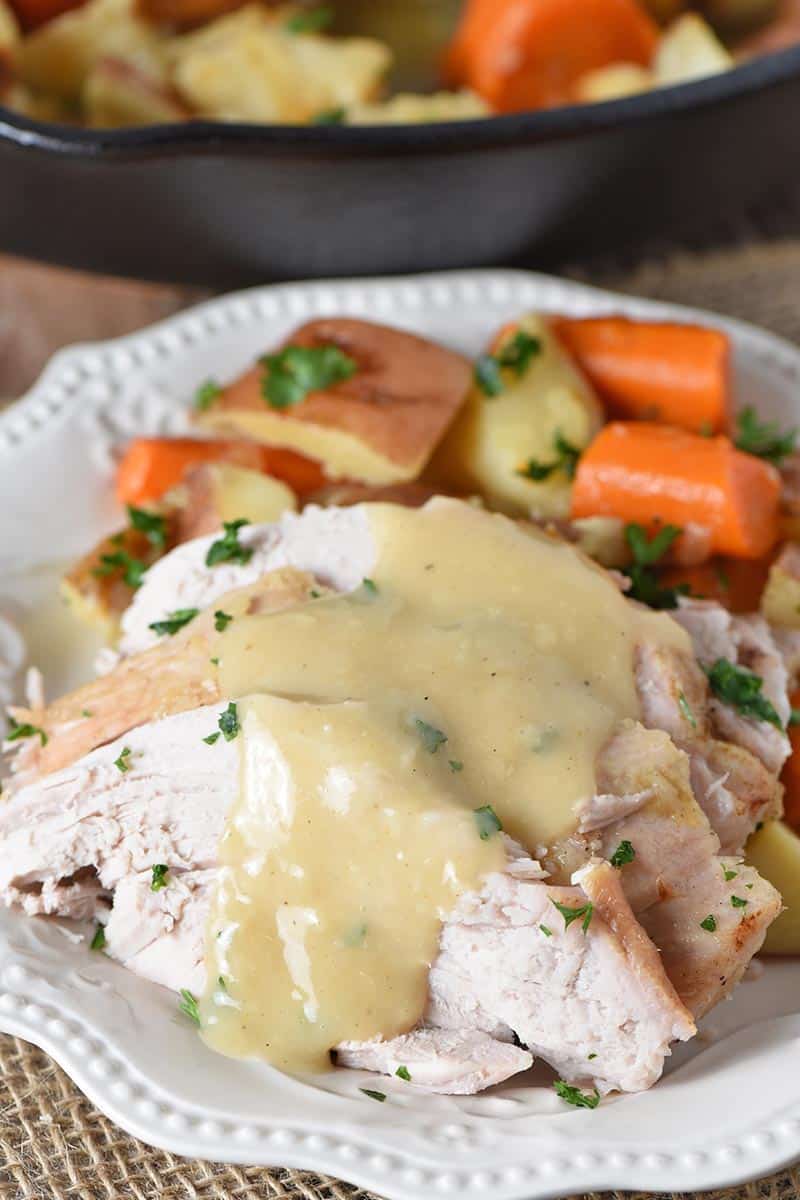
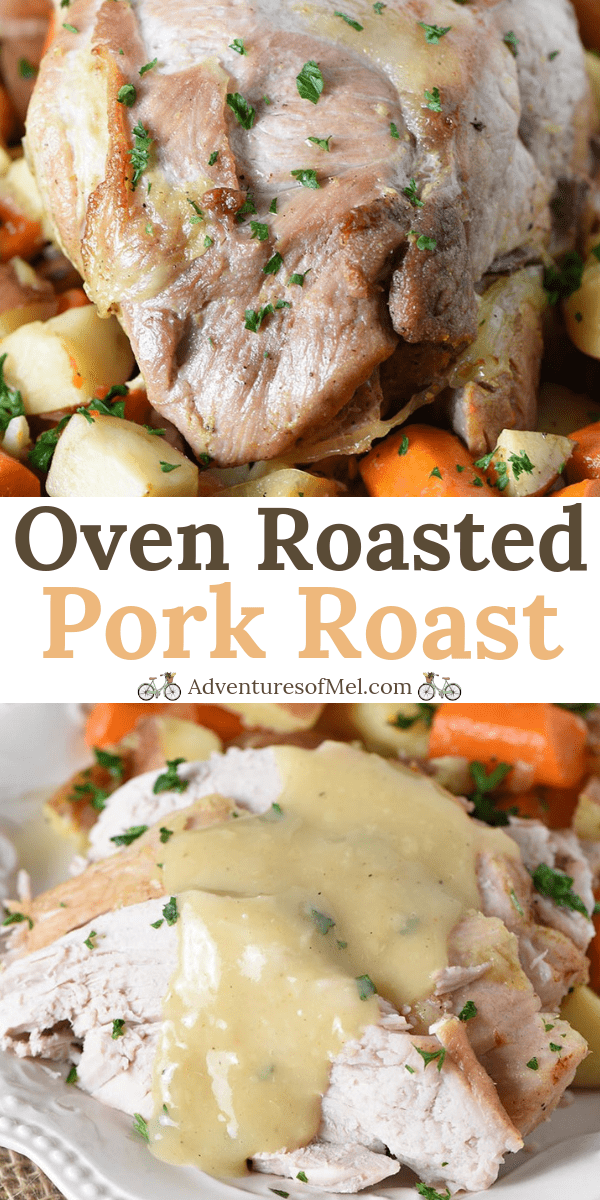
    Pork Roast Recipe – Deliciously easy pork roast recipe with vegetables and gravy, perfect for dinner tonight. How to cook a pork roast with simple seasoning in the oven.

    pork roast in oven with potatoes and carrots in a cast iron pan

    My house is full of meat eaters. They love their meat, so I try to occasionally add a roast to our weekly menu, or baked chicken drumsticks.

    A good pork roast recipe can stretch to more than just one meal, especially if you’re careful about portion sizes. That means leftover pork for the win when it comes to more dinnertime meals (or leftovers for lunch).

    Not only that, but a pork roast with vegetables can mean a one pot meal. I love cooking pork roast in the Crock Pot because it’s an easy meal I can set and forget.

    It’s also delicious with a good side of mashed potatoes or green beans or even a colorful salad. I’ll also share with you how to make a simple gravy to go with your roast.

    Did you know pork roast is a traditional Easter food for many families?

    pork roast with vegetables and gravy on white plate

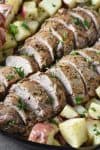
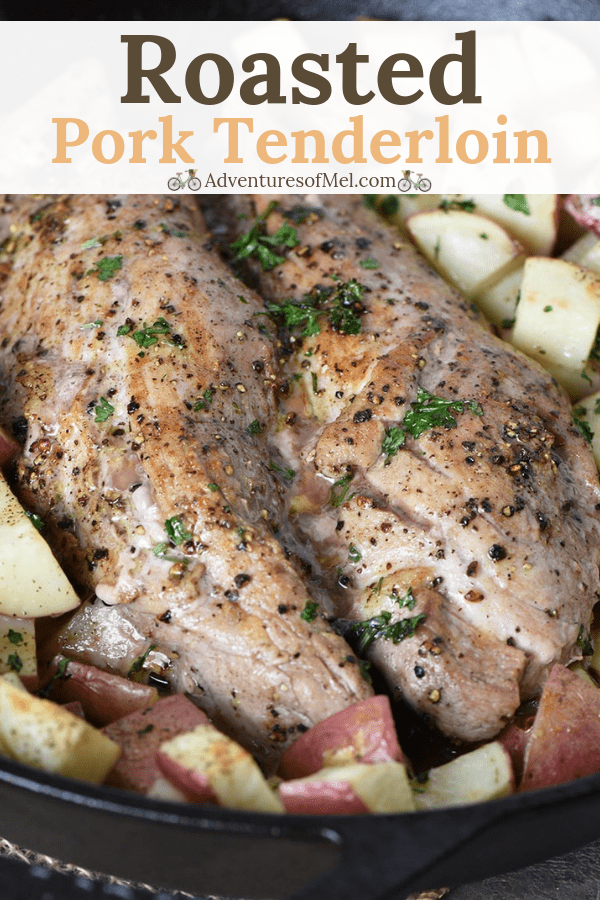
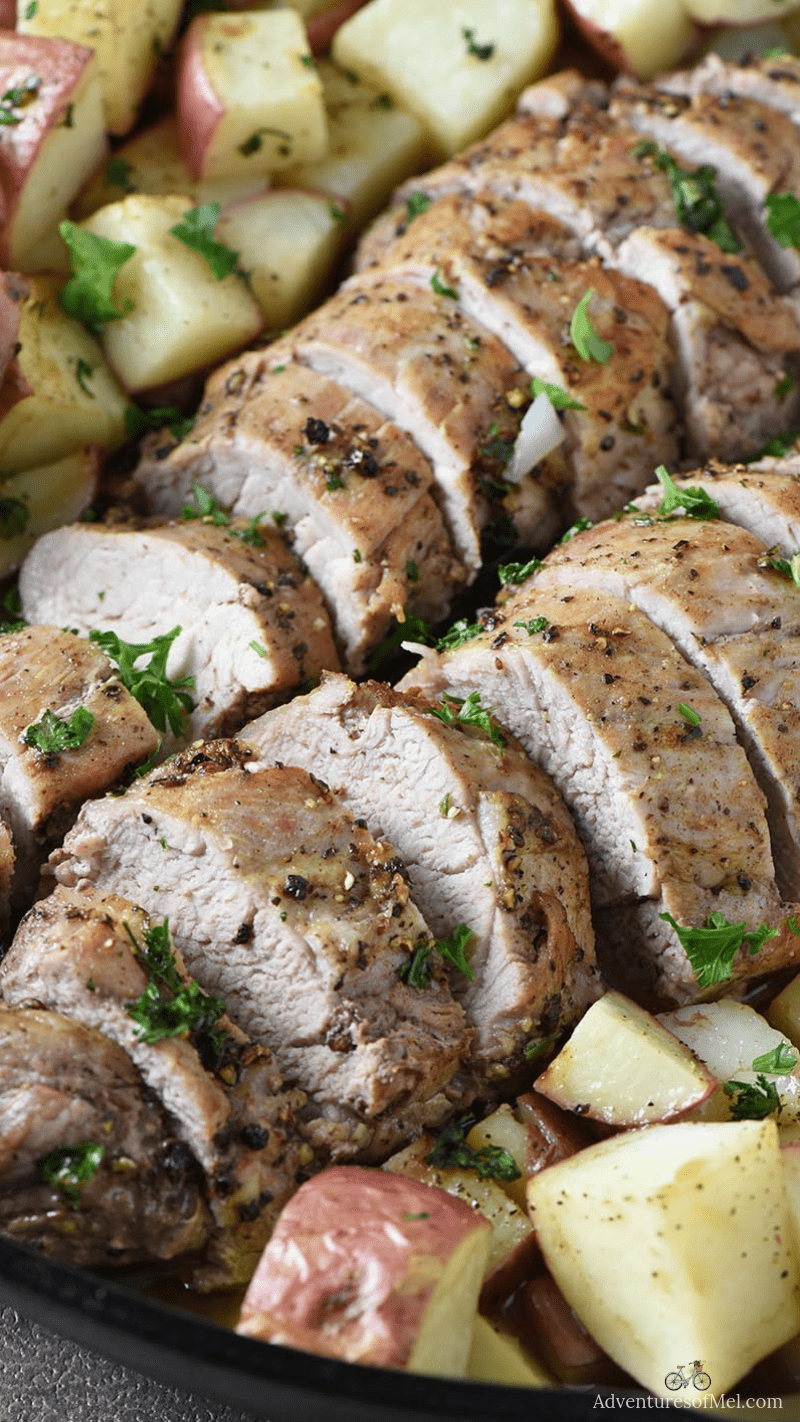
    If you love this pork roast in oven, you may also enjoy our recipes for roasted pork tenderloin and maple pork chops with apples and onions.

    WHERE CAN I FIND THE RECIPE FOR PORK ROAST?

    If you’d rather skip all of my cooking tips, important cooking info for this recipe, and similar recipe ideas – and get straight to the pork roast recipe – just scroll down to the bottom, where you’ll find a printable recipe card.

    TIPS FOR HOW TO COOK A PORK ROAST

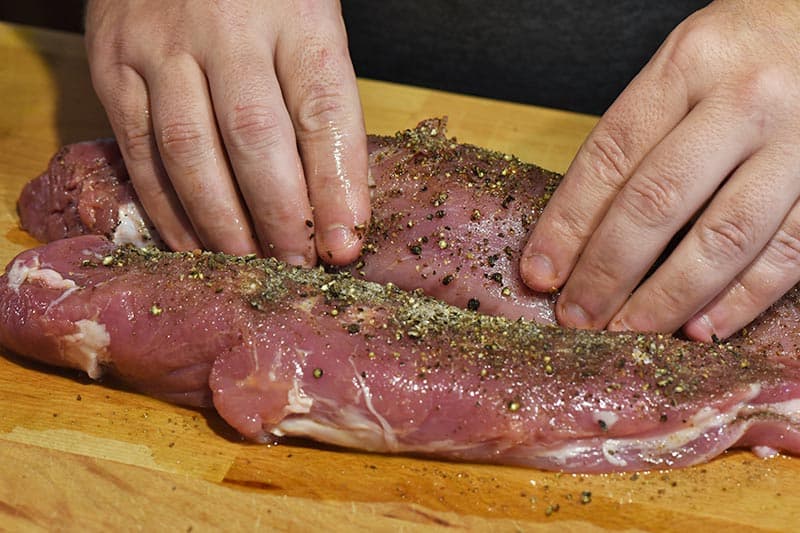
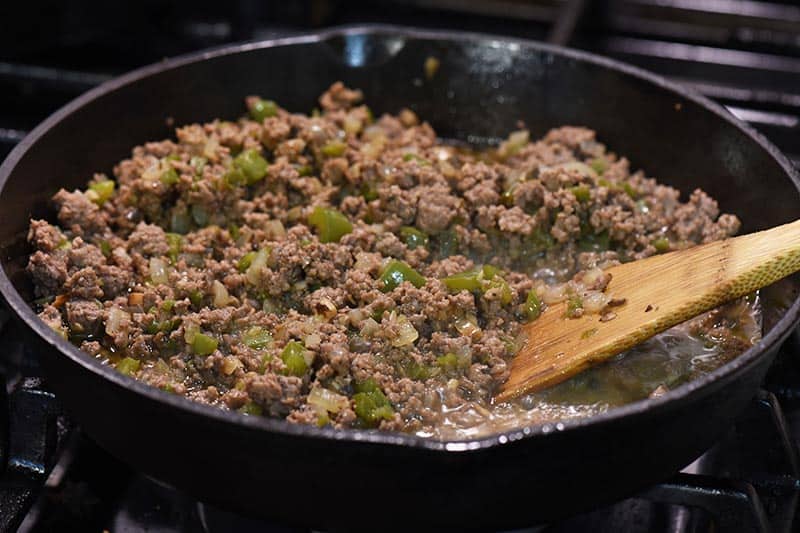
    This recipe is pretty simple. I use chicken broth, a yellow onion, and garlic for simple seasoning and flavoring.

    searing pork roast in blue Dutch oven on stovetop
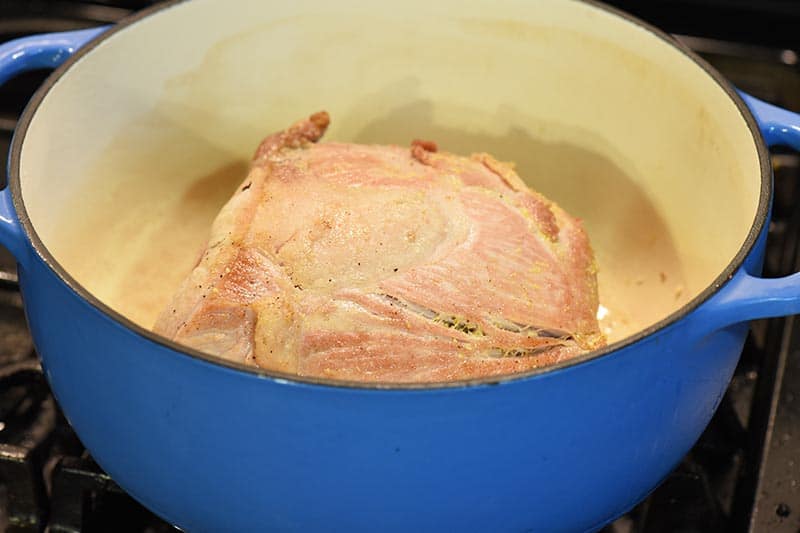
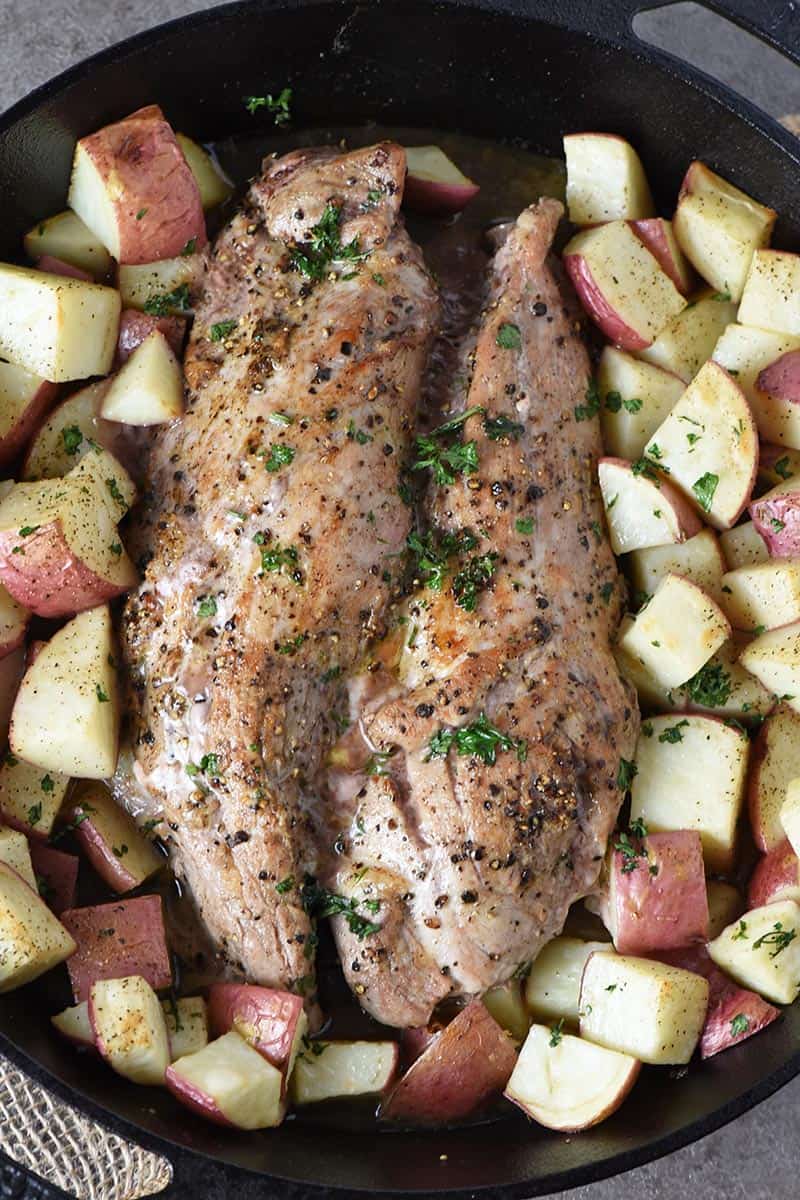
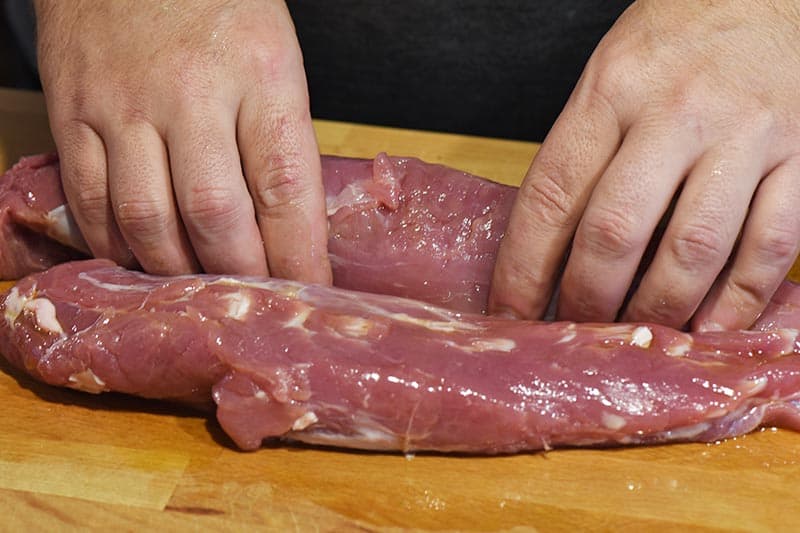
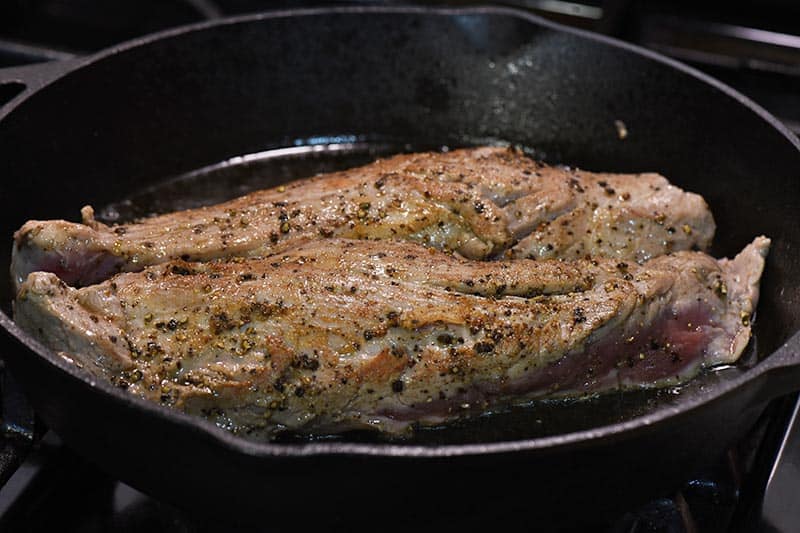
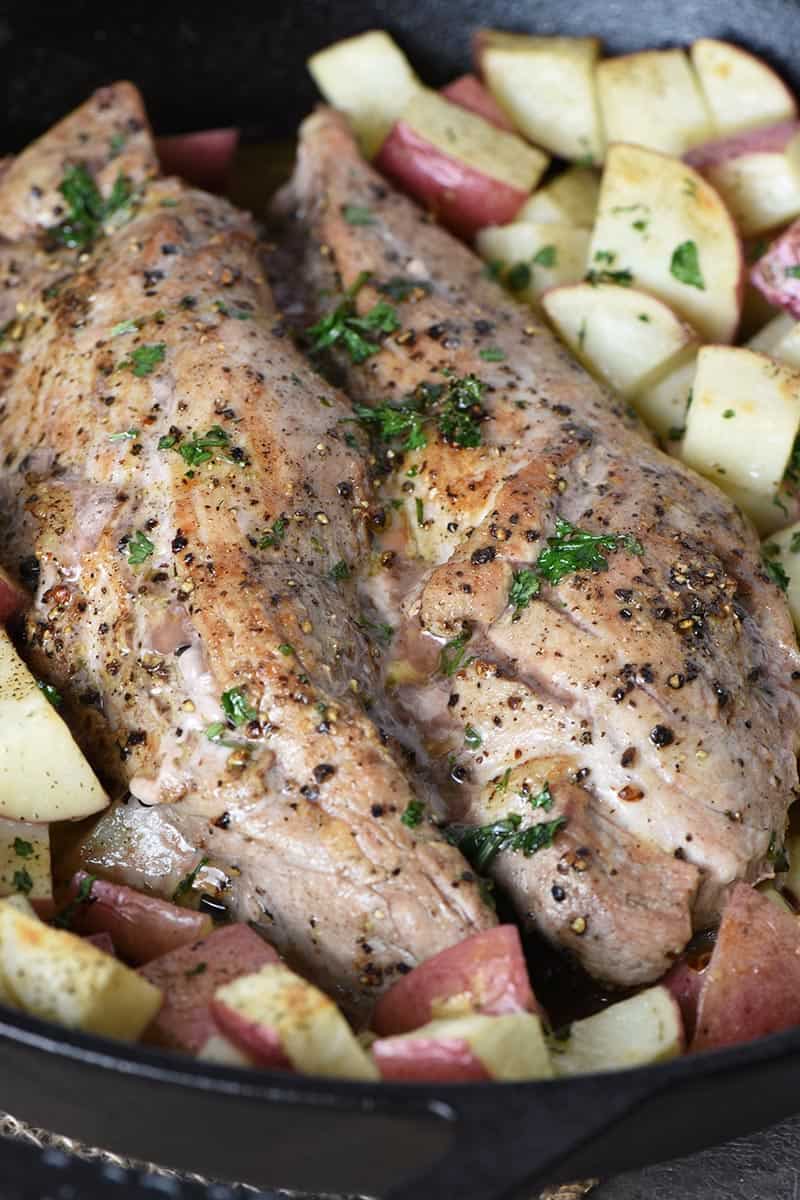
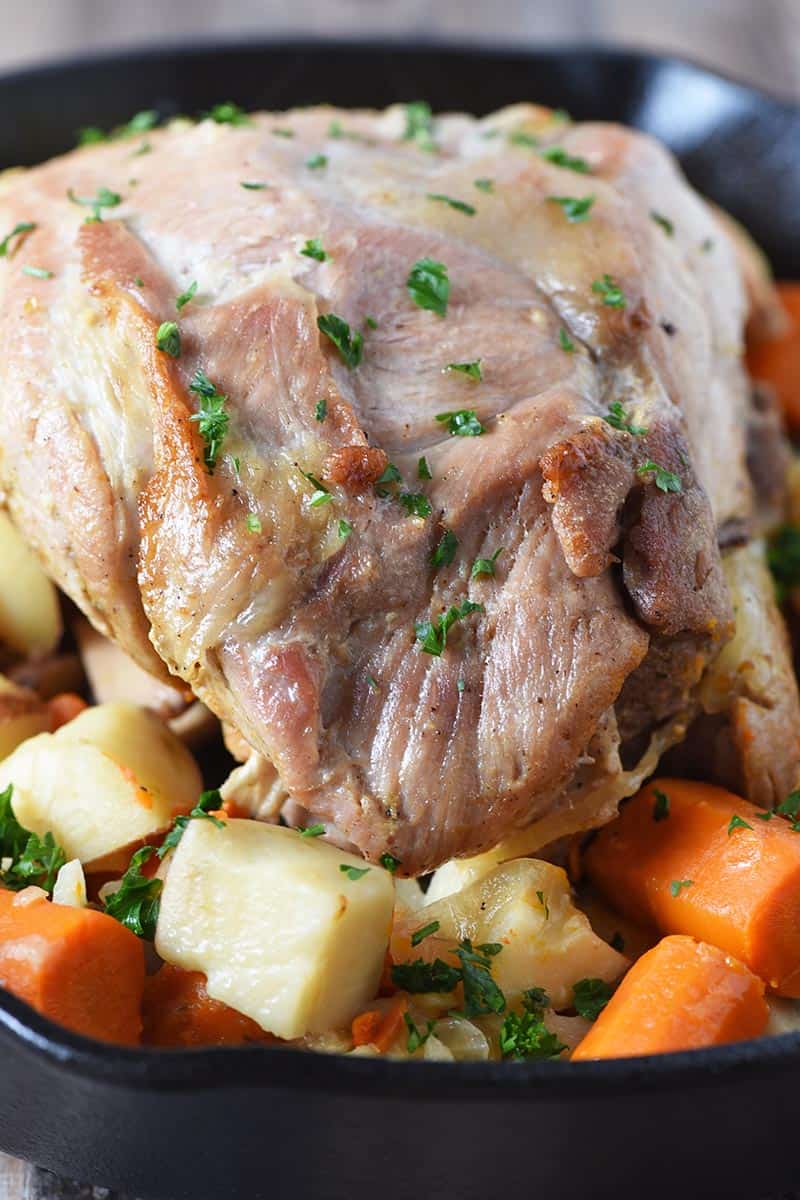
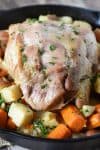
    • Your first step is to sear the roast in a Dutch oven. You want to brown all sides of your roast, and this usually takes about 10 minutes or so to do.
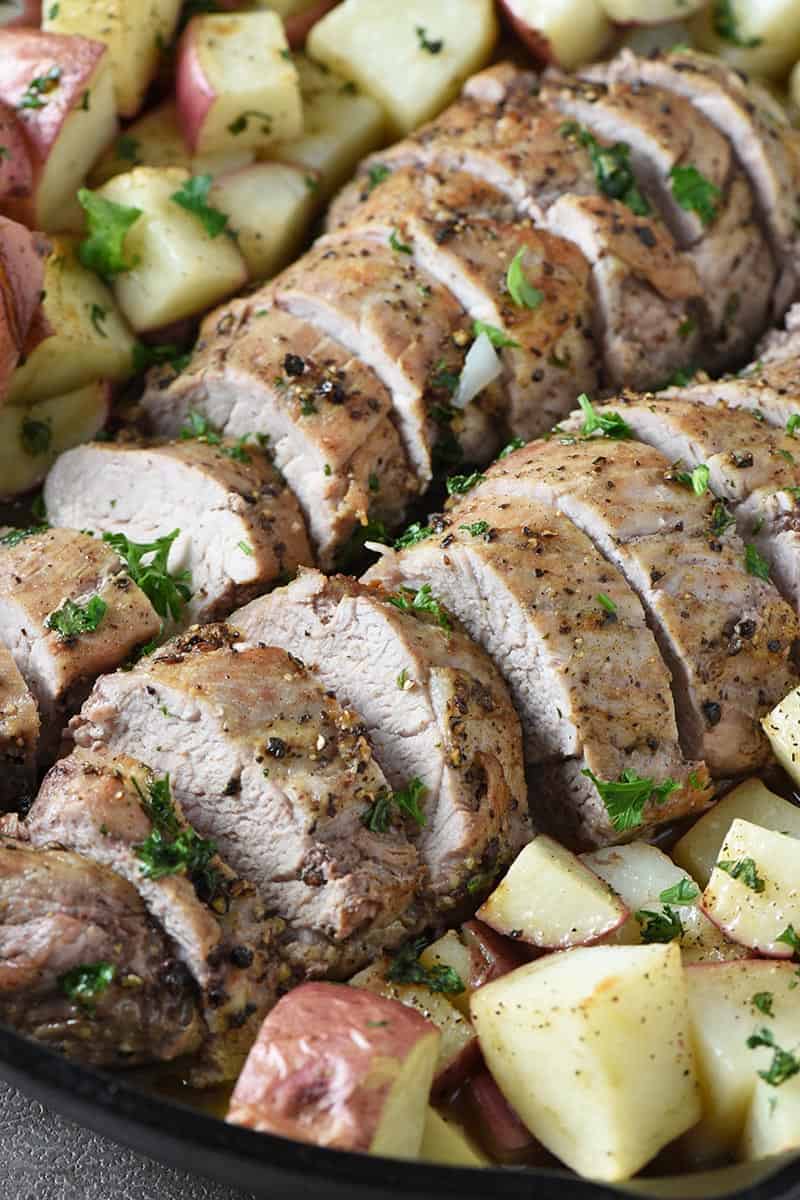
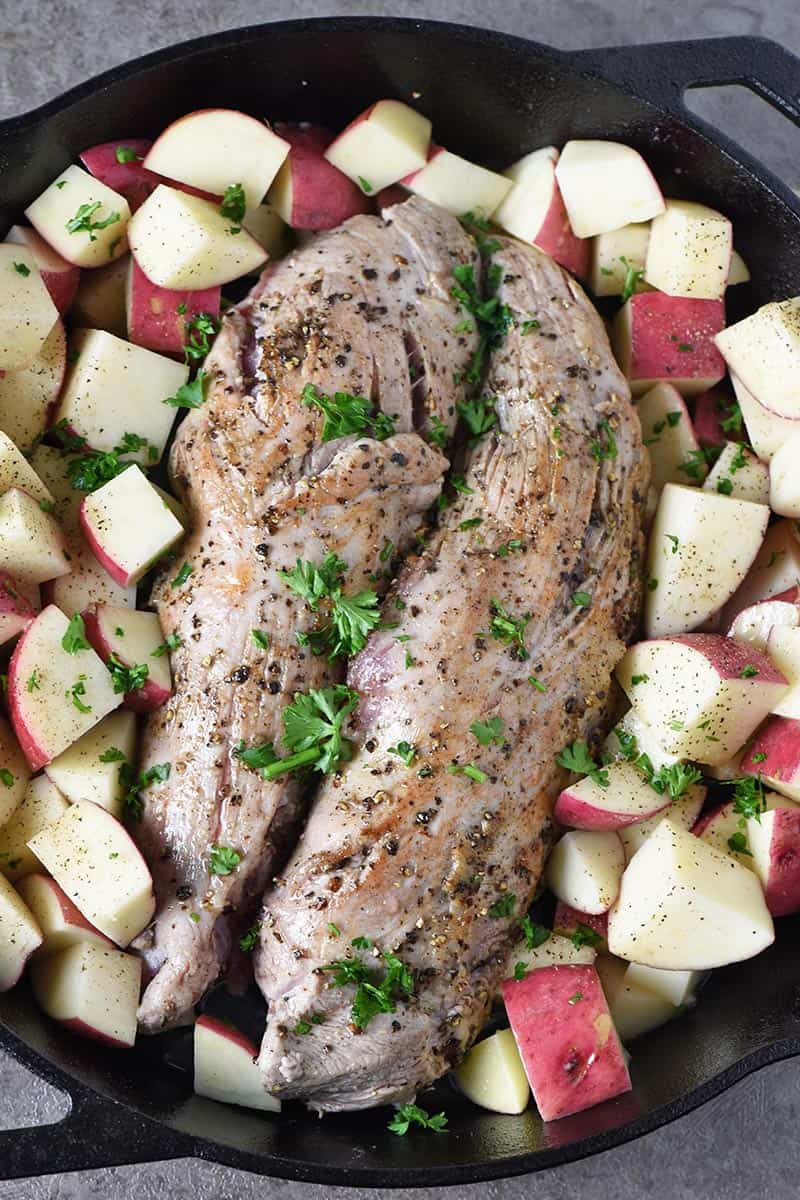
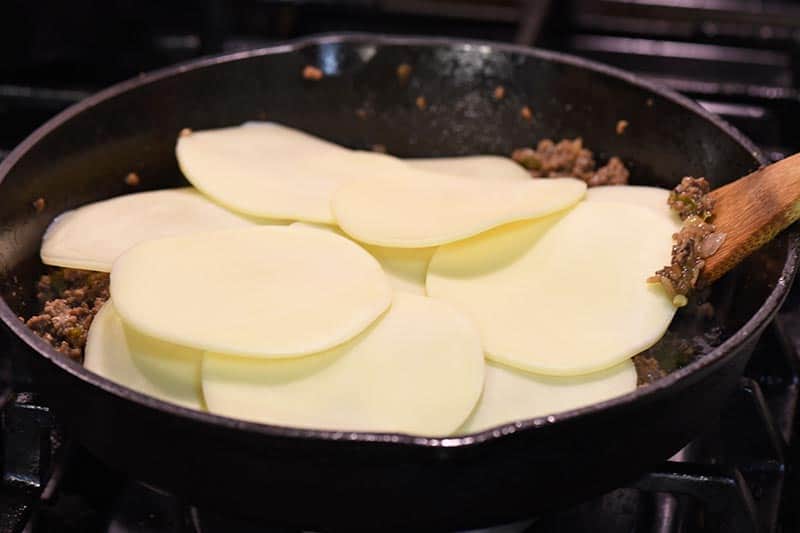
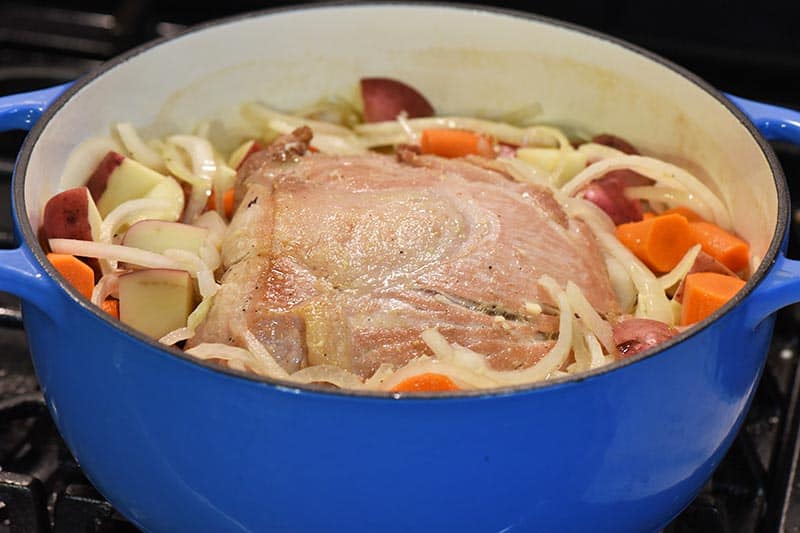
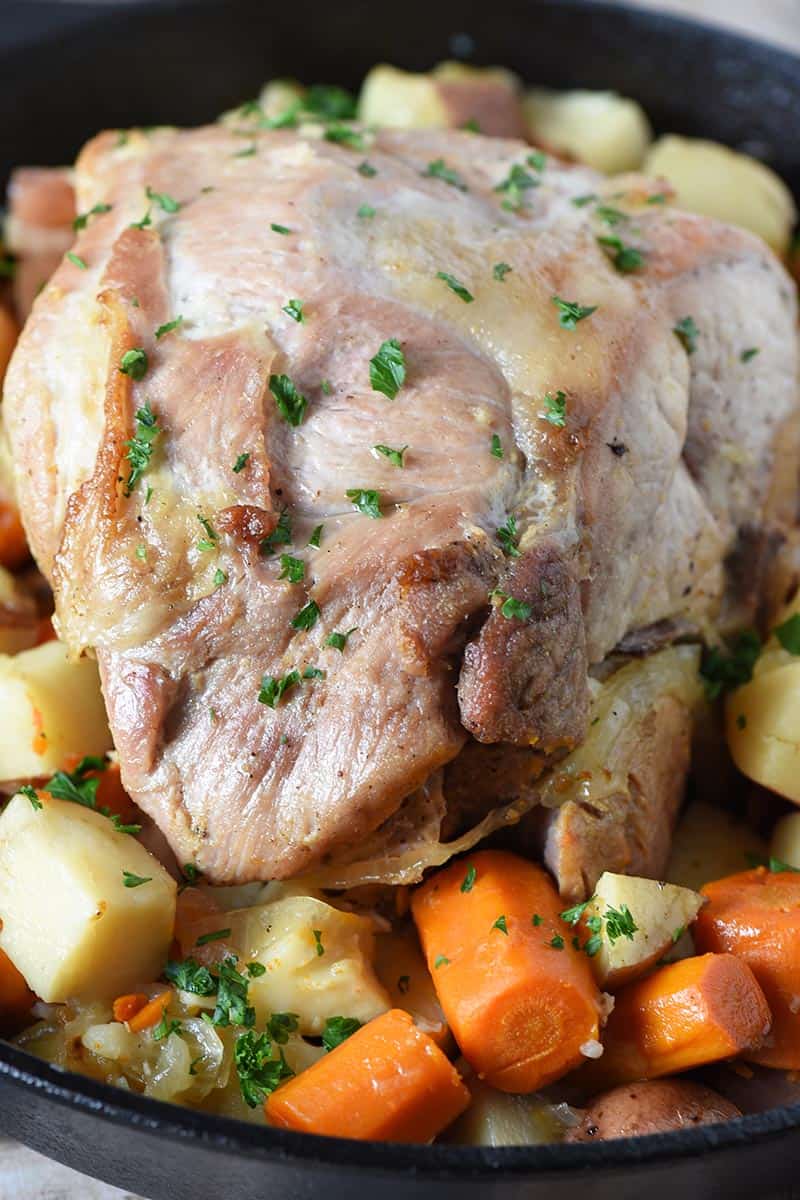
    • Once it’s seared, you can add all of the prepared vegetables into the pan all around the meat. We like to add potatoes, carrots, onion, and garlic.
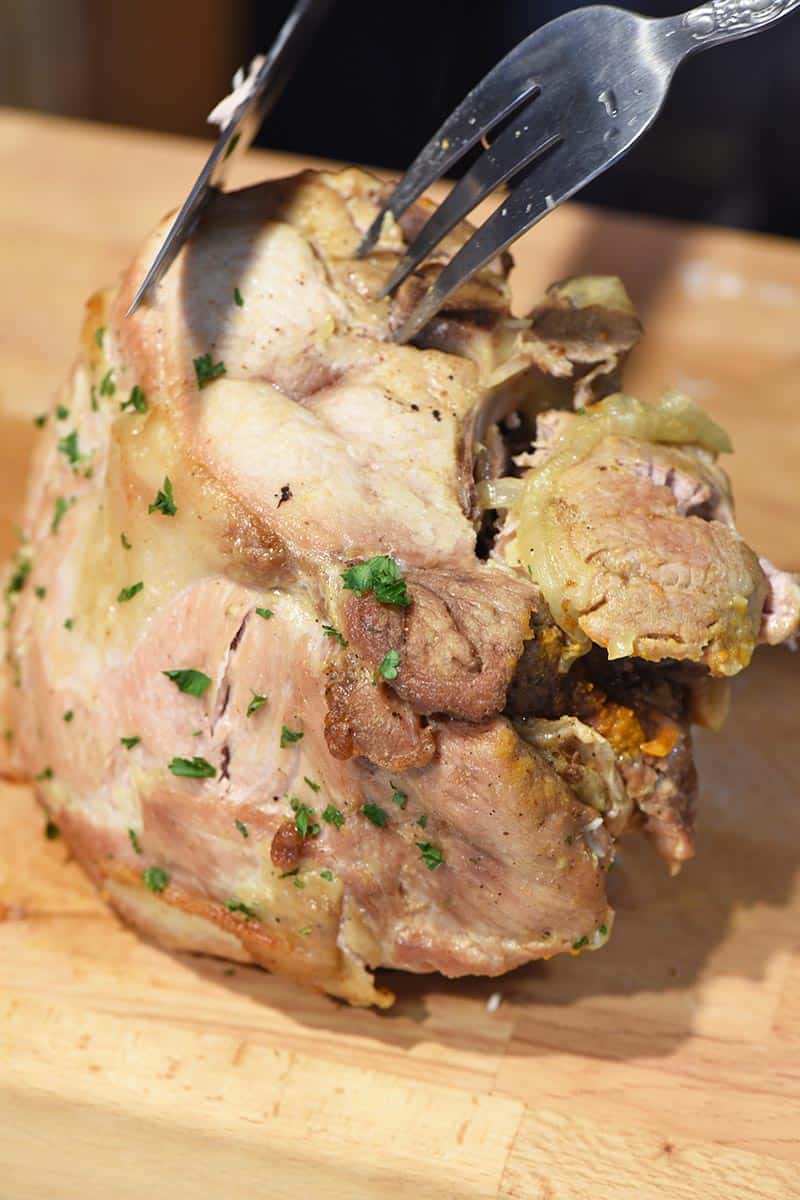
    • Then just bake the roast until it’s fully cooked.
    cooking pork roast with vegetables in blue Dutch oven

    I didn’t find it necessary with this roast because we cover it while cooking so it steams. But, depending on the size of your roast, you may want to parboil potatoes and veggies just a bit, so they get completely cooked in the amount of time they’ll cook with the meat.

    slicing pork roast on wooden cutting board

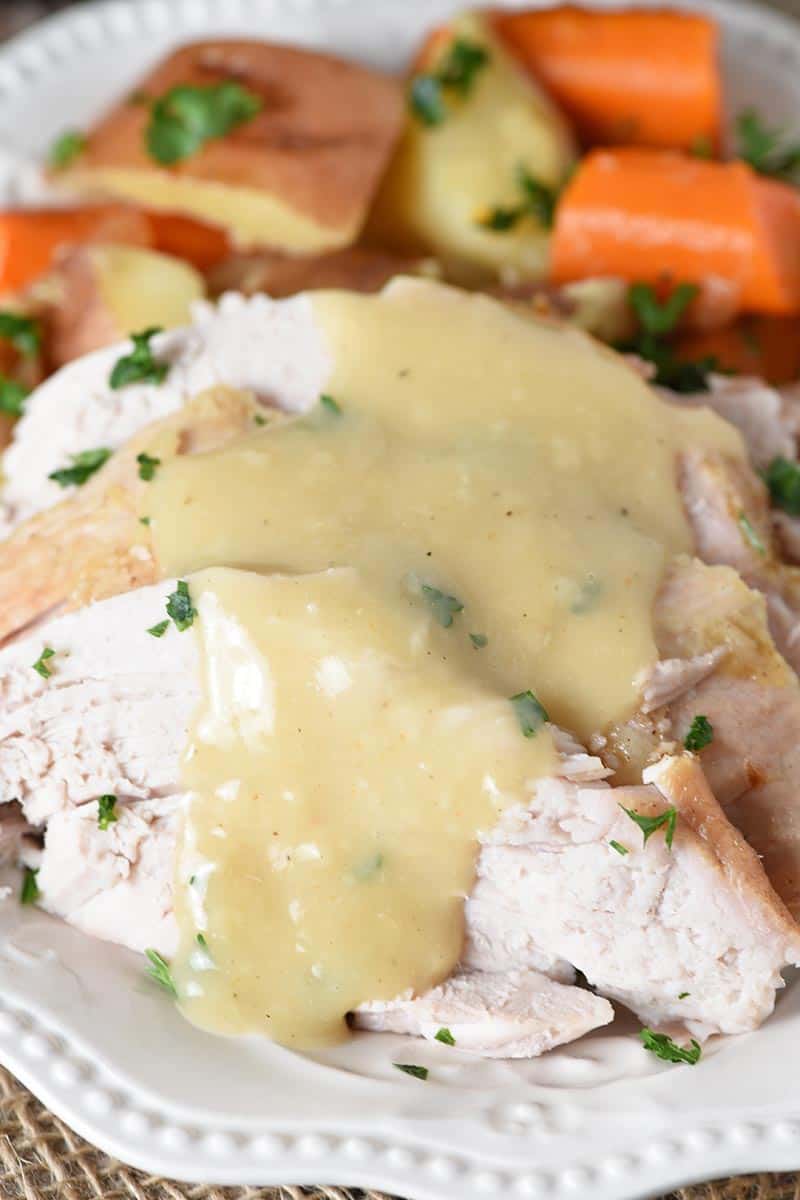
    You can also make a simple pork gravy with some of the leftover pork broth (instructions included in the recipe below).

    pork roast recipe with potatoes and carrots in cast iron skillet

    PORK ROAST COOKING TIME

    How long to cook pork roast really depends on a number of factors, including both your oven and the size of your roast.

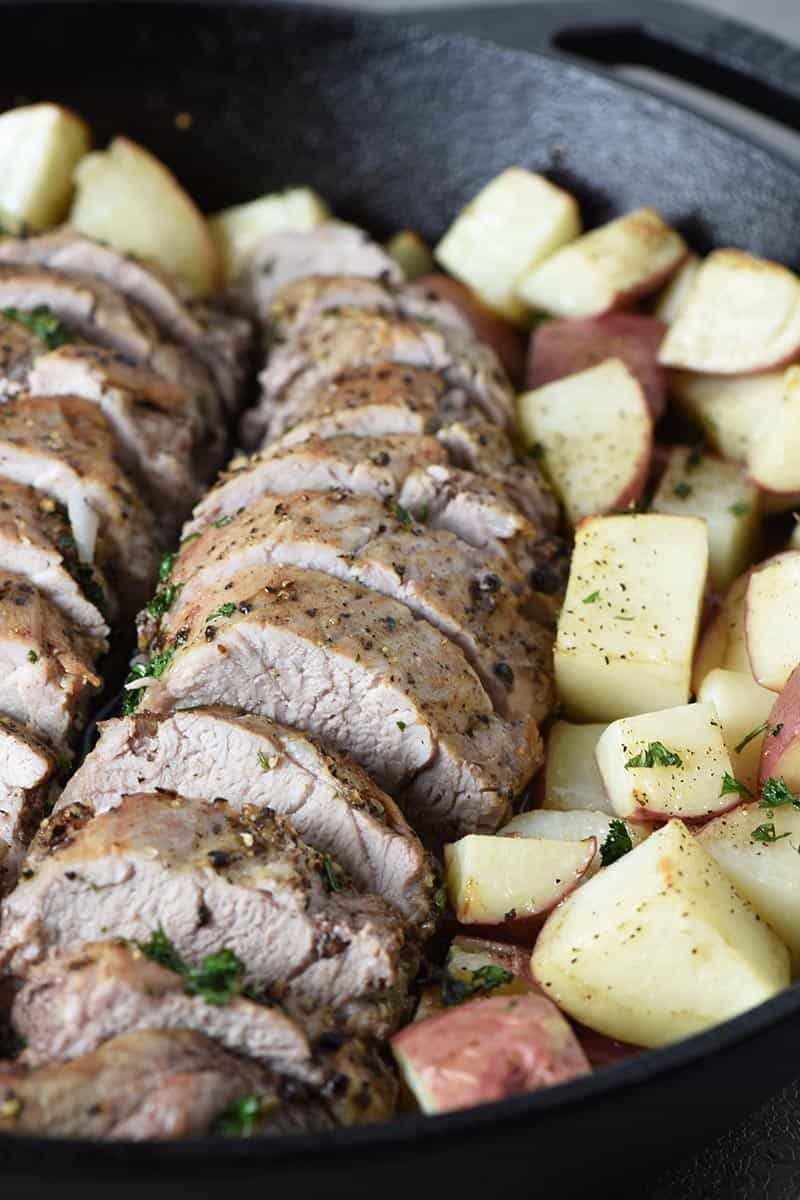
    We cooked ours for close to an hour or more, or until it came to temp.

    sliced pork roast with vegetables on white plate

    SPEAKING OF PORK TEMPERATURE…

    You want to make sure that it reaches the recommended internal temperature for pork, which is 145 to 160°F. We prefer not to mess around with pork and always let it come to temp before eating.

    Use a meat thermometer to check the temperature of your roast before removing it from the oven.

    pork roast recipe, oven roasted with potatoes, carrots, and onions in cast iron pan, with parsley sprinkled on top

    MORE PORK RECIPES YOU’LL ENJOY:

    We love making these sweet chili baby back ribs in our Instant Pot. Pineapple honey glazed ham is one of our go to ham recipes for special occasions and holidays.

    Sidetracked Sarah has a delicious recipe for a slow cooker honey parmesan pork roast. And It Is a Keeper has a wonderful recipe for slow cooker garlic balsamic pork roast.

    pork gravy over sliced pork roast on white plate with vegetables

    KITCHEN TOOLS YOU’LL NEED TO MAKE OVEN ROASTED PORK ROAST

    Dutch Oven – You can sear and bake all in one pan, making cleanup easier too.

    Tongs or Turning Fork

    Meat Thermometer

    Cute Pot Holders – Ok, so they don’t have to be cute, but it certainly doesn’t hurt anything.

    Whisk

    Spatula

    PORK ROAST RECIPE

    If you love this pork roast as much as I do, please write a 5 star review, and help me share the recipe on Facebook and Pinterest! If you make the recipe, be sure to share that you tried it on Pinterest. I love when readers share feedback!

    Oven Roasted Pork Roast Recipe

    CONNECT WITH ADVENTURES OF MEL!

    Be sure to follow me on social, so you never miss a post!

    Facebook | Pinterest | YouTube | Instagram | Twitter

    Sign up to receive my newsletter, filled with delicious recipes and outdoor travel adventures, in your inbox:

    FREE EMAIL SUBSCRIPTION

    Oven Roasted Pork Roast Recipe

    Deliciously easy pork roast recipe with vegetables and gravy, perfect for dinner tonight. How to cook a pork roast with simple seasoning in the oven.

    Pork Roast:

    • 1 tablespoon bacon grease
    • 4 1/12 pounds pork roast (*)
    • 2 cups chicken broth
    • 1 medium yellow onion (sliced)
    • 4 cloves garlic (minced)
    • 5 medium potatoes (chopped or chunked)
    • 5 medium carrots (peeled and chopped)

    Pork Gravy:

    • 1 cup pork broth
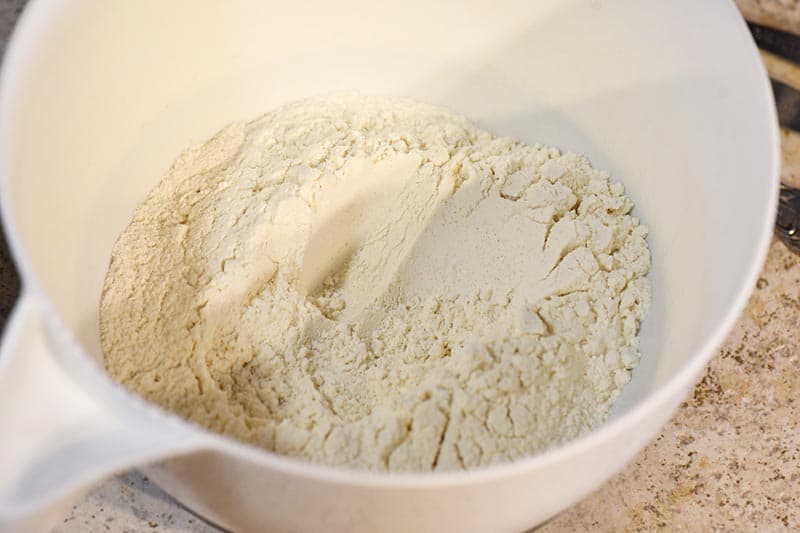
    • 1/2 cup unbleached all-purpose flour
    • 1 1/2 cups water
    • 1 tablespoon salt
    • 1 teaspoon ground black pepper
    1. Pre-heat the oven to 350°F.
    2. Add bacon grease to the heated Dutch oven.
    3. Sear the roast in the Dutch oven, being sure to brown all sides. This may take about 10 minutes or so.
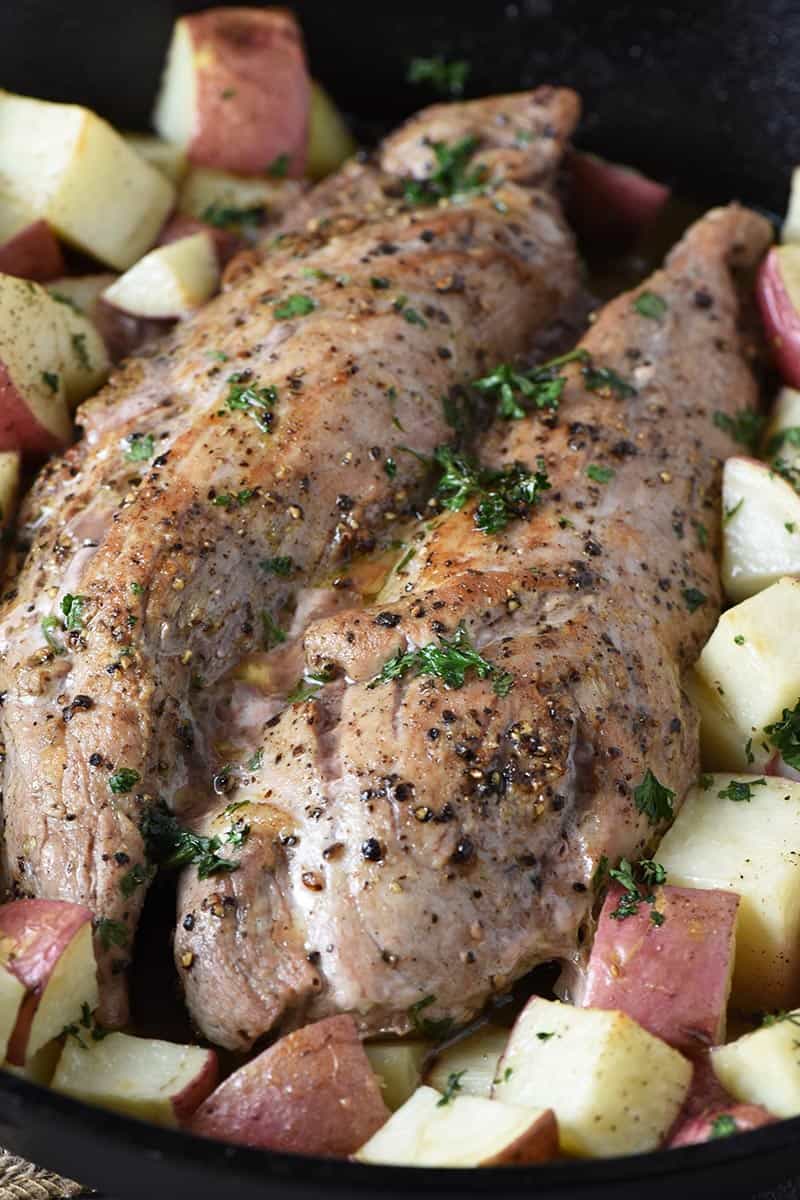
    4. Pour the chicken broth over the roast.
    5. Add the sliced onion, minced garlic, potatoes, and carrots all around the roast. 
    6. Cover and bake at 350°F for about an hour, or until it reaches an internal temperature between 145° to 160°F. 
    7. Once your roast and vegetables are fully cooked, you can make a simple gravy. You can make it right in the same pan after removing the contents, or in a different skillet.
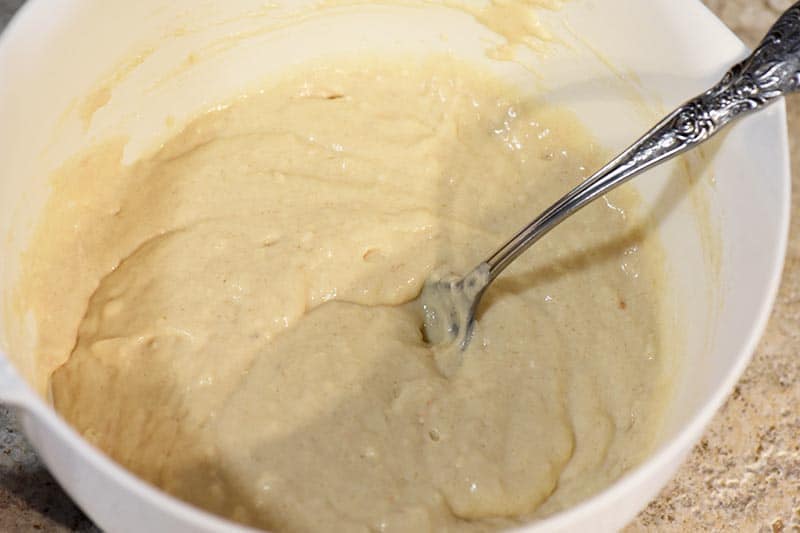
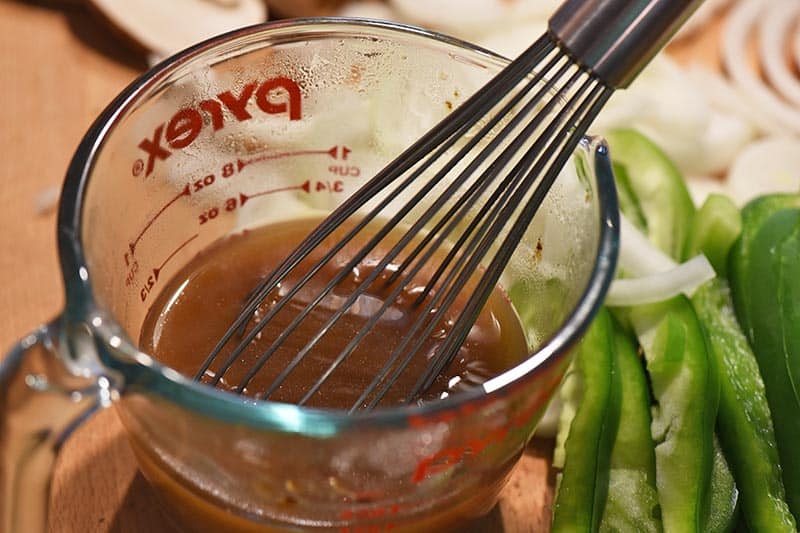
    8. Whisk together the pork broth and flour over low to medium heat.
    9. Then add water, salt, and pepper to the broth mixture, and constantly stir until the gravy starts to thicken.
    10. Once the gravy has thickened enough to form a gravy, it’s ready to eat.
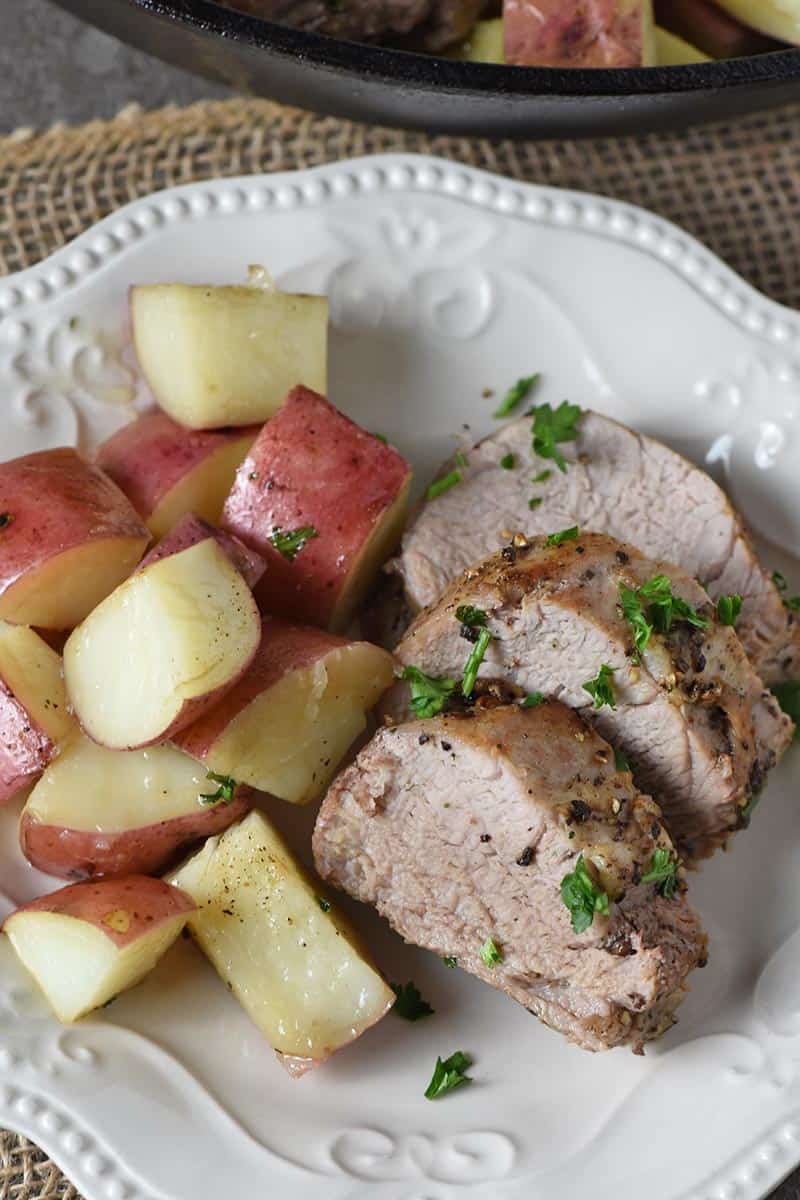
    11. Pair the gravy with the pork roast and vegetables.

    *This roast was a bone in pork roast.

    Pork Recipes
    American
    cooking pork roast, how to cook a pork roast, pork recipes, pork roast, pork roast in oven, pork roast recipe, pork roast with vegetables
    oven roasted pork roast
    pork roast recipe
  • Harry Potter Butterbeer Pancakes from Scratch

    Harry Potter Butterbeer Pancakes from Scratch

    How to make fluffy butterbeer pancakes your Harry Potter fan will love. Easy butterscotch pancakes recipe with no eggs, perfect for a breakfast or brunch surprise!

    If you’ve read the Harry Potter books or watched the movies, you know that butterbeer is a special drink. I’ve had a lot of fun coming up with an actual butterbeer recipe, as well as a recipe for butterbeer buttercream frosting.

    butterbeer pancakes from scratch on gray plate with whipped cream on top and butterscotch syrup

    My boys love cooking pancakes on weekends and special occasions, so a nice batch of butterbeer pancakes from scratch seemed the next logical step.

    This is a butterbeer pancake recipe without eggs; instead I substitute applesauce. I also use buttermilk, which I’ll show you how to make as you read further.

    Harry Potter pancakes are perfect for breakfast, brunch, and holiday mornings. The best part about butterscotch pancakes is that anyone can make them because they’re pretty easy to make.

    bite of butterbeer pancakes sliced on fork with whipped cream and butterscotch syrup

    If you love Harry Potter food, you may want to check out our Polyjuice Potion punch, as well!

    What Is Butterbeer and What Does It Taste Like?

    Most Harry Potter fans have a pretty good idea what butterbeer tastes like. You’ve probably either had a glass at the Wizarding World of Harry Potter at Universal Orlando, or you’ve made a recipe.

    butterbeer pancakes with whipped cream and butterscotch syrup on gray plate with fork

    For those that haven’t…

    Butterbeer is a buttery, butterscotch sweet drink, with a hint of caramel, that’s served hot or cold. It’s described as a “less-sickly butterscotch” and even has a little bit of fizz to it.

    Fandom explains exactly what butterbeer is, where it came from, and what it’s all about.

    Ingredients and Substitutions Notes

    You’ll need to gather a few simple ingredients to make these butterbeer butterscotch pancakes…

    • All-Purpose Flour – You can also make these pancakes gluten-free by using a good gluten-free all-purpose flour.
    • Baking Soda and Baking Powder – Both of these ingredients will help achieve a very fluffy pancake.
    • Sea Salt – I love using Redmond’s Fine Sea Salt for best flavor.
    • Cane Sugar – You can also use granulated sugar.
    • Unsweetened Applesauce – I actually use this in place of eggs. If you prefer to use eggs, you can substitute 1 egg.
    • Buttermilk – This will also help with the leavenin process, meaning it will help you achieve a plate full of soft, fluffy pancakes. We almost never buy buttermilk. We just never use it because I know I can make my own soured milk for cooking and baking. My mom taught me this little trick when I was younger. Just add about a tablespoon of distilled white vinegar for every 1 cup of milk. Stir and let sit for 5 to 10 minutes. And that’s it! You’ve got buttermilk, or sour milk, for your recipe.
    • Canola Oil – You can also sub liquid coconut oil or butter.
    • Cream Soda
    • Extracts – You’ll need vanilla extract, butter extract, and caramel extract.
    • Butterscotch Syrup or Topping – Just look for butterscotch ice cream topping. You’ll use just a hint of butterscotch syrup.
    stack of butterbeer pancakes with butter and syrup on gray plate with milk

    How to Make Butterbeer Pancakes from Scratch

    Making Harry Potter butterbeer pancakes is super easy. But first you have to learn how to make pancake batter.

    How to Mix Butterscotch Pancake Batter

    1. Whisk your dry ingredients in a large bowl.
    sifted dry ingredients for butterbeer pancake recipe in white mixing bowl
    1. Make a depression or well right in the center of the dry ingredients in the bowl.
    2. Then add the wet ingredients, including the applesauce, buttermilk, canola oil, cream soda, vanilla extract, butter extract, caramel extract, and butterscotch topping to the well.
    3. Mix everything together just until it’s blended; try not to over mix.
    how to make pancake batter, butterbeer pancake batter in white mixing bowl

    How to Cook the Pancakes

    You’ll need a griddle or skillet for cooking pancakes. You can also use an electric griddle.

    1. Spray the griddle with cooking spray. My mom used to use oil for cooking instead of cooking spray, or you could probably use butter.
    2. Spoon pancake batter onto the griddle into a circular shape until you have the size you prefer for your pancake.
    3. Allow it to cook on low to medium heat until the edges start to turn a golden brown color.
    cooking pancakes on griddle, using a butterbeer pancake recipe
    1. Then just flip the pancakes and cook the other side until it turns the same golden brown color.
    cooking pancakes from scratch on the griddle, using a butterbeer pancake recipe

    When your pancakes are all cooked, stack them up.

    stack of butterbeer pancakes on gray plate with butter and milk

    Then serve them with whipped cream, maple syrup, and butterscotch topping. Yum!

    stack of butterbeer pancakes from scratch on gray plate with butter, milk, whipped cream, and butterscotch topping

    Expert Tips

    TIP #1 – Some pancake batters will start to dimple, and that’s when you know to flip the pancakes. However, this pancake batter is pretty thick, so it doesn’t usually dimple for me.

    TIP #2 – As your pancakes get done and you take them off the griddle, keep them warm by putting them on a cookie sheet or pizza pan in a slightly heated oven.

    More Pancake Recipes You May Enjoy

    My favorite pancakes are blueberry buttermilk pancakes, filled to the gills with all the blueberry goodness. Of course, I love a yummy batch of chocolate chip pancakes and apple cinnamon pancakes.

    My boys love when I make dinosaur shaped strawberry buttermilk pancakes or heart shaped buttermilk pancakes.

    Mommy Hates Cooking has a wonderful recipe for gluten free bananas foster pancakes. And Moscato Mom has a delicious recipe for healthy banana nut pancakes.

    stack of homemade butterbeer pancakes from scratch on gray plate with whipped cream and butterscotch syrup and milk

    If you try this recipe, why not leave a star rating in the recipe card right below and/or a review in the comment section further down the page? I always appreciate your feedback. You can also follow me on Pinterest, Facebook, Instagram, and YouTube. And subscribe to my email list too!

    Butterbeer Pancakes

    How to make fluffy butterbeer pancakes your Harry Potter fan will love. Easy butterscotch pancakes recipe with no eggs, perfect for a breakfast or brunch surprise!

    • Whisk
    • Batter Bowl
    • Pancake Batter Dispenser
    • Griddle
    • Pancake Turner
    • 1 1/4 cups all-purpose flour
    • 1/2 teaspoon baking soda
    • 2 teaspoons baking powder
    • 3/4 teaspoon salt
    • 2 tablespoons cane sugar
    • 1/4 cup unsweetened applesauce
    • 1/2 cup buttermilk
    • 3 tablespoons canola oil
    • 1/4 cup cream soda
    • 1/2 teaspoon vanilla extract
    • 1/4 teaspoon butter extract
    • 1/8 teaspoon caramel extract
    • 1 teaspoon butterscotch topping
    1. Whisk the flour, baking soda, baking powder, salt, and sugar in a batter bowl or mixing bowl.

    2. Make a depression or well with your spoon in the center of the dry ingredients in the bowl.

    3. Add the applesauce, buttermilk, canola oil, cream soda, vanilla extract, butter extract, caramel extract, and butterscotch topping to the well.
    4. Stir everything together just until moistened. The batter will be quite thick.
    5. Lightly spray a griddle with cooking spray, and heat to a moderate temperature over low heat on the stove.

    6. Spoon pancake batter onto the griddle in circular shapes until you have the size you prefer for your pancakes.

    7. Allow them to cook over low to medium heat until the edges begin to turn a golden color.

    8. Then just flip the pancakes and cook the other side until it turns the same golden color and the pancake is cooked through.

    9. When your pancakes are done, serve them with whipped cream, maple syrup, and butterscotch topping.

    Tip: As your pancakes get done and you take them off the griddle, keep them warm by putting them on a cookie sheet or pizza pan in a slightly heated oven.

    Breakfast & Brunch, Pancakes, Waffles, & French Toast
    American
    butterbeer pancakes, Harry Potter, Harry Potter food, pancake recipe, pancake recipe without eggs, pancakes, pancakes from scratch
    Butterbeer Pancakes from Scratch Recipe
  • Simple and Delicious Roasted Pork Tenderloin

    Simple and Delicious Roasted Pork Tenderloin

    Pork Tenderloin – How to cook pork tenderloin, roasted to a juicy perfection in the oven. Easy recipe for a delicious dinner with simple seasonings and potatoes.

    sliced pork tenderloin with potatoes in cast iron skillet

    Growing up in a meat and potatoes household, I have a love relationship with meat and potatoes, even though we don’t always eat the second part of that equation. My guys love meat too, so we occasionally gravitate toward pork for dinner.

    Pork tenderloin is the best of both worlds because it’s super easy to make and doesn’t take quite as long to make as our more typical slow cooker pork roast. It’s also delicious with a good side of mashed potatoes, green beans, fried rice with pork or even a colorful salad. Sometimes I even top it off with a fresh batch of mango peach salsa or regular fruit salsa.

    Who doesn’t love an easy dinner the whole family will eat? And it’s healthy to boot. Kind of like these family favorite baked chicken drumsticks!

    Oven roasted pork tenderloin usually takes less than half an hour to bake. There’s hardly any prep time either.

    It’s the perfect solution if you’re wondering what to make for and everyday dinner or even a big family dinner on Easter.

    pork tenderloin with potatoes roasted in a cast iron skillet in the oven

    If you love this tenderloin recipe, you may also enjoy our oven roasted pork roast recipe and maple pork chops with apples and onions.

    WHERE CAN I FIND THE RECIPE FOR PORK TENDERLOIN?

    If you’d rather skip all of my cooking tips, important cooking info for this recipe, and similar recipe ideas – and get straight to the pork tenderloin recipe – just scroll down to the bottom, where you’ll find a printable recipe card.

    FIRST, LET’S TALK ABOUT THE DIFFERENCE BETWEEN PORK LOIN AND PORK TENDERLOIN

    Because yep, there is a difference. Don’t feel bad if you didn’t know, because I didn’t realize it either; I thought they were one and the same.

    I share this with you because I want to make sure you get the right cut of meat for this recipe.

    As it happens, pork loin is speaking about more of a pork roast, while pork tenderloin is more of a boneless filet. Pork tenderloin is that longer, thinner piece of pork that almost looks like a long roll.

    The Kitchn actually has a really helpful explanation for the difference between pork loin and pork tenderloin.

    TIPS FOR HOW TO COOK PORK TENDERLOIN

    This pork tenderloin recipe is really simple, and we actually only use a couple of seasonings that you likely already have in your kitchen.

    • Your first step is to dry the pork tenderloin with a paper towel. It’ll likely have a little bit of water in the package with it, so just pat it dry.
    patting pork tenderloin dry with a paper towel
    • Then rub it down with the olive oil.
    rubbing olive oil into pork tenderloin before cooking
    • Sprinkle the salt and pepper over the entire pork tenderloin, and rub it in well.
    rubbing salt and pepper into pork tenderloin before roasting
    • Sear the meat in a large skillet (preferably a skillet you can also bake it in), being sure to turn it so that both sides slightly brown.
    searing pork tenderloin in cast iron skillet on stovetop

    And now you’re ready to roast it.

    seared pork tenderloin with raw potatoes in cast iron skillet

    Note: You’ll want to parboil potatoes and veggies just a bit, so they get completely cooked in the short amount of time they’ll cook with the meat.

    PORK TENDERLOIN COOKING TIME

    How long to cook pork tenderloin really depends on a number of factors, including both your oven and the size of your tenderloin.

    We cooked ours for about 25 to 30 minutes.

    baked pork tenderloin and potatoes in cast iron skillet

    You want to make sure that it reaches the recommended internal temperature for pork, which is 145 to 160°F. We prefer not to mess around with pork and always let it come to temp before eating.

    pork tenderloin and potatoes, sliced and placed on white plate

    MORE PORK RECIPES YOU’LL ENJOY:

    We love making these sweet chili baby back ribs in our Instant Pot. Pineapple honey glazed ham is one of our go to ham recipes for special occasions and holidays.

    Make a slow cooker apple cider pork loin with this recipe from Mommy Hates Cooking. Mmmm, this recipe for a Maple and Brown Sugar Pork Tenderloin in the Slow Cooker, from Sidetracked Sarah, looks so delicious.

    roasted pork tenderloin with potatoes in cast iron skillet

    KITCHEN TOOLS YOU’LL NEED TO MAKE ROASTED PORK TENDERLOIN

    Large Cast Iron Skillet – You can sear and bake right in this one skillet, making cleanup easier too.

    Tongs

    Meat Thermometer

    Cute Pot Holders – Ok, so they don’t have to be cute, but it certainly doesn’t hurt anything.

    sliced pork tenderloin with tender roasted potatoes in cast iron skillet

    PORK TENDERLOIN RECIPE

    If you love this baked pork tenderloin as much as I do, please write a 5 star review, and help me share the recipe on Facebook and Pinterest! If you make the recipe, be sure to share that you tried it on Pinterest. I love when readers share feedback!

    Simple and Delicious Roasted Pork Tenderloin Recipe

    CONNECT WITH ADVENTURES OF MEL!

    Be sure to follow me on social, so you never miss a post!

    Facebook | Pinterest | YouTube | Instagram | Twitter

    Sign up to receive my newsletter, filled with delicious recipes and outdoor travel adventures, in your inbox:

    FREE EMAIL SUBSCRIPTION

    Simple and Delicious Roasted Pork Tenderloin

    How to cook pork tenderloin, roasted to a juicy perfection in the oven. Easy recipe for a delicious dinner with simple seasonings and potatoes.

    Pork Tenderloin:

    • 2 pounds pork tenderloin (*)
    • 4 tablespoons olive oil
    • 2 teaspoons smoked sea salt
    • 2 teaspoons ground black pepper

    Potatoes (Optional):

    • 5 whole potatoes (chopped)
    • 2 tablespoons olive oil
    • 1 teaspoon salt
    • 1/2 teaspoon ground black pepper
    • 2 tablespoons fresh parsley (chopped or minced)
    1. Pre-heat the oven to 400°F.
    2. If you want to roast potatoes or veggies with your pork tenderloin, now is the time to prep them and get them ready.**
    3. Pat the pork tenderloin dry with a paper towel.
    4. Rub it down with olive oil.
    5. Sprinkle the smoked sea salt and black pepper over the tenderloin, rubbing the seasonings in.
    6. Sear the meat in a large skillet (preferably a skillet you can also bake it in), being sure to turn the tenderloin halfway thru searing, so that both sides slightly brown.
    7. Place the parboiled potatoes and veggies in the skillet with the tenderloin, sprinkling olive oil, salt, and black pepper over the veggies.
    8. Bake everything at 400°F for about 25 to 30 minutes, or until it reaches the recommended internal temperature of 145 to 160°F with a meat thermometer.***
    9. Optional step: In the last 5 to 10 minutes of baking, sprinkle parsley over the entire skillet.
    10. Once the pork tenderloin is fully cooked, remove it from the oven.
    11. Slice the tenderloin and serve with the potatoes and veggies.

    *This recipe is based on the size of about a 2 pound pork tenderloin.

    **Wash, chop, and parboil potatoes and veggies, so they’re ready to go. 

    ***How long to cook pork tenderloin really depends on a number of factors, including both your oven and the size of your tenderloin.

    Pork Recipes
    American
    baked pork tenderloin, how long to cook pork tenderloin, how to cook pork tenderloin, oven roasted pork tenderloin, pork recipes, pork tenderloin, pork tenderloin cooking time, pork tenderloin recipe, roasted pork tenderloin
    Simple and Delicious Roasted Pork Tenderloin
    pork tenderloin recipe
  • Ham and Cheese Egg Muffins

    Ham and Cheese Egg Muffins

    Simple ham and cheese egg muffins are an easy and healthy breakfast and brunch recipe, perfect for busy mornings or make ahead freezer meals and snacks.

    There are times when we’ll make breakfast ahead of time, like when we’re headed out on a dispersed camping trip or for mornings we know we may not have enough time to make a good breakfast. We love making Instant Pot hard boiled eggs, as well as bacon, egg, and cheese breakfast muffins for just such occasions.

    bite out of ham and cheese egg muffins on white plate

    Ham and cheese egg cups are also the perfect take along meal or snack. They keep well in the fridge, freezer, and cooler, and they’re full of delicious flavor.

    Eat them with a fork, or eat them with your fingers, making them the perfect breakfast on the go. They’re a quick, healthy, low carb breakfast, giving you a boost of protein to give you a good start to your day.

    ham and cheese egg cups on white plate with blue cloth

    Rather have sausage? No problem! Make low carb sausage egg muffins instead.

    WHERE CAN I FIND THE HAM AND CHEESE EGG MUFFIN RECIPE?

    If you’d rather skip all of my cooking tips, important cooking info for this recipe, and similar recipe ideas – and get straight to the delicious recipe for ham and cheese egg muffins – just scroll down to the bottom, where you’ll find a printable recipe card.

    CAN YOU MAKE AHEAD AND FREEZE BREAKFAST MUFFINS WITH EGGS?

    Yes, you can. In fact, you can make enough for a whole week in just a short amount of time.

    • Make a batch or two of breakfast egg muffins and allow them to cool.
    • Then place them all in a freezer bag or airtight container and freeze.
    • When morning comes, simply warm them up in the microwave or the oven, whichever your preference.

    Enjoy easy breakfasts every single morning of your week. Or feed a holiday crowd with egg muffin cups you’ve already made before the big day.

    ham and eggs breakfast muffins on white plate

    TIPS FOR HOW TO BAKE MUFFIN TIN EGGS

    Baking ham and eggs in a muffin tin is actually really easy, even when you have multiple ingredients you’re trying to fit in each small muffin cup.

    Make sure all of your ingredients are ready first… Ham is cooked and chopped (no need to cook deli ham), green onions are chopped, cheese is shredded, and eggs are whipped up with either heavy whipping cream or milk.

    beating eggs and heavy whipping cream for breakfast muffins recipe

    Spray the muffin pan with cooking spray before adding any ingredients to it. Then start by adding your meat.

    ham in muffin cups for ham egg cups

    Add the cheese.

    adding cheese with ham to muffin cups for breakfast egg muffins

    Then sprinkle in the green onions.

    adding green onions with ham and cheese for egg muffin recipe

    Pour the egg mixture into the muffin tin, filling each cup about 3/4 of the way full; this will leave a little room for expansion in baking.

    raw eggs, ham and cheese, and green onions in muffin pan ready to bake into egg muffins

    Finally, bake the ham and cheese egg muffin cups, following the recipe instructions.

    Ham and egg cups are another one of my favorite ham recipes to use up leftover ham or pineapple ham from the holidays or family dinners.

    HOW TO TELL WHEN EGG MUFFINS ARE DONE

    You’ll be able to tell when your egg muffins are done by both sight and touch. They’ll be fluffy and not jiggly in the middle.

    baked egg cups in a muffin pan

    Of course, if you really want to make sure the eggs are cooked through, you can always use a cooking thermometer to check the temperature. According to the Egg Safety Center, any type of quiche or egg casserole should reach a temperature of 160°F.

    WAYS YOU CAN CHANGE UP BAKED EGG MUFFINS

    • Add minced onions (yellow onions or sweet onions).
    • Add chopped up spinach to the egg mixture.
    • Use smoked cheese, Queso Fresco, or Cotija cheese in place of cheddar, colby jack, or pepper jack.
    • Add a different type of meat, like sausage or bacon.
    • Or go meatless.

    LOOKING FOR MORE EASY BREAKFAST IDEAS?

    One of my favorite breakfast sandwiches is the Egg McMuffin, so it stands to reason I’d create McDonald’s Egg McMuffin and sausage egg McMuffin copycat recipes. And eggs in a basket has been one of my favorite breakfast treats since I was a little girl.

    Moscato Mom has a delicious finger food breakfast idea for Ham, Cheese, and Bell Pepper Mini Quiche. Midlife Boulevard has a list of 10 easy and delicious keto breakfast recipes.

    ham and cheese egg muffin cups on a white plate

    KITCHEN TOOLS YOU’LL NEED TO MAKE HAM AND CHEESE EGG MUFFIN CUPS:

    Ninja Food Chopper Express or Cutting Board and Chef’s Knife

    Cheese Grater

    Liquid Measuring Cup

    Mixing Bowl and Whisk

    Muffin Tins

    Cooking Thermometer (optional)

    HAM AND CHEESE EGG MUFFINS RECIPE

    If you love this easy breakfast recipe as much as I do, please write a 5 star review, and help me share the recipe on Facebook and Pinterest!

    ham and cheese egg muffins recipe

    CONNECT WITH ADVENTURES OF MEL!

    Be sure to follow me on social, so you never miss a post!

    Facebook | Pinterest | YouTube | Instagram | Twitter

    Sign up to receive my newsletter, filled with delicious recipes and outdoor travel adventures, in your inbox:

    FREE EMAIL SUBSCRIPTION

    Ham and Cheese Egg Muffins

    Simple ham and cheese egg muffins are an easy and healthy breakfast and brunch recipe, perfect for busy mornings or make ahead freezer meals and snacks.

    • Muffin Tin
    • 4 ounces ham (chopped)
    • 1 cup cheddar cheese (shredded)
    • 3 green onions (chopped)
    • 10 large eggs
    • 1/4 cup heavy whipping cream
    • 1/2 teaspoon salt
    • 1/2 teaspoon ground black pepper
    1. Pre-heat the oven to 375° F and grease a muffin tin.

    2. Place a little bit of chopped ham in the bottom of each muffin cup.

    3. Next sprinkle a little cheese on top of the ham in each muffin cup.

    4. Then sprinkle green onions into each muffin cup.

    5. In a large mixing bowl, whisk together the eggs, heavy whipping cream, salt, and pepper.

    6. Pour the egg mixture into the muffin tin, filling each cup about 3/4 of the way full; this will leave a little room for expansion in baking.
    7. Bake the muffins at 375° F for 20 to 25 minutes, or until the egg muffins are fluffy, not jiggly, and have reached 160° F with a meat thermometer.

    8. Allow the muffins to cool for 2 to 3 minutes in the pan; then run a table knife around the edges of the muffin cups, and pop the muffins out onto a wire rack to cool. 

    9. Serve immediately with your favorite toppings and sides!

    *You can use any kind of cheese you like, including cheddar, American, pepper Jack, smoked cheese, Queso Fresco, Cotija cheese, etc.

    *You can serve them immediately, or you can refrigerate or freeze them. Then pop them in the microwave in the morning, and enjoy a warm breakfast with hardly any effort! They’re perfect for a quick, on the go, healthy breakfast!

    Breakfast & Brunch, Main Course
    American
    baked egg cups, breakfast egg muffins, breakfast muffins, easy breakfast, egg cups, egg muffin cups, egg muffin recipe, egg muffins, ham and cheese, ham and eggs, low carb breakfast, muffin tin eggs
    low carb breakfast recipe, ham and cheese egg cups
    easy breakfast recipe, ham and cheese egg muffins
  • Creamy Chicken Enchiladas with Sour Cream Sauce

    Creamy Chicken Enchiladas with Sour Cream Sauce

    Delicious recipe for the best chicken enchiladas, made with corn tortillas and a creamy white sauce. How to make a Tex Mex dinner your family will love!

    On a long ago trip to Texas, I ate the most delicious chicken enchiladas at a restaurant called Riverwalk Cantina. They were so good, we went back and ate there again.

    creamy chicken enchiladas with sour cream sauce in white baking dish

    My favorite dish was their creamy chicken enchiladas with sour cream sauce. These enchiladas didn’t have the typical red enchilada sauce but rather a really creamy white sauce.

    They were so delicious, I came home and recreated the recipe after that trip. And after a little trial and error, I ended up with a chicken enchilada recipe we’ve made over and over again.

    While this is a fairly easy chicken enchilada recipe, it does require filling tortillas with the chicken mixture and wrapping them. Other than that, it’s a matter of making sauce and throwing it all together in a pan to bake.

    You may also enjoy this CrockPot chicken enchilada casserole and turkey enchilada skillet casserole. And if you want easy, this slow cooker chicken enchilada soup has all the flavors of enchiladas without any hassle.

    creamy chicken enchiladas served on a light blue plate with fresh tomatoes and green onions

    WHERE CAN I FIND THE CREAMY CHICKEN ENCHILADA RECIPE?

    If you’d rather skip all of my cooking tips, important cooking info for this recipe, and similar recipe ideas – and get straight to the delicious recipe for creamy chicken enchiladas – just scroll down to the bottom, where you’ll find a printable recipe card.

    TIPS FOR HOW TO MAKE EASY CHICKEN ENCHILADAS

    First things first, you’ll need to cook the chicken so it’s ready to use. Now you have two options here:

    add taco chicken to corn tortilla to make chicken enchilada recipe

    I prefer shredded chicken enchiladas, so I just prefer to make my own. But again, it’s your kitchen, your time… Either one will work.

    LET’S MAKE THE CREAMY ENCHILADA SAUCE…

    This homemade enchilada sauce is actually really easy to make, even though it does require just a little bit of stove time.

    • Start by sautéing the onion in the butter.
    • Then stir in the cream cheese and let it melt.
    • Add the sour cream, whipping cream, green chilies, shredded cheese, salt, and pepper.
    making a creamy chicken enchilada sauce with fresh tomatoes and sour cream in sauce pan
    • Then just let it all mesh and cook together until it starts to thicken up.
    • Finally, add in the freshly diced tomatoes, just stirring them into the sauce.

    And that’s it… It’s ready to go.

    WRAP THE CORN TORTILLAS AND PUT IT ALL TOGETHER…

    After putting a tablespoon or so of taco chicken in each corn tortilla, you’ll loosely wrap it up and add it to a lightly greased baking dish.

    chicken enchiladas made with corn tortillas in white baking dish

    Once all the enchiladas are made, pour the white sauce over them.

    chicken enchiladas with a white enchilada sauce in white baking dish

    Then add the tomatoes and green onions on top (or you can wait and sprinkle the green onions on after baking), and generously sprinkle on the cheese.

    add tomatoes to top of chicken enchiladas in white baking dish

    Be generous with the cheese.

    add shredded cheese to top of creamy chicken enchiladas in white baking dish

    And that’s about the gist of it… Your homemade chicken enchiladas are ready to go in the oven.

    We serve any Tex Mex food we make with fresh tomatoes, avocado or guacamole, and sour cream on the side. As Zeke would say, “Num nums, Momma. Num nums!”

    baked chicken enchiladas in white baking dish

    CAN I FREEZE CHICKEN ENCHILADAS?

    Yes, there’s really no reason why you can’t make these up ahead of time and freeze them. Just make sure you cover them well to prevent any freezer burn.

    LOOKING FOR MORE TEX MEX RECIPES?

    We make all sorts of Tex Mex and Mexican food, and sometimes we’ll even go out to dinner. One of our favorite meals we have on a pretty regular basis is ground beef tacos. Sometimes we even switch it up and have fish tacos with fruit salsa instead.

    Speaking of fish and seafood, I love making crab enchiladas too.

    Occasionally for lunch, I’ll make the boys cheesy chicken quesadillas.

    If it’s more enchiladas you’re looking for, my friend Kristy from Mommy Hates Cooking has you covered with breakfast enchiladas and these delicious looking Air Fryer cheesy beef enchiladas. And my friend Kelly from Eat Picks has a super easy make ahead chicken enchilada recipe (made with a red sauce).

    homemade chicken enchiladas with tomatoes and green onions in a white baking dish, baked and ready to eat

    KITCHEN TOOLS YOU’LL NEED TO MAKE CHICKEN ENCHILADAS

    Sauce Pot

    Ninja Food Chopper Express or Cutting Board and Chef’s Knife

    Spatula

    Baking Dish

    CHICKEN ENCHILADA RECIPE

    If you love these creamy chicken enchiladas as much as I do, please write a 5 star review, and help me share the recipe on Facebook and Pinterest! If you make the recipe, be sure to share that you tried it on Pinterest. I love when readers share feedback!

    Creamy Chicken Enchiladas Recipe

    CONNECT WITH ADVENTURES OF MEL!

    Be sure to follow me on social, so you never miss a post!

    Facebook | Pinterest | YouTube | Instagram | Twitter

    Sign up to receive my newsletter, filled with delicious recipes and outdoor travel adventures, in your inbox:

    FREE EMAIL SUBSCRIPTION

    Chicken Enchiladas with Sour Cream Sauce

    Delicious recipe for the best chicken enchiladas with sour cream sauce, made with corn tortillas. How to make a Tex Mex dinner your family will love!

    • 1/2 cup picante sauce
    • 1 1/2 pounds chicken (cooked and shredded)
    • 2 tablespoons salted butter
    • 1/2 medium yellow onion (minced)
    • 8 ounces cream cheese
    • 2 cups sour cream
    • 1/4 cup heavy whipping cream
    • 4 ounces green chilies (diced)
    • 1 teaspoon salt
    • 1/2 teaspoon ground black pepper
    • 1 cup cheddar cheese (shredded)
    • 1 cup Monterey Jack cheese (shredded)
    • 2 cups tomatoes (diced)
    • 12 corn tortillas
    • 5 green onions (diced)
    1. Pre-heat the oven to 350° F, and lightly grease a 9×13 baking dish with cooking spray.

    2. Combine the picante sauce and shredded chicken in a container, and let it marinate in the fridge while you're making the enchilada sauce.

    3. Melt the butter in a medium sauce pan over low to medium heat.

    4. Sauté the onion in the butter until it turns a light golden color, about 5 minutes or so.
    5. Add the cream cheese to the onion, stirring well until it melts. 
    6. Then add the sour cream, heavy whipping cream, green chilies, salt, pepper, 1/2 cup cheddar, and 1/2 cup Monterey Jack to the sauce mixture.

    7. Let the sauce simmer, constantly stirring, until it begins to thicken up, probably 10 to 15 minutes.
    8. Stir 1 cup of the freshly diced tomatoes into the sauce. Turn the burner on low and keep the sauce warm at this point.

    9. Add a heaping tablespoon of the marinated chicken to each corn tortilla, and loosely wrap each enchilada.

    10. Place each chicken enchilada in the prepared baking dish.

    11. When all of the chicken mixture has been used, pour the white sour cream sauce over the wraps, spreading it around evenly. 

    12. Add another cup of freshly diced tomatoes, as well as the rest of the cheese and the green onions, to the top of the enchiladas.
    13. Bake at 350° F for about 40-45 minutes, or until the cheese is melted and the enchiladas are cooked through. 

    14. Serve with freshly diced tomatoes, avocado, and sour cream on the side.

    *You can use either picante sauce or salsa, or you can make my recipe for taco chicken and forget the picante sauce/salsa altogether.

    Dinner Ideas, main dish
    Tex-Mex
    chicken enchilada recipe, chicken enchiladas, chicken enchiladas with sour cream sauce, creamy chicken enchiladas, each chicken enchiladas, enchilada sauce, enchiladas, Mexican food, Tex Mex
    Creamy Chicken Enchilada Recipe
    chicken enchilada recipe
  • Grilled Cheese Sloppy Joes

    Grilled Cheese Sloppy Joes

    Enjoy the best of both worlds with grilled cheese sloppy joes, the ultimate comfort food sandwich made with ground beef, homemade sauce, and melted cheese.

    Grilled cheese has to be one of the most comforting of all comfort foods, besides maybe macaroni and cheese. Combine grilled cheese with sloppy joes, though, and you’ve got the ultimate comfort food.

    grilled cheese sloppy joes on butter bread with basil on gray plate

    My kids love a good grilled cheese sandwich. I mean, who doesn’t? Especially when the weather starts to turn cold, it’s one of our favorite go to lunch ideas.

    I love a little bit of meat on my grilled cheese too, whether it’s ham, turkey, or sloppy joe meat. It just adds a real oomph to the whole sandwich.

    This grilled cheese recipe is an easy meal you can throw together in no time, especially if you’ve already made the homemade sloppy joes ahead of time. Did you know that you can make slow cooker sloppy joes?

    Pair it up with a batch of homemade steak fries, and you’ve got a meal the whole family will love time and time again.

    grilled cheese sloppy joes on sourdough bread on gray plate with potato chips

    If you love this easy sloppy joe recipe, you may also enjoy Philly cheesesteak sloppy joes.

    WHERE CAN I FIND THE GRILLED CHEESE SLOPPY JOE RECIPE?

    If you’d rather skip all of my cooking tips, important cooking info for this recipe, and similar recipe ideas – and get straight to the delicious recipe for grilled cheese sloppy joes – just scroll down to the bottom, where you’ll find a printable recipe card.

    WHAT EXACTLY ARE GRILLED CHEESE SLOPPY JOES?

    If you’ve never had sloppy joes, they’re a sort of loose meat sandwich made with loose ground beef that’s mixed with a tomato based sauce. The sauce usually has ingredients like ketchup or tomato sauce, Worcestershire sauce, sometimes a little mustard, and other tasty ingredients.

    Grilled cheese sloppy joes are exactly what they sound like. A loose meat sandwich with melted cheese, grilled between two slices of buttered bread.

    grilled cheese sloppy joes made with ground beef, sloppy joe sauce, and melted cheese, sandwiches on gray plate

    DO I HAVE TO USE GROUND BEEF?

    Nope. While I prefer to use ground beef, you can also make a good sloppy joe sandwich with ground pork or ground turkey.

    TIPS FOR HOW TO MAKE SLOPPY JOES

    I recommend using bacon grease for added flavor to the meat mixture (maybe even for grilling the sandwiches, but we’ll get to that in a minute). However, no worries if you don’t have bacon grease; you can also use butter or olive oil.

    Be sure to mince up the garlic and onion really well. I like mincing them up so they blend well with the meat and the sauce.

    saute onions and garlic for grilled cheese sloppy joe recipe in iron skillet

    Start by sautéing the garlic and onion in a large skillet. Then add the meat and mix together with the garlic and onion, cooking the mixture well.

    mixing onion, garlic, and ground beef together while making grilled cheese sloppy joe recipe in cast iron skillet

    Be sure to drain off any excess oil when the meat has finished cooking.

    Once you add the sauce ingredients, just let the whole mixture simmer for a good 5 minutes.

    mixing sloppy joe sauce ingredients into ground beef mixture in cast iron skillet

    TIPS FOR HOW TO CREATE SLOPPY JOE GRILLED CHEESE

    Meanwhile, while the juicy burger meat is simmering, prep your bread and cheese.

    Butter the outside of 2 slices of bread, a set of slices for each person you’re feeding. You can even brush on a bit of bacon grease, or you can add a little bacon grease to the griddle for frying.

    grilled cheese sloppy joes frying on cast iron griddle

    TYPES OF CHEESE YOU MAY WANT TO USE FOR GRILLED CHEESE:

    • American
    • Cheddar
    • Smoked Cheddar
    • Pepper Jack
    • Smoked Gouda
    • Gruyeré
    • Swiss

    Honestly, the list could go on and on. In fact, The Daily Meal has a list of the 11 best cheeses for a grilled cheese sandwich.

    PUT YOUR GRILLED CHEESE SANDWICH TOGETHER

    Once the sloppy joe meat has finished cooking, add the desired amount of meat to each sandwich, along with 2 or 3 slices of each person’s favorite cheese.

    open grilled cheese with juicy burger meat on sourdough bread on cast iron griddle

    Slap the cover on your sandwich, and fry it in a skillet or on a griddle until each side is golden and the cheese has melted. Turning the sandwich with loose hamburger meat can be tricky, but a little easier if you use a wider spatula.

    sourdough grilled cheese sloppy joes on gray plate

    You can even sprinkle a little bit of fresh basil on each sandwich once they’re fully cooked. Yum!

    grilled cheese juicy burger or loose meat sandwich with fresh basil on gray plate

    MORE SLOPPY JOE RECIPES YOU MAY ENJOY:

    Taco Sloppy Joes

    Sloppy Joe Stuffed Peppers

    Pepperoni Pizza Sloppy Joes

    25+ Sloppy Joe Recipes for Dinner Tonight

    holding grilled cheese sandwich sloppy joes in hands

    KITCHEN TOOLS YOU MAY NEED TO MAKE SLOPPY JOES

    Skillet and Griddle – We love using our cast iron skillets for pretty much everything both at home and while camping; they are very much a part of our camping cooking gear on every trip.

    Hamburger Chopper – This handy dandy tool makes it easier to chop up the meat into a much looser mixture.

    Wooden Spatula

    Ninja Food Chopper Express or Cutting Board and Chef’s Knife

    Cheese Slicer

    Grilled Cheese Spatula

    GRILLED CHEESE SLOPPY JOE RECIPE

    If you love this grilled cheese sloppy joe recipe as much as I do, please write a 5 star review, and help me share the recipe on Facebook and Pinterest! If you make the recipe, be sure to share that you tried it on Pinterest. I love when readers share feedback!

    Grilled Cheese Sloppy Joes Recipe

    CONNECT WITH ADVENTURES OF MEL!

    Be sure to follow me on social, so you never miss a post!

    Facebook | Pinterest | YouTube | Instagram | Twitter

    Sign up to receive my newsletter, filled with delicious recipes and outdoor travel adventures, in your inbox:

    FREE EMAIL SUBSCRIPTION

    Grilled Cheese Sloppy Joes

    Enjoy the best of both worlds with grilled cheese sloppy joes, the ultimate comfort food sandwich made with ground beef, homemade sauce, and melted cheese.

    • 1 tablespoon bacon grease ((or olive oil))
    • 1 clove garlic (minced)
    • 1/2 medium yellow onion (minced)
    • 1 pound ground beef
    • 1/4 cup ketchup
    • 1 tablespoon Worcestershire sauce
    • 1/2 tablespoon light brown sugar
    • 4 tablespoons salted butter (softened)
    • 8 slices bread
    • 8 slices cheese
    1. Heat the bacon grease, or olive oil, in a large skillet over medium heat 'til hot. 

    2. Sauté the garlic in the bacon grease for 1-2 minutes.

    3. Stir the onion in with the garlic and sauté for another 2-3 minutes.

    4. Add the ground beef into the skillet, stirring the onions and garlic into the meat. Cook on medium heat for 15 to 20 minutes, or until the meat is well cooked. Be sure to drain off any excess oil when the meat has finished cooking.

    5. Mix the ketchup, Worcestershire sauce, and brown sugar into the meat, stirring until combined.
    6. Let the sloppy joe mixture simmer over low to medium heat for at least 5 minutes.

    7. Meanwhile, prep your bread and cheese. Butter the outside of 2 slices of bread, and repeat with a set of slices for each person you’re feeding.
    8. Once the sloppy joe meat is finished cooking, add the desired amount of meat to each sandwich.

    9. Then add 2 or 3 slices of each person’s favorite cheese.
    10. Slap the cover on your sandwich, and fry it in a skillet or on a griddle over low heat 'til each side is golden and the cheese has melted, probably about 5-10 minutes.

    11. Once your sandwiches are grilled, they're ready to serve with your favorite side!

    *I recommend using bacon grease for the added flavor it will give to the meat mixture (and for toasting the buns). But if you don’t have bacon grease, no worries; you can also use butter or olive oil.

    *You can use your choice of cheese. We usually choose between American, extra sharp cheddar, pepper Jack, etc.

    *Turning the sandwich with loose hamburger meat can be tricky, but a little easier if you use a wider spatula.

    Burgers & Sandwiches, Main Course
    American
    easy sloppy joe recipe, grilled cheese, grilled cheese recipe, grilled cheese sandwich, grilled cheese sloppy joes, homemade sloppy joes, how to make sloppy joes, juicy burger, loose meat sandwich, sloppy joe grilled cheese, sloppy joe recipe, sloppy joe sauce, sloppy joes
    grilled cheese sloppy joes comfort food recipe
    grilled cheese sloppy joe recipe
  • Pepperoni Pizza Sloppy Joes

    Pepperoni Pizza Sloppy Joes

    Pizza Sloppy Joes – Easy recipe for pepperoni pizza sloppy joes! Delicious family dinner made with ground beef and all the cheesy, saucy goodness of homemade pizza.

    pepperoni pizza sloppy joes with toasted buns and potato chips on gray plate

    We’re full steam ahead with the next stop on our sloppy joe journey with these lovely li’l pizza joes. Made with ground beef, pepperoni, and mozzarella cheese, pizza sloppy joes are the best of both worlds.

    Unlike our original homemade sloppy joes or slow cooker sloppy joes, this sloppy joe recipe has absolutely no ketchup in it. Instead we went with a homemade pizza sauce, made with crushed tomatoes and all the seasonings.

    My boys have really been enjoying all of these delicious sloppy joe recipes. I’m pretty sure their favorite so far have been the taco sloppy joes, the Philly cheesesteak sloppy joes, and the grilled cheese sloppy joes.

    Personally, I really enjoyed the sloppy joe stuffed peppers.

    open faced pizza sloppy joes on toasted buns with potato chips, served on a gray plate

    Just like our other juicy burger recipes, you can serve pizza joes on toasted buns or for a lower carb option, on a bed of lettuce or spinach. Either way, they make a really tasty family meal.

    WHERE CAN I FIND THE RECIPE FOR PIZZA SLOPPY JOES?

    If you’d rather skip all of my cooking tips, important cooking info for this recipe, and similar recipe ideas – and get straight to the delicious recipe for pepperoni pizza sloppy joes – just scroll down to the bottom, where you’ll find a printable recipe card.

    WHAT IS A PIZZA SLOPPY JOE?

    If you’ve never had sloppy joes, they’re a loose meat sandwich made with loose ground beef that’s mixed with a tomato based sauce. The sauce usually has things like ketchup or tomato sauce, Worcestershire sauce, sometimes a little mustard, and other ingredients.

    Pizza sloppy joes are a loose meat sandwich, but instead of ketchup, they’re made with a homemade pizza sauce, pepperoni, and shredded mozzarella cheese.

    DO I HAVE TO USE GROUND BEEF? CAN I USE OTHER MEATS?

    Pizza joes would taste incredible with a little bit of Italian sausage or regular sausage mixed in with the ground beef. Or you can even use ground turkey instead of beef.

    ground beef mixture for pizza joes, with wooden spatula in iron skillet

    Think pizza when you’re making these… What are your favorite meats when you go to order or make pizza?

    DO I NEED TO THAW THE GROUND BEEF? WHAT IF IT’S FROZEN?

    You can use frozen hamburger meat to make homemade sloppy joes, but you may need to sauté your garlic in a different skillet so it can be added to the ground beef once the meat has thawed. We’re really bad about remembering to get meat out to thaw, so don’t fret if you’ve forgotten it too.

    Since it’s a loose meat sandwich and you’re not having to shape hamburger patties, it’s a little bit easier to do; though I do recommend thawing if at all possible.

    holding a pizza sloppy joe in hands

    Just put the meat into a skillet with maybe 1/2 cup water, turn the heat on medium, and place a lid on the skillet. This will steam the meat.

    You can add the sautéed garlic once the meat has loosened up. And when it’s fully cooked, just be sure to drain off any excess oil.

    TIPS FOR HOW TO MAKE SLOPPY JOES WITH A PIZZA TWIST

    This is a really easy sloppy joe recipe that’s perfect for both pizza lovers and sloppy joe lovers.

    I recommend using bacon grease for added flavor to your meat mixture (and for toasting the buns). But if you don’t have bacon grease, no worries; you can also use butter or olive oil.

    sauté garlic in bacon grease in iron skillet on stovetop for pepperoni pizza sloppy joes

    Be sure to mince up the garlic really well. I prefer to mince it up so that it blends well with the meat and the sauce.

    Sauté the garlic in bacon grease in a large skillet. Then add the meat and mix together with the garlic, cooking the mixture well.

    mixing ground beef and garlic together for pizza sloppy joe recipe in iron skillet with wooden spatula

    Be sure to drain off any excess oil when the meat has finished cooking.

    Add the sloppy joe sauce ingredients, including the crushed tomatoes, seasonings, and chopped pepperoni. Let the mixture simmer for a good 5-10 minutes.

    ingredients for pizza sloppy joe sauce in iron skillet with wooden spatula

    Place the shredded mozzarella cheese on top of the cooked juicy burger mixture, and stir it in as it begins to melt.

    adding mozzarella cheese to pizza sloppy joes meat in iron skillet

    Meanwhile, you can toast hamburger buns in another skillet or on a griddle in a little bit of bacon grease. Or you may choose a lower carb option and prep a plate of lettuce or spinach to go with your pizza sloppy joe meat.

    Add the meat to the buns, lettuce, or spinach, and enjoy a flavorful dinner with your family. This is an especially kid-friendly meal that’s sure to be on your menu again and again!

    pepperoni pizza juicy burger, open faced, served on a gray plate with potato chips and a sprinkling of fresh basil

    WANT MORE SIMILAR DINNERTIME GOODNESS?

    My friend Kristy, from Mommy Hates Cooking, has a delicious recipe for Root Beer Sloppy Joes.

    And my friend Lisa from Crazy Adventures in Parenting, has a yummy recipe for Pizza Stuffed Burgers.

    KITCHEN TOOLS YOU’LL NEED TO MAKE THIS PIZZA SLOPPY JOE RECIPE

    Skillet – We love using our cast iron skillets and griddle for pretty much everything both at home and while camping; they are very much a part of our camping cooking gear on every trip.

    Hamburger Chopper – This handy dandy tool makes it easier to chop up the meat into a much looser mixture.

    Wooden Spatula

    Ninja Food Chopper Express or Cutting Board and Chef’s Knife

    Cheese Grater

    PEPPERONI PIZZA SLOPPY JOE RECIPE

    If you love this pepperoni pizza sloppy joe recipe as much as I do, please write a 5 star review, and help me share the recipe on Facebook and Pinterest! If you make the recipe, be sure to share that you tried it on Pinterest. I love when readers share feedback!

    Pepperoni Pizza Sloppy Joes Recipe

    CONNECT WITH ADVENTURES OF MEL!

    Be sure to follow me on social, so you never miss a post!

    Facebook | Pinterest | YouTube | Instagram | Twitter

    Sign up to receive my newsletter, filled with delicious recipes and outdoor travel adventures, in your inbox:

    FREE EMAIL SUBSCRIPTION

    Pepperoni Pizza Sloppy Joes

    Easy recipe for pepperoni pizza sloppy joes! Delicious family dinner made with ground beef and all the cheesy, saucy goodness of homemade pizza.

    • 1 tablespoon bacon grease (*)
    • 1 clove garlic (minced)
    • 1 pound ground beef
    • 1/2 cup crushed tomatoes
    • 1 tablespoon Italian seasoning
    • 1/2 teaspoon salt
    • 1/2 teaspoon ground black pepper
    • 1/2 cup pepperoni (chopped)
    • 1 cup mozzarella cheese (shredded)
    1. Heat the bacon grease in a large skillet until hot. 
    2. Then add in the garlic and sauté for 3-5 minutes
    3. Add the ground beef into the skillet, stirring the garlic into the meat. Cook on medium heat for 15 to 20 minutes, or until the meat is well cooked.
    4. Be sure to drain off any excess oil when the meat has finished cooking.
    5. Mix the crushed tomatoes, Italian seasoning, salt, black pepper, and pepperoni into the meat, stirring until combined.
    6. Let the pizza sloppy joe mixture simmer for a good 5-10 minutes.
    7. Finally, top the meat with the shredded mozzarella right in the skillet and let it begin to melt.** Then stir the melted cheese into the meat mixture.
    8. Serve on toasted buns or on a bed of lettuce or spinach.

    *I recommend using bacon grease for the added flavor it will give to the meat mixture (and for toasting the buns). But if you don’t have bacon grease, no worries; you can also use butter or olive oil.

    **It will help the cheese to melt a little faster if you place a lid on the skillet.

    You can add a little bit of chopped basil for extra flavor, if desired.

    Burgers & Sandwiches
    American
    easy sloppy joe recipe, homemade sloppy joes, juicy burger, loose meat sandwich, pepperoni pizza, pizza joes, pizza sloppy joes, sloppy joe recipe, sloppy joe sauce, sloppy joes
  • Philly Cheesesteak Sloppy Joes

    Philly Cheesesteak Sloppy Joes

    How to make the most delicious Philly cheesesteak sloppy joes with ground beef, mushrooms, and provolone. Easy dinner idea and recipe!

    Back in college, I was introduced to my first Philly cheesesteak on a trip to Philly. Before that, I’d really never heard of a cheesesteak and really had no idea what it was.

    open faced Philly cheesesteak sloppy joes on toasted hamburger buns with potato chips on gray plate

    And then I married a guy from Pennsylvania who absolutely loved a good Philly cheese steak sandwich. In fact, it became a regular part of our menu.

    Combine his favorite Philly cheese steak with my favorite sloppy joes, and you’ve got the makings of a really yummy dinner.

    The nice thing about Philly cheesesteak sloppy joes is that without the toasted buns, the meat mixture is fairly low carb. So pair with a bed of lettuce or spinach and you’ve got a much healthier option.

    And if you’re in a pinch and need a super quick dinner, you can totally make this juicy burger up ahead of time and just warm it up for dinner. Easy make ahead meal for the win!

    Another couple Philly cheesesteak favorites around here are this Crock Pot Philly cheesesteak sandwich, roast beef Philly cheesesteaks and Philly cheesesteak peppers. Yum!

    holding a Philly cheesesteak sloppy joe in hands

    I JUST WANT THE RECIPE! TAKE ME TO THE PHILLY CHEESESTEAK SLOPPY JOES RECIPE!

    If you’d rather skip all of my cooking tips, important cooking info for this recipe, and similar recipe ideas – and get straight to the delicious recipe for Philly cheesesteak sloppy joes – just scroll down to the bottom, where you’ll find a printable recipe card.

    WHAT IS A PHILLY CHEESESTEAK SLOPPY JOE?

    Don’t worry, before college I’d never heard of a Philly cheesesteak sandwich either.

    A Philly cheese steak sandwich is basically a sandwich made on a hoagie with smaller, thinner pieces of beefsteak and cheese. What cheese goes on a Philly cheese steak depends; it can be provolone, American, or Cheez Whiz.

    A Philly cheesesteak sloppy joe is made with ground beef instead of beefsteak. And like a cheesesteak, it has peppers, onions, mushrooms, and cheese.

    close up of Philly cheesesteak sloppy joes on gray plate with toasted hamburger bun and potato chips

    Instead of serving this loose meat sandwich on a hoagie, you serve it on a toasted hamburger bun, just like a sloppy joe.

    While I use ground beef, you can also make a good sloppy joe sandwich with ground pork or ground turkey.

    CAN I USE FROZEN GROUND BEEF? DO I NEED TO THAW IT?

    You can use frozen hamburger meat to make homemade sloppy joes, but you may need to sauté your onion, garlic, mushrooms, and bell pepper in a different skillet so they can be added to the ground beef once it’s thawed. We actually do this quite often because we forget to get the meat out, so don’t fret if you’ve forgotten it too.

    Since it’s a loose meat sandwich and you’re not making hamburger patties, it’s a little bit easier to do; though I do recommend thawing if at all possible.

    Just put the meat into a skillet with maybe 1/2 cup water, turn the heat on medium, and place a lid on the skillet. This basically steams the meat.

    You can add the sautéed onion, garlic, mushrooms, and pepper once the meat has loosened up.

    ground beef for Philly cheesesteak sloppy joes, cooked in cast iron skillet with green bell peppers and wooden spatula

    When it’s fully cooked, you can drain off any excess oil.

    TIPS FOR HOW TO MAKE PHILLY CHEESESTEAK SLOPPY JOES

    I recommend using bacon grease for added flavor to the meat mixture (and for toasting the buns). But if you don’t have bacon grease, no worries; you can also use butter or olive oil.

    Be sure to mince up the garlic, onion, mushrooms, and bell pepper really well. I like mincing them up so they blend well with the meat and the sauce.

    onion, bell pepper, garlic, and mushrooms for Philly cheesesteak sloppy joes cooking in cast iron skillet
    • You’ll start by sautéing the garlic, onion, mushrooms, and bell pepper in a large skillet.
    • Then add the ground beef and mix together with the vegetables, cooking the mixture well.
    ground beef and veggie mixture for Philly cheesesteak sloppy joes, cooking in cast iron skillet
    • Be sure to drain off any excess oil when the meat has finished cooking.
    • Whisk together the beef broth and flour in a separate measuring cup.
    beef broth in Pyrex measuring cup for Philly cheesesteak sloppy joes
    • Once you add the sloppy joe sauce ingredients, including the broth mixture, just let the meat simmer for a good 5-10 minutes.
    • Finally, top with the Provolone right in the skillet and let it melt. Then stir the melted cheese into the meat mixture.
    provolone cheese topping Philly cheesesteak sloppy joes meat in cast iron skillet

    Meanwhile, you can toast hamburger buns in another skillet or on a griddle in a little bit of bacon grease. Or you may choose a lower carb option and prep a plate of lettuce or spinach to go with your cheesesteak sloppy joe meat.

    Spoon the meat onto a toasted bun and serve it while it’s all toasty warm!

    closed face Philly cheese steak sloppy joes with potato chips on gray plate

    MORE SLOPPY JOE RECIPES YOU MAY ENJOY:

    Sloppy Joe Stuffed Peppers

    Taco Sloppy Joes

    Pepperoni Pizza Sloppy Joes

    Grilled Cheese Sloppy Joes

    25+ Sloppy Joe Recipes for Dinner Tonight

    open faced Philly cheese steak sloppy joe on gray plate with potato chips

    KITCHEN TOOLS YOU MAY NEED TO MAKE PHILLY CHEESE STEAK SLOPPY JOES

    Skillet – We love using our cast iron skillets and griddle for pretty much everything both at home and while camping; they are very much a part of our camping cooking gear on every trip.

    Hamburger Chopper – This handy dandy tool makes it easier to chop up the meat into a much looser mixture.

    Wooden Spatula

    Ninja Food Chopper Express or Cutting Board and Chef’s Knife

    Pyrex Measuring Cup and Whisk

    PHILLY CHEESESTEAK SLOPPY JOE RECIPE

    If you love this Philly cheesesteak sloppy joe recipe as much as I do, please write a 5 star review, and help me share the recipe on Facebook and Pinterest! If you make the recipe, be sure to share that you tried it on Pinterest. I love when readers share feedback!

    Philly Cheesesteak Sloppy Joes Recipe

    CONNECT WITH ADVENTURES OF MEL!

    Be sure to follow me on social, so you never miss a post!

    Facebook | Pinterest | YouTube | Instagram | Twitter

    Sign up to receive my newsletter, filled with delicious recipes and outdoor travel adventures, in your inbox:

    FREE EMAIL SUBSCRIPTION

    Philly Cheesesteak Sloppy Joes

    How to make the most delicious Philly cheesesteak sloppy joes with ground beef, mushrooms, and provolone. Easy dinner idea and recipe!

    • 1 tablespoon bacon grease (*)
    • 1 clove garlic (minced)
    • 1/2 medium yellow onion (chopped)
    • 1/2 large green bell pepper (chopped)
    • 2 ounces fresh mushrooms (minced)
    • 1 pound ground beef
    • 1/2 cup beef broth
    • 1/2 tablespoon unbleached all-purpose flour
    • 1 tablespoon Worcestershire sauce
    • 2 teaspoons dry mustard
    • 1/2 teaspoon salt
    • 1/8 teaspoon ground black pepper
    • 8 ounces Provolone cheese
    1. Heat the bacon grease in a large skillet until hot. 
    2. Then add in the garlic and sauté for 2-3 minutes.
    3. Add the onion, mushrooms, and bell pepper in with the garlic and sauté for another 3-5 minutes.
    4. Add the ground beef into the skillet, stirring the garlic, onion, mushrooms, and bell pepper into the meat. Cook on medium heat for 15 to 20 minutes, or until the meat is well cooked.
    5. Be sure to drain off any excess oil when the meat has finished cooking
    6. Whisk together the beef broth and flour in a separate measuring cup.
    7. Mix the beef broth mixture, Worcestershire sauce, dry mustard, salt, and black pepper into the meat, stirring until combined.
    8. Let the cheesesteak sloppy joe mixture simmer for a good 5-10 minutes.
    9. Finally, top the meat with the Provolone right in the skillet and let it melt.** Then stir the melted cheese into the meat mixture.
    10. Serve on toasted buns or on a bed of lettuce or spinach.

    *I recommend using bacon grease for the added flavor it will give to the meat mixture (and for toasting the buns). But if you don’t have bacon grease, no worries; you can also use butter or olive oil.

    **It will help the cheese to melt a little faster if you place a lid on the skillet.

    Burgers & Sandwiches
    American
    easy sloppy joe recipe, homemade sloppy joes, juicy burger, loose meat sandwich, Philly cheese steak recipe, Philly cheese steak sauce, Philly cheesesteak, Philly cheesesteak sloppy joes, sloppy joe recipe, sloppy joes
    easy Philly Cheesesteak Sloppy Joes dinner recipe
    homemade Philly cheesesteak sloppy joes recipe
  • Sloppy Joe Stuffed Peppers

    Sloppy Joe Stuffed Peppers

    Easy homemade sloppy joe stuffed peppers, made with ground beef and baked in the oven, are a healthy dinner recipe the whole family will love!

    If you love sloppy joes and you love stuffed peppers, you are going to love this recipe. Combine the two and you’ve got a grand slam dinner recipe that’s pretty easy to make.

    sloppy joe stuffed peppers on baking sheet and ivory plate

    The best part about this stuffed pepper recipe is you don’t need any buns or bread, so it’s going to be a healthier option. Low carb is a necessity on our weekly dinnertime menu.

    And who needs canned sloppy joe sauce when you can make your own? We like a good homemade sauce that’s not so thick and gooey. Sometimes I even make crock pot sloppy joes!

    I sometimes use a colorful variety for our stuffed bell peppers, but you can pretty much use any color you want. Whether you want stuffed green peppers, red, yellow, or orange, it doesn’t matter.

    colorful sloppy joe stuffed bell peppers on a baking sheet

    You may also enjoy these stuffed peppers recipes: Spinach and Chicken Stuffed Peppers, Chicken and Rice Stuffed Peppers, Philly cheese stuffed peppers, and beef taco stuffed peppers.

    DO I NEED TO PRE-COOK BELL PEPPERS BEFORE STUFFING THEM?

    You can, but you don’t have to. This is usually done to shorten the cooking time.

    The Cookful has a great explanation for how to pre-cook peppers.

    yellow sloppy joe stuffed bell pepper with stem intact

    HOW TO CUT THE PEPPERS WHEN MAKING STUFFED PEPPERS

    While I usually cut my bell peppers in half, you can go with one of two options when prepping your bell peppers for a stuffed bell pepper recipe…

    • Remove the top of the pepper, along with all the pith and seeds that are down inside.
    • OR cut the peppers in half and remove all the pith and seeds inside. Just remember not to eat the stem if you leave the stem intact.

    Not sure how to go about cutting up a pepper? Here’s a whole tutorial for how to cut a pepper 4 easy ways!

    DO I HAVE TO USE GROUND BEEF FOR SLOPPY JOE MEAT?

    No, you can use ground turkey or ground pork too, whichever is your personal preference.

    ingredients for sloppy joe stuffed peppers, including ground beef in cast iron skillet with wooden spatula and bell peppers on baking sheet

    We prefer ground beef, so this recipe is based around ground beef.

    DO I NEED TO THAW THE MEAT BEFOREHAND? CAN I USE FROZEN GROUND BEEF?

    You can use frozen hamburger meat to make the sloppy joe meat for your stuffed peppers, but you may need to sauté your onion and garlic in a different skillet so they can be added to the ground beef once it’s thawed.

    We actually do this quite often because we forget to get the meat out, so don’t fret if you’ve forgotten it too.

    Since sloppy joes are a loose meat sandwich and you’re not making hamburger patties but rather going with that juicy burger texture for stuffed bell peppers, it’s a little bit easier to do; though I do recommend thawing if at all possible.

    Just put the meat into a skillet with maybe 1/2 cup water, turn the heat on medium, and place a lid on the skillet. This basically steams the meat.

    cooking ground beef, onion, and garlic for sloppy joe stuffed peppers recipe in cast iron skillet on stovetop

    You can add the sautéed onion and garlic once the meat has loosened up.

    When it’s browned, you’ll need to drain off any excess oil.

    TIPS FOR HOW TO MAKE STUFFED PEPPERS WITH SLOPPY JOE MEAT

    I recommend using bacon grease for a li’l added flavor to the meat mixture. But if you don’t have bacon grease, no worries; you can also use butter or olive oil.

    Be sure to mince up the garlic and the onion really well. I like mincing them up so they blend well with the meat and sauce.

    spooning sloppy joe meat into stuffed peppers on baking sheet

    You’ll start by sautéing the garlic and onion in a large skillet. Then add the meat and mix together with the garlic and onion, cooking the mixture just until the meat is browned.

    Be sure to drain off any excess oil when the meat has finished cooking.

    Once you add the sauce ingredients, give it a really good stir and let it simmer for 2 to 3 minutes.

    sloppy joe stuffed green peppers on baking sheet

    Remove the meat mixture from the stovetop, and mix the shredded cheddar into it. Then spoon the sloppy joe mixture into the washed and prepared peppers.

    Bake the stuffed peppers at 350° for 30 to 45 minutes, or until they reach an internal temperature of at least 160°F with a meat thermometer. You may need to cover the peppers halfway through with aluminum foil to prevent them from getting too brown on top.

    Garnish with fresh basil if you want and serve!

    sloppy joe stuffed peppers on baking sheet, garnished with fresh basil

    MORE SLOPPY JOE RECIPES YOU MAY ENJOY:

    red stuffed peppers with sloppy joe meat and fresh basil on baking sheet

    KITCHEN TOOLS YOU MAY NEED TO MAKE SLOPPY JOE STUFFED PEPPERS

    Skillet – We love using our cast iron skillets and griddle for pretty much everything both at home and while camping; they are very much a part of our camping cooking gear on every trip.

    Hamburger Chopper – This handy dandy tool makes it easier to chop up the meat into a much looser mixture.

    Wooden Spatula

    Ninja Food Chopper Express or Cutting Board and Chef’s Knife

    Meat Thermometer

    Baking Sheet

    Aluminum Foil

    SLOPPY JOE STUFFED PEPPERS RECIPE

    If you love this sloppy joe stuffed peppers recipe as much as I do, please write a 5 star review, and help me share the recipe on Facebook and Pinterest! If you make the recipe, be sure to share that you tried it on Pinterest. I love when readers share feedback!

    Sloppy Joe Stuffed Peppers Recipe

    CONNECT WITH ADVENTURES OF MEL!

    Be sure to follow me on social, so you never miss a post!

    Facebook | Pinterest | YouTube | Instagram | Twitter

    Sign up to receive my newsletter, filled with delicious recipes and outdoor travel adventures, in your inbox:

    FREE EMAIL SUBSCRIPTION

    Sloppy Joe Stuffed Peppers

    Easy homemade sloppy joe stuffed peppers, made with ground beef and baked in the oven, are a healthy dinner recipe the whole family will love!

    • 2 tablespoons bacon grease (*)
    • 2 cloves garlic (minced)
    • 1 medium yellow onion (minced)
    • 2 pounds ground beef
    • 1/2 cup ketchup
    • 2 tablespoons Worcestershire sauce
    • 1 tablespoon light brown sugar
    • 1 cup cheddar cheese (shredded)
    • 4 whole bell peppers
    1. Pre-heat the oven to 350°.
    2. Mince the garlic and onion really well.
    3. Sauté the garlic and onion in a large skillet. 
    4. Then add the meat and mix together with the garlic and onion, cooking the mixture just until the meat is browned.
    5. Be sure to drain off any excess oil when the meat has finished cooking.
    6. Add the sauce ingredients, including the ketchup, Worcestershire sauce, and light brown sugar, to the ground beef. 
    7. Give the meat mixture a really good stir and let it simmer for 2 to 3 minutes.
    8. Remove the meat mixture from the stovetop, and mix the shredded cheddar into it. 
    9. Wash and prepare the peppers by either removing the top of the pepper, along with all the pith and seeds that are down inside. Or cut the peppers in half and remove all the pith and seeds inside. 
    10. Spoon the sloppy joe mixture into the washed and prepared peppers. 
    11. Bake the stuffed peppers on a baking sheet at 350° for 30 to 45 minutes, or until they reach an internal temperature of at least 160°F with a meat thermometer.**
    12. Garnish with fresh basil if you want and serve!

    *I recommend using bacon grease for the added flavor to the meat mixture. But if you don’t have bacon grease, no worries; you can also use butter or olive oil.

    **You may need to cover the peppers halfway through with aluminum foil to prevent them from getting too brown on top.

    Dinner Ideas
    American
    easy stuffed peppers, how to make stuffed peppers, juicy burger, sloppy joe, sloppy joe recipe, sloppy joes, stuffed bell pepper recipe, stuffed bell peppers, stuffed pepper recipe, stuffed peppers
    Sloppy Joe Stuffed Peppers Homemade Recipe
    delicious sloppy joe stuffed peppers recipe
  • Easy Homemade Sloppy Joes

    Easy Homemade Sloppy Joes

    Sloppy Joes – Make your own homemade sloppy joes! Easy 30 minute sloppy joe recipe with a simple and delicious sauce. Serve on toasted buns or a bed of lettuce.

    When I was a kid, sloppy joes were one of my favorite meals. Of course, Manwich was the sloppy joe sauce of choice back then.

    open faced sloppy joes with potato chips on gray plate and sloppy joe meat in iron skillet

    But who needs canned sloppy joe sauce when you can make your own simple sauce? And it doesn’t have to be an overbearing sauce either, completely masking the flavor of the meat.

    Nope, you can make a sauce with minimal ketchup, a little bit of Worcestershire sauce, and a pinch of brown sugar. And it’s out of this world delicious!

    When I first made this recipe, it reminded me of the old days when Mom and Grandma would make the best juicy burger around. The toasted buns toasted in just a smidge of bacon grease really brought back a taste of home.

    Tasty Tip: This also makes the best grilled cheese sloppy joes and sloppy joe shepherd’s pie! You can also make crock pot sloppy joes instead.

    holding a sloppy joe or juicy burger with 2 hands above a plate of potato chips

    Are you ready for a dinnertime favorite your family will love? Let’s get to it!

    More sloppy joe recipes you may enjoy: Taco Sloppy JoesPhilly Cheesesteak Sloppy JoesSloppy Joe Stuffed Peppers, and Pepperoni Pizza Sloppy Joes.

    I JUST WANT THE RECIPE! TAKE ME TO THE SLOPPY JOES RECIPE!

    If you’d rather skip all of my cooking tips, important cooking info for this recipe, and similar recipe ideas – and get straight to the delicious recipe for sloppy joes – just scroll down to the bottom, where you’ll find a printable recipe card.

    WHAT ARE SLOPPY JOES?

    If you’ve never had sloppy joes, never fear. It’s never too late to add this yummy recipe to your weekly menu planning.

    Sloppy joes are a sort of loose meat sandwich made with loose ground beef mixed with a tomato based sauce. The sauce usually has things like ketchup or tomato sauce, Worcestershire sauce, sometimes a little mustard, and other ingredients.

    ground beef sloppy joes mixture in iron skillet with wooden spatula

    You can also make a sloppy joe sandwich with ground pork or ground turkey.

    It’s a very flavorful sandwich that’s otherwise known as a juicy burger (what my mama and grandma called it), loose meat sandwich, Manwich, dynamite, slush burger, tavern sandwich, a Maid-Rite, etc.

    SLOPPY JOE INGREDIENTS YOU’LL NEED:

    • Garlic clove
    • Yellow onion
    • Bacon grease (you can also use butter or olive oil)
    • Ground beef

    CAN I USE FROZEN HAMBURGER MEAT? DO I NEED TO THAW IT?

    You can use frozen ground beef. In fact, we do this quite often because we forget to get the meat out.

    Since it’s a loose meat sandwich and you’re not making hamburger patties, it’s a little bit easier to do; though I do recommend thawing if at all possible.

    Just put the meat into a skillet with maybe 1/2 cup water, turn the heat on medium, and place a lid on the skillet. This basically steams the meat.

    When it’s cooked, you can drain off any excess oil.

    TIPS FOR HOW TO MAKE SLOPPY JOES

    Sloppy joes are one of the easiest meals to make. I totally get why my mom liked making them.

    Now I do recommend using bacon grease for the added flavor to the meat mixture (and for toasting the buns). But if you don’t have bacon grease, no worries; you can also use butter or olive oil.

    sauteeing onions and garlic for making sloppy joes

    Be sure to mince up the garlic and the onion really well. I like mincing them up so they blend well with the meat and sauce.

    adding ground beef to sloppy joes mixture with onions and garlic in cast iron skillet

    You’ll start by sautéing the garlic and onion in a large skillet. Then add the meat and mix together with the garlic and onion, cooking the mixture well.

    cooking ground beef mixture for sloppy joes in cast iron skillet

    Be sure to drain off any excess oil when the meat has finished cooking.

    mixing ingredients for sloppy joes sauce into meat mixture in cast iron skillet on stovetop

    Once you add the sauce ingredients, just let the whole mixture simmer for a good 5 minutes.

    simmering sloppy joes ground beef mixture in cast iron skillet on stovetop

    Meanwhile, you can toast hamburger buns in another skillet in a little bit of bacon grease. Or you may choose a lower carb option and prep a plate of lettuce or spinach to go with your sloppy joe meat.

    toasting hamburger buns in a little bit of bacon grease on cast iron griddle for the most delicious sloppy joes

    However you choose to enjoy your sloppy joes, hopefully with a nice big batch of homemade steak fries, this is sure to be a family favorite recipe for many meals to come.

    homemade sloppy joes on plate with potato chips

    KITCHEN TOOLS YOU MAY NEED TO MAKE SLOPPY JOES

    Skillet – We love using our cast iron skillets for pretty much everything both at home and while camping; they are very much a part of our camping cooking gear on every trip.

    Hamburger Chopper – This handy dandy tool makes it easier to chop up the meat into a much looser mixture.

    Wooden Spatula

    meat for sloppy joes or juicy burger recipe in cast iron skillet

    SLOPPY JOE RECIPE

    If you love this sloppy joe recipe as much as I do, please write a 5 star review, and help me share the recipe on Facebook and Pinterest! If you make the recipe, be sure to share that you tried it on Pinterest. I love when readers share feedback!

    Easy Homemade Sloppy Joes Recipe

    CONNECT WITH ADVENTURES OF MEL!

    Be sure to follow me on social, so you never miss a post!

    Facebook | Pinterest | YouTube | Instagram | Twitter

    Sign up to receive my newsletter, filled with delicious recipes and outdoor travel adventures, in your inbox:

    FREE EMAIL SUBSCRIPTION

    Easy Homemade Sloppy Joes

    Make your own homemade sloppy joes! Easy 30 minute sloppy joe recipe with a simple and delicious sauce. Serve on toasted buns or a bed of lettuce.

    • 1 tablespoon bacon grease (*)
    • 1 clove garlic (minced)
    • 1/2 medium yellow onion (minced)
    • 1 pound ground beef
    • 1/4 cup ketchup
    • 1 tablespoon Worcestershire sauce
    • 1/2 tablespoon light brown sugar
    1. Heat the bacon grease in a large skillet until hot. 
    2. Then add in the garlic and sauté for 1-2 minutes.
    3. Add the onion in with the garlic and sauté for another 2-3 minutes.
    4. Add the ground beef into the skillet, stirring the onions and garlic into the meat. Cook on medium heat for 15 to 20 minutes, or until the meat is well cooked.
    5. Be sure to drain off any excess oil when the meat has finished cooking.
    6. Mix the ketchup, Worcestershire sauce, and brown sugar into the meat, stirring until combined.
    7. Let the sloppy joe mixture simmer for at least 5 minutes.
    8. Serve on toasted buns or on a bed of lettuce or spinach.

    *I recommend using bacon grease for the added flavor it will give to the meat mixture (and for toasting the buns). But if you don’t have bacon grease, no worries; you can also use butter or olive oil.

    Burgers & Sandwiches
    American
    easy sloppy joe recipe, homemade sloppy joes, how to make sloppy joes, juicy burger, loose meat sandwich, sloppy joe recipe, sloppy joe sauce, sloppy joes, sloppy joes from scratch
    easy homemade sloppy joes or juicy burger recipe
  • Low Carb Meatloaf Recipe

    Low Carb Meatloaf Recipe

    Easy recipe for a low carb meatloaf made with cauliflower and ground beef. Simple, healthy dinner idea and comfort food recipe with absolutely no ketchup!

    Meatloaf is one of my favorite meals, but my regular meatloaf has oatmeal, ketchup, and BBQ sauce, which all spell carbs, pretty much a no go for Dan. So I decided to work on a low carb meatloaf recipe he could enjoy too.

    low carb meatloaf baked in blue baking dish with basil sprinkled on top

    I’m not sure if this could be considered a keto meatloaf; I don’t know enough about keto ingredients at this point. BUT I do know it’s one recipe you can add to your list of low carb foods.

    Now it is a work in progress, meaning I may be coming back to tweak it as I continue making it. I like to do that when I remake things over and over… I’ll tweak ingredients and sometimes it turns out even better than before.

    This easy meatloaf is definitely delicious just the way it is, though. Even without all the ketchup and BBQ sauce that’s in my favorite meatloaf with oatmeal, it still has a ton of flavor.

    sliced homemade low carb meatloaf in blue baking dish

    And if you’re making meatloaf and need fewer servings, you can always cut the recipe in half– or you could use it to make mini meatloaf muffins! I like to make enough so that we can have meatloaf sandwiches (or salads) the next day for lunch.

    I JUST WANT THE RECIPE! TAKE ME TO THE LOW CARB MEATLOAF RECIPE!

    If you’d rather skip all of my cooking tips, important cooking info for this recipe, and similar recipe ideas – and get straight to the delicious recipe for low carb meatloaf – just scroll down to the bottom, where you’ll find a printable recipe card.

    baked low carb meatloaf in baking dish

    MEATLOAF INGREDIENTS YOU’LL NEED:

    You’ll need just a few simple ingredients to make this low carb meatloaf…

    • Ground beef
    • Eggs
    • Small onion

    You can also add a little parmesan, maybe 1/4 to 1/2 cup if you want more flavor… Parmesan is definitely something I add to my baked Italian cauliflower meatballs, but unfortunately, I didn’t have any on hand for my homemade meatloaf.

    TIPS FOR HOW TO MAKE A LOW CARB MEATLOAF

    Meatloaf is super easy to make, which is why it’s usually on our menu at least once or twice a month. It’s basically a throw everything in the bowl and mix it up type of recipe.

    low carb meatloaf ingredients in blue mixing bowl, including ground beef, cauliflower rice, onion, eggs, and seasonings

    I’d suggest using a leaner ground beef that won’t shrink as much when baked. Meat with more fat will leave a ton of liquid in the pan when it’s done baking, and it’s liable to shrink up big time.

    We usually buy beef from our local butcher shop, and it’s about a 90/10 mixture, which works really well for meatloaf. That mixture still gives off a little bit of juice but not so much that our meatloaf is sitting in a bunch of liquid.

    The steamed cauliflower rice will help the meatloaf to be moist… Normally, I use oatmeal, but the carb content in oatmeal deterred me from using it for this recipe.

    easy low carb meatloaf uncooked in a white baking dish

    As for seasonings, we kept it simple. Salt, pepper, seasoning salt, and a Texas Style BBQ Seasoning (Great Value brand) we found at Walmart; I still like just a hint of BBQ flavor in my meatloaf.

    HOW LONG TO COOK MEATLOAF

    You’ll bake meatloaf at 350° in the oven.

    Meatloaf usually takes anywhere from 45 minutes to an hour to cook all the way through. You want to make sure it reaches an internal temperature of at least 160° with a meat thermometer.

    low carb meatloaf baked and resting in baking dish

    When it’s done, you can just remove it from the oven and let it rest for a few minutes while you finish prepping the rest of your meal.

    WHAT FOODS ARE GOOD TO PAIR WITH MEATLOAF?

    Normally, I’d say to serve meatloaf with mashed potatoes. Yum! Unfortunately, mashed potatoes are definitely not low carb.

    So you might want to go with a better option like maybe a colorful saladgreen beans, or broccoli. And remember, there’s cauliflower in the meatloaf, so you’ve already got a few hidden veggies.

    slice of low carb meatloaf on white plate with fork

    CAN I FREEZE MEATLOAF?

    Yes, you can. Meatloaf would make an excellent freezer meal or make ahead meal.

    MORE DINNER IDEAS WITH GROUND BEEF AND/OR CAULIFLOWER:

    Instant Pot Meatloaf and Mashed Potatoes

    Baked Italian Cauliflower Meatballs – which you can pair with Spaghetti Squash Spaghetti.

    Cauliflower Chicken Fried Rice

    Sausage and Chicken Instant Pot Casserole

    KITCHEN TOOLS YOU MAY NEED TO MAKE THIS EASY MEATLOAF RECIPE:

    13″x9″ casserole or baking dish – I love using this size baking dish to make a big 2-pound meatloaf that will stretch to give our family of 5 more than one meal.

    Large mixing bowl – This makes it easy to just dump in all the ingredients and start mixing.

    Meat thermometer – We use ours all the time; it really helps to tell if the meat has come to temp and is fully cooked.

    LOW CARB MEATLOAF RECIPE

    If you love this low carb meatloaf recipe as much as I do, please write a 5 star review, and help me share the recipe on Facebook and Pinterest! If you make the recipe, be sure to share that you tried it on Pinterest. I love when readers share feedback!

    low carb meatloaf recipe

    CONNECT WITH ADVENTURES OF MEL!

    Be sure to follow me on social, so you never miss a post!

    Facebook | Pinterest | YouTube | Instagram | Twitter

    Sign up to receive my newsletter, filled with delicious recipes and outdoor travel adventures, in your inbox:

    FREE EMAIL SUBSCRIPTION

    Low Carb Meatloaf

    Easy recipe for a low carb meatloaf made with cauliflower and ground beef. Simple, healthy dinner idea and comfort food recipe with absolutely no ketchup!

    • 2 pounds ground beef
    • 2 large eggs
    • 1/2 cup onion (minced)
    • 1 cup cauliflower rice (steamed)
    • 1 teaspoon salt
    • 1/2 teaspoon ground black pepper
    • 1 teaspoon seasoning salt
    • 1 teaspoon BBQ Seasoning (*)
    1. Pre-heat the oven to 350° and spray a 13"x9" baking dish with cooking spray.
    2. In a large mixing bowl, mix together the ground beef, eggs, minced onion, and cauliflower rice.
    3. Sprinkle in the seasonings, including the salt, black pepper, seasoning salt, and BBQ seasoning; and mix together well.
    4. Add the meatloaf mixture to the prepared baking dish, and pat together into a loaf.
    5. Bake at 350° for 45 minutes to 1 hour, or until it reaches an internal temperature of at least 160° with a meat thermometer.
    6. When the meatloaf has finished cooking, remove it from the oven and allow it to rest for just a few minutes while you finish prepping the rest of your meal.
    7. Serve with your favorite sides** and enjoy!

    *I used Great Value brand Texas Style BBQ Seasoning, but you can use any low carb BBQ seasoning.

    Normally, I serve meatloaf with mashed potatoes. Unfortunately, mashed potatoes are definitely not low carb. So you may want to serve it with something like a colorful saladgreen beans, or broccoli.

    Dinner Ideas
    American
    easy meatloaf recipe, homemade meatloaf, how long to cook meatloaf, how to make meatloaf, low carb meatloaf, making meatloaf, meatloaf
    how to make a low carb meatloaf recipe
    easy low carb meatloaf recipe
  • Low Carb Sausage Egg Muffins

    Low Carb Sausage Egg Muffins

    Low carb sausage egg muffins you can make ahead for an easy, healthy breakfast both for you and your kids. Freezable, simple ingredients, quick and delicious recipe!

    We pretty much eat the same thing for breakfast every single morning, but sometimes we just need to switch it up. These sausage egg muffins, filled with sausage, bell pepper, cheddar, pepper jack, and basil, are an easy way to do that.

    sausage egg muffins recipe

    Like bacon, egg, and cheese breakfast muffins, this egg muffin recipe is bursting with incredible flavor. It also makes a very fluffy egg muffin cup.

    Eat them with a fork, or eat them with your fingers, making them the perfect breakfast on the go. They’re quick, low carb, and healthy, giving you a boost of protein to start your day off right.

    sausage egg muffins on a white plate

    If you love these egg cups, you’ll also love these ham and cheese egg muffins.

    I JUST WANT THE RECIPE! TAKE ME TO THE RECIPE FOR LOW CARB SAUSAGE EGG MUFFINS!

    If you’d rather skip all of my cooking tips, important cooking info for this recipe, and similar recipe ideas – and get straight to this delicious low carb sausage egg muffins recipe – just scroll down to the bottom, where you’ll find a printable recipe card.

    sausage egg muffins in a cast iron muffin tin

    CAN YOU MAKE AHEAD AND FREEZE BREAKFAST MUFFINS WITH EGGS?

    Yes, you can. In fact, you can make enough for a couple weeks in a very short amount of time.

    • Make a batch or two of sausage and egg muffins and allow them to cool.
    • Then place them all in a freezer bag or freezer tight container and freeze for easy breakfasts all week.
    • When morning comes, simply warm them up in the microwave or the oven, whichever your preference.
    sausage egg muffins popped out of muffin tin, ready to eat for an easy breakfast

    TIPS FOR HOW TO BAKE EGGS IN A MUFFIN TIN

    Baking eggs in a muffin tin is actually really easy, even when you have multiple ingredients you’re trying to fit in each small muffin cup.

    • Make sure all of your ingredients are ready first… Sausage (or bacon or ham) is cooked, peppers and onions are sautéed, cheese is shredded, veggies are washed and ready, and eggs are whipped up with either heavy whipping cream or milk.
    cooking sausage and peppers in a cast iron skillet
    • Spray the muffin pan with cooking spray before adding any ingredients to it.
    • Start by adding solid ingredients, like your meat, vegetables, cheese, etc.
    layering sausage and cheese for sausage egg muffins in cast iron muffin pan
    • Then pour the egg mixture into the muffin tin, filling each cup about 3/4 of the way full; this will leave a little room for expansion in baking.
    fill egg cups with egg mixture for easy sausage egg muffins
    • Then bake the sausage egg muffins, following your recipe instructions.
    cooked sausage egg muffins in cast iron muffin pan

    HOW TO TELL WHEN EGG MUFFINS ARE DONE

    You’ll be able to tell when your egg muffins are done by both sight and touch. They’ll be fluffy and not jiggly in the middle.

    Of course, if you really want to make sure the eggs are cooked through, you can always use a cooking thermometer to check the temperature. According to the Egg Safety Center, any type of quiche or egg casserole should reach a temperature of 160°F.

    low carb sausage egg muffins in a muffin pan

    IF YOU LOVE THIS SAUSAGE EGG MUFFINS RECIPE, TRY SOME OF OUR OTHER BREAKFAST FAVORITES:

    WAYS YOU CAN CHANGE UP BAKED EGG MUFFINS

    • Add minced onions.
    • Or if you like them better, add chopped green onions.
    • Add chopped up spinach to the egg mixture.
    • Use smoked cheese or Queso Fresco in place of cheddar, colby jack, or pepper jack.
    • Add a different type of meat, like ham or bacon.
    • Or go meatless.
    low carb sausage egg muffins from scratch with basil on top

    KITCHEN TOOLS YOU’LL NEED TO MAKE EGG MUFFINS WITH SAUSAGE:

    Frying Pan and Spatula

    Cutting Board and Sharp Knife

    Cheese Grater

    Liquid Measuring Cup

    Mixing Bowl and Whisk

    Muffin Tins

    Cooking Thermometer (optional)

    LOW CARB SAUSAGE EGG MUFFINS RECIPE

    If you love this low carb sausage egg muffins recipe as much as I do, please write a 5 star review, and help me share the recipe on Facebook and Pinterest!

    low carb sausage egg muffins recipe from scratch

    CONNECT WITH ADVENTURES OF MEL!

    Be sure to follow me on social, so you never miss a post!

    Facebook | Pinterest | YouTube | Instagram | Twitter

    Sign up to receive my newsletter, filled with delicious recipes and outdoor travel adventures, in your inbox:

    FREE EMAIL SUBSCRIPTION

    Sausage Egg Muffins

    Low carb sausage egg muffins you can make ahead for an easy, healthy breakfast both for you and your kids. Freezable, simple, and delicious!

    • Muffin Tin
    • 1 tablespoon salted butter
    • 1 medium bell pepper (minced)
    • 1 pound breakfast sausage
    • 1 tablespoon fresh basil (chopped)
    • 10 large eggs
    • 1/4 cup heavy whipping cream
    • 1/2 teaspoon salt
    • 1/2 teaspoon ground black pepper
    • 1/2 cup cheddar cheese (shredded)
    • 1/2 cup pepper Jack cheese (shredded)
    1. Pre-heat the oven to 375° F and grease a muffin tin. 

    2. Add the butter to a large skillet over medium heat.

    3. Sauté the minced bell pepper in the melted butter for 3 to 5 minutes, or until the peppers begin to soften.

    4. Add the sausage to the skillet, combining it with the peppers.

    5. Stir in the chopped basil leaves, and cook the sausage thoroughly.
    6. Remove the sausage and pepper mixture from the heat, and drain well.
    7. In a large mixing bowl, whisk together the eggs, heavy whipping cream, salt, and pepper.

    8. Put 1 to 2 tablespoons of sausage in the bottom of each muffin cup.
    9. Sprinkle on a layer of cheddar and pepper Jack.

    10. Pour the whipped egg mixture over the sausage and cheese, filling each muffin cup about 3/4 of the way full.

    11. Bake at 375° F for about 20 to 25 minutes, or until the egg muffins are fluffy, not jiggly, and have reached 160° F with a meat thermometer. 

    12. Allow the muffins to cool for 2 to 3 minutes in the pan; then run a table knife around the edges of the muffin cups, and pop the muffins out onto a wire rack to cool. 

    13. Serve immediately with your favorite toppings and sides!

    *You can serve them immediately, or you can refrigerate or freeze them. Then pop them in the microwave in the morning, and enjoy a warm breakfast with hardly any effort! They’re perfect for a quick, on the go, healthy breakfast!

    Breakfast & Brunch, Main Course
    American
    easy breakfast, low carb breakfast, sausage egg muffins
  • Delicious Salmon Patties Recipe

    Delicious Salmon Patties Recipe

    Simple and easy salmon patties, made with crackers. Delicious with tzatziki sauce and perfect for dinner or served as an appetizer.

    delicious salmon patties on white platter with small bowl of tzatziki sauce

    My mom used to make the best salmon patties when I was growing up; my dad did a lot of deep sea fishing, so a lot of times, she’d make them with home canned salmon

    Like grilled fish fillets, fried crappie and Instant Pot salmon, these fried salmon patties have so much flavor. Mom always knew just the right seasonings to add.

    fried salmon patties on a white serving platter with small bowl of tzatziki sauce

    While my salmon cakes can probably never live up to hers, I still enjoy making them for dinner, especially when we make tzatziki sauce to go with them. 

    I’ll keep perfecting my salmon patties recipe, and hopefully, some day I’ll come close to Mom’s.

    salmon patties torn in half in hands

    You can find a printable recipe below. 

    Ingredients you need to make this recipe for salmon patties:

    ingredients for salmon patties recipe, including canned salmon, Saltine crackers, lemon juice, eggs, fresh chives, fresh parsley, Miracle Whip, salt, and pepper

    Tips for how to make salmon patties:

    The first thing you’ll want to do if you’re using canned salmon, is to drain and rinse the salmon. Then add it to a large mixing bowl.

    Add the eggs and lemon juice to the salmon, and give it a good stir.

    Crush the Saltine crackers in a plastic baggie, using a rolling pin. Then add the crackers to your salmon mixture.

    Next, mix in the Miracle Whip.

    ingredients for salmon cakes in large blue mixing bowl with spatula

    Then add the salt, pepper, chives, and chopped fresh parsley. The mixture should be just right for forming 1 to 2 dozen salmon patties, depending on the size you make them.

    Add a dash of olive oil or a couple tablespoons of butter to a skillet and begin to warm.

    Grab about 1 to 2 tablespoons of the mixture and begin forming a patty. Repeat and continue until all of the mixture has been formed into patties.

    fried salmon patties in cast iron skillet

    Add the patties to your skillet (or griddle) and fry each side until the patties have turned a golden brown color and have a crispy texture. 

    salmon patties served on white platter with tzatziki sauce

    When they are cooked through, remove them from the skillet and serve while warm. 

    recipe for salmon patties, crispy and delicious

    If you have leftovers, they’re just as good the next day. 

    What to serve with salmon patties

    Salmon cakes are delicious when served with pasta, rice, vegetables, and more. We enjoy pairing them with a salmon patties sauce like tzatziki sauce, as well as spaghetti squash alfredo (minus the chicken).

    salmon patties cut in half served with salmon patties sauce

    They’d also pair well with a colorful salad

    More fish and seafood recipes you may enjoy:

    easy salmon cakes on white platter, served with homemade tzatziki sauce

    Kitchen tools you may need to make salmon patties:

    Strainer – This makes it easy to drain and rinse the salmon.
    Mixing bowl – You’ll need a large mixing bowl to mix up the salmon patties recipe.
    Rolling Pin – Makes it easy to crush up the Saltines.
    Skillet or Griddle – You’ll need a way to fry the salmon patties.
    Flipper or Turner – for turning the patties in the skillet.

    salmon cakes and tzatziki sauce on white platter

    Delicious Salmon Patties Recipe

    Simple and easy salmon patties, made with crackers. Delicious with tzatziki sauce and perfect for dinner or served as an appetizer.

    • 20 ounces canned salmon (boneless and skinless)
    • 4 whole eggs
    • 2 tablespoons lemon juice
    • 64 whole Saltine crackers ((about 2 sleeves))
    • 1/2 cup Miracle Whip
    • 1 teaspoon salt
    • 1 teaspoon black pepper
    • 1 tablespoon fresh chives (chopped)
    • 3 tablespoons fresh parsley (chopped)
    • 2 tablespoons olive oil (or salted butter)
    1. Drain and rinse the salmon. Then add it to a large mixing bowl.
    2. Add the eggs and lemon juice to the salmon, and give it a good stir.
    3. Crush the Saltine crackers in a plastic baggie, using a rolling pin. 
    4. Add the crackers to your salmon mixture.
    5. Next, mix in the Miracle Whip.
    6. Then add the salt, pepper, chives, and fresh parsley. Mix everything together well.
    7. Add a dash of olive oil or a couple tablespoons of butter to a skillet and begin to warm.
    8. Grab about 1 to 2 tablespoons of the mixture and begin forming a patty. Repeat and continue until all of the mixture has been formed into patties.
    9. Add the patties to your skillet (or griddle) and fry each side on low to medium heat until the patties have turned a golden brown color and have a crispy texture.
    10. When they are cooked through, remove them from the skillet, allow to drain, and serve while warm. 
    11. They pair deliciously well with this homemade tzatziki sauce.

    You can use canned salmon or fresh salmon, totally up to you.

    You can also substitute dried chives or parsley for fresh.

    If you have leftovers, these salmon patties are just as good the next day.

    Seafood Recipes
    American
    salmon cakes, salmon patties, salmon patties recipe

    Update Notes: This recipe was originally published in 2013, but was re-published with bigger photos and more details in July of 2018.

    Salmon Patties Recipe
    Delicious recipe for salmon patties
    salmon cakes recipe
    how to make salmon patties
  • Easy Fish Tacos with a Tzatziki Fish Taco Sauce

    Easy Fish Tacos with a Tzatziki Fish Taco Sauce

    Fish Tacos – Easy, simple, delicious, crispy fish tacos recipe with a low carb tzatziki fish taco sauce. Perfect dinner idea for Taco Tuesday!

    Tacos = life. Do you agree? If you said yes, you’re going to love this recipe for the most deliciously crispy fish tacos with the most deliciously creamy tzatziki fish taco sauce ever!

    fish tacos with all the fixings on a wooden cutting board

    We grilled trout fillets to use in our tacos. However, you can use any white, flaky fish you want for this fish tacos recipe. Sometimes we just make salmon in the Instant Pot if we don’t have time to fire up the grill!

    You can also cook the fish however you choose, though grilling is definitely my favorite way to eat fish. Except, of course, when we make salmon into the most delicious salmon patties; they are definitely a family favorite. And my boys love pan fried crappie after a good fishing trip!

    I’ll share a few alternative options for how to cook fish below.

    Not a fan of fish? No problem! Try our Chicken Tacos or Ground Beef Tacos.

    fish tacos with a tzatziki fish taco sauce on a wooden cutting board

    Choose the right fish for fish tacos and cook it!

    While we used trout, you can use any white, flaky fish. Food and Wine has a great article on how to choose the right fish for tacos.

    Once you’ve chosen the fish you want to use, you’ll need to cook it. We highly recommend grilling on a charcoal grill or gas grill to give your fish a smoky, slightly blackened flavor.

    But if you don’t want to grill or don’t have access to a grill, you can certainly bake the fish or even fry the fish. I’m pretty sure you can even cook fish in your Instant Pot, though you’d definitely want to check pressure cooking times and settings.

    fish tacos recipe ingredients, including cheese, tomatoes, and green onions

    Gather your ingredients for this fish tacos recipe:

    • Lettuce
    • Tomatoes
    • Monterey Jack cheese

    How to make taco shells for crispy fish tacos:

    To make your own crispy taco shells (they remind me of a Taco Bell Chalupa shell)…

    frying corn tortillas in an iron skillet for fish tacos recipe
    • Heat about a tablespoon of bacon grease in a skillet; let it melt and heat up.
    • Add a corn tortilla to the skillet, letting it cook on one side.
    • Use tongs to turn the tortilla and let the other side cook.
    • Finally, remove the tortilla from the skillet and let drain on a paper towel or paper bag for maybe 30 seconds or so.
    • Fold into a taco shape and place in either a taco holder or the bottom side of a muffin pan.

    And that’s it, you’ve made your own taco shells. They’re so good!

    grilled fish tacos with a creamy tzatziki fish taco sauce in a muffin pan

    Tips for how to make grilled fish tacos:

    First, grill the fish; or cook it however you choose.

    Prep all your fresh ingredients. Wash and chop the lettuce, tomatoes, and green onions. Also, shred the cheese.

    Fry up a batch of corn tortillas to form taco shells. You can use bacon grease or oil.

    Once the fish is fully cooked, taco shells are done, and fresh ingredients are prepped, you’re ready to start the process of layering.

    start with a layer of fish in a crispy taco shell for fish tacos

    You can layer ingredients in any order you want (I layer them a bit differently in the video and photos from what I describe here), but I prefer to add the fish into the taco shell first, then the cheese (it gets all melty on the warm meat), and go from there.

    Add a layer of lettuce.

    add layer of lettuce to fish tacos

    Then add a layer of tomatoes.

    layer of tomatoes on lettuce in fish tacos

    Now add the cheese, green onions, and whatever else your heart desires.

    layer of cheese and green onions in fish tacos

    Don’t forget a dollop of tzatziki sauce (though I love adding a good layer of fish taco sauce or sour cream before I even add the meat; that way I have the sauce in every single bite).

    fish tacos with tzatziki sauce for a fish taco sauce

    And that’s it. Tacos are the easiest thing to make on a busy weeknight!

    More Tex Mex recipes you may enjoy:

    Doritos Walking Taco

    Crab Enchilada Recipe

    Beef Taco Stuffed Peppers

    Chicken and Hummus Loaded Nachos in a Sheet Pan

    Easy Chicken Fajitas

    Creamy Chicken Enchiladas

    Cheesy Chicken Quesadillas

    the best fish tacos ever with a tzatziki fish taco sauce on a wooden cutting board

    Kitchen tools you may need to make fish tacos:

    Charcoal Grill or Gas Grill – We love using our charcoal grill.

    Grilling Spatula – for turning the fish and carefully removing it from the grill.

    Iron Skillet – We’re avid users of cast iron cookware. We even take our favorite iron skillet camping with us.

    Tongs – They’ll be needed for flipping the corn tortillas in the skillet.

    Taco Holder – Ok, so you don’t technically NEED this, but it sure does come in handy. I just use the bottom side of my muffin pan.

    Cutting Board and Knife – You’ll use this for way more than just one recipe. We use ours just about every time we step foot in the kitchen.

    grilled fish tacos with a creamy tzatziki fish taco sauce on a wooden cutting board

    Easy Fish Tacos with a Tzatziki Fish Taco Sauce

    Easy, simple, delicious, crispy fish tacos recipe with a low carb tzatziki fish taco sauce. Perfect dinner idea for Taco Tuesday!

    • 2 pounds fish fillets (grilled or cooked)
    • 12 whole corn tortillas
    • 3 tablespoons bacon grease
    • 1/2 head lettuce
    • 6 whole Roma tomatoes (chopped)
    • 4 ounces Monterey Jack cheese (shredded)
    • 4 ounces cheddar cheese (shredded)
    • 6 whole green onions (chopped)
    • 1/4 cup cilantro (optional)
    • 1/2 cup tzatziki sauce
    1. First, grill the fish fillets; or cook it however you choose. 
    2. Prep all your fresh ingredients. Wash and chop the lettuce, tomatoes, and green onions. Also, shred the cheese.
    3. Fry up a batch of corn tortillas to form taco shells. You can use bacon grease or canola oil.
    4. Once the fish is fully cooked, taco shells are done, and fresh ingredients are prepped, you’re ready to start the process of layering. You can layer ingredients in any order you want. 
    5. Add the fish into the taco shell first, then the cheese.
    6. Layer lettuce, a layer of tomatoes, green onions, and whatever else your heart desires. 
    7. Add a dollop of tzatziki sauce or sour cream to top them off.

    You can use canola oil in place of bacon grease.

    And you can also substitute sour cream for the tzatziki sauce.

    When it comes to layering, I actually really love layering starting with the sauce first (so there’s sauce in every bite), then the fish, the cheese so it gets a little melty on the hot meat, then all the rest of the layers.

    Dinner Ideas
    Tex-Mex
    fish taco sauce, fish tacos
    Easy Fish Tacos with a Tzatziki Fish Taco Sauce
    easy grilled fish tacos recipe with a creamy tzatziki sauce
    crunchy fish tacos with a creamy fish taco sauce
  • Simple and Delicious Grilled Fish Fillets Recipe

    Simple and Delicious Grilled Fish Fillets Recipe

    This grilled fish fillets recipe adds a whole new level of deliciousness to dinner. Healthy, delicious, lightly seasoned fish fillets on the grill.

    grilled fish fillets with cilantro on a baking sheet

    While I haven’t always been a big fish eater, I do love fishing with my boys. And I do appreciate the mild flavor of fried crappie! With our busy schedule, we usually make Instant Pot salmon, but I recently learned that I actually really love fish fillets that are cooked on the grill, especially paired with our favorite tzatziki sauce, this salsa recipe with fruit, or this peach and mango salsa

    Fish has so many health benefits, and we are trying to incorporate more of it into our family meals with recipes like our favorite salmon patties. I think in the past maybe we’ve gone with the wrong kinds of fish (that fishy taste), or we’ve cooked it incorrectly.

    After grilling this last batch of trout fillets, I can honestly say I loved them. They were so easy to make, just lightly seasoned, and everyone ate them up; in fact, we used them to make the most delicious fish tacos, which goes really well with homemade pork fried rice!

    I mentioned the health benefits; are you aware of the following?

    • Fish is filled with omega-3 fatty acids and vitamins like Vitamin D, a vitamin that many of us are lacking these days. Just the omega-3’s alone are worth adding a good amount of fish to your weekly menu. We’re talking heart and brain health.
    • Fish has lots of calcium.
    • It’s also rich in minerals.
    • Fish contains essentially a “Caf-Pow” of protein (clearly, I’ve watched way too much NCIS).
    grilled fish fillets with a dollop of tzatziki sauce

    Those are just a few of the many benefits of adding more fish in our diets. So, let’s get to the grilling of these amazing fillets, so you can start enjoying the benefits of fish.

    Ingredients needed to grill trout fillets or any white, flaky fish fillets:

    Tips and tricks for how to grill fish fillets on a charcoal grill:

    The first step is to get your grill going. We prefer using a charcoal grill, but you can use any type of grill.

    Heat up the grill while you prepare the fish.

    Rinse and pat the fish fillets dry.

    grill fish with a coating of olive oil and salt and pepper seasoning

    Add the olive oil to a large bowl, and coat the fish in the oil. 

    Place each fillet on a baking sheet. Season the fish fillets with salt and pepper.

    grill trout fillets on a charcoal grill

    Place each of the fish fillets on the already heated grill. You can also use a plank, but there is definitely an art to grilling with a plank, so this recipe is focusing on adding the fillets straight onto the grill. 

    grilled fish fillets recipe, cooked ad placed on a baking sheet

    Grill fish on high for 10 to 12 minutes, turning for the last 1 to 2 minutes. 

    Use a grilling spatula to carefully get under the whole fillet and pick it up off the grill. Serve immediately with tzatziki sauce and your favorite sides. Grilled fish pairs really well with spaghetti squash alfredo (minus the chicken), broccoli salad, biscuits, or pasta salad.

    More grilling recipes you may enjoy:

    grilled fish fillets served with tzatziki sauce

    Kitchen tools you may need to make this grilled fish fillets recipe:

    Charcoal Grill or Gas Grill – We love using our charcoal grill.
    Large Bowl – for coating the fillets with olive oil.
    Baking Sheet – for seasoning the fish fillets.
    Grilling Spatula – for turning the fish and carefully removing it from the grill.
    Fish Oven Mitts – You may or may not need oven mitts for grilling, but aren’t these fun?!

    Simple and Delicious Grilled Fish Fillets

    This grilled fish fillets recipe adds a whole new level of deliciousness to dinner. Healthy, delicious, lightly seasoned fish fillets on the grill.

    • 2 pounds fish
    • 2 tablespoons olive oil
    • 2 teaspoons salt
    • 2 teaspoons black pepper
    1. Heat up the grill while you prepare the fish.
    2. Rinse and pat the fish fillets dry.
    3. Add the olive oil to a large bowl, and coat the fish in the oil.
    4. Place each fillet on a baking sheet.
    5. Season the fish fillets with salt and pepper.
    6. Place each of the fish fillets directly onto the already heated grill. 
    7. Grill fish on high for 10 to 12 minutes, turning for the last 1 to 2 minutes.
    8. Use a grilling spatula to carefully get under the whole fillet and pick it up off the grill. 
    9. Serve immediately with tzatziki sauce and your favorite sides. 

    Grilled fish fillets pair really well with spaghetti squash alfredo (minus the chicken), broccoli salad, biscuits, or pasta salad.

    Seafood Recipes
    American
    fish fillets, fish fillets recipe
    Simple and Delicious Grilled Fish Fillets Recipe
    how to grill fish fillets
    delicious grilled fish fillets recipe
  • Maple Bourbon Marinated Grilled Shrimp Kabobs

    Maple Bourbon Marinated Grilled Shrimp Kabobs

    Easy recipe for grilled shrimp kabobs marinated with the most delicious, two ingredient, maple bourbon grilled shrimp marinade, then skewered with pineapple chunks and thrown on the grill.

    maple bourbon grilled shrimp kabobs with pineapple on a cookie sheet

    We’ve been a huge fan of the flavor that maple syrup and bourbon give together, especially since we shared the recipe for our Maple Bourbon Brined Turkey. We had to give a similar (but much simpler) glaze a try with our grilled shrimp kabobs

    Shrimp is so easy to make, I don’t know why we haven’t shared more easy shrimp recipes. But get ready because I have a feeling we’ll be sharing more in the near future.

    up close shrimp kabobs with pineapple grilled and placed on a cookie sheet

    I’m not quite sure how to describe the flavor that maple and bourbon give together. It’s slightly sweet, slightly tangy. These grilled shrimp kabobs are juicy and flavorful, just like my garlic parmesan chicken skewers.

    Our grilled shrimp marinade is as simple and easy as 2 ingredients. And just in case you’re wondering where to buy shrimp if you don’t live near a coast… We bought frozen, already cooked shrimp at Aldi, $4.99 for a 12-ounce bag.

    How to make a simple grilled shrimp marinade:

    You’ll need 2 ingredients for this simple marinade recipe… Real maple syrup (make sure it’s real) and bourbon. If you’re not sure where to buy bourbon, Saucey will deliver it right to your home.

    maple bourbon marinade for grilled shrimp recipe
    • Mix the maple syrup and bourbon together in a bowl.
    • Then pour into a gallon-sized bag with your shrimp (about two 12-ounce bags of already cooked shrimp).
    • Seal the bag and allow the shrimp to soak in the mixture for 20 to 25 minutes in the refrigerator.
    soak shrimp in grilled shrimp marinade in gallon bag

    Meanwhile, get the grill heated up and going; we prefer using a charcoal grill, but you can use any type of grill.

    Tips for how to make grilled shrimp kabobs:

    Gather the rest of your ingredients… You’ll need the marinated shrimp, fresh pineapple chunks, and optional cayenne pepper.

    add marinated shrimp and pineapple chunks to skewers for shrimp kabobs

    Take your skewers and alternate adding the marinated shrimp and pineapple chunks to each skewer. 

    grilling marinated shrimp kabobs on a charcoal grill

    Once your skewers are filled with shrimp and fresh pineapple chunks, place them on the already heated grill. 

    grilled shrimp recipe for maple bourbon grilled shrimp kabobs sprinkled with cayenne pepper on the grill

    Sprinkle a bit of cayenne pepper on the kabobs… This step is optional but adds a little spicy taste. 

    brushing a maple bourbon grilled shrimp marinade or glaze on shrimp kabobs on the charcoal grill

    Brush a bit of the marinade on when the shrimp kabobs begin to cook, and grill on high for 5 to 7 minutes per side. 

    maple bourbon grilled shrimp kabobs, easy shrimp recipe

    And that’s really all there is to this grilled shrimp recipe. Easy peasy! I like to top mine off with a fresh batch of sweet fruit salsa, or sometimes peach and mango salsa!

    More grilling recipes you may enjoy:

    Tools you may need to make shrimp kabobs:

    grilled maple bourbon shrimp kabobs with pineapple chunks and bits of parsley

    Mixing Bowl – A medium sized bowl will come in handy for mixing the maple syrup and bourbon together before pouring it over the shrimp in a gallon-sized bag.
    Charcoal Grill or Gas Grill – We love using our charcoal grill.
    Skewers – You’ll need skewers to make kabobs; we have metal skewers similar to this, and they’re so easy to use.
    Grilling Tongs – You’ll need tongs to turn the shrimp kabobs on the grill.
    Basting Brush – to brush on the maple bourbon grilled shrimp marinade. 

    Maple Bourbon Marinated Grilled Shrimp Kabobs

    Easy recipe for grilled shrimp kabobs marinated with the most delicious, two ingredient, maple bourbon grilled shrimp marinade, then skewered with pineapple chunks and thrown on the grill.

    • 1/4 cup real maple syrup
    • 1/4 cup bourbon
    • 24 ounces frozen cooked shrimp (thawed)
    • 1 whole pineapple (cut into chunks)
    • 1 teaspoon cayenne pepper
    1. Mix the maple syrup and bourbon together in a bowl.
    2. Then pour the mixture into a gallon-sized bag with the thawed shrimp.
    3. Seal the bag and allow the shrimp to soak in the mixture for 20 to 25 minutes in the refrigerator.
    4. Meanwhile, heat up the grill; we prefer using a charcoal grill, but you can use any type of grill. 
    5. Take your skewers and alternate adding the marinated shrimp and pineapple chunks to each skewer.
    6. Once your skewers are filled with shrimp and fresh pineapple chunks, place them on the already heated grill.
    7. Sprinkle a bit of cayenne pepper on the kabobs… This step is optional but adds a little spicy taste.
    8. Brush a bit of the marinade on when the shrimp kabobs begin to cook, and grill on high for 5 to 7 minutes per side. The shrimp and pineapple will start to blacken up just a bit.
    9. Once the shrimp are cooked through, remove from the grill and serve immediately with your favorite sauce.
    Seafood Recipes
    American
    grilled shrimp marinade, shrimp kabobs
    Maple Bourbon Marinated Grilled Shrimp Kabobs easy shrimp recipe
    Maple Bourbon Grilled Shrimp Kabobs
    easy maple bourbon grilled shrimp kabobs recipe
  • Easy Ground Beef Tacos from Scratch

    Easy Ground Beef Tacos from Scratch

    The best ground beef tacos ever, made with crispy fried corn tortilla shells, seasoned hamburger, and all the delicious toppings. Easy dinner recipe that’s perfect for Taco Tuesday!

    Have I mentioned how much I love tacos? Besides chicken tacos, ground beef tacos are my favorite, especially when we make them with corn tortilla taco shells.

    ground beef tacos with all the toppings on a wooden cutting board

    Tacos are an easy meal too, making them a win win when it comes to dinner. Really, all it takes is cooking the meat and prepping a few of your favorite toppings.

    For toppings, I recommend lettuce, tomatoes, cheese, sour cream, avocado and maybe even some green onions. You can also add my favorite peach and mango salsa if you like.

    You can use regular taco shells you buy in the store; we love these… Or you can make your own, using corn tortillas, and fry them up in a dab of bacon grease or oil.

    You can even swap out taco shells for bell peppers, making the most delicious taco stuffed peppers.

    beef tacos in corn tortilla taco shells set in a muffin pan for filling with all the toppings

    Want a variation on ground beef tacos? Try taco sloppy joes, cheesy Mexican pie, or taco tater tot hotdish.

    Want less mess? You’ll love this walking taco recipe.

    How to make taco shells for ground beef tacos:

    To make your own crispy taco shells (they remind me of a Taco Bell Chalupa shell)…

    frying a corn tortilla into a taco shell in a cast iron skillet with tongs
    • Heat about a tablespoon of bacon grease in a skillet; let it melt and heat up.
    • Add a corn tortilla to the skillet, letting it cook on one side.
    • Use tongs to turn the tortilla and let the other side cook.
    • Finally, remove the tortilla from the skillet and let drain on a paper towel or paper bag for maybe 30 seconds or so.
    • Fold into a taco shape and place in either a taco holder or the bottom side of a muffin pan.

    And that’s it, you’ve made your own taco shells. They’re so good!

    Tips for how to make this beef taco recipe:

    You’ll need to gather your ingredients, including ground beef, garlic, lemon juice, chili powder, salt, black pepper, peppers, onion, Roma tomatoes, lettuce, cheddar cheese, Monterey Jack cheese, green onions, corn tortillas, and sour cream. You may also want extra ingredients like avocado, black olives, queso, and fresh tomato salsa with basil.

    Add the ground beef, garlic, lemon juice, chili powder, salt, and black pepper to a large skillet. Brown the meat well.

    cooking ground beef and seasoning for tacos in cast iron skillet

    Add the chopped onion, peppers, and 2 to 3 Roma tomatoes to the ground beef mixture. Cook thoroughly until the meat is fully cooked and the veggies have softened.

    cooking ground beef with onion, peppers, and tomatoes in a cast iron skillet for a delicious taco recipe

    Meanwhile, prep all your fresh ingredients. Wash and chop the lettuce, tomatoes, and green onions. Also, shred the cheese.

    Fry up a batch of corn tortillas to form taco shells. You can use bacon grease or oil.

    Once the ground beef is fully cooked, taco shells are done, and fresh ingredients are prepped, you’re ready to start the process of layering. You can layer ingredients in any order you want, but I prefer to add the beef into the taco shell first, then the cheese (it gets all melty on the warm meat), and go from there.

    layer toppings in a fried corn tortilla shell for homemade tacos

    Add a layer of lettuce, a layer of tomatoes, green onions, and whatever else your heart desires. Don’t forget a dollop of sour cream (though I love adding a good layer of sour cream before I even add the meat; that way I have sour cream in every single bite).

    And that’s it. Tacos are the easiest thing to make on a busy weeknight!

    beef tacos in a muffin pan with all sorts of toppings ideas

    More Tex Mex recipes you may enjoy:

    Easy Fish Tacos with a Tzatziki Fish Taco Sauce

    Chicken and Hummus Loaded Nachos in a Sheet Pan

    Easy Chicken Fajitas

    Creamy Chicken Enchiladas

    Cheesy Chicken Quesadillas

    Kitchen tools you may need to make beef tacos:

    Iron Skillet – We’re avid users of cast iron cookware. We even take our favorite iron skillet camping with us.

    Tongs – They’ll be needed for flipping the corn tortillas in the skillet.

    Ground Meat Chopper – This makes it easy to chop up the meat while cooking.

    Taco Holder – Ok, so you don’t technically NEED this, but it sure does come in handy. I just use the bottom side of my muffin pan.

    Cutting Board and Knife – You’ll use this for way more than just one recipe. We use ours just about every time we step foot in the kitchen.

    best ground beef tacos ever on a wooden cutting board with colorful toppings like cheese, tomatoes, and green onions

    Love cooking shows and want to make these tacos along with us? Watch our recipe video!

    Easy Ground Beef Tacos from Scratch

    The best ground beef tacos ever, made with crispy fried corn tortilla shells, seasoned hamburger, and all the delicious toppings. Easy dinner recipe that’s perfect for Taco Tuesday!

    • 1/2 large onion
    • 1 large bell pepper
    • 1 tablespoon salted butter or bacon grease
    • 1 pound ground beef
    • 2 cloves garlic
    • 1 teaspoon lemon juice
    • 1 tablespoon chili powder
    • 1 teaspoon salt
    • 1/2 teaspoon black pepper
    • 2 to 3 whole Roma tomatoes (chopped)
    • 1/2 head lettuce
    • 6 whole Roma tomatoes (chopped)
    • 6 whole green onions (chopped)
    • 4 ounces cheddar cheese
    • 4 ounces Monterey Jack cheese
    • 1/2 cup sour cream
    • 16 whole corn tortillas
    • 3 to 4 tablespoons bacon grease or oil of choice
    1. Add the ground beef, garlic, lemon juice, chili powder, salt, and black pepper to a large skillet. Brown the meat well.
    2. Add the chopped onion, peppers, and 2 to 3 Roma tomatoes to the ground beef mixture. Cook thoroughly until the meat is fully cooked and the veggies have softened.
    3. Meanwhile, prep all your fresh ingredients. Wash and chop the lettuce, tomatoes, and green onions. Also, shred the cheese.
    4. Fry up a batch of corn tortillas to form taco shells. You can use bacon grease or oil.
    5. Once the ground beef is fully cooked, taco shells are done, and fresh ingredients are prepped, you’re ready to start the process of layering. You can layer ingredients in any order you want.
    6. Add a layer of lettuce, a layer of tomatoes, green onions, and whatever else your heart desires. Don’t forget a dollop of sour cream.
    Dinner Ideas
    Tex-Mex
    easy ground beef tacos, ground beef tacos, tacos
    Easy ground beef tacos from scratch
    beef tacos from scratch
    beef taco recipe that's easy to make
  • Easy Meatloaf with Oatmeal (How to Make + Video)

    Easy Meatloaf with Oatmeal (How to Make + Video)

    How to make an old-fashioned meatloaf with oatmeal just like Mom used to make. Easy classic dinner recipe you can quickly mix together and pop in the oven. So much flavor, it’s not your average meatloaf!

    Oatmeal meatloaf is one meal that our whole family loves, and it’s become a go to meal for me when planning our menus. I love making it because I know we’ll get at least 2 meals out of 1 easy meatloaf recipe with oats; same when we make Instant Pot meatloaf and potatoes and my traditional meatloaf recipe, a more classic recipe with a sauce.

    meatloaf with oatmeal baked in white baking dish

    Now I know this classic meatloaf recipe definitely has some carbs; so I’ve actually taken my meatball recipe and kinda tweaked it to make a low carb meatloaf recipe if you’re looking for a low carb option.

    This family favorite meatloaf with oatmeal is super easy to make and so full of flavor. Basically, dump the ingredients in a bowl, mix them up, and drop the whole mixture into a baking pan. Sometimes we even scoop it into muffin tins to make meatloaf muffins!

    easy meatloaf recipe with oatmeal sliced on a pretty white plate ready to serve with a fork

    Meatloaf Ingredients and Substitutions Notes

    To make this flavorful meatloaf recipe with oatmeal, you’ll need to gather a few simple ingredients.

    • Ground Beef – To make the best meatloaf recipe, it’s best to use a lean ground beef; we prefer to use 90/10 or 85/15 ground beef when mixing up a meatloaf. Our reasons are that it’s leaner, there’s less fat, and there will be less grease around your meatloaf. Don’t worry about flavor… You’ll still get really great flavor from a leaner ground beef. And you’ll also be eating a bit healthier, as well. Note: You can use all or half ground turkey or ground pork for this recipe in place of ground beef. However, it will change the look, texture, and flavor of your finished meatloaf.
    • Large Eggs
    • Yellow Onion – Chop or mince the onion. You can use sweet onion, but I like the kick in flavor from a yellow onion.
    • Ketchup – You’ll need ketchup for the meatloaf mixture and the top of the meatloaf.
    • Barbecue Sauce – This gives a smoky flavor to the meat; it’s so good!
    • Oatmeal – Oats are the secret to moist meatloaf; they help make a very tender meatloaf. I generally use old-fashioned rolled oats or quick oats to make this juicy meatloaf with oatmeal recipe; I don’t recommend using steel-cut oats, mainly for texture reasons. If using old-fashioned oats, try soaking them in milk before adding them to the mixture, to help soften them. I’ve even used gluten-free quick oats, so if you want a gluten-free meatloaf with oats, this is the way to go (although you should also check ingredient labels on your other ingredients just to be safe). If you don’t have oats, and you want, you can also sub bread crumbs or cracker crumbs with a 1:1 ratio.
    • Seasoned Salt You can use a good seasoning salt or just plain salt and pepper.

    Keep in mind, this is a 2 lb meatloaf recipe; to make a 1 lb meatloaf recipe with oatmeal, just cut the ingredient amounts in half.

    How to Make Meatloaf with Oatmeal

    You’ll need to pre-heat your oven to 350° F, and grease a 13”x9” baking dish with cooking spray for homemade meatloaf.

    1. Add all of the ingredients, including the ground beef, eggs, minced onion, ketchup, BBQ sauce, oatmeal, and seasoned salt to a large bowl. Mix well using a large fork; or you can just use your hands.
    mixing ingredients for meatloaf recipe with oatmeal in blue mixing bowl
    1. Once everything in the large mixing bowl has been mixed together well, transfer the meat mixture to the 9×13 baking dish, and shape it into a loaf. You can pat the ground beef into a larger loaf and bake it in the 9×13 meatloaf pan; or we’ve even made it by patting the meatloaf into a larger baking sheet. If you do choose to make it in a sheet pan, it likely won’t need as long to bake.
    hands shaping oatmeal meatloaf in white baking dish on white marble countertop
    1. Then an optional step, but one I highly recommend… Squirt ketchup all over the top of the meatloaf.
    unbaked oatmeal meatloaf covered with ketchup in a white baking dish

    How Long to Cook a 2-Pound Meatloaf

    Bake the meatloaf at 350° F for about an hour, longer if needed, until the internal temperature reaches 160° F. Again, a meat thermometer is definitely something I recommend to make sure the meat has come to temp and is fully cooked.

    Expert Tips and Recipe FAQ’s

    Can I sub bread crumbs for oatmeal 1:1 in meatloaf?

    If you must use something other than oatmeal, you can sub 1:1, bread crumbs or crackers. I’ve subbed gluten-free saltine cracker crumbs in a pinch, and they make a delicious meatloaf, as well.

    Should I cover my meatloaf while baking?

    There’s really no need to cover it with aluminum foil, unless your meatloaf starts to brown too quickly on the top or sides… But I have never had this problem. Keep in mind, I use a gas oven, so oven times may vary.

    How should meatloaf be stored?

    You can keep leftover meatloaf in the original baking dish and cover with plastic wrap or foil; or you can put whatever’s left in an airtight container and keep it in the fridge for 3-4 days. We usually make the BEST meatloaf sandwiches with our leftovers the next day.

    Can I make this old-fashioned meatloaf recipe ahead?

    If you want to make meatloaf ahead of time without baking, just mix it all up, shape it in the baking dish, cover, and store in the fridge ’til you’re ready to bake it. You can keep it in the fridge overnight.

    Can I freeze meatloaf?

    Yes, you can freeze meatloaf before or after cooking. Just be sure it’s wrapped tightly or stored properly in an airtight container to prevent freezer burn. It should keep in the freezer for up to 3 months.

    homemade easy meatloaf recipe with oats in a white baking dish

    Optional Recipe Variations

    There are a few things you can add to give this simple meatloaf recipe with oats even more of a flavor kick…

    • Add a bit of Worcestershire sauce, which pairs well with just about any beef dish.
    • Add a dash of onion powder and minced garlic (or garlic powder) to the meat mixture.
    • Put bacon slices on top of the meatloaf before you bake it.
    • Top with a mixture of both ketchup and bbq sauce.
    • Make a simple meatloaf glaze with ketchup or tomato sauce, mustard, bbq sauce, and brown sugar for the top of the meatloaf.

    Great Side Dishes to Serve with Meatloaf

    When it’s fully cooked, remove it from the oven; and serve it with sides like creamy mashed potatoes, green beans, or broccoli.

    You can even do what my family absolutely LOVES to do with meatloaf… Make the most delicious meatloaf sandwich ever! Mmmm, I love meatloaf sandwiches… My favorite way to use leftovers!

    forked bite of meatloaf with oatmeal on white plate

    More Favorite Meat Recipes:

    If you love this easy meatloaf recipe, you’ll love these meaty main dishes too…

    If you try this recipe, why not leave a star rating in the recipe card right below and/or a review in the comment section further down the page? I always appreciate your feedback. You can also follow me on Pinterest, Facebook, Instagram, and YouTube. And subscribe to my email list too!

    Meatloaf with Oatmeal

    How to make an old-fashioned meatloaf with oatmeal just like Mom used to make. Easy classic dinner recipe you can pop in the oven.

    • Large Mixing Bowl
    • 9×13 Baking Dish
    • Meat Thermometer
    • 2 pounds ground beef
    • 2 large eggs
    • 1/2 large yellow onion (minced)
    • 1/2 cup ketchup
    • 1/2 cup BBQ sauce
    • 2 cups old-fashioned oatmeal
    • 2 teaspoons seasoned salt
    • 4 to 6 tablespoons ketchup (for the top of the meatloaf)
    1. Pre-heat the oven to 350° F, and grease a 9×13 baking dish with cooking spray.

    2. Add all of the ingredients, including the ground beef, eggs, minced onion, ketchup, bbq sauce, oatmeal, and seasoned salt, to a large bowl. Mix well using a large fork; or you can just use your hands.

    3. Transfer the meat mixture to the greased 9×13 baking dish, and shape it into a loaf.

    4. Squirt ketchup all over the top of the meatloaf.
    5. Bake the meatloaf at 350° F for about 1 hour, or longer if needed, until the internal temperature reaches 160° F. I definitely recommend a meat thermometer, to make sure the meat has come to temp and is fully cooked.

    6. When it’s fully cooked, remove the meatloaf from the oven; slice it and serve with your favorite sides.

    *We prefer to use 90/10 or 85/15 ground beef when mixing up a meatloaf. Our reasons are that it’s leaner, there’s less fat, and there will be less grease around your meatloaf. Don’t worry about flavor… You’ll still get really good flavor from a leaner ground beef. And you’ll also be eating a bit healthier, as well. Note: You can use all or half ground turkey or ground pork for this recipe in place of ground beef. However, it will change the look, texture, and flavor of your finished meatloaf.

    *I’ve used both old-fashioned oats and quick oats for this meatloaf. I’ve even used gluten-free quick oats, so if you want a gluten-free meatloaf with oats, this is the way to go (although you should also check ingredient labels on your other ingredients just to be safe).

    Should I cover the meatloaf while baking?

    There’s really no need to, unless your meatloaf starts to brown too quickly on the top or sides… But I have never had this problem. Keep in mind, I use a gas oven, so oven times may vary.

    How to store meatloaf?

    You can keep leftover meatloaf in the original baking dish and cover with plastic wrap or foil; or you can put whatever’s left in an airtight container and keep it in the fridge for 3-4 days.

    Can I make it ahead?

    If you want to make meatloaf ahead of time without baking, just mix it all up, shape it in the baking dish, cover, and store in the fridge ’til you’re ready to bake it. You can keep it in the fridge overnight.

    Dinner Ideas, main dish
    American
    2 lb meatloaf recipe with oatmeal, easy meatloaf recipe, easy meatloaf recipe with oats, gluten-free meatloaf with oats, how to make meatloaf with oatmeal, meatloaf, meatloaf ingredients, meatloaf made with oatmeal, meatloaf recipe, meatloaf recipe with oatmeal, meatloaf recipe with oats, meatloaf with oatmeal, meatloaf with oatmeal recipe, meatloaf with oats, oatmeal meatloaf, oatmeal meatloaf recipe, simple meatloaf recipe with oats
  • Instant Pot Shredded Chicken Tacos

    Instant Pot Shredded Chicken Tacos

    Made with Instant Pot chicken, corn tortillas, and fresh ingredients, shredded chicken tacos are an easy homemade dinner recipe the whole family will love!

    Shredded chicken tacos, as well as fish tacos and beef tacos, have been a favorite meal around our house for quite some time. I think it’s both the ease of making them with our favorite taco chicken recipe and our love for delicious Tex-Mex food.

    shredded chicken tacos with fresh ingredients on a muffin pan

    As mentioned, they really are easy to make, especially if you’ve already cooked the chicken. All that’s left is prepping a few fresh ingredients to go on your tacos.

    As long as you have lettuce, tomatoes, cheese, and sour cream, you’re in business. Extras you may want to add include avocado, green onions, black olives, queso, fruit salsa… The sky’s the limit when it comes to easy chicken tacos.

    You can use regular taco shells you buy in the store; we love these… Or you can make your own, using corn tortillas and frying them up in a bit of bacon grease or oil.

    easy chicken tacos on a cutting board close up with fresh ingredients and sour cream

    If you love Tex Mex, you’ll love these beef taco stuffed peppers. And if it’s less mess, less stress you’re after, try our taco in a bag recipe!

    How to make taco shells for easy chicken tacos:

    To make your own crispy taco shells (they remind me of a Taco Bell Chalupa shell)…

    • Heat about a tablespoon of bacon grease in a skillet; let it melt and heat up.
    • Add a corn tortilla to the skillet, letting it cook on one side.
    • Use tongs to turn the tortilla and let the other side cook.
    • Finally, remove the tortilla from the skillet and let drain on a paper towel or paper bag for maybe 30 seconds or so.
    • Fold into a taco shape and place in either a taco holder or the bottom side of a muffin pan.

    And that’s it, you’ve made your own taco shells. They’re so good!

    Tips for how to make shredded chicken tacos:

    You’ll need to gather your ingredients, including already cooked taco chicken, lettuce, Roma tomatoes, cheddar cheese, Monterey Jack cheese, green onions, corn tortillas, and sour cream. You may also want extra ingredients like avocado, black olives, queso, mango peach salsa and basil salsa.

    loaded pressure cooker chicken tacos on a cutting board

    While the chicken is cooking in your Instant Pot or pressure cooker, you can take time to wash and chop your lettuce, tomatoes, and green onions. Also, shred the cheese.

    Fry up a batch of corn tortillas to form taco shells. You can use bacon grease or oil.

    Once your chicken is fully cooked and shredded, taco shells are done, and fresh ingredients are prepped, you’re ready to start the process of layering. You can layer ingredients in any order you want, but I prefer to add the chicken into the taco shell first, then the cheese (it gets all melty on the warm chicken), and go from there.

    Add a layer of lettuce, a layer of tomatoes, green onions, and whatever else your heart desires. Don’t forget a dollop of sour cream (though I love adding a good layer of sour cream before I even add the chicken; that way I have sour cream in every single bite).

    And that’s it. I love the ease of making pressure cooker chicken tacos for dinner!

    how to make shredded chicken tacos with fresh ingredients, Instant Pot taco chicken, fresh ingredients, and sour cream

    More Tex-Mex recipes with chicken:

    Kitchen tools you may need to make pressure cooker chicken tacos:

    Instant Pot – We use our Instant Pot almost every day. It really does make the most delicious taco chicken for easy chicken tacos.

    Iron Skillet – We’re also avid users of cast iron cookware. We even take our favorite iron skillet camping with us.

    Tongs – They’ll be needed for slipping the corn tortillas in the skillet.

    Taco Holder – Ok, so you don’t technically NEED this, but it sure does come in handy. I just use the bottom side of my muffin pan.

    Instant Pot Shredded Chicken Tacos

    Shredded chicken tacos, made with Instant Pot chicken, corn tortillas, and fresh ingredients, are an easy homemade dinner recipe the whole family will love!

    • 3 cups Instant Pot taco chicken
    • 16 corn tortillas
    • 3 to 4 tablespoons bacon grease or oil of choice
    • 1/2 head iceberg lettuce
    • 6 Roma tomatoes
    • 6 green onions
    • 4 ounces cheddar cheese
    • 4 ounces Monterey Jack cheese
    • 1/2 cup sour cream

    Corn Tortilla Taco Shells:

    1. Heat about a tablespoon of bacon grease in a skillet; let it melt and heat up.
    2. Add a corn tortilla to the skillet, letting it cook on one side.
    3. Use tongs to turn the tortilla and let the other side cook.
    4. Finally, remove the tortilla from the skillet and let it drain on a paper towel or paper bag for maybe 30 seconds or so.
    5. Fold into a taco shape and place in either a taco holder or the bottom side of a muffin pan.
    6. Continue cooking tortillas until you have the desired number of taco shells.

    Shredded Chicken Tacos:

    1. Cook a batch of taco chicken in your Instant Pot.
    2. Prep and cook taco shells, per the steps above.
    3. Wash and chop the lettuce, tomatoes, and green onions.
    4. Shred or grate both cheeses.
    5. Layer ingredients in any order you want, but I prefer to add the chicken into the taco shell first, then the cheese (it gets all melty on the warm chicken), and go from there.
    6. Add a layer of lettuce, a layer of tomatoes, green onions, and whatever else your heart desires.
    7. Don’t forget a dollop of sour cream (though I love adding a good layer of sour cream before I even add the chicken; that way I have sour cream in every single bite).
    Dinner Ideas
    Tex-Mex
    chicken tacos, Instant Pot recipes, Instant Pot tacos, shredded chicken tacos, tacos
    Instant Pot Shredded Chicken Tacos
    how to make the most delicious chicken tacos with shredded chicken and fresh ingredients
  • Easy Spaghetti Squash Chicken Alfredo

    Easy Spaghetti Squash Chicken Alfredo

    Spaghetti Squash Chicken Alfredo, made with shredded chicken and an easy homemade Alfredo sauce, is a healthy recipe for dinner. So creamy and delicious!

    spaghetti squash chicken alfredo on a plate with fork

    Spaghetti Squash Chicken Alfredo is one of my family’s favorite weeknight meals, probably because it’s so easy to make, especially when we cook the spaghetti squash in the Instant Pot.

    I love it too because it’s a healthy meal we can all enjoy together. And it pairs really well (minus the chicken) with fish fillets and salmon patties.

    While I do love pasta, I’ve grown quite accustomed to replacing all our favorite pasta dishes with spaghetti squash instead. It’s actually a really delicious alternative to carb heavy pastas.

    We make an easy homemade alfredo sauce that calls for 4 simple ingredients. Heavy whipping cream is the base for this sauce, mainly because it has no carbs. Parmesan cheese (Parmigiano-Reggiano cheese) adds some pretty excellent flavor to the sauce, as well.

    healthy chicken alfredo with spaghetti squash on a blue plate

    If you’ve never had spaghetti squash chicken alfredo, now’s the time to make it. Pair it with a batch of quick garlic breadsticks, and it’ll quickly climb to the top of your favorite dinner ideas.

    [mv_video doNotAutoplayNorOptimizePlacement=”false” jsonLd=”true” key=”nhrxaov5gdkchhhejyn0″ sticky=”false” thumbnail=”https://mediavine-res.cloudinary.com/v1520216541/sujmcqpn3oi00wrbtb42.jpg” title=”Easy Spaghetti Squash Chicken Alfredo” volume=”100″]

    Tips for how to make healthy chicken Alfredo:

    Gather your ingredients… You’ll need an already cooked spaghetti squash, 2 cooked chicken breasts, heavy whipping cream, Parmesan (Parmigiano-Reggiano) cheese, salt, pepper, and fresh parsley.

    1. Cook the spaghetti squash and chicken beforehand. An easy option is to cook either or both in the Instant Pot.
    2. Prep the spaghetti squash by pulling the squash out of the skin.
    3. Shred the chicken.
    4. To make the sauce, pour the heavy whipping cream into a large skillet or saucepan.
    5. Stir constantly to avoid scorching, and allow the cream to come to a boil.
    6. Slowly whisk the cheese into the simmering cream. The sauce will start to thicken.
    7. At this point, whisk the salt and pepper into the sauce.
    8. Use tongs to add spaghetti squash to your plate.
    9. Add a handful of shredded chicken on top.
    10. Finally, add Alfredo sauce to your liking.
    11. Top it all off with a light sprinkling of parsley.
    Plate full of easy chicken fettuccine alfredo made with spaghetti squash

    More Pasta Dishes You May Enjoy:

    Kitchen tools you may need to make easy chicken fettuccine Alfredo:

    plated chicken fettuccine Alfredo recipe using spaghetti squash as a low carb alternative

    Instant Pot – We use our Instant Pot several times a week, if not every day, and it makes cooking the spaghetti squash a breeze.
    Cutting Board – Perfect for prepping the squash and shredding the chicken.
    Large Skillet or Saucepan – We love using a deeper iron skillet to make the sauce.
    Heat Resistant Spatula – One of my favorite tools to use for stirring.
    Whisk – For stirring in the cheese, salt, and pepper.
    Tongs – They make it easy to serve up the squash.

    Print this chicken fettuccine Alfredo recipe:

    Easy Spaghetti Squash Chicken Alfredo

    Spaghetti Squash Chicken Alfredo, made with shredded chicken and an easy homemade Alfredo sauce, is a healthy recipe for dinner. So creamy and delicious!

    • 1 cooked spaghetti squash
    • 2 cooked chicken breasts
    • 3 cups heavy whipping cream
    • 1/2 pound Parmesan (Parmigiano-Reggiano cheese)
    • 1/2 teaspoon salt
    • 1/2 teaspoon ground black pepper
    • Fresh parsley
    1. Cook the spaghetti squash and chicken beforehand. An easy option is to cook either or both in the Instant Pot.
    2. Prep the spaghetti squash by pulling the squash out of the skin.
    3. Shred the chicken.
    4. To make the sauce, pour the heavy whipping cream into a large skillet or saucepan.
    5. Stir constantly to avoid scorching, and allow the cream to come to a boil.
    6. Slowly whisk the cheese into the simmering cream. The sauce will start to thicken.
    7. At this point, whisk the salt and pepper into the sauce.
    8. Use tongs to add spaghetti squash to your plate.
    9. Add a handful of shredded chicken on top.
    10. Finally, add Alfredo sauce to your liking.
    11. Top it all off with a light sprinkling of parsley.


    Pasta
    Italian
    chicken alfredo, spaghetti squash chicken alfredo

    Pin this recipe for future dinner ideas!

    Spaghetti Squash Chicken Alfredo
    Spaghetti Squash Chicken Alfredo with fork on a plate