Desserts can make a person smile, and that’s why I love a good dessert. Here you’ll find loads of scrumptious dessert recipes, including cake recipes, cupcakes, cookie recipes, pies and pastries, frozen treats, and sweet snacks.
Craving a simple dessert that will satisfy your sweet tooth but only take about a minute to make? I partnered with Duncan Hines to share this recipe for a simple and easy raspberry chocolate cake.
It’s no secret that I love dessert. I especially love dessert when it involves chocolate. Pretty sure my grandma passed her love for chocolate on to me with all the yummy things she used to bake. The truth is, though, I don’t always have a lot of time to bake. There are times when I just want something quick and easy, ya know? If you’re reading this, of course you know!
Enter Duncan Hines with their scrumptious Perfect Size for 1 desserts that are ready in about a minute.
Keep reading because I’m going to show you how to customize their Chocolate Lover’s Cake into a delicious recipe for an unforgettable afternoon treat.
Perfect Size for 1 Warm Treats
Dessert is especially good right after dinner. But sometimes I love a good afternoon treat because that’s the time when cravings usually seem to hit.
Perfect Size for 1 comes in 18 different varieties, including flavors like Banana Bread, Lemon Cake, S’mores Cake, Brownie, Carrot Cake, and of course, Chocolate Lover’s Cake. All you need are a mug, a little bit of water (or other liquid), and about a minute. How perfect is that?
I love that I can enjoy a warm delicious treat just for me without all the work of actually baking a cake.
And it’s individually sized so I’m not tempting myself with an entire cake. Another plus is that when the summer heat is here, there’s no need to turn on the oven. There are no dishes, besides my 8-oz. mug; so there’s no mess to clean up!
The best part is you can customize your treat to your liking, and that’s where the printable recipe below comes in.
How to Make Raspberry Chocolate Cake for 1 in About a Minute
Ready to make a decadently delicious treat in about a minute? Let’s do this.
Empty the contents of 1 cake mix pouch into an 8-oz. or larger coffee mug.
Add a handful (about 1/4 cup) of semi-sweet chocolate chips to the mixture.
Add 3 tablespoons of raspberry coffee creamer to the mix.
Stir with a spoon until the batter is smooth, making sure to scrape the sides and bottom of your mug so it’s all mixed in. Cook according to package directions for about 1 minute 10 seconds.
Cool for another 2 minutes before you devour this delicious dessert!
Print the Recipe for Raspberry Chocolate Cake
IF YOU LOVE THIS RECIPE, HERE ARE A FEW MORE CAKE MIX RECIPES YOU WILL LOVE:
Craving a simple and easy dessert that will satisfy your sweet tooth but only take about a minute to make? How to make raspberry chocolate cake for 1 in about a minute. Print the recipe!
1 8- oz. or larger coffee mug
1 Duncan Hines Perfect Size for 1 cake mix pouch
1/4 cup chocolate chips
3 tablespoons raspberry coffee creamer
Empty the contents of 1 cake mix pouch into an 8-oz. or larger coffee mug.
Add semi-sweet chocolate chips to the mixture.
Add raspberry coffee creamer to the mix.
Stir the mixture with a spoon until the batter is smooth, making sure to scrape the sides and bottom of your mug so it’s all mixed in.
Cook according to package directions for about 1 minute 10 seconds.
Don’t you just love berry season? It seems like it came early this year here in our little corner of Arkansas.
Every year around this time I have to make all the things with delicious fresh-picked strawberries, including strawberry cream pie, strawberry freezer jam, strawberry delight, and strawberry shortcake. And fresh strawberries make the ultimate mini fruit pizzas! Because who doesn’t love a good old-fashioned strawberry shortcake, especially when it involves Grandma’s biscuits?
And of course, the star of the show… Red, juicy strawberries.
Speaking of Grandma’s Biscuits…
For as long as I can remember, Grandma kept a slip of paper taped to the inside of her cabinet door. That slip of paper held her favorite biscuit recipe, handwritten in her own handwriting. My mom now has that same slip of paper taped to the inside of her cabinet door. And I’m considering writing out the recipe and taping it to the inside of our cabinet.
We love making these biscuits. They can be rolled out or dropped. For this particular recipe, I actually grabbed spoonfuls and shaped them by hand, so they were more like drop biscuits. I also added in a teaspoon of sugar just to add a li’l sweetness to the recipe since I planned to use them for strawberry shortcake.
Gobs of Creamy Whipped Cream
Before I actually created this recipe, I had this idea to add cream cheese to the homemade whipped cream I planned to make. Dan wasn’t sure it would work; frankly, I wasn’t either. But like I’ve said before, cream cheese is one of my favorite ingredients. Ever.
Well, it worked. The whipped cream is so creamy and flavorful. It definitely adds a special touch to the shortcake.
Print the Recipe for Old-Fashioned Strawberry Shortcake with Grandma’s Biscuits
Below is the printable recipe for this scrumptious old-fashioned strawberry shortcake using Grandma’s biscuits. Enjoy!
Old-Fashioned Strawberry Shortcake with Grandma’s Biscuits
Strawberry Shortcake made with a cream cheese whipped cream, Grandma's biscuits, and juicy red strawberries! Print the recipe for Old-Fashioned Strawberry Shortcake with Grandma's Biscuits.
Biscuits –
2 cups all-purpose flour
3 teaspoons baking powder
1/2 teaspoon salt
1 teaspoon sugar
1/3 cup unsalted butter
3/4 cup milk
Whipped Cream –
2 ounces cream cheese
2 cups heavy whipping cream
1 teaspoon vanilla extract
1/2 cup powdered sugar
Strawberries (washed and sliced)
For the biscuits, mix together flour, baking powder, salt, and sugar in a medium bowl.
Use a pastry blender to blend flour mixture together with cold sliced butter. Continue until mixture is well blended.
Add milk to mixture, and mix well. You should be left with a somewhat sticky but still manageable dough.
Grab spoonfuls of dough and shape into biscuits about 3/4 inch thick. Place on ungreased cookie sheet.
Bake at 425° for about 15-20 minutes, or until tops are beginning to turn golden.
Meanwhile, wash strawberries.
Mix together cream cheese, heavy whipping cream, vanilla, and powdered sugar to form a whipped cream.
Once the biscuits have cooled, slice a biscuit in half.
Place bottom half of biscuit on plate. Add a layer of sliced strawberries, followed by a generous layer of whipped cream, then another layer of sliced strawberries. Top with the top half of the biscuit.
Add a small dollop of whipped cream to the top, followed by a whole strawberry.
Serve and enjoy!
Desserts
American
old-fashioned strawberry shortcake, strawberry shortcake, strawberry shortcake with biscuits
Learn how to make easy and adorable bunny tail cupcakes with chocolate cupcakes, frosting, and mini marshmallows. This is a fun Easter dessert kids will love to help make!
Easter will soon be here, and these little bunny cupcakes are so easy and fun, you’ll want to add them to your traditional Easter dinner menu.
Why You’ll Love This Easter Dessert
This is a fun dessert for kids and young at heart.
Perfect recipe for toddlers and working on fine motor skills… Placing the marshmallows on the cupcakes will keep them entertained and busy for at least a little bit.
You can make regular sized cupcakes or mini cupcakes. Mini bunny tail cupcake bites are the perfect size dessert if you’re trying to watch what you eat but still want a bit of a sweet treat.
They involve chocolate, so that’s a win win dessert right there. Of course, you can make the cupcakes any flavor you like.
Ingredients and Substitutions Notes:
You’ll need a few ingredients to make this recipe…
Butter and Oil – I like to use salted butter and canola oil for this recipe.
Unsweetened Cocoa Powder – I prefer Hershey’s Cocoa Powder, but you can use any brand you like.
Large Eggs
Baking Soda
Buttermilk – You can use a buttermilk mix, straight buttermilk from the store, or just sour regular milk by adding a tablespoon of vinegar to the measuring cup, then measure out the milk to the line for the amount you need.
Another option is to use a cake mix. I’m all for easy, so I totally get it, plus you can make any flavor you want.
If you decide to make mini cupcakes, you’ll definitely need a mini muffin pan.
Before you get starting mixing up the cupcake batter, pre-heat the oven to 350° F, and line your muffin pan/s with cupcake liners.
Mix and Bake the Cupcakes
In a large mixing bowl, whisk together the sugar, flour, and cocoa powder.
In a medium saucepan, bring the butter, oil, and water to a boil.
Then remove the mixture from the heat, and mix together with the flour mixture.
In a separate bowl, dissolve the baking soda in the buttermilk by whisking together for a minute or so.
Then beat the eggs in with that buttermilk mixture.
Add the egg mixture and vanilla extract to the flour mixture in the mixing bowl, and mix well.
Pour the cupcake batter into the prepared muffin pan/s, and bake at 350° for about 15-20 minutes, or until a toothpick inserted in the center of a cupcake comes out clean.
Let the cupcakes cool in the pan for about 10 minutes before removing to a wire rack to cool completely.
Make the Frosting
While your cupcakes are baking, mix up the frosting.
In a medium mixing bowl, whisk together the powdered sugar and cocoa powder. Set aside.
In a medium saucepan, melt the butter into the buttermilk, but do not boil. Remove from the heat when all the butter has melted.
Then beat in the powdered sugar mixture ’til you have a spreadable consistency for frosting.
Whisk in the vanilla extract, and it’s ready to go.
How to Decorate Bunny Tail Cupcakes
Once your cupcakes have baked and cooled, frost to whatever thickness you prefer.
Then apply a thin layer of marshmallow cream; it’s ok if the marshmallow cream mixes just a bit with the chocolate frosting. This mixture will allow the mini marshmallows to really adhere to the top of the cupcake without sliding off.
Slice or tear each mini marshmallow in half.
Place the marshmallows all over the top of each frosted cupcake, adding more marshmallow halves ’til the top of each cupcake is covered, resembling a fluffy bunny tail.
And that’s it. They are so cute and perfect for the Easter holiday with family and friends.
Expert Tips and Recipe FAQ’s
How should I store bunny tail cupcakes?
If you have leftovers, store them in an airtight container in the fridge. They’ll keep better in the fridge, though they’ll likely only last about 3-4 days before going stale.
Do I have to frost the cupcakes?
No, you don’t. You can just use marshmallow cream if you want. However, you do need marshmallow cream, no matter what, to help the marshmallows stick to the cupcake tops; I’ve found it works the best to keep them from sliding off.
If you try this recipe, why not leave a star rating in the recipe card right below and/or a review in the comment section further down the page? I always appreciate your feedback. You can also follow me on Pinterest, Facebook, Instagram, and YouTube. And subscribe to my email list too!
Bunny Tail Cupcakes
How to make easy, adorable bunny tail cupcakes with chocolate cupcakes, frosting, and mini marshmallows. Fun Easter dessert kids will love!
Muffin Tins
Cupcake Liners
Cupcakes:
2 cups cane sugar
2 cups all-purpose flour
1/4 cup unsweetened cocoa powder
1/2 cup salted butter
1/2 cup canola oil
1 cup water
1 1/2 teaspoons baking soda
1/2 cup buttermilk
2 large eggs
1 teaspoon vanilla extract
Frosting:
5 1/2 to 6 cups powdered sugar
1/4 cup unsweetened cocoa powder
8 tablespoons salted butter (softened)
1/2 cup buttermilk
1 teaspoon vanilla extract
1 cup marshmallow cream
4 cups mini marshmallows
Mix and Bake the Cupcakes:
Pre-heat the oven to 350° F, and line muffin tin/s with cupcake liners.
In a large mixing bowl, whisk together the sugar, flour, and cocoa powder.
In a medium saucepan, bring the butter, oil, and water to a boil.
Then remove the mixture from the heat, and mix together with the flour mixture.
In a separate bowl, dissolve the baking soda in the buttermilk by whisking together for a minute or so.
Then beat the eggs in with that buttermilk mixture.
Add the egg mixture and vanilla extract to the flour mixture in the mixing bowl, and mix well.
Pour the cupcake batter into the prepared muffin pan/s, and bake at 350° for about 15-20 minutes, or until a toothpick inserted in the center of a cupcake comes out clean.
Let the cupcakes cool in the pan for about 10 minutes before removing to a wire rack to cool completely.
Make the Frosting:
In a medium mixing bowl, whisk together the powdered sugar and cocoa powder. Set aside.
In a medium saucepan, melt the butter into the buttermilk, but do not boil. Remove from the heat when all the butter has melted.
Then beat in the powdered sugar mixture 'til you have a spreadable consistency for frosting.
Whisk in the vanilla extract, and it's ready to go.
How to Decorate Bunny Tail Cupcakes:
Once your cupcakes have baked and cooled, frost to whatever thickness you prefer.
Then apply a thin layer of marshmallow cream; it's ok if the marshmallow cream mixes just a bit with the chocolate frosting. This mixture will allow the mini marshmallows to really adhere to the top of the cupcake without sliding off.
Slice or tear each mini marshmallow in half.
Place the marshmallows all over the top of each frosted cupcake, adding more marshmallow halves 'til the top of each cupcake is covered, resembling a fluffy bunny tail.
*You can also make mini cupcakes by using a mini muffin pan.
If you have leftovers, store them in an airtight container in the fridge. They’ll keep better in the fridge, though they’ll likely only last about 3-4 days before going stale.
With St. Patrick’s Day just around the corner, I’ve got a fun project kids will adore. It’s pretty much a spinoff of a favorite Christmas classic, but geared toward St. Patrick’s Day and the luck of the Irish. Instead of gingerbread, though, it’s a graham cracker leprechaun house.
I remember when I was a little girl, and my mom and I watched Disney’s classic, Darby O’Gill and the Little People. Remember that movie? Leprechauns and all the legend surrounding them just fascinated me as a kid. This would be the perfect movie to watch as you create your very own leprechaun house.
Before you get started making your own graham cracker leprechaun house, you’ll need a few supplies.
Supplies You’ll Need for a Graham Cracker Leprechaun House
Cake board or small white cardboard squares for house to rest on
Scissors
Box of graham crackers
Decorating Icing – I used Wilton Green Decorating Icing.
Spice Drops or gum drop candies
Skittles
M&M’s
Mini crackers
Small green gummy candies
Rainbow sprinkles and decorating candies
How to Construct Your Own Graham Cracker Leprechaun House
Your first step is to prep your cake board. You can cut it into smaller squares or use a smaller piece of cardboard wrapped in white freezer paper.
Next assemble your leprechaun house using graham crackers and Decorating Icing. Now here’s where it was a bit tricky for me in the beginning. Everything I’d read said to use Royal Icing, but I’m just going to be real here… I tried that, and it was horrible. It was horrible! A disaster of epic proportions. I’d bought a box kit, and I’m not sure what happened with it, but it just wasn’t for me. I think it had more to do with me than the icing; I just didn’t have the patience for it. But I was lucky that I actually had backup in the form of Wilton Decorating Icing. It worked great! And there was no mixing or hassle with it.
To construct your graham cracker house, I recommend following this wonderful tutorial from Happiness is Homemade. Just be sure you have plenty of graham crackers on hand.
Decorate Your Graham Cracker Leprechaun House
Once your house is constructed and has had a chance to meld together enough that it’s not going anywhere, it’s time for the fun part… Decorating! This is where all your candies and sprinkles come in.
There really is no set way to decorate a leprechaun house. But I do recommend LOADS of rainbow colors, in the form of spice drops (or gum drop candies), M&M’s, Skittles, sprinkles, and more. Use your Decorating Icing to attach everything to your house.
You can use mini crackers as windows. I found small green apple gummies that I actually cut with scissors to hopefully look more like 4-leaf clovers.
You can create a door with icing and sprinkles. Skittles make a wonderful rainbow path through clouds of mini marshmallows. Just be creative and have fun with it! The decorating is especially fun for kids, though they may eat more than they decorate, fair warning.
Happy decorating your very own graham cracker leprechaun house this St. Patrick’s Day!
Use candy melts and marshmallows to make easy Valentine marshmallow pops. A kid-friendly Valentine’s Day recipe, they make perfect party treats with oodles of decorating ideas.
If you’re still looking for a fun treat to make with your kids this Valentine’s Day, Valentines marshmallows are something both you and your kids will love. Awhile ago, I shared my recipe for cherry chip cake pops…. Valentine marshmallow pops are a slightly easier treat and oh so fun and kid-friendly to make.
Ingredient Notes:
Snowman marshmallow pops are another fun marshmallow dessert for kids, especially during the wintertime.
Paper Towel for Work Space – This will catch all the extra sprinkles and drips from the melted candy melts. It definitely makes cleanup a LOT easier afterward.
The first step is to place marshmallows on the paper straws. Insert the paper straws into the center of your marshmallows, letting the straw act as a lollipop stick.
Be creative and make different designs, like doubling up heart shaped marshmallows on one stick.
How to Melt the Candy Melts and Chocolate for Dipping
Depending on the dipping candy you decide to use, you can melt it a couple different ways:
Melt using a double boiler on the stove – This is basically a pan inside of another pan with boiling water in the bottom pan. It allows for more even melting without burning, and it also keeps chocolate warm for dipping. If you’re wanting to use different colors, this may not be the easiest way to melt the candy melts. So instead…
Melt it in the microwave – This is usually the route I go. Just follow the package instructions for melting. Usually, you heat and stir in 15-second intervals until the candy is melted and smooth enough for dipping.
One Important Tip: Depending on the type of chocolate you use, some people like to add shortening or paraffin wax to their chocolate as it melts. This allows for a thinner coat and stretches the chocolate a little further. If you use a good quality chocolate, you likely won’t need this step.
Dip and Decorate Marshmallows
Dip the marshmallows in the melted candy melts, letting excess candy drip back into the bowl.
Now you’re ready to immediately grab the sprinkles and decorate before the candy coating hardens. You can create polka dots all over the marshmallows with candy beads and shake little sprinkles or hearts all over. Maybe even sprinkle a little candy sugar on top. Just be creative and let your kids do their thing; you never know what they’ll come up with.
Place the Valentine marshmallows in the marshmallow pop holder, and let the candy coating set.
There’s nothing like festive Valentine dipped marshmallows to wish someone a very Happy Valentine’s Day.
Expert Tips and Recipe FAQ’s
Can I make these ahead of time?
Yes, you can, though it’d probably be best to make them only 1-2 days in advance, so they don’t get stale.
How should I store marshmallow pops?
They should be stored in an airtight container in a slightly cooler environment. Not chilled in the fridge, but you want them to keep their shape and the candy to not melt… So you don’t want them next to a stove or oven.
If you try this recipe, why not leave a star rating in the recipe card right below and/or a review in the comment section further down the page? I always appreciate your feedback. You can also follow me on Pinterest, Facebook, Instagram, and YouTube. And subscribe to my email list too!
Valentine Marshmallow Pops
Use candy melts and marshmallows to make easy Valentine marshmallow pops. They make perfect kid-friendly Valentine's Day party treats.
Wilton Cake Pops Decorating Stand
Valentine Paper Straws
Paper Towels
12 ounces marshmallows
12 ounces candy melts
1/2 cup Valentine sprinkles
Insert the paper straws into the center of your marshmallows, letting the straw act as a lollipop stick.
Be creative and make different designs, like doubling up heart shaped marshmallows on one stick.
How to Melt the Candy Melts and Chocolate for Dipping
Depending on the dipping candy you decide to use, you can melt it a couple different ways… Melt using a double boiler on the stove – This is basically a pan inside of another pan with boiling water in the bottom pan. It allows for more even melting without burning, and it also keeps chocolate warm for dipping. If you're wanting to use different colors, this may not be the easiest way to melt the candy melts. So instead…
Melt it in the microwave – This is usually the route I go. Just follow the package instructions for melting. Usually, you heat and stir in 15-second intervals until the candy is melted and smooth enough for dipping.
Dip and Decorate Marshmallows
Dip the marshmallows in the melted candy melts, letting excess candy drip back into the bowl.
Immediately grab the sprinkles and decorate before the candy coating hardens. You can create polka dots all over the marshmallows with candy beads and shake little sprinkles or hearts all over. Maybe even sprinkle a little candy sugar on top.
Place the Valentine marshmallows in the marshmallow pop holder, and let the candy coating set.
Then they're ready to serve and enjoy!
One Important Melting Tip: Depending on the type of chocolate you use, some people like to add shortening or paraffin wax to their chocolate as it melts. This allows for a thinner coat and stretches the chocolate a little further. If you use a good quality chocolate, you likely won’t need this step.
Can I make these ahead of time?
Yes, you can, though it’d probably be best to make them only 1-2 days in advance, so they don’t get stale.
How should I store marshmallow pops?
They should be stored in an airtight container in a slightly cooler environment. Not chilled in the fridge, but you want them to keep their shape and the candy to not melt… So you don’t want them next to a stove or oven.
Desserts
American
how to make Valentine marshmallow pops, Valentine dipped marshmallows, Valentine marshmallow fun pops, Valentine marshmallow pops, Valentine marshmallow pops recipe, Valentine marshmallows, Valentine’s Day marshmallows, Valentines marshmallows
Remember when you were a kid and Valentine’s Day meant school parties with homemade Valentine boxes, gobs of Valentines, and yummy heart shaped treats like heart shaped chocolate whoopie pies?
With the holiday of love and hearts and sprinkled cupcakes just around the corner, Heart Shaped Chocolate Whoopie Pies are a most scrumptious treat, as are heart shaped chocolate chip pancakes.
We didn’t really call them whoopie pies. Ever. I’m not sure why.
But that’s really what they are. Only our icing is more of a creamy sugar cookie icing made with powdered sugar.
I think original whoopie pies have a sort of marshmallow cream icing. Either way, they’re one of my favorite cookies.
Grandma would mix these up and pop them in the oven. When they came out, the entire kitchen smelled like chocolate.
We’d smooth a bit of icing on one cookie and sandwich them together.
To this day, they’re still a family favorite. Her recipe lives on.
How to Make Heart Shaped Chocolate Whoopie Pies
Below is the printable recipe.
You can make these round or heart shaped. To get the heart shape, I used a Wilton heart shaped whoopie pie pan.
If you don’t want to buy the pan, I imagine you could use a heart shaped cookie cutter to form each shape with dough. Just be sure to remove the cookie cutter before baking.
This is the most scrumptious cookie… If I could call it the king of cookies (besides my favorite chocolate chip cookies), I totally would. Enjoy!
Chocolate sandwich cookies are a favorite family recipe passed down from generation to generation. Whether you call them sandwich cookies or whoopie pies, Heart Shaped Chocolate Whoopie Pies really do make a yummy Valentine's Day treat.
Cookie Dough:
1 cup unsalted butter (softened)
2 cups cane sugar
2 large eggs
1 teaspoon vanilla extract
3 3/4 cups all-purpose flour
2 teaspoons baking powder
6 tablespoons unsweetened cocoa powder
1 teaspoon salt
1 cup whole milk
Icing:
2 tablespoons salted butter (softened)
1/2 teaspoon vanilla extract
1/2 teaspoon almond extract
1/2 cup whole milk
3 cups powdered sugar
Cookies:
Pre-heat the oven to 350° F.
Cream (or mix) the butter and sugar together.
Then add the eggs and vanilla, mixing well.
Whisk or sift together the flour, baking powder, cocoa powder, and salt.
Mix the dry ingredients into the creamed mixture alternately with the milk, beginning and ending with the dry ingredients. If the batter is too thin, you may need to add just a bit more flour.
Spray the whoopie pie pan with cooking spray. Drop 1-2 teaspoonfuls of cookie dough into each heart and smooth out.
Bake at 350° F for about 10 to 12 minutes.
Remove the cookies from the cookie sheet and place on a wire rack to cool.
Icing:
In a large mixing bowl, mix together the softened butter, vanilla extract, and almond extract.
Add the milk to the mixture.
Slowly add the powdered sugar to the mixture, mixing it in as you go. You want a good consistency, not too runny or the cookies will slide apart; you want the icing thick enough to stay on the cookie but not so thick that it breaks the cookies apart when trying to spread it. Once everything is mixed together, the icing should be smooth and creamy, free of any lumps.
After the cookies have cooled, sandwich them together with the icing.
Learn how to make a copycat version of sweet Little Debbie Valentine snack cakes. Heart shaped cakes are layered with a vanilla white creme filling inside and covered with a pink shell on the outside. They’re the perfect treat for a Valentine’s Day party!
Little Debbie Valentine Cakes… Who doesn’t love these scrumptious little cakes covered in a sweet pink shell?
Along with Christmas Tree Cakes, these heart snack cakes are one of my favorite Little Debbie treats. I say treat because they are an every once in a while treat, something to look forward to.
That being said, my boys have been trying to get me to try making more than a few Little Debbie copycat recipes for not just one but a few of our favorite Little Debbie treats. Since Valentine’s Day is right around the corner, what better time to try making Little Debbie Be My Valentine Snack Cakes than now?
Cake Mix – While I prefer to use cherry chip cake mix because it gives a slightly pink tone to the cakes and I love the flavor of cherry chip, you can use any flavor you want. White cake mix or strawberry cake mix are a couple of yummy options that come to mind. You can even make Little Debbie Valentine chocolate cakes; use a chocolate cake mix or use this homemade chocolate cupcakes recipe for a moist chocolate snack cake.
Cream Cheese – I recommend using full fat cream cheese vs. low fat.
Butter – Use real salted butter rather than margarine; margarine will change the texture and outcome of your cakes.
Marshmallow Fluff – You can use any marshmallow cream, but I love actual Fluff brand. Holy cow, the creamy factor that Marshmallow Fluff adds to frosting is ah-mazing.
Candy Melts – If making pink Valentine’s Day Little Debbie cakes, you’ll want pink and white candy melts… Pink for the coating, white for the little decorative dribbles on top.
How to Make Little Debbie Valentine Snack Cakes
I had to think about this recipe for quite a while before attempting to make it; if you think of it like cupcakes, it’s really pretty simple to make.
First, Make Heart Shaped Cakes:
Mix the cake mix according to the package directions.
Spray a heart shaped mini cakes pan with cooking spray. Then fill the heart shapes in the pan with batter, about 2/3 of the way full.
Bake according to package directions for cupcakes, or until a toothpick inserted in the center of the cakes comes out clean.
Remove the cakes from the pan and let cool on a wire rack.
Next Mix the Filling:
Mix together the cream cheese, butter, and vanilla.
Add the powdered sugar, mixing well.
Then add in Marshmallow Fluff, making sure all the ingredients are mixed.
Once the cakes have cooled, slice them in half horizontally, add a layer of creme, and sandwich them back together.
Now Coat the Snack Cakes:
Melt the pink candy melts, according to package directions. Note: It can be difficult to shake excess candy coating off the cakes as you’re dipping and rolling, and the coating may need to be just a bit thinner; it may help to add a tablespoon of shortening to it during the melting process.
Gently dip (or roll) the cake sandwiches, one at a time, in the melted candy coating.
Set each dipped cake on wax paper. You may need to spoon a bit of candy coating on top of each cake once you’ve set it on the wax paper.
Once all the heart cakes have been coated, allow them to chill in the refrigerator until the coating has hardened.
Then melt the white candy melts, according to package directions.
Drizzle over the top of each cake in whatever pattern you desire. I used a bottle with a cake tip for this step.
Again, allow to chill until the candy coating has fully hardened.
These sweet little snack cakes were a hit with my boys, which is really what mattered. The cakes were gone in no time.
If you try this recipe, why not leave a star rating in the recipe card right below and/or a review in the comment section further down the page? I always appreciate your feedback. You can also follow me on Pinterest, Facebook, Instagram, and YouTube. And subscribe to my email list too!
Little Debbie Valentine Snack Cakes
How to make a copycat version of Little Debbie Valentine snack cakes, pink heart shaped cakes layered with a vanilla white creme filling.
Heart Shaped Muffin Pan
Cake –
15.25 ounces Cherry Chip cake mix
1 cup water
1/2 cup canola oil
3 large eggs
Filling –
8 ounces cream cheese (softened)
3 tablespoons salted butter (softened)
1/4 teaspoon vanilla extract
2 cups powdered sugar
1/3 cup Marshmallow Fluff
Coating –
12 ounces pink candy melts
12 ounces white candy melts
Cake –
Mix the cake mix according to the package directions.
Spray the pan with cooking spray. Then fill the heart shapes in the pan with batter, about 2/3 of the way full.
Bake according to package directions for cupcakes, or until a toothpick inserted in the center of the cakes comes out clean.
Remove the cakes from the pan and let cool on a wire rack.
Filling-
Mix together the cream cheese, butter, and vanilla.
Add the powdered sugar, mixing well.
Then add in Marshmallow Fluff, making sure all the ingredients are mixed.
Once the cakes have cooled, slice them in half horizontally, add a layer of creme, and sandwich them back together.
Coating –
Melt the pink candy melts, according to package directions. See Notes below.
Gently dip (or roll) the cake sandwiches, one at a time, in the melted candy coating.
Set each dipped cake on wax paper. You may need to spoon a bit of candy coating on top of each cake once you've set it on the wax paper.
Once all the heart cakes have been coated, allow them to chill in the refrigerator until the coating has hardened.
Then melt the white candy melts, according to package directions.
Drizzle over the top of each cake in whatever pattern you desire. I used a bottle with a cake tip for this step.
Again, allow to chill until the candy coating has fully hardened.
Store the pink heart snack cakes in the refrigerator until ready to serve.
It can be difficult to shake excess candy coating off the cakes as you’re dipping and rolling, and the coating may need to be just a bit thinner; it may help to add a tablespoon of shortening to it during the melting process.
Desserts
American
Be My Valentine snack cakes, heart snack cakes, Little Debbie copycat recipe, Little Debbie heart cakes, Little Debbie Valentine cakes, Little Debbie Valentine heart cakes, Little Debbie Valentine snack cakes, Valentine snack cakes, Valentine’s Day Little Debbie cakes
But we hardly ever make gingerbread cookies. I’ve made them before, but they’ve always been either a really difficult recipe or frankly, just haven’t tasted that great.
Not so with this recipe. These cookies are slightly chewy with a somewhat crunchy edge. You are going to love it!
These chewy gingerbread cookies have disappeared from our cookie jar rather quickly. In fact, I’ve considered making another batch.
We actually have all sorts of things planned for this week (or rather, I have a few surprises up my sleeve).
The week before Christmas we usually do a little Christmas school, where instead of hitting the books, we do fun Christmas-y things, like make all sorts of goodies, start a Christmas puzzle, put together a gingerbread house, read Christmas books, go shopping for any last minute gifts, go see Christmas lights, and just spend time together.
Baking together is one of our favorite things.
With this recipe, we chose to make Christmas trees, gingerbread men, and stars.
Creating recipes like this gives opportunity to teach kids a few cooking skills… For instance, they can learn how to roll out dough. Warning: They may even fight over who gets to roll the dough.
They can also cut out the cookies and put them on the cookie sheet. My boys love to actually decorate cookies with Easy Sugar Cookie Icing, though I’m not sure how much decorating gets done vs. eating.
Below you’ll find the printable recipe. This gingerbread cookie recipe is adapted from the Gingerbread Boys recipe in the old 1969 version of Betty Crocker’s Cookbook. Don’t you just love vintage cookbooks? Within the pages are treasures to be found.
I tweaked and added a few things to give the recipe my own touch. Also, just a helpful note, the cookies are even better the next day. I hope you enjoy!
Chewy Gingerbread Cookies
Grab the ingredients, a few decorations, and your family, and make Chewy Gingerbread Cookies together. They're scrumptious classic holiday treats inspired by a vintage cookbook.
Cookie Dough:
1/2 cup unsalted butter (softened)
1/4 cup cane sugar
1/4 cup dark brown sugar
1/2 cup molasses
1/4 cup whole milk
1/2 teaspoon lemon juice
2 1/2 cups all-purpose flour
1/2 teaspoon baking soda
1/2 teaspoon salt
3/4 teaspoon ground ginger
1/4 teaspoon ground nutmeg
1/4 teaspoon ground cinnamon
1/8 teaspoon ground allspice
Cookie Icing:
4 tablespoons salted butter (softened)
1 teaspoon vanilla extract
1 cup whole milk
6 cups powdered sugar
Gingerbread Cookies:
In a large mixing bowl, cream or mix together the softened unsalted butter, sugar, and dark brown sugar.
Add the molasses, milk, and lemon juice, mixing well.
In a separate large bowl, sift together the flour, baking soda, salt, ginger, nutmeg, cinnamon, and allspice.
Mix the dry ingredients into the creamed mixture, mixing well.
Cover the dough, and chill in the refrigerator for about 4 hours.
Pre-heat the oven to 375° F.
Turn the dough out onto a floured surface, coating the dough with flour and kneading it until it's less sticky and more pliable.
Then roll the dough out to about 1/4 inch thickness.
Cut out cookies with floured Christmas cookie cutters.
Place the cookies on an un-greased cookie sheet, and bake at 375° F for about 10 minutes, or until the cookies are set.
Place the cookies on a wire rack to cool completely before decorating.
Cookie Icing:
In a large mixing bowl, mix together the softened salted butter and vanilla extract.
Add the milk to the mixture.
Slowly add the powdered sugar to the mixture, mixing it in as you go; the finished icing should be smooth, creamy, and spreadable.
Decorate the gingerbread cookies with icing, sprinkles, and nonpareils.
Christmas, Desserts
American
chewy gingerbread cookies, gingerbread cookies, homemade gingerbread cookies
Christmas always gets me in a crafty mood, and more times than not it inspires me to make something for or with my boys. My middle child especially loves to craft and create, and these Snowman Marshmallow Pops, inspired by both Pinterest and winter, are definitely something we have to make during the holiday season.
Want to make them with your kids? You just need to gather a few supplies.
Supplies You’ll Need to Make Snowman Marshmallow Pops
Honestly, just let your imagination be your guide when gathering supplies. There are a few basics that you’ll want to have on hand, but as far as candy and the rest of your “sweet” decorations go, let your kids have fun with it and decide what to use.
Supplies and Ingredients You’ll Need
Jumbo marshmallows
Regular sized marshmallows
Mini marshmallows
Paper straws or cake pop sticks Wilton Decorating icing in your favorite colors
Round cake tips w/ couplers
Reese’s Mini Peanut Butter Cups
Hershey’s Kisses (Hugs would work great too) Airheads Xtremes Sour Belts Cake Pop Decorating Stand (Wilton has a basic cardboard stand that is affordable and works great)
How to Make Snowman Marshmallow Pops
Once you’ve gathered all your supplies, it’s time to get creative. You can use a mix of different sized marshmallows to create your snowmen. I made some triple stack and some more roly-poly.
Trim the snowmen to your heart’s desire; the sky really is the limit once you get going because it’s really quite relaxing and fun. Place a Hershey Kiss on the top of the snowman to create a sort of stocking cap. Or you can use a Reese’s Mini to create more of a traditional “Frosty” hat.
Use mini marshmallows, a little icing, and smaller lengths of the Airheads candy to create earmuffs, or as my kids called them, “Awesome headphones.”
Also, use the Airheads belts to create scarves. Then decorate the snowmen with the Decorating Icing, forming carrot noses, eyes, smiles, and buttons.
This might be a fun activity for holiday parties and family get-togethers. Create a decorating table, and let all the kids create their own snowman treats.
If you try this recipe, why not leave a star rating in the recipe card right below and/or a review in the comment section further down the page? I always appreciate your feedback. You can also follow me on Pinterest, Facebook, Instagram, and YouTube. And subscribe to my email list too!
What candies and decorations would you use for your own Snowman Marshmallow Pops?
Snowman Marshmallow Pops
Use marshmallows of all sizes to make yummy snowman marshmallow pops. They're a scrumptious Christmas craft or holiday party idea, and kids love decorating these festive treats.
Cake Pop Sticks
Round Cake Tips
Cake Tip Couplers
Cake Pop Decorating Stand
16 jumbo marshmallows
16 marshmallows
Decorating Icing ((variety of colors))
16 Hershey Kisses ((or Hugs))
16 Mini Peanut Butter Cups
64 mini marshmallows
Airheads Xtremes Sour Belts
Place marshmallows on cake pop sticks; use a variety of large and jumbo marshmallows. You can make some triple stack, some with a jumbo body and large head, and so on.
To give the snowman a hat, use a Hershey Kiss or Mini Peanut Butter Cup, attaching either one with a dab of Decorating Icing.
To create earmuffs, cut smaller lengths of Airheads Sour Belts, long enough to drape over the snowman's head; dab Decorating Icing on 2 mini marshmallows, and attach 1 to each end of a shortened Sour Belt. Then place the earmuffs on the snowman.
Use the Airheads Sour Belts to create scarves around your snowman's neck.
Use Decorating Icing to decorate each snowman, forming carrot noses, eyes, smiles, and buttons.
This might be a fun activity for holiday parties and family get-togethers. Create a decorating table, and let all the kids create their own snowman treats.
Christmas just wouldn’t be the same without my family’s traditional recipes, especially when it comes to classic Christmas cookies. I’m thinking of my mom’s Christmas sugar cookies, my favorite thumbprint cookies, and more.
Holiday cookies bring a touch of cozy to the season. There are so many delicious holiday recipes.
The Internet makes it really easy to swap recipes back and forth with people near and far. I love that, don’t you?!
As we embark upon the Christmas holiday, I hope you are enjoying every moment. Nothing says Christmas like tried and true, stand the test of time, traditional, classic Christmas cookies.
Below you’ll find a collection of 30 Classic Christmas Cookies to inspire your holiday season. Enjoy and Happy Baking!
One of my favorite magazines and one I’ve actually been subscribed to for awhile is Taste of Home. They always have the most down-to-earth, delicious recipes with beautiful photos that make my mouth water.
While browsing through an old issue awhile ago, I noticed a Rice Krispies ad with a recipe for Snap, Crackle, Snowmen from another reader.
While we didn’t follow the recipe to a T, we tried making these together and ended up having a LOT of fun. They are the perfect holiday project for kids. They’re definitely going on my list of The Best Christmas Recipes for Your Holiday Celebrations.
Make Rice Krispies Treats
First, gather your ingredients. You’ll need Rice Krispies, marshmallows, butter, and plenty of candy embellishments.
Mix up the Rice Krispies Treats as usual. We did double the recipe, so we’d have enough treats for all of us to share in the fun.
Let the Rice Krispies cool just slightly but not too much.Then begin to form snowmen.
Rice Krispies Snowman
To make a snowman, form round treats for the head, middle, and base of the snowman; then put them together. The more the Rice Krispies cool, though, the harder it is to get them to form and stick; so, you definitely don’t want to wait long at all.
Decorate Your Rice Krispies Snowman
Lay out all your decorating treats in a candy bar of sorts.
We used spice drops, mini marshmallows, mini M&M’s, mini chocolate chips, sour strips, and mini pretzel sticks. Use the candies in creative ways to decorate your snowmen.
The boys had a blast decorating and came up with some pretty interesting characters.Jacob ended up with a chicken.
Jaden, well, I’m not sure what his was, but he was being silly, as usual.
He’s the comedian in the house; we’re always saying how he’s going to be a comedian when he grows up because he constantly makes everyone laugh.
Even Dan got in on the fun, even though he changed his snowman from a beach snowman to…. Well, I’m not sure.
The most important thing is we had fun.
These holiday treats are all hands on and are the perfect activity for a chilly afternoon during the holidays. They also make a great Advent activity.
How to make southern sweet potato pie from Grandma’s recipe box. Simple and easy, old-fashioned, family favorite Thanksgiving dessert from scratch.
This delicious southern sweet potato pie recipe is one I’m sharing from my grandmother’s recipe box (though I’ve tweaked it just a bit). The recipe card actually has my Aunt Jennie’s name written at the top, along with a date from 1980.
As a little girl, we would often visit family in Texas, including my Great Aunt Jennie. Aunt Jennie was one of a kind, and it was always fun going to see her.
Add a dollop of whipped cream on top, and you’ve got a very yummy holiday dessert.
This southern style sweet potato pie is super easy to make, and it doesn’t require a ton of ingredients. But unless you’re using canned sweet potato, be sure to cook your sweet potatoes beforehand and have them ready to go; I prefer to cook my sweet potatoes in the Instant Pot.
If you’d rather skip all of my baking tips, important info for this recipe, and similar recipe ideas – and get straight to the recipe – just scroll down to the bottom, where you’ll find a printable recipe card with a longer how to video.
[mv_video doNotAutoplayNorOptimizePlacement=”false” jsonLd=”true” key=”thwa2qs4gar1afkxwkat” sticky=”false” thumbnail=”https://mediavine-res.cloudinary.com/v1574196027/hyh4dexiffyqoyhsqwz2.jpg” title=”How to Make Southern Sweet Potato Pie” volume=”100″]
DOES SWEET POTATO PIE TASTE LIKE PUMPKIN PIE?
Sweet potato pie is basically a sweet potato custard pie. So, yes, it’s a lot like your classic old-fashioned pumpkin pie, only it’s made with sweet potatoes.
It has the same look, a similar taste (personally, I think it’s better than pumpkin pie), and a very similar texture.
Coffee Maker with Coffee – Some of my favorite memories are dessert with my grandmother. She always loved a hot cup of coffee with her pie.
HOW TO PREP FRESH SWEET POTATOES FOR PIE
You can either boil, pressure cook, or bake the sweet potatoes.
If you decide to boil or pressure cook the sweet potatoes, you’ll need to wash and peel them before you cook them. If you decide to bake them, you can bake them in the skins, and then remove the skins after they’ve cooled.
Then just purée the sweet potatoes in a blender or with an immersion blender to get them ready for pie. You’ll want a smooth, creamy texture to your sweet potato purée.
To make the whole process easier, I usually just pressure cook the sweet potatoes in my Instant Pot, then peel them and mash them up, right in the pot, with my immersion blender.
HOW TO MAKE SOUTHERN SWEET POTATO PIE
Before you get started, just make sure you’ve got your mashed sweet potatoes and an unbaked pie crust ready to go. Let’s talk about the crust and the filling…
MAKING THE PIE CRUST:
If you prefer a traditional roll-out crust, this pie crust is the way to go. If you want to keep it easy, try making this easy no-roll pie crust.
Add in the salt, cinnamon, and nutmeg, whipping the mixture until it’s blended well. You may need to scrape the sides of your mixing bowl and mix again.
Then just pour the batter into your prepared, unbaked pie shell.
Bake according to the instructions in the recipe card below. Then allow the pie to cool on a wire rack.
Once your pie has cooled, I recommend chilling it overnight in the refrigerator before slicing into it. This is one pie that just gets better and better the next day and the day after that.
Once it’s chilled, you can slice it, add a dollop of whipped cream, and you’re all set to enjoy every bite, along with a glass of milk or a cup of coffee. Nothing like coffee to bring all the flavors full circle!
CAN I USE CANNED SWEET POTATO TO MAKE THIS PIE?
Yes, you can use canned sweet potato, which is certainly easier to do.
Though I still prefer to use fresh sweet potatoes for the flavor. They just require a little more prep work.
IS SOUTHERN STYLE SWEET POTATO PIE GLUTEN-FREE?
You can absolutely make it gluten-free by substituting a good cup for cup gluten-free flour for the all-purpose flour. And then also make the pie crust with gluten-free flour.
Also, be sure to check labels on any of the above ingredients, just to be safe, especially the spices you use.
HOW TO TELL WHEN SWEET POTATO PIE IS DONE
You can use a toothpick, table knife, or cake tester to see if your pie is done, but being that this is more of a sweet potato custard pie, you may still see a bit of residue on your tester. So this may not be an accurate way of telling whether or not it’s done.
When you go to take it out of the oven, your pie should still be a little bit jiggly. If it’s more than just a little jiggly, it needs more time in the oven.
It’s a delicate balance between under-baking and over-baking when it comes to custard pie. On one hand, you don’t want it to be uncooked in the middle; on the other hand, you don’t want it to crack and be too dry.
The pie will continue to cook even when you take it out of the oven. As it cools, it will firm up; placing it in the fridge after cooling will help even more.
Yes, you can freeze sweet potato pie. Just make sure it’s covered well so it doesn’t get freezer burn.
You may also want to make it in a pie dish you don’t plan to use again before you take the pie out of the freezer; or use a disposable aluminum pie plate.
The Kitchn has a great tutorial on how to freeze pumpkin pie with all sorts of helpful tips that would work just as well for sweet potato pie.
GET THE PRINTABLE SWEET POTATO PIE RECIPE
If you love this recipe as much as I do, please write a 5 star review, and help me share the recipe on Facebook and Pinterest! If you make the recipe, be sure to share that you tried it on Pinterest. I love when readers share feedback!
How to make southern sweet potato pie from Grandma's recipe box. Simple and easy, old-fashioned, family favorite Thanksgiving dessert from scratch.
2 cups sweet potato purée
2 large eggs
1/2 tablespoon all-purpose flour
1 cup cane sugar
1/2 cup salted butter (softened)
3/4 cup evaporated milk
1 teaspoon vanilla extract
1 teaspoon salt
1 teaspoon ground cinnamon
1/2 teaspoon ground nutmeg
1 single pie crust (unbaked)
Using a mixer, mix together the sweet potato purée, eggs, flour, sugar, butter, evaporated milk, and vanilla extract.
Add in the salt, cinnamon, and nutmeg, whipping the mixture until it’s blended well. You may need to scrape the sides of your mixing bowl and mix again.
Pour the mixture into your prepared and unbaked pie crust.
Bake the pie at 350° F for about 1 hour, or until it’s firm.
Allow the pie to cool on a wire rack.
Once your pie has cooled, I recommend chilling it overnight in the refrigerator before slicing it. This is one pie that just gets better and better the next day and the day after that.
Once it’s chilled, you can slice it, add a dollop of whipped cream, and serve.
*You can use canned sweet potato if you want. Though I still prefer to use fresh sweet potatoes for the flavor. They just require a little more prep work. You can either boil, pressure cook, or bake the sweet potatoes. To make the whole process easier, I usually make Instant Pot sweet potatoes, then peel them and mash them up, right in the pot, with my immersion blender.
**You can make this pie gluten-free by substituting a good cup for cup gluten-free flour for the all-purpose flour. And then also make the pie crust with gluten-free flour. Also, be sure to check labels on any of the above ingredients, just to be safe, especially the spices you use.
5. When you go to take it out of the oven, your pie should still be a little bit jiggly. If it’s more than just a little jiggly, it needs more time in the oven. It’s a delicate balance between under-baking and over-baking when it comes to custard pie. On one hand, you don’t want it to be uncooked in the middle; on the other hand, you don’t want it to crack and be too dry. The pie will continue to cook even when you take it out of the oven. As it cools, it will firm up; and placing it in the fridge after cooling will help even more.
Can you freeze sweet potato pie?
Yes, you can freeze sweet potato pie. Just make sure it’s covered well so it doesn’t get freezer burn.
Desserts, Pies & Pastries
American
5 star sweet potato pie recipe, canned sweet potato pie, how to make southern sweet potato pie, old fashioned sweet potato pie, southern style sweet potato pie, southern sweet potato pie recipe, sweet potato custard pie, sweet potato pie recipe
Every time I make this cobbler, it just seems to get better and better. When I made this particular one to share as a recipe, I kid you not, my guys pretty much devoured it in a day.
I really do need to be more strategic about when I make this and make it when we’re about to have company, so we don’t eat it all ourselves. I did get a little bit… just a li’l.
And I must say that you can’t have peach cobbler without a scoop of vanilla ice cream. It just wouldn’t be the same.
So, if you plan to make this, get to the store and get yourself a carton of ice cream to go with it; or better yet, make homemade vanilla ice cream.
Peach cobbler is probably the easiest recipe, besides chocolate chip cookies, you could ever make. Ingredients are simple and the crust is a press-in crust, my favorite type of pie crust.
The more tedious part is peeling and slicing the peaches, but even that isn’t bad. Fair warning, though… If you don’t watch it, you may not have as many peaches in your cobbler as you first started out with… They’re hard to resist.
You can use a regular baking dish. I’ve made this in a round glass casserole dish for years, but while I was pregnant and more prone to anemia, we really started using more cast iron for cooking. So, I decided to give Dan’s favorite skillet a try.
A cast iron skillet makes a super delicious cobbler.
Below is a printable recipe. If you decide to make it, you’ll have to let me know how long it lasted in your house. Enjoy!
The Best Peach Cobbler Ever, Made in a Cast Iron Skillet
Peach cobbler is probably the easiest dessert recipe you could ever make. Ingredients are simple, with a press-in crust! Bake it up in your favorite cast iron skillet, serve with vanilla ice cream, and watch it disappear.
Crust:
2 cups flour
3-4 tbsp. sugar
1/2 tsp. salt
3/4 cup unsalted butter (softened)
3-4 tbsp. milk
Filling:
8-12 peaches
1/2-2/3 cup sugar
Pinch of salt
1/2 tbsp. corn starch
1/4 cup salted butter
1/2 tbsp. cinnamon
Preheat oven to 425 degrees. Bring down to 375 degrees.
For the crust, combine dry ingredients and set aside.
Combine softened butter and milk in smaller bowl.
Add to dry ingredients, stirring with a fork.
Set aside 1/4 of dough for topping.
Press the rest of the dough into a baking dish or large cast iron skillet. Press up the sides until the crust covers the dish or skillet.
Wash, peel, and slice peaches.
Add in sugar, salt, corn starch, and cinnamon. Mix well.
Pour peach mixture into crust, and top with sliced butter.
Finally, crumble your saved crust topping over the peach mixture.
Bake for 40 minutes to 1 hour, until crust is golden brown.
Serve with a scoop of vanilla ice cream and enjoy!
Pies & Pastries
American
best peach cobbler, cast iron peach cobbler, peach cobbler, skillet peach cobbler
Lately I’ve felt the need to do more with my Jaden to both spend more time with him and keep him busy through the day. Since Baby Zeke was born, we’ve been pretty consumed with everything baby. If I let Jaden, he would stay on electronics or watch tv all day long. Sure, he loves to go outside, go swimming, and play with his army men; but he can get sucked into electronics like nobody’s business. This week we’ve made a couple of treats together, including these yummy Fruit Pizza Bites. Made with Puff Pastry Cups, they’re the perfect summery bite-sized treat, and they’re so easy to make.
Fruit Pizza is one of my kids’ favorite desserts, especially Jacob. He usually asks for it every birthday. These bite-sized fruit pizzas are a spin-off of our favorite dessert, made with berries. They’re perfectly kid-friendly to make, and you can whip up a batch in hardly any time at all.
Baking the Puff Pastry Cups according to package directions is your first step. When they come out of the oven, use the tip of a wooden spoon to smash down the middle of each cup. Once they’ve cooled, add a tiny dollop of the cream cheese mixture. Then top with a berry… …or in true Jaden fashion, a pyramid of berries. Yum! That’s all there is to it. They’re so fun to make and eat.
Fruit Pizza Bites, made with strawberries, blueberries, and blackberries, is a spin-off made with Puff Pastry Cups, and it’s so kid-friendly to make, perfect for summer. Grab the printable recipe!
1 box Puff Pastry Cups
1 8 oz. box cream cheese
1/2 cup powdered sugar
Strawberries
Blueberries
Blackberries
Bake the Puff Pastry Cups according to package directions.
When they come out of the oven, use the tip of a wooden spoon to smash down the middle of each cup.
Once they’ve cooled, add a tiny dollop of the cream cheese mixture to the center of each Puff Pastry Cup.
Wash all berries.
Prep strawberries by stemming and slicing.
Top each cup with a berry, or if desired, a pyramid of berries.
Serve and enjoy!
Desserts
American
fruit pizza, fruit pizza bites, puff pastry recipes
How do you keep your kids busy and active? Share your best tips in the comments below!
Can’t make them just yet? Pin the recipe for later!
With February being national cherry month, I thought it the perfect time to celebrate with a homemade fruit cobbler. I make a killer campfire cherry cobbler when we’re out camping, but it’s been a long time since I’ve made a cherry cobbler at home. This recipe is very similar to my homemade peach cobbler and homemade blueberry cobbler recipes.
How to Make a Dark Cherry Cobbler
Making a fruit cobbler is really not as hard as it sounds; in fact, a cobbler is probably the easiest type of pie/pastry you could ever endeavor to make. It’s perfect for a beginning baker, and kids might like to get involved, as well.
The crust comes first. You mix up the ingredients for the crust, per the recipe below. Then save back about 1/4 of the dough to use as topping. Press the rest of the crust into a baking dish. Personally, I love ceramic bakeware, and just a hint… Wayfair has an excellent selection of bakeware. You can also use an oven-friendly glass baking dish or a pie plate. The choice is totally up to you. But press that crust all along the bottom of your dish and up the sides just a bit, enough to hold the cobbler filling.
Next, you’ll mix up the filling, per the recipe below. You can use fresh cherries or frozen; I used frozen organic dark sweet cherries since fresh are a bit out of season in our neck of the woods right now.
Once you’ve poured your filling into the crust, just crumble the rest of the crust that you saved back on top of your cobbler and bake! It’s as simple as that.
We love our cobbler with a scoop or two of vanilla ice cream. The cream just adds even more flavor to the fruity cobbler. It’s so delicious!
My sweet tooth sometimes gets ahold of me and won’t let up until I satisfy that craving for whatever particular sweet treat I’m craving at the moment. I like to think I get it honest, per my grandmother, who had a mean sweet tooth.
But let me tell you, moderation is key and plays a role in this recipe… Bite-sized treats are perfect when trying to satisfy a craving yet still not gorge oneself on sweet goodies from above.
When I cooked this up, I knew I wanted something similar to a cheese danish. Shopping for ingredients led me to these itty bitty Puff Pastry Cups.
Aren’t they cute? They are awesome! I totally see cream puffs in our future with these bad boys.
These bite-sized morsels of creamy cheesecake-esque goodness are delightfully easy to make, and here’s how.
First things first, bake the Puff Pastry Cups according to package directions. When done, after about 20 minutes, immediately remove from oven and press center of each cup down with the tip of a wooden spoon handle. Then fill each cup with a spoonful or dollop of the cream cheese filling you mixed up while they were baking. Bake again for about 15 minutes at a lower temp (exact instructions are in the printable recipe below).
Once filling is set, remove from oven and allow to cool for 5-10 minutes. Then top with a small dollop of strawberry jam, and lace with a simple powdered sugar icing. Of course, store them in the fridge until ready to serve.
They’re so scrumptious! I love the mini size… It’s the perfect amount of sweet to satisfy that craving yet not overdo. Moderation…
Below you’ll find the printable recipe. Enjoy!
Can’t make it just yet? Pin it for later!
Easy Strawberry Cheese Danish Pastry Bites
Satisfy your sweet tooth with Easy Strawberry Cheese Danish Pastry Bites. Made with bite-sized Puff Pastry Cups, they’re so easy to make and so delightfully scrumptious, allowing for moderation, as well!
Pastry Bites:
1 pkg. Pepperidge Farm Puff Pastry Cups
1 8 oz. pkg. cream cheese
3 tbsp. granulated sugar
1/2 tsp. vanilla
1 egg yolk
Strawberry jam
Icing:
1-2 tbsp. salted butter (melted)
1/2 tsp. vanilla
1 cup powdered sugar
5 tbsp. heavy whipping cream
Set Puff Pastry Cups on ungreased cookie sheet. Follow package directions, baking at 400° for about 20 minutes.
Meanwhile, mix cream cheese, sugar, vanilla, and egg yolk ’til smooth and creamy.
When done, remove Pastry Cups from oven and immediately press center of each cup down with tip of wooden spoon handle.
Spoon cream cheese mixture into each cup, adding a small dollop in each.
Bake at 350° for 15 minutes or until filling is set.
Remove from oven and allow to cool for 5-10 minutes.
Top each danish with small dollop of strawberry jam.
Mix icing ingredients together until smooth and creamy. It will have a thin consistency.
Snow… I am seriously pining for snow right now, as are both my boys — especially Jaden. On a recent, particularly rainy day, I decided to bring the snow indoors, so to speak. Nothing gets me in a wintry mood more than a snowman. And nothing makes Jaden’s heart happier than creating something with Mama. So, we decided to gather all our supplies and make our very own indoor snowman in a Snack Pack® pudding cup. In fact, we made quite a few of the little guys, so much so that we had enough to share with Daddy and Jacob. Crafting + edible ingredients = 1 very happy boy!
Snack Pack® pudding cups
Extra large marshmallows
Large marshmallows
Mini marshmallows
Various chocolate candies (for the hat)
Fruit rope (for the scarf)
Frosting in black and orange (or whatever colors your heart desires)
2 ordinary round cake tips
Instructions for Creating a Snowman in a Pudding Cup
The first step is to remove the lid from each Snack Pack® pudding cup you’ll be using. We used chocolate and butterscotch, mainly because they’re our favorite flavors. Clean the top edge of the pudding cup with a paper towel.
When beginning a snowman, you can use an extra large or large marshmallow for the foundation. I preferred using the extra large on the bottom; but if using a large marshmallow for your first layer, you can surround it with mini marshmallows, both for support and because it can look like snow.
Add a dab of frosting before adding the top marshmallow; the frosting helps things stick and stay together. Then add the marshmallow, pressing onto frosting.
Now for the fun of decorating, and this part is totally up to what you or your kids want to do; after all, there’s no right or wrong way to decorate a snowman. Use hat shaped candies for top hats or stocking caps (you could even use a strawberry for a hat), adding a dab of frosting to the snowman’s head before adding candy pieces. Use black frosting for coal eyes and a smile; orange frosting works well for a carrot nose. Add a scarf, using fruit rope or candy rope, with a dot of frosting to hold the scarf together. Black frosting makes cute little buttons down your snowman’s front. Jaden even added things like earmuffs (with mini marshmallows) and a tie to his snowmen.
When you’re all done, you can add more mini marshmallows around the edge of the pudding cup to make it look like snow piled up. A dab of frosting helps the marshmallows stay put.
The sky’s the limit. It’s really just all about having FUN! As we were making these, Jaden whispered excitedly between bites of sweet, creamy goodness, “This is really fun!”. Isn’t that what it’s all about? Spending time together, just enjoying the moment and making a fun memory that will last a lifetime. Oh and, of course, eating the results of your work when finished. Eating as you go can be quite fun too!
How would you build a snowman in a Snack Pack®? Share your idea in a comment below!
This winter, take a moment to slow down and enjoy a tasty and fun treat with the kids. Snack Pack® comes in a variety of flavors and offers endless mix-in opportunities the kids can help prepare. Each serving of Snack Pack is fortified with as much calcium as an 8-oz glass of milk,* so you can feel good about serving your kids Snack Pack. For mix-in inspiration, visit Snack Pack on Pinterest (pinterest.com/snackpack) and Facebook (facebook.com/SnackPackPudding).
** All Snack Pack products contain 30% DV calcium, with the exception of Bakery Shop Lemon Meringue Pie, Lemon Pudding, and Snack Pack Gels.
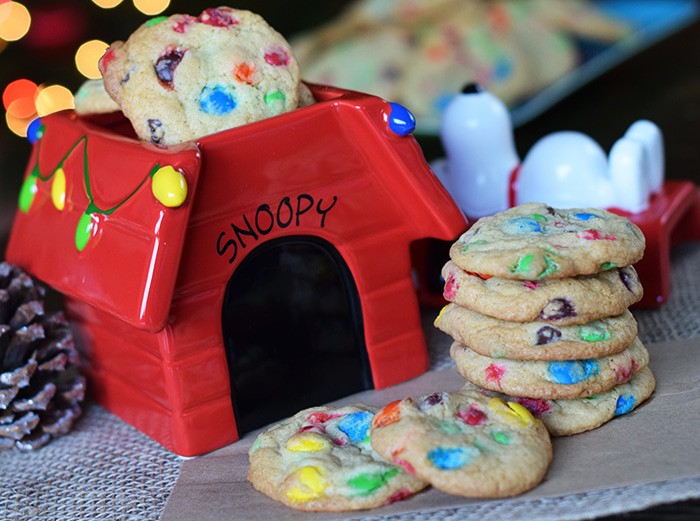
We have been baking up a storm, ordering Christmas presents, and thoroughly enjoying the holiday season this year.
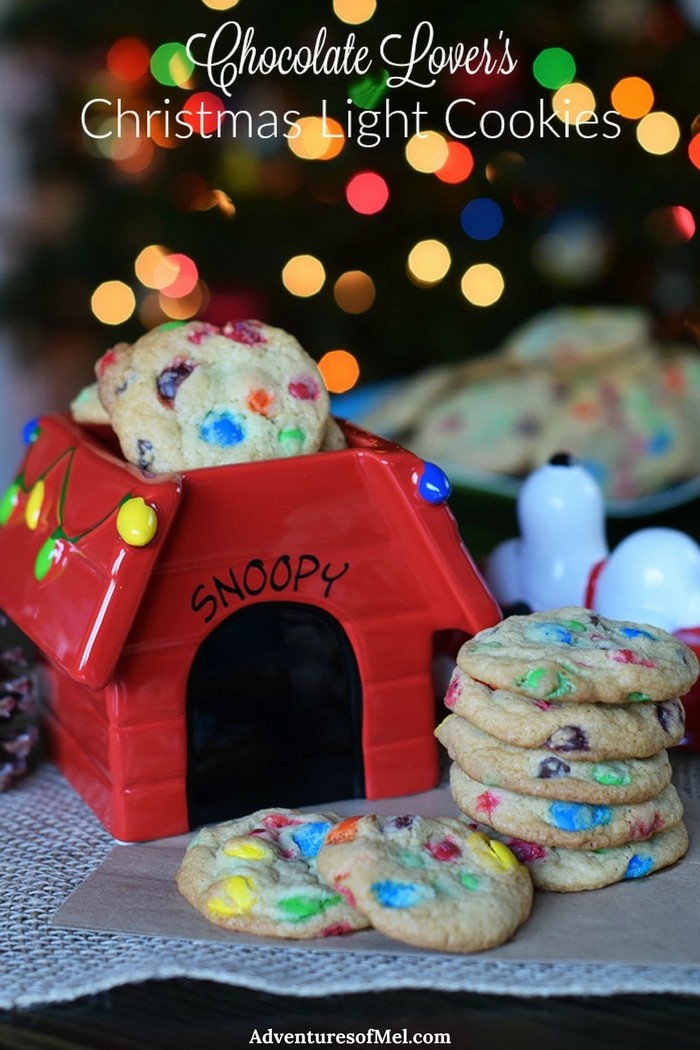
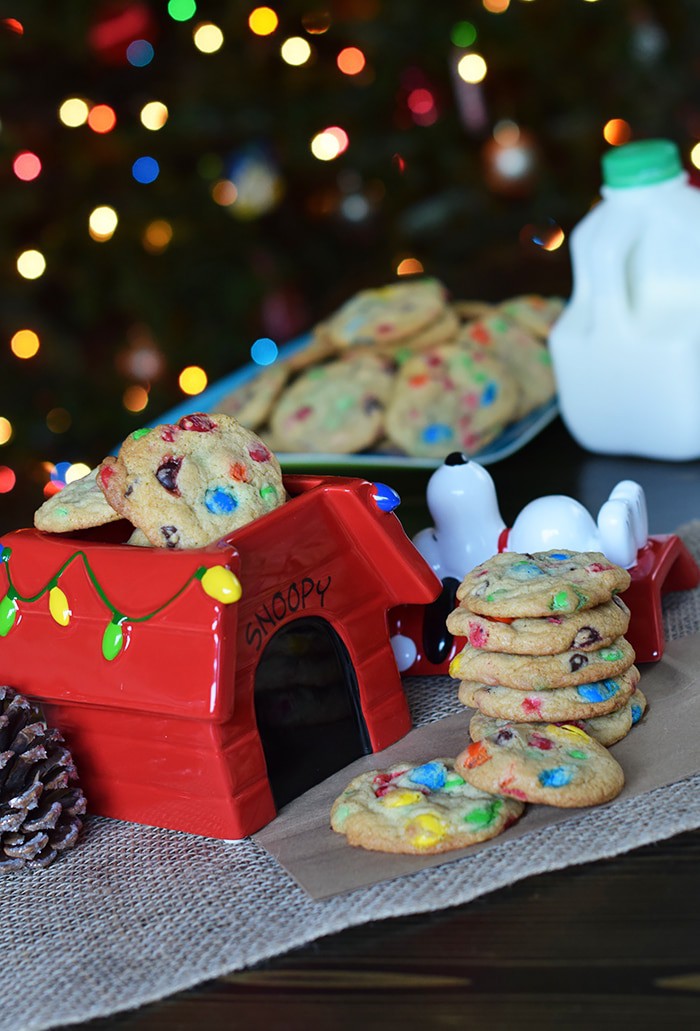
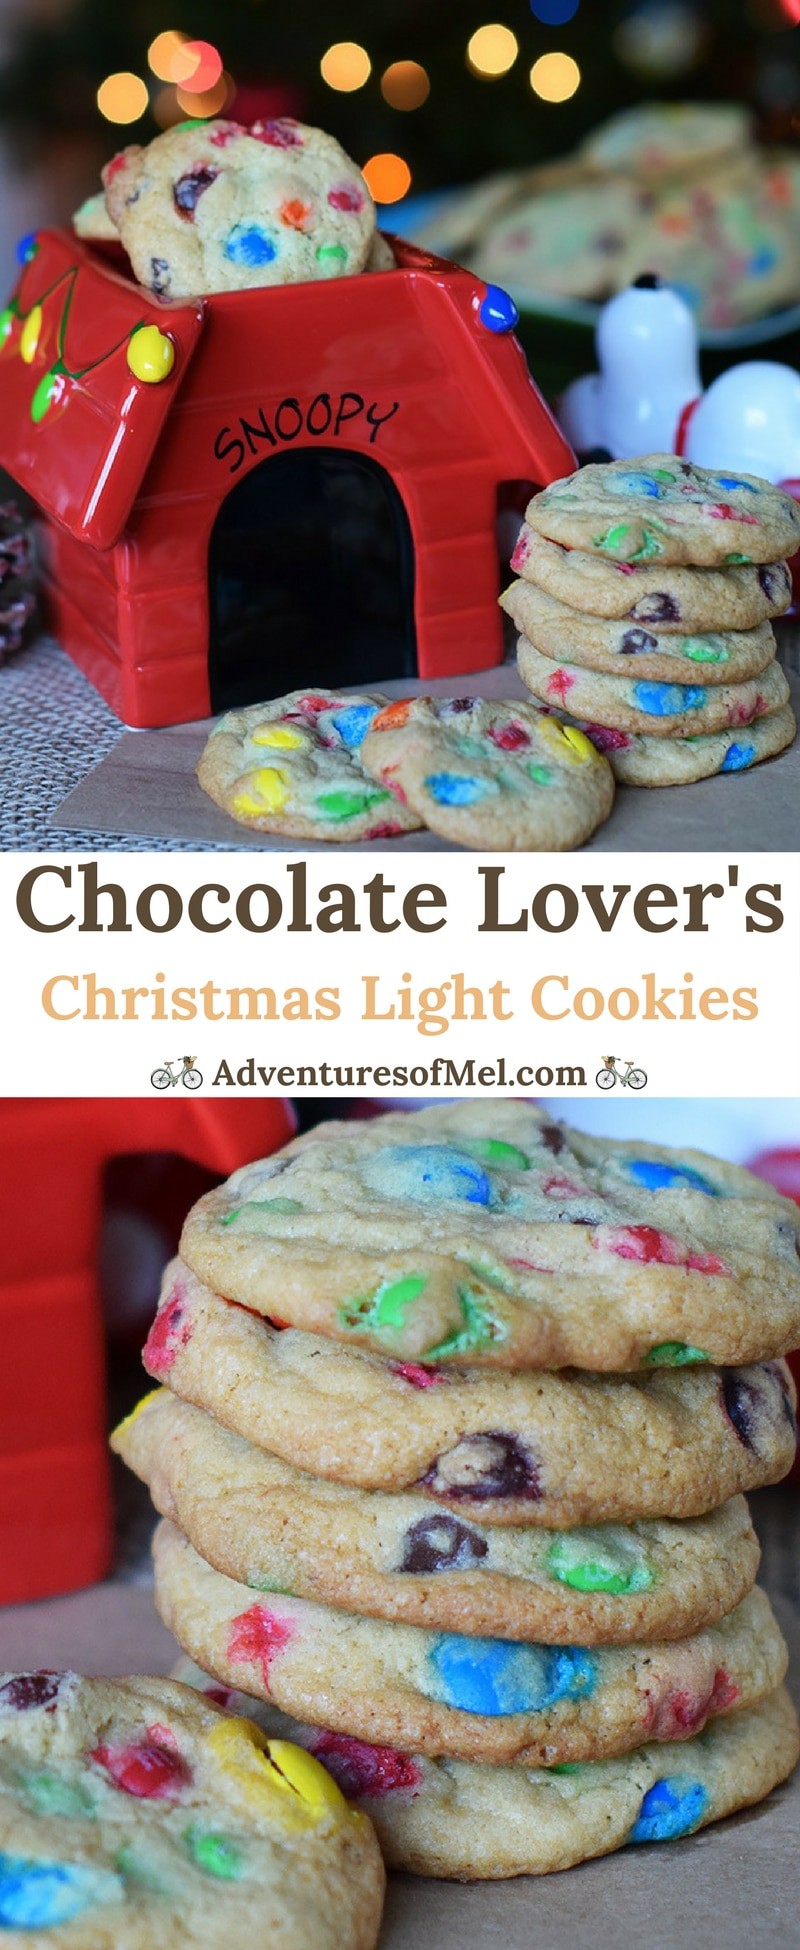
Now, I usually make these cookies any time of the year, but when I thought about it, the candies in these cookies really do resemble Christmas lights! So, why not give them a new name… Christmas Light Cookies!
I’ve made these twice in the past week because they’re just that good. My kids gobble them up as fast as they gobble up M&M monster cookies, but they also make great gifts.
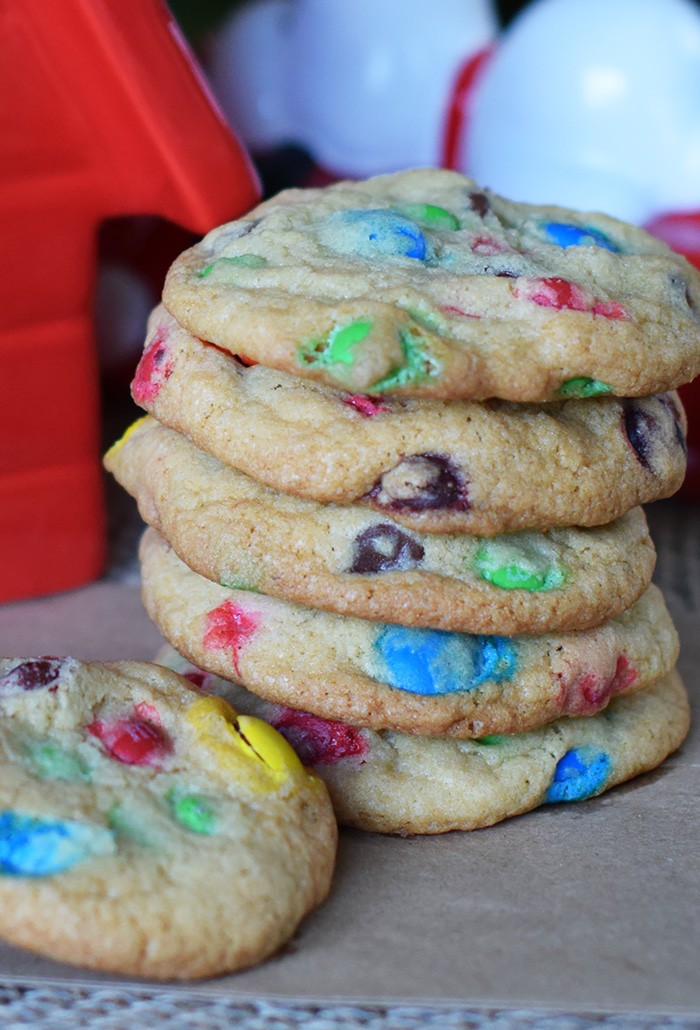
Made similarly to my favorite Chocolate Chip Cookies, these cookies are filled with mini milk chocolate candy bits, semi-sweet dark chocolate candy bits, and semi-sweet chocolate chips. They’re made for the chocolate lover in you.
My favorite time to eat them is fresh out of the oven, but as they age, they get even more of a chewy texture to them. I love a chocolaty cookie that’s good and chewy, don’t you? Chewy is best when it comes to any kind of cookie with chocolate chunks in it.
Christmas light cookies are filled with mini milk chocolate M&M's Minis, semi-sweet dark chocolate M&M's, and semi-sweet chocolate chips. They’re made for the chocolate lover in you.
1 cup 2 sticks unsalted butter
¾ cup granulated sugar
¾ cup brown sugar
2 eggs
2 tsp. vanilla extract
2¼ cups all-purpose flour (measure before sifting)
½ tsp. baking soda
1 heaping tsp. salt
1/2 bag (6 oz. semi-sweet chocolate chips)
1 bag Semi-Sweet Dark Chocolate M&M’s Baking Bits
3/4 bag Milk Chocolate M&M’s Minis Holiday Baking Bits
Pre-heat oven to 375°.
Cream butter and sugars together. It’s up to you whether you use light brown or dark brown sugar, depending on your preferred cookie texture. I prefer light brown because it lends to a more golden, raised cookie with crunchy edges and a chewy, slightly cake-like center.
Add eggs and vanilla, mixing well.
Sift flour, baking soda, and salt.
Add sifted dry ingredients to creamed mixture, mixing well.
Add chocolate chips and chocolate candies, thoroughly mixing into dough.
At this point, nuts are an optional add-in, but I always make without.
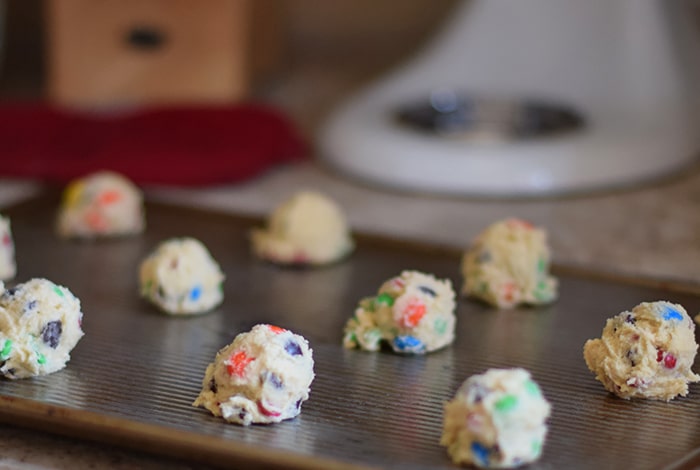
Drop by heaping teaspoon onto cookie sheet.
Bake at 375° for 10-11 minutes, or until cookies are lightly golden and done.
Serve and enjoy!
Cookies & Bars
American
chocolate chip cookies, chocolate chip cookies with M&M’s, Christmas cookies, Christmas light cookies, M&M’s cookies
What’s your favorite holiday treat? Share in the comments! I’d love to know your favorite Christmas-y treats and traditions.
Originally, I meant to get this recipe up in September, but when you’re utterly and completely sick to your stomach for weeks (er, months) on end, food is the absolute last thing you EVER want to look at, let alone write about unless you absolutely have to.
While I’m still dealing with the yucks somewhat (oh, but I know the end reward will be worth it), I’m calling it and posting this recipe anyway. And you know why? You deserve to make this recipe while you’re still craving caramel apple everything and all the apple recipes.
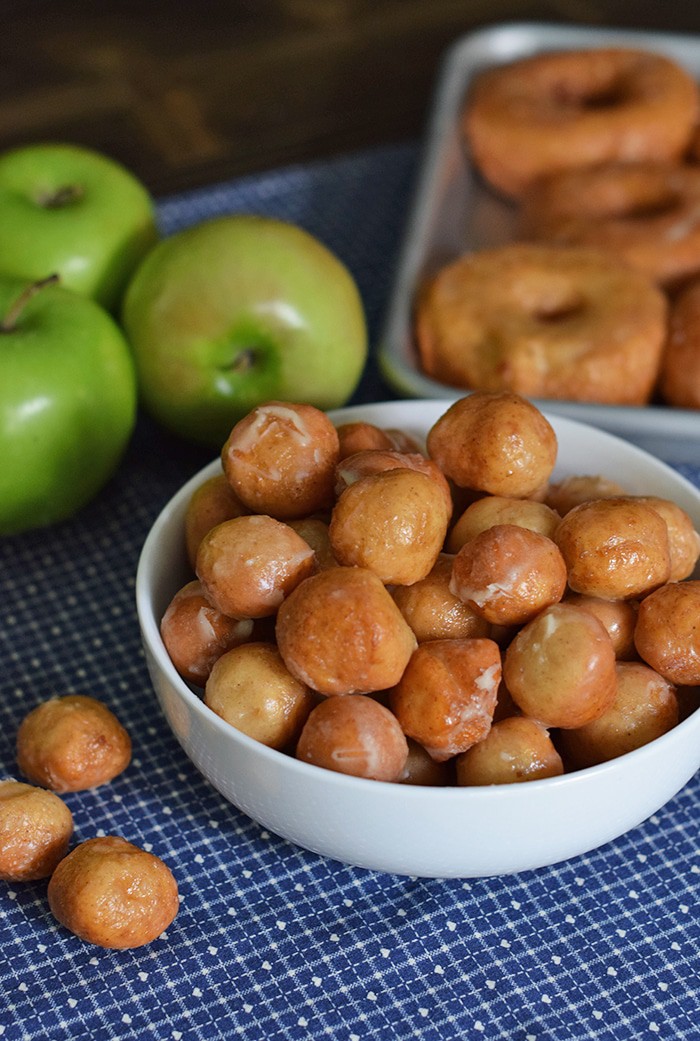
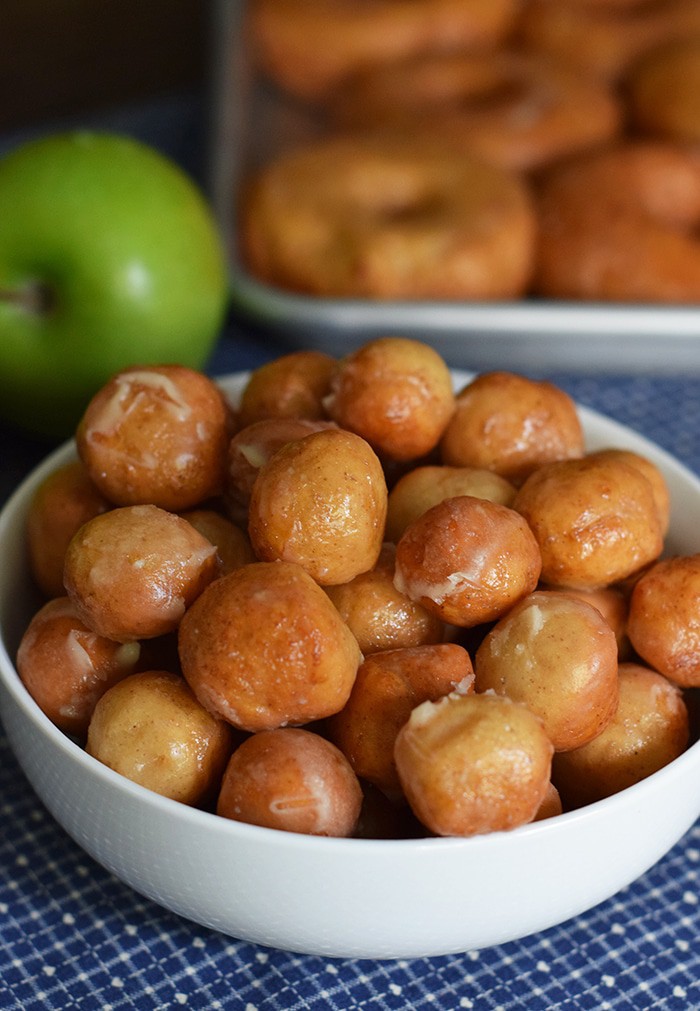
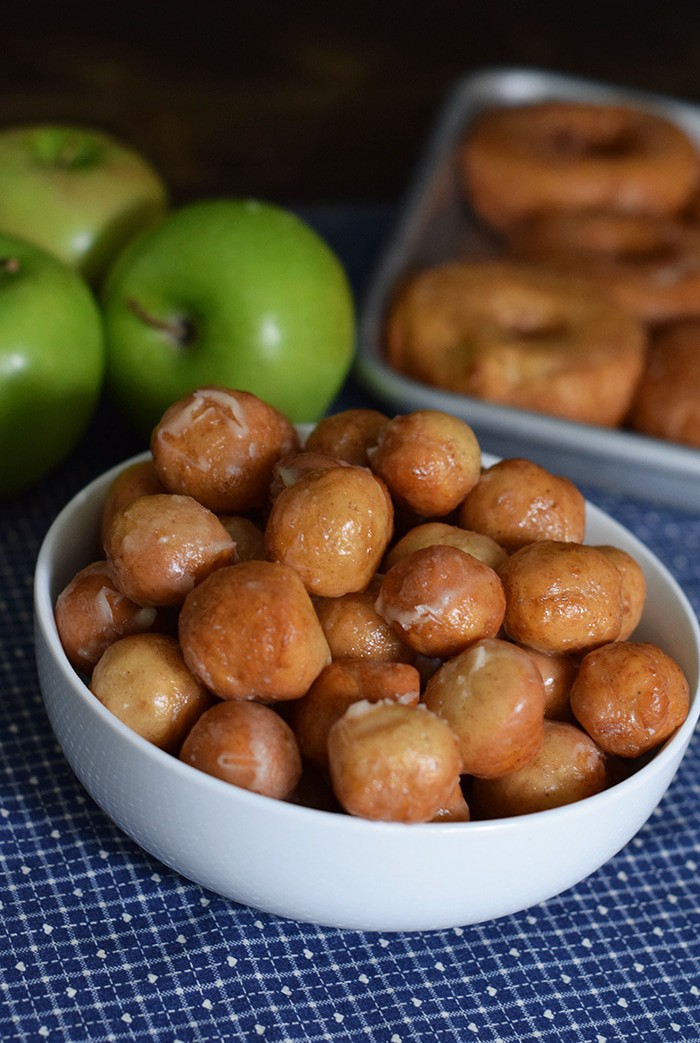
Back when my taste buds were still in good working order, these donut holes were AH-MAZING.
These are a quick rise yeast donut, fried in a deep fryer. I know, not the healthiest, but every once in awhile, it’s ok to enjoy a simple treat. Simple ingredients led to a delicious fall treat that I honestly can’t wait to make again.
In fact, I may take this recipe, switch it up, and make a fantastic baked sweet bread. Who can tell? Just let me get my tummy back in order, and a recipe will be coming your way.
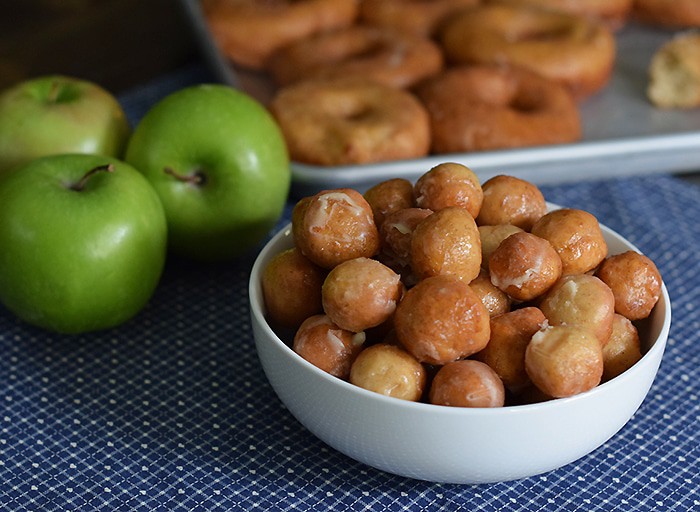
Let’s just talk about the icing, though. I happen to be a fan of Krispy Kreme and the wonderful, flaky, melt-in-your-mouth icing they use on their glazed donuts. In trying to emulate the texture and consistency of their icing, this icing turned out quite well. Quite the copycat if I do say so myself.
When you bite into the donut holes, the icing flakes and gives that deliciously crunchy effect. So yummy!
Grab the printable recipe below. And most of all, enjoy!
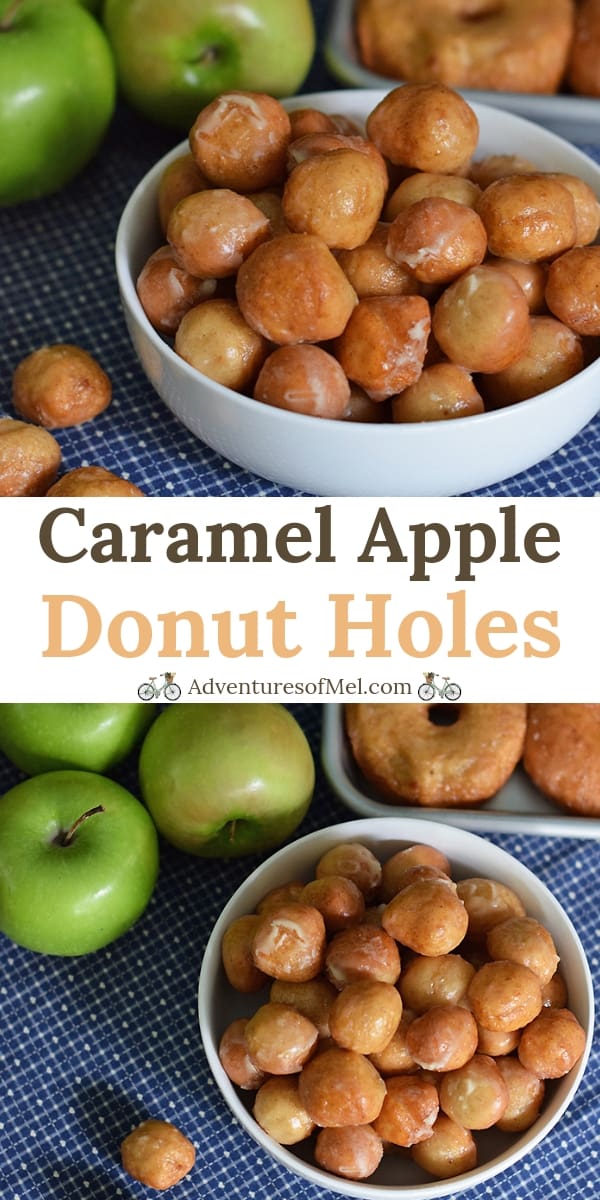
Caramel apple donut holes are a quick rise yeast donut, fried in a deep fryer and glazed with a thin, flaky, melt-in-your-mouth icing that's oh so delicious!
Donut Holes:
4 1/2 cups all-purpose flour
2 tablespoons quick rise yeast
2/3 cup cane sugar
3 teaspoons salt
1 tablespoon apple pie spice
3 tablespoons unsalted butter (softened)
1 cup whole milk
3 large eggs
1/2 teaspoon caramel extract
Icing:
4 tablespoons salted butter (softened)
1 teaspoon vanilla extract
1/2 teaspoon caramel extract
4 1/2 cups powdered sugar
1/4 cup whole milk
1/2 cup apple juice
Whisk all the dry ingredients, including the flour, yeast, sugar, salt, and apple pie spice, together.
In a separate bowl, mix together the softened unsalted butter, milk, eggs, and caramel extract.
Blend the liquid ingredients with the dry ingredients.
Let the dough rise for an hour or more, 'til doubled in size.
Roll the dough out onto a floured surface, and cut with donut/donut hole cutter. (TIP: If you don't have a donut hole cutter, cut the top off a plastic soda bottle and wash. Use the opening of the soda bottle to cut out donut holes, works like a charm!)
Place the donuts on a cookie sheet and let rise 'til doubled in size.
Meanwhile, mix up the icing, blending all the ingredients together.
Fry the donuts and donut holes in a deep fryer set to 350° F, 'til each donut hole is cooked thru and golden. You can also fry them in a skillet in a couple inches of canola oil.
Let the donuts and donut holes drain on paper bags.
While still warm, dip each one in the icing.
Set on a rack over wax paper to drip and cool.
Once they've cooled enough to eat, they're ready for you to enjoy!
Breads & Muffins
American
caramel apple donut holes, fried donut holes, homemade donut holes
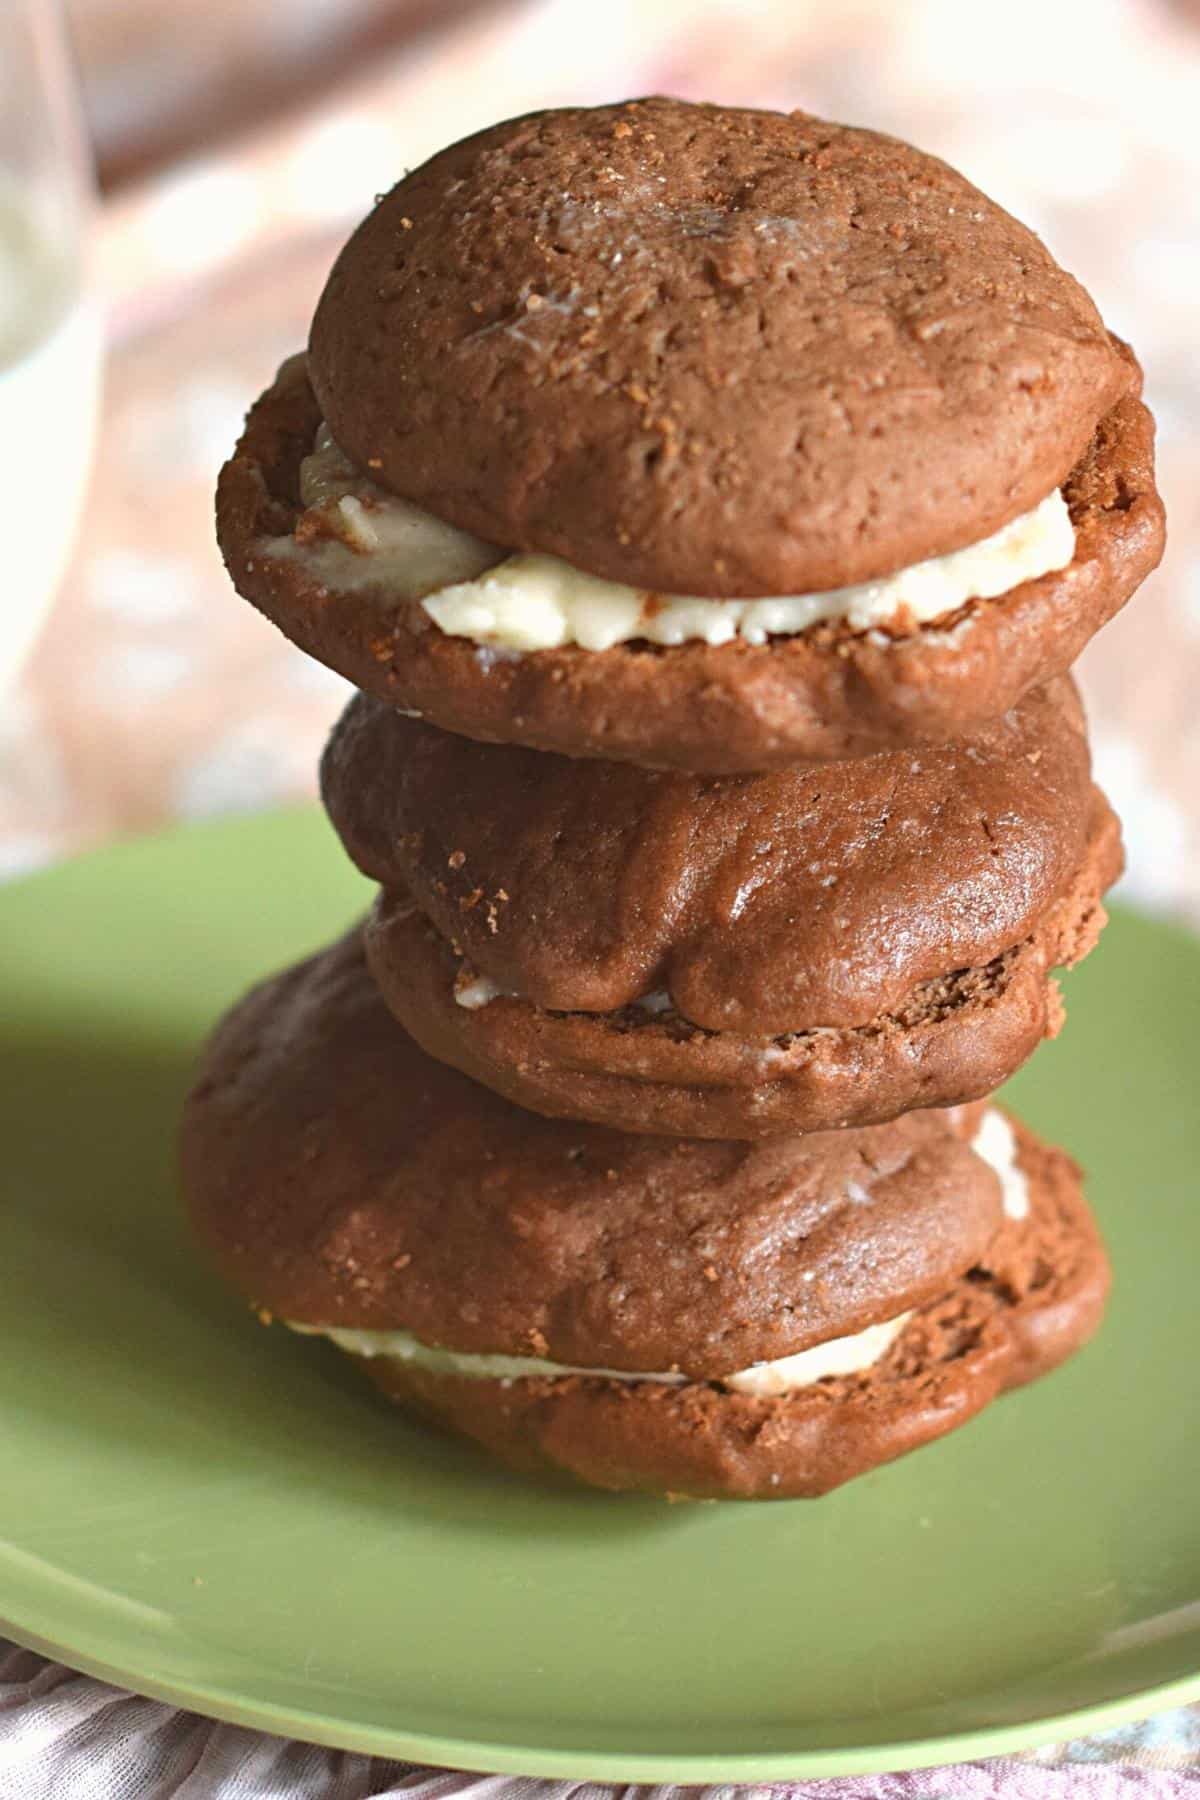
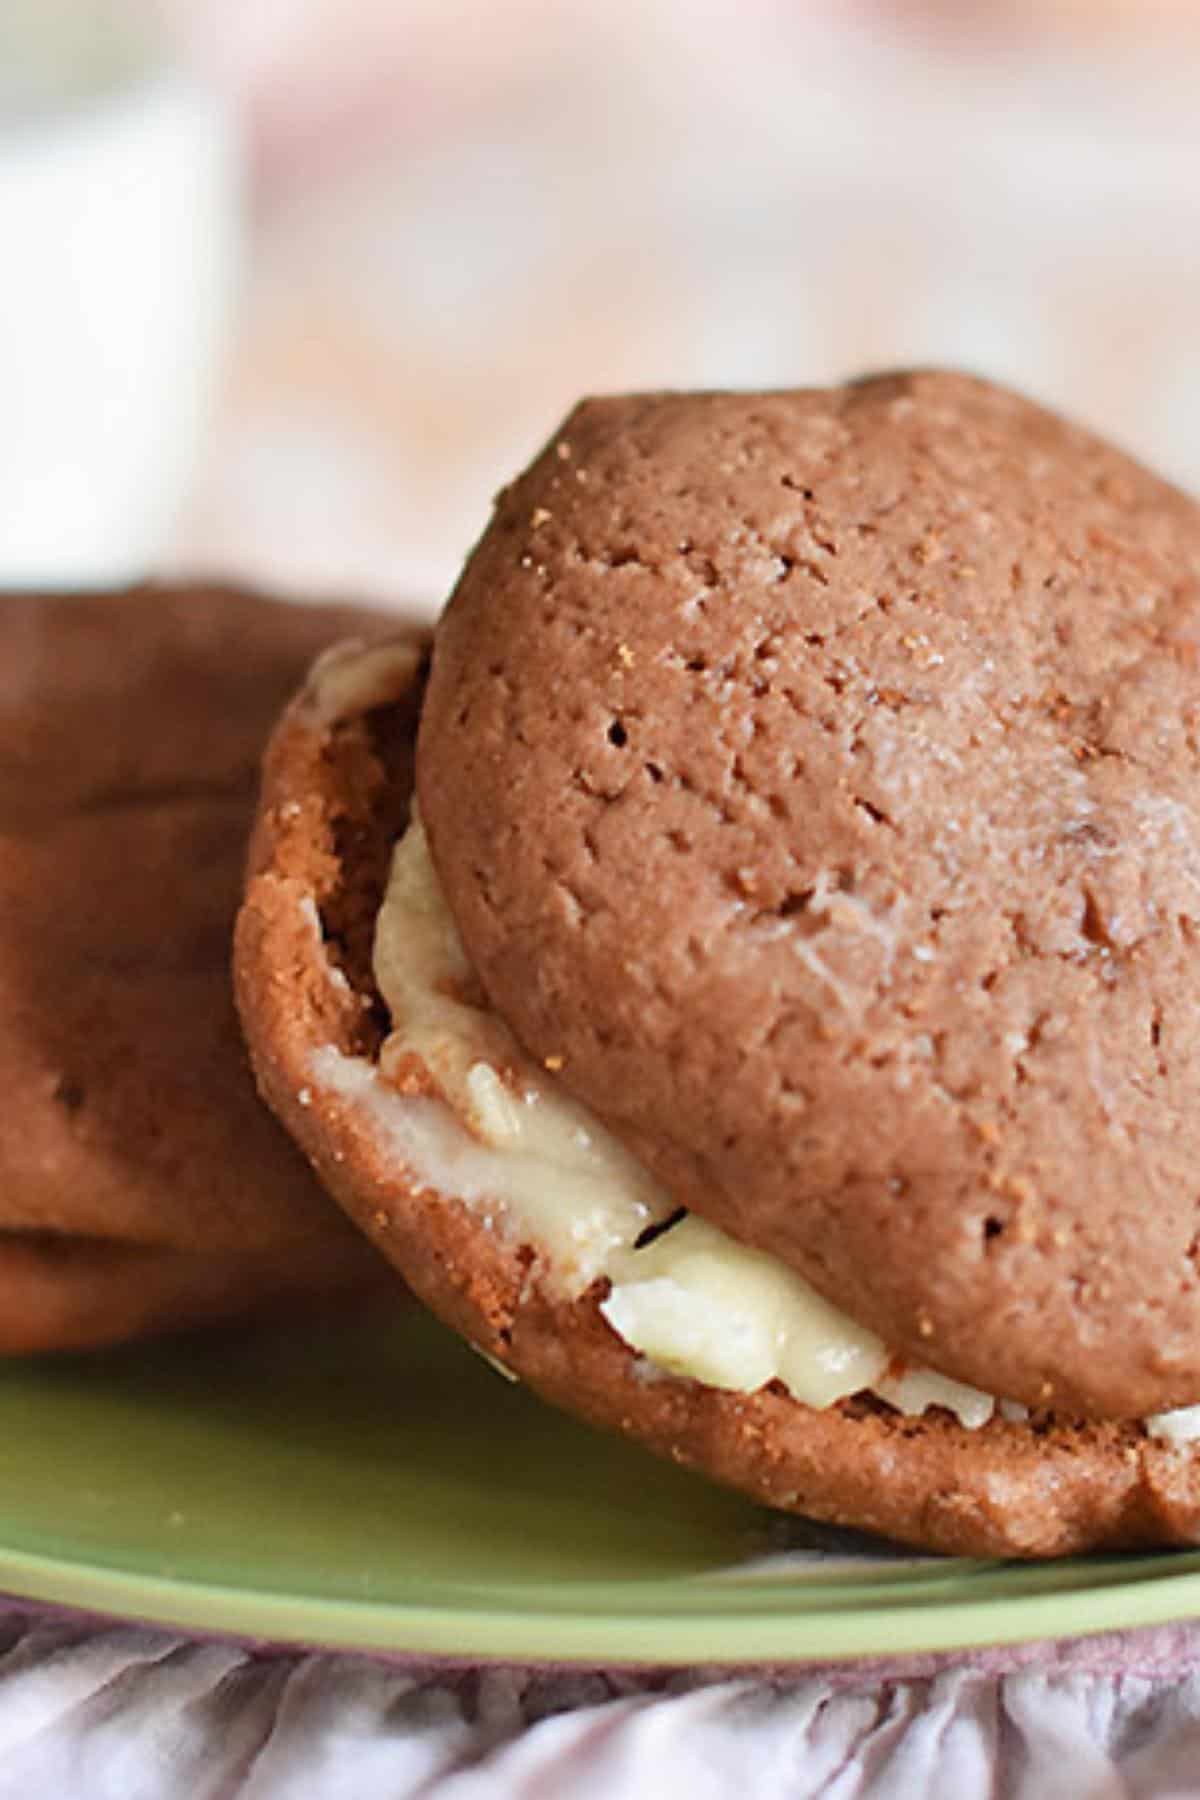
Let me share with you how to make my grandma’s recipe for chocolate whoopie pies. These soft chocolate cookie sandwiches with vanilla buttercream filling are a family-favorite dessert recipe she taught us all how to bake.
It’s no secret that I love my grandma’s recipes. Both my grandmas were wonderful cooks, and the heirloom recipes they passed down mean everything to me. This chocolate whoopie pie recipe has been in my family for over a century.
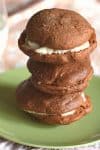
They’re so delicious. Soft and cake-like, they’re sandwiched together with a creamy vanilla buttercream filling.
You’ll love how easy they are to make. There’s nothing to them. Mix up the cookie dough and bake, and mix up a quick filling while they’re cooling. Easy peasy.
They require minimal ingredients you likely already have in your pantry.
Ingredient and Substitution Notes
Butter – You’ll need unsalted for the cookie dough, and salted butter for the filling.
All-Purpose Flour – While these are made with regular flour, I make them gluten-free all the time; I just use my favorite gluten-free all-purpose flour to make them. You can make them both ways with no issues whatsoever. Just use a good flour.
Unsweetened Cocoa Powder – I prefer Hershey’s unsweetened cocoa powder, but you can use whatever you have on hand, as long as it’s unsweetened.
While we’re talking ingredients…
Let’s Talk Quick about What Whoopie Pie Filling is Made of
You have options when it comes to making your whoopie pie filling…
Most whoopie pies include marshmallow fluff in the filling.
My great grandma, who traveled to Missouri by covered wagon, used a cooked icing she made with 1 cup sugar, 1 or 2 tbsp. butter, 1 tsp. vanilla, a dash of salt, and enough cream to set this mixture. She’d cook it to soft ball stage and ice the cookies on the underside, putting together two cookies like a sandwich. She would make these and have them ready for an after school snack when my mom and her sisters would arrive home from school via the school bus. She stored them in a metal roasting pan with a lid that was all bent up, and she kept it in the pantry.
I prefer to use a whoopie pie filling without fluff, my favorite sugar cookie icing I’ve made since I was a kid. It includes powdered sugar, salted butter, vanilla, almond extract, and milk or heavy whipping cream. This is pretty much what my grandma used too.
Remember, the complete ingredient list with amounts and everything is in the printable recipe card below. Keep scrolling.
How to Make Chocolate Whoopie Pies
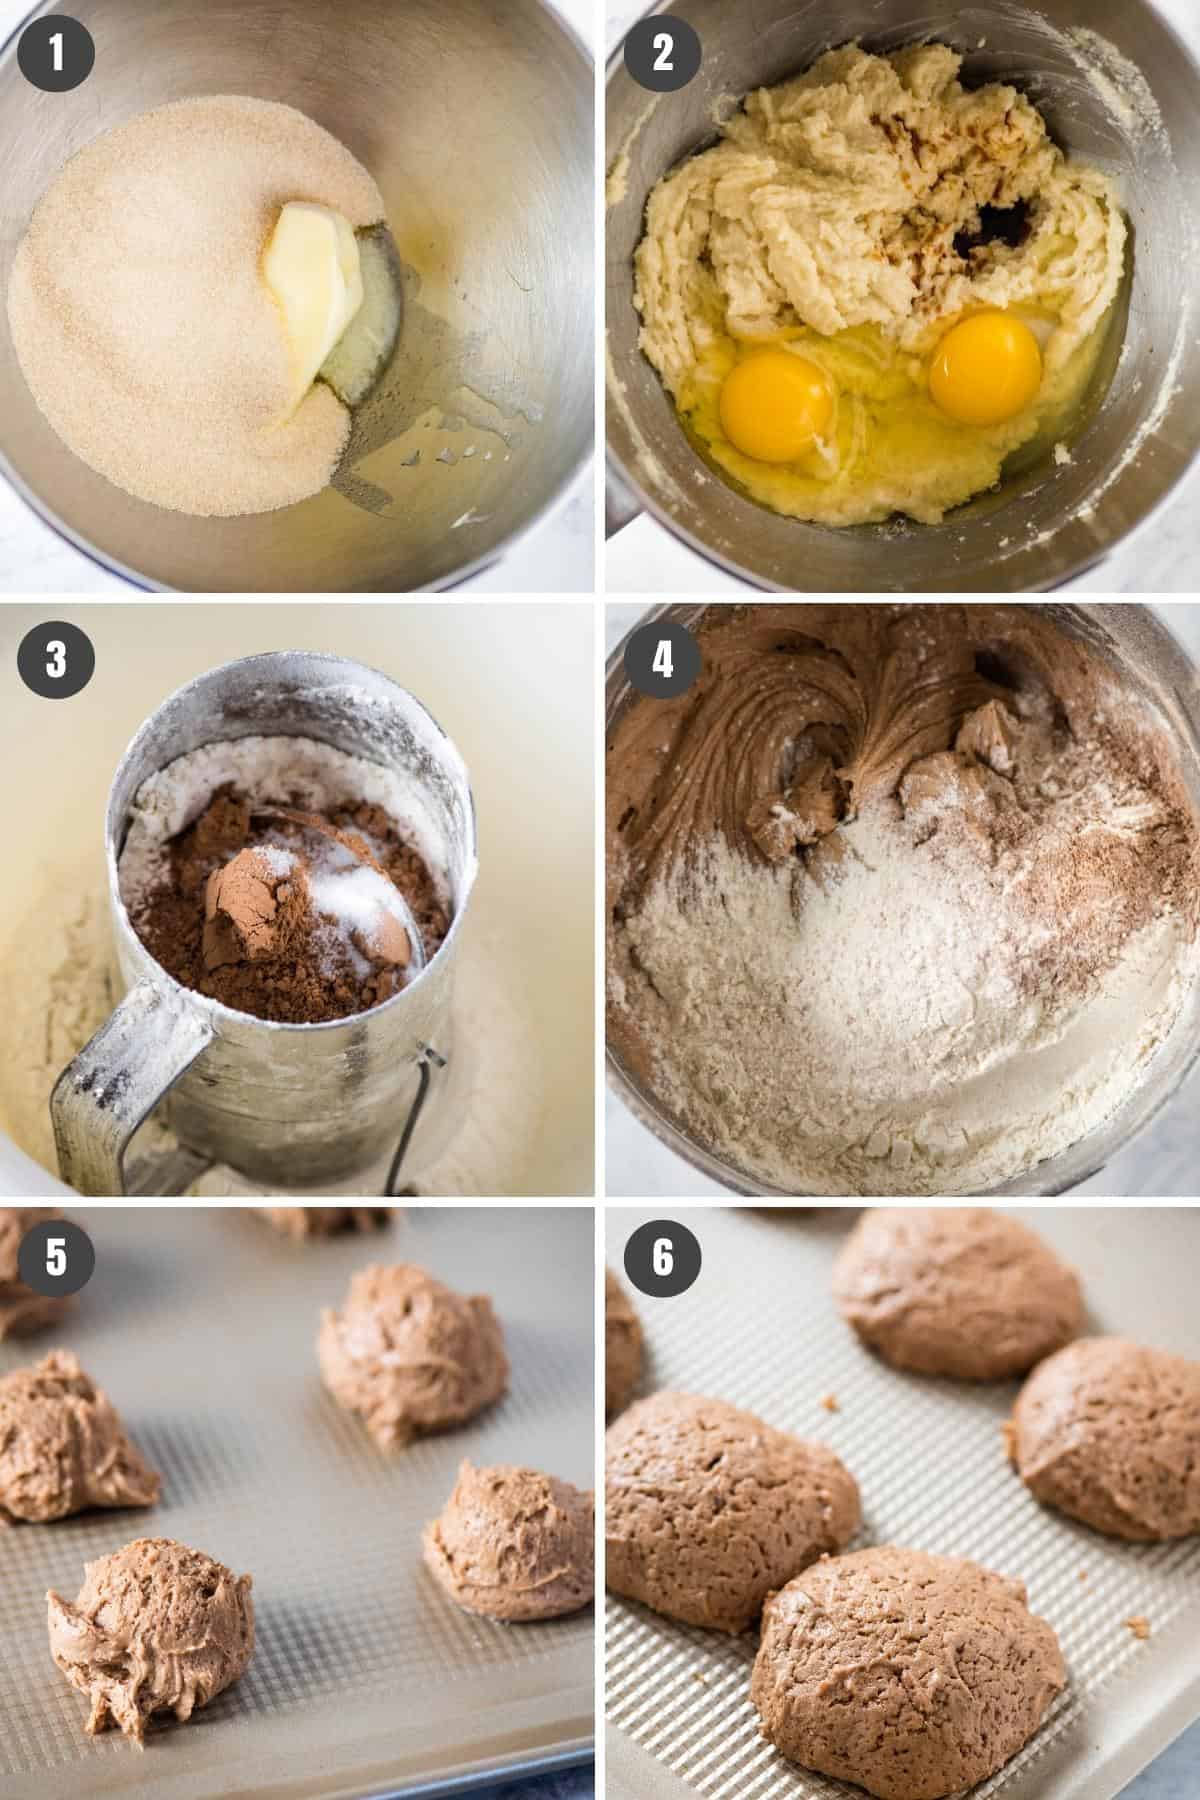
Baking chocolate gobs is a 2-step process. First, cookies, then the filling.
First Bake the Cookies
Cream (or mix) the butter and sugar together.
Then add the eggs and vanilla, mixing well.
Whisk or sift all the dry ingredients, including the flour, baking powder, cocoa powder, and salt, together.
Mix the dry ingredients into the creamed mixture alternately with the milk, beginning and ending with the dry ingredients. If the batter is too thin, you may need to add just a bit more flour.
Drop from teaspoons onto a baking sheet; then bake at 350° F for 10 to 12 minutes.
When fully baked, remove the cookies from the cookie sheet, and allow them to cool on a wire rack.
Then Make the Whoopie Pie Filling
In a large mixing bowl, mix together the softened butter, vanilla extract, and almond extract.
Add the milk to the mixture.
Slowly add the powdered sugar to the mixture, mixing it in as you go. You want a good consistency, not too runny or the cookies will slide apart; you want the icing thick enough to stay on the cookie but not so thick that it breaks the cookies apart when trying to spread it. Once everything is mixed together, the icing should be smooth and creamy, free of any lumps.
Put the cookies together with this filling to form chocolate sandwich cookies.
And that’s it! They’re ready to enjoy, and boy will you enjoy these cookies. My mouth is watering just thinking about them.
Expert Tips and Recipe FAQ’s
Why are my whoopie pies flat?
This is why I mention that you may need to add just a bit more flour. Depending on the flour you use, your dough could be quite thin, and you don’t want it to be so thin that it’s falling off the spoon. It should scoop quite nicely without running off the spoon. If your batter’s too thin, your cookies will be flat.
Can I make these ahead of time?
Yes, of course! I wouldn’t recommend more than a day ahead of time, but yes, you can make them the day before and they’ll be just fine. You may, however, want to store them in the fridge if you add the filling the day before, since the icing has milk.
How should I store whoopie pies?
I recommend keeping them in the fridge ’til you’re ready to serve them, since the filling does have milk (or cream). They should keep for 3-5 days if stored in an airtight container.
Can you freeze whoopie pies?
Yes, you can. You can bake them, frost them, package them in plastic wrap, then place them in an airtight container and freeze. They should keep for about 3 months.
If you try this recipe, why not leave a star rating in the recipe card right below and/or a review in the comment section further down the page? I always appreciate your feedback. You can also follow me on Pinterest, Facebook, Instagram, and YouTube. And subscribe to my email list too!
Chocolate Whoopie Pies
How to make my grandma's family-favorite recipe for chocolate whoopie pies. Soft cookie sandwiches with vanilla buttercream filling.
Stand Mixer
Cookie Scoop
Cookie Sheet
Whoopie Pie Dough:
1 cup unsalted butter (softened)
2 cups cane sugar
2 large eggs
1 teaspoon vanilla extract
3 3/4 cups all-purpose flour
2 teaspoons baking powder
6 tablespoons unsweetened cocoa powder
1 teaspoon salt
1 cup whole milk
Whoopie Pie Filling:
2 tablespoons salted butter (softened)
1/2 teaspoon vanilla extract
1/2 teaspoon almond extract
1/2 cup whole milk (or heaving whipping cream)
3 cups powdered sugar
Pre-heat the oven to 350° F.
Cream (or mix) the butter and sugar together.
Then add the eggs and vanilla, mixing well.
Whisk or sift together the flour, baking powder, cocoa powder, and salt.
Mix the dry ingredients into the creamed mixture alternately with the milk, beginning and ending with the dry ingredients. If the batter is too thin, you may need to add just a bit more flour.
Drop from teaspoons onto a baking sheet.
Bake at 350° F for about 10 to 12 minutes.
When fully baked, remove the cookies from the cookie sheet, and allow them to cool on a wire rack.
Whoopie Pie Filling:
In a large mixing bowl, mix together the softened butter, vanilla extract, and almond extract.
Add the milk to the mixture.
Slowly add the powdered sugar to the mixture, mixing it in as you go. You want a good consistency, not too runny or the cookies will slide apart; you want the icing thick enough to stay on the cookie but not so thick that it breaks the cookies apart when trying to spread it. Once everything is mixed together, the icing should be smooth and creamy, free of any lumps.
Put the cookies together with this filling to form chocolate sandwich cookies.
Why are my whoopie pies flat?
This is why I mention that you may need to add just a bit more flour. Depending on the flour you use, your dough could be quite thin, and you don’t want it to be so thin that it’s falling off the spoon. It should scoop quite nicely without running off the spoon. If your batter’s too thin, your cookies will be flat.
How should I store whoopie pies?
I recommend keeping them in the fridge ’til you’re ready to serve them, since the filling does have milk (or cream). They should keep for 3-5 days if stored in an airtight container.

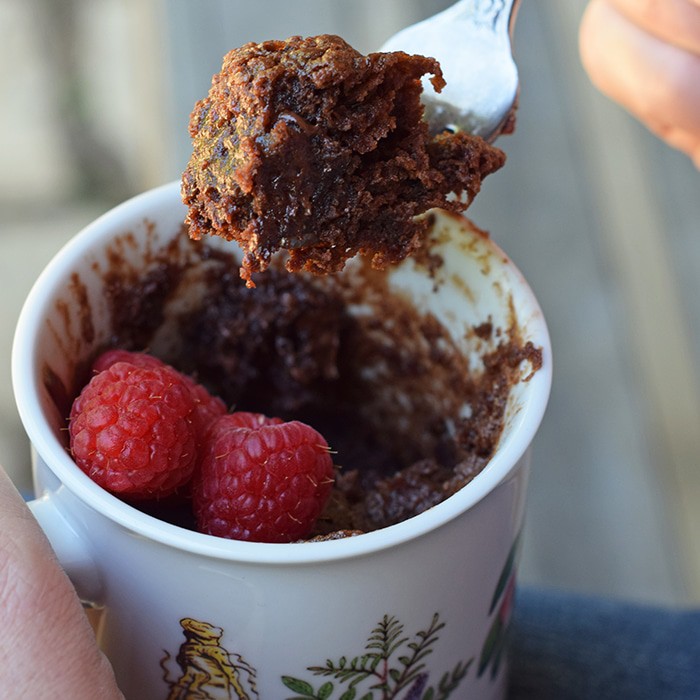
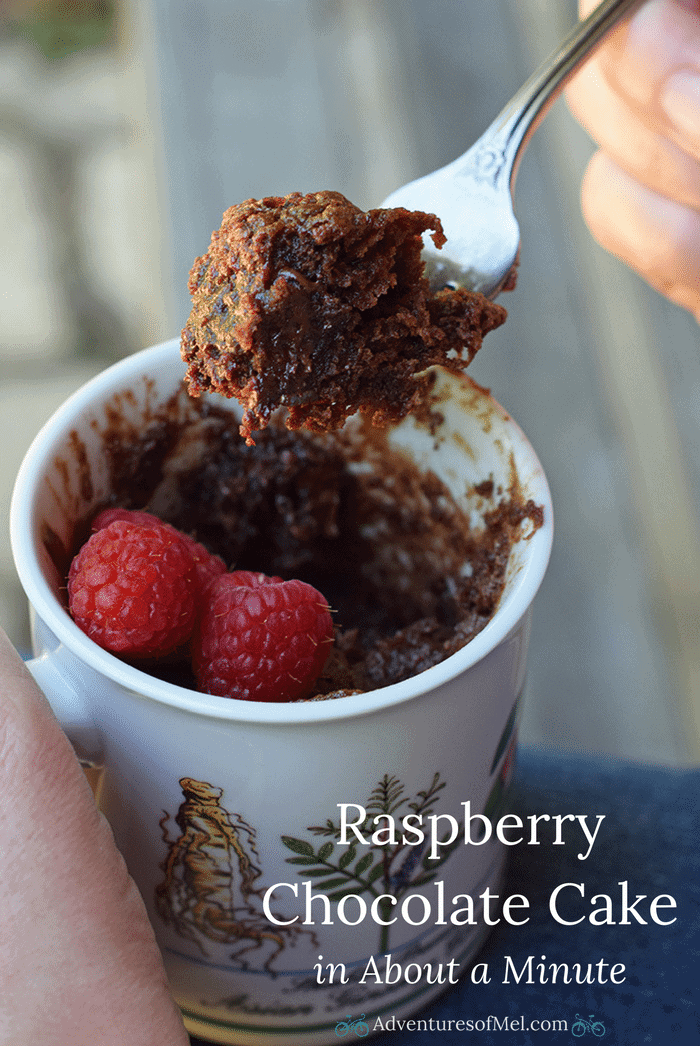
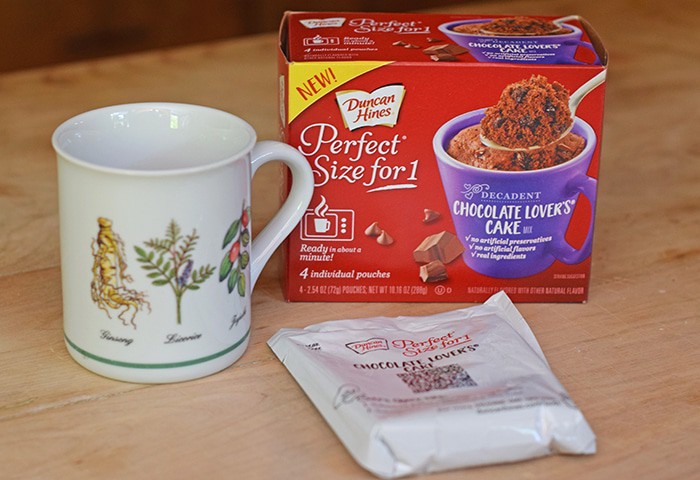
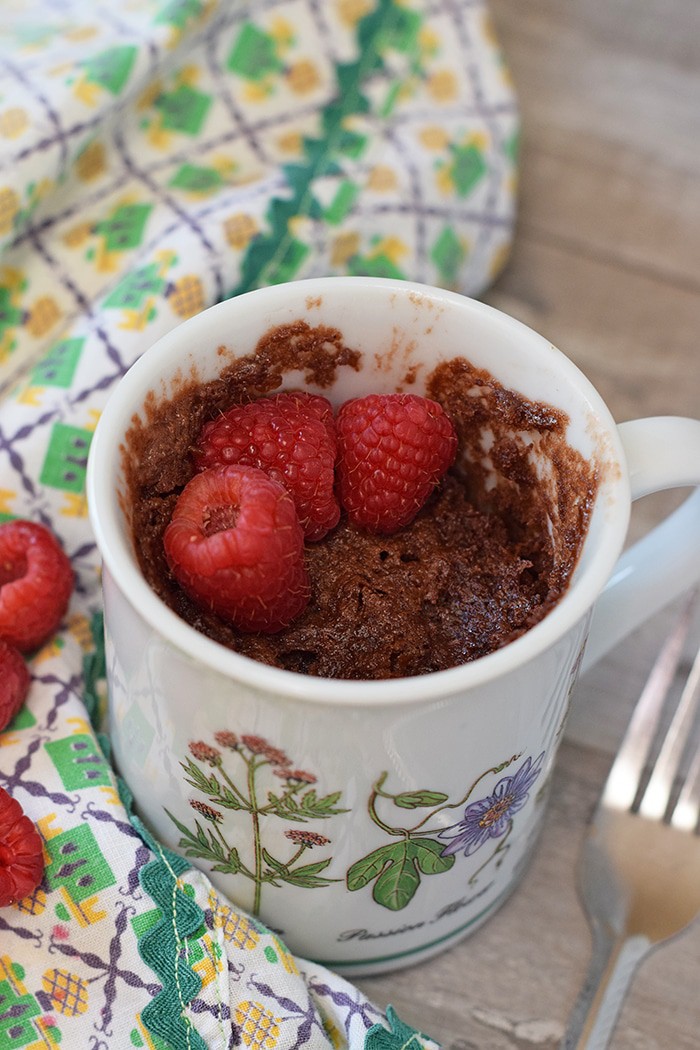
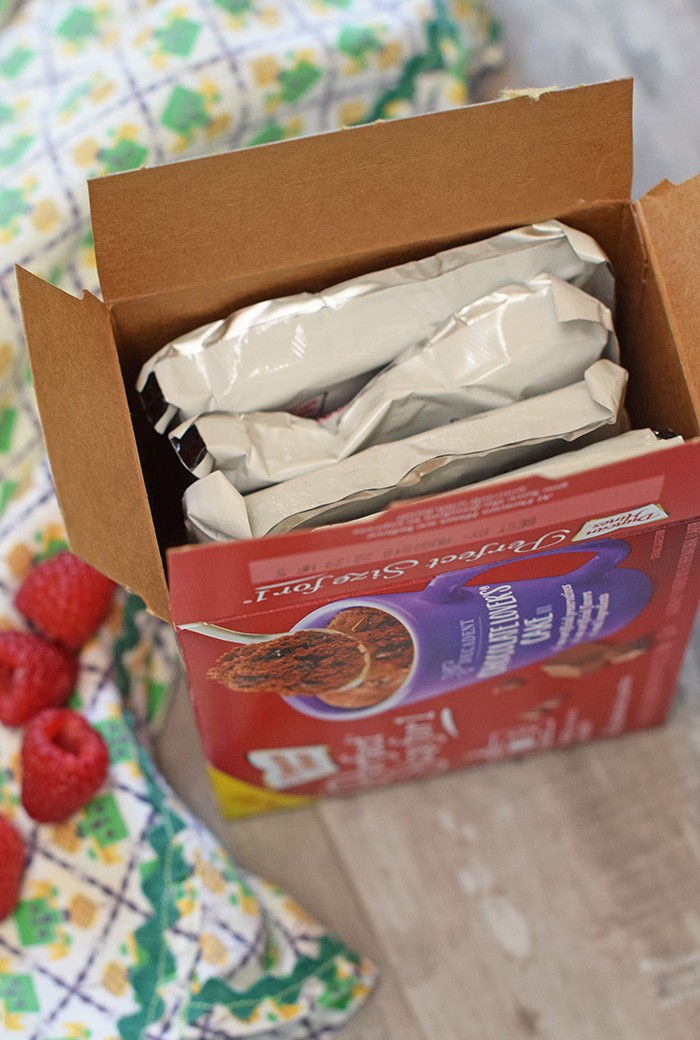
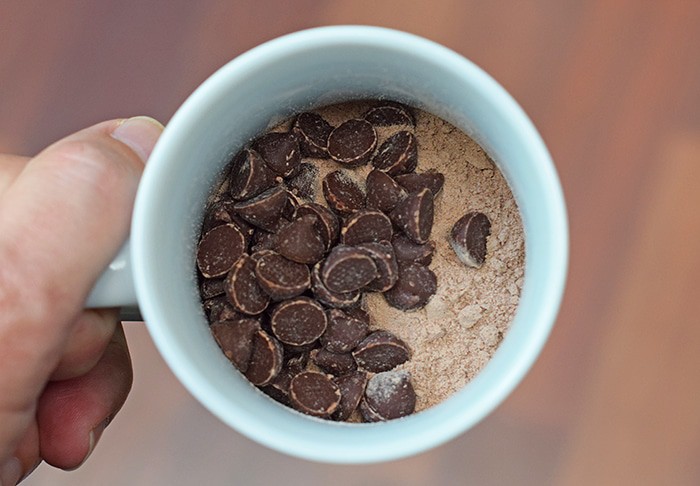
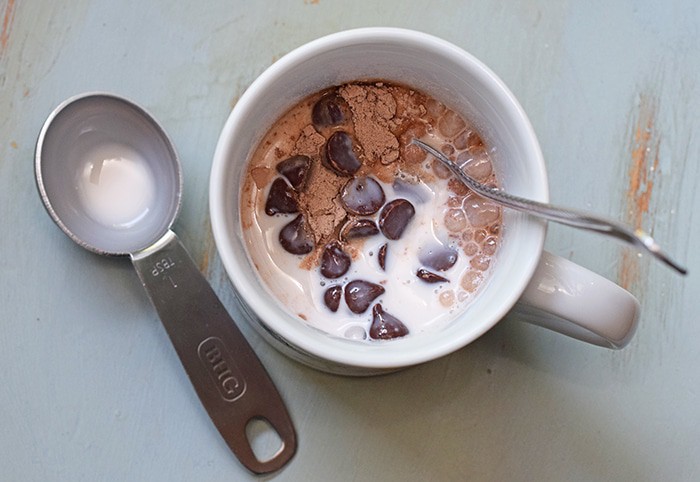
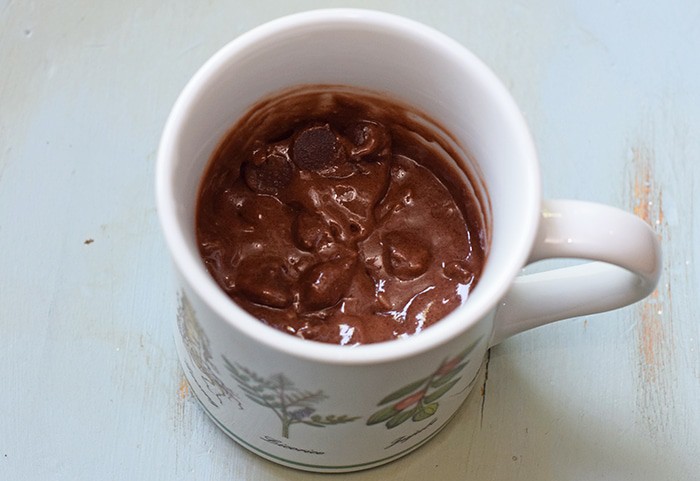
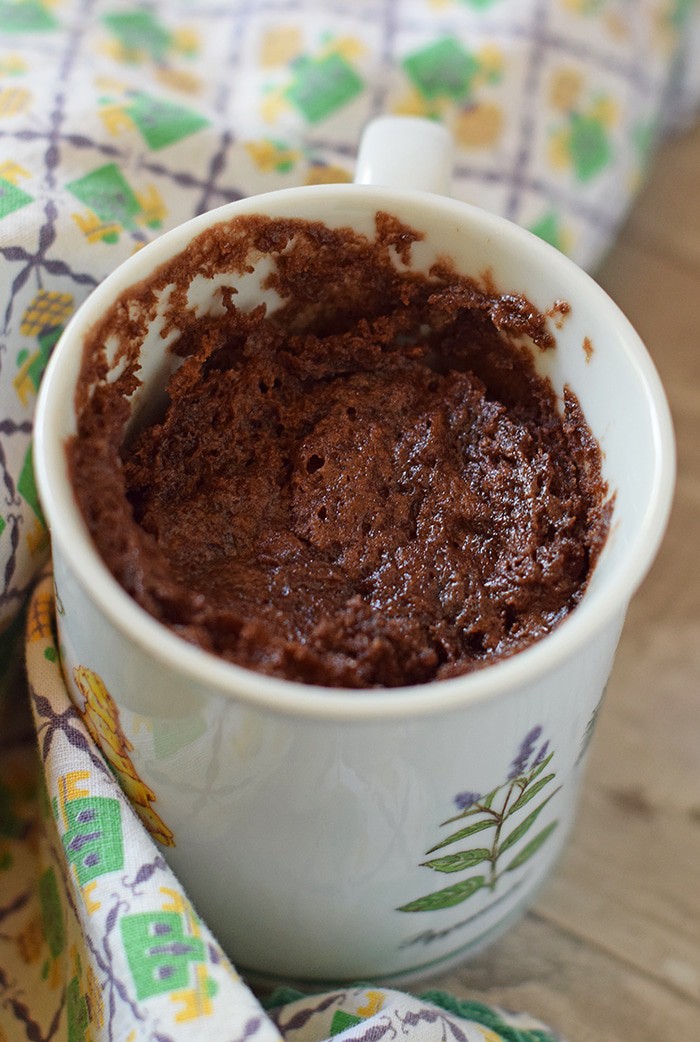
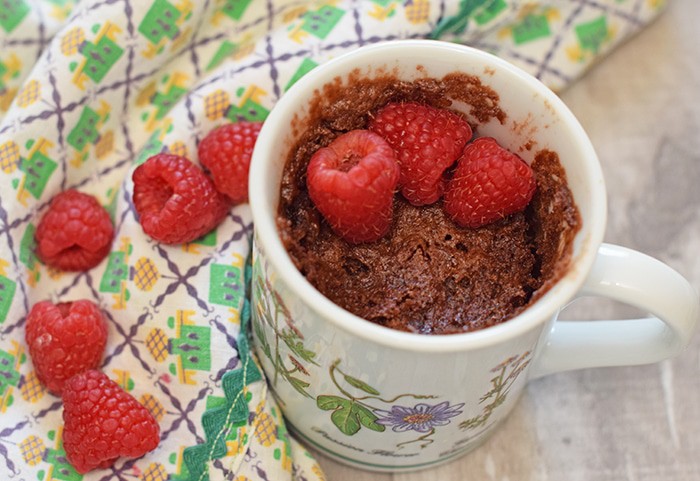
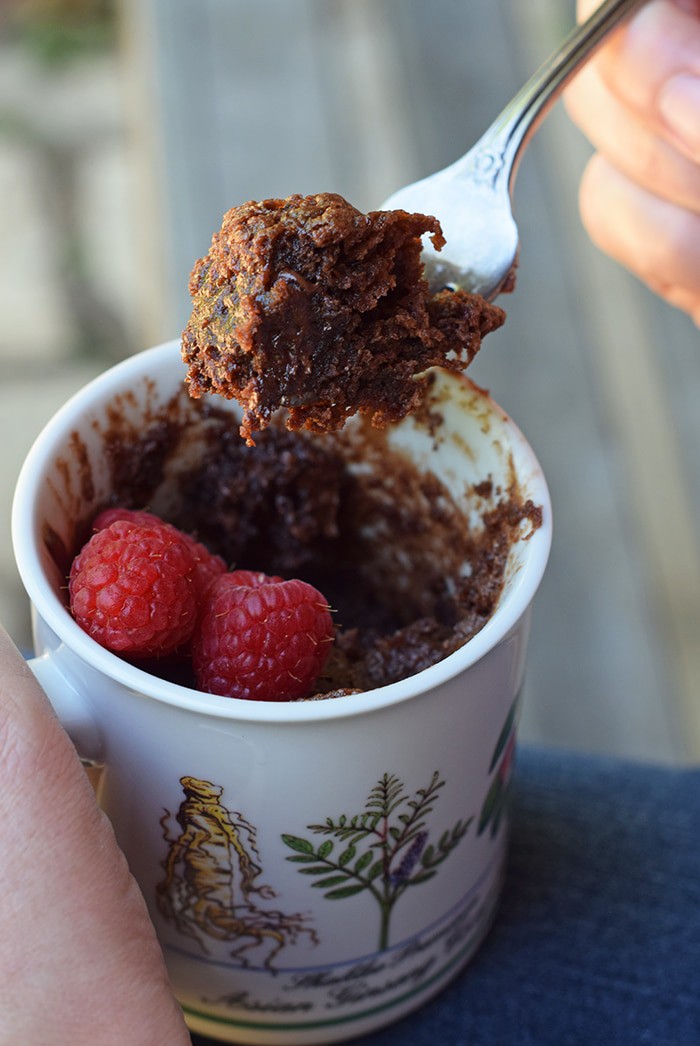
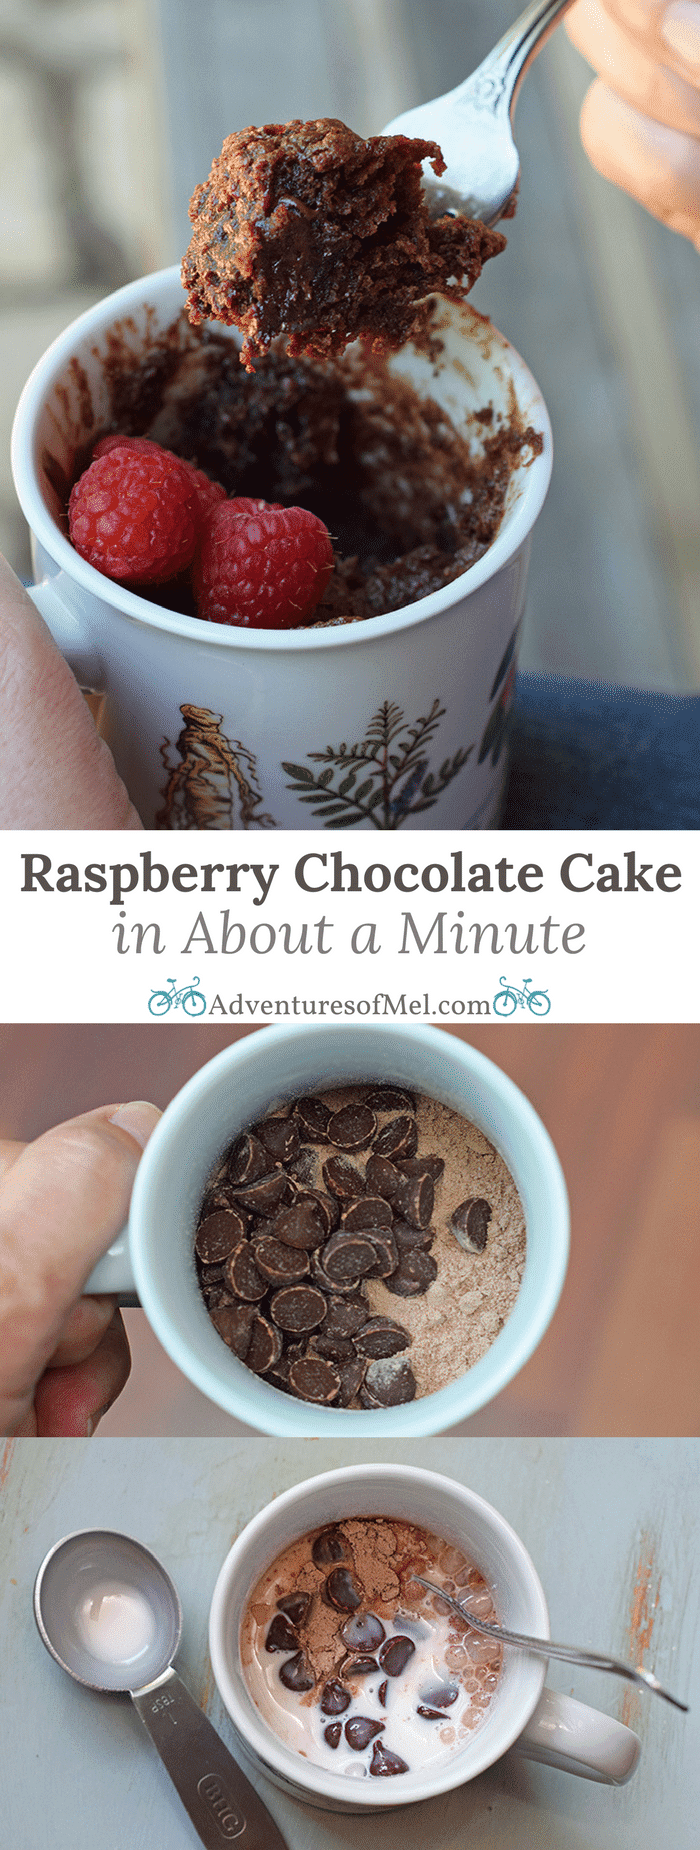
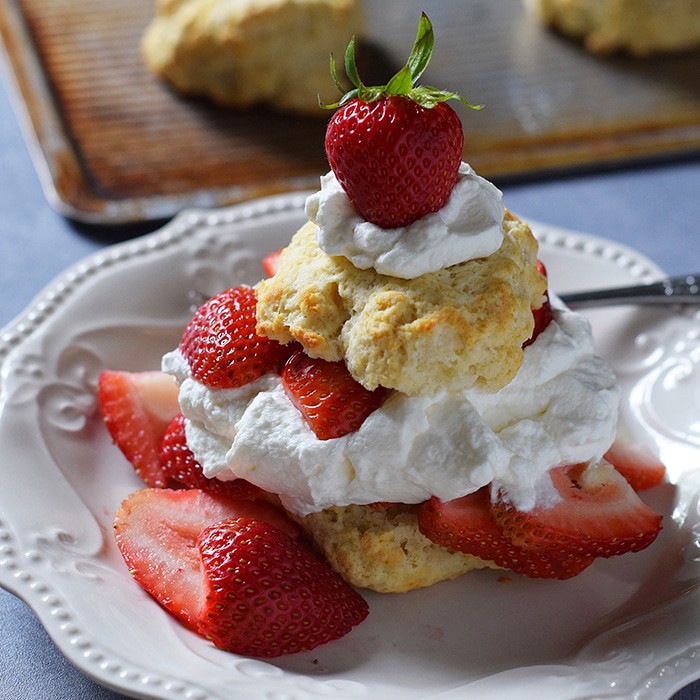
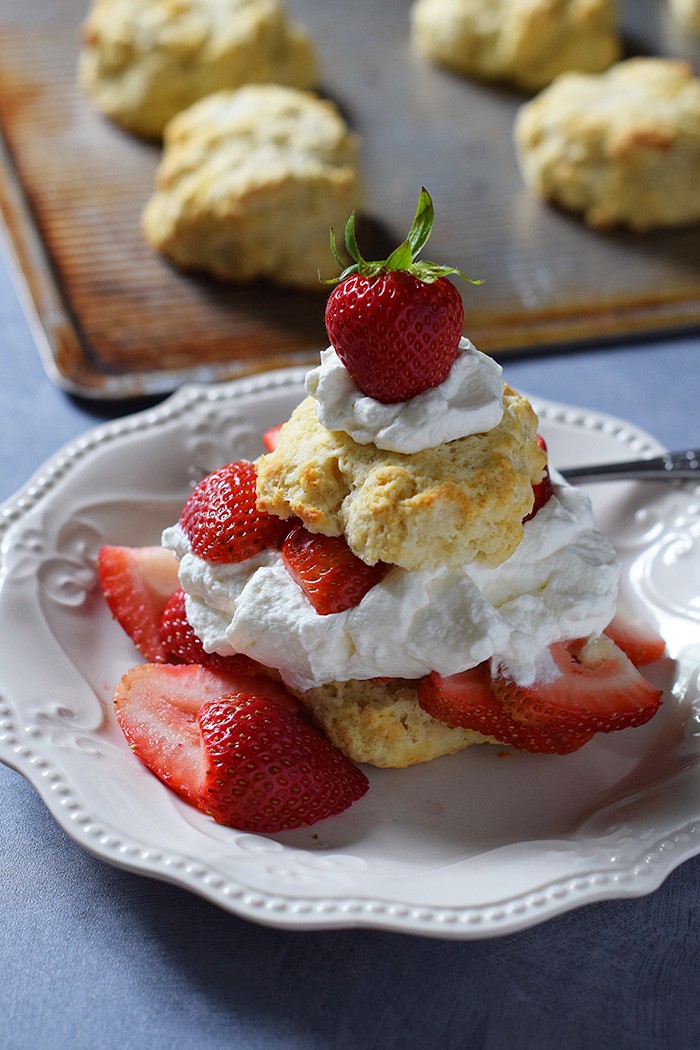
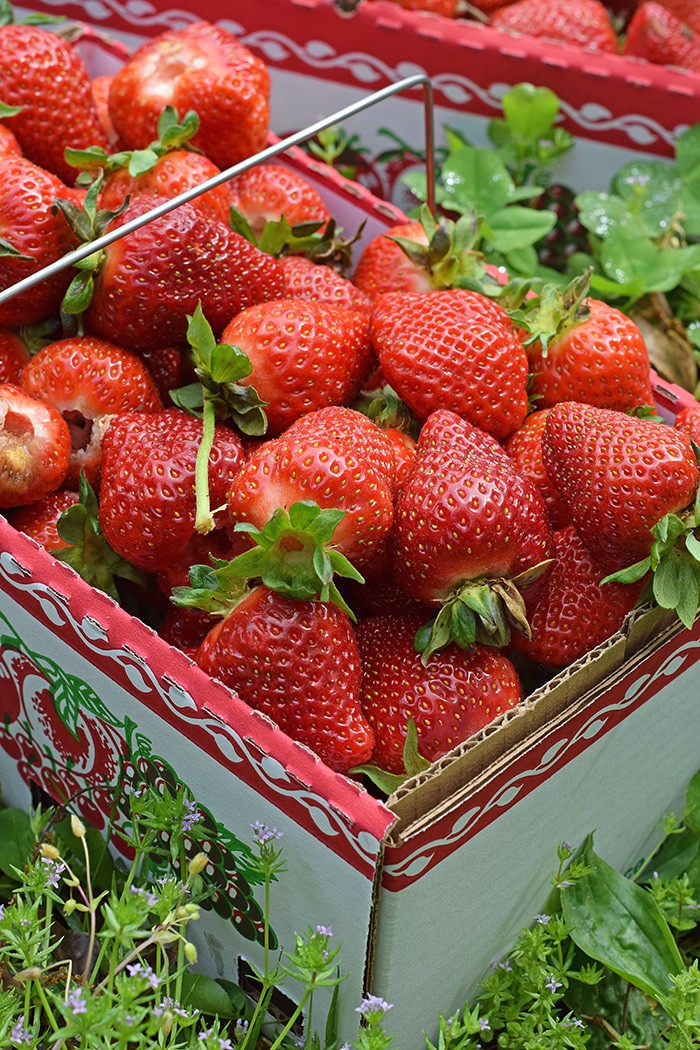

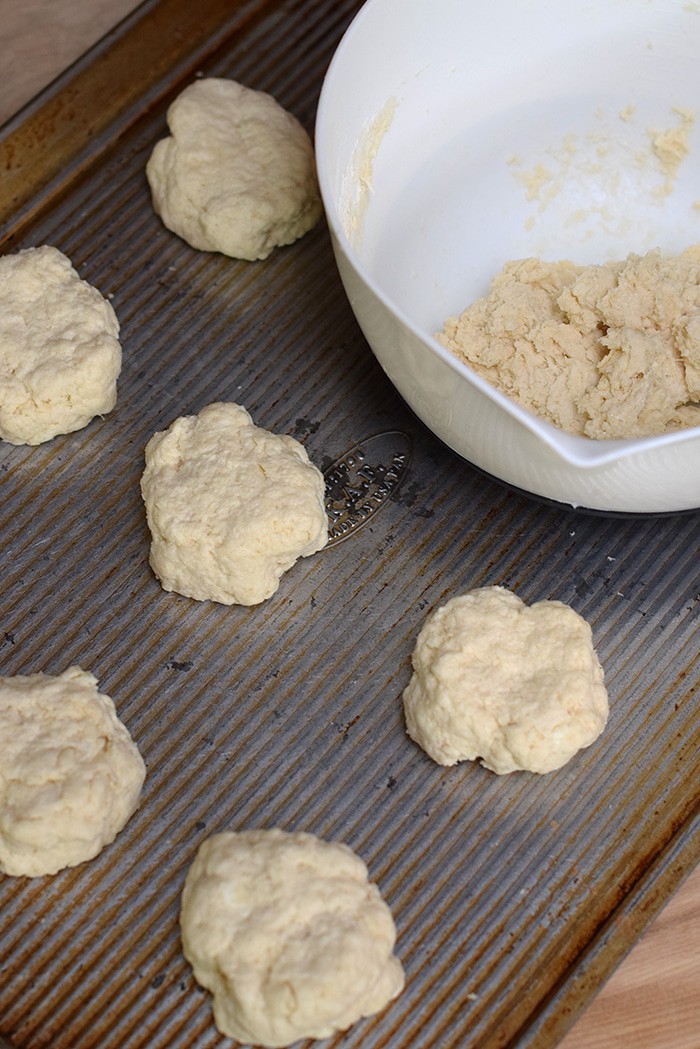
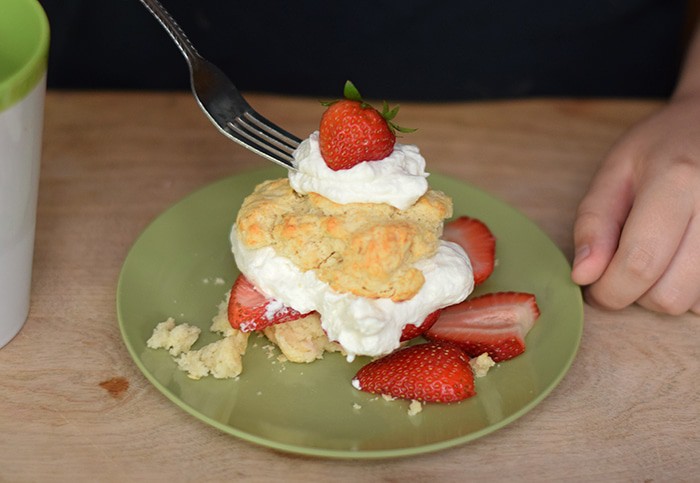
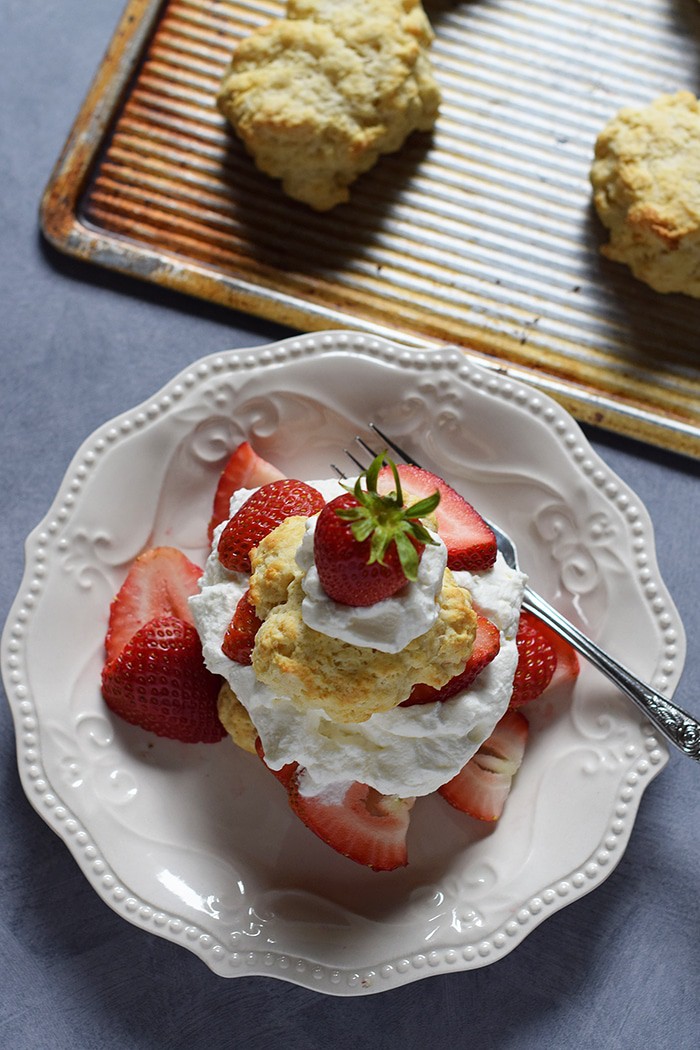
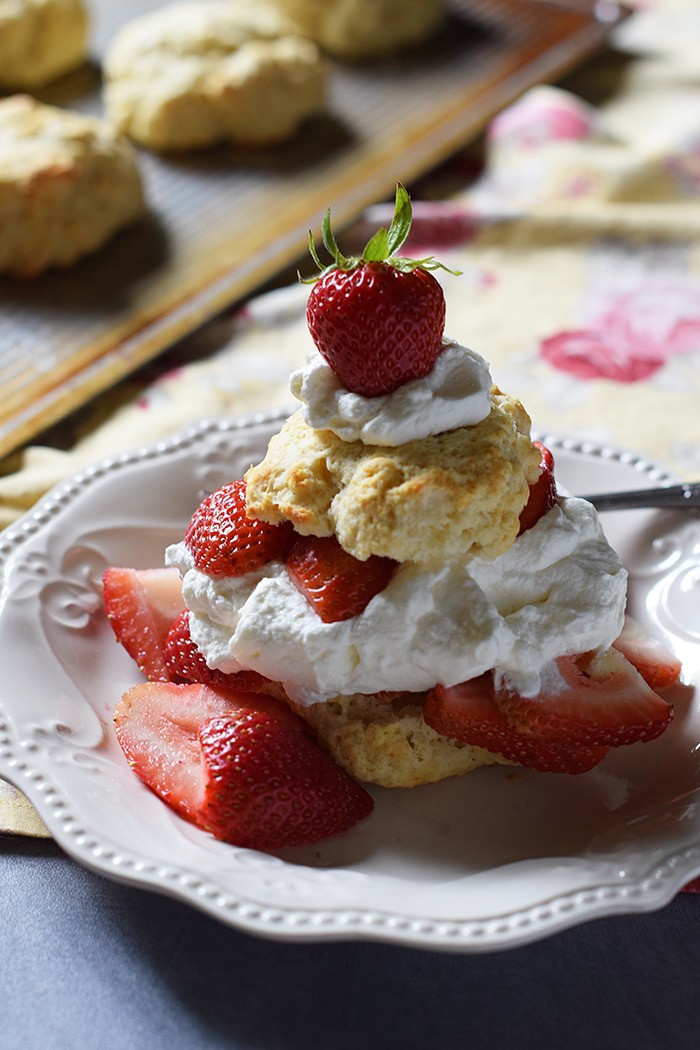
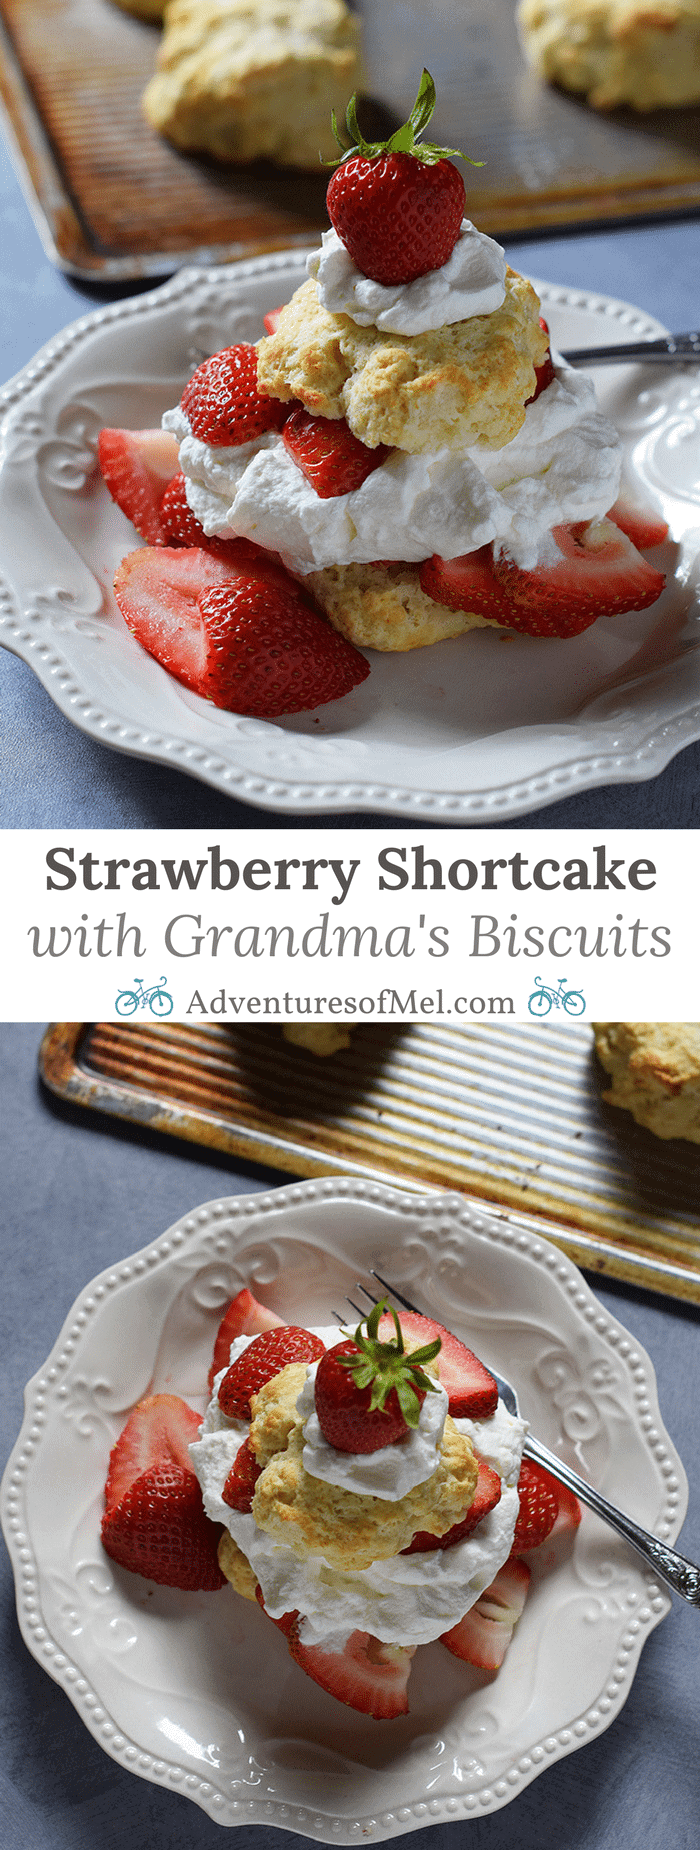
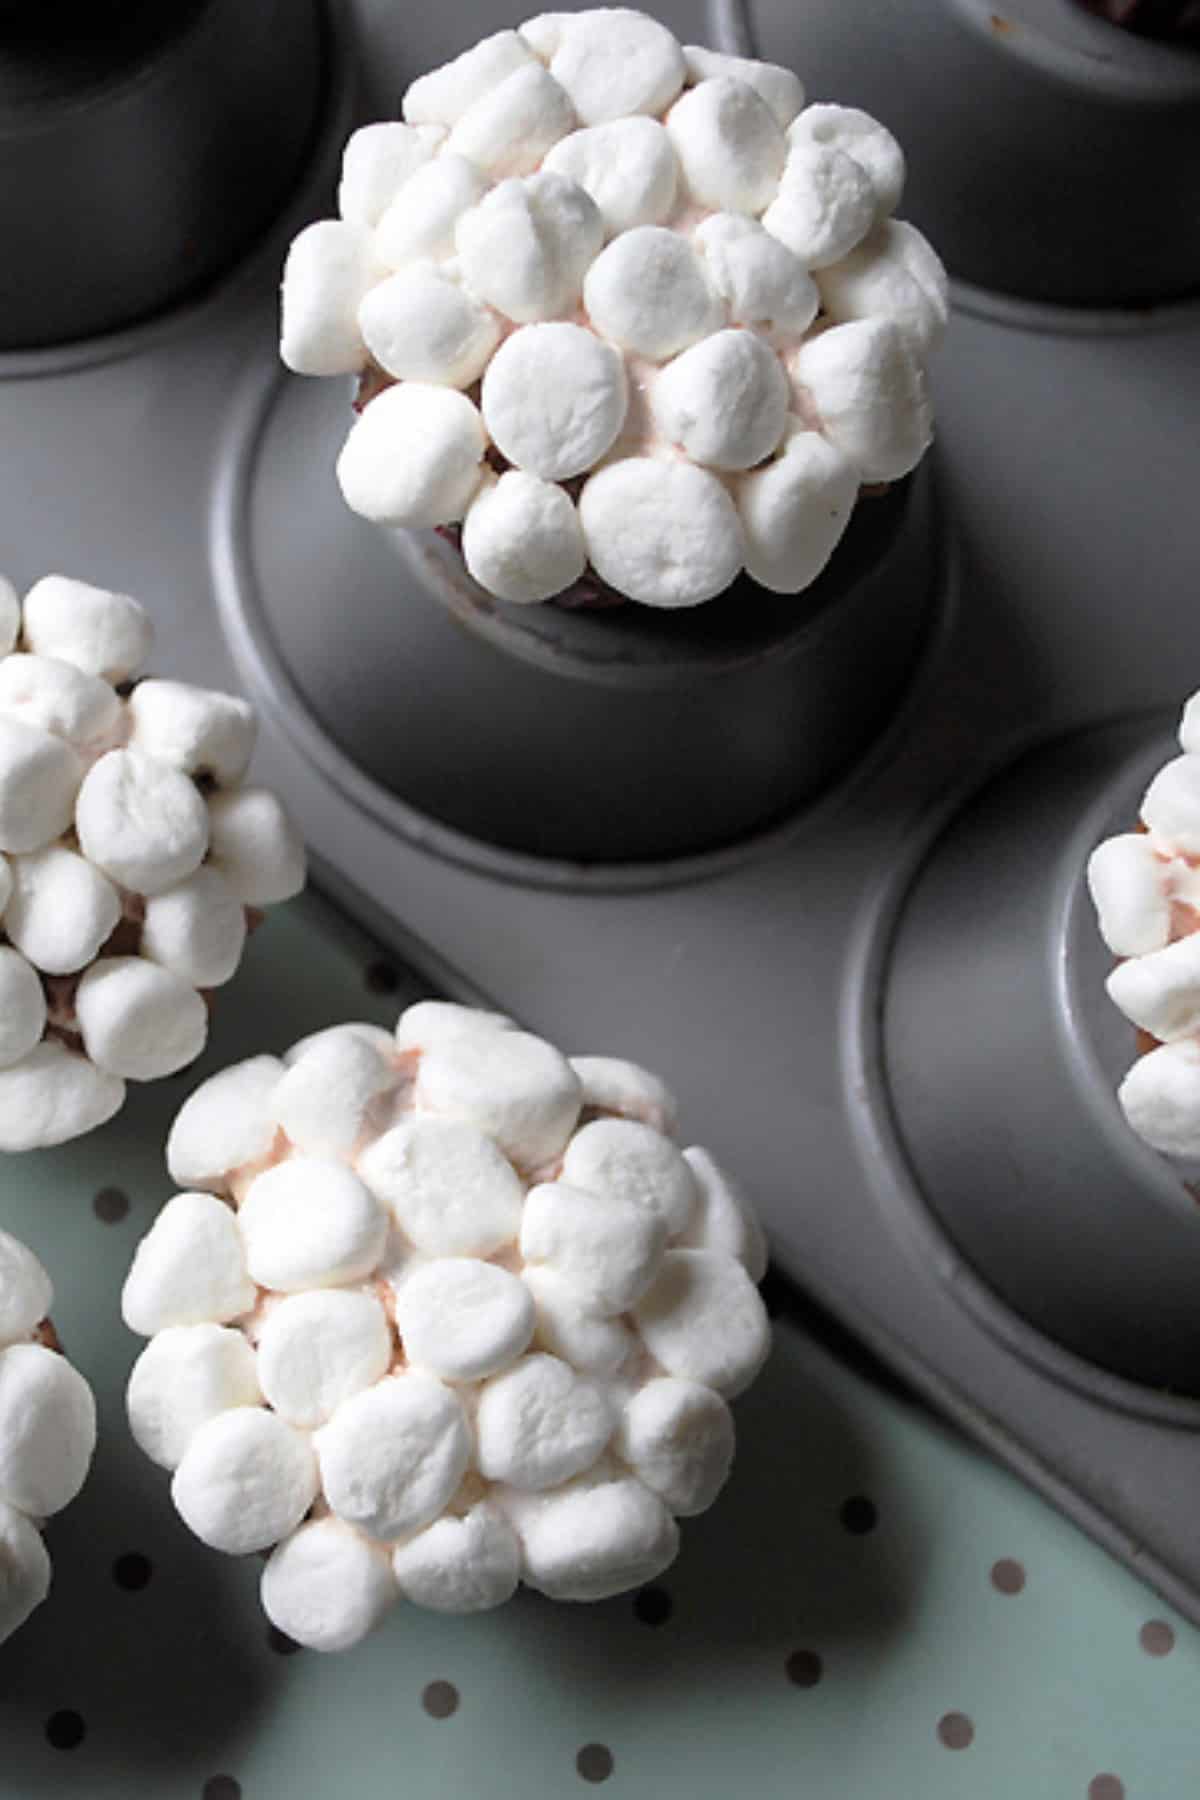
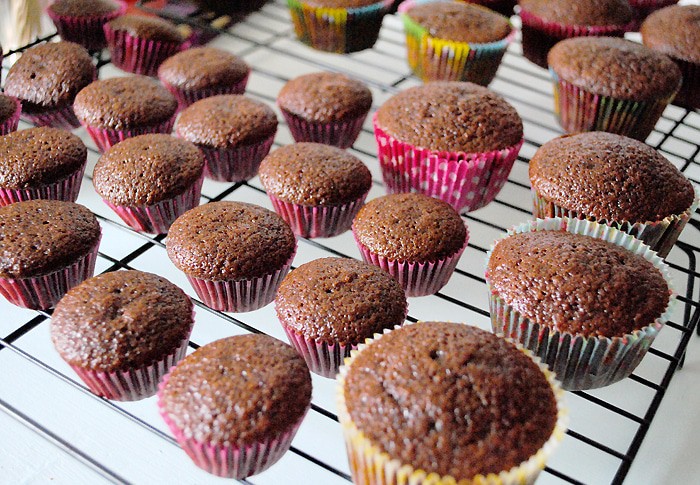

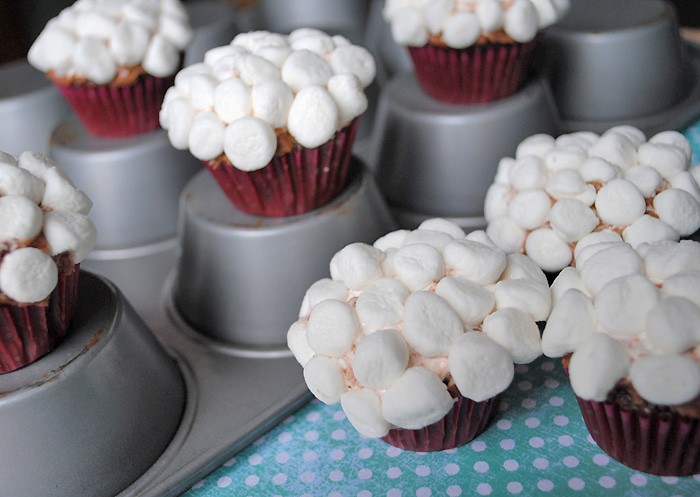
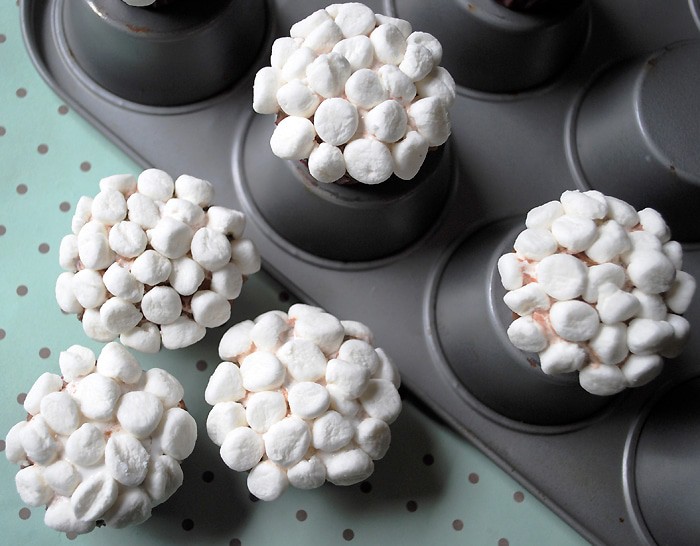
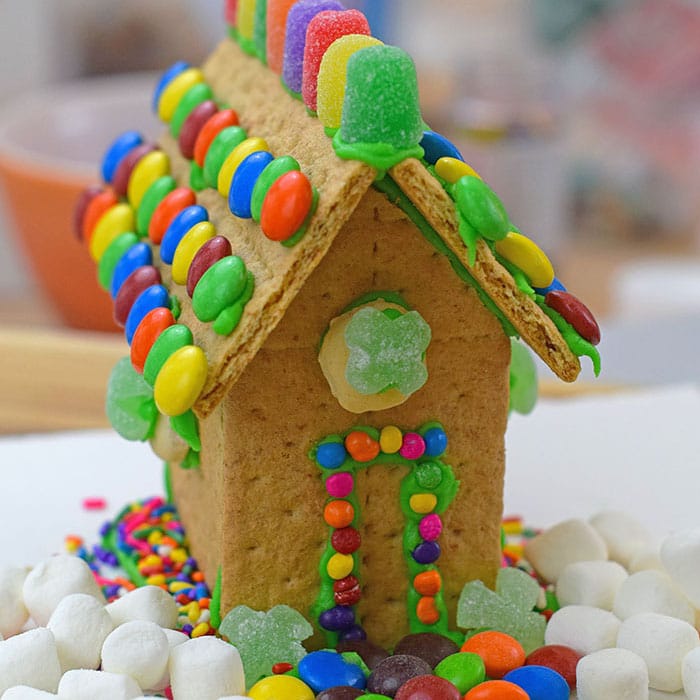
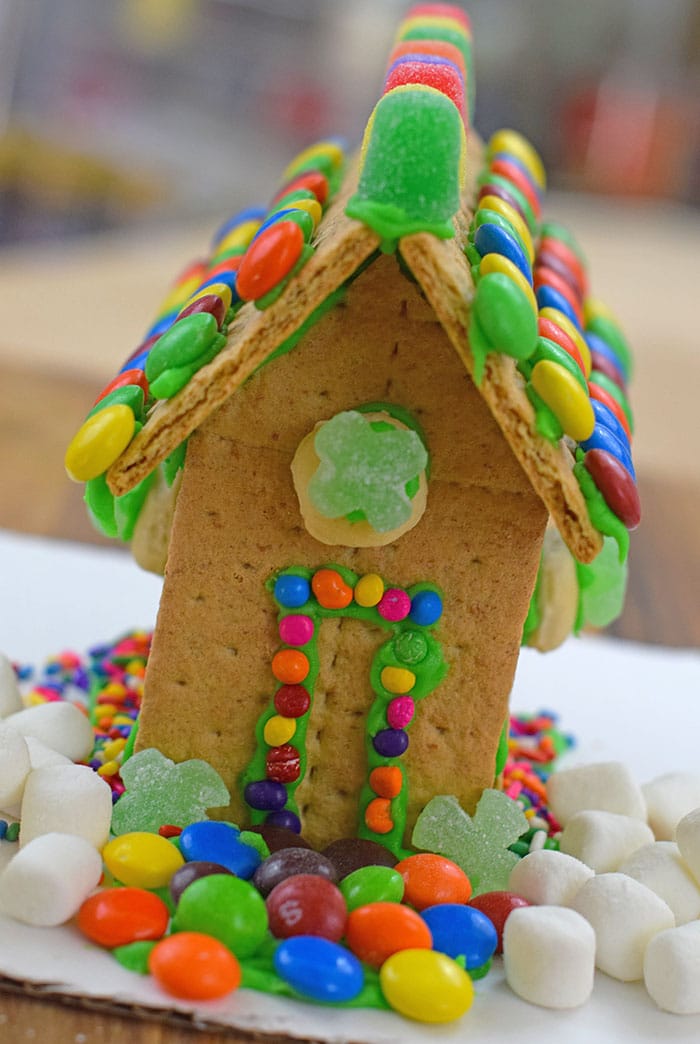
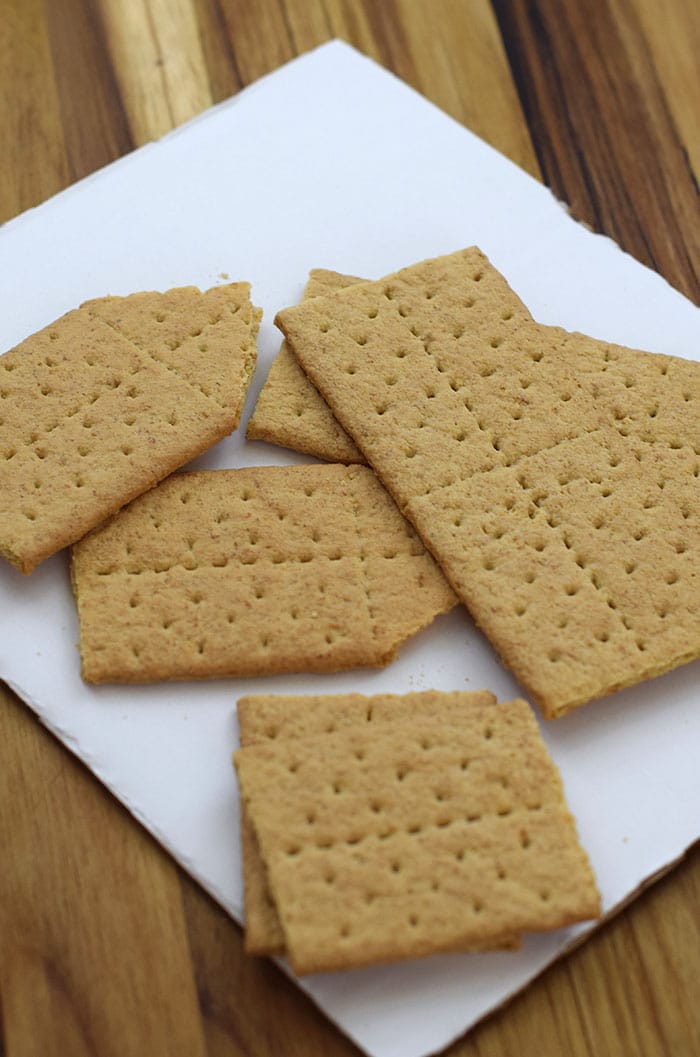 Next assemble your leprechaun house using graham crackers and Decorating Icing.
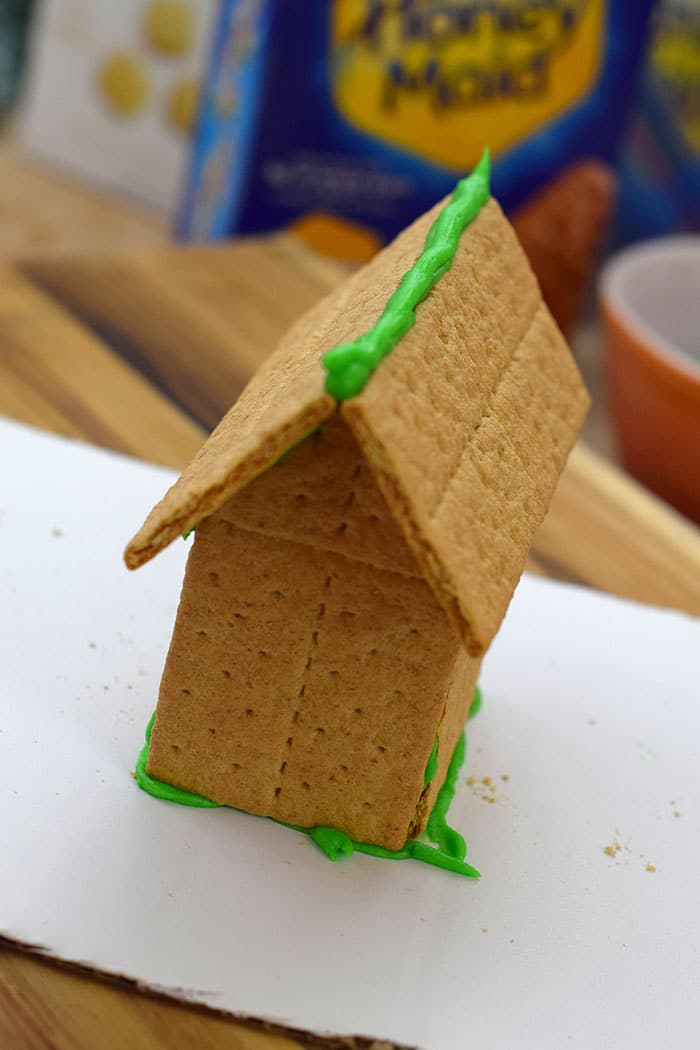 Now here’s where it was a bit tricky for me in the beginning. Everything I’d read said to use Royal Icing, but I’m just going to be real here… I tried that, and it was horrible. It was horrible! A disaster of epic proportions. I’d bought a box kit, and I’m not sure what happened with it, but it just wasn’t for me. I think it had more to do with me than the icing; I just didn’t have the patience for it. But I was lucky that I actually had backup in the form of Wilton Decorating Icing. It worked great! And there was no mixing or hassle with it.
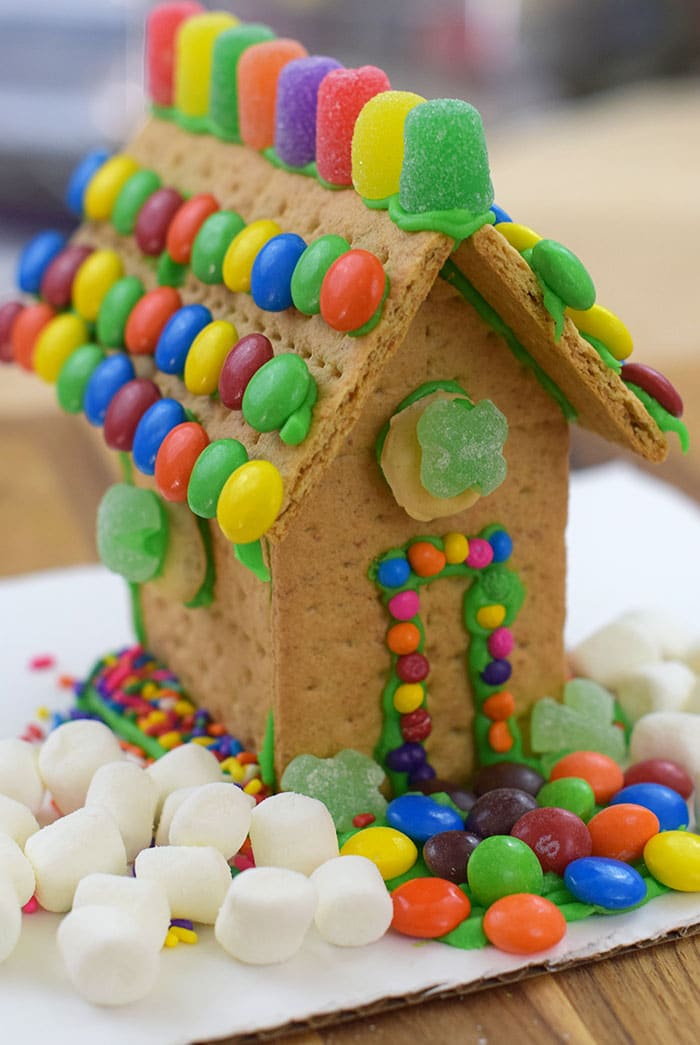 Once your house is constructed and has had a chance to meld together enough that it’s not going anywhere, it’s time for the fun part… Decorating! This is where all your candies and sprinkles come in.
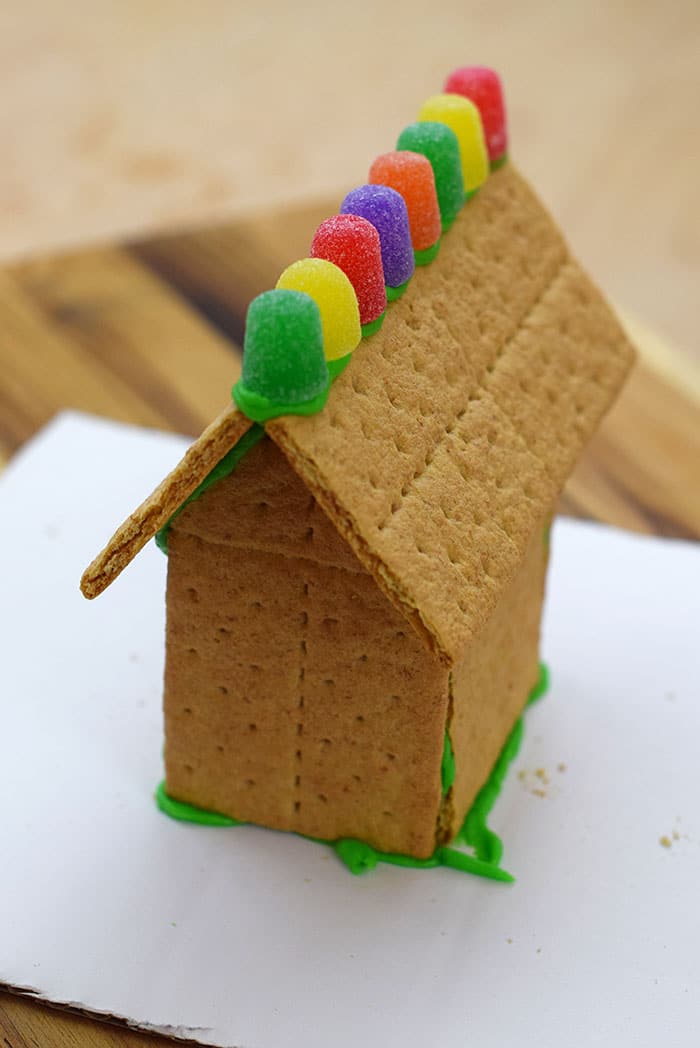 There really is no set way to decorate a leprechaun house.
 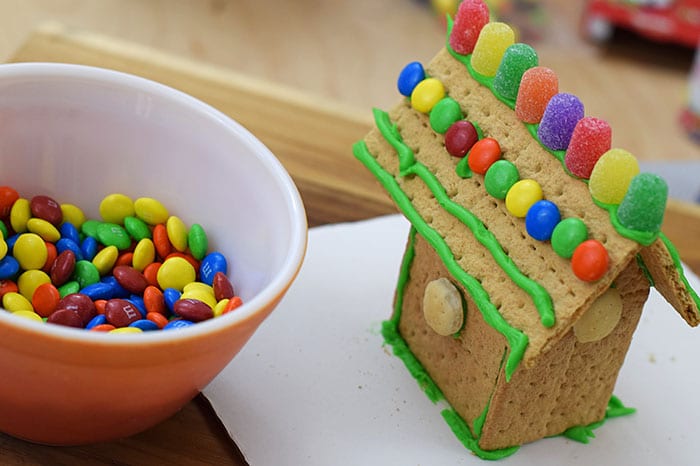 But I do recommend LOADS of rainbow colors, in the form of spice drops (or gum drop candies), M&M’s, Skittles, sprinkles, and more.
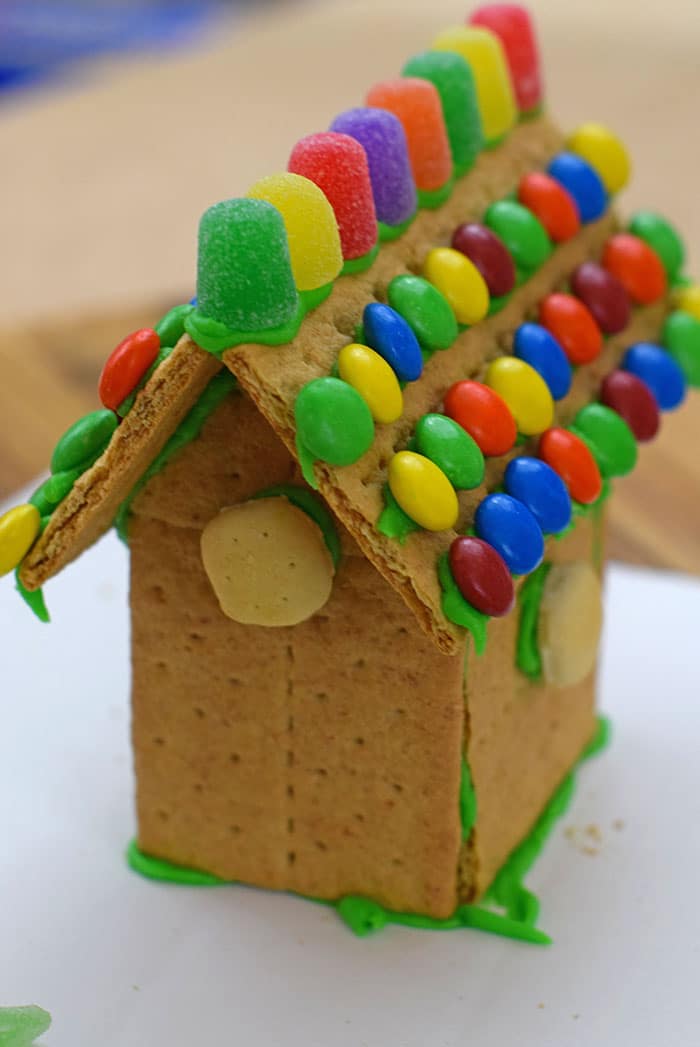 Use your Decorating Icing to attach everything to your house.
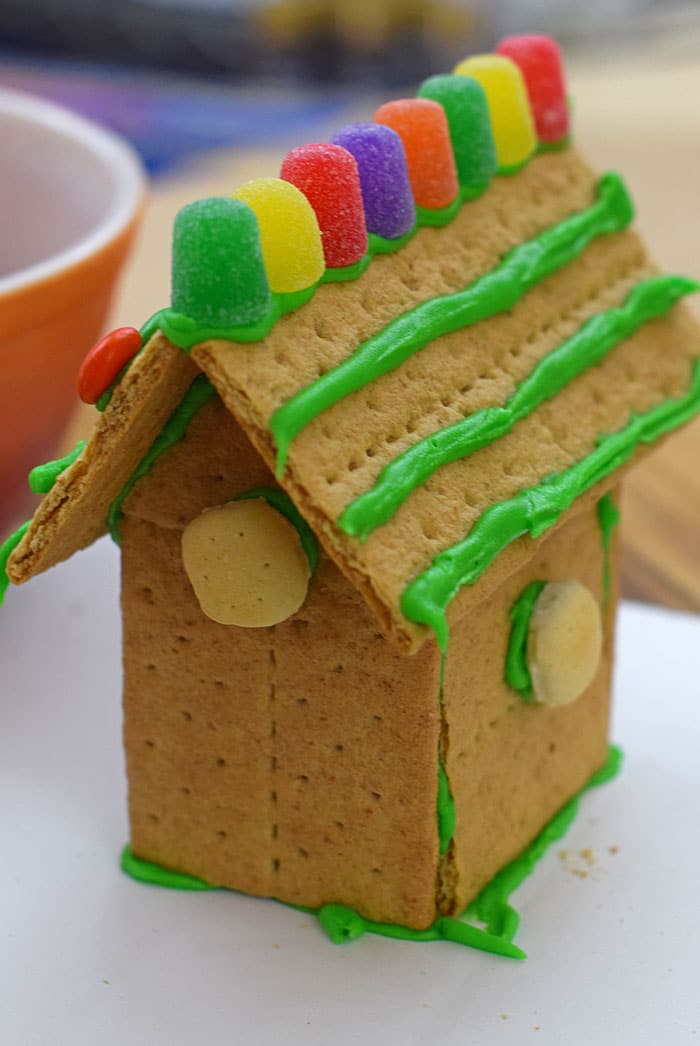
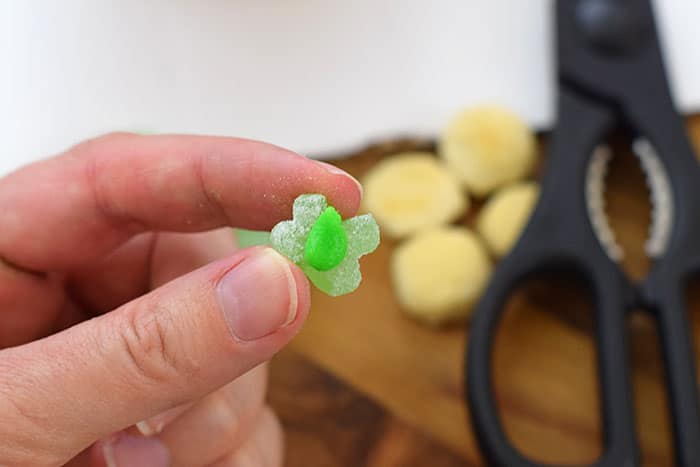 I found small green apple gummies that I actually cut with scissors to hopefully look more like 4-leaf clovers.
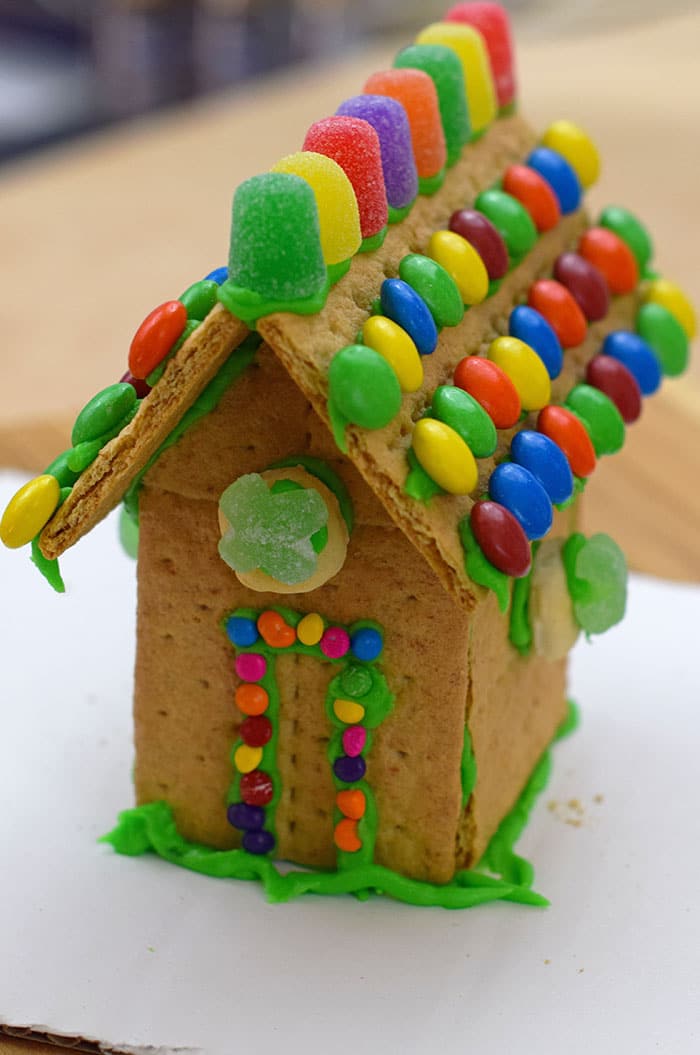
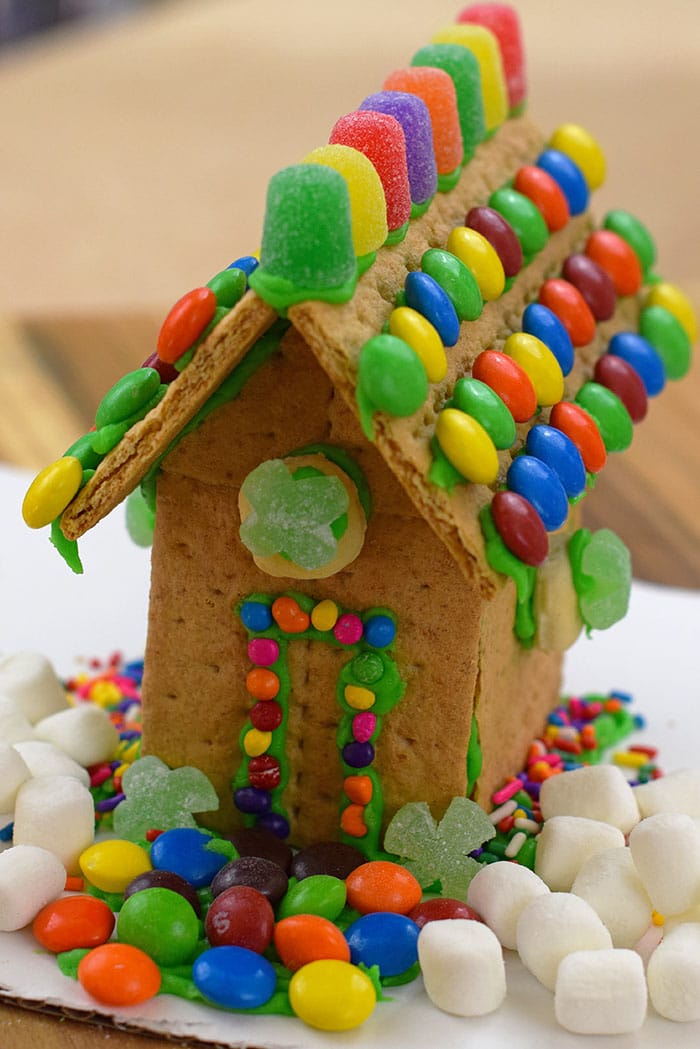 Skittles make a wonderful rainbow path through clouds of mini marshmallows.
 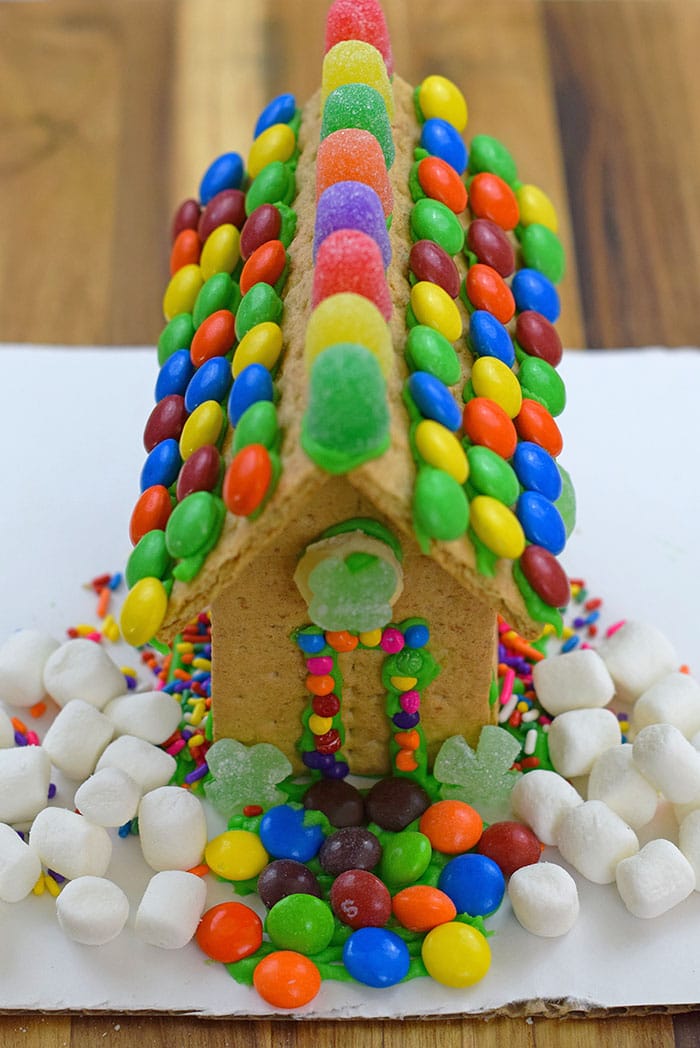 Just be creative and have fun with it! The decorating is especially fun for kids, though they may eat more than they decorate, fair warning.
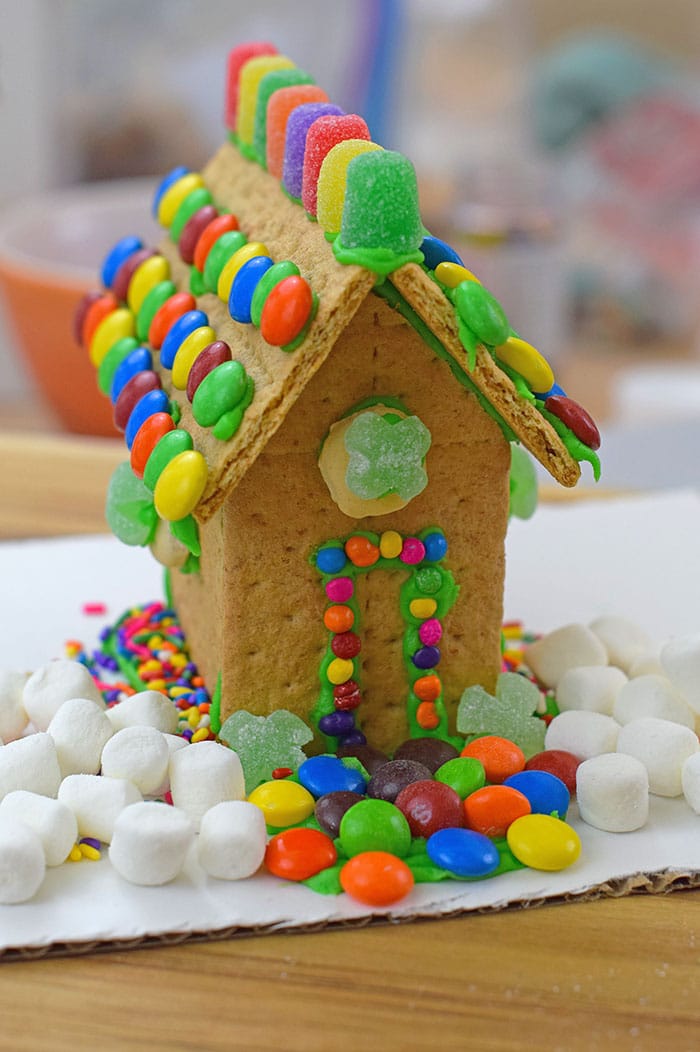 Happy decorating your very own graham cracker leprechaun house this
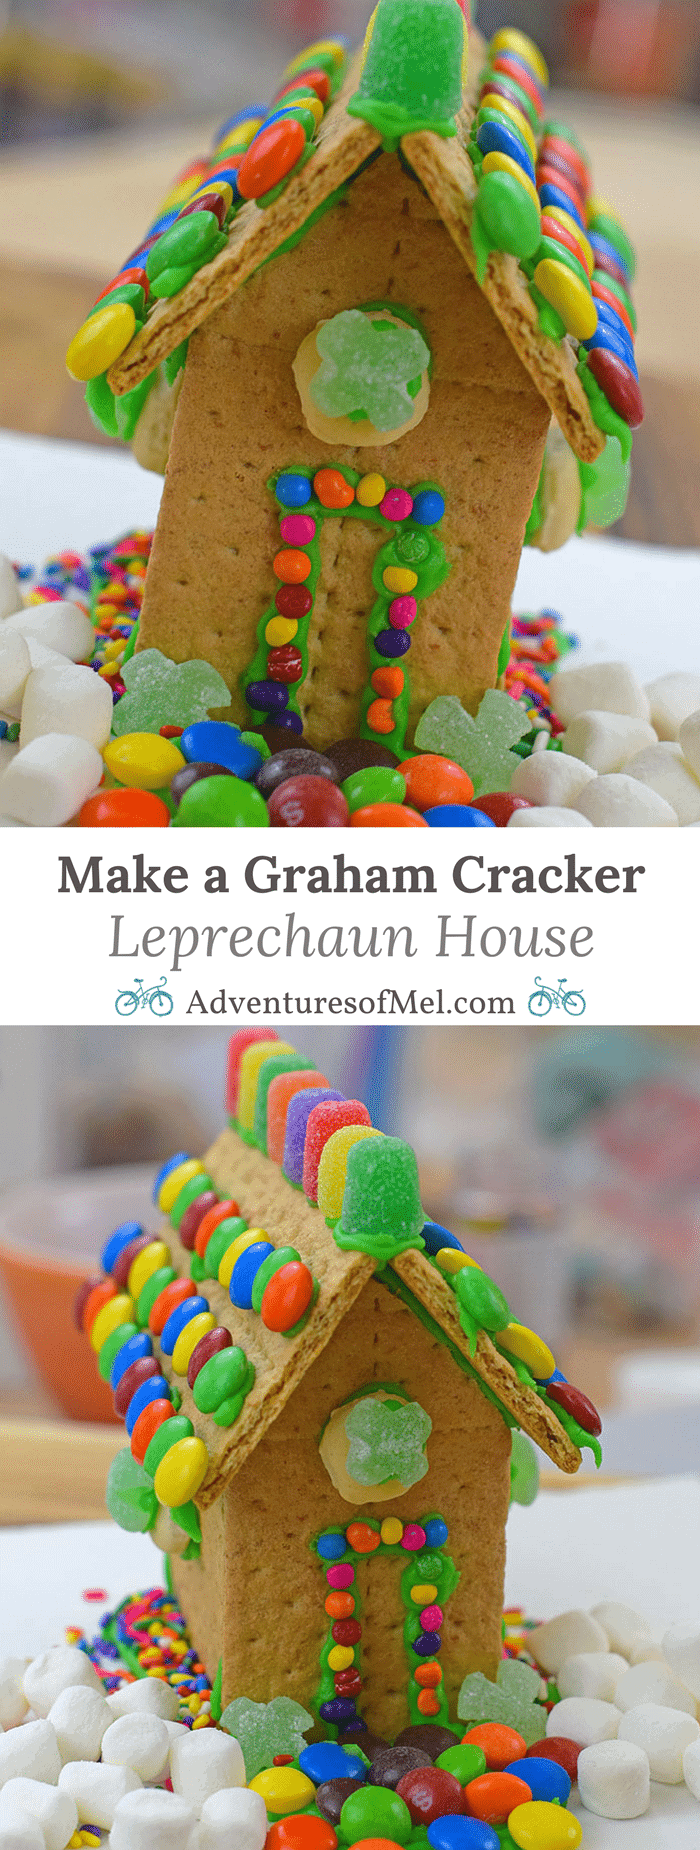

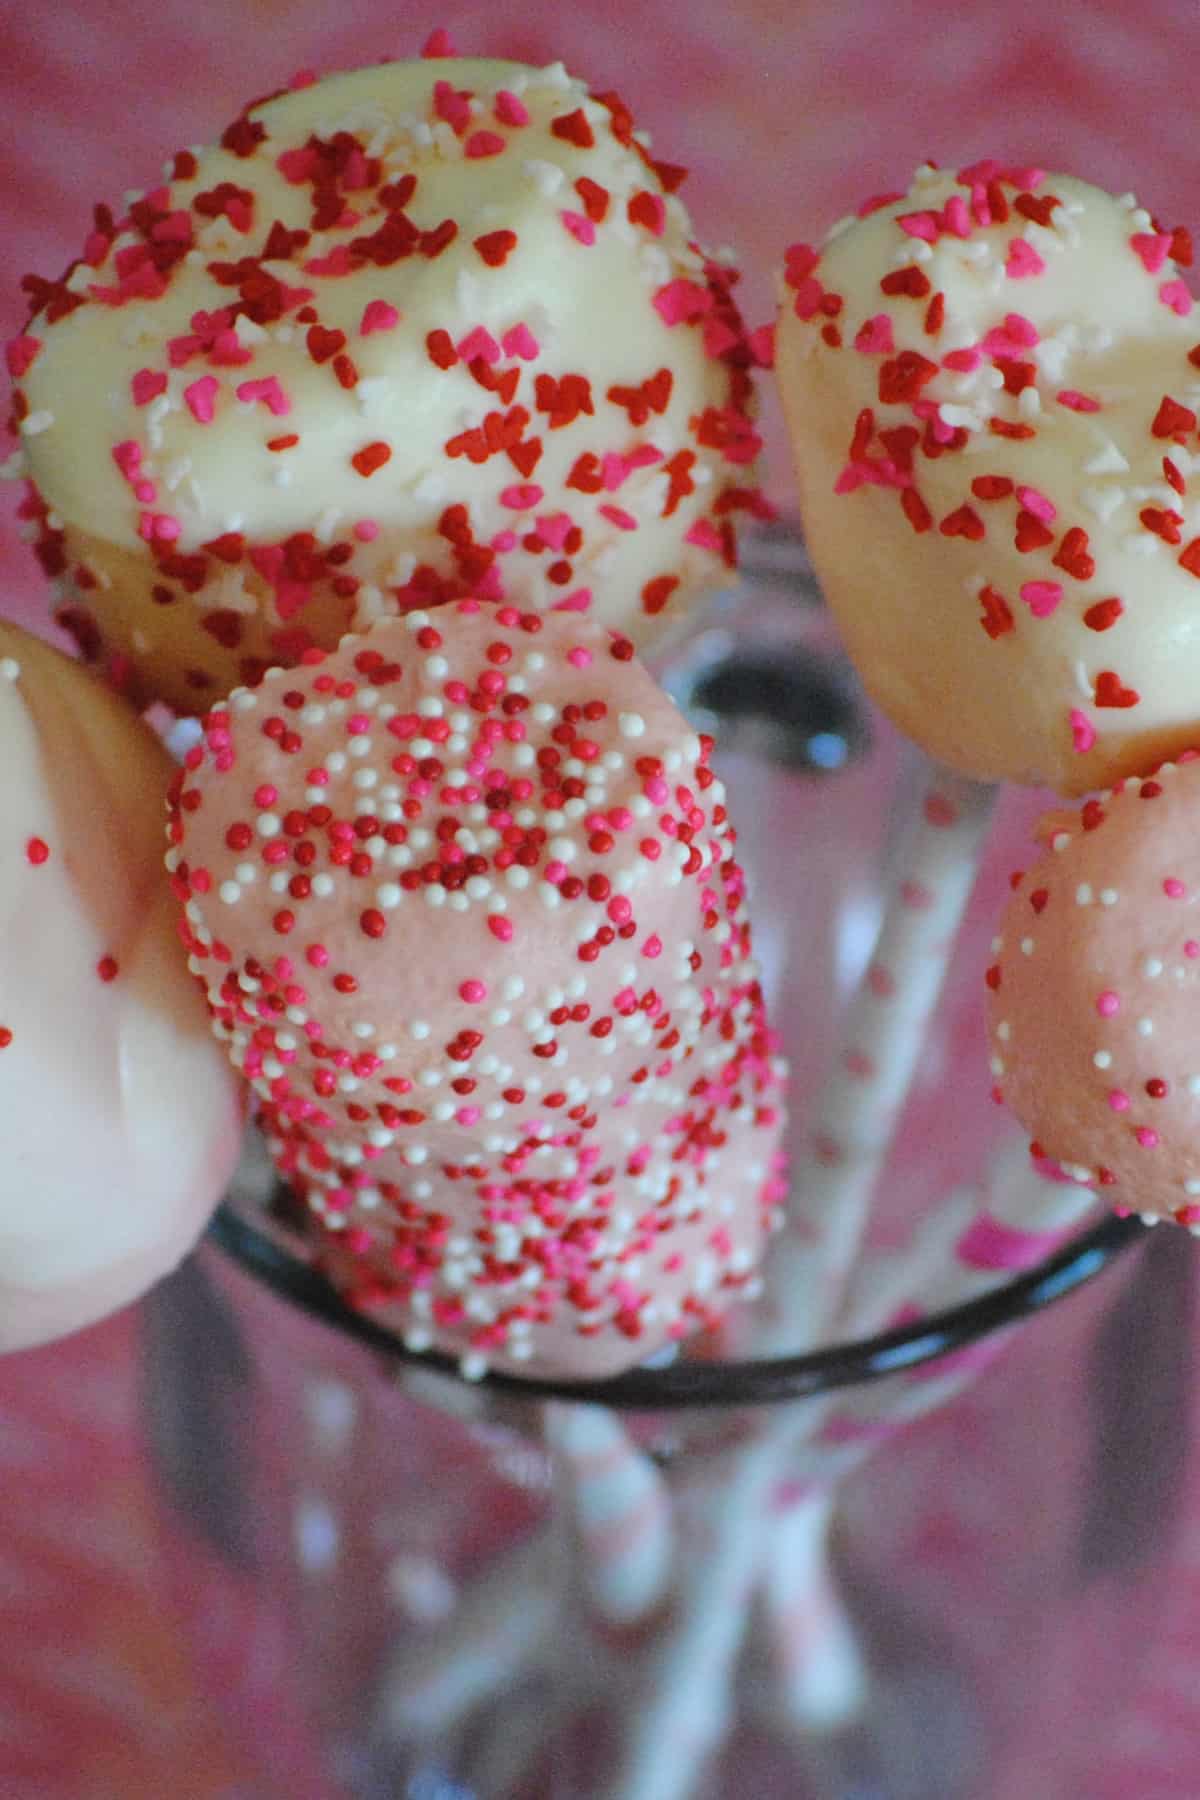
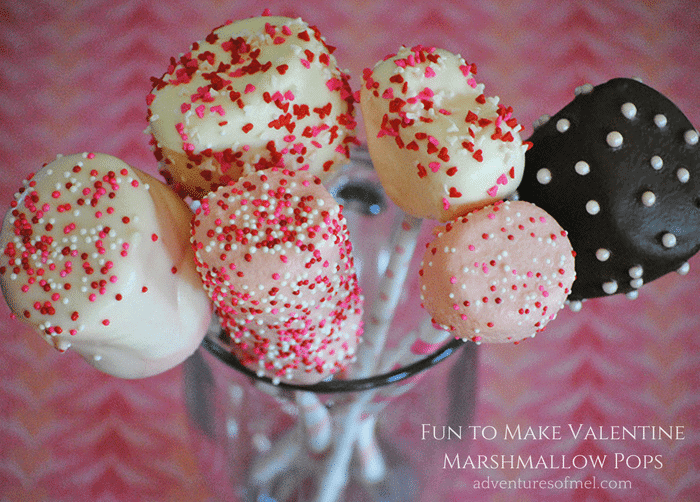
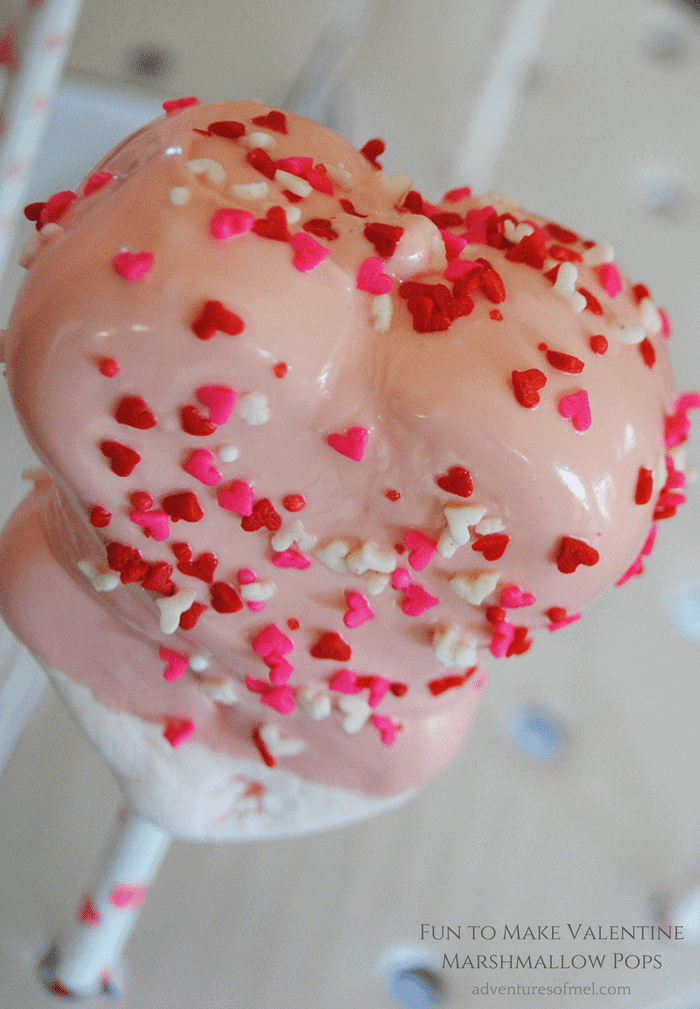
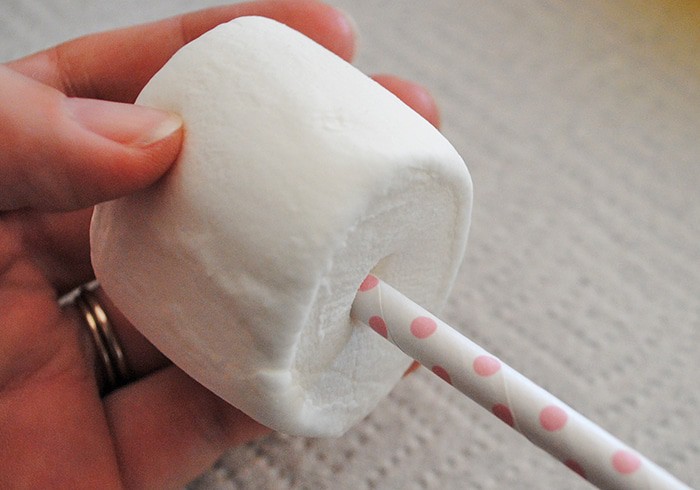
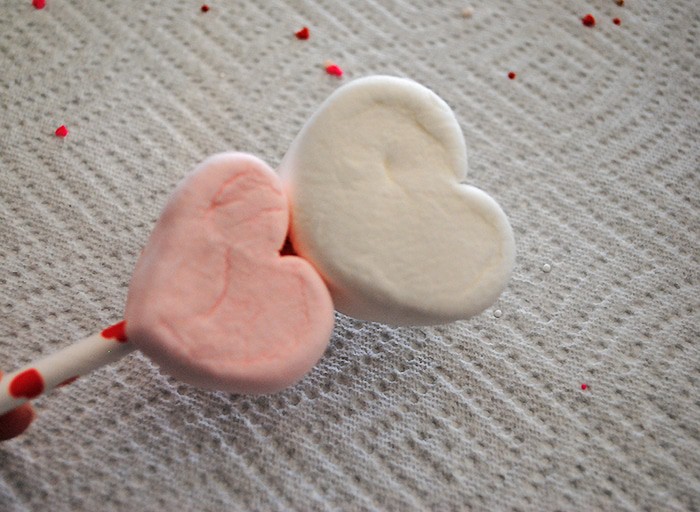

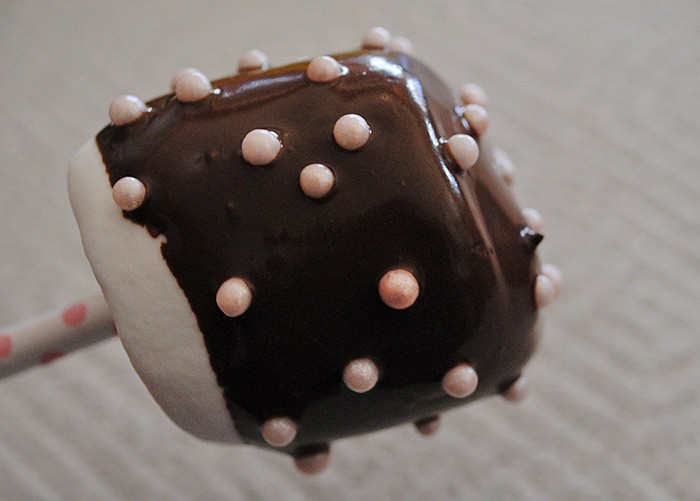
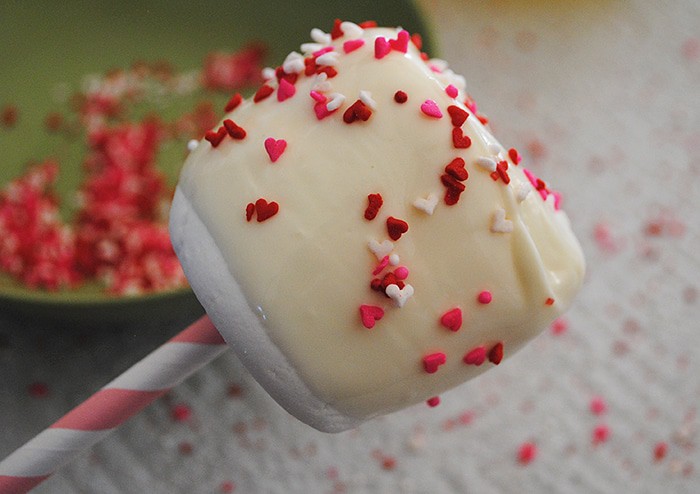
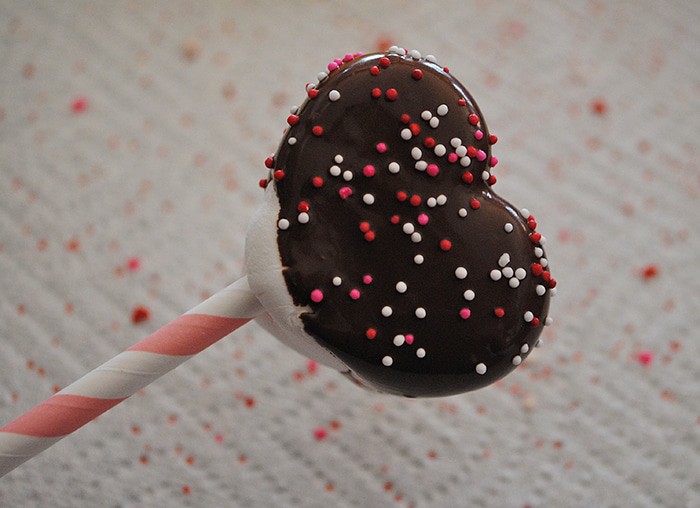

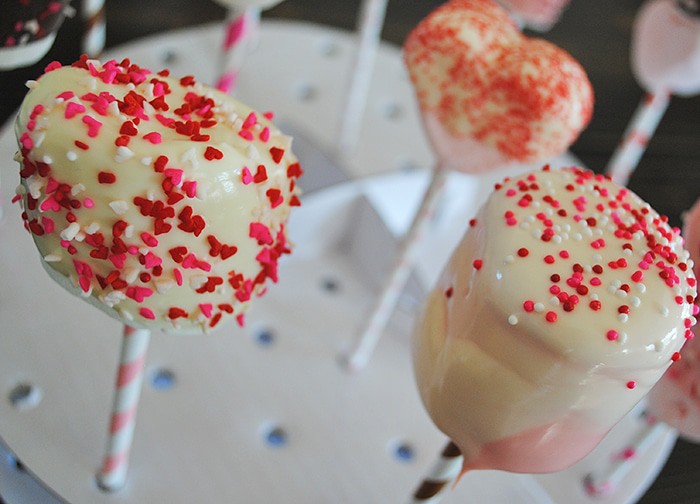


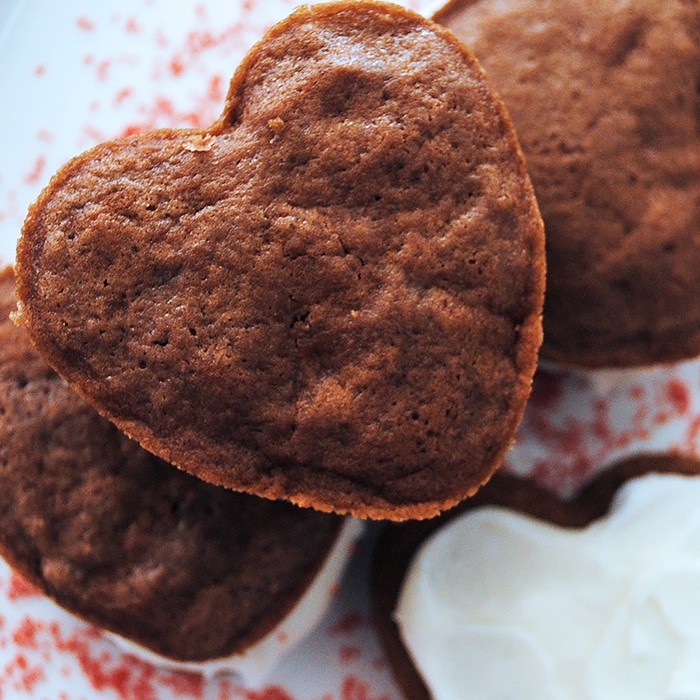

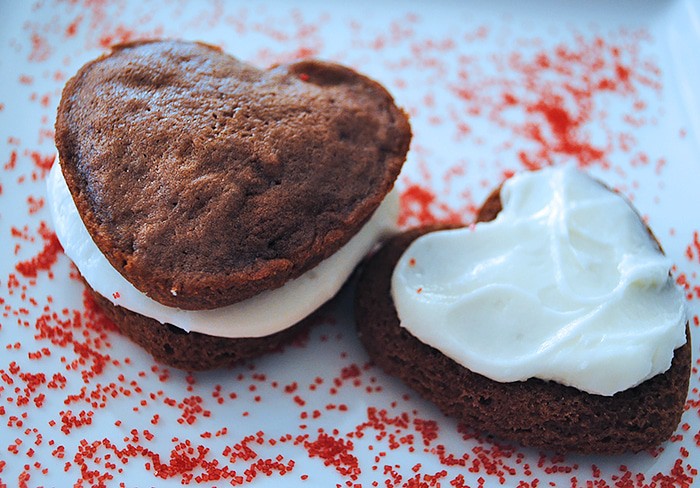
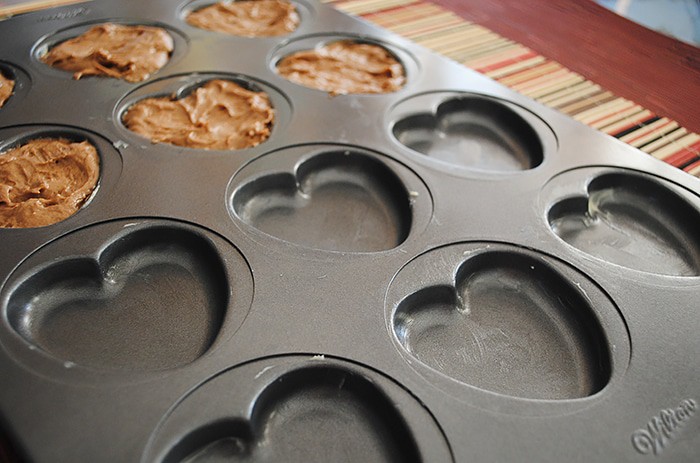
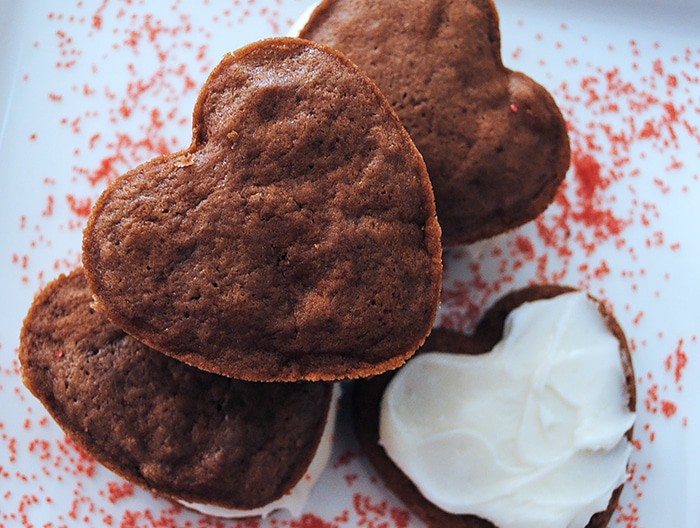

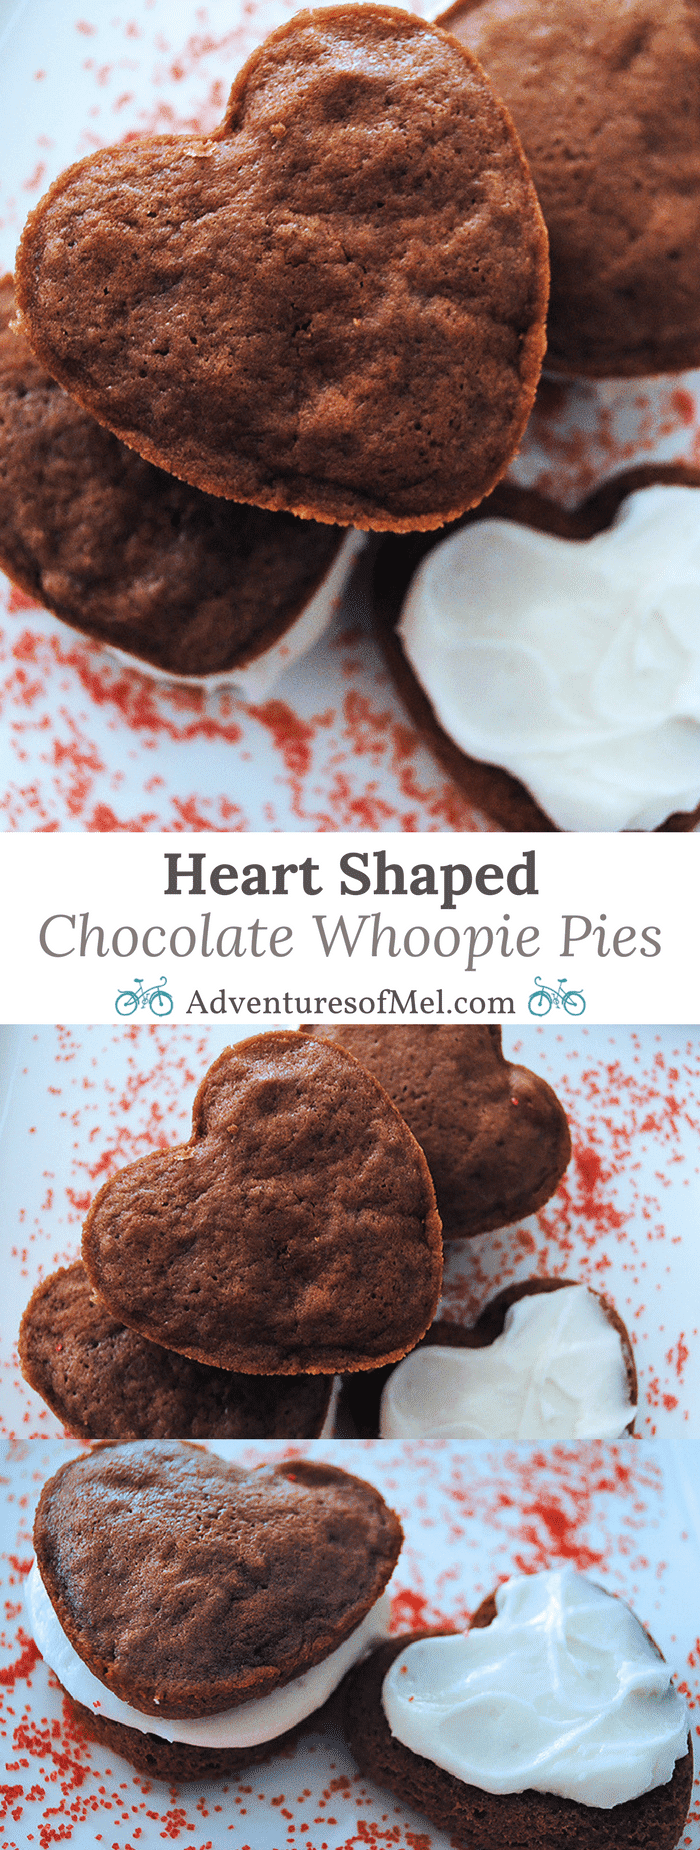
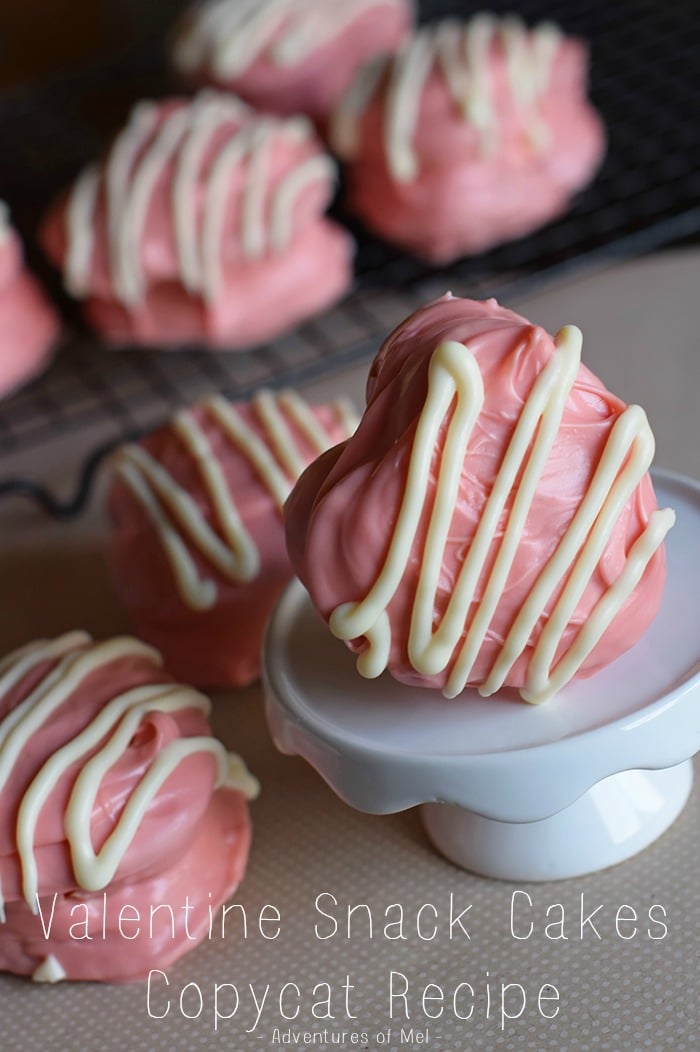

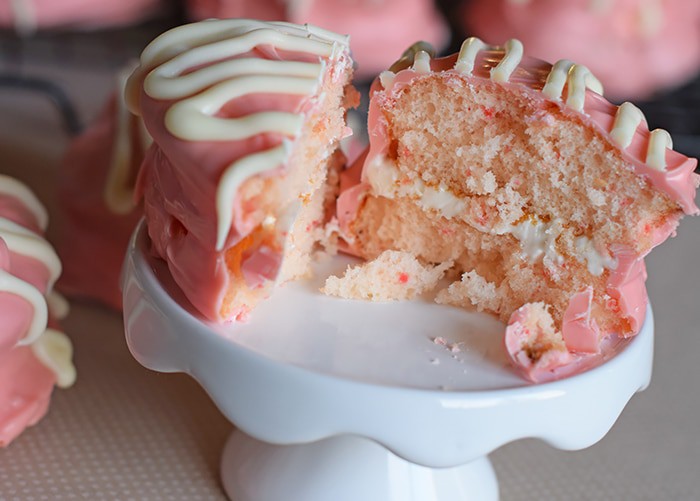
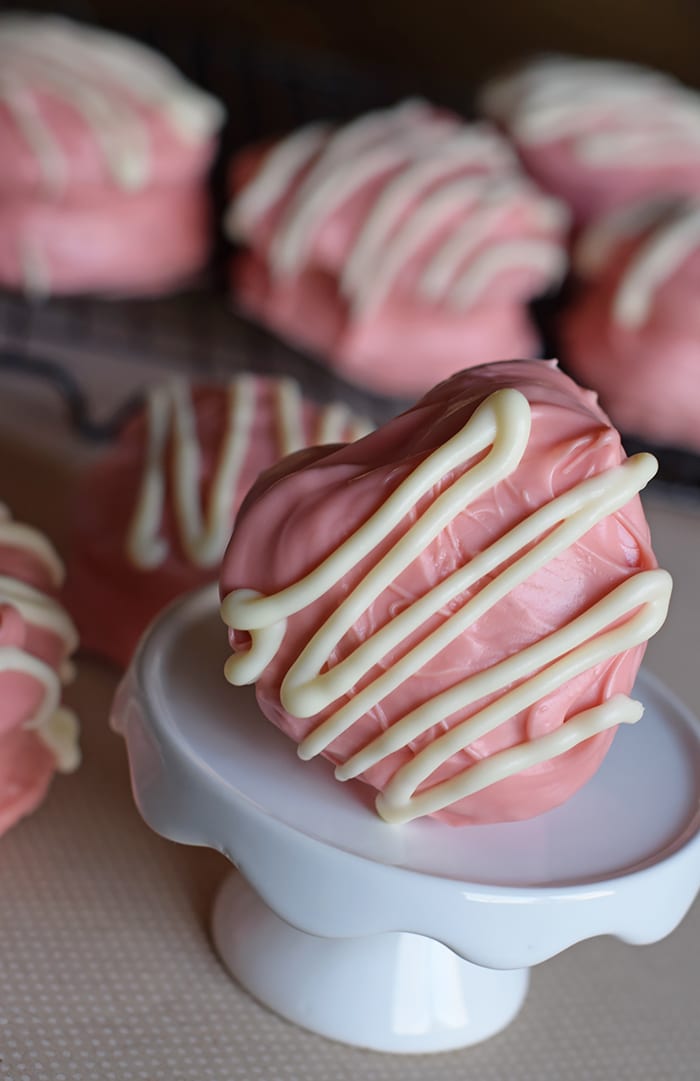
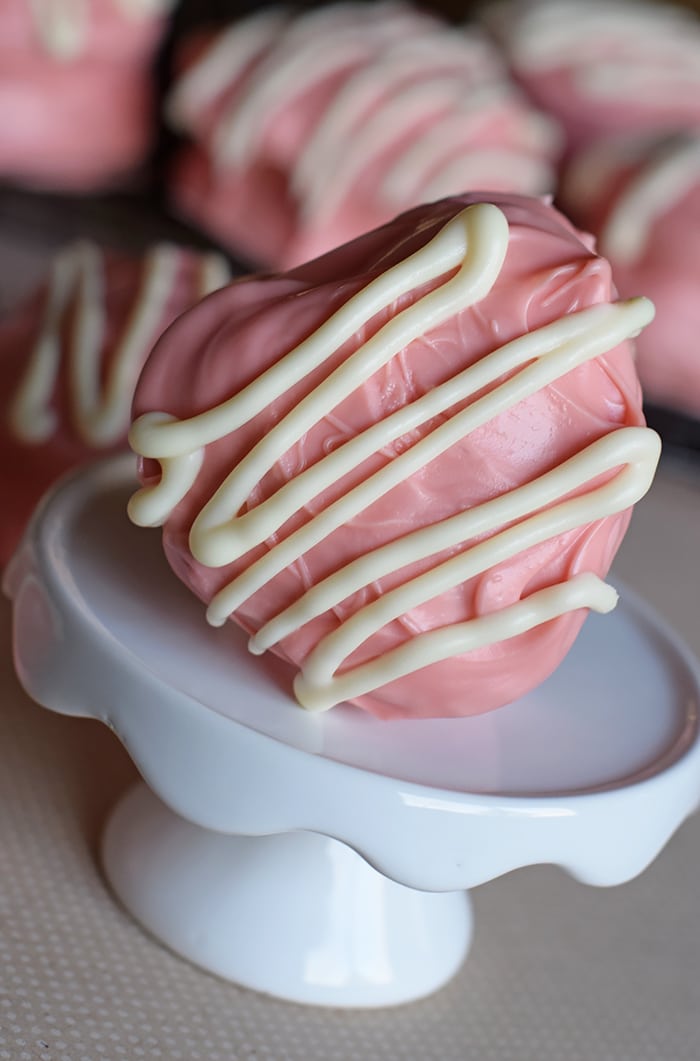

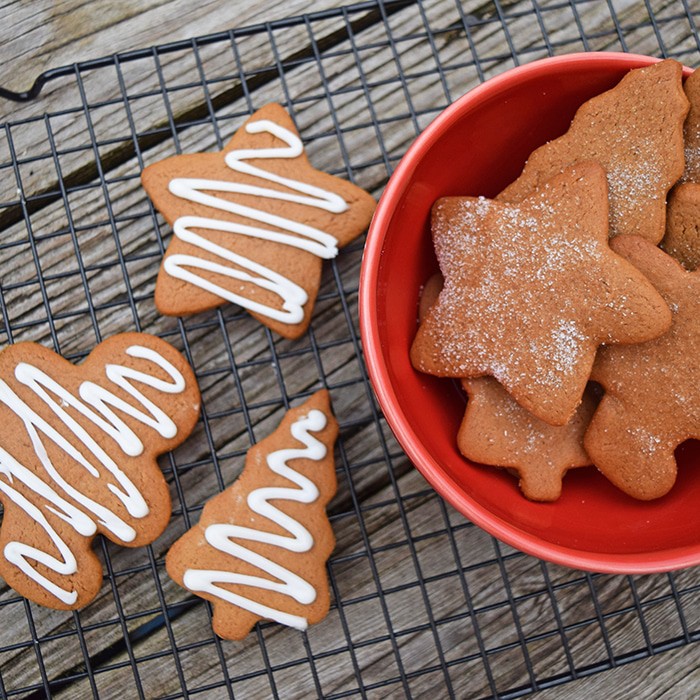
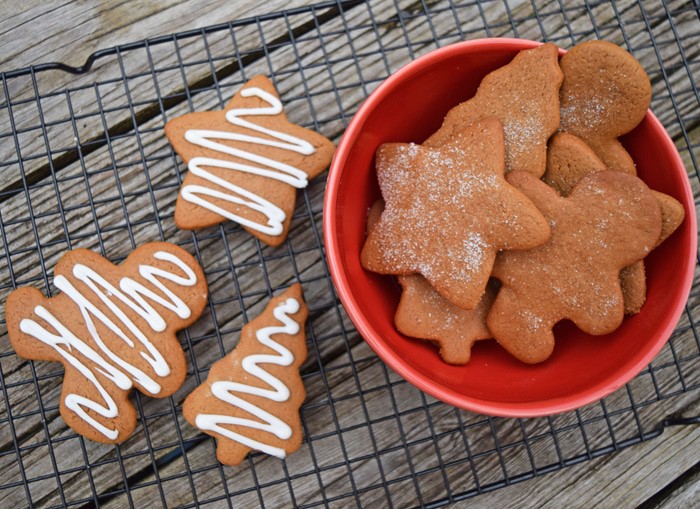
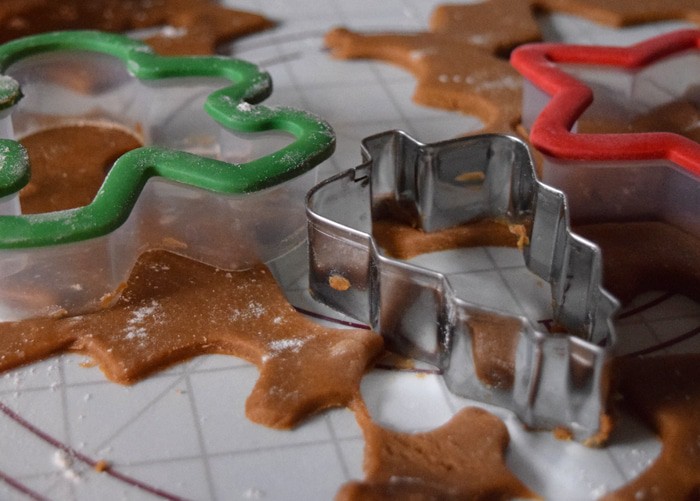
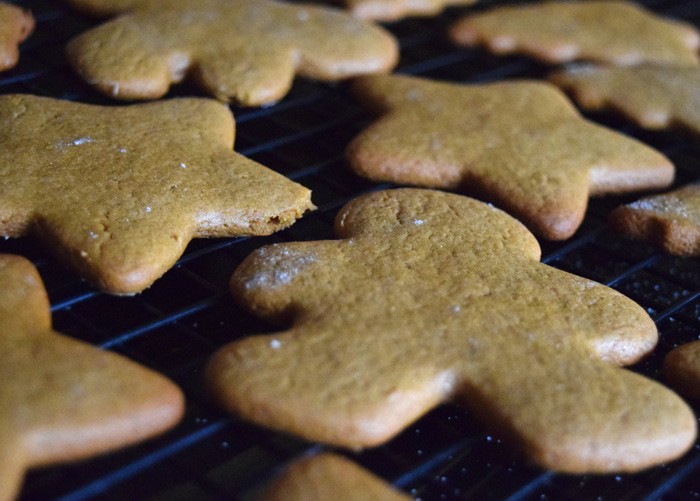
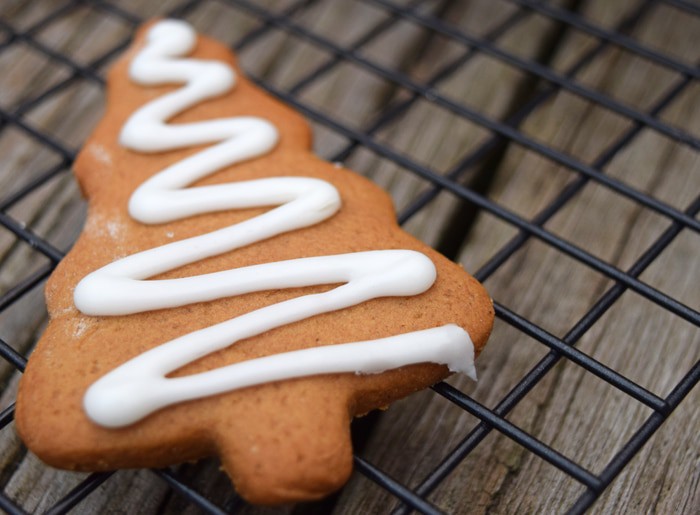

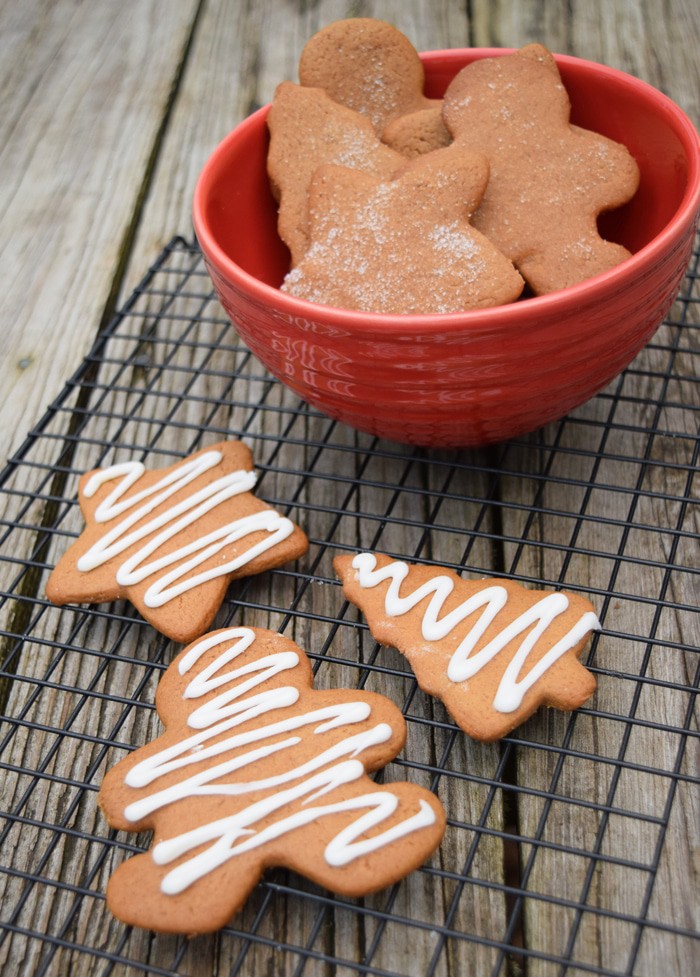

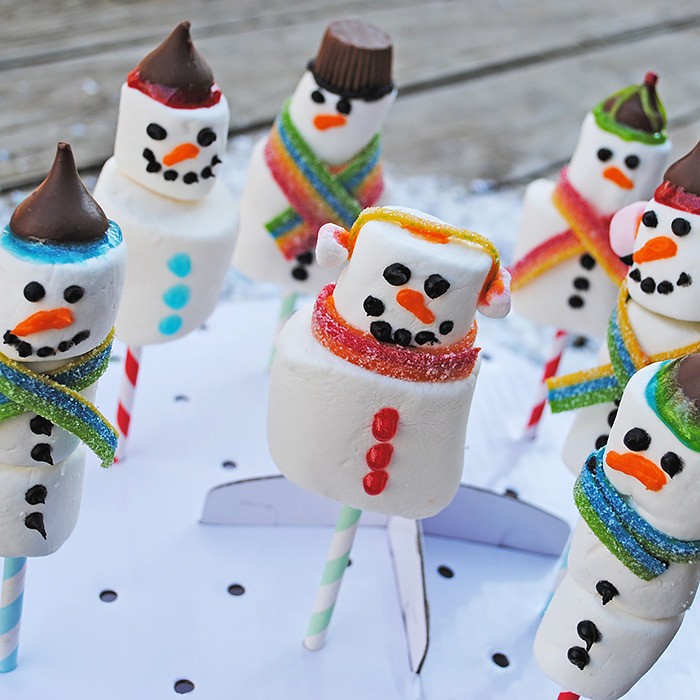
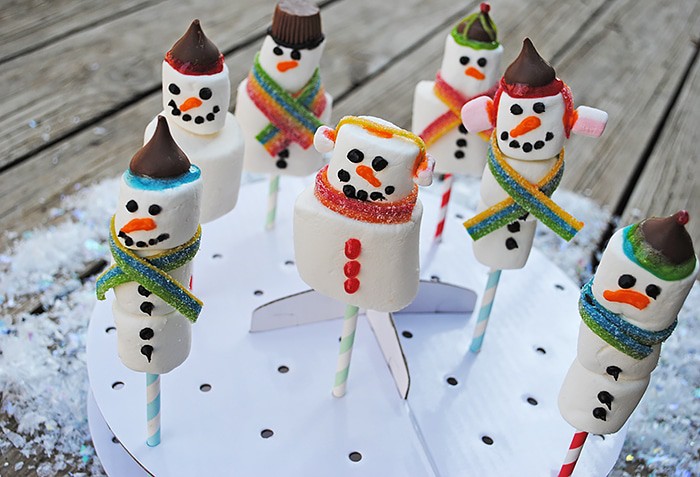
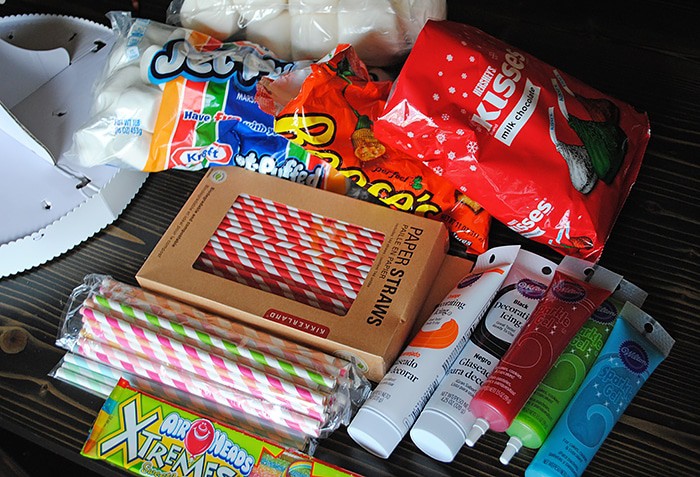
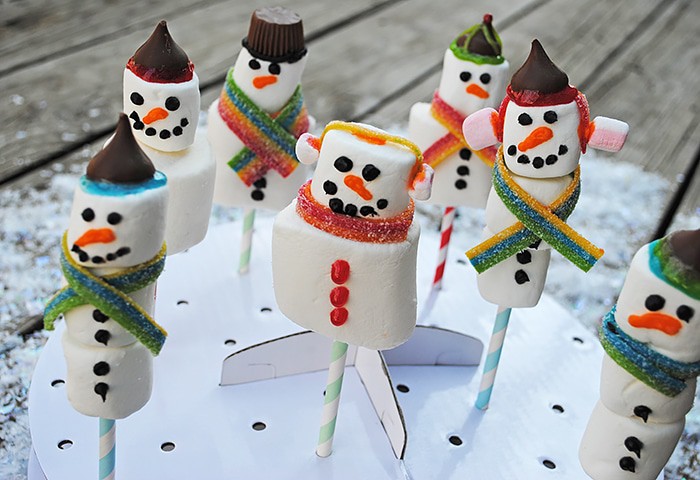
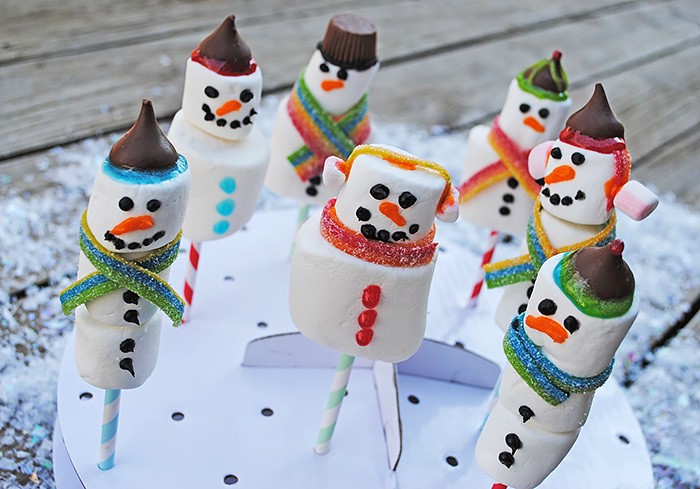
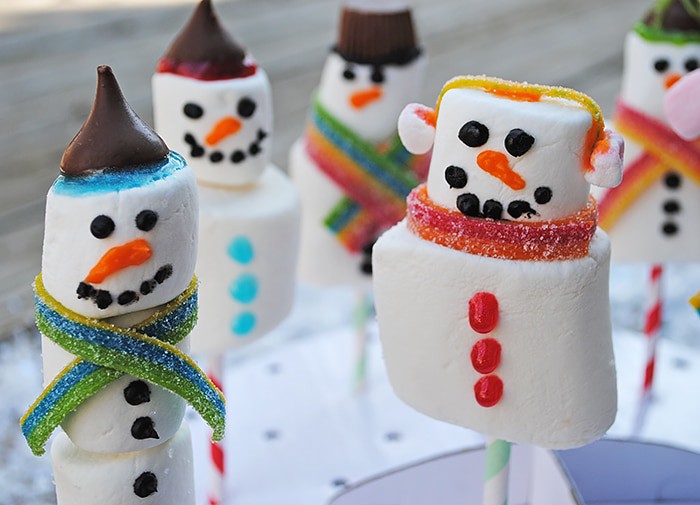

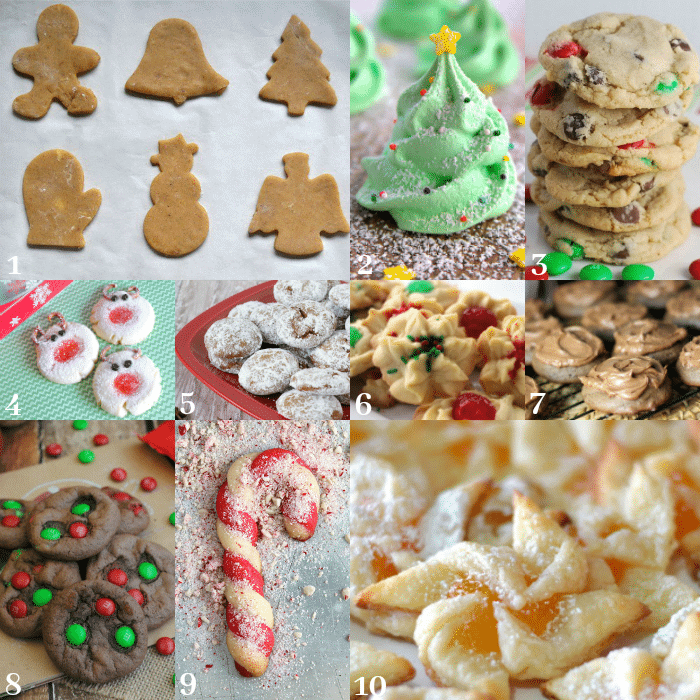
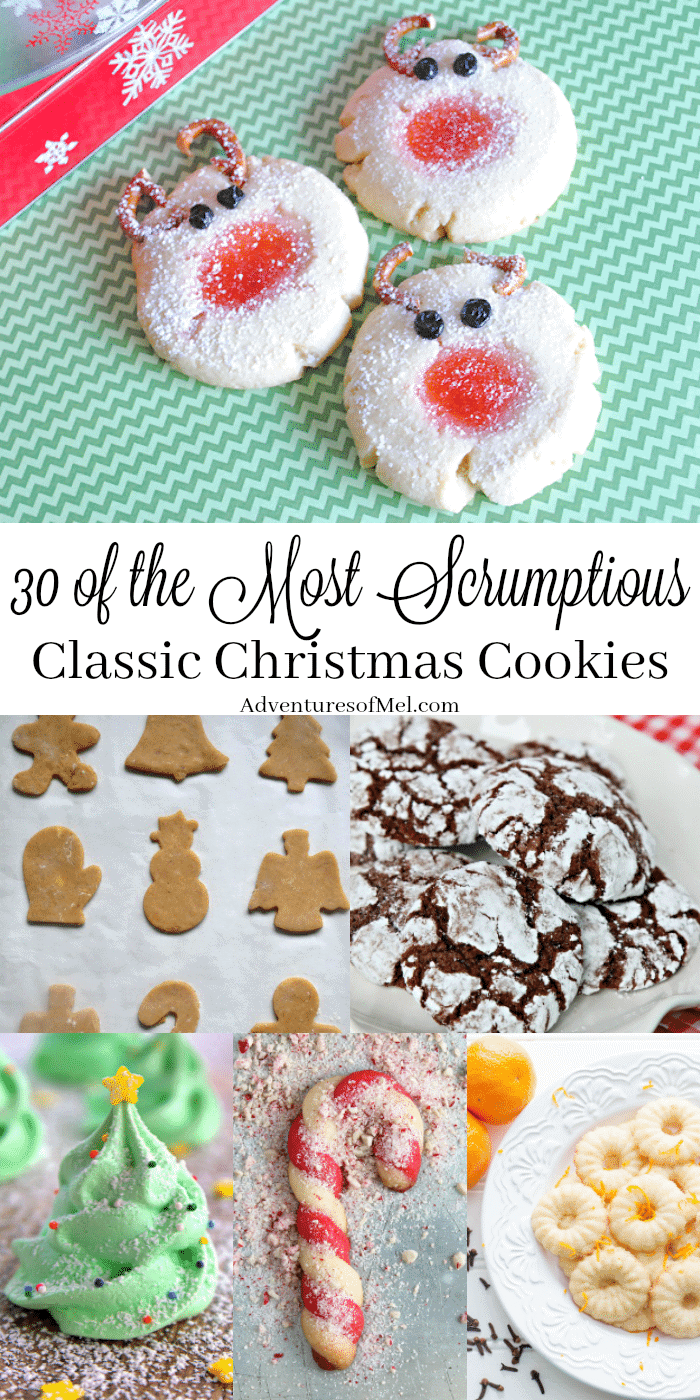
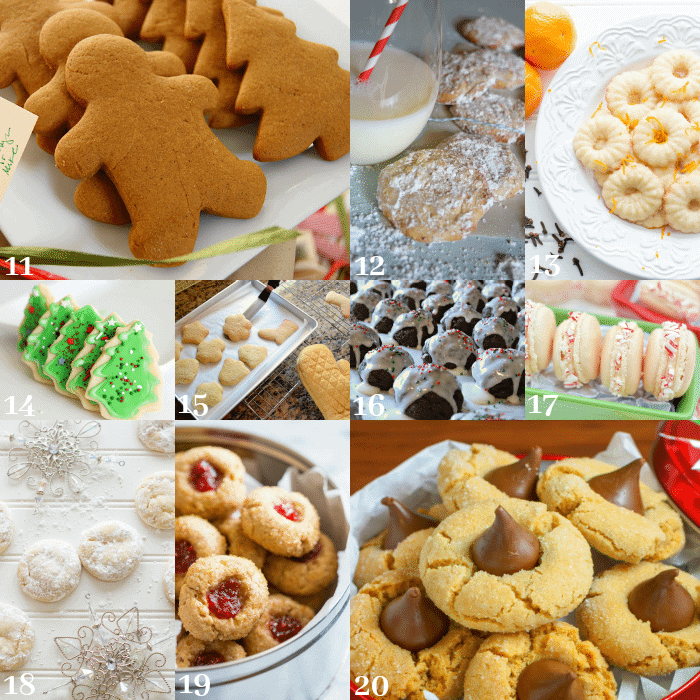
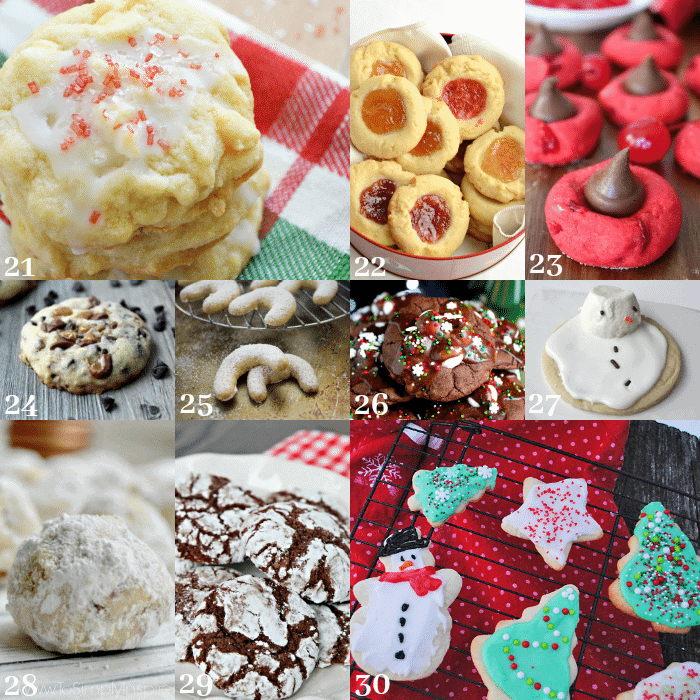
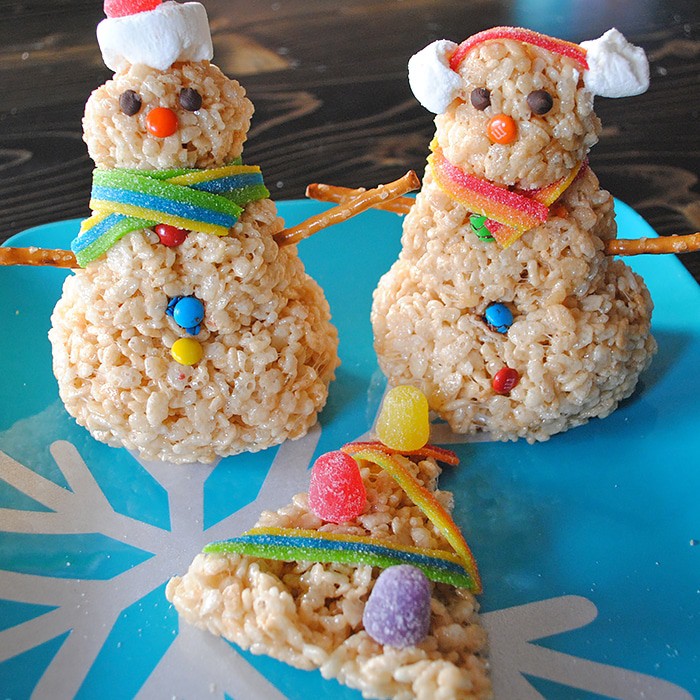
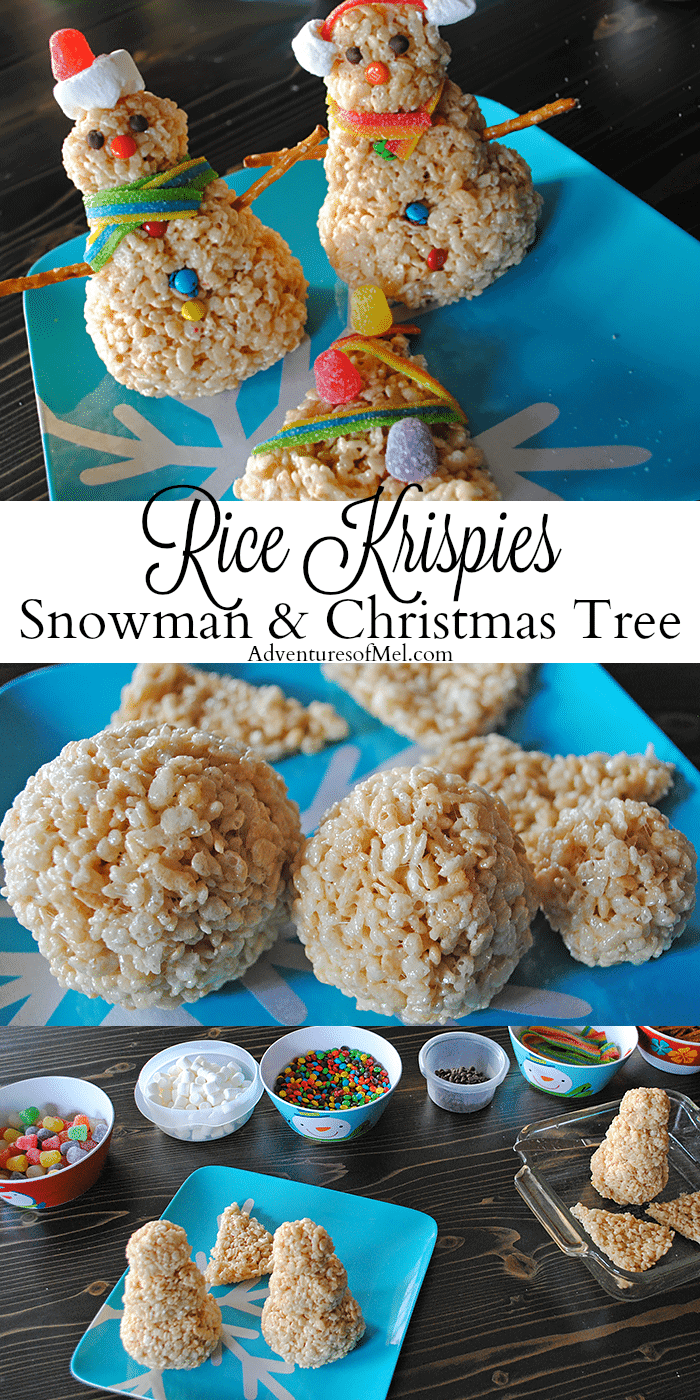
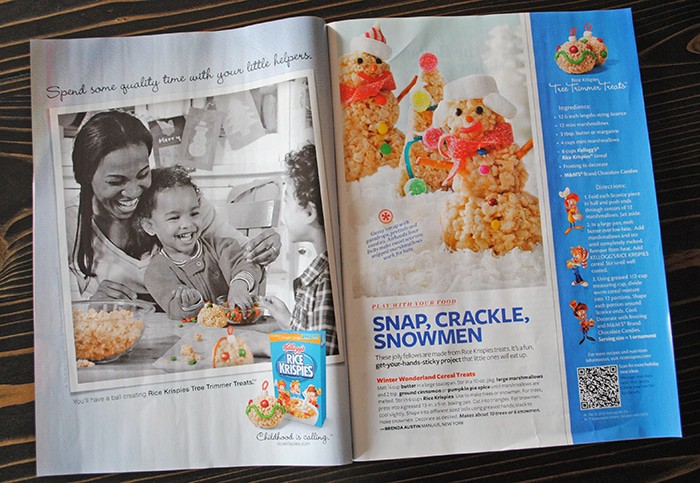
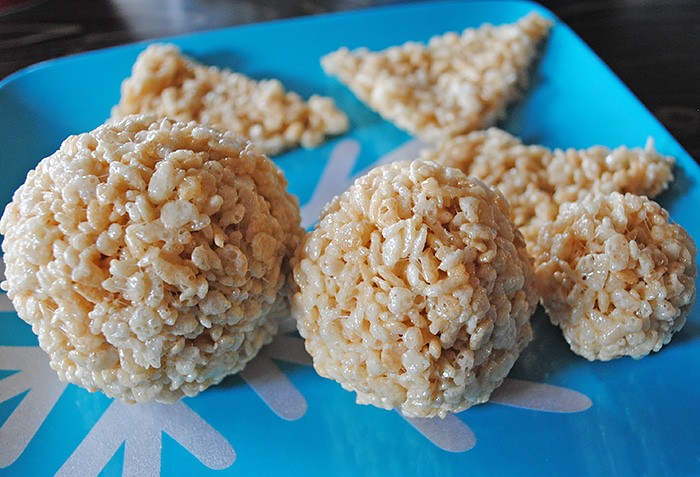
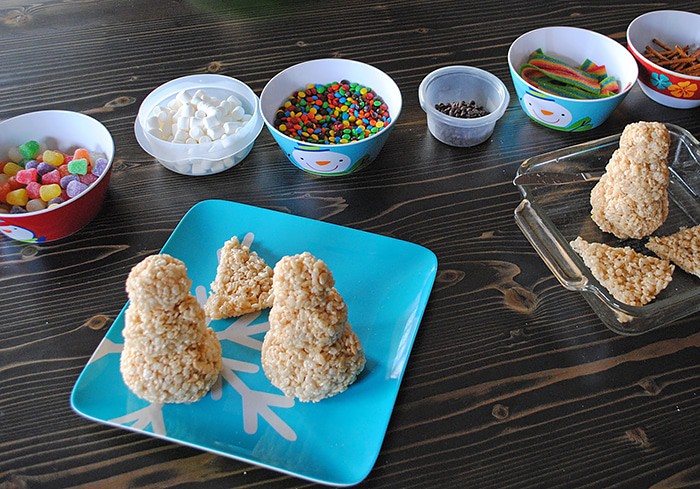
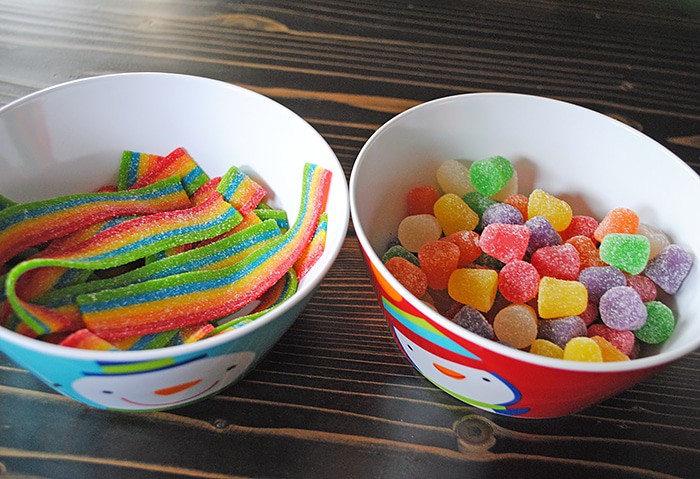
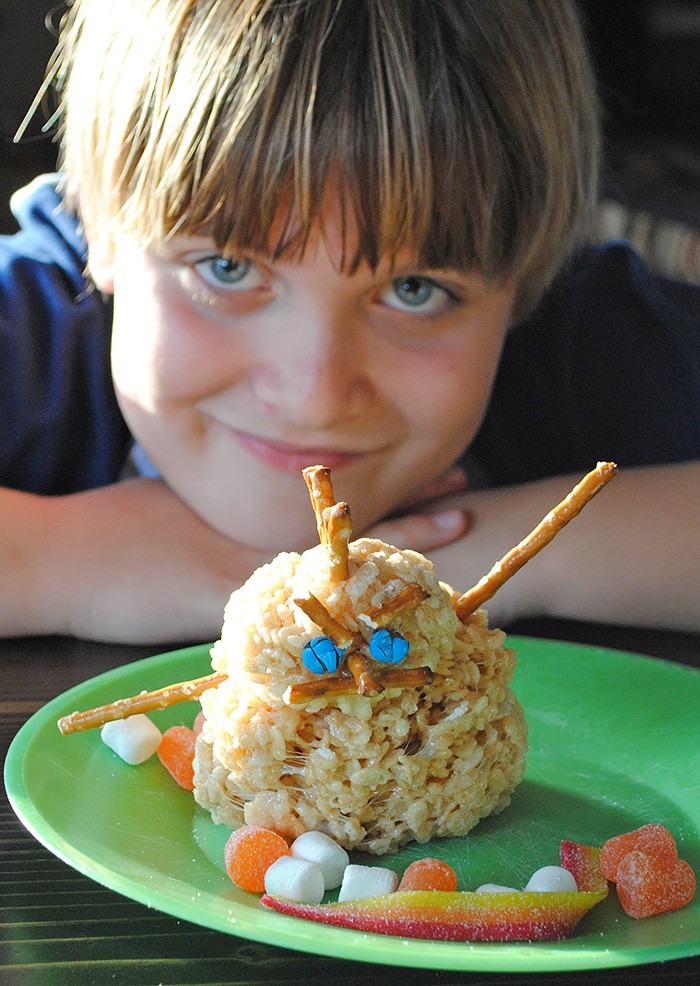
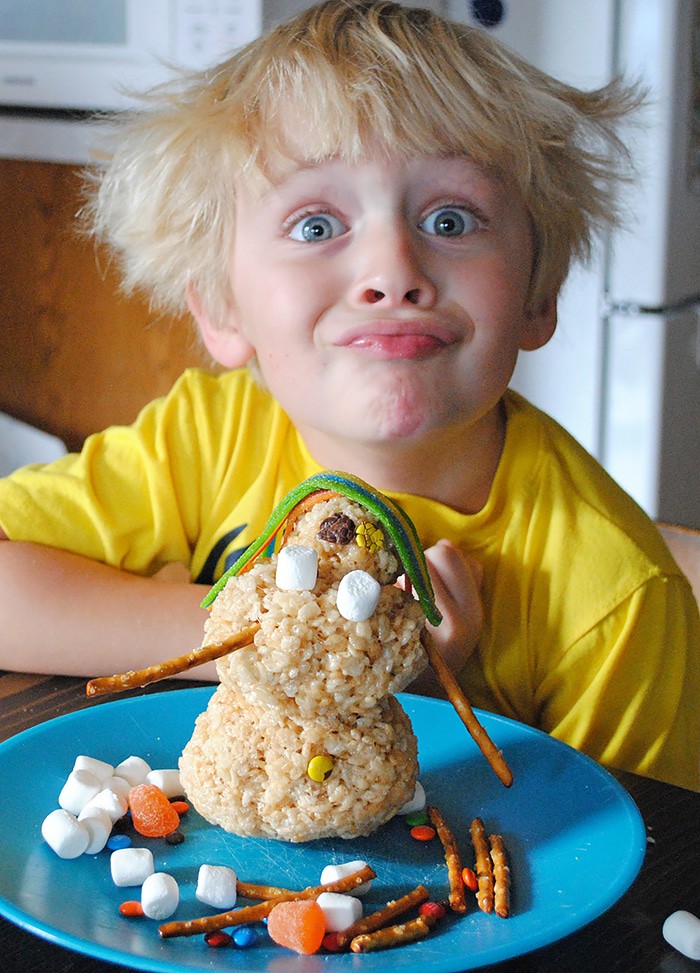
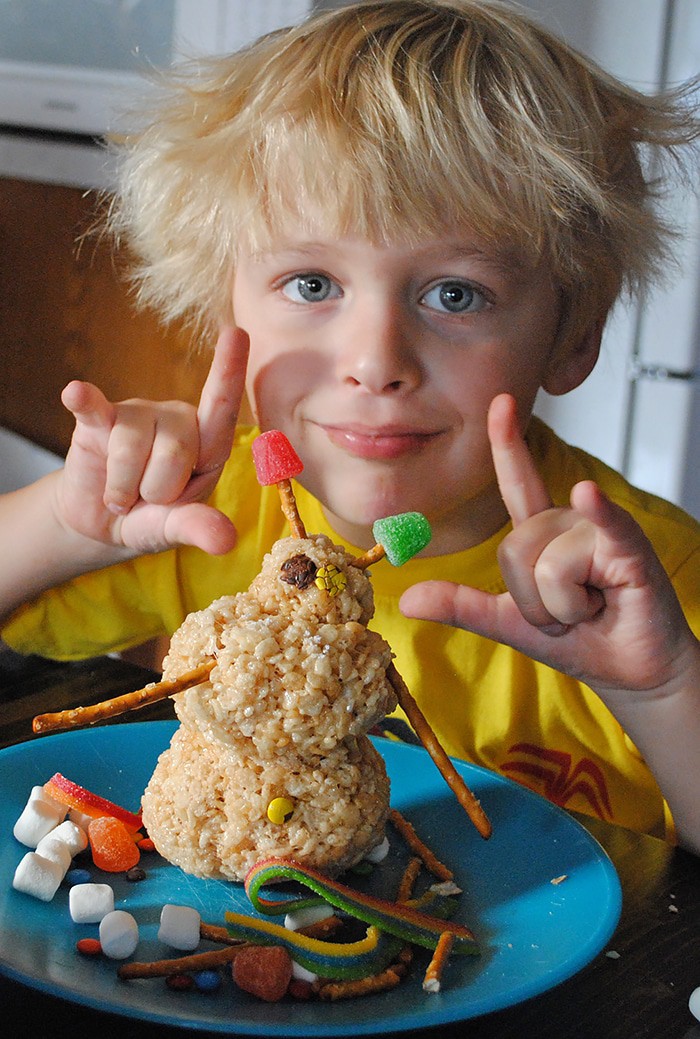
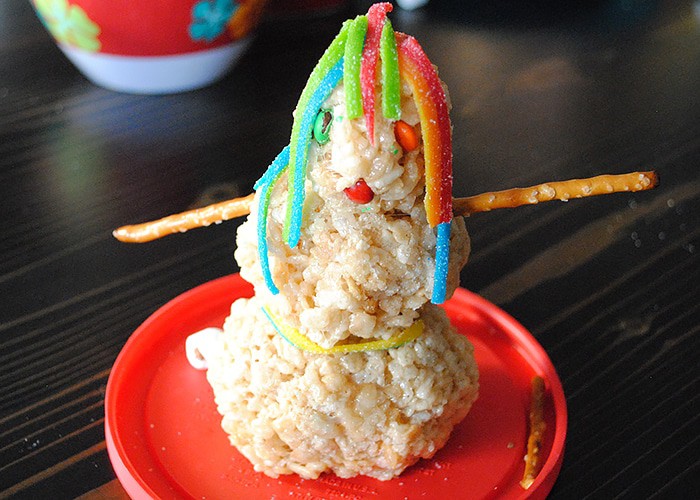
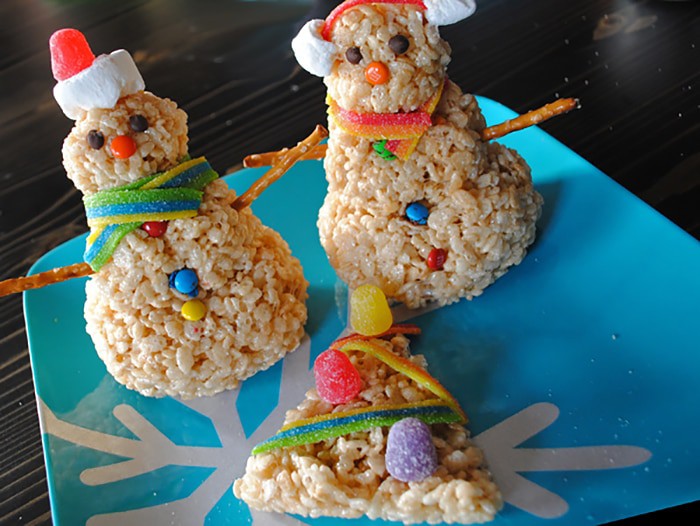
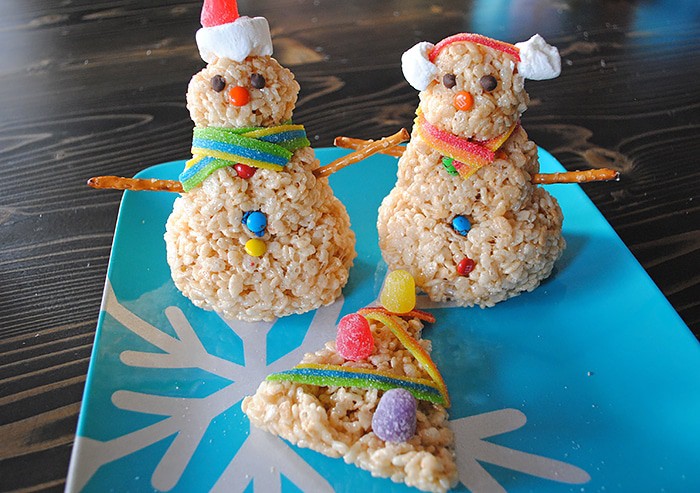
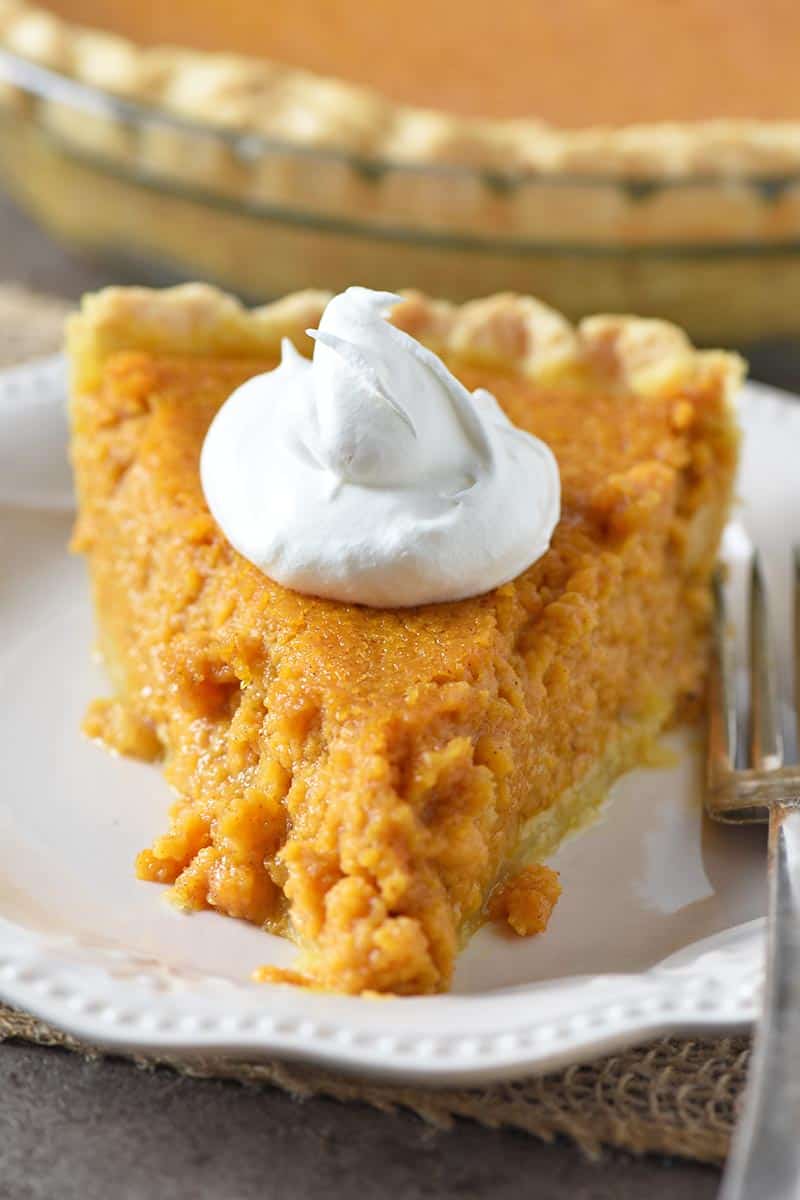
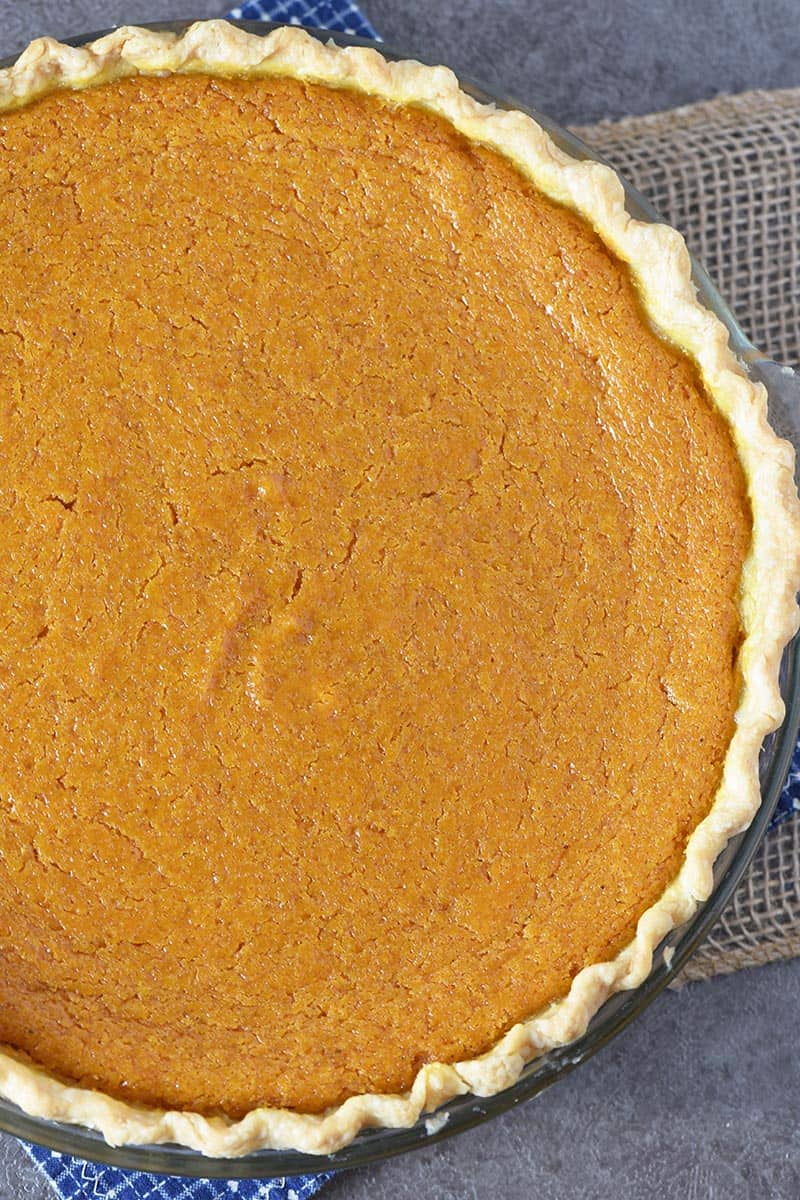
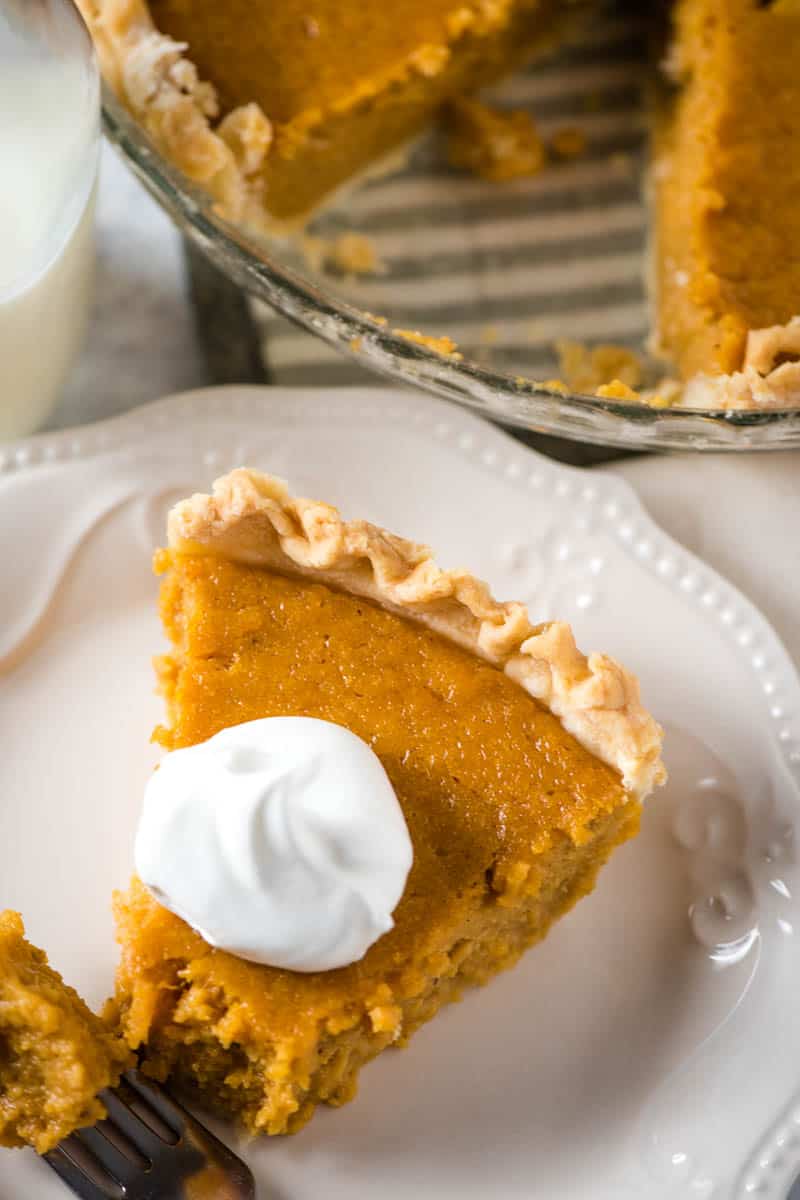
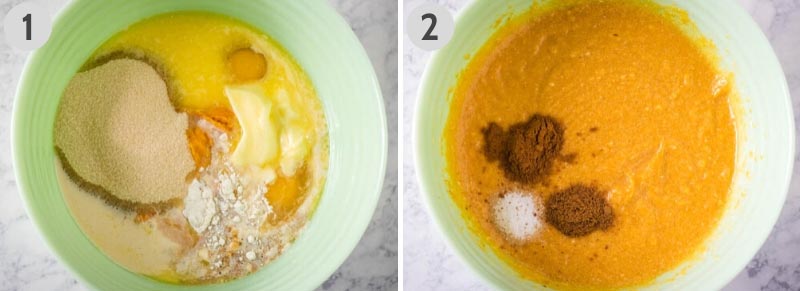
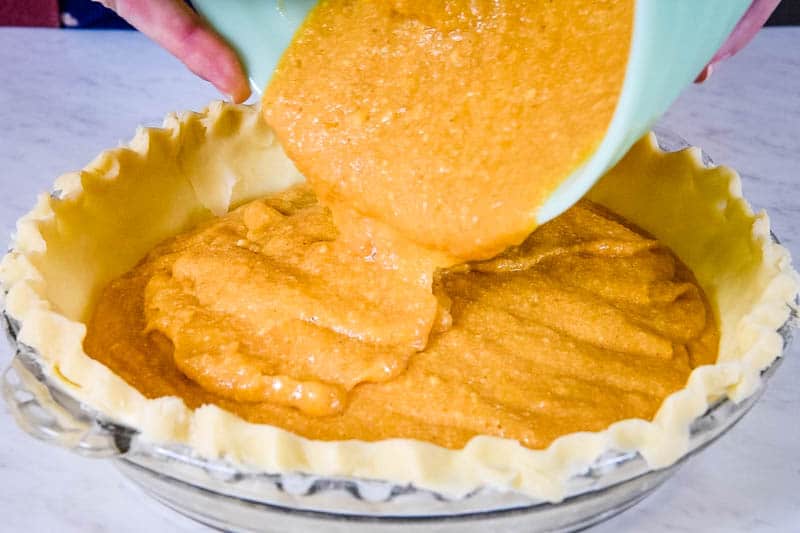
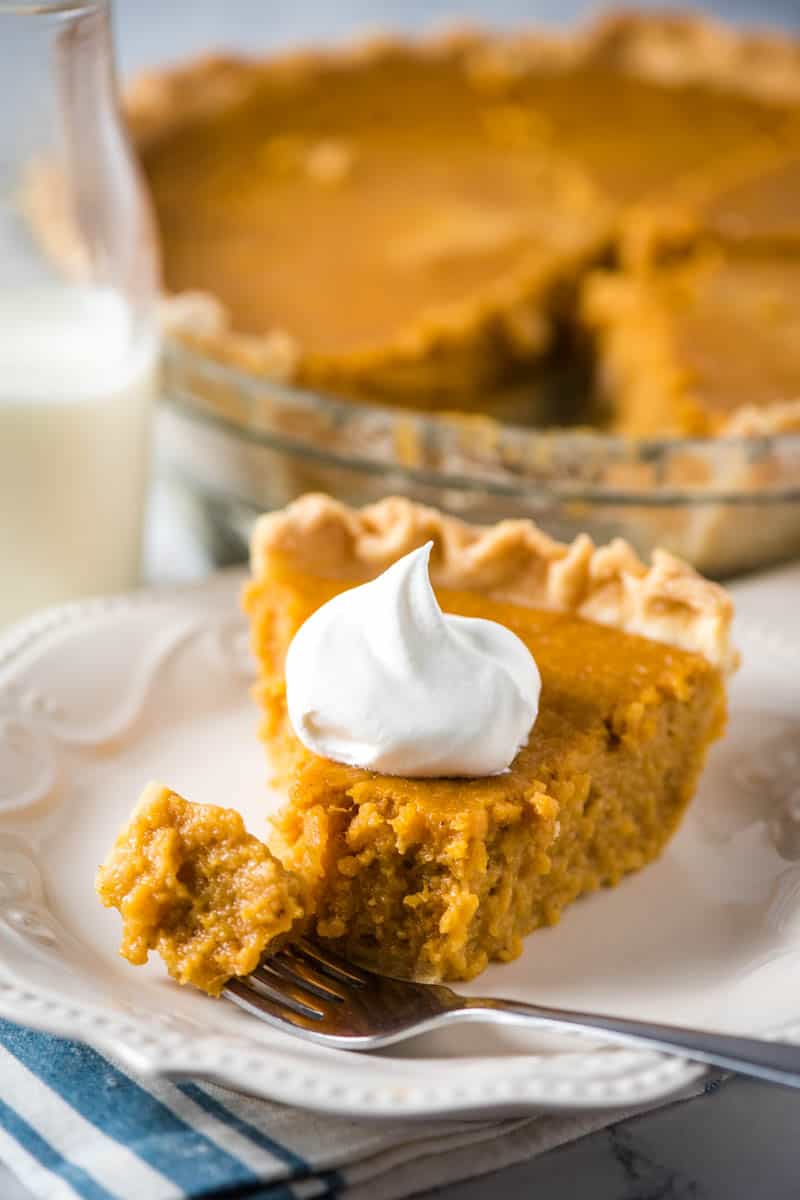
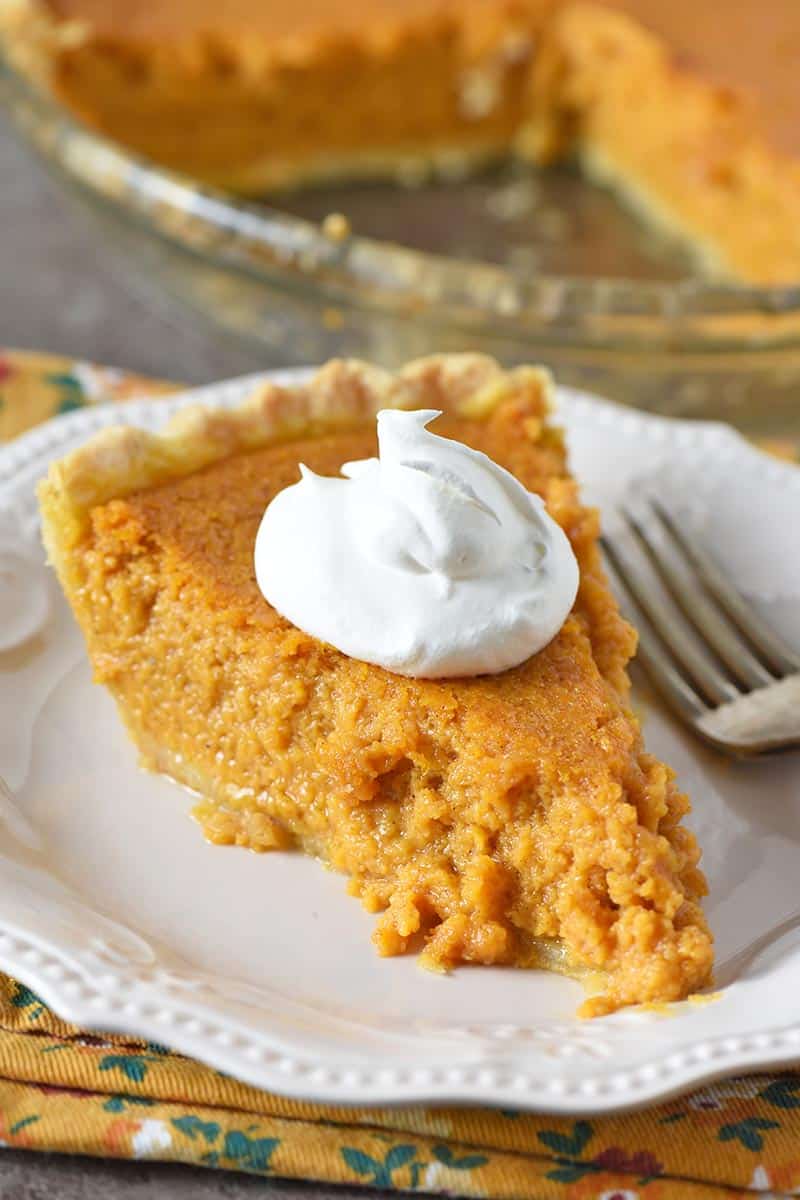
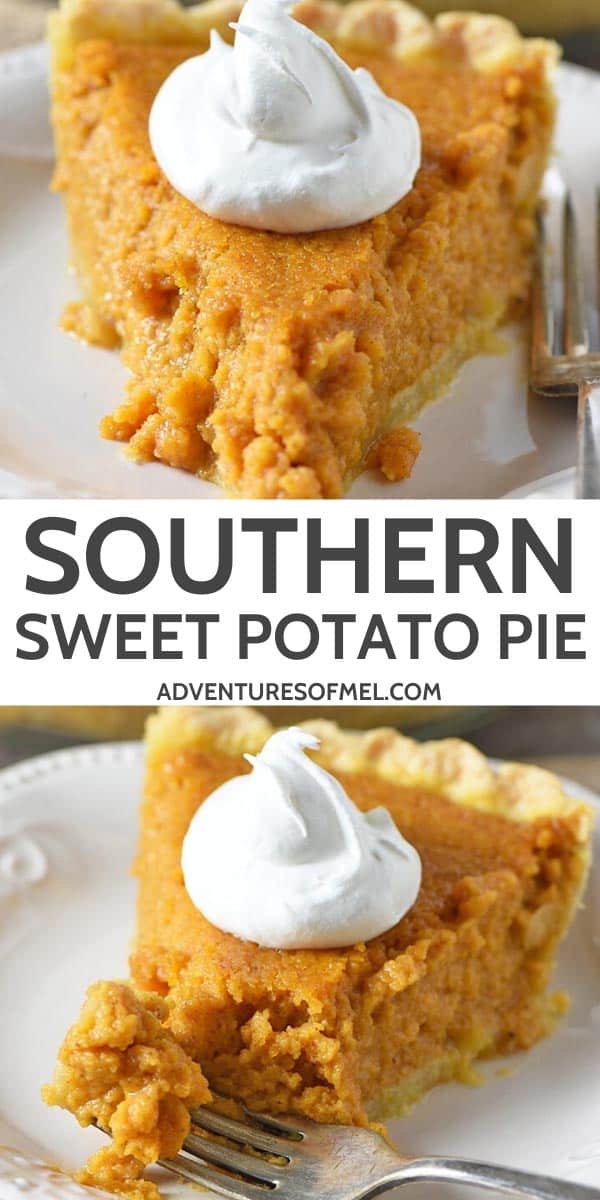

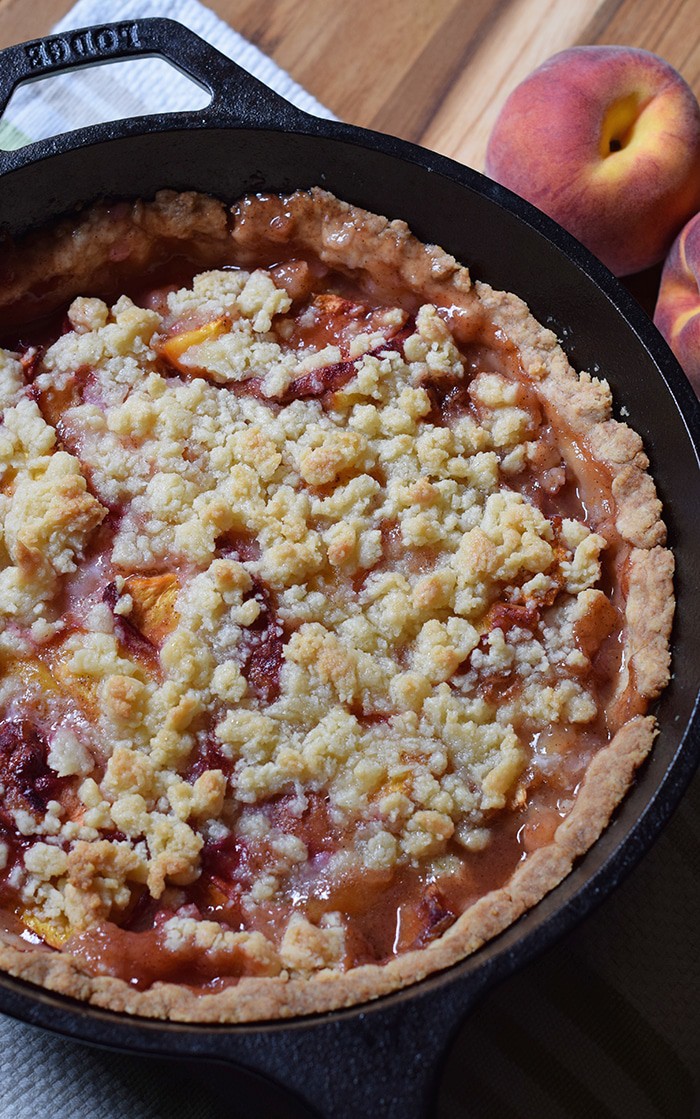
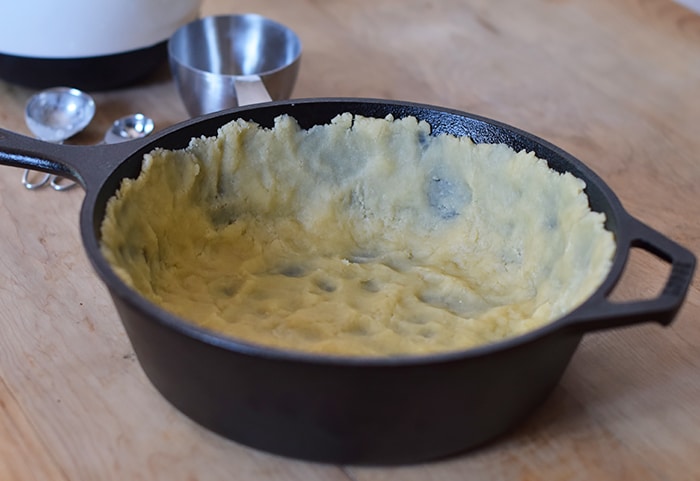
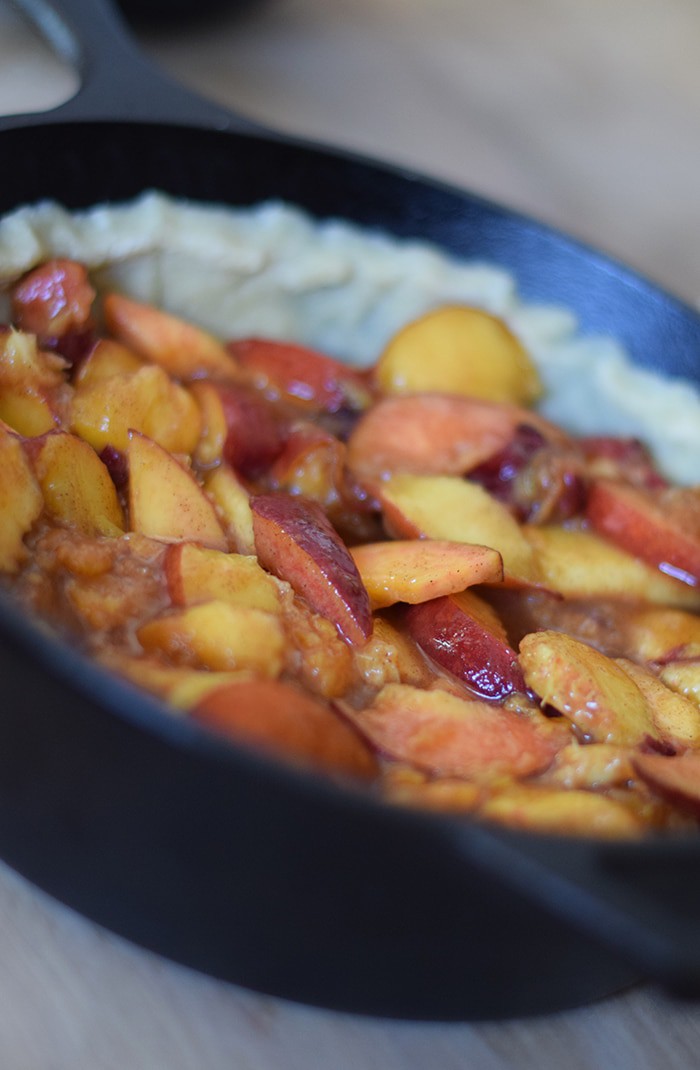
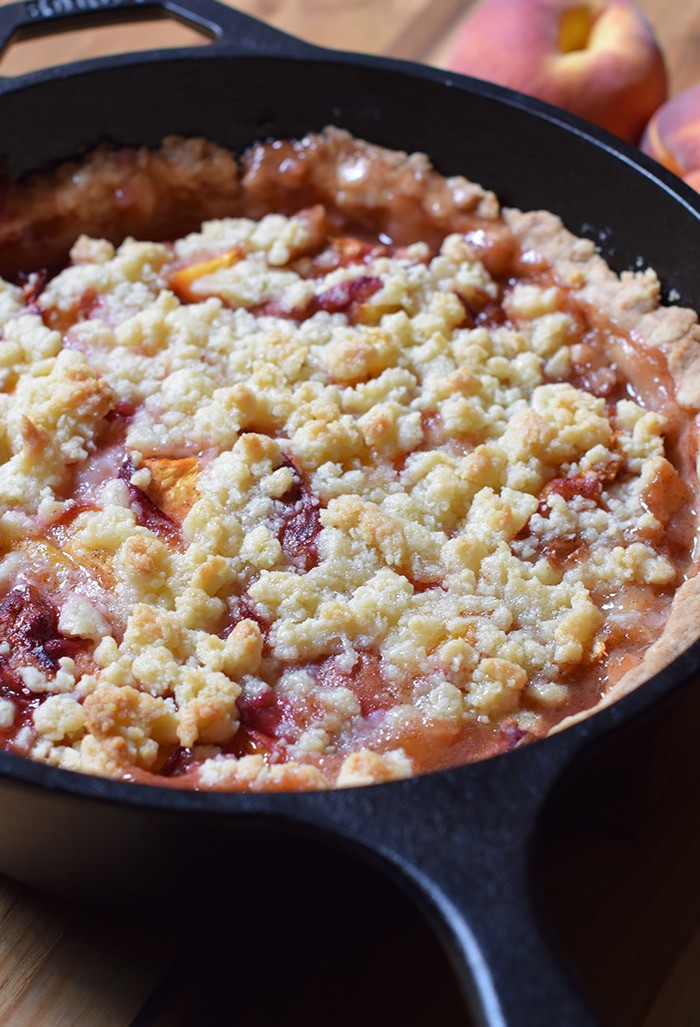
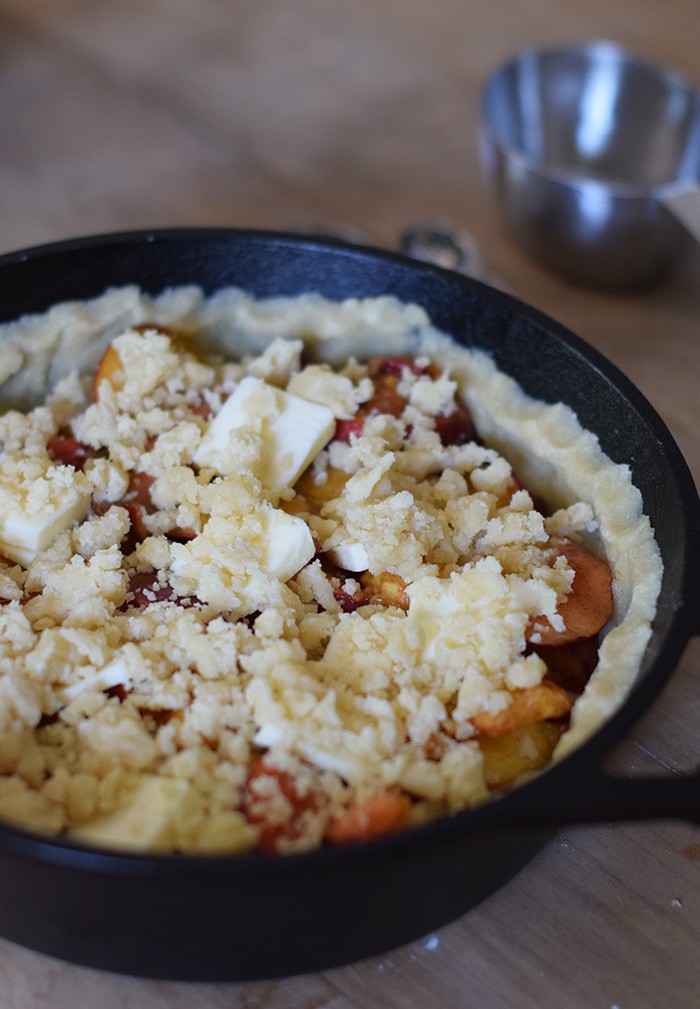
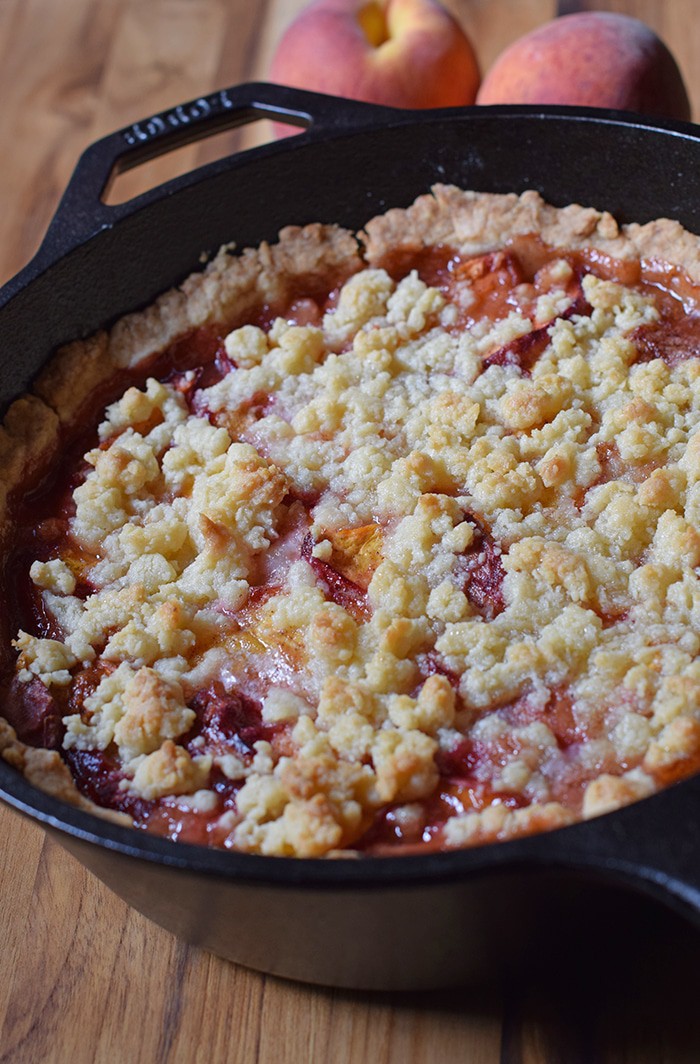
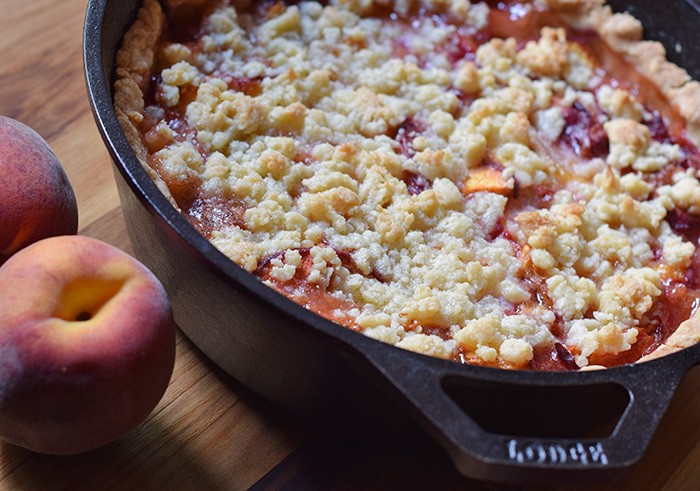
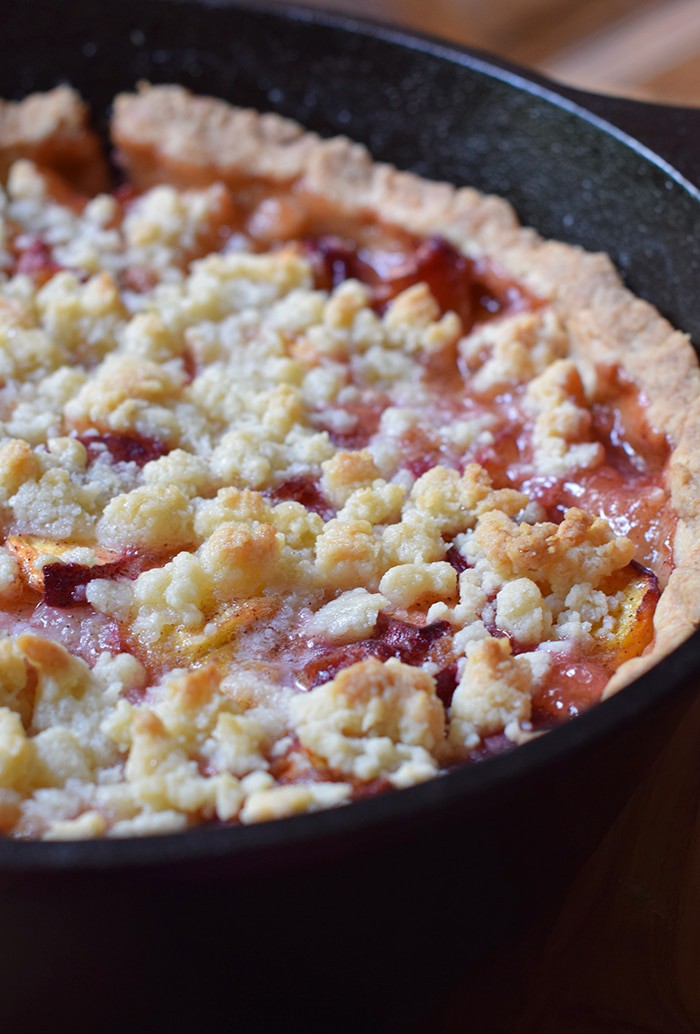
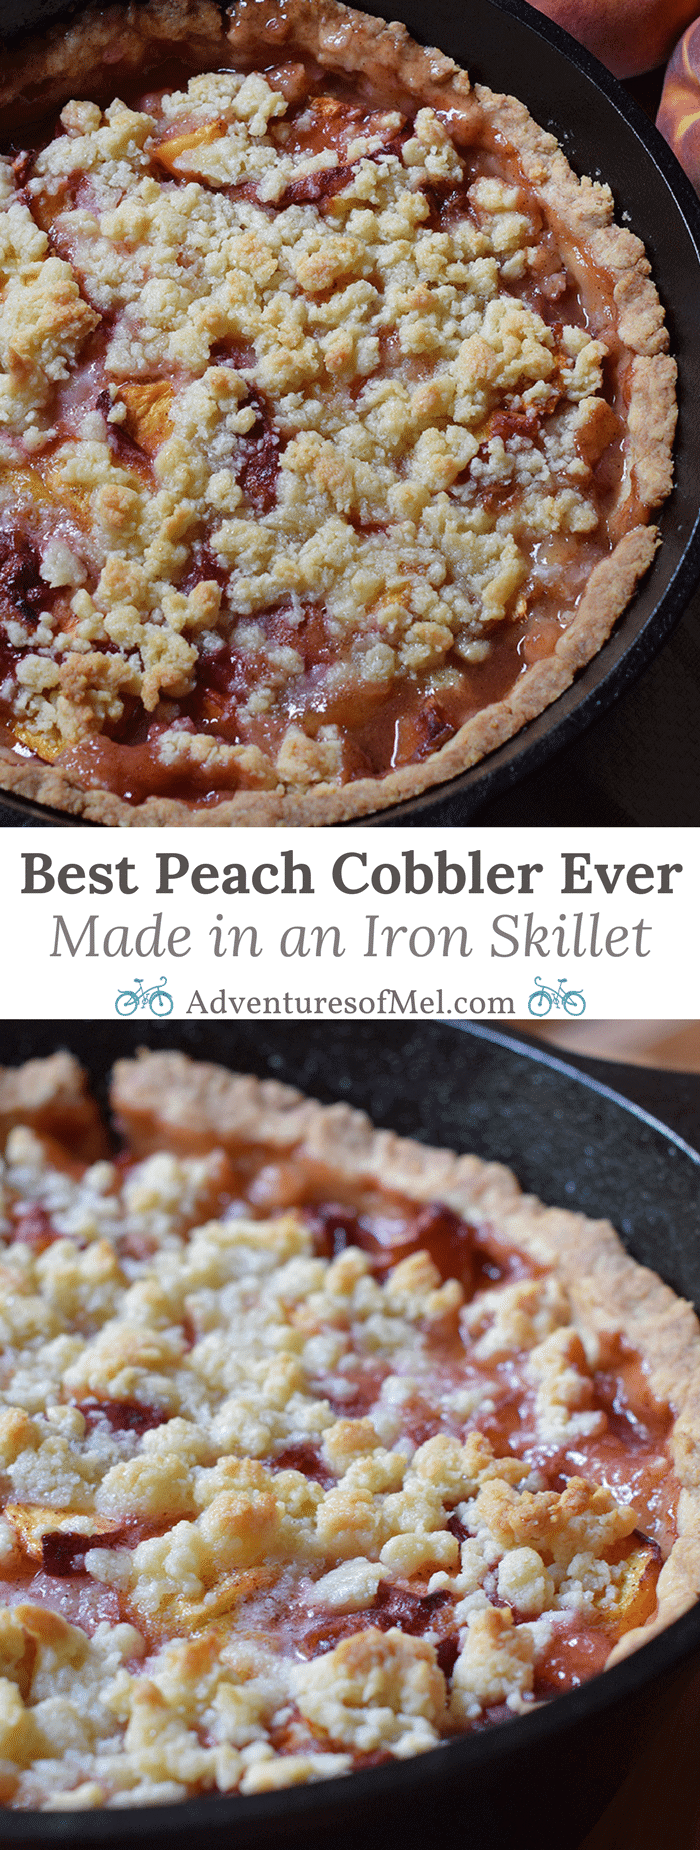
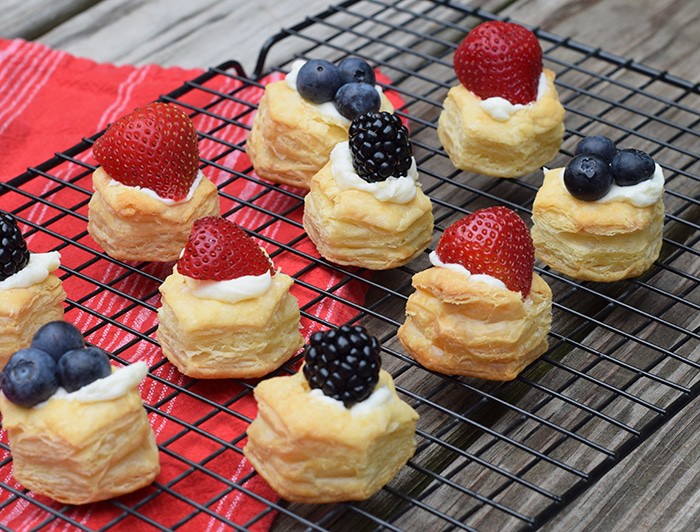
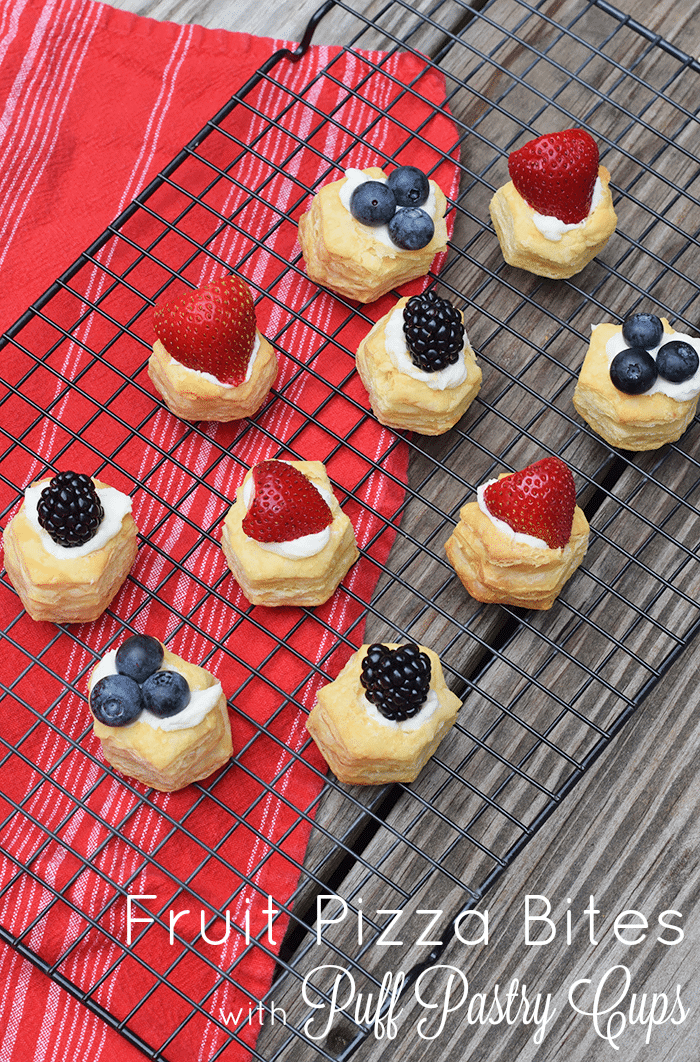
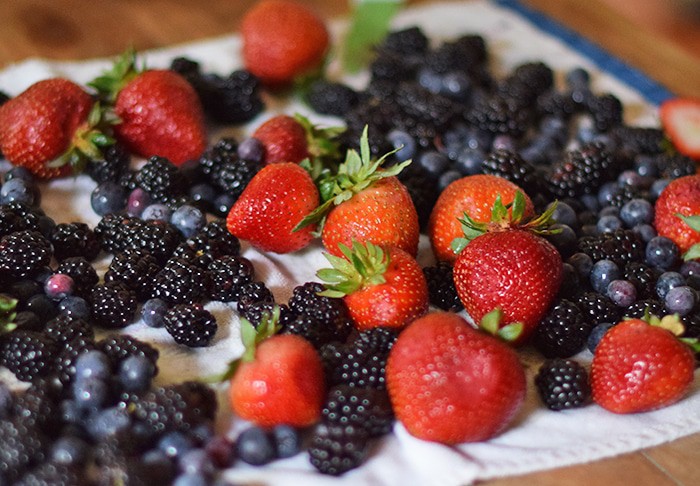
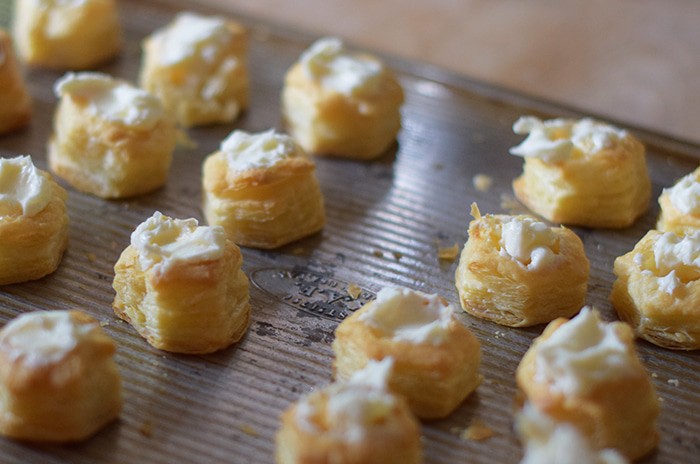
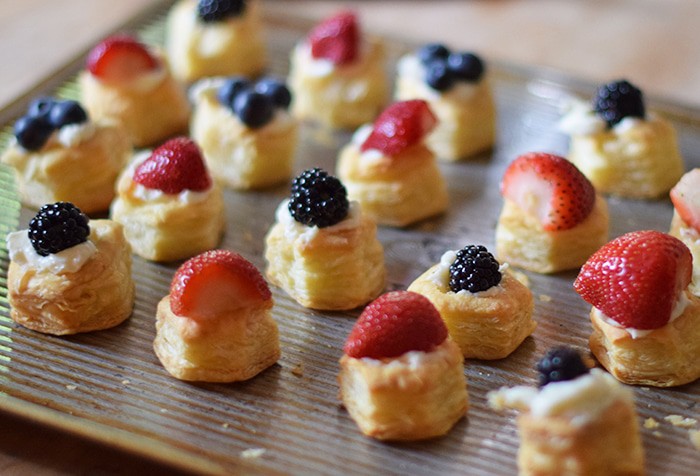
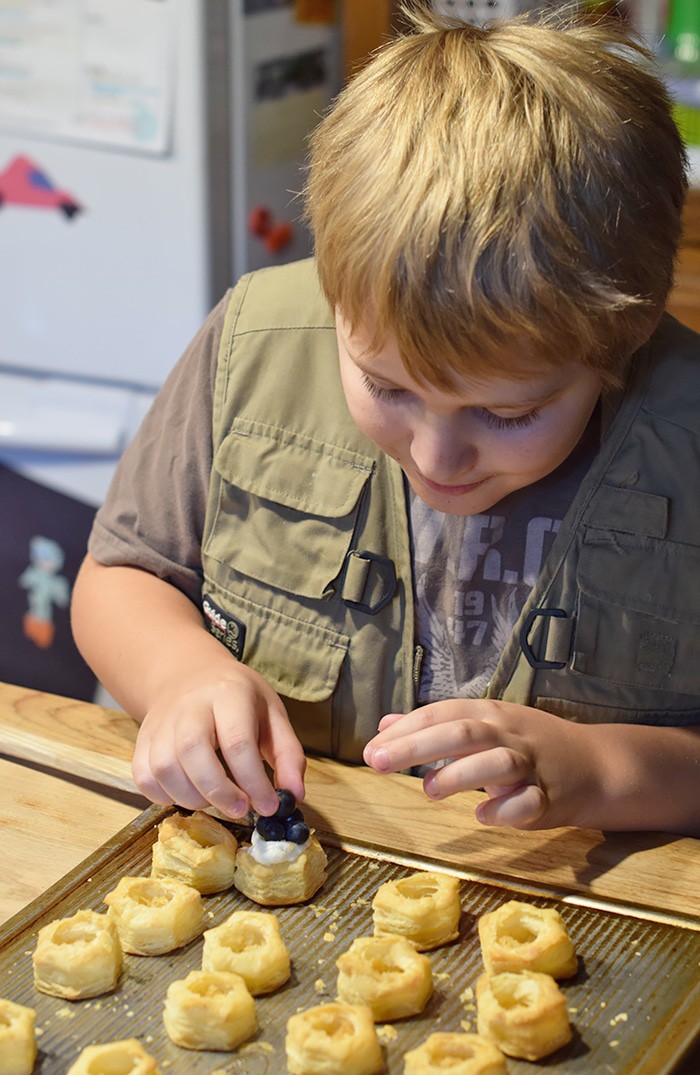
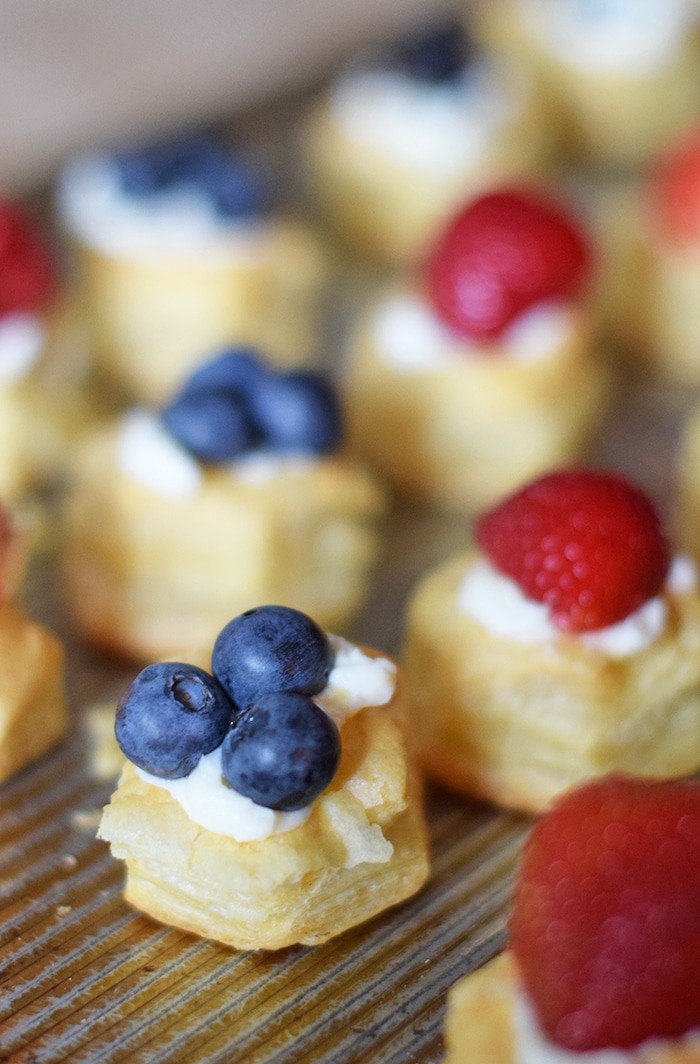

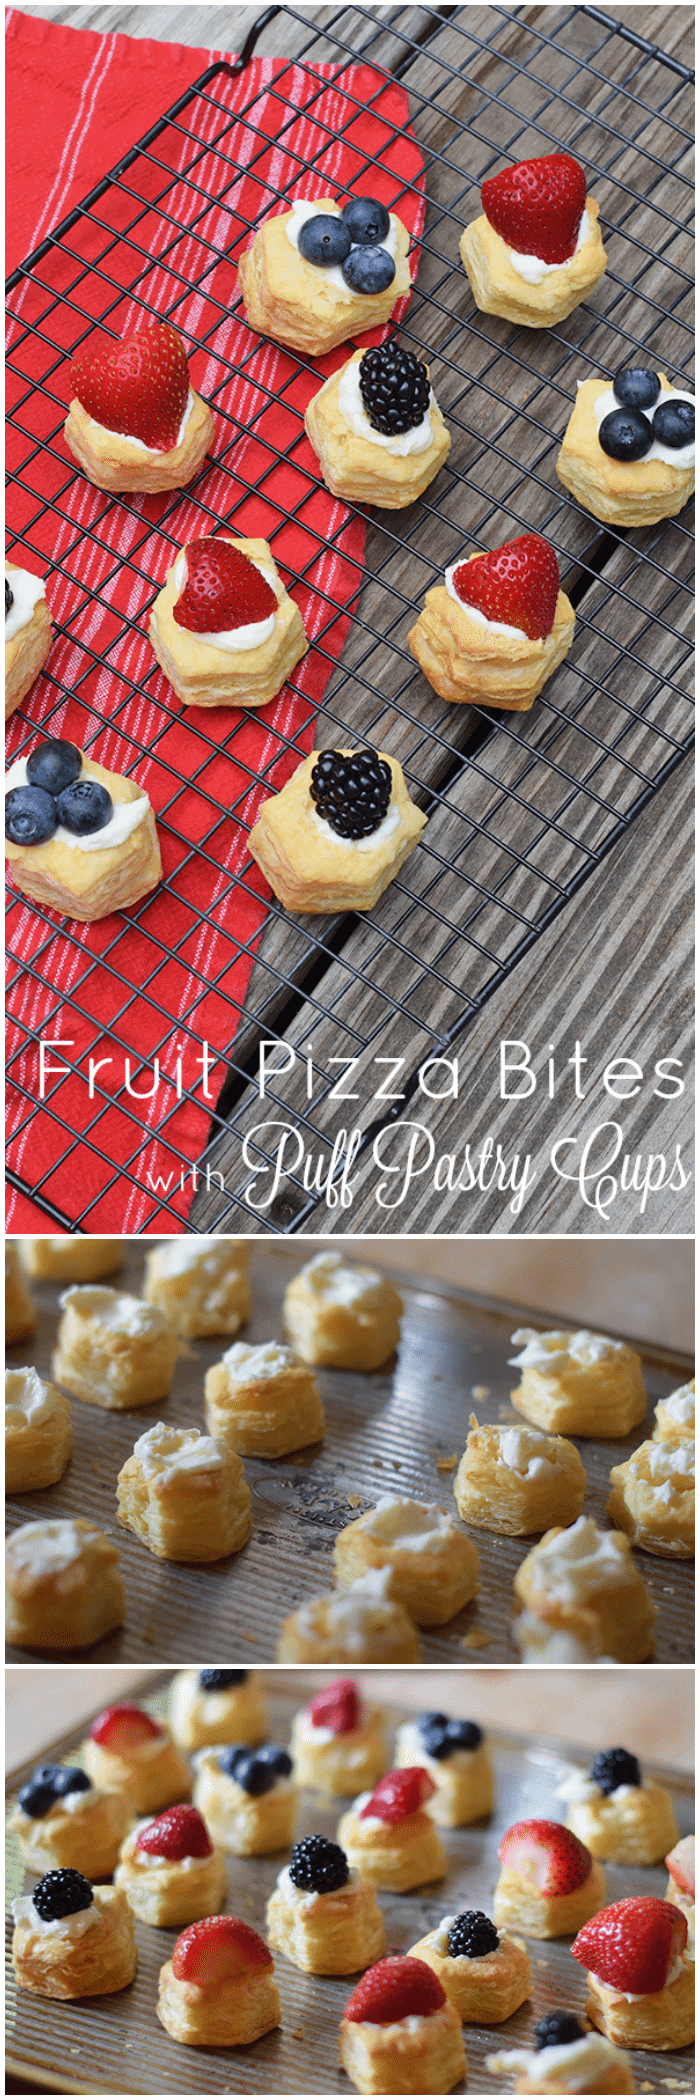
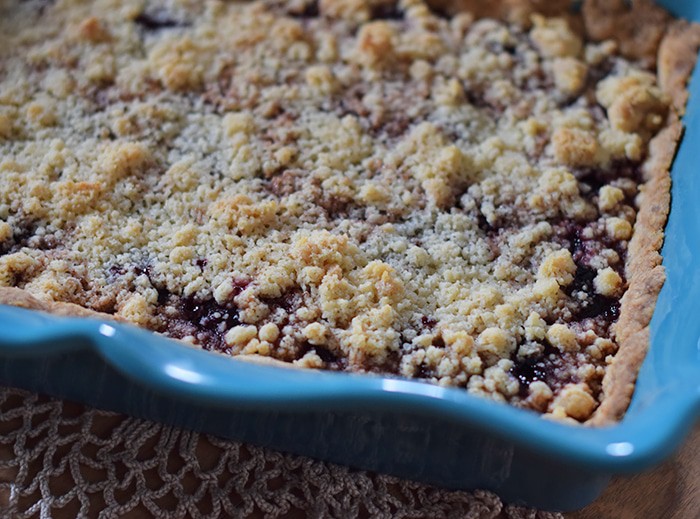

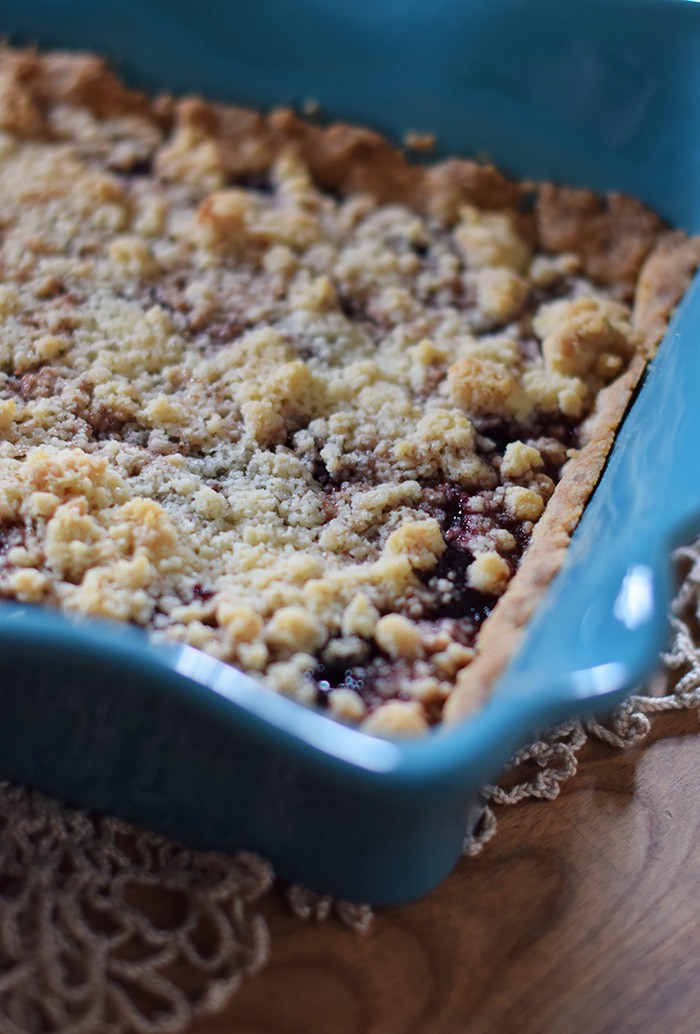
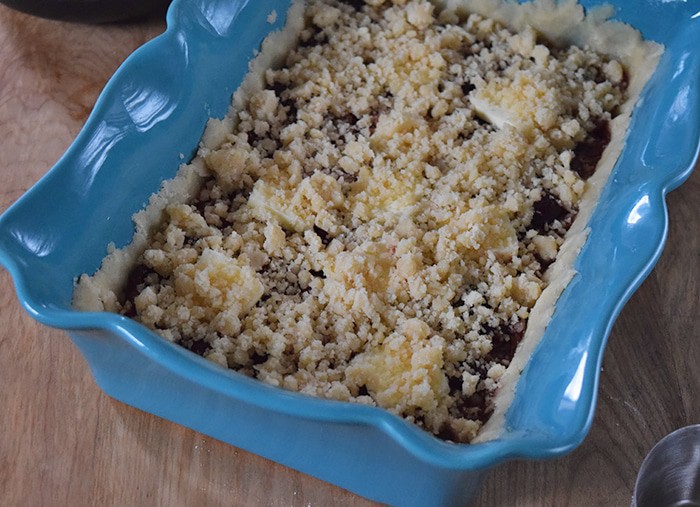
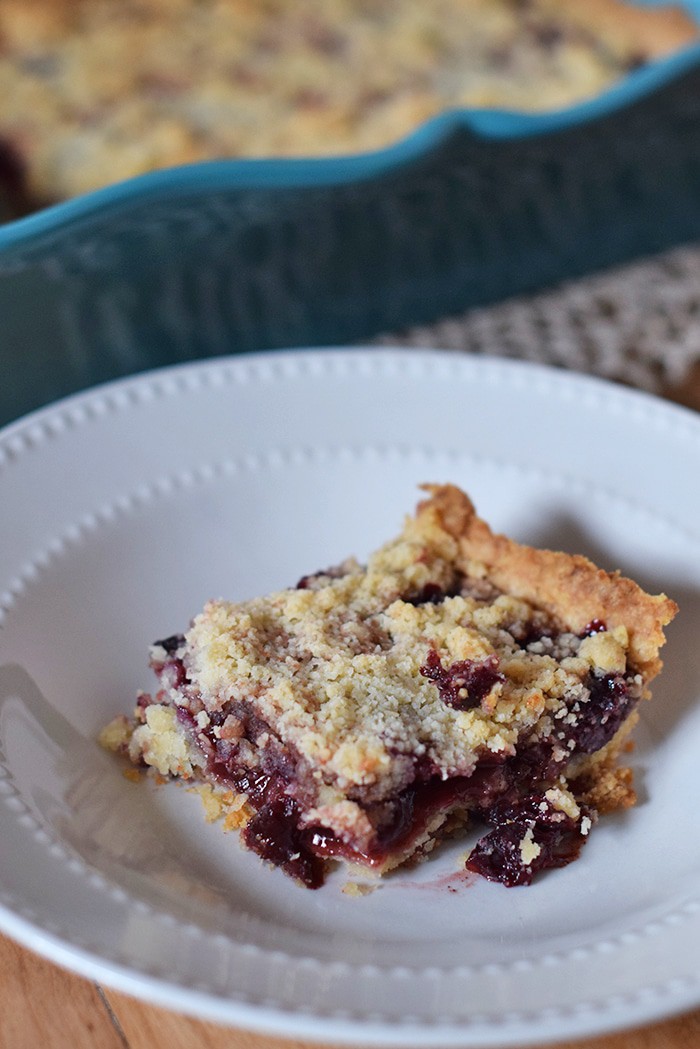
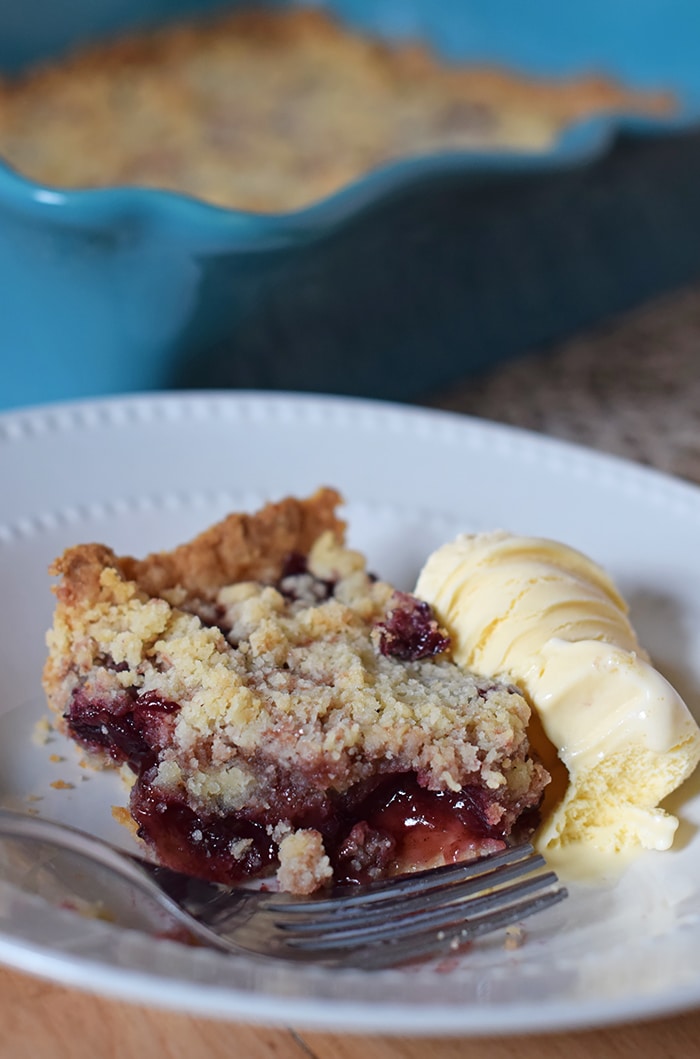
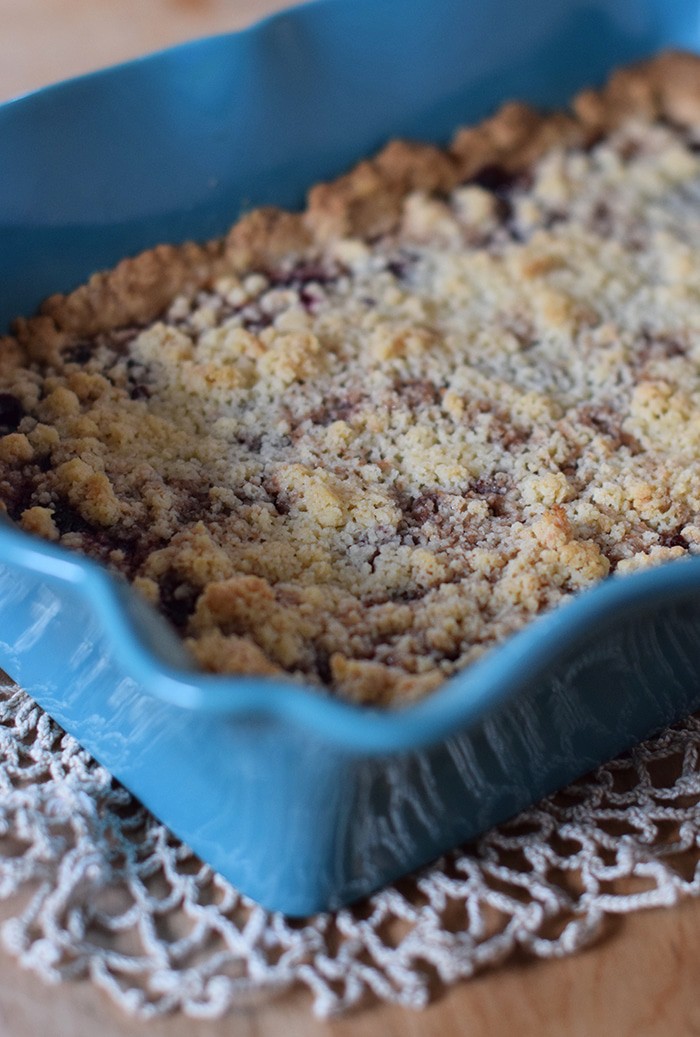
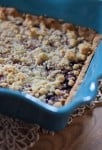
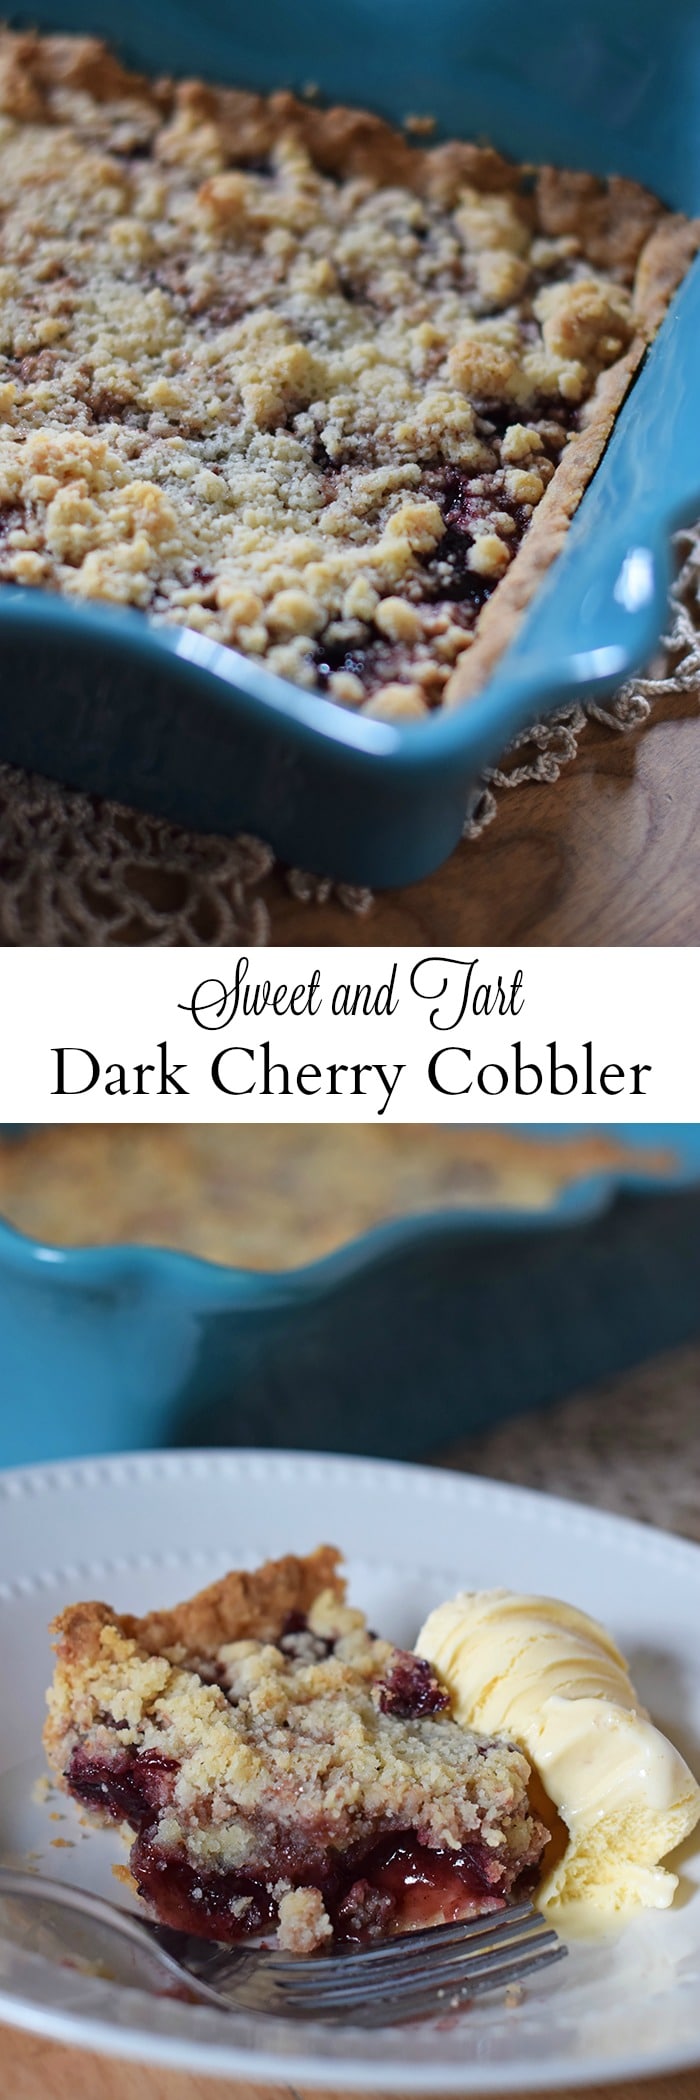

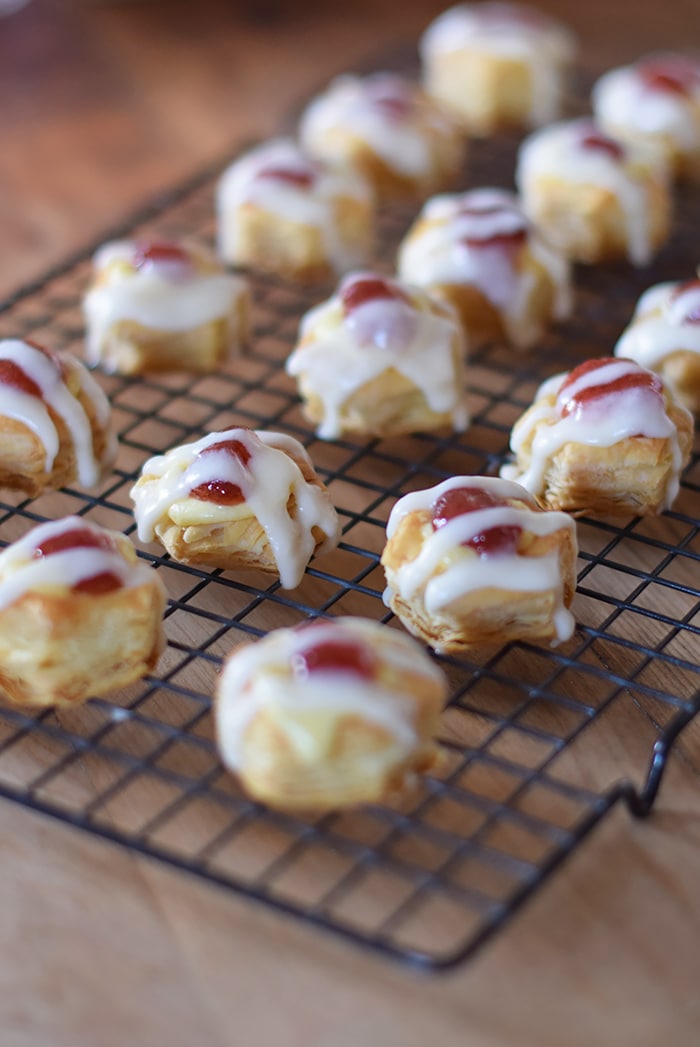
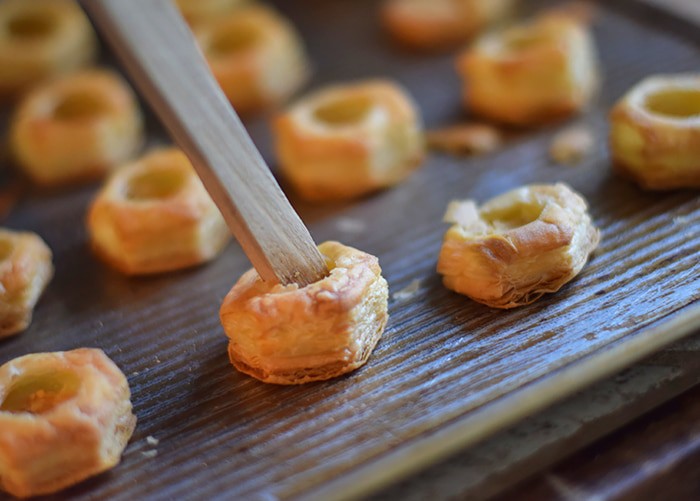
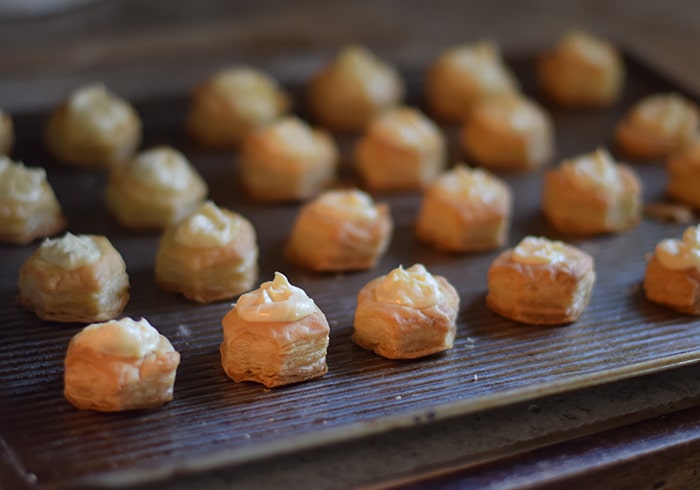
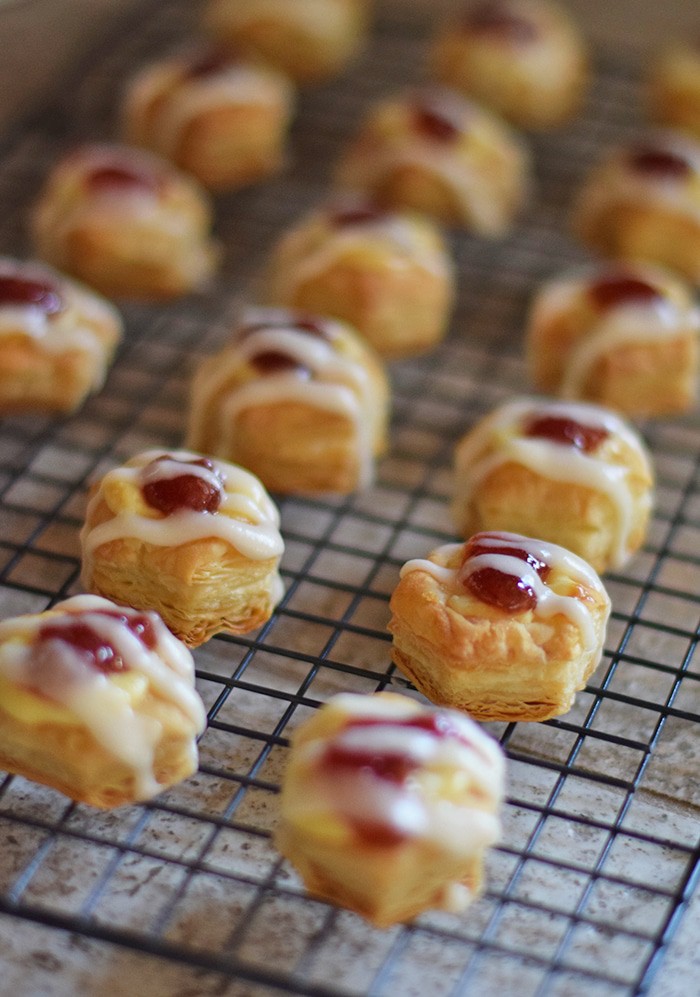
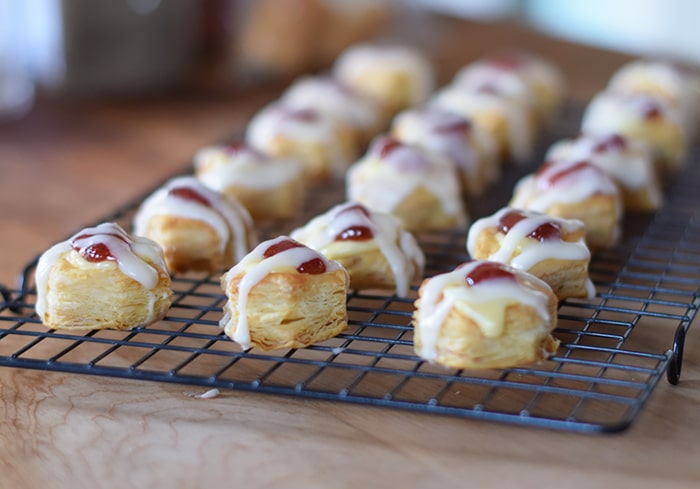
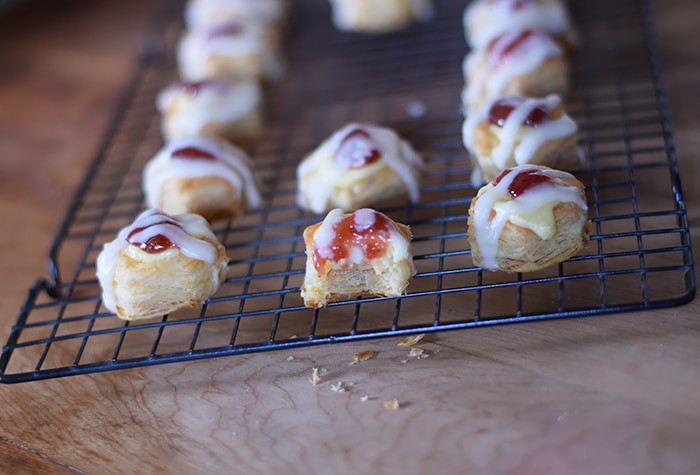
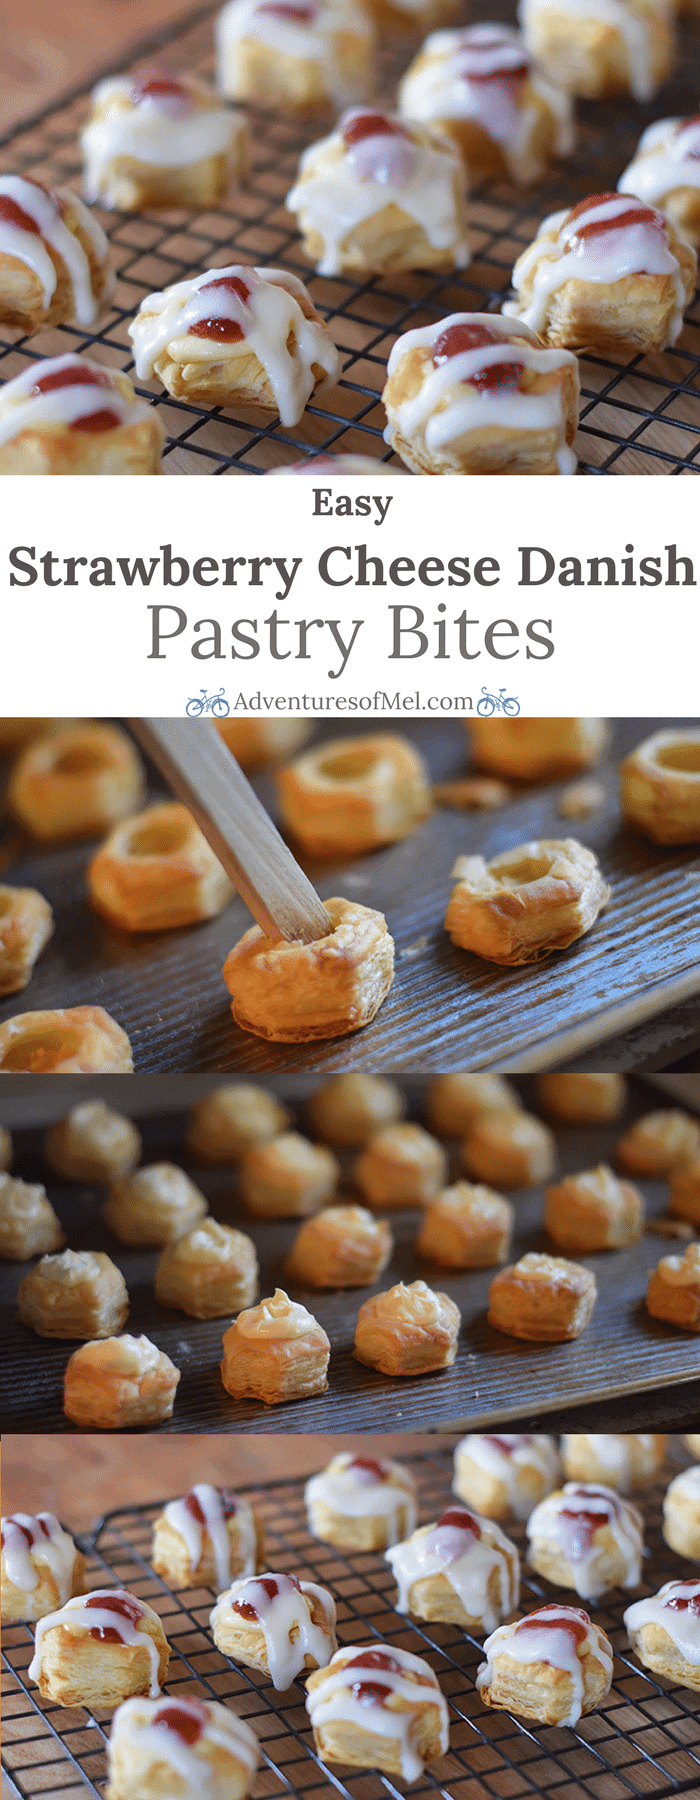
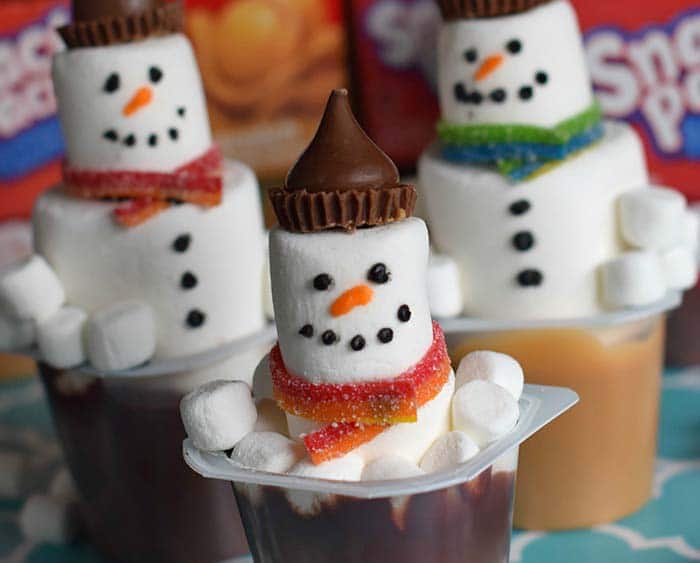
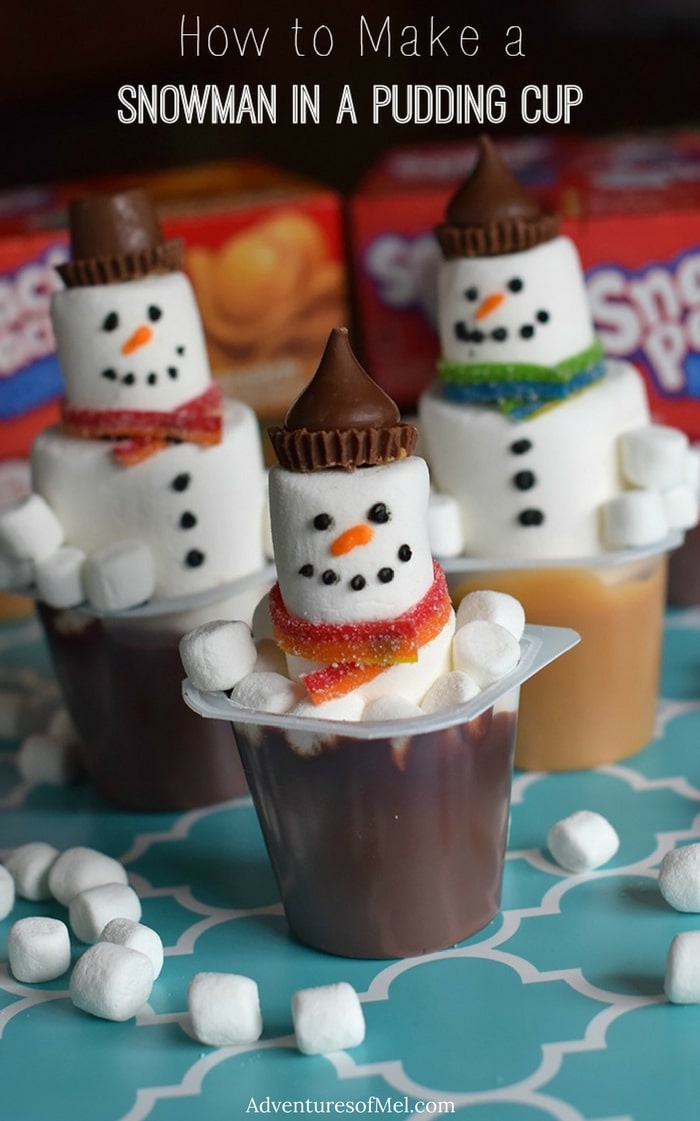
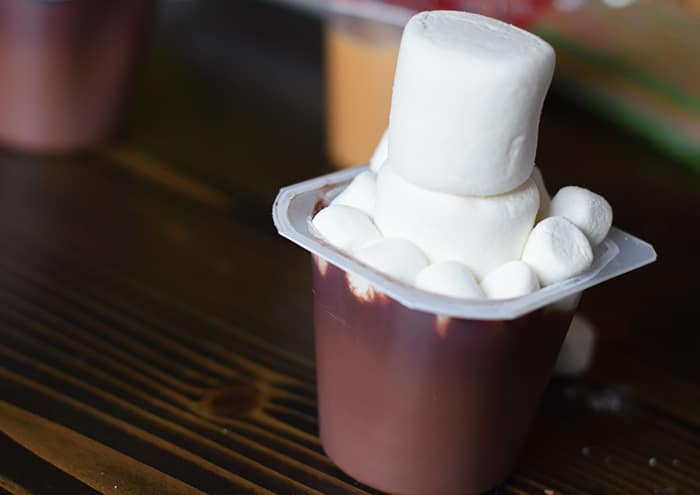
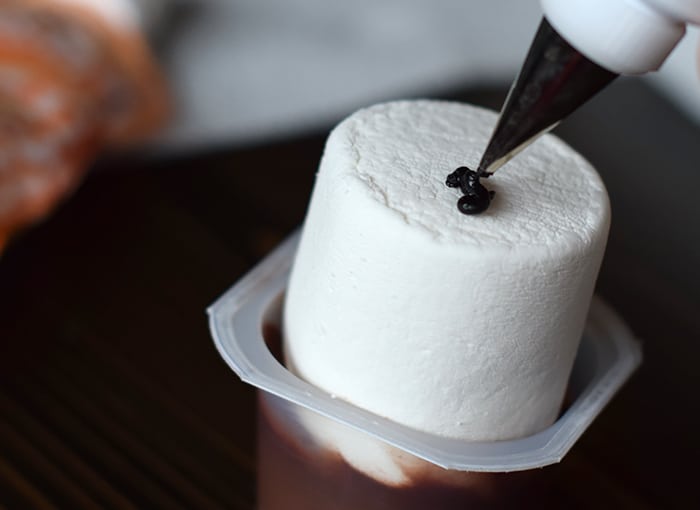 Then add the marshmallow, pressing onto frosting.
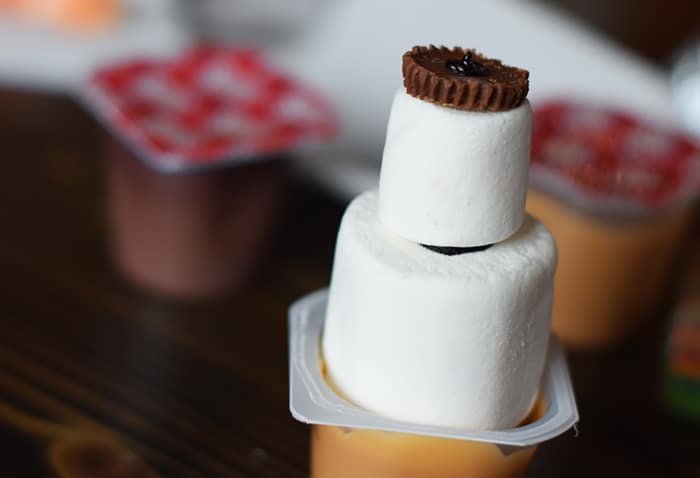
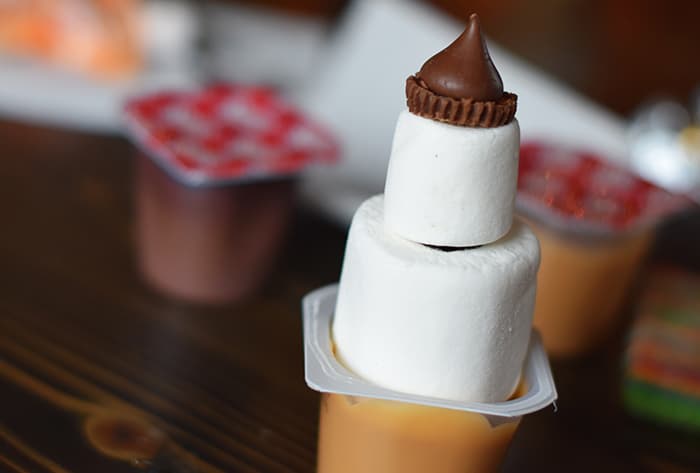 Use black frosting for coal eyes and a smile; orange frosting works well for a carrot nose. Add a scarf, using fruit rope or candy rope, with a dot of frosting to hold the scarf together. Black frosting makes cute little buttons down your snowman’s front.
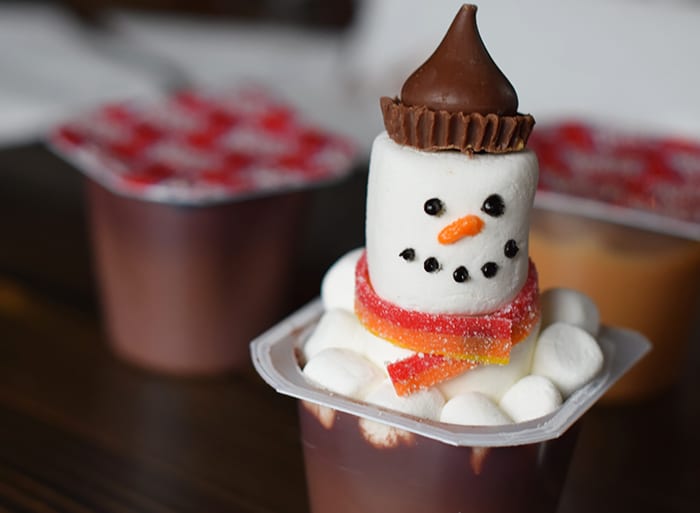 Jaden even added things like earmuffs (with mini marshmallows) and a tie to his snowmen.
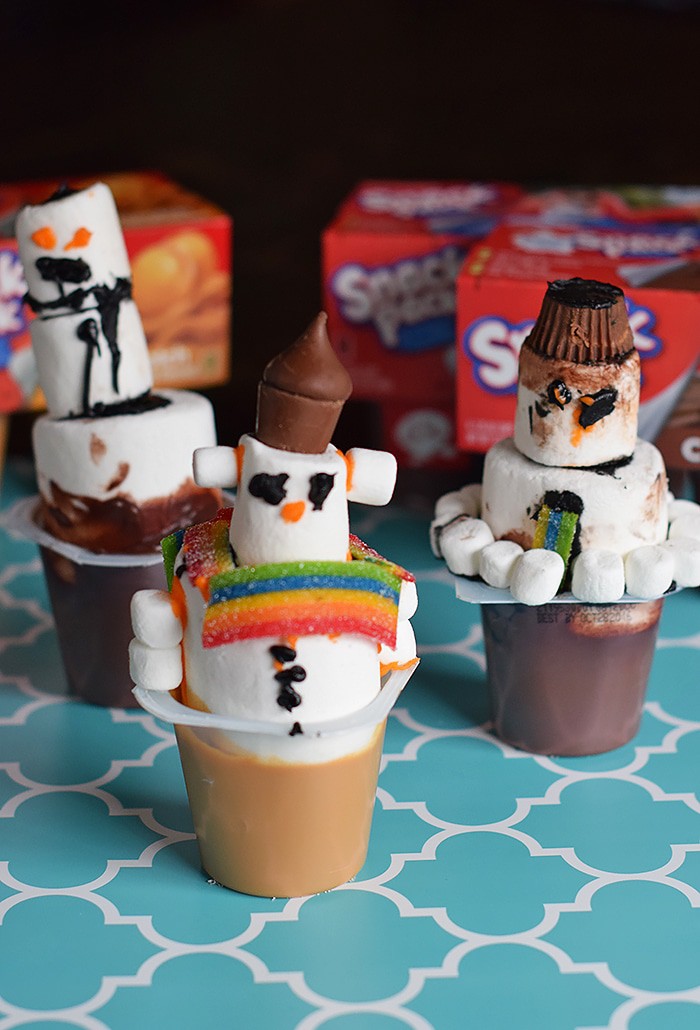
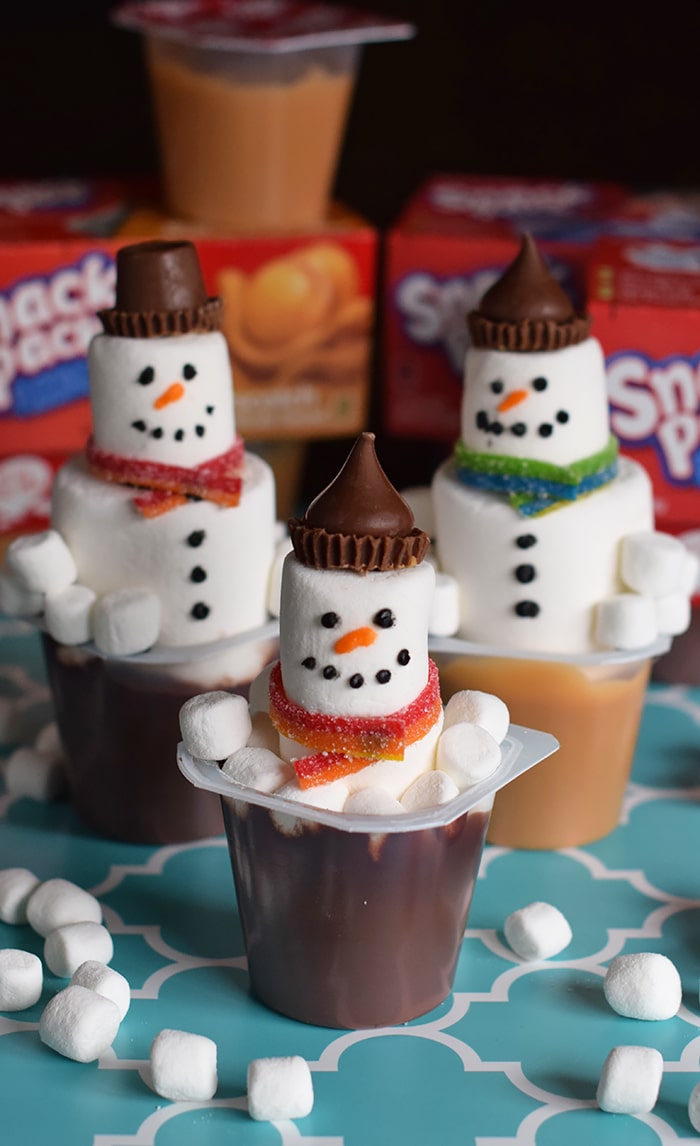
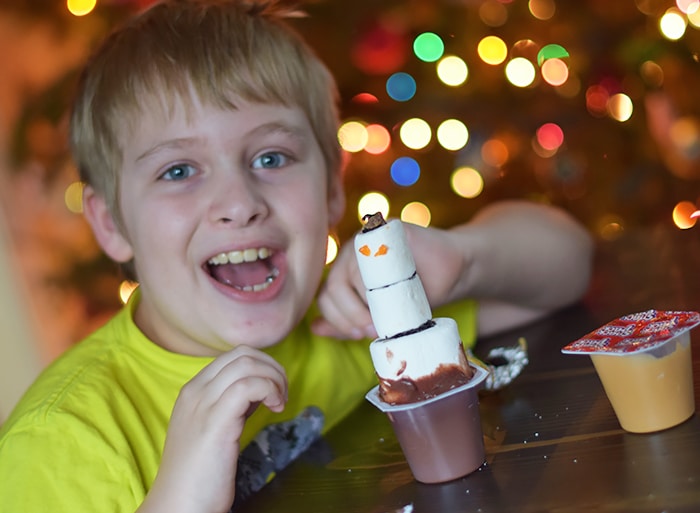 Isn’t that what it’s all about? Spending time together, just enjoying the moment and making a fun memory that will last a lifetime. Oh and, of course, eating the results of your work when finished. Eating as you go can be quite fun too!
 This winter, take a moment to slow down and enjoy a tasty and fun treat with the kids. Snack Pack® comes in a variety of flavors and offers endless mix-in opportunities the kids can help prepare. Each serving of Snack Pack is fortified with as much calcium as an 8-oz glass of milk,* so you can feel good about serving your kids Snack Pack. For mix-in inspiration, visit Snack Pack on Pinterest (