Category: Canning & Freezing

I dabble in canning. So here you’ll find canning recipes and freezer recipes, including jams and jellies, applesauce, apple butter, pie filling, and more.

Reader favorites include the most delicious Instant Pot apple butter, blackberry jam without pectin, and this small batch blueberry pie filling recipe.

And don’t miss out on taking a tour through our own working pantry, where we share with you how to stock your pantry with everything you need for whatever life throws your way.

freezer recipes, canning recipes, and food preserving recipes, including pantry staples like applesauce, jams, jellies, and pie filling
  • How to Make Salted Butter from Raw Milk

    How to Make Salted Butter from Raw Milk

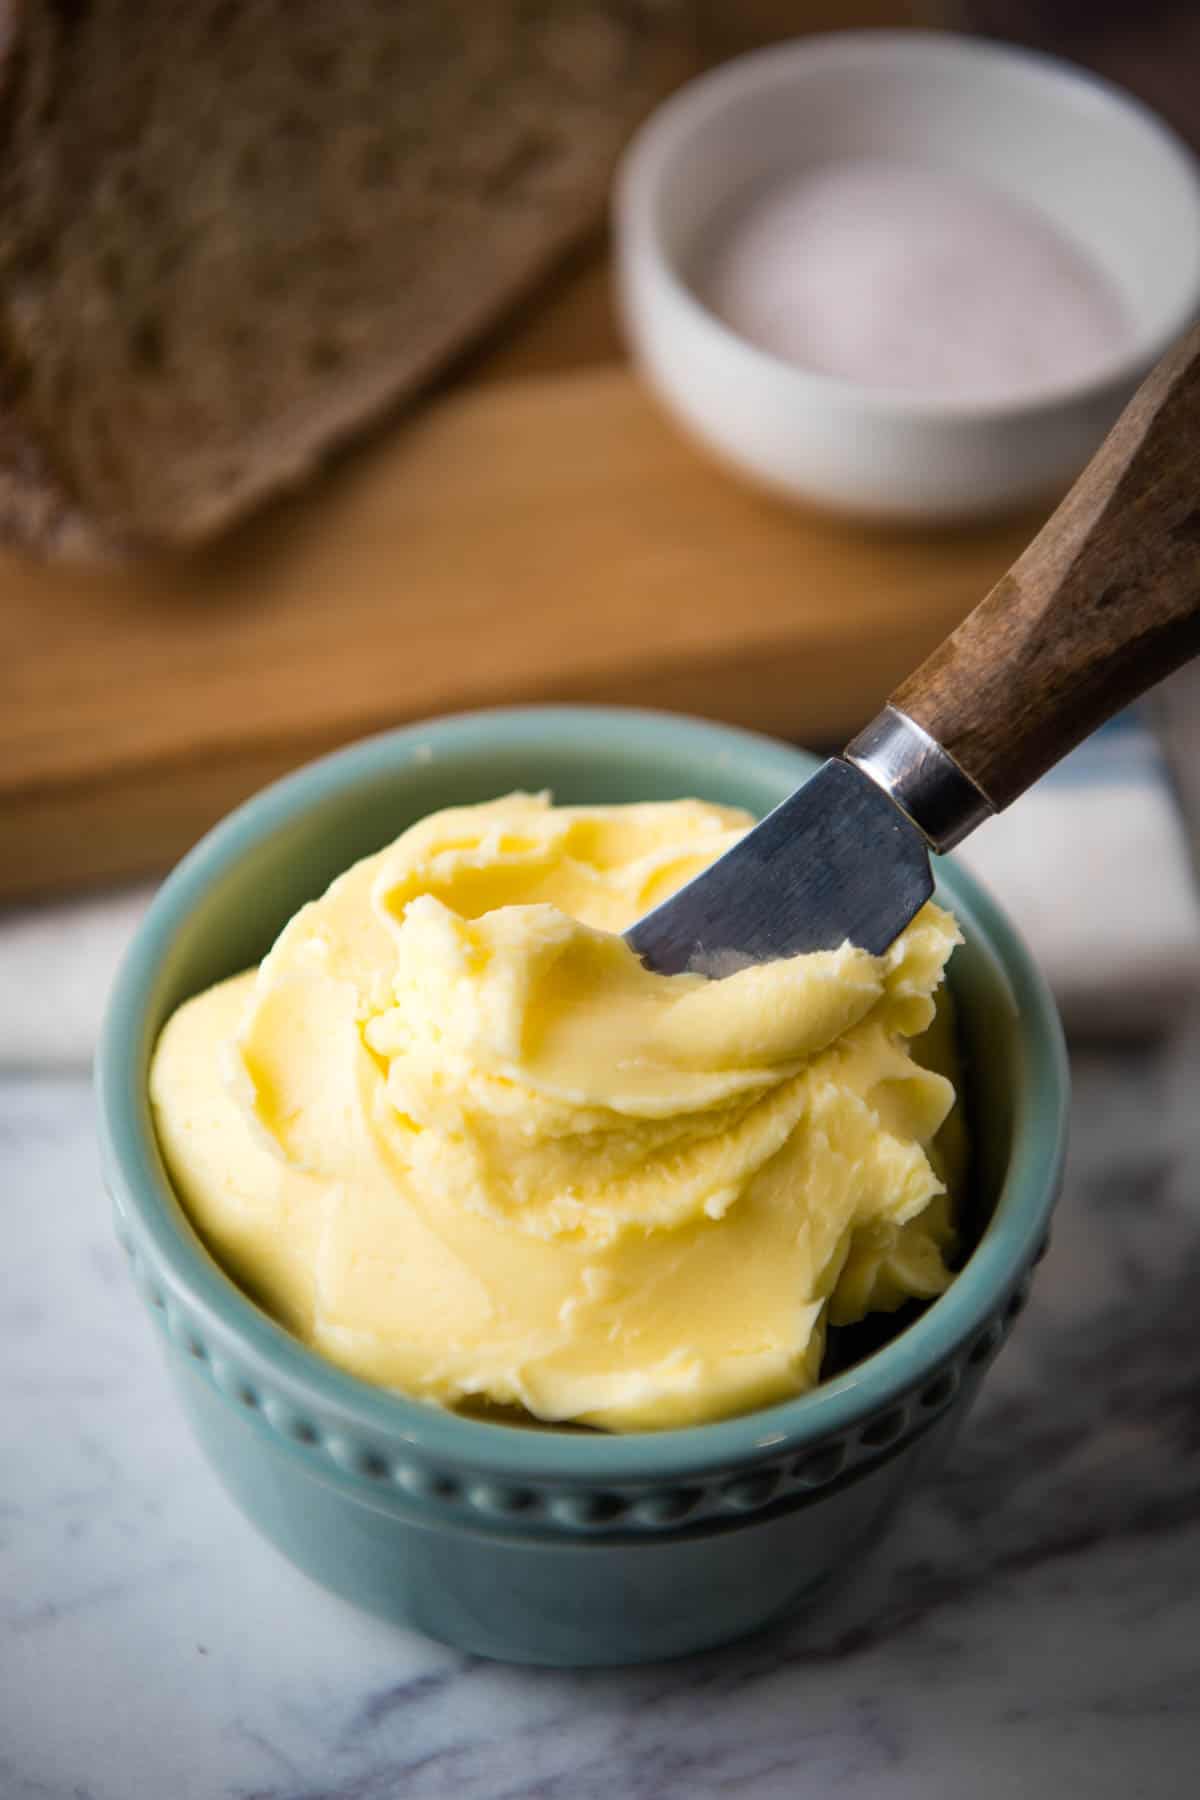
    Learn how to make salted butter from raw milk or store bought cream. You only need 2 ingredients to make this easy homemade butter recipe, and you can make it with a mixer, blender, or churn. Fresh butter never tasted so good!

    When we started milking our A2 Jersey cows, we knew we wanted to regularly make 2 things… Ice cream and butter. Learning how to make butter from raw milk was the #1 thing on our to do list when we started milking.

    homemade salted butter in blue ramekin with butter knife in it, in front of wood cutting board with sliced bread and small bowl of sea salt

    Making homemade butter is a relatively simple process, and you don’t need a bunch of fancy tools to make it; you can even make it in a jar if you’re making a smaller quantity.

    I’m going to show you how to make butter from heavy cream and share some of the benefits and ways you can use homemade salted butter. Now that we’ve been eating butter made from our cows’ fresh milk, I can’t imagine going back to store bought butter; and I’m willing to bet that once you taste it, you won’t want to either.

    Why You’ll Love Making Homemade Butter

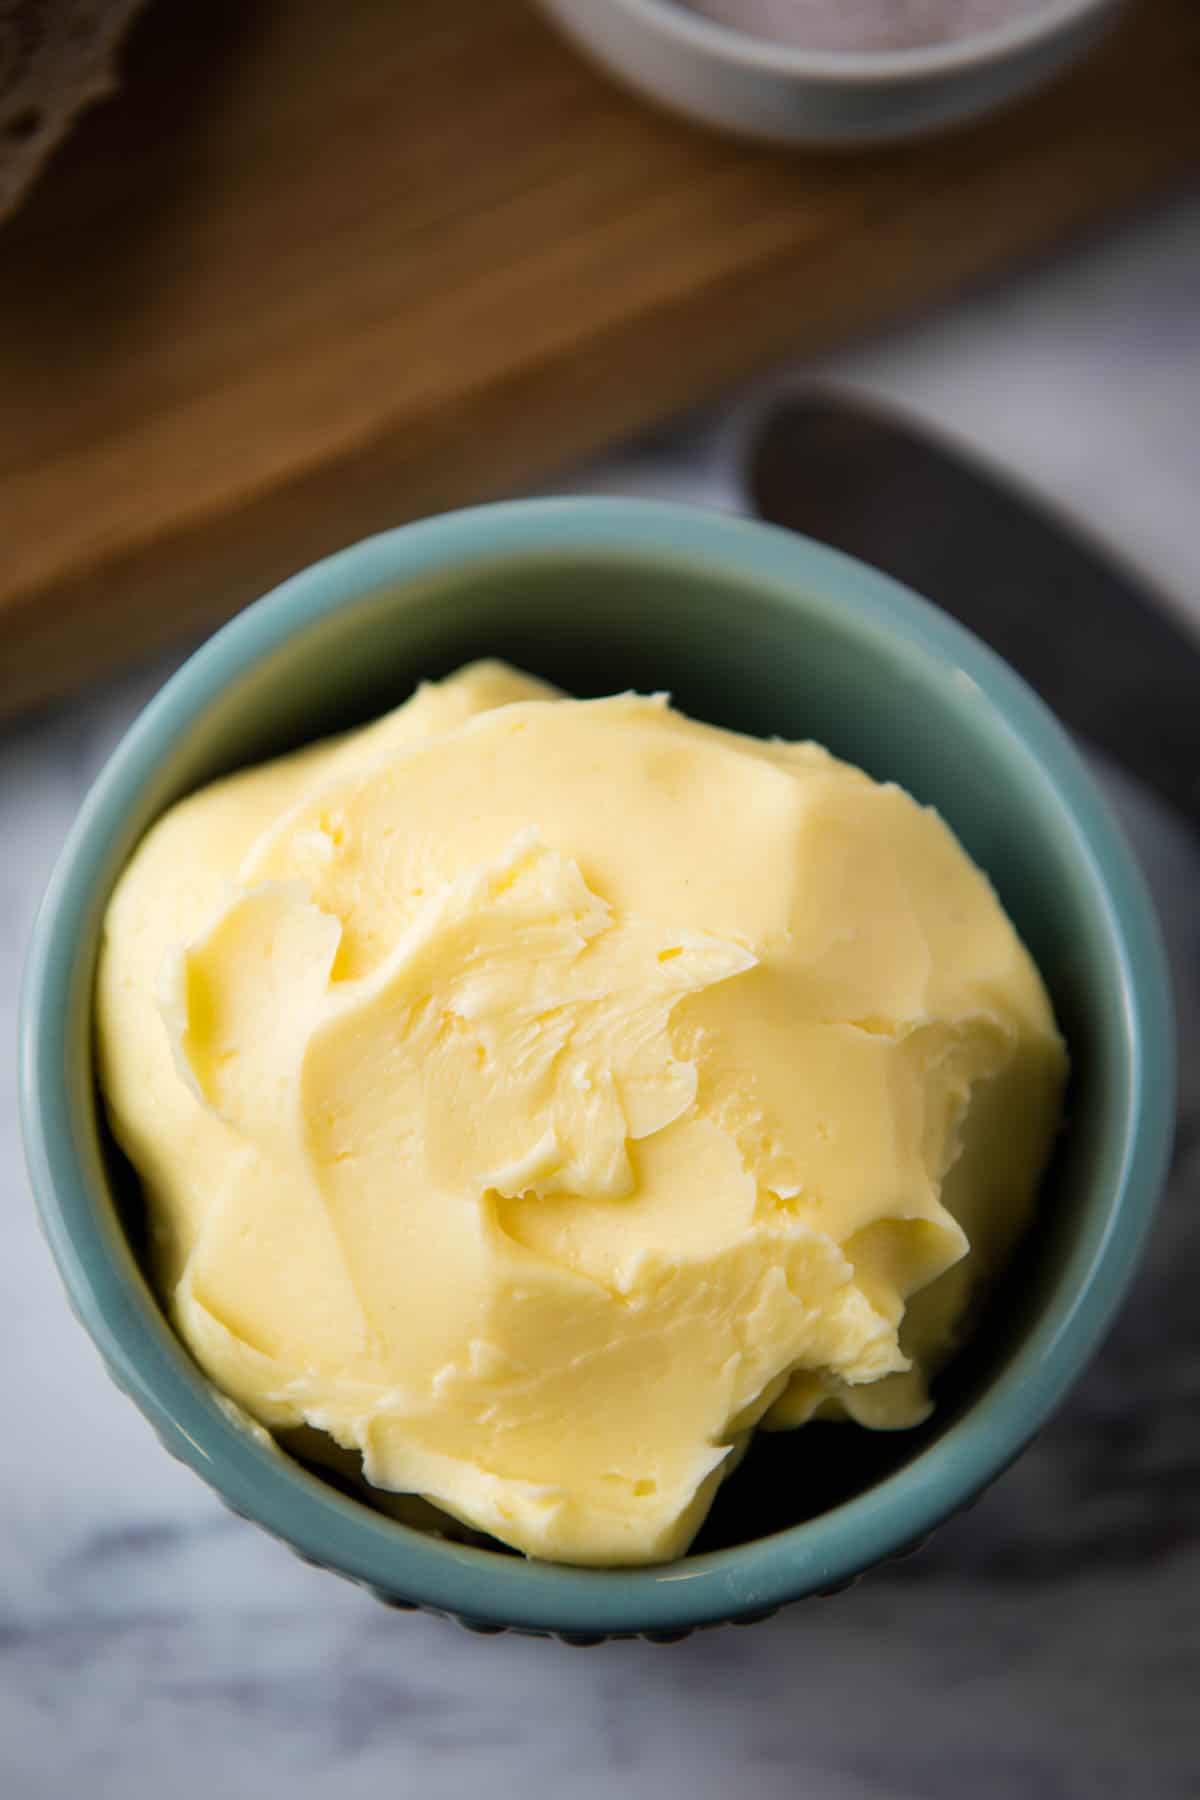
    • Homemade butter has a deliciously rich flavor and even a darker yellow coloring, especially during the warmer months when the cows can eat more fresh green grass versus hay in the winter.
    • It’s relatively simple and easy to make. There are a few steps to it, but the steps are easy to follow.
    • If you’re needing A2 butter like I do, making it is the cheapest and sometimes the only option. Before we had our own cows, I was buying small half-pints of A2 cream from a natural grocery store an hour and a half away, sometimes ordering thru Azure. Said cream was not cheap; I think it was around $8 for a 12-oz. bottle. Now… Factor in the cost of feeding and caring for a cow, store bought cream is definitely more affordable. However, if you’re buying raw milk from a local farmer at say, $8/gallon, and able to skim off the cream to use for butter, local raw milk is the way to go, especially in terms of cost-effectiveness.
    • You can eat it fresh, you can use it in baking, and you can make all sorts of things with homemade butter. You can even add flavorings to it, which we’ll talk more about below.
    • Contrary to what much of society, not to mention what our modern healthcare system thinks, butter has a lot of health benefits. It’s not only good for the immune system, it’s also a healthy source of fatty acids, healthy cholesterol, and antioxidants. It’s a good source of selenium. It’s also a good source of nutrients that protect against heart disease. It contains vitamin A, which is good for healthy thyroid function, something many of us need. And did you know that butter contains saturated fats that actually help protect against cancer? You can read more about the benefits and learn why butter is better.
    half gallon of raw milk cream and small bowl of sea salt, ingredients for homemade salted butter

    Ingredients and Substitutions Notes:

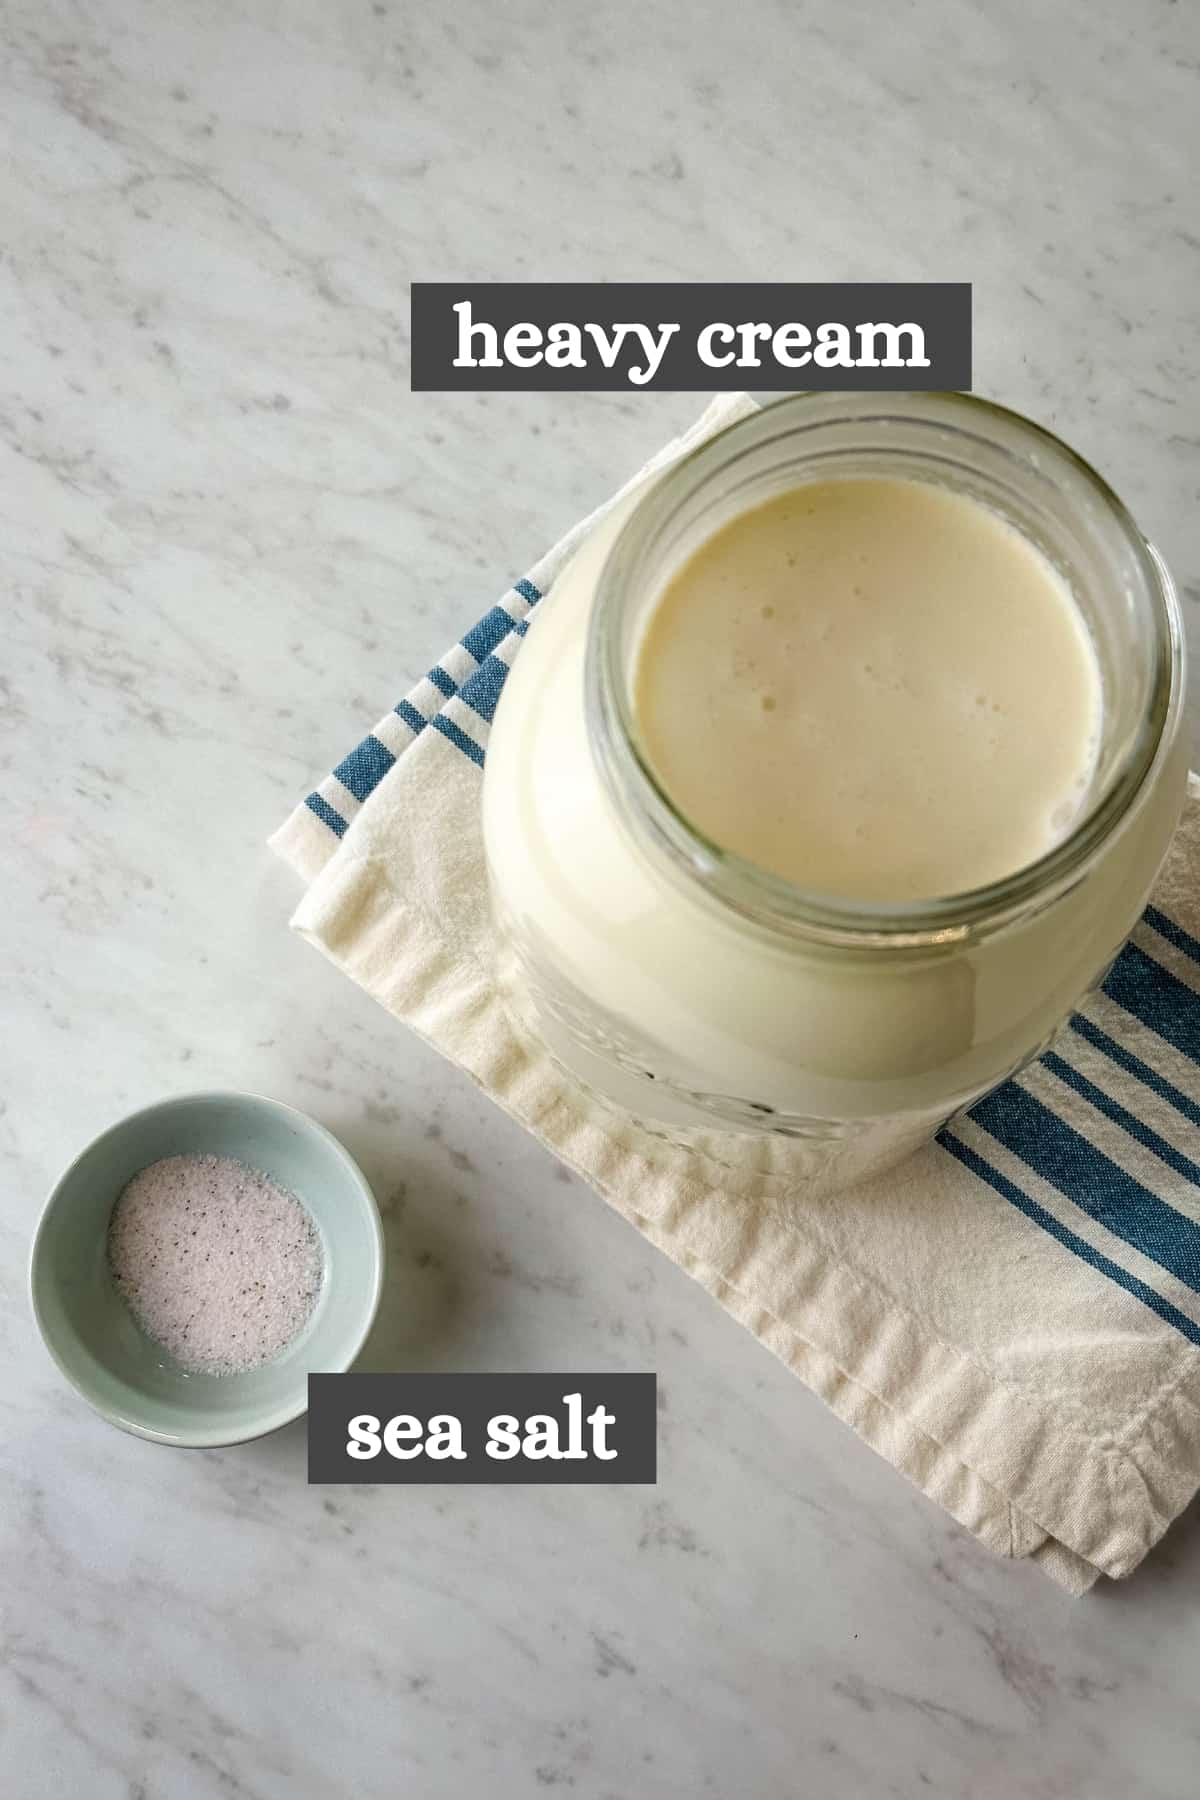
    This section is pretty simple, because you only need 2 ingredients to make butter…

    • Heavy Cream – You can separate the cream from raw milk, and I’ll share how to do that a little further below. Or you can buy a carton of heavy whipping cream from your local grocery store. To find a good source of raw milk, start researching your local area; you can find raw milk dairy farmers through Real Milk’s Raw Milk Finder. You may also search local Facebook groups, Facebook Marketplace, or ask around in local community groups you’re involved with.
    • Sea Salt – I recommend using a healthy sea salt. Redmond Sea Salt is the best.

    How to Make Salted Butter from Raw Milk

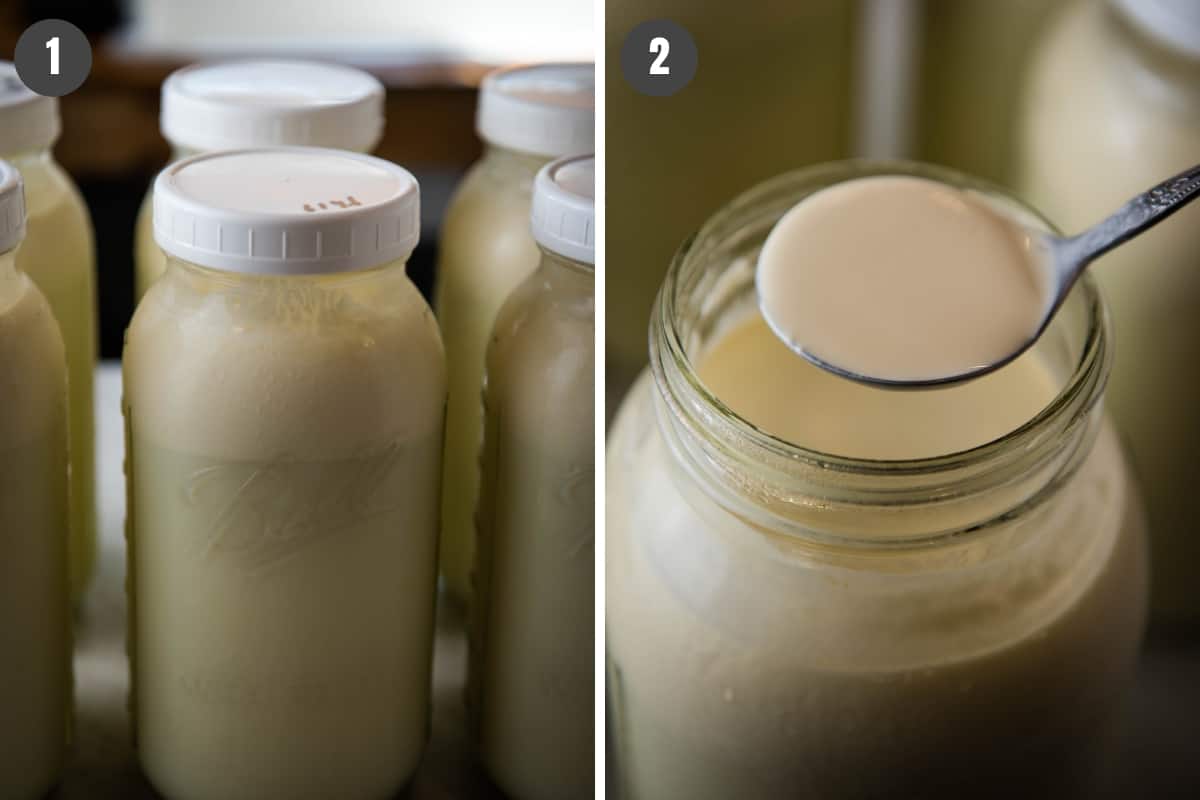
    Before getting started, it’s important to chill the milk in the fridge ’til the cream has separated. Cream will rise to the top, and milk will be left underneath. I usually let fresh milk sit in the fridge, untouched, for 6-12 hours before skimming off the cream.

    How to Separate Cream from Cows’ Milk

    1. Once you have a definitive cream line, it’s ready to skim.
    2. Use a ladle or large gravy spoon to skim the cream off the milk. You can even use a turkey baster to gather up the cream. As you skim, add the cream to a large 1/2 gallon jar or mixing bowl.
    cream line on half gallon Mason jars; skimming cream off raw milk with small ladle or gravy spoon

    How to Mix the Butter

    Now keep in mind, you can use whatever you have, whether it’s a blender, a stand mixer, or a butter churn. We actually alternate on which one we use, depending how much cream we have; sometimes we have multiples going at once, but lately, we’ve been using our blender quite a bit.

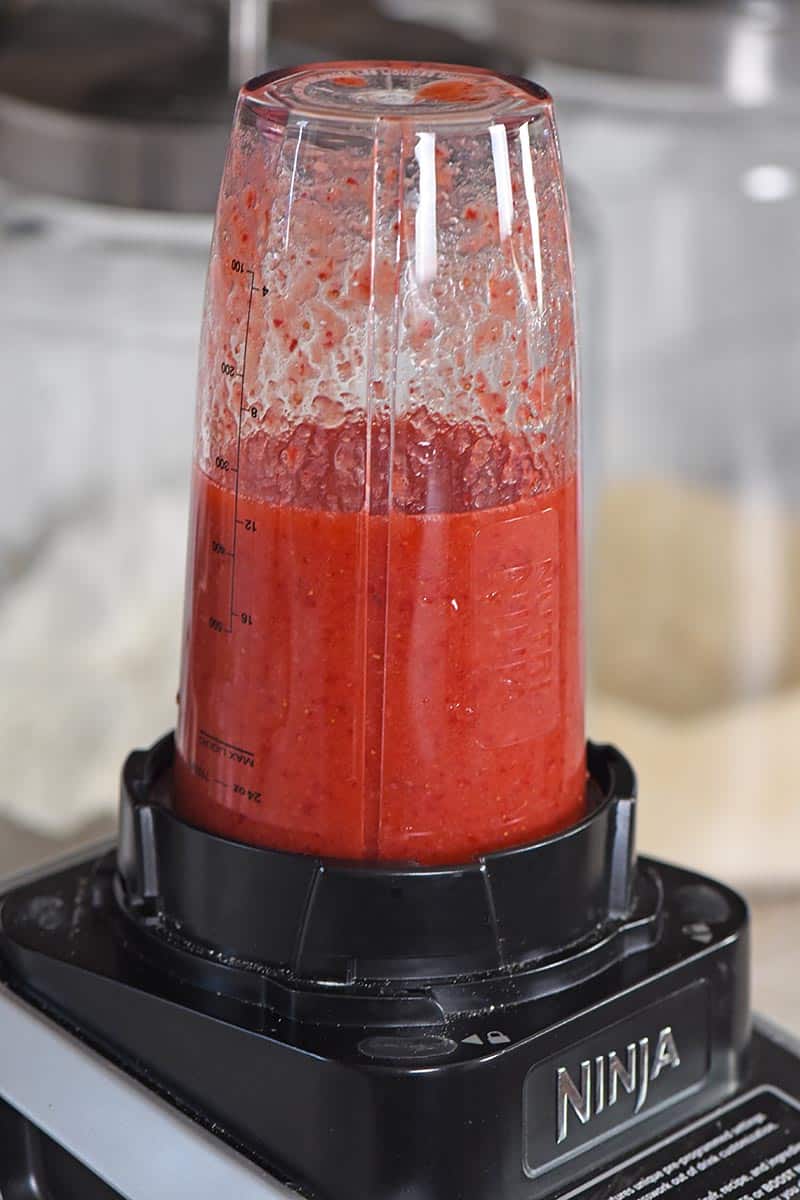
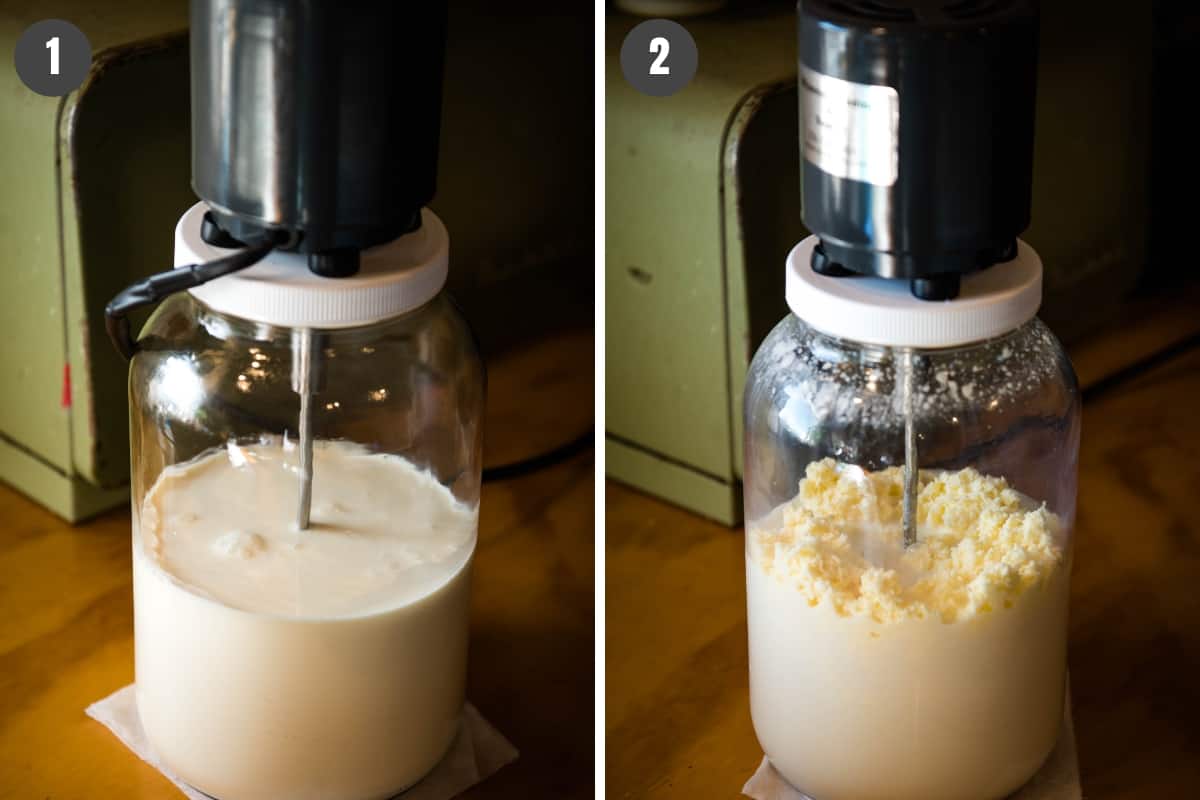
    1. Add the cream to your preferred small appliance, whether it’s a stand mixer, blender, or butter churn. If you’re using a mixer, you’ll want to cover the mixer with a flour sack towel, or use a shield to keep it from splattering all over the place.
    2. Allow it to run ’til the butter separates from the milk (less than 5 minutes for a blender, about 20 minutes for a mixer, and maybe 30 minutes for a butter churn); then drain the milk off the butter curds. You’ll know when it’s ready because you’ll have chunks of butter separate from the liquid.
    churning raw milk into butter with Buttermeister butter churn

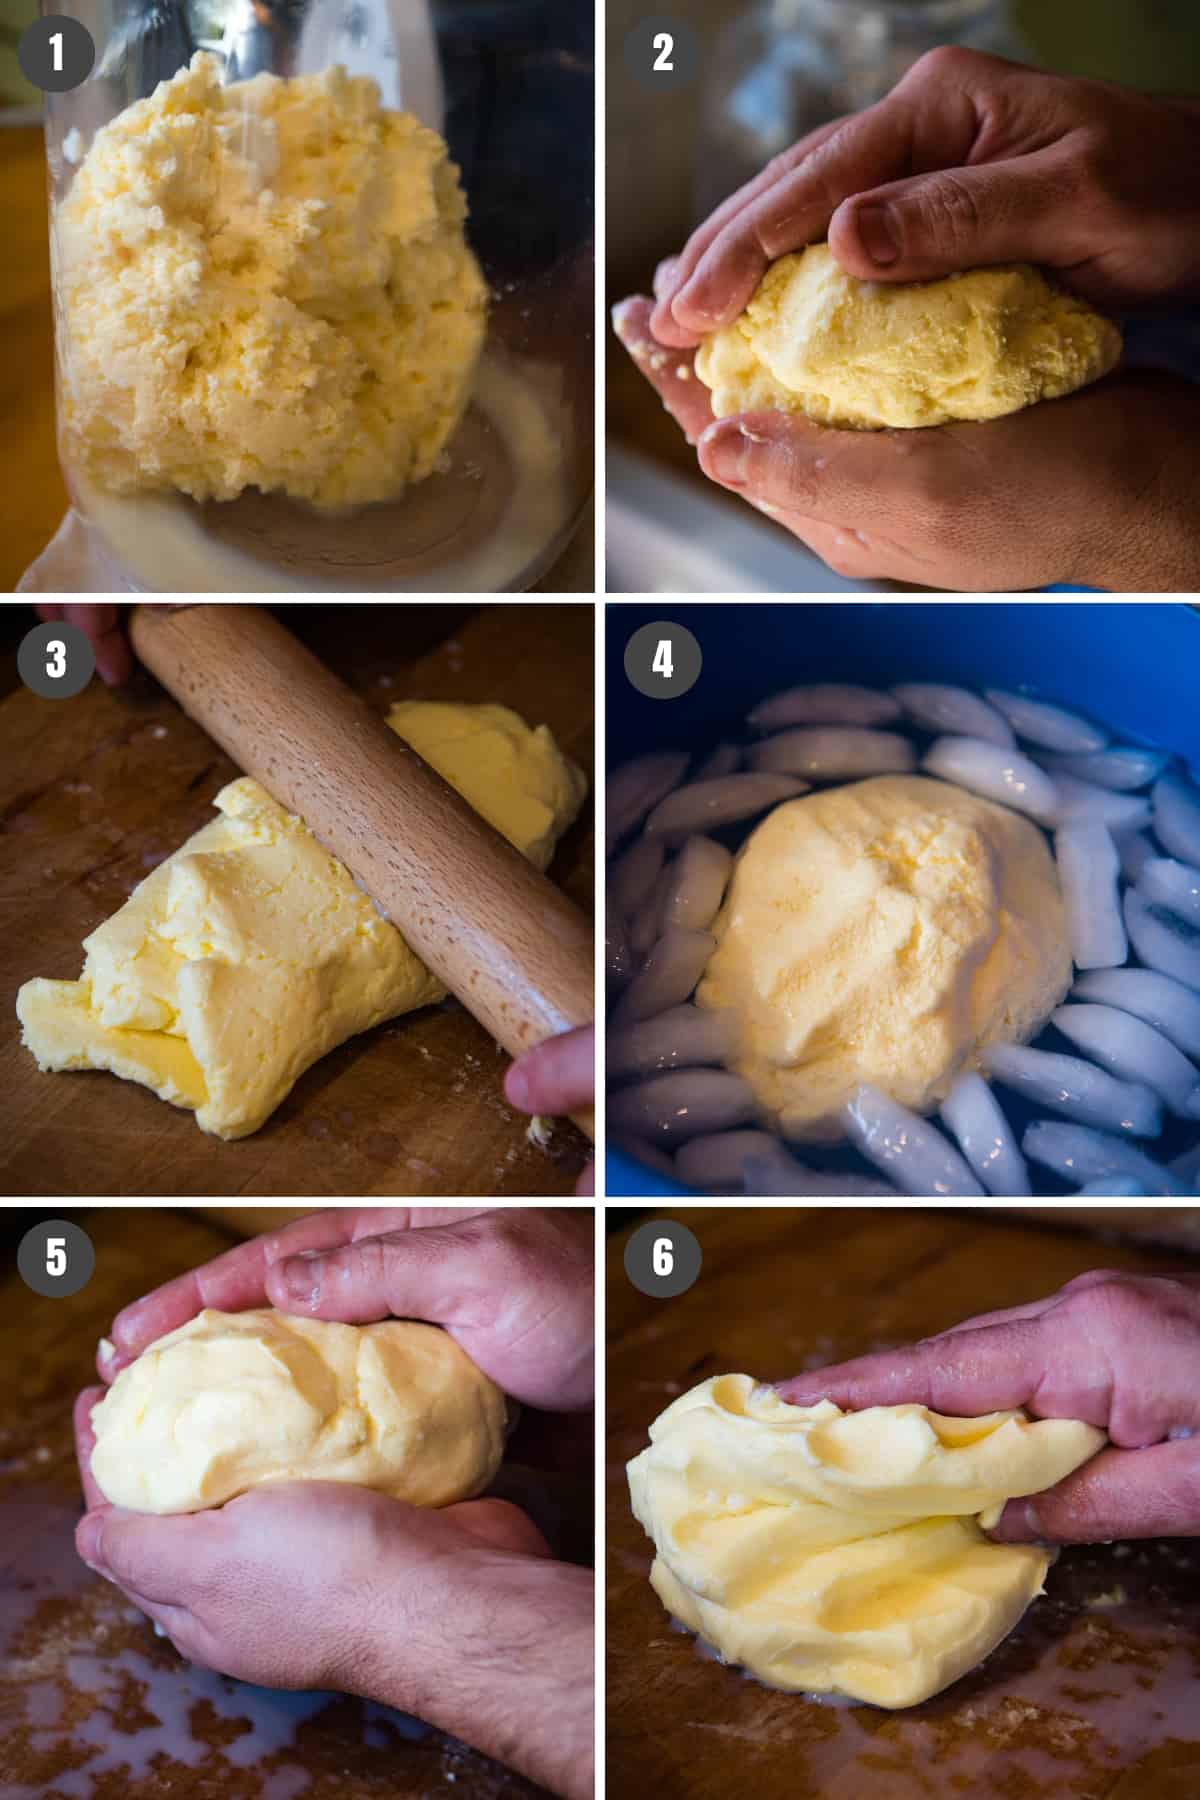
    Now Squeeze the Milk out of the Butter

    1. If the butter is too soft, add ice water to the churn and let the butter firm up before removing the liquid.
    2. Remove the butter from the jar and squeeze out as much milk as possible.
    3. Place the butter on a cutting board, and roll it with a rolling pin to squeeze out more milk.
    4. Alternate cooling the butter down in a bowl of ice water to keep it firm.
    5. Keep squeezing more milk out, as much as possible, until the liquid you squeeze out is as clear as possible. You can use paddles, if so inclined, but we prefer to use our hands.
    6. Keep cooling in ice water in between squeezing more milk out.
    how to make butter from raw milk by taking churned butter in churn, then hands alternating squeezing milk out of butter, rolling milk out of butter with rolling pin, and butter in ice bath

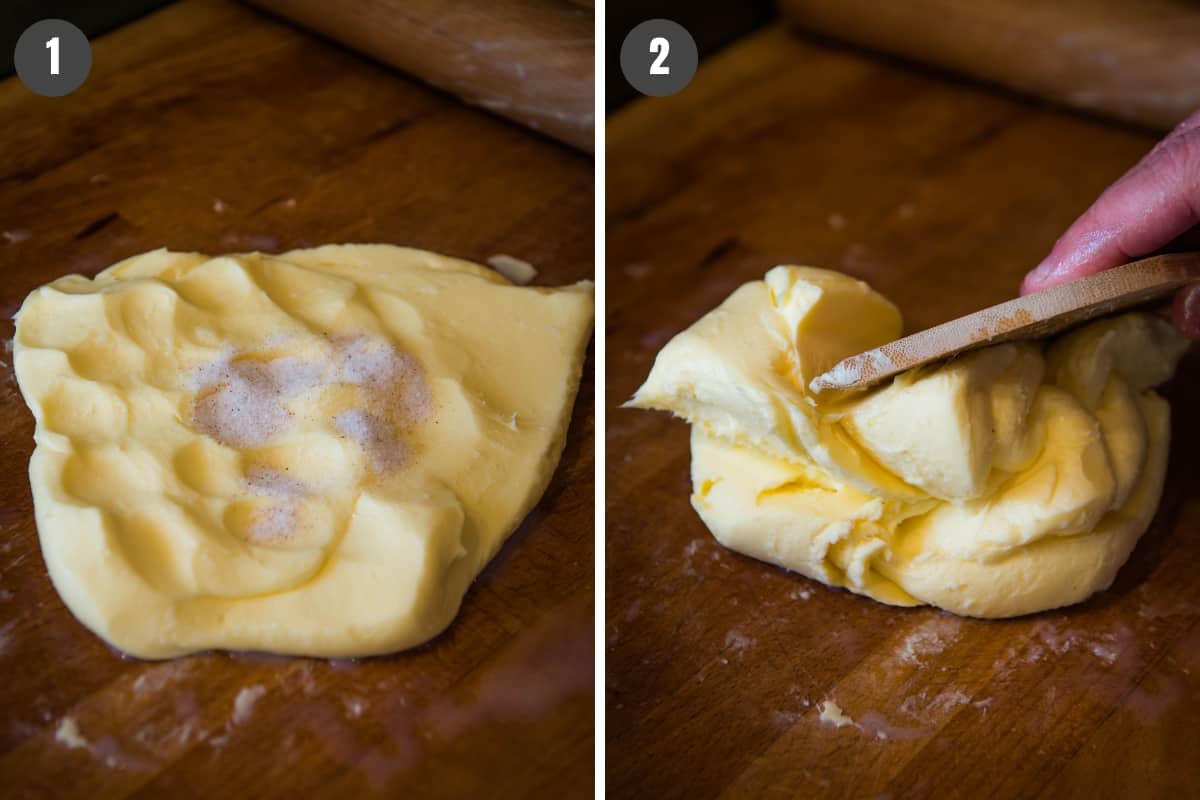
    When to Add Salt to Homemade Butter

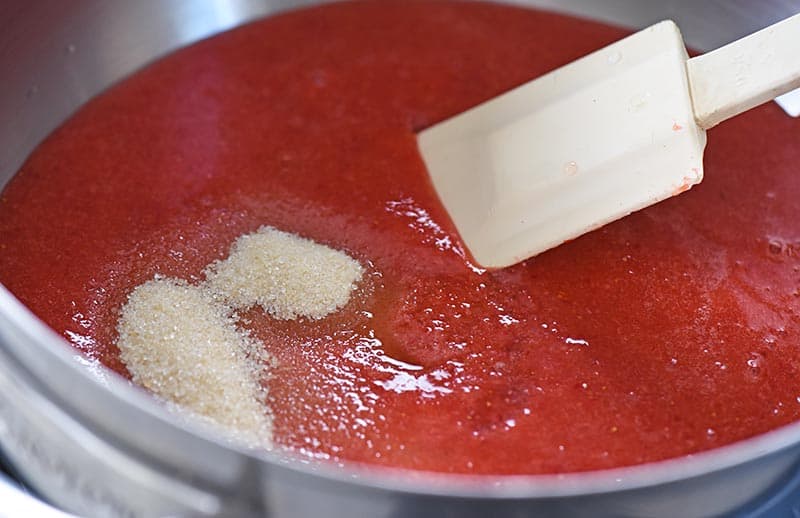
    1. Once you’ve gotten as much milk out as possible, add the sea salt on top of the butter.
    2. Work the salt into the butter with your hands or with butter paddles.
    how to make salted butter by adding sea salt on pile of homemade butter, then mixing salt into butter with wooden butter paddle

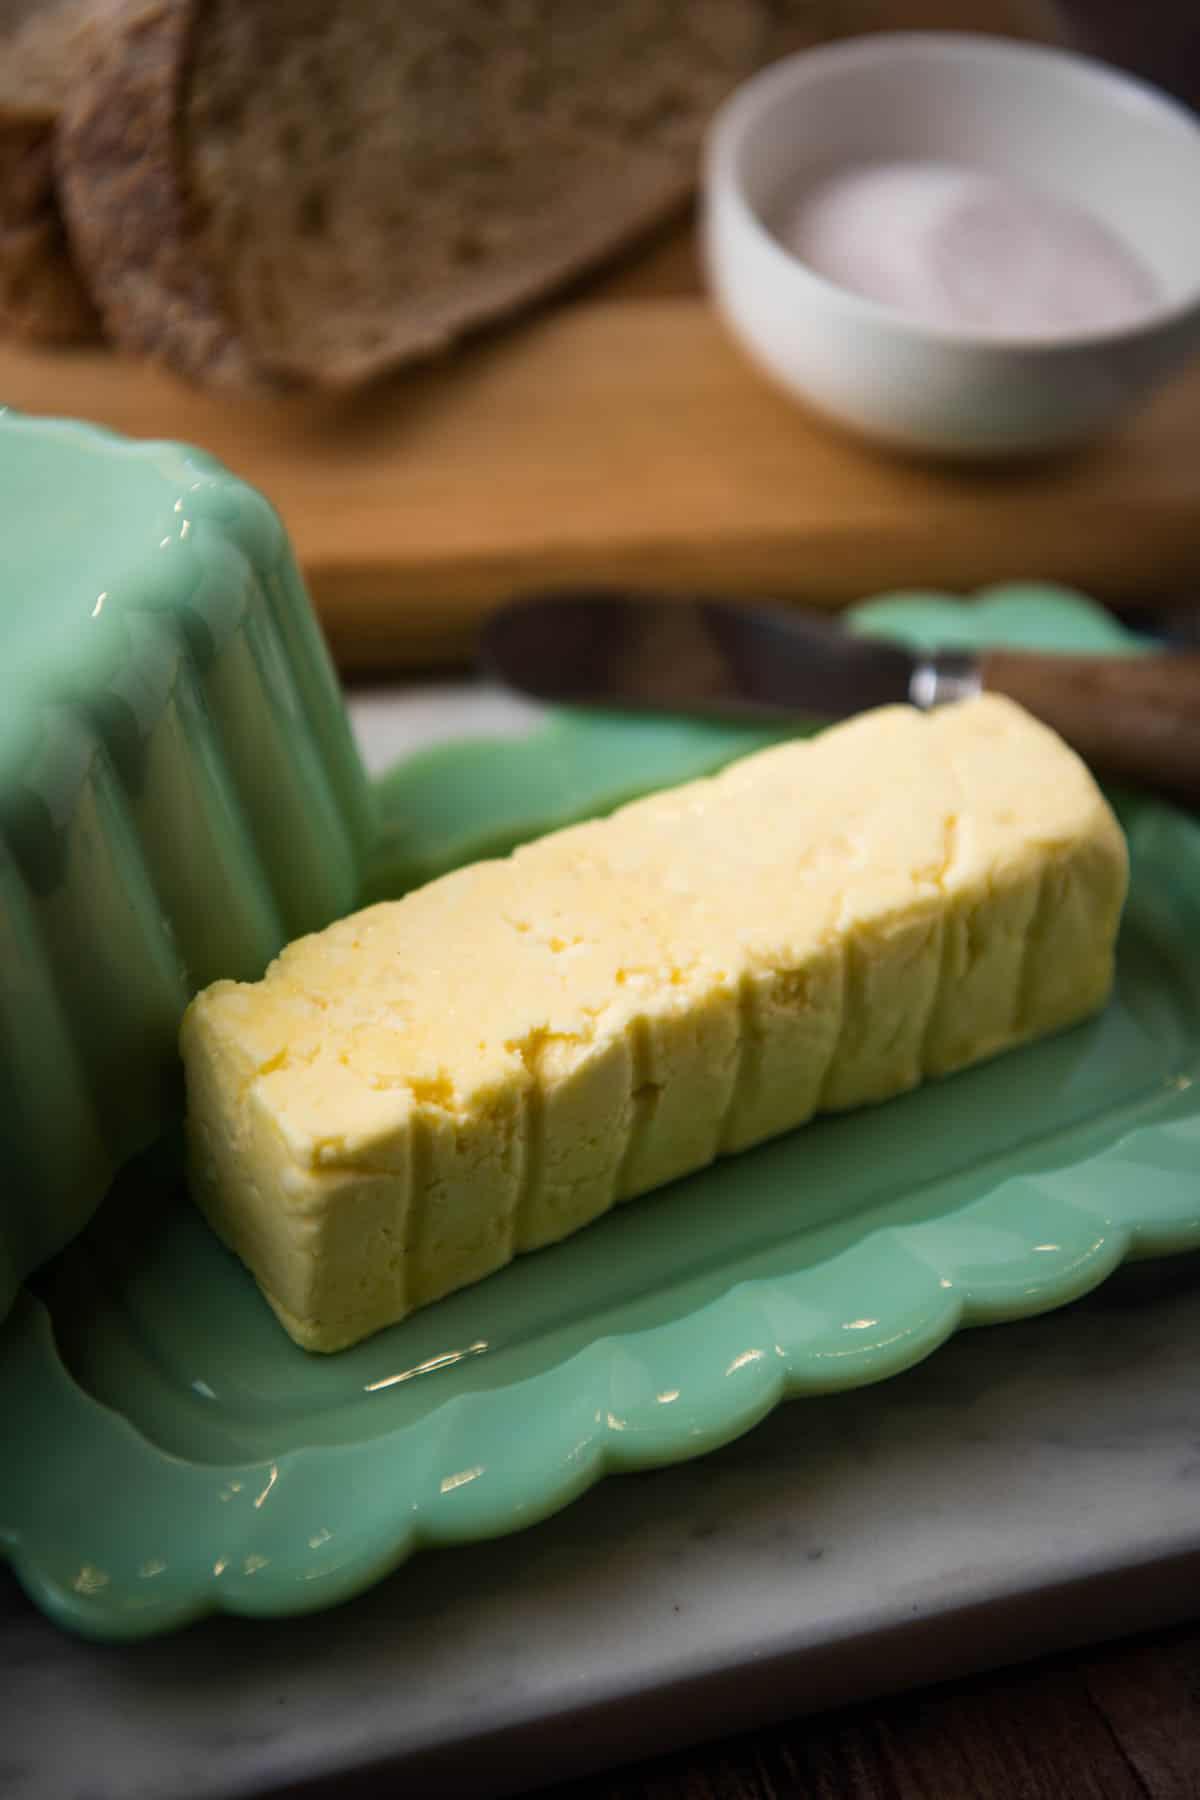
    How to Make Homemade Butter into Sticks

    You can just put your butter into a container, refrigerate it, and use it as is. Or you can form it into sticks or blocks, then refrigerate or freeze. We use butter stick molds for this.

    1. Press the butter into the butter molds.
    2. Then level the butter in the mold.
    3. Cover and freeze the butter sticks for 3-4 hours.
    4. Once the butter has sufficiently frozen, remove the sticks from the butter molds, and wrap each one individually in wax paper. Then store in a freezer bag or airtight container in the freezer ’til ready to use.
    steps for how to make homemade salted butter into sticks, including putting butter in green silicone butter stick mold, leveling, freezing, and wrapping in wax paper

    And that’s it! Now you have a batch of homemade butter to enjoy.

    homemade raw milk butter stick on jadeite green butter dish

    Can I Add Flavorings to Homemade Salted Butter?

    Yes, you can totally add flavorings, and gently stir or whip them in with a rubber spatula. You likely only need a dash of seasoning to mix up a cup of flavored butter.

    Here are a few ideas…

    Expert Tips and Recipe FAQ’s

    How should I store butter, and how long will it last?

    It’s better to keep raw milk butter in the fridge, and use it as needed. It should keep for 2-3 weeks in the fridge.

    If I keep it in the fridge, won’t it be extremely hard to spread?

    Yes, it will harden in the fridge. However, you can get it out a little ahead of time if you know you need butter with breakfast or dinner. And if you’re buttering hot toast or homemade biscuits or Grandma’s homemade yeast rolls, I’ve found lightly scraping the top of the butter with a butter knife allows me to get a good amount of butter that melts right into my toast or bread.

    Can homemade butter be frozen?

    You betcha it can! In fact, it’ll keep for at least 6 months to a year, possibly longer. Just make sure it’s wrapped tightly in wax paper or parchment paper and store in either an airtight container or a sealed freezer bag.

    What should I do with the leftover buttermilk?

    Well, you can drink it. Or you can use it to make a batch of raw milk ice cream. Or save it for later use; just be sure to store it in an airtight container or jar in the fridge.

    Can homemade butter be used for baking?

    You better believe it. In fact, one of my favorite things to make with it is a big batch of chocolate chip cookies. It also makes a mean Texas sheet cake.

    homemade salted butter from raw milk in blue ramekin on white marble countertop

    More Raw Milk Recipes

    If you love making butter from cream, you’ll love these recipes too…

    If you try this recipe, why not leave a star rating in the recipe card right below and/or a review in the comment section further down the page? I always appreciate your feedback. You can also follow me on Pinterest, Facebook, Instagram, and YouTube. And subscribe to my email list too!

    How to Make Salted Butter

    Learn how to make salted butter from raw milk or store bought cream. Easy recipe using a mixer, blender, or churn. Only 2 ingredients needed!

    • Blender
    • Stand Mixer
    • Butter Churn
    • Large Mixing Bowl
    • Butter Stick Molds
    • Wax Paper
    • 1/2 gallon heavy cream
    • 1 teaspoon sea salt
    1. Once you have a definitive cream line*, use a ladle or large gravy spoon to skim the cream off the milk. As you skim, add the cream to a large 1/2 gallon jar or mixing bowl.

    2. Add the cream to your preferred small appliance, whether it's a stand mixer, blender, or butter churn. If you're using a mixer, you'll want to cover the mixer with a flour sack towel, or use a shield to keep it from splattering all over the place.

    3. Allow it to run 'til the butter separates from the milk (less than 5 minutes for a blender, about 20 minutes for a mixer, and maybe 30 minutes for a butter churn); then drain the milk off the butter curds. You'll know when it's ready because you'll have chunks of butter separate from the liquid.

    4. If the butter is too soft, add ice water to the churn and let the butter firm up before removing the liquid.

    5. Remove the butter from the jar and squeeze out as much milk as possible.

    6. Place the butter on a cutting board, and roll it with a rolling pin to squeeze out more milk.

    7. Alternate cooling the butter down in a bowl of ice water to keep it firm.

    8. Keep squeezing more milk out, as much as possible, until the liquid you squeeze out is as clear as possible. You can use paddles, if so inclined, but we prefer to use our hands.

    9. Keep cooling in ice water in between squeezing more milk out.

    10. Once you've gotten as much milk out as possible, add the sea salt on top of the butter.

    11. Work the salt into the butter with your hands or with butter paddles.

    12. You can just put your butter into a container, refrigerate it, and use it as is. Or you can form it into sticks or blocks, then refrigerate or freeze. We use butter stick molds for this.

    13. Press the butter into the butter molds.

    14. Then level the butter in the mold.

    15. Cover and freeze the butter sticks for 3-4 hours.

    16. Once the butter has sufficiently frozen, remove the sticks from the butter molds, and wrap each one individually in wax paper. Then store in a freezer bag or airtight container in the freezer 'til ready to use.

    17. And that's it! Now you have a batch of homemade butter to enjoy.

    *Before getting started, make sure raw milk has been chilled in the refrigerator ’til the cream has separated, about 6-12 hours.

    How should I store butter, and how long will it last?

    It’s better to keep raw milk butter in the fridge, and use it as needed. It should keep for 2-3 weeks in the fridge.

    What should I do with the leftover buttermilk?

    Well, you can drink it. Or you can use it to make a batch of raw milk ice cream. Or save it for later use; just be sure to store it in an airtight container or jar in the fridge.

    Condiments
    American
    homemade butter, homemade salted butter, how to make butter from cream, how to make butter from heavy cream, how to make butter from raw milk, how to make salted butter, how to make salted butter from heavy cream
  • Easy Instant Pot Applesauce in 30 Minutes or Less

    Easy Instant Pot Applesauce in 30 Minutes or Less

    Now it’s easier than ever to make homemade applesauce with an electric pressure cooker. This Instant Pot applesauce (with skins) has no added sugar, and it’s ready to eat in 15 minutes.

    The fact that it’s pressure cooked takes the work out of making applesauce because you don’t have to stand in front of a hot stove. Instead, just load everything up in the Instant Pot, push a couple buttons, and let it do the work for you.

    homemade Instant Pot applesauce in a Ball canning jar

    My boys love both applesauce and Instapot apple butter, and we eat quite a bit of it throughout the year. I especially like to keep it on hand for times when we’re sick; in a way, it’s a sort of comfort food too.

    It’s quite fulfilling to fill your pantry up with homemade canned foods that your family will actually eat. And when it’s easy to do, it’s a win win.

    [mv_video doNotAutoplayNorOptimizePlacement=”false” doNotOptimizePlacement=”false” jsonLd=”true” key=”feqiv3m4fb2wykmfijd8″ ratio=”16:9″ thumbnail=”https://mediavine-res.cloudinary.com/v1630362383/wfrf9ob81l8m4loh8gmj.jpg” title=”Easy Instant Pot Applesauce in 30 Minutes or Less” volume=”70″]

    Why Make This Recipe?

    I think you’ll love this no-peel applesauce because it’s…

    • Easy to make – Pressure cooker applesauce is made with 3 ingredients, and you just put everything in the Instant Pot and let it cook. That means no need to stand in front of the stove and stir; you can walk away and let the pressure cooker do the work.
    • No peeling required – While you do need to core and slice the apples up, there’s no need to peel off the skins, unless you just want to.
    • Budget-friendly – Let’s face it, good applesauce can be more expensive at the store. And it just doesn’t taste as good as homemade. You can make 5 to 6 pints of applesauce for less than $10, depending on the cost of your apples.
    ingredients for pressure cooker applesauce, including apples, lemon juice, and water

    Ingredient Notes

    The ingredients you need are simple, and you may already have them on hand.

    A bit of advice… I’m very partial to canning applesauce in the fall because it’s usually pretty easy to find seconds at a local orchard or farmer’s market. Buying seconds means you can buy a HUGE box of less-than-perfect apples for a lot less than normal cost, which is going to save you a ton of money.

    • Apples – When it comes to picking the type of apples you should use, I recommend apples that are both sweet and tart; I don’t add any sugar, so I want the unsweetened applesauce to taste really good. Some of the best apples for making applesauce include Jonathan, Jonagold, Braeburn, McIntosh, Winesap, Rome, Golden Delicious, Cortland, Fuji, Gala, and Ambrosia.
    • Lemon juice – I like to use a fresh lemon juice, either straight from a lemon or my favorite shortcut, Minute Maid lemon juice you can find in the freezer section of some grocery stores; I’ve been able to find it at my local Walmart. There are multiple reasons for adding lemon juice to applesauce, but it’s usually to help preserve or protect the color of your apples over time (making your applesauce stay pretty), and/or to make the applesauce more acidic for home canning. Wind fallen apples (including seconds) can have a lower acidity and a higher mold/bacteria count than umblemished apples.

    If you are one who loves to add the flavor of cinnamon to your sauce, you may also love my recipe for cinnamon applesauce.

    How to Make Instant Pot Applesauce

    You can make applesauce from the leftover apple mush you have left behind when you make fresh apple juice. But if you’re not making apple juice, here’s how to make a fresh batch of sauce in your pressure cooker.

    Keep in mind, you can make this recipe in any brand of electric pressure cooker you have, including the Instant Pot, Ninja Foodi, or Power Pressure Cooker XL.

    1. Wash, core, and slice the apples; I use my Johnny apple peeler to core and slice all at once. Cut out any bad spots, as well.
    2. Put the sliced apples in your Instant Pot.
    3. Sprinkle lemon juice over the apples.
    4. Then add water to the apples, as well. If you want to mix everything together, you can; but there’s no need to until after it all cooks.
    how to make applesauce in the Instant Pot, including slicing apples with Johnny apple peeler, putting apples in Instant Pot, then adding lemon juice and water
    1. Put the lid in place on the Instant Pot. Press Manual or Pressure Cook for 10 minutes. When it’s finished cooking, allow the pressure cooker to do a natural release.
    1. Purée the mixture with an immersion blender, standing blender, or food mill; or if you want a chunky applesauce, you can mash the apples with a potato masher. It’s up to you how you prefer the texture and consistency.
    how to make pressure cooker applesauce in Ninja Foodi, then mashing cooked apples with immersion blender

    Freezing Instructions:

    My mom used to freeze a LOT of the applesauce she made when we were kids growing up. She’d keep freezer safe plastic containers just for storing things like her homemade applesauce.

    1. When your applesauce has cooked, allow it to cool to room temperature.
    2. Then just ladle or pour it into freezer safe containers that seal; leave 1/2 inch headroom at the top, to allow for expansion as it freezes.
    3. Label the containers, and place them in the freezer.

    Frozen applesauce should keep for about a year.

    Canning Instructions:

    I prefer water bath canning applesauce.

    1. While your applesauce is cooking, wash pint jars in hot soapy water, rinse, and keep warm. We like to place ours on a baking sheet in a lower temp oven to stay hot.
    2. Once you’ve mashed up your sauce, promptly ladle or pour it into the hot jars you prepared ahead of time. Be sure to leave about a 1/2-inch gap at the top of each jar.
    pouring homemade applesauce into canning jars with yellow canning funnel
    1. Wipe the rim of each jar with a wet towel or rag, place the lid on, and tighten the band.
    2. Then place the hot jars down in a boiling hot water bath canner with 1-2 inches of water over the jars, and process those jars in the hot water bath for about 20 minutes.
    canning applesauce in water bath canner

    Home canned applesauce should last at least 1 year. If you choose to can applesauce, Ball has wonderful Canning Guides to guide you through the process. You can also consult the Ball Blue Book Guide to Preserving.

    Expert Tips and Recipe FAQ’s

    Can you overcook applesauce?

    Yes, actually, you can; and overcooking it will lose a lot of the flavor. That’s why making it in the Instant Pot is better because it cooks for a set amount of time with no guesswork, and pressure cooking is a wonderful way to preserve the flavors of whatever food you’re cooking.

    How should I store it?

    If you’re not freezing or canning your applesauce, it should be kept in the refrigerator. It’ll keep in the fridge for about 5 to 7 days.

    What are some ways I can use applesauce?

    We love to eat applesauce on buttered toast. It’s also delicious on pancakes, especially apple cinnamon pancakes. You can enjoy it with oatmeal, cottage cheese, and pork chops. And you can use it when you’re baking… For example, you can use it to make apple bundt cake; or you can sometimes use it as a substitute for egg, butter, oil, or sugar, depending on the recipe. Momables shares an ingredient substitution list for baking that explains how to sub applesauce in; and Craftsy has a really good explanation, as well, as to how and when to substitute applesauce for certain ingredients when you’re baking.

    white bowl of pressure cooker applesauce

    More Recipes for Fresh Apples:

    You can also learn how to use your Instant Pot with our Instant Pot Quick Start Guide, filled with practical tips, Instant Pot recipes, accessory ideas, and more!

    You’ll find a longer recipe tutorial in the Instant Pot applesauce recipe card below.

    If you try this recipe, why not leave a star rating in the recipe card right below and/or a review in the comment section further down the page? I always appreciate your feedback. You can also follow me on Pinterest, Facebook, Instagram, and YouTube. And subscribe to my email list too!

    Instant Pot Applesauce

    How to make the best homemade Instant Pot applesauce with skins and no added sugar. Easy pressure cooker recipe, ready to eat in 30 minutes or less.

    • Instant Pot
    • Ninja Foodi
    • Johnny apple peeler
    • Immersion blender
    • Pint jars
    • Hot Water Bath Canner
    • Canning Funnel
    • Jar Lifter
    • 6 pounds apples (unpeeled)
    • 2 teaspoons lemon juice
    • 1 cup water
    1. Wash, core, and slice the apples; I use my Johnny apple peeler to core and slice all at once. Cut out any bad spots, as well.

    2. Put the sliced apples in your Instant Pot.
    3. Sprinkle lemon juice over the apples.

    4. Then add water to the apples, as well. If you want to mix everything together, you can; but there’s no need to until after it all cooks.

    5. Put the lid in place on the Instant Pot. Press Manual or Pressure Cook for 10 minutes. When it’s finished cooking, allow the pressure cooker to do a natural release.

    6. Purée the mixture with an immersion blender, standing blender, or food mill; or if you want a chunky applesauce, you can mash the apples with a potato masher. It’s up to you how you prefer the texture and consistency.

    7. If you're not freezing or canning your applesauce, it should be kept in the refrigerator. It'll keep in the fridge for about 5 to 7 days.

    Freezing Instructions:

    1. When your applesauce has cooked, allow it to cool to room temperature.

    2. Then just ladle or pour it into freezer safe containers that seal; leave 1/2 inch headroom at the top, to allow for expansion as it freezes.

    3. Label the containers, and place them in the freezer.

    Canning Instructions:

    1. While your applesauce is cooking, wash pint jars in hot soapy water, rinse, and keep warm. We like to place ours on a baking sheet in a lower temp oven to stay hot.

    2. Once you've mashed up your sauce, promptly ladle or pour it into the hot jars. Be sure to leave about a 1/2-inch gap at the top of each jar.

    3. Wipe the rim of each jar with a wet towel or rag, place the lid on, and tighten the band.

    4. Then place the hot jars in a boiling hot water bath canner with 1-2 inches of water over the jars, and process those jars in the hot water bath for about 20 minutes.

    5. Allow your jars to rest for at least 24 hours, but be sure to check every lid to make sure it's sealed shortly after canning.

    6. Before moving to the pantry, write what it is and the year on the lid, so you know when you made it.

    *When it comes to picking the type of apples you should use, I recommend apples that are both sweet and tart; I don’t add any sugar, so I want the unsweetened applesauce to taste really good. Some of the best apples for making applesauce include Jonathan, Jonagold, Braeburn, McIntosh, Winesap, Rome, Golden Delicious, Cortland, Fuji, Gala, and Ambrosia.

    Canning & Freezing, Sauces & Dressings
    American
    applesauce in the instant pot, canning applesauce, how to make applesauce, Instant Pot applesauce, instant pot applesauce no sugar, instant pot applesauce with skins, no peel applesauce, pressure cooker applesauce
  • Homemade Apple Jelly Recipe without Pectin

    Homemade Apple Jelly Recipe without Pectin

    It’s really easy to make a delicious apple jelly recipe everyone will love with just 3 simple ingredients. I especially love that this easy home canning recipe needs no added pectin!

    My boys love a good fruit spread in the mornings with breakfast, whether we’re eating toast or biscuits. We’ve made pressure cooker apple butter for a long time now, and this apple jelly recipe without pectin has become another family-favorite breakfast addition.

    small wooden spoon in half pint jar of apple jelly recipe with Gala apples

    This recipe for apple jelly reminds me of my sister, because her version was the first I’d ever tasted in my then young life. I’m pretty sure she made her apple jelly from juice too; I just remember it tasting so delicious.

    Why You’ll Love Making This Apple Jelly Recipe without Pectin

    I think you’ll love this homemade apple jelly because it’s…

    • Easy to make – With only 3 ingredients, it only requires a little bit of cook time. It’s just a matter of mixing and stirring while it heats.
    • No need to peel or core any apples – Instead of apples, you use apple juice for this recipe. You can either make homemade apple juice; or you can use store-bought juice, though you may need to add a little bit of pectin to store-bought juice.
    • Budget-friendly – Let’s face it, good jelly is expensive at the store. You can make 4 to 6 jelly jars (or half-pints) of this homemade jelly for less than $10.

    What’s the Difference Between Apple Butter and Apple Jelly?

    Basically, jelly is clear and made from juice.

    Apple butter is more like jam and made with actual apples vs. juice. It’s not clear and also has various spices like cloves and nutmeg for added flavors.

    Ingredients and Substitutions Notes

    3 ingredients for apple jelly recipe without pectin, including apple juice, lemon juice, and sugar on white marble countertop

    The ingredients you need are simple, and you may already have them in your pantry. If you choose to juice your own apples, that may require a quick trip to the orchard or farmer’s market.

    • Apple juice Again, you can make this homemade with fresh apples, or you can use store bought juice. If making apple juice, I recommend a sweeter apple like Gala, Honeycrisp, Fuji, Yellow Delicious, Rome, Jonagold, or Pink Lady. You’ll need about 5 pounds of apples to get enough juice to make jelly.
    • Lemon juice – I like to use a fresh lemon juice, either straight from a lemon or my favorite shortcut… Minute Maid lemon juice you can find in the freezer section of some grocery stores; I’ve been able to find it at my local Walmart.

    How to Make Apple Jelly

    The process of making apple jelly is actually really easy, especially if your juice is already made and ready to go.

    1. Mix together the apple juice, lemon juice, and sugar in a stock pot. Then bring the mixture to a boil, constantly stirring. Continue to cook the mixture, constantly stirring, until the mixture reaches a temperature of 220° with a candy thermometer.
    cooking apple jelly in a stock pot with a whisk
    1. Remove from the heat, and promptly ladle or pour into clean and sanitized/sterilized jelly jars for canning or freezing. Be sure to leave about a 1/2-inch gap at the top of each jar.
    pouring cooked apple jelly from juice into half pint jelly jars for canning, using yellow canning funnel
    1. Wipe the rim of each jar with a wet towel or rag, place the lid on, and tighten the band. At this point, you can either can the apple jelly or freeze it. I prefer water bath canning apple jelly, where I place the hot jars down in a boiling hot water bath canner with 1-2 inches of water over the jars. Then we process those jars in the hot water bath for about 10 to 15 minutes.
    water bath canning apple jelly in black water bath canner

    If you choose to can it, Ball has wonderful Canning Guides to guide you through the process. You can also consult the Ball Blue Book Guide to Preserving.

    Expert Tips and Recipe FAQ’s

    Careful… If the jelly hasn’t begun to set or thicken once it’s reached 220° F, you may need to cook it just a little bit longer. Whatever you do, do not cook it too long, or it will end up like our first batch… A sticky, gooey apple taffy mess that eventually turns into a slab of apple rock. Believe me, you don’t want that.

    How long does apple jelly take to set?

    Time to set up really depends on a number of factors, including the type of stove you’re using to cook the jelly. It will likely take a good 30 to 45 minutes, maybe longer for your jelly to set. And even as you remove it from the stove, it won’t be completely set; in fact, it will be more like liquid. As it sits in the jars and begins to cool, the jelly will firm up and set even more. That’s why it’s important to put it in jars right away.

    How long will jelly keep in the pantry?

    Most sources say that pantry stored (and canned) jam and jelly can last 1 to 2 years. Freezer jam is a bit less with a freezer life of about 6 months. Shelf Life Advice has a helpful chart with the life span of a jar of jelly.

    Why may store-bought juice need added pectin?

    Pectin occurs naturally in fruits like berries and apples. When that pectin is cooked with sugar, it can thicken, forming the gel that makes jam and jelly. Apples have a very good amount of natural pectin, especially when you cook the peelings, cores, and all to make your juice. Store bought juice may not have all the natural pectin you’ll get from a good homemade apple juice made by cooking the whole apple.

    What to Eat with Apple Jelly

    Apple jelly is so delicious served on homemade biscuits and crescent dinner rolls and toast with butter. It’s also a welcome addition to a slice of buttermilk cornbread.

    homemade apple jelly on toast on white flowered plate

    More Homemade Jams and Jellies and Sauces You’ll Love:

    If you try this recipe, why not leave a star rating in the recipe card right below and/or a review in the comment section further down the page? I always appreciate your feedback. You can also follow me on Pinterest, Facebook, Instagram, and YouTube. And subscribe to my email list too!

    Homemade Apple Jelly Recipe without Pectin

    How to make an apple jelly recipe everyone will love with 3 simple ingredients. Easy home canning recipe with no added pectin!

    • Stock Pot
    • Candy Thermometer
    • Canning Funnel
    • Half-Pint Jelly Jars
    • Hot Water Bath Canner
    • Jar Lifter
    • Dissolvable Canning Jar Labels
    • 4 cups apple juice*
    • 2 tablespoons lemon juice
    • 3 cups sugar
    1. Mix together the apple juice, lemon juice, and sugar in a stock pot.
    2. Bring the mixture to a boil, constantly stirring.
    3. Continue to cook the mixture, constantly stirring, until the mixture reaches a temperature of 220° with a candy thermometer. If the jelly hasn't begun to gel once it's reached 220°, you may need to cook it just a little bit longer.*

    4. Remove the jelly from the heat, and promptly ladle or pour into clean and sanitized/sterilized jars for canning or freezing. Be sure to leave about a 1/2-inch gap at the top of each jar.

    5. Wipe the rim of each jar with a wet towel or rag, place the lid on, and tighten the band.
    6. At this point, you can either can the apple jelly or freeze it. I prefer water bath canning apple jelly, where I place the hot jars down in a boiling hot water bath canner with 1-2 inches of water over the jars. Then we process those jars in the hot water bath for about 10 to 15 minutes.

    7. Once canned, allow your jelly to sit undisturbed for 24 hours before labeling and storing in your pantry.

    *You can buy store bought juice to make apple jelly, but you may need to add a little pectin to it if it’s not a good quality juice. Some store bought juice may not have all the natural apple pectin you’ll get from a good homemade apple juice made by cooking the whole apple.

    *It will likely take a good 30 to 45 minutes, maybe longer for your jelly to thicken or set. And even as you remove it from the stove, it won’t be completely set. Whatever you do, do not cook it too long, or it will end up like our first batch… A sticky, gooey apple taffy mess that eventually turns into a slab of apple rock.

    How long will jelly keep in the pantry?

    Most sources say that pantry stored (and canned) jam and jelly can last 1 to 2 years. Freezer jam is a bit less with a freezer life of about 6 months.

    Canning & Freezing, jams and jellies
    American
    apple jelly, apple jelly from juice, apple jelly no pectin, apple jelly recipe, apple jelly recipe without pectin, apple jelly without pectin, canning apple jelly, homemade apple jelly, how to make apple jelly, recipe for apple jelly
  • Easy Stovetop Apple Butter Recipe the Old Fashioned Way

    Easy Stovetop Apple Butter Recipe the Old Fashioned Way

    This is absolutely my favorite stovetop apple butter recipe made the old fashioned way with fresh, crisp apples and delicious cinnamon spice. It’s my go to recipe every apple season, and while I love to can it, I include both freezing and canning instructions for whichever works best for you.

    Just a bit ago, I gave you my favorite CrockPot apple butter recipe. I’ve had a lot of readers ask for a stovetop version of both that and my quick Instant Pot apple butter recipe. So, drumroll… I leave here my best apple butter recipe, stovetop edition.

    blue Dutch oven with old-fashioned stovetop apple butter recipe and wooden spoon

    That’s right; you don’t need any special appliances to make this more traditional apple butter recipe. All you need is your stove and a stock pot or Dutch oven.

    Now as I’ve mentioned before, I do highly recommend an apple peeler for easy stovetop apple butter. It really does make the job of coring, peeling, and slicing apples so much quicker and easier.

    When I make homemade apple butter, I also like to add a secret ingredient that really adds to the flavor and gives it an even cozier feel than it already has.

    What’s the Difference Between Apple Butter and Applesauce?

    This old fashioned apple butter recipe is a mixture of apples and spices, with a texture that’s very similar to canned applesauce and Instant Pot cinnamon applesauce; but the taste is a little sweeter, a little darker, and filled with cinnamon spice flavors.

    Why You’ll Love This Recipe

    You are going to love this easy stovetop apple butter because it…

    • Is super easy to make – Coring, peeling (if you choose to peel the apples), and slicing the apples is a job made much easier and quicker with a Johnny apple peeler. Then it’s just a matter of mixing everything together in a Dutch oven and letting it simmer, ’til it’s ready to mash up with a blender. Easy peasy.
    • Doesn’t require a ton of stirring – Once you get it cooking, you can just stir occasionally as it simmers. There’s no need to stand over the stove with this recipe.
    • Smells like heaven – I always know it’s fall when the aroma of apple butter lingers in the air. It’s such a cozy, comforting scent… Why have they not made an apple butter candle yet?
    • Tastes downright heavenly – I like to use spices like nutmeg, cloves, allspice, and cinnamon to really give it a delicious flavor. I also add my favorite secret ingredient (keep reading to find out what it is).
    • Is budget-friendly – Depending where you buy your apples and your spices, you can make a batch of 5-6 half-pints or 2-3 pints for less than $10. A bit of advice… I’m very partial to canning apple butter in the fall because it’s usually pretty easy to find apple seconds at a local orchard or farmer’s market. Buying seconds means you can buy a HUGE box of less-than-perfect apples for a lot less than normal cost, which is going to save you a ton of money. I also like to buy spices in bulk at our local grocery discount store and sometimes thru Amazon; I especially love Badia spices and seasonings. When you compare the cost of making homemade to store bought apple butter, you’re saving money. Plus homemade is just better all ’round. You can even use this DIY apple pie spice instead!
    ingredients for stovetop apple butter recipe on white marble countertop

    Ingredients and Substitutions Notes:

    • Fresh apples – When it comes to picking the kind of apples to use, I recommend apples that are both sweet and tart to really give it a flavor kick. Some of the best apples for making apple butter include Jonathan, Jonagold, Braeburn, McIntosh Red, Winesap, Cortland, Fuji, and Gala. Jonathan and Jonagold are two of my favorites; I’ve also combined Fuji with Gala to make a really delicious apple butter.
    • Molasses I prefer to use just regular molasses over blackstrap molasses.
    • Lemon juice – I prefer to use a fresh lemon juice, either straight from a lemon or my favorite shortcut, Minute Maid lemon juice you can find in the freezer section of some grocery stores; I’ve been able to find it at my local Walmart. There are multiple reasons for adding lemon juice to apple butter, but it’s usually to help preserve or protect the color of your apples over time (making your apple butter stay pretty), and/or to make the apple butter more acidic for home canning. Wind fallen apples (including seconds) can have a lower acidity and a higher mold/bacteria count than umblemished apples.
    • Vanilla extract This is my secret ingredient, and you’ll understand why I add it when you take your first bite. It’s so good!

    How to Make This Stovetop Apple Butter Recipe

    Before starting anything, it’s important to wash your apples. I always soak mine in a vinegar/water bath for at least 10 minutes, then rinse. You’ll need about 4 pounds of apples.

    It’s also important to prep your jars for canning or freezing. That means washing, sterilizing, etc.

    Follow These Steps to Make This Apple Butter Recipe, Stovetop Edition

    1. Core, peel, and slice the apples; again, an apple peeler for apple butter makes this step so easy. Cut out any worm holes or bad spots, as well. Note: While I do leave the peeling on when making applesauce, and you can do that for apple butter too, I usually choose not to for this recipe.
    Johnny apple peeler for peeling, coring, and slicing apples on white countertop
    1. Put the sliced apples in your Dutch oven pan.
    peeled and sliced apples for apple butter in blue Dutch oven
    1. Add molasses, sugar, brown sugar, spices, lemon juice, and vanilla extract to the apples.
    adding molasses, cinnamon, sugar, brown sugar, and spices to sliced apples in blue Dutch oven
    1. Stir everything together well.
    stirring apple butter ingredients in blue Dutch oven with wooden spoon
    1. Bring the mixture to a boil over medium heat; then reduce the heat to low and simmer, with the lid on the Dutch oven, for about an hour, or ’til the apples are softened and tender. How long it needs to cook will depend on the type and texture of your apples. If using a harder, crisper apple, it may take longer.
    cooking traditional apple butter recipe in blue Dutch oven with wooden spoon
    1. Remove the lid, turn off the heat, and remove your Dutch oven from the stove. Allow the apple butter to cool for 5 to 10 minutes.
    2. Then using an immersion blender, blend the apples into smooth apple butter, or ’til you reach the consistency/texture you want. If you don’t have an immersion blender, you can use a food processor, or for a chunkier texture, a potato masher.
    blending stovetop apple butter in blue Dutch oven with immersion blender

    Freezing Instructions:

    I stored apple butter in the freezer quite a bit before I learned how to can it, so it works just fine without any worries. And frozen apple butter should keep for at least a year.

    1. When your apple butter has cooked, allow it to cool to room temperature.
    2. Then just ladle or pour it into freezer safe containers that seal; leave 1/2 inch headroom at the top, to allow for expansion as it freezes.
    3. Label the containers, and place them in the freezer.

    Canning Instructions:

    I prefer water bath canning apple butter. Canned apple butter should keep for 1-2 years in the pantry.

    1. While your apple butter is cooking, wash half-pint jars (jelly jars) or pint jars in hot soapy water, rinse, and keep warm. We like to place ours on a baking sheet in a lower temp oven to stay hot.
    2. Once you’ve mashed up the apples, promptly ladle or pour the resulting apple butter mixture into the hot jars you prepared ahead of time. This is where a funnel pitcher comes in super handy. Be sure to leave about a 1/2-inch gap at the top of each jar.
    pouring easy stovetop apple butter from funnel pitcher into jelly jar using red jar funnel and funnel pitcher
    1. Wipe the rim of each jar with a wet towel or rag, place the lid on, and tighten the band.
    2. Then place the hot jars down in a boiling hot water bath canner with 1-2 inches of water over the jars, and process those jars in the hot water bath for about 20 minutes.
    hot water bath canning jars of apple butter in water bath canner
    1. Allow your jars to rest for at least 24 hours, but be sure to check every lid to make sure it’s sealed shortly after canning.
    2. Before moving to the pantry, write what it is and the year on the lid, so you know when you made it. There are plenty of options for pretty jar labels for apple butter, and you can even turn your home canned apple butter into holiday gifts or hostess gifts.

    If you choose to can it, Ball has wonderful Canning Guides to guide you through the process. You can also consult the Ball Blue Book Guide to Preserving.

    Expert Tips and Recipe FAQ’s

    How do you make homemade apple butter thicker?

    After blending the apples into apple butter, you can place the apple butter back on low heat on the stove, and cook uncovered for 30 minutes to 1 hour if you want it to thicken up more. While I have never had to do this, it’s a good way to make homemade apple butter thicker.

    How should I store it?

    If you’re not freezing or canning your apple butter, it should be kept in the refrigerator. It should keep in the fridge for about 2-3 months.

    What are some ways I can use apple butter?

    I really enjoy apple butter on my toast in the mornings with breakfast. It’s also really delicious on Grandma’s biscuits and Grandma’s dinner rolls. And I especially love making my soda scones recipe and adding a dollop of apple butter on my buttered scone. So good! My friend Heather actually adds apple butter to the meatloaf in her meatloaf sandwich recipe, and I want to try this; it sounds so delicious.

    spoonful of easy old fashioned stovetop apple butter over jelly jar with drips of apple butter on rim

    If you try this recipe, why not leave a star rating in the recipe card right below and/or a review in the comment section further down the page? I always appreciate your feedback. You can also follow me on Pinterest, Facebook, Instagram, and YouTube. And subscribe to my email list too!

    Stovetop Apple Butter Recipe

    How to make the best stovetop apple butter recipe the old fashioned way with crisp apples and delicious spices. Easy freezing and canning instructions included.

    • Johnny apple peeler
    • Dutch oven
    • Immersion blender
    • Funnel pitcher
    • Canning Funnel
    • Pint jars
    • Jar Lifter
    • Hot Water Bath Canner
    • 4 pounds apples
    • 1/2 cup water
    • 1/4 cup molasses
    • 1/2 cup cane sugar
    • 1/2 cup light brown sugar
    • 1/2 teaspoon ground nutmeg
    • 1/2 teaspoon ground cloves
    • 1/2 teaspoon ground allspice
    • 1/2 teaspoon ground cinnamon
    • 1 teaspoon lemon juice
    • 1 teaspoon vanilla extract
    1. Before starting anything, it’s important to wash your apples. I always soak mine in a vinegar/water bath for at least 10 minutes, then rinse. It’s also important to prep your jars for canning or freezing. So, that means washing, sterilizing, etc.
    2. Core, peel, and slice the apples; again, an apple peeler for apple butter makes this step so easy. Cut out any worm holes or bad spots, as well.

    3. Put the sliced apples in your Dutch oven pan.

    4. Add molasses, sugar, brown sugar, spices, lemon juice, and vanilla extract to the apples.
    5. Stir everything together well.
    6. Bring the mixture to a boil over medium heat; then reduce the heat to low and simmer, with the lid on the Dutch oven, for about an hour, or 'til the apples are softened and tender.

    7. Remove the lid, turn off the heat, and remove your Dutch oven from the stove. Allow the apple butter to cool for 5 to 10 minutes.
    8. Then using an immersion blender or standing blender, blend the apples into smooth apple butter, or 'til you reach the consistency/texture you want.

    Freezing Instructions:

    1. When your apple butter has cooked, allow it to cool to room temperature.

    2. Then just ladle or pour it into freezer safe containers that seal; leave 1/2 inch headroom at the top, to allow for expansion as it freezes.

    3. Label the containers, and place them in the freezer.

    Canning Instructions:

    1. While your apple butter is cooking, wash half-pint jars (jelly jars) or pint jars in hot soapy water, rinse, and keep warm. We like to place ours on a baking sheet in a lower temp oven to stay hot.

    2. Once you've mashed up the apples, promptly ladle or pour the resulting apple butter mixture into the hot jars you prepared ahead of time. This is where a funnel pitcher comes in super handy. Be sure to leave about a 1/2-inch gap at the top of each jar.

    3. Wipe the rim of each jar with a wet towel or rag, place the lid on, and tighten the band.

    4. Then place the hot jars down in a boiling hot water bath canner with 1-2 inches of water over the jars, and process those jars in the hot water bath for about 20 minutes.

    5. Allow your jars to rest for at least 24 hours, but be sure to check every lid to make sure it's sealed shortly after canning.

    6. Before moving to the pantry, write what it is and the year on the lid, so you know when you made it.

    *How long it needs to cook will depend on the type and texture of your apples. If using a harder, crisper apple, it may take longer.

    *A hand blender (or immersion blender) really allows you to get the texture or consistency that you want. It makes it easy to purée the apples when they’ve fully cooked, without having to take them out and put them in a food processor or blender. You can just blend them up right in your cooking pot. If you like your apple butter a bit chunky, a potato masher will work well too.

    How do you make homemade apple butter thicker?

    After blending the apples into apple butter, you can place the apple butter back on low heat on the stove, and cook uncovered for 30 minutes to 1 hour if you want it to thicken up more. While I have never had to do this, it’s a good way to make homemade apple butter thicker.

    How should I store it, and how long will it last?

    • Canned apple butter will last about 2 years on the shelf.
    • Frozen apple butter will last about 1 year in the freezer.
    • In the fridge, apple butter will last about 2-3 months.
    apple recipes, Canning & Freezing
    American
    apple butter recipe stovetop, canning apple butter, easy stovetop apple butter, homemade apple butter, how to make apple butter on the stove, how to make stovetop apple butter, old-fashioned apple butter recipe, stovetop apple butter, stovetop apple butter recipe, traditional apple butter recipe
  • Easy CrockPot Apple Butter Recipe

    Easy CrockPot Apple Butter Recipe

    How to make homemade CrockPot apple butter filled with cinnamon spice flavors! Easy slow cooker recipe perfect for canning or freezing.

    Every year in August and September, I love to make apple butter. So far I’ve written an Instant Pot apple butter recipe; and now I’m sharing how to make apple butter in a CrockPot.

    While I normally like to wait for Jonathan or JonaGold seconds in the fall, I used a mix of Gala and Fuji for this batch, since it’s all I could find. And I have to say, they made a really delicious homemade apple butter. I’d go so far as to say it’s been my best batch yet.

    tiny wooden spoon in jar of CrockPot apple butter with apple butter dripping down side of jar

    There’s not a whole lot of work to this recipe, besides peeling and slicing the apples. And even that’s made easy with the apple peeler/slicer/corer I prefer to use; it makes the job a whole lot quicker and easier.

    I love eating slow cooker apple butter on my toast in the mornings at breakfast; it’s perfectly delicious on Grandma’s homemade biscuits too.

    If you’re wondering whether or not I’ve made a stovetop version of apple butter, fret no more. You now have your choice of how to make it, including a delicious stovetop apple butter.

    WHERE CAN I FIND THE ACTUAL RECIPE CARD?

    If you’d rather skip all of my apple butter making tips, important cooking info for this recipe, and similar recipe ideas – and get straight to the CrockPot apple butter recipe – just scroll down to the bottom, where you’ll find a printable recipe card.

    spreading homemade apple butter on toast with butter knife, on gray plate

    WONDERING, “WHAT IS APPLE BUTTER?” HERE’S THE ANSWER!

    According to Wikipedia, “Apple butter is a highly concentrated form of apple sauce produced by long, slow cooking of apples with cider or water to a point where the sugar in the apples caramelizes, turning the apple butter a deep brown.”

    Apple butter is a mixture of apples and spices, very similar to applesauce and cinnamon applesauce, but a little sweeter, a little darker, and filled with cinnamon spice flavors.

    For this recipe, we use spices like nutmeg, cloves, allspice, and cinnamon. You could also use homemade apple pie spice. And we put everything in the slow cooker and slow cook it for 6 to 8 hours.

    slow cooker apple butter in jelly jar with small wooden spoon

    INGREDIENTS YOU’LL NEED:

    Remember, all of the ingredient amounts you’ll need are in the printable recipe card below.

    KITCHEN TOOLS AND EQUIPMENT YOU’LL NEED:

    Apple Peeler/Corer/Slicer – I’m telling you, this tool is so worth every penny we spent at the thrift store, but I’d order one brand new too. My advice is to go with the one that clamps to your tabletop versus the apple peeler with a suction cup.

    Paring Knife and Cutting Board – for trimming off any bad spots or slicing the apples.

    Slow Cooker – Mine is a 7-quart Crock-Pot slow cooker.

    Immersion Blender or Potato Masher – This will allow you to get the texture or consistency that you want. An immersion blender makes it easy to purée the apples when they’ve fully cooked, without having to take them out and put them in a food processor or blender. You can just blend them up right in the CrockPot.

    Jar Funnel for canning apple butter – This helps to pour the apple butter into the jars without making a huge mess.

    Ladle or Cupcake Scoop or Funnel Pitcher – to pour the apple butter into the jars.

    Jars – You can use 4-ounce jelly jars or pint jars. I’ve found 8-ounce jelly jars are just the right size for us with the amount of jam and apple butter we eat in a 3-week period. If you already have jars, you may need new lids or a pack of lids and bands.

    Water Bath Canner or Pressure Canner and Cooker

    Sharpie and/or Jar Labels – so you can label your jars and know what it is and when you made this particular batch.

    WHERE CAN I FIND THE BEST APPLES FOR APPLE BUTTER?

    Fall is the best time to find apples, but you can use any apples you can get, whether you’re shopping at an orchard, a farmer’s market, or buying store bought apples.

    However, in the fall, you can usually buy seconds at just about any orchard, and sometimes at the farmer’s market. Meaning you can buy a HUGE box of apples for a lot less than normal cost, which is going to save you a ton of money.

    Now I will say… It takes a LOT of apples to get very little apple juiceapple jelly, apple butter, or homemade applesauce. But in my opinion, it’s totally worth it.

    toast on gray plate, spread with easy homemade apple butter, jar of apple butter and butter knife behind toast

    WHAT ARE THE BEST APPLES TO USE?

    There are certain types of apples that are sweeter and certain types of apples that have a more tart taste. Galas and Fujis are sweeter with a slightly tart taste.

    The best apples for apple butter may include:

    • Jonathan
    • Jonagold
    • Braeburn
    • Fuji
    • Gala
    • McIntosh Red
    • Cortland
    • Winesap

    HOW TO MAKE APPLE BUTTER IN A CROCKPOT

    You can make this recipe on the stovetop, and you can even make it in the Instant Pot. Of course, cooking times will differ.

    Before starting anything, it’s important to wash your apples. I usually like to soak mine in a vinegar/water bath for at least 10 minutes, then rinse.

    You’ll need 4 pounds of apples.

    It’s also important to prep your jars for canning or freezing.

    THEN JUST FOLLOW THESE STEPS…

    1. Core, peel, and slice the apples; again, an apple slicer, corer, parer for apple butter makes this step so easy. Cut out any bad spots, as well. Note: While I do leave the peeling on when making homemade applesauce, and you can do that for apple butter too, I chose not to for this recipe.
    2. Put the sliced apples in the slow cooker.
    3. Add molasses, sugar, brown sugar, spices, lemon juice, and vanilla extract to the apples.
    4. Stir everything together well.
    steps for how to make apple butter in a CrockPot, including coring, peeling, and slicing the apples; placing apples in slow cooker; adding ingredients with apples; and stirring everything together in CrockPot

    Place the lid on the slow cooker, and cook on low for about 6 to 8 hours, or ’til the apples are tender.

    HOW TO MAKE APPLE BUTTER SMOOTH

    Once your apples are tender and it’s fully cooked, it’s ready to blend.

    cooked and tender apples in black slow cooker, ready to blend into apple butter

    Uncover your slow cooker, and use an immersion blender to purée the apple butter ’til it’s smooth. If you feel it needs to thicken, you can cook it on high with the lid off for an additional hour.

    blending up slow cooker apple butter with immersion blender right in black CrockPot slow cooker

    TIPS FOR FREEZING OR CANNING APPLE BUTTER

    Using a jar funnel, pour the apple butter into each prepared jar… You can use a ladle, but I like to use my cupcake batter scoop or funnel pitcher to dip and pour. It makes the process so easy and less messy.

    pouring CrockPot apple butter into 8-ounce jelly jars for canning

    Wipe the top rim of each jar with a wet towel or rag, place the lid on, and tighten the band.

    Choose to can or freeze it…

    • You can freeze apple butter, but be sure to leave about a 1/2-inch gap at the top of each jar to allow for expansion in the freezer. Also, allow the jars to completely cool before placing in the freezer.
    • We prefer to use a hot water bath canning method (at least 15 minutes in a hot water bath) to can the apple butter. If you choose to can it, Ball has wonderful Canning Guides to guide you through the process. You can also consult the Ball Blue Book Guide to Preserving.
    canning homemade apple butter in hot water bath in large enamel water bath canner

    Before you put your apple butter in the freezer or the pantry, be sure to write what it is and the year on the lid, so you know when you made it. There are plenty of options for pretty jar labels for apple butter too.

    This recipe makes probably about 4-6 pints.

    spoonful of easy CrockPot apple butter over jar with drips down side

    HOW LONG WILL APPLE BUTTER LAST?

    Canned apple butter will last about 2 years; frozen apple butter will last about 1 year.

    MORE APPLE RECIPES YOU MAY ENJOY:

    GET THE PRINTABLE RECIPE

    If you love this delicious apple butter recipe as much as I do, please write a 5 star review, and help me share the recipe on Facebook and Pinterest!

    double image of CrockPot apple butter with text, including top image of apple butter in jar with small wooden spoon and bottom image of slow cooker apple butter spreading on toast with butter knife

    CRAVING MORE DELICIOUS RECIPES? Subscribe to my newsletter, and follow along on PinterestFacebookYouTube, and Instagram for all the latest updates!

    Easy CrockPot Apple Butter Recipe

    How to make homemade CrockPot apple butter filled with cinnamon spice flavors! Easy slow cooker recipe perfect for canning or freezing.

    • Johnny Apple Peeler Cast Iron Clamp Base, Apple Slicer, Corer, Parer & Pie maker, Red
    • Mueller Austria Ultra-Stick 500 Watt 9-Speed Immersion Multi-Purpose Hand Blender
    • 1.5″ Homemade with Love Canning Labels for Jars / 500 Labels Per Roll
    • Mason Jars 8 OZ with Regular Lids, 15 PACK
    • Granite Ware Enamel-on-Steel Canning Kit, 9-Piece
    • All American Canner Pressure Cooker, 30 qt, Silver
    • 4 pounds apples
    • 1/4 cup molasses
    • 1/2 cup pure cane sugar*
    • 1/2 cup light brown sugar
    • 1/2 teaspoon ground nutmeg
    • 1/2 teaspoon ground cloves
    • 1/2 teaspoon ground allspice
    • 1/2 teaspoon ground cinnamon
    • 1 teaspoon lemon juice
    • 1 teaspoon vanilla extract
    1. Before starting anything, it’s important to wash your apples. I usually like to soak mine in a vinegar/water bath for at least 10 minutes, then rinse.
    2. It’s also important to prep and sterilize your jars for canning or freezing.
    3. Core, peel, and slice the apples; an apple slicer, corer, parer for apple butter makes this step so easy. Cut out any bad spots, as well. Note: While I do leave the peeling on when making applesauce, and you can do that for apple butter too, I chose not to for this recipe.
    4. Put the sliced apples in the slow cooker.
    5. Add molasses, sugar, brown sugar, spices, lemon juice, and vanilla extract to the apples.
    6. Stir everything together well.
    7. Place the lid on the slow cooker, and cook on low for about 6 to 8 hours, or ’til the apples are tender.
    8. Once your apples are tender and it’s fully cooked, uncover your slow cooker, and use an immersion blender to purée the apple butter ’til it’s smooth. At this point, if you feel it needs to thicken, you can cook it on high with the lid off for an additional hour.
    9. Using a jar funnel, pour the apple butter into each prepared jar… You can use a ladle, but I like to use my funnel pitcher or cupcake batter scoop to dip and pour. It makes the process so easy and less messy.
    10. Wipe the top rim of each jar with a wet towel or rag, place the lid on, and tighten the band.
    11. You can freeze apple butter, but be sure to leave about a 1/2-inch gap at the top of each jar to allow for expansion in the freezer. Also, allow the jars to completely cool before placing in the freezer.
    12. We prefer to use a hot water bath canning method to can the apple butter, immersing the closed jars in boiling water for at least 15 minutes. If you choose to can it, Ball has wonderful Canning Guides to guide you through the process. You can also consult the Ball Blue Book Guide to Preserving.
    13. Before you put your apple butter in the freezer or the pantry, be sure to write what it is and the year on the lid, so you know when you made it.

    *You can also use granulated sugar.

    You can make this recipe on the stovetop, and you can even make it in the Instant Pot. Of course, cooking times will differ.

    Canned apple butter will last about 2 years; frozen apple butter will last about 1 year.

    WHERE CAN I FIND THE BEST APPLES FOR APPLE BUTTER?

    Fall is the best time to find apples, but you can use any apples you can get, whether you’re shopping at an orchard, a farmer’s market, or buying store bought apples.

    However, in the fall, you can usually buy seconds at just about any orchard, and sometimes at the farmer’s market. Meaning you can buy a HUGE box of apples for a lot less than normal cost, which is going to save you a ton of money.

    WHAT ARE THE BEST APPLES TO USE?

    There are certain types of apples that are sweeter and certain types of apples that have a more tart taste. Galas and Fujis are sweeter with a slightly tart taste.

    The best apples for apple butter may include:

    • Jonathan
    • Jonagold
    • Braeburn
    • Fuji
    • Gala
    • McIntosh Red
    • Cortland
    • Winesap
    Canning & Freezing
    American
    apple recipes, best apples for apple butter, canning apple butter, crockpot apple butter, crockpot apple butter recipe, easy homemade apple butter, homemade apple butter, how to make apple butter, how to make apple butter in a crockpot, how to make apple butter smooth, how to serve apple butter, how to use apple butter, slow cooker apple butter
  • No-Peel Instant Pot Cinnamon Applesauce

    No-Peel Instant Pot Cinnamon Applesauce

    How to make easy, homemade, no-peel, Instant Pot cinnamon applesauce, a delicious recipe for canning or freezing. Make it smooth or chunky, no sugar added!

    Instant Pot cinnamon applesauce is really easy to make and made pretty much the same way as regular Instant Pot applesauce. You really just need to add cinnamon to the mixture.

    white bowl filled with homemade cinnamon applesauce with apples

    This applesauce recipe only calls for 4 ingredients, and none of them includ added sugar. If you use the right apples, which we’ll talk about below, you won’t need additional sugar because it’ll be sweet enough on its own.

    Think about it… Natural ingredients, no need to actually peel apples, all the nutritional benefits of those peelings, and it’s all made in the Instant Pot.

    The fact that it’s pressure cooked takes the work out of making applesauce because you don’t have to stand in front of a hot stove stirring the day away. Instead, just add the ingredients to your Instant Pot pressure cooker, push a couple buttons, and let it do the majority of the work for you.

    Now you can peel your apples if you want to; it’s totally up to you. If you use an immersion blender and not a regular blender, you may have some tiny pieces of peeling still left in your sauce.

    There’s really no reason, though, that you can’t fill your pantry with jars of homemade applesauce. And can I just say it tastes so much better and has a much better texture than store canned applesauce. So much better!

    Let’s get cooking, shall we?

    Looking for apple recipes? Here are 50 mouthwatering apple recipes you may enjoy!

    I JUST WANT THE RECIPE! TAKE ME TO THE RECIPE FOR CINNAMON APPLESAUCE!

    If you’d rather skip all of my cooking tips, important cooking info for this recipe, and similar recipe ideas – and get straight to the delicious recipe for cinnamon applesauce – just scroll down to the bottom, where you’ll find a printable recipe card.

    Instant Pot cinnamon applesauce in canning jar with small wooden spoon

    WHERE CAN I FIND THE BEST APPLES FOR APPLESAUCE?

    Fall is probably the best time to find the best apples for applesauce, although you can use pretty much any apples you can find, whether you’re shopping at the store, an orchard, or the farmer’s market.

    In the fall, though, I recommend buying seconds at a local orchard if you have one, and sometimes you can find them at the farmer’s market.

    Buying seconds usually ensures that you can buy a HUGE box of apples for a lot less than normal cost, which is going to save you a ton of money.

    One thing you need to know, though… It does take a LOT of apples to get a little bit of applesauce, fresh homemade apple juiceapple jelly, or apple butter. But in my opinion, that homemade flavor and texture of home canned applesauce is totally worth it.

    washing apples in sink for cinnamon applesauce recipe

    WHAT KIND OF APPLES SHOULD I USE TO MAKE APPLESAUCE?

    Some apples are sweet and some have a more tart, sour taste. Also, some apples are crisp, while others are softer.

    When making a batch of homemade applesauce, I like to use a sweeter apple that has a little bit of tartness to it.  I prefer not to add any sugar, so I want the unsweetened applesauce to taste really good all on its own.

    Most people recommend using a softer apple for applesauce; it doesn’t even matter if your apples are mushy since they’re going to be made into mush anyway.

    We’ve found that Jonagold apples make the BEST applesauce. They’re sweet with just a little bit of tartness. And they mash up really well.

    easy Instant Pot cinnamon applesauce in Ball canning jar with wooden spoon

    Other best apples for applesauce may include:

    • Jonathan
    • Braeburn
    • Honeycrisp
    • McIntosh
    • Winesap
    • Rome
    • Golden Delicious
    • Cortland
    • Fuji
    • Gala
    • Ambrosia

    You can also try mixing and matching different kinds of apples to get the flavor you want for your applesauce.

    WHY ADD LEMON JUICE TO AN APPLESAUCE RECIPE?

    You’ll find different opinions about this topic when you research, but there are two main reasons home canners give for adding lemon juice to home canned applesauce.

    1. It helps preserve or protect the color of your apples over time.
    2. It can help make the applesauce more acidic for home canning. Wind fallen apples (including seconds) can have a lower acidity and a higher mold/bacteria count than unblemished apples.

    Even though their explanation is focused more around homemade jam, The Kitchn provides a great explanation for why it’s important to add lemon juice.

    slicing apples while making cinnamon applesauce

    TIPS FOR HOW TO MAKE CINNAMON APPLESAUCE IN THE INSTANT POT

    For this Instant Pot applesauce, you’ll need about 6 pounds of apples, just a little bit of lemon juice, water, and cinnamon.

    You can make this recipe on the stovetop, or you can even make it as Crock Pot applesauce; keep in mind that cooking times will vary.

    You can also make applesauce from the leftover apple mush you have when you make apple juice.

    sliced apples for making applesauce, cinnamon applesauce recipe, in instant pot pressure cooker

    Here’s how to make a stand alone cinnamon applesauce recipe:

    • Wash, core, and slice the apples. Be sure to cut out any bad spots, as well.
    • Put the sliced apples in your Instant Pot.
    • Add the lemon juice, water, and cinnamon to the Instant Pot, as well. If you want to mix everything together, you can; but there’s really no need to until after it all cooks.
    • Put the lid in place on the Instant Pot, and press Manual or Pressure Cook for 10 minutes.
    add cinnamon to cinnamon applesauce mixture in Instant Pot
    • When it’s finished cooking, allow the pressure cooker to do a natural release.
    • Purée the mixture with an immersion blender, or mash the apples with a potato masher.

    Note: If you want to eliminate any tiny pieces of peeling in the sauce, you may want to blend with a regular blender. It’s up to you how you prefer the texture and consistency.

    immersion blender mixing cinnamon applesauce in Instant Pot

    CAN YOU FREEZE HOMEMADE APPLESAUCE?

    Yes, you can freeze applesauce. In fact, you can freeze or can applesauce, whichever you prefer.

    My mom used to freeze a LOT of the applesauce she made when we were kids growing up. She’d keep freezer safe plastic containers just for storing things like homemade applesauce.

    pouring cinnamon applesauce through funnel into canning jars

    HOW DO I CAN APPLESAUCE?

    Applesauce canning is actually pretty simple. We use a water bath canning method.

    Should you choose to can your cinnamon applesauce, Ball has wonderful Canning Guides to guide you through the process. You can also consult the Ball Blue Book Guide to Preserving.

    cinnamon applesauce water bath for canning applesauce

    This applesauce recipe for canning makes probably around 4-6 pints total. It’s so delicious served on homemade biscuits, toast, and cornbread. Yum!

    MORE APPLE RECIPES YOU MAY ENJOY:

    Learn how to use your Instant Pot with our Instant Pot Quick Start Guide, filled with practical tips, Instant Pot recipes, accessory ideas, and more!

    cinnamon applesauce in Ball canning jar with small wooden spoon and fresh apples

    KITCHEN TOOLS YOU’LL NEED TO MAKE INSTANT POT CINNAMON APPLESAUCE

    Jars and Lids – I prefer jelly jars or pint jars. In fact, we usually try to keep our pantry stocked with jars. But don’t forget the lids and rings. They can be easy to forget, and before you know it, you have all the jars you need but no lids.

    Canning Funnel – for pouring the applesauce into the jars without making a mess.

    Jar Lifter

    Apple Corer/Peeler/Slicer – I’m telling you, this tool is so worth every penny we spent at the thrift store, but I’d order one brand new too. It saves so much time.

    coring apples for cinnamon applesauce with johnny apple peeler

    Paring Knife – for trimming off any bad spots or slicing the apples.

    Immersion Blender or Potato Masher – This will allow you to get the texture or consistency that you want.

    Instant Pot – We used our 6-quart Instant Pot.

    CINNAMON APPLESAUCE RECIPE

    If you love this cinnamon applesauce recipe as much as I do, please write a 5 star review, and help me share the recipe on Facebook and Pinterest! If you make the recipe, be sure to share that you tried it on Pinterest. I love when readers share feedback!

    easy no-peel Instant Pot cinnamon applesauce recipe

    CONNECT WITH ADVENTURES OF MEL!

    Be sure to follow me on social, so you never miss a post!

    Facebook | Pinterest | YouTube | Instagram | Twitter

    Sign up to receive my newsletter, filled with delicious recipes and outdoor travel adventures, in your inbox:

    FREE EMAIL SUBSCRIPTION

    No-Peel Instant Pot Cinnamon Applesauce

    How to make easy, homemade, no-peel, Instant Pot cinnamon applesauce, a delicious recipe for canning or freezing. Make it smooth or chunky, no sugar added!

    • 6 pounds apples (unpeeled)
    • 2 teaspoons lemon juice
    • 1 cup water
    • 2 tablespoons cinnamon
    1. Wash, core, and slice the apples. Cut out any bad spots, as well.
    2. Put the sliced apples in your Instant Pot.
    3. Add the lemon juice, water, and cinnamon to the Instant Pot, as well. If you want to mix everything together, you can; but there’s no need to until after it all cooks.
    4. Put the lid in place on the Instant Pot. Press Manual or Pressure Cook for 10 minutes.
    5. When it’s finished cooking, allow the pressure cooker to do a natural release.
    6. If it seems like the applesauce will be a bit watery, drain a bit of the water before mashing the apples.*
    7. Purée the mixture with an immersion blender, or mash the apples with a potato masher.** It’s up to you how you prefer the texture or consistency.
    8. Preserve using your preferred method, whether you choose to freeze or can the applesauce.***

    *You can drink the apple juice if you choose to drain the apples before mashing.

    **If you want to eliminate any tiny pieces of peeling in the sauce, you may want to blend with a regular blender. It’s up to you how you prefer the texture and consistency.

    ***If you choose to can it, Ball has wonderful Canning Guides to guide you through the process. You can also consult the Ball Blue Book Guide to Preserving.

    Sauces & Dressings
    American
    applesauce, applesauce recipe, cinnamon applesauce, Instant Pot applesauce
    easy no-peel instant pot or pressure cooker cinnamon applesauce recipe
  • Easy Blackberry Jam Recipe without Pectin

    Easy Blackberry Jam Recipe without Pectin

    How to make my grandma’s old-fashioned blackberry jam recipe without pectin. It’s perfect for freezing or canning. Delicious and easy batch with just 3 ingredients, including blackberries and sugar!

    Blackberry jam is one of our favorite homemade jams to make and eat; my boys love jam with breakfast. While my favorite strawberry jam recipe uses pectin, this is a recipe for blackberry jam without pectin.

    close up jar of homemade blackberry jam recipe without pectin, with tiny wooden spoon and fresh blackberries

    Actually, while blackberries can be expensive, I think it actually saves money to make homemade jam versus buying store bought. The healthier store bought jams without high fructose corn syrup are usually very pricey.

    That and you only get 1 jar of jam for that expensive price tag vs. a whole batch of jam out of a relatively small batch of blackberries. When I make this blackberry jam recipe no pectin, I usually get 8 to 10 half pint jars. That’s a lot of blackberry jam for my buck.

    Why You’ll Love This Recipe

    • You can use fresh or frozen blackberries for this recipe. While picking blackberries would be more ideal and probably more affordable (especially if you have your own bushes), frozen berries work just fine.
    • This recipe is actually adapted from my grandma’s recipe for strawberry preserves. I changed the ingredients and the instructions just a bit, but basically, it’s Grandma’s recipe, minus a few steps. And Grandma’s jam was always good.
    • It’s easy to make.
    • It’s a very simple recipe with only 3 ingredients, including blackberries, sugar, and lemon juice. That’s it!
    • You don’t need pectin, which brings me to my next point…
    blackberry freezer jam on toast on white plate

    What Is Pectin and Why Make Blackberry Jam without It?

    Pectin is a natural starch that’s naturally present in fruits and berries, some more so than others. When pectin is heated, it helps to helps to thicken jam and give it that jelly like texture.

    Rather than use store bought pectin, which is heavily processed, this recipe allows you to use that natural pectin by cooking the berries down in a step-by-step process, that together with a resting time, allows the natural pectin already in the berries to thicken the jam.

    Apples are another really great source of pectin, which is one reason I also love to make apple jelly without pectin.

    Ingredients and Substitutions Notes:

    When I found Grandma’s recipe, I was curious about the difference between blackberry jam and blackberry preserves. How Stuff Works explains the difference really well.

    • Fresh Blackberries – While you can use thawed frozen berries, fresh blackberries give the best results with this blackberry jam no pectin. If you don’t have your own blackberry bushes, you can usually find them at local farmers’ markets; or you might even have a local u-pick patch where you can go pick berries. My mom and I used to actually drive dirt roads in our area, scouting out blackberry bushes, when I was a kid; it was a great way to pick a couple buckets of free and otherwise unpicked blackberries for jams and eating.
    • Cane Sugar – You can also use granulated sugar. If you want to make this with an alternative sugar, you can try using things like Splenda, Monk Fruit, or Truvia; however, keep in mind that amounts may vary per the substitution amount and instructions for the particular sweetener you choose.
    • Lemon Juice – This is especially needed if you plan on canning the jam you make. To avoid bacteria, it’s best to use a commercially bottled lemon juice; I prefer to use this lemon juice when I can’t use fresh.
    blackberry jam without pectin in half pint jars

    How to Make Blackberry Jam without Pectin

    Before you get started, you’ll need to prep your jars, as well as the lids and bands. Make sure everything is clean and dry.

    Also, be sure to wash the blackberries beforehand, especially if you’re using fresh berries.

    Crush and Prepare the Blackberries

    You can make the choice of whether to crush the berries with a potato masher, leaving a few chunks in the finished jam; or you can actually purée the blackberries using a blender or food processor.

    While normally I like to leave a few chunks in my jam, this time I decided to purée the berries in my blender for 2-3 minutes.

    blackberry puree in Ninja blender for blackberry jam recipe

    Note: If you’re using frozen berries, you may want to let them thaw for just a bit before you try to purée them.

    How to Cook Blackberry Jam without Pectin

    1. In a larger stock pot, mix together the crushed blackberries, sugar, and lemon juice.
    2. Heat on low to medium heat, and bring the mixture to a boil, stirring constantly so it doesn’t scorch.
    3. Boil the mixture for a good 20 to 24 minutes, stirring constantly with a spatula. The sugar should all dissolve in the boiling process.
    4. Remove the mixture from the heat, and let it set a few minutes.
    5. If you have any foam on top, you’ll want to skim that off; my foam all dissipated in the cooking process, so this step wasn’t needed.

    Now a note: Your jam will seem more like syrup at this point. Please don’t be discouraged, because it’s a bit like magic from here on. 

    Allow the Jam to Rest and Thicken

    1. Pour the mixture into a 9×13 cake pan, and let it stand until it cools, 3+ hours. Grandma suggests 12 hours, but I let mine sit for probably around 6-ish hours, and it was ready.
    recipe for blackberry jam without pectin setting in cake pan
    1. As it cools, it will begin to set and jell. Before you know it, you have the thick consistency of jam; it feels like magic, but it’s actually a combination of the natural pectin in the berries and the cooling process that does the work of thickening or setting the jam.

    How to Properly Store Blackberry Jam

    At this point, you can decide if you want to can it or freeze it. Simply Rebekah has a really good explanation of the difference between cooked jam and freezer jam.

    Sometimes I’ve canned it, because it will keep even longer in the pantry, up to a year. Sometimes I make it into blackberry freezer jam just because it’s easier. It will keep for 3-6 months in the freezer.

    Canning Blackberry Jam

    1. Wash half-pint jars and lids in hot soapy water, rinse, and keep warm. We like to place ours on a baking sheet in a lower temp oven to stay hot.
    2. Using a jar funnel, ladle or pour the jam into the hot jars. Be sure to leave about a 1/2-inch gap at the top of each jar.
    3. Wipe the rim of each jar with a wet towel or rag, place the lid on, and tighten the band.
    4. Then place the hot jars down in a boiling hot water bath canner with 1-2 inches of water over the jars, and process those jars in the hot water bath for about 10 minutes.
    5. Remove the jars from the oven, and allow them to rest for at least 24 hours, but be sure to check every lid to make sure it’s sealed shortly after canning.
    6. Before moving to the pantry, remove the bands and write what it is and the year on the lid, so you know when you made it. There are plenty of options for pretty jar labels for jam, and you can even turn your home canned blackberry jam into holiday gifts or hostess gifts.
    adding blackberry jam to jars with canning funnel

    Freezing Blackberry Jam

    1. Using a jar funnel, ladle or pour the jam into the clean jars. Be sure to leave about a 1/2-inch gap at the top of each jar to allow for expansion in the freezer.
    2. Wipe the top of each jar with a wet towel or rag, place the lid on, and tighten the band.
    3. Before you put your jam in the freezer, be sure to write what it is and the year on the lid, so you know when you made it.
    blackberry jam without pectin in half pint jar with small wooden spoon

    And that’s really all there is to it. This blackberry jam is so simple and easy, and it tastes so good on biscuits, blackberry strawberry muffins, toast, homemade angel food cake, butterhorn dinner rolls, and especially old fashioned homemade ice cream!

    blackberry preserves or blackberry jam on toast for breakfast

    Expert Tips and Recipe FAQ’s

    Do you need to remove the seeds from blackberries for jam?

    If you want a smoother consistency and texture to your jam, then yes, you can remove the seeds using a food mill; or you can strain out the seeds while pouring the cooked jam into the cake pan. However, you don’t need to remove the seeds in order to make this easy blackberry jam. In fact, the seeds actually contain natural pectin.

    Can I use frozen blackberries?

    While fresh are better, yes, you can use frozen blackberries. Just be sure to thaw them ahead of time, so they don’t add unnecessary liquid to the mixture.

    easy recipe for blackberry jam in half pint jelly jars

    More Jam, Jelly, and Sauce Recipes You May Enjoy:

    If you love this no pectin blackberry jam, you’ll love these delicious fruit spreads too…

    If you try this recipe, why not leave a star rating in the recipe card right below and/or a review in the comment section further down the page? I always appreciate your feedback. You can also follow me on Pinterest, Facebook, Instagram, and YouTube. And subscribe to my email list too!

    Blackberry Jam Recipe without Pectin

    How to make Grandma's old-fashioned blackberry jam recipe without pectin. Perfect for freezing or canning. Easy batch with just 3 ingredients!

    • Blender
    • Stock Pot
    • 9×13 Cake Pan
    • Half Pint Jelly Jars with Lids and Bands
    • Jar Funnel
    • Hot Water Bath Canner
    • Dissolvable Canning Jar Labels
    • 6 cups crushed blackberries
    • 6 cups cane sugar
    • 2 tablespoons lemon juice
    1. Prep your jars, as well as the lids and bands. Make sure everything is clean and dry.
    2. Wash and rinse your berries, especially if they’re fresh berries. Pat dry.
    3. Purée or crush the berries, using a blender, potato masher, or food processor, for 2 to 3 minutes. 

    4. In a stock pot, mix together the crushed blackberries, sugar, and lemon juice. 

    5. Heat the mixture on low to medium heat, and bring it to a boil, stirring constantly with a spatula, so it doesn’t scorch.
    6. Boil the mixture for a good 20 to 24 minutes, stirring constantly. The sugar should all dissolve in the boiling process. 
    7. Remove the mixture from the heat, and let it set a few minutes. 

    8. If you have any foam on top, you’ll want to skim that off; this may or may not be necessary.
    9. Note: Your jam will seem more like syrup at this point. Please don't be discouraged, because it works a little bit like magic from here on.

    10. Pour the mixture into a 9×13 cake pan, and let it stand until it cools, 3+ hours. As it cools, it will begin to set and jell. Before you know it, you'll have the thick consistency of jam; it feels like magic, but it's actually a combination of the natural pectin in the berries and the cooling process that does the work of thickening or setting the jam.

    Canning Blackberry Jam:

    1. Wash half-pint jars and lids in hot soapy water, rinse, and keep warm. We like to place ours on a baking sheet in a lower temp oven to stay hot.

    2. Using a jar funnel, ladle or pour the jam into the hot jars. Be sure to leave about a 1/2-inch gap at the top of each jar.

    3. Wipe the rim of each jar with a wet towel or rag, place the lid on, and tighten the band.

    4. Then place the hot jars down in a boiling hot water bath canner with 1-2 inches of water over the jars, and process those jars in the hot water bath for about 10 minutes.

    5. Remove the jars from the oven, and allow them to rest for at least 24 hours, but be sure to check every lid to make sure it's sealed shortly after canning.

    6. Before moving to the pantry, remove the bands and write what it is and the year on the lid, so you know when you made it.

    Freezing Blackberry Jam:

    1. Using a jar funnel, ladle or pour the jam into the clean jars. Be sure to leave about a 1/2-inch gap at the top of each jar to allow for expansion in the freezer.

    2. Wipe the top of each jar with a wet towel or rag, place the lid on, and tighten the band.

    3. Before you put your jam in the freezer, be sure to write what it is and the year on the lid, so you know when you made it.

    4. Serve the jam on toast, biscuits, ice cream, etc.

    While fresh are better, you can use frozen blackberries. Just be sure to thaw them ahead of time, so they don’t add unnecessary liquid to the mixture and they’re easier to crush. 

    jams and jellies
    American
    blackberry jam, blackberry jam no pectin, blackberry jam recipe no pectin, blackberry jam recipe without pectin, blackberry jam without pectin, no pectin blackberry jam, old fashioned blackberry jam, recipe for blackberry jam without pectin
  • Small Batch Blueberry Filling Recipe

    Small Batch Blueberry Filling Recipe

    Learn how to make an easy homemade blueberry filling for pies and desserts. This is a small batch recipe using fresh or frozen berries! You can make enough for one dessert, or double the recipe and freeze it!

    Blueberries are quite possibly my favorite snacking berries; they’re full of antioxidants and they’re just plain delicious. Pie happens to be a family favorite too.

    blueberry filling for pie in a mason jar with a wooden spoon and fresh blueberries

    So, while it’s hard to do, I’ve got to stop eating blueberries long enough to make a small batch blueberry pie filling for blueberry cream cheese pie or Dutch oven blueberry cobbler and our favorite, blueberry yum yum.

    ‘Cause you know… Homemade is so much better. This stove top blueberry pie filling is so much better than store bought cans. It just is.

    Making your own blueberry filling for pie really isn’t difficult. It requires a little stove time with constant stirring, but really it isn’t bad at all; believe me, I’d tell you if it were, because I’m not a fan of standing in front of a stove for long periods of time.

    wooden spoon in mason jar of homemade small batch blueberry pie filling

    You only need a few ingredients, and besides the blueberries, you should already have everything else in your kitchen cabinets. What you’ll love about this recipe is it’s small batch (so no canning required), and you can use it for all sorts of desserts

    Why Make Homemade Fruit Filling?

    That’s a very good question, and one with a few answers…

    • Homemade is always better, in my opinion. First of all, you have control over the type of ingredients you use, and you also have control of how much of those ingredients goes in to your filling. You have the power to make it the way you want it, and it’s not going to be pumped full of preservatives to keep it fresh.
    • Personally, I prefer the taste of homemade versus store bought canned filling, especially when it’s made with fresh berries. Nothing beats that fresh blueberry flavor. Even good frozen blueberries give amazing flavor compared to canned.
    • You can use it for so many things, not just pie. You can use it as a topping for vanilla ice cream, blueberry pancakes, and French toast casserole.
    • It’s so quick and easy to make, and the best part is it only needs 5 ingredients. That’s it!

    Ingredient Notes for Blueberry Filling:

    • Blueberries – You can use fresh or frozen blueberries; just be sure to thaw and dry the berries if using frozen, so you’re not adding unnecessary moisture to your filling.
    • Corn starch – This is used to thicken the pie filling.
    • Lemon juice – I prefer to either juice a lemon, or use Minute Maid lemon juice, which you can usually find in the freezer section of any grocery store.
    • Pure cane sugar – You can also use granulated sugar, but I prefer to use unrefined pure cane sugar.
    • Cinnamon – This adds a spicy hint to the filling… Don’t worry, not so spicy that it’s weird, just enough that it enhances the flavor of the blueberries.
    blueberry pie filling from scratch in a mason jar, with fresh blueberries

    How to Make Blueberry Pie Filling

    First I find it’s easier if you gather your ingredients together, so everything is ready to go.

    1. Make the blueberry purée using a blender. I recommend a blender in this case because the skins on blueberries can be hard to break down with a potato masher
    2. Whisk together the water and corn starch first, ensuring there are little to no lumps.
    3. Then combine the water/corn starch mixture together with the lemon juice and sugar in a medium saucepan on medium heat.
    4. Add the puréed blueberries and whole blueberries to the mixture in the pan.
    5. Cook the entire mixture for about 10 to 15 minutes, stirring constantly until the mixture begins to thicken.

    Remove from the heat and add to an already cooked pie crust. Or if you’re adding the pie filling to a chilled dessert, allow the filling to cool before doing so. 

    In need of a super easy pie crust? You may enjoy this shortcut no-roll pie crust.

    Wooden spoon in mason jar of freshly made blueberry filling for pie

    FAQ’s and Expert Tips

    Can I use frozen blueberries?

    Yes, you can. As mentioned above, just be sure to thaw and dry the berries well before using, so you don’t add unnecessary moisture to the filling.

    How do you store it?

    You’ll definitely want to keep it in the fridge, and it should keep for 4-5 days. After that, you’ll want to freeze it if not able to use it, which brings me to the next question…

    Can you freeze it?

    Yes, you can. If freezing it, just be sure to put it in an airtight container so it doesn’t get freezer burn. It should keep for up to 3 months in the freezer. I don’t recommend canning this pie filling because it used cornstarch, and cornstarch is not safe for canning; instead you’d want to use Clear-Jel as a thickener, so it’s safe for canning.

    How long should I cook it if I put it in a pie?

    Make this filling, per the recipe instructions. Then follow the instructions for whichever pie you’re using as to how long to bake it in the crust.

    close up look at easy blueberry pie filling in mason jar

    More Blueberry Recipes:

    If you try this recipe, why not leave a star rating in the recipe card right below and/or a review in the comment section further down the page? I always appreciate your feedback. You can also follow me on Pinterest, Facebook, Instagram, and YouTube. And subscribe to my email list too!

    Small Batch Blueberry Filling

    How to make an easy homemade blueberry filling for pies and desserts. Small batch recipe using fresh or frozen berries!

    • Blender
    • Medium Saucepan
    • Whisk
    • Heat-Resistant Spatula
    • 2 cups blueberry purée
    • 2 cups blueberries* (fresh or frozen)
    • 2 tablespoons water
    • 1 tablespoon corn starch
    • 1/2 teaspoon lemon juice
    • 2 tablespoons sugar
    • 1/4 teaspoon ground cinnamon
    1. Make the blueberry purée using a blender. 
    2. Whisk together the water and corn starch first, ensuring there are little to no lumps. 
    3. Then mix the water/corn starch mixture together with the lemon juice and sugar in a medium saucepan on medium heat.
    4. Add the puréed blueberries and whole blueberries to the mixture.
    5. Cook the entire mixture for about 10 to 15 minutes, stirring constantly until the mixture begins to thicken.
    6. Remove from the heat and add to an already cooked pie crust. Or if you’re adding the pie filling to a chilled dessert, allow the filling to cool before doing so.

    *If using frozen berries, just be sure to thaw and dry the berries well before using, so you don’t add unnecessary moisture to the filling.

    How do you store it?
    You’ll definitely want to keep it in the fridge, and it should keep for 4-5 days. After that, you’ll want to freeze it if not able to use it, which brings me to the next question…

    Can you freeze it?
    Yes, you can. If freezing it, just be sure to put it in an airtight container so it doesn’t get freezer burn. It should keep for up to 3 months in the freezer. I don’t recommend canning this pie filling because it used cornstarch, and cornstarch is not safe for canning; instead you’d want to use Clear-Jel as a thickener, so it’s safe for canning.

    Pies & Pastries
    American
    blueberry filling, blueberry filling recipe, blueberry pie filling, blueberry pie filling recipe, small batch blueberry pie filling
  • Quick and Easy Strawberry Jam Recipe

    Quick and Easy Strawberry Jam Recipe

    How to make freezer jam in minutes with a quick and easy, no-cook strawberry jam recipe that uses simple ingredients. Why buy store bought when you can make your own delicious jam filled with delicious berry chunks?

    Mmmm, one of the main reasons I love spring is because it’s the beginning of a long and hopefully very productive berry season, starting with strawberries. Our favorite strawberry pie and strawberry jam recipe in mind, we go strawberry picking every May, filled with the notion of making plenty of freezer jam to last the whole year long.

    jar of strawberry jam made with fresh strawberries

    Of course, after strawberries come blueberries, then blackberries, then peaches, then apples… And I know peaches and apples aren’t berries; but peach jam is delicious, this blackberry jam recipe without pectin is amazing, apple jelly from juice is so easy to make, and apple butter is another one of our favorites.

    The last few years we’ve used a different brand of pectin than what we used before.

    Ball RealFruit Instant Pectin for fresh homemade strawberry freezer jam

    I really like using Ball RealFruit Instant Pectin because it calls for way less sugar, and I also love that I don’t have to cook a thing.

    Simply mix the ingredients together, and you’ve got a whole batch of jam. Don’t worry, I’ll walk you through the whole thing… It’s quick, painless, and so easy.

    Your reward at the end will be about 8 jelly jars full of the most delicious no cook strawberry freezer jam ever. Let’s make some jam, shall we?

    Tips for how to prep strawberries for this strawberry jam recipe:

    You’ll likely need 3 to 4 quarts of berries for 8 jars of jam. Here’s how to get them ready…

    • First, wash and dry the berries. I like to soak mine in a vinegar water solution for 5 to 10 minutes, then rinse well.
    • Then just pat the berries dry with a towel.
    • Next use a paring knife to stem the berries.
    stemming strawberries with a paring knife for easy strawberry freezer jam
    • Slice the berries in half, lengthwise.
    slicing strawberries in half for easy strawberry freezer jam
    crushing strawberries with a potato masher for a quick and easy strawberry jam recipe

    When you’re done, you’ll be ready to mix up a quick batch of freezer jam.

    Tips for how to make strawberry jam, the quick and easy way:

    According to the Pectin Calculator, this recipe should really only make 6 jars of jam. I consistently get 8 jelly jars and call it a win.

    First of all, prep your jars, as well as the lids and bands. Make sure everything is clean and dry.

    You’ll need to stir together the sugar and pectin in a large mixing bowl.

    Then add the crushed berries to your sugar/pectin mixture; stir together for a good 3 to 4 minutes, just to make sure everything’s dissolved and mixed up well.

    mixing together sugar, pectin, and crushed strawberries for freezer jam

    Using a jar funnel, pour the jam into each prepared jar… You can use a ladle, or I like to use a really small liquid measuring cup to dip and pour. It makes the process so easy and less messy.

    pouring strawberry freezer jam in jelly jars using a jar funnel

    Be sure to leave about a 1/2-inch gap at the top of each jar to allow for expansion in the freezer. Wipe the top of each jar with a wet towel or rag, place the lid on, and tighten the band.

    placing lids and bands on jars of fresh strawberry jam

    Let the jars stand for about 30 minutes, then either refrigerate or freeze. Ball says the jam keeps up to 3 weeks in the refrigerator and up to 1 year in the freezer. 

    how to make strawberry jam in minutes, jars of fresh homemade freezer jam

    Before you put your jam in the freezer, be sure to write what it is and the year on the lid, so you know when you made it.

    And that’s really all there is to it. So simple and easy, and it tastes so good on biscuits, toast, butterhorn rolls, chocolate chip pancakes, strawberry and cream oatmeal, and especially easy homemade vanilla ice cream!

    I even use this strawberry jam at Christmas time for my reindeer thumbprint cookies. It makes the brightest red nose for Rudolph.

    homemade strawberry jam on toast

    More jam and jelly and sauce recipes you may enjoy:

    Apple Jelly without Pectin

    Strawberry Sauce

    Raspberry Sauce

    Instant Pot Apple Butter

    More strawberry treats you may want to make:

    Old-Fashioned Homemade Strawberry Ice Cream

    Strawberry Shortcake with Grandma’s Biscuits

    Pie – Strawberry Cream Pie or Easiest Strawberry Pie Ever

    Strawberry Blackberry Muffins

    no cook strawberry jam recipe that's quick and easy to make, jam in a jar with a small wooden spoon

    Kitchen tools you may need to make strawberry freezer jam:

    Paring Knife – to stem the berries and slice them in half.

    Large Mixing Bowl – You’ll need a large bowl to mix up your jam. Of course, I also love my handled bowl for slicing and crushing the berries.

    Potato Masher or Blender – to crush the berries.

    8-ounce Jelly Jars – You can use smaller jars or even pint jars. I’ve found these jelly jars are just the right size for us with the amount of jam we eat in a 3-week period. If you already have jars, you may need new lids or a pack of lids and bands.

    Jar Funnel – This helps to pour the jam into the jars without making a huge mess.

    Ladle or Liquid Measuring Cup – to pour the jam into the jars.

    Sharpie or Jar Labels – so you can label your jars and know what it is and when you made this batch of freezer jam.

    Quick and Easy Strawberry Jam Recipe

    How to make freezer jam in minutes with a quick and easy, no-cook strawberry jam recipe that uses simple ingredients. Why buy store bought when you can make your own delicious jam filled with delicious berry chunks?

    • 5 cups crushed strawberries
    • 6 tablespoons Ball RealFruit Instant Pectin
    • 2 cups pure cane sugar
    1. Wash the strawberries. 
    2. Pat the berries dry with a towel.
    3. Stem the berries.
    4. Slice the berries in half, lengthwise.
    5. Once your bowl is full, crush the berries with a potato masher; or you can puree them with a blender.
    6. Prep your jars, as well as the lids and bands. Make sure everything is clean and dry.
    7. Stir together the sugar and pectin in a large mixing bowl.
    8. Add the crushed berries to your sugar/pectin mixture; stir together for a good 3 to 4 minutes, just to make sure everything’s dissolved and mixed up well.
    9. Using a jar funnel and either a ladle or small liquid measuring cup, pour the jam into each prepared jar. Be sure to leave about a 1/2-inch gap at the top of each jar to allow expansion in the freezer.
    10. Let the jars stand for about 30 minutes, then either refrigerate or freeze. Ball says the jam keeps up to 3 weeks in the refrigerator and up to 1 year in the freezer.
    Canning & Freezing
    American
    strawberry freezer jam, strawberry jam recipe
    Quick and Easy Strawberry Jam Recipe
    how to make strawberry jam for the freezer
  • How to Make Strawberry Sauce

    How to Make Strawberry Sauce

    How to make a delicious homemade strawberry sauce for cheesecake, pancakes, and ice cream topping. Easy recipe using fresh berries.

    Fresh strawberries make the most delicious strawberry sauce for cheesecake, another yummy dessert recipe I’m currently working on. Of course, it also makes the perfect pancake topping, especially when paired with a light sprinkling of powdered sugar; and the perfect ice cream topping or swirl, especially in Fruity Pebble ice cream.

    spoonful of homemade strawberry sauce in mason jar

    You only need a few key ingredients, possibly things you already have in your kitchen. You can also use fresh or frozen berries, your choice; I chose to use fresh berries for this strawberry sauce recipe.

    One thing I love is that this sauce is definitely not too sweet. Let the berries flavor the sauce, adding in only 2 tablespoons of pure cane sugar. You can possibly even replace the sugar with honey.

    homemade strawberry sauce recipe in mason jar with strawberry pie

    Whether for breakfast or dessert, it’s an easy recipe anyone can make.

    Tips for how to make Strawberry Sauce

    First, you’ll need to gather your ingredients… You’ll need strawberries (fresh or frozen), water, lemon juice, pure cane sugar, and corn starch. If you’re using frozen berries, allow them to thaw first.

    puree strawberries in Ninja blender for strawberry sauce
    how to make strawberry sauce using simple ingredients, including pure cane sugar

    Purée the strawberries using a blender or potato masher. Mix together the water, lemon juice, sugar, and puréed strawberries in a small saucepan.

    Before heating, whisk the corn starch into the mixture. Whisking will ensure a lump-free sauce. If you want more of a strawberry syrup, you can use a little less corn starch.

    Bring the mixture to a boil on low to medium heat and simmer for about 3 minutes, or until your sauce has the desired thickness.

    mason jar of strawberry sauce for cheesecake

    You can pour or spoon this delicious strawberry sauce on pancakes, waffles, ice cream, strawberry oatmeal, etc. I actually swirled most of mine into my cheesecake batter.

    Looking for more delicious sauce or jam recipes?

    Kitchen tools you may need to make this Strawberry Sauce recipe

    Blender – You’ll need a way to puree the berries. You can also use a potato masher if you don’t have a blender.

    Small Saucepan – You’ll need a saucepan to cook your sauce.

    Whisk – Whisking ensures a lump-free sauce.

    Heat-Resistant Spatula – I love my spatulas and use them for scraping the sides of the pan and easily keeping my sauce stirred.

    Strawberry Sauce

    How to make a delicious homemade strawberry sauce for cheesecake, pancakes, and ice cream topping. Easy recipe using fresh berries.

    • 1 pound fresh or frozen strawberries
    • 2 tablespoons water
    • 1/2 teaspoon lemon juice
    • 2 tablespoons pure cane sugar
    • 1 tablespoon corn starch
    1. If you’re using frozen berries, allow them to thaw first. 
    2. Purée the strawberries using a blender or potato masher.
    3. Mix together the water, lemon juice, sugar, and puréed strawberries in a small saucepan.
    4. Before heating, whisk the corn starch into the mixture. Whisking will ensure a lump-free sauce.
    5. Bring the mixture to a boil on low to medium heat and simmer for about 3 minutes, or until your sauce has the desired thickness.
    6. You can pour or spoon this delicious strawberry sauce on pancakes, waffles, ice cream, etc. I actually swirled most of mine into my cheesecake batter.
    Sauces & Dressings
    American
    homemade strawberry sauce, strawberry sauce
    How to Make Strawberry Sauce
    Strawberry Sauce Recipe
  • Homemade Raspberry Sauce

    Homemade Raspberry Sauce

    Homemade Raspberry Sauce, made with fresh or frozen raspberries, is delicious and easy to make. It’s the perfect sauce for cheesecake, pancakes, waffles, ice cream, and other desserts.

    Homemade Raspberry Sauce is an easy recipe I came up with for my Olive Garden White Chocolate Raspberry Cheesecake (remember that cheesecake recipe I mentioned working on?). When you think about it, basic fruit sauce is actually pretty simple to make.

    Spoonful of Homemade Raspberry Sauce in a Jar

    You only need a few basic ingredients, including the fruit you choose to use in your sauce, in this case, raspberries. You can use fresh or frozen berries; it really doesn’t matter. I did use frozen, though, mainly because they are a lot cheaper.

    Even with straining the sauce to remove most of the seeds, there really is nothing complicated about making raspberry sauce. And it’s delicious on so many things.

    You can spoon raspberry sauce onto cheesecake, pancakes, ice cream, especially with this Fruity Pebbles ice cream recipe… Zeke and I even enjoyed a peanut butter and jelly sandwich with this sauce instead of jelly.

    Also, it’s not too sweet. I let the berries flavor the sauce and only added in 2 tablespoons of pure cane sugar. I got to thinking afterward, I could’ve even replaced that sugar with honey.

    Homemade Raspberry Sauce in a Jar

    Either way you make it, with sugar or with honey, it’s sure to be a delicious addition to breakfast, brunch, or dessert.

    Tips for how to make Homemade Raspberry Sauce

    First of all, gather your ingredients… You’ll need raspberries (fresh or frozen), water, lemon juice, pure cane sugar, and corn starch.

    1. If you’re using frozen berries, allow them to thaw first. I actually microwaved mine on defrost.
    2. Purée the raspberries using a blender or potato masher.
    3. Strain the raspberries to remove most, if not all, of the seeds. I just used a simple mesh strainer.
    4. Mix together the water, lemon juice, sugar, and puréed raspberries in a small saucepan.
    5. Before heating, whisk the corn starch into the mixture. Whisking will ensure a lump-free sauce.
    6. Bring to a boil on low to medium heat and simmer for about 3 minutes, or until your sauce has the desired thickness.
    7. You can pour or spoon this delicious raspberry sauce on heart pancakes, waffles, ice cream, etc. I actually swirled most of mine into my cheesecake batter.

    Looking for more delicious jam and sauce recipes?

    Kitchen tools you may need to make Homemade Raspberry Sauce

    Lemon Juicer – I tend to buy lemon juice from the freezer section at my grocery store, but this may come in handy if you want to juice your own lemons for more than just this recipe.

    Blender – You’ll need a way to puree the berries. You can also use a potato masher if you don’t have a blender.

    Mesh Strainer – This will allow you to remove the seeds from the berries.

    Small Saucepan – So you can cook your sauce.

    Whisk – Whisking ensures a lump-free sauce.

    Heat-Resistant Spatula – I love my spatulas and use them for scraping the sides of the pan and easily keeping my sauce stirred.

    Homemade Raspberry Sauce on a Spoon

    Print the recipe for Homemade Raspberry Sauce

    Homemade Raspberry Sauce

    Homemade Raspberry Sauce, made with fresh or frozen raspberries, is delicious and easy to make. It’s the perfect sauce for cheesecake, pancakes, waffles, ice cream, and other desserts.

    • 1 pound frozen raspberries (thawed)
    • 2 tablespoons water
    • 1/2 teaspoon lemon juice
    • 2 tablespoons pure cane sugar
    • 1 tablespoon corn starch
    1. If you’re using frozen berries, allow them to thaw first. I actually microwaved mine on defrost. 
    2. Purée the raspberries using a blender or potato masher.
    3. Strain the raspberries to remove most, if not all, of the seeds. I just used a simple mesh strainer.
    4. Mix together the water, lemon juice, sugar, and puréed raspberries in a small saucepan.
    5. Before heating, whisk the corn starch into the mixture. Whisking will ensure a lump-free sauce.
    6. Bring to a boil on low to medium heat and simmer for about 3 minutes, or until your sauce has the desired thickness.
    7. You can pour or spoon this delicious raspberry sauce on pancakes, waffles, ice cream, etc. I actually swirled most of mine into my cheesecake batter.
    Sauces & Dressings
    American
    homemade raspberry sauce, raspberry sauce

    Pin this recipe to save it for later!

    Homemade Raspberry Sauce
    Homemade Raspberry Sauce Recipe
  • How to Make Homemade Pumpkin Puree

    How to Make Homemade Pumpkin Puree

    Learn how to roast pie pumpkins and make homemade pumpkin puree for your favorite recipes and desserts, including pies, cakes, and more.

    Homemade pumpkin puree is so easy to make, I’m not sure why I haven’t done it before now. I mean, my 15 year old son who grew pumpkins in his garden this year, taught me how to roast a pumpkin.

    How to roast a pumpkin and make homemade pumpkin puree for all your favorite recipes and desserts, including pies, cakes, and breads. It’s so easy to do!

    And the taste of a real pumpkin? It’s pretty darn good.  Granted, I love the canned kind too, but I’ll probably roast my own much more often now that I know how.

    We make all sorts of things with pumpkin this time of year, including Grandma’s pumpkin pie, a deliciously creamy no bake pumpkin dessert and pumpkin spice sugar cookies. I know some get sick of hearing pumpkin pumpkin pumpkin, but I don’t think I could ever tire of fall and all the wonderful recipes it brings out of the woodwork.

    I love using pumpkin I roast myself for pumpkin pie, pumpkin roll, and more. It’s super easy to make homemade pumpkin puree, and it’s so delicious!

    Tips for Roasting Your Own Pumpkin for Homemade Pumpkin Puree

    • Cut the pumpkin in half. You can either remove the stem and cut lengthwise; or you can cut across like we did.
    • Scoop out the seeds and scrape out the strings. A larger metal spoon works well for this.
    • Drizzle olive oil onto a cookie sheet (also make sure this cookie sheet has edges that rise up).
    • Place the pumpkins flesh down on the cookie sheet.
    • Cover them with foil.
    • Bake at 375° for about 40 minutes, or until a fork easily pokes into the sides of the pumpkin.
    • Remove the pumpkins from the oven, and allow them to cool enough so that you can handle them.
    • Peel off the skin with your fingers.
    • Add the flesh to a blender and puree.
    • And that’s pretty much it. Your homemade pumpkin puree is ready to use in all your favorite pumpkin recipes.

    Looking for more delicious recipes to make with pumpkin?

    Ooey gooey pumpkin cake

    Gluten-Free Pumpkin Muffins

    Creamy No Bake Pumpkin Dessert

    Deliciously Moist Pumpkin Bread Recipe

    The Most Scrumptious Pumpkin Roll Ever

    Pumpkin Pear Spice Cake

    Instant Pot Pumpkin Spice Cheesecake

    How to easily make your own homemade pumpkin puree from a pie pumpkin. Roast it, puree it, and you’re ready to make pie, pumpkin roll, breads, and more.

    Tools you may need to make Homemade Pumpkin Puree

    Butcher Knife or Cleaver – to cut the pumpkin in half.

    Pumpkin Scraper – to scrape out the insides easily and efficiently (although a larger metal spoon works well too).

    Cookie Sheet – You definitely want one that has raised sides.

    Olive Oil – to drizzle over the cookie sheet before you place the pumpkin on it.

    Aluminum Foil – to cover your pumpkins for roasting.

    Blender to puree the pumpkin flesh so it’s ready for all your favorite recipes.

    HOMEMADE PUMPKIN PUREE RECIPE

    If you love this homemade pumpkin puree recipe as much as I do, please write a 5 star review, and help me share the recipe on Facebook and Pinterest!

    homemade pumpkin puree recipe

    CONNECT WITH ADVENTURES OF MEL!

    Be sure to follow me on social, so you never miss a post!

    Facebook | Pinterest | YouTube | Instagram | Twitter

    Sign up to receive my newsletter, filled with delicious recipes and outdoor travel adventures, in your inbox:

    FREE EMAIL SUBSCRIPTION

    Homemade Pumpkin Purée

    Homemade pumpkin purée is so easy to make. How to roast pie pumpkins and purée for your favorite recipes and desserts, including pies, cakes, and more.

    • 1 pie pumpkin
    • 1/4 cup olive oil
    1. Pre-heat the oven to 375° F.

    2. Cut the pie pumpkin in half. You can either remove the stem and cut lengthwise; or you can cut crosswise.

    3. Scoop out the seeds and scrape out the strings, discarding both; a large metal spoon works well for this.

    4. Drizzle the olive oil onto a baking sheet; make sure the baking sheet you use has raised sides, so it will contain any juices that result from baking.

    5. Place the pumpkins flesh down on the baking sheet, and cover them with foil.

    6. Bake at 375° F for about 40 minutes, or 'til a fork easily pokes into the sides of the pumpkin.

    7. Remove the pumpkins from the oven, and allow them to cool enough so that you can handle them.

    8. Peel off the skin with your fingers and discard.

    9. Add the flesh to a blender and purée.

    10. Use the purée in your favorite pumpkin recipes.

    *Always use caution when handling hot food. Allow the pumpkin to cool before handling.

    Canning & Freezing
    American
    homemade pumpkin puree

    homemade pumpkin puree, roasted from scratch
  • Quick Instant Pot Apple Butter Recipe

    Quick Instant Pot Apple Butter Recipe

    Save time with this quick Instant Pot apple butter recipe you can make fast. There’s no peeling or stirring necessary, and it’s easy to make in less than an hour. This homemade fall favorite is perfect with biscuits, pancakes, and toast!

    This apple butter Instant Pot recipe is so easy to make, that I’ll never buy store bought again. It’s one of my favorite fall recipes.

    3 jelly jars full of quick Instant Pot apple butter recipe

    I remember years ago making apple butter, and it was quite the chore, standing over the sink working up all the apples for the recipe. Not anymore, though, thanks to my Johnny apple peeler, which cores, peels, and slices all at once.

    This kitchen tool is our best thrift store find ever because it does it all the work for me. I’m able to throw this Instant Pot apple butter recipe together in minutes.

    What is Apple Butter?

    According to Wikipedia, “Apple butter is a highly concentrated form of apple sauce produced by long, slow cooking of apples with cider or water to a point where the sugar in the apples caramelizes, turning the apple butter a deep brown.”

    Well, yes, but you can make apple butter in your electric pressure cooker, and it’s not a long, slow, painful process. It’s actually pretty painless.

    My apple butter is a mixture of apples and spices, with a texture that’s very similar to Instant Pot applesauce and Instant Pot cinnamon applesauce; but the taste is a little sweeter, a little darker, and filled with cinnamon spice flavors.

    Why You’ll Love This Recipe

    You’ll love making pressure cooker apple butter, possibly even more than my stovetop apple butter recipe, because it…

    • It’s even easier to make, if you can imagine that, no stirring necessary. Simply put your ingredients into your electric pressure cooker, put the lid on, set it, and forget it while it cooks. And if you’re thinking the apples will be a chore… Coring, peeling (if you choose to peel the apples), and slicing the apples is a job made much easier and quicker with a Johnny apple peeler.
    • It smells and tastes heavenly; it really does. I mean, would it really be fall without the scent of homemade apple butter wafting through the house? Better than any candle out there! It makes our home smell heavenly, and it tastes dreamy too.
    • It’s budget-friendly. Depending where you buy your apples and your spices, you can make a batch of 5-6 half-pints or 3-4 pints for less than $10. A bit of advice… I’m very partial to canning apple butter in the fall because it’s usually pretty easy to find apple seconds at a local orchard or farmer’s market. Buying seconds just means you can buy a bushel or half-bushel of less-than-perfect apples for a lot less than normal cost, which is going to save you a ton of money. I also like to buy spices in bulk at our local grocery discount store and sometimes thru Amazon; I especially love Badia spices and seasonings. When you compare the cost of making homemade to store bought apple butter, you save a little bit of money. But even more importantly, homemade is just better all ’round. You can even use your own homemade apple pie spice! Plus, if you’re like me, you love the satisfaction of having your own jars of home canned food lining your pantry shelves.
    • You can can it or freeze it for storage purposes.
    ingredients for quick apple butter recipe on white marble countertop

    Ingredients and Substitutions Notes:

    When I developed this Instapot apple butter, I knew I wanted it to taste similar to Cracker Barrel apple butter. Not a copycat recipe really, but similar.

    • Fresh apples – When it comes to picking the kind of apples to use, I recommend apples that are both sweet and tart to really give it a flavor kick. Some of the best apples for making apple butter include Jonathan, Jonagold, Braeburn, McIntosh Red, Winesap, Cortland, Fuji, and Gala. Jonathan and Jonagold are two of my favorites; I’ve also combined Fuji with Gala to make a really delicious apple butter.
    • Molasses – I prefer to use just regular molasses over blackstrap molasses.
    • Spices – I use nutmeg, cloves, allspice, and cinnamon to really give this apple butter a kick of flavor.
    • Lemon juice – I prefer to use a fresh lemon juice, either straight from a lemon or my favorite shortcut, Minute Maid lemon juice you can find in the freezer section of some grocery stores; I’ve been able to find it at my local Walmart. There are multiple reasons for adding lemon juice to apple butter, but it’s usually to help preserve or protect the color of your apples over time (making your apple butter stay pretty), and/or to make the apple butter more acidic for home canning. Wind fallen apples (including seconds) can have a lower acidity and a higher mold/bacteria count than umblemished apples.
    • Vanilla extract – This is my secret ingredient, and you’ll understand why I add it when you take your first bite. It’s so good!

    How to Make Quick Instant Pot Apple Butter Fast

    Before starting anything, it’s important to wash your apples. I always soak mine in a vinegar/water bath for at least 10 minutes, then rinse. You’ll need about 4 pounds of apples.

    fresh apples soaking in water in white sink

    It’s also important to prep your jars for canning or freezing. That means washing, sterilizing, etc.

    Keep in mind, you can make this recipe in any brand of electric pressure cooker you have, including the Instant PotNinja Foodi, or Power Pressure Cooker XL.

    Just Follow These Steps…

    1. Core, peel, and slice the apples; again, an apple peeler for apple butter makes this step so easy. Cut out any worm holes or bad spots, as well. Note: While I do leave the peeling on when making applesauce, and you can do that for apple butter too, I usually choose not to for this recipe.
    peeling and coring apples for apple butter with a clamping Johnny apple peeler
    1. Put the sliced apples in your Instant Pot.
    sliced apples in the Instant Pot for making pressure cooker apple butter
    1. Add water, molasses, sugar, brown sugar, spices, lemon juice, and vanilla extract to the Instant Pot. If you want to mix everything together, you can; but there’s no need to until after it all cooks.
    spices, sugar, apples, and ingredients for apple butter Instant Pot recipe
    1. Put the lid in place on the Instant Pot. Press Manual or Pressure Cook for 15 minutes; when it’s finished cooking, allow the pressure cooker to do a natural release.
    2. Then using an immersion blender, blend the apples into smooth apple butter, or ’til you reach the consistency/texture you want.
    blending apple butter in Instant Pot with immersion blender after pressure cooking

    How to Freeze Apple Butter:

    I stored apple butter in the freezer quite a bit before I learned how to can it, so it works just fine without any worries. And frozen apple butter should keep for at least a year.

    1. When your apple butter has cooked, allow it to cool to room temperature.
    2. Then just ladle or pour it into freezer safe containers that seal; leave 1/2 inch headroom at the top, to allow for expansion as it freezes.
    3. Label the containers, and place them in the freezer.

    How to Can Apple Butter:

    I prefer water bath canning apple butter. Canned apple butter should keep for 1-2 years in the pantry.

    1. While your apple butter is cooking, wash half-pint jars (jelly jars) or pint jars in hot soapy water, rinse, and keep warm. We like to place ours on a baking sheet in a lower temp oven to stay hot.
    2. Once you’ve mashed up the apples, promptly ladle or pour the resulting apple butter mixture into the hot jars you prepared ahead of time. This is where a funnel pitcher comes in super handy. Be sure to leave about a 1/2-inch gap at the top of each jar.
    pouring apple butter in canning jars using a yellow jar funnel
    1. Wipe the rim of each jar with a wet towel or rag, place the lid on, and tighten the band.
    2. Then place the hot jars down in a boiling hot water bath canner with 1-2 inches of water over the jars, and process those jars in the hot water bath for about 20 minutes.
    water bath canning apple butter in water bath canner
    1. Allow your jars to rest for at least 24 hours, but be sure to check every lid to make sure it’s sealed shortly after canning.
    2. Before moving to the pantry, write what it is and the year on the lid, so you know when you made it. There are plenty of options for pretty jar labels for apple butter, and you can even turn your home canned apple butter into holiday gifts or hostess gifts.

    If you choose to can it, Ball has wonderful Canning Guides to guide you through the process. You can also consult the Ball Blue Book Guide to Preserving.

    Expert Tips and Recipe FAQ’s

    How do you thicken apple butter?

    After blending the apples into apple butter, you can place the apple butter back on low heat on the stove, and cook uncovered for 30 minutes to 1 hour if you want it to thicken up more. While I have never had to do this, it’s a good way to make homemade apple butter thicker. Keep in mind, your apple butter will also thicken as it cools.

    What’s the best way to store it?

    If you’re not freezing or canning your apple butter, you should keep it in the refrigerator. It should keep in the fridge for about 2-3 months.

    How can I best use apple butter?

    I really enjoy apple butter on my toast in the mornings with breakfast. It’s also really delicious on Grandma’s biscuits, on drop biscuits, and on homemade dinner rolls. I especially love making my soda scones recipe and adding a dollop of apple butter on my buttered scone. So good! My friend Kelly makes a Dutch Baby apple puffed pancake that would pair so well with apple butter. And my friend Heather actually adds apple butter to the meatloaf in her meatloaf sandwich recipe; I want to try making this too because it sounds so delicious.

    spoonful of pressure cooker apple butter from canning jar

    More Apple Recipes:

    If you love this apple butter recipe, you’ll love these too…

    You can also learn how to use your Instant Pot with our Instant Pot Quick Start Guide, filled with practical tips, Instant Pot recipes, accessory ideas, and more!

    You’ll find a short video tutorial in the recipe card below. Wanna see a longer recipe video with a little bit of farm life too? Be sure to watch the full video over on YouTube.

    If you try this recipe, why not leave a star rating in the recipe card right below and/or a review in the comment section further down the page? I always appreciate your feedback. You can also follow me on Pinterest, Facebook, Instagram, and YouTube. And subscribe to my email list too!

    Instant Pot Apple Butter

    Save time with this quick Instant Pot apple butter recipe. No peeling or stirring, easy to make in less than an hour. Homemade fall favorite!

    • Instant Pot
    • Ninja Foodi
    • Johnny apple peeler
    • Immersion blender
    • Funnel pitcher
    • Canning Funnel
    • Pint jars
    • Hot Water Bath Canner
    • Jar Lifter
    • 4 pounds apples
    • 1/4 cup water
    • 1/4 cup molasses
    • 1/2 cup cane sugar
    • 1/2 cup light brown sugar
    • 1/2 teaspoon ground nutmeg
    • 1/2 teaspoon ground cloves
    • 1/2 teaspoon ground allspice
    • 1/2 teaspoon ground cinnamon
    • 1 teaspoon lemon juice
    • 1 teaspoon vanilla extract
    1. Before starting anything, it's important to wash your apples. I always soak mine in a vinegar/water bath for at least 10 minutes, then rinse.

    2. Core, peel, and slice the apples; again, an apple peeler for apple butter makes this step so easy. Cut out any worm holes or bad spots, as well.

    3. Put the sliced apples in your Instant Pot.

    4. Add water, molasses, pure cane sugar, brown sugar, spices, lemon juice, and vanilla extract to the Instant Pot. If you want to mix everything together, you can; but there’s no need to until after it all cooks.
    5. Put the lid in place on the Instant Pot. Press Manual or Pressure Cook for 15 minutes; when it's finished cooking, allow the pressure cooker to do a natural release. 

    6. Purée the mixture with an immersion blender, standing blender, or food mill; or if you want a chunky applesauce, you can mash the apples with a potato masher. It’s up to you how you prefer the texture and consistency.

    How to Freeze Apple Butter:

    1. When your apple butter has cooked, allow it to cool to room temperature.

    2. Then just ladle or pour it into freezer safe containers that seal; leave 1/2 inch headroom at the top, to allow for expansion as it freezes.

    3. Label the containers, and place them in the freezer.

    How to Can Apple Butter:

    1. While your apple butter is cooking, wash half-pint jars (jelly jars) or pint jars in hot soapy water, rinse, and keep warm. We like to place ours on a baking sheet in a lower temp oven to stay hot.

    2. Once you've mashed up the apples, promptly ladle or pour the resulting apple butter mixture into the hot jars you prepared ahead of time. This is where a funnel pitcher comes in super handy. Be sure to leave about a 1/2-inch gap at the top of each jar.

    3. Wipe the rim of each jar with a wet towel or rag, place the lid on, and tighten the band.

    4. Then place the hot jars down in a boiling hot water bath canner with 1-2 inches of water over the jars, and process those jars in the hot water bath for about 20 minutes.

    5. Allow your jars to rest for at least 24 hours, but be sure to check every lid to make sure it's sealed shortly after canning.

    6. Before moving to the pantry, write what it is and the year on the lid, so you know when you made it.

    * While I do leave the peeling on when making applesauce, and you can do that for apple butter too, I usually choose not to for this recipe.

    How do you make homemade apple butter thicker?

    After blending the apples into apple butter, you can place the apple butter back on low heat on the stove, and cook uncovered for 30 minutes to 1 hour if you want it to thicken up more. While I have never had to do this, it’s a good way to make homemade apple butter thicker.

    How should I store it, and how long will it last?

    • Canned apple butter will last about 2 years on the shelf.
    • Frozen apple butter will last about 1 year in the freezer.
    • In the fridge, apple butter will last about 2-3 months.
    Canning & Freezing, Condiments
    American
    apple butter Instant Pot, canning apple butter, how to make apple butter, how to make apple butter fast, how to make apple butter in the Instant Pot, how to make Instant Pot apple butter, Instant Pot apple butter, Instant Pot apple butter recipe, Instapot apple butter, pressure cooker apple butter, quick apple butter recipe