San Jose Island in Port Aransas is an uninhabited island you can only travel to by ferry. Explore the island, play on the beach, and collect sand dollars!
While doing a little research before we traveled to Port Aransas Beach a few years ago, I came upon an island everyone said was a must see place. San Jose Island, or Saint Joe’s Island, is a wild uninhabited piece of coastline on the Texas Gulf Coast.
San Jose Island, Texas, is a beautiful natural island; it’s privately owned, free of vehicles, about 2 miles wide at its widest point, and about 21 miles long. There are no shelters of any kind, but you may see the occasional cow roaming about.
The only way to get to the island is to take the Jetty Boat from Fisherman’s Wharf, Port Aransas.
It’s one of our favorite things to do in Port Aransas besides hanging out on beautiful Port Aransas beaches, and believe me, there are a LOT of fun things to do and explore in this amazing Texas beach town.
I know things may have changed since we were there, especially after Hurricane Harvey; but I’m anxious to go back and explore some more.
Getting to San Jose Island by the Jetty Boat
We decided to spend half a day on the island and explore, play in the ocean, and just like on Sanibel Island, hunt for sand dollars and sea shells. We bought our tickets at Fisherman’s Wharf.
There were a few people making the short journey with us. You can actually see the island from Port Aransas; it’s only a 5 minute ride.
Exploring Saint Joe’s Island in Port A
When we arrived, there were a handful of people waiting to take the Jetty Boat back to Port A.
We walked along the edge of the water until we came to the Gulf side of the island and then were able to walk along the shoreline.
The shoreline itself was absolutely beautiful, and the water was as warm as bath water.
While visitors are restricted to the beach, I will say that if you’re going to explore past the line of seaweed on the upper edge of the shore, I recommend wearing shoes or flip flops; don’t go barefoot. Trash and other objects tend to wash up from the ocean.
We settled in a spot with our towels and things we’d brought over to the island with us. We were mesmerized and walked and walked along the shoreline.
Photo Opps and Treasures on San Jose Island
There were so many beautiful photo opps, from this washed up buoy…
To an old boat that looked like it’d seen better days…
To the waves rolling in from the Gulf of Mexico.
It was a cloudy day, but even so, the ocean was gorgeous and warm.
Closer to the harbor end of the island, ships sailed in and out, dolphins swimming right in front of or beside them. There was a lot of traffic in and out of the harbor.
Walking up and along the shoreline, we found quite a few sand dollars and smaller sea shells; Jacob got so excited with every sand dollar we found. They were really small and cute; we’d find broken pieces of larger sand dollars too.
I love raising explorers; I hope my boys stay that way their entire lives.
Our visit to the island was so relaxing and quiet; there were not a lot of other people, and the people that were there were enjoying the solitude of the Texas Gulf Coast just as much as we were.
Eventually, we caught the Jetty Boat back to Port A.
Reluctant to leave, we made a vow to return again soon.
Though next time, we’ll stay even longer and explore even farther.
Things to know before you go to San Jose Island, Texas:
There are a few things you should know before you plan a trip to San Jose Island in Port Aransas.
You can catch a boat to the island via Fisherman’s Wharf in Port Aransas. Tickets are $12 for adults, $6 for kids.
There are daily departure times, as well as return times, to choose from when planning your visit. Once you are on the island, you’ll be there for at least 2 hours before the ferry returns to pick you up; but you can stay longer.
Activities on San Jose Island include spectacular birding, fishing, crabbing, hunting for sea shells and sand dollars, and of course, the beach.
The island is privately owned and needs to be respected as such; visitors are not permitted above the vegetation line, meaning you must stay on the beach.
Fisherman’s Wharf offers pull carts you can rent to carry your stuff over to the island with you.
There are no bathrooms on the island, so plan accordingly.
Pack food and drinks (including water bottles) with you in a small cooler, along with everything you’ll need… Again, there are no shelters or facilities of any kind on the island.
Before Zeke was born, we knew we needed a baby carrier that would stand up to all of our outdoor adventures. Of course, we also wanted it to be comfortable, lightweight, and easy to carry; and we wanted it to grow with him.
After a lot of research, we decided on the Osprey Poco AG Premium Child Carrier. It’s been the best purchase we could have ever made and the ONE baby product we’ve used over and over and over again.
How we use our Osprey baby carrier backpack
The Osprey carrier is actually quite versatile, and we’ve used it in many different ways for many different things. While it’s mostly meant for hiking, we’ve also used it in other ways…
Eating on the trail or while traveling – it makes a phenomenal baby seat and keeps Zeke safe when we don’t necessarily want him running around, even more so when he was really little.
Riding burros to Boquillas – Zeke rode on Dan’s back.
Working outside in the yard and garden – Dan and I both would take Zeke outside in the carrier before he was able to walk.
While we haven’t used it in the airport, it’d be a great way to navigate the airport, especially when your child is really little.
The carrier has an anti-gravity (AG) suspension system. It has aluminum stays that provide stability both while carrying and while sitting on the ground.
I love that the child seat has padding, a drool pad, and a softer fleece lining. We can strap Zeke in with the safety harness, and his feet can either dangle down, which he seems to prefer, or be secured in the provided adjustable foot straps.
Some of our favorite features of the Osprey Poco AG Premium:
Comfort for Zeke – It’s comfortable for Zeke; he’s loved it since he was a baby. He absolutely loves being in his pack when we’re out exploring.
Comfort for Us – It has a Fit-on-the-Fly hipbelt we can easily adjust to fit whoever is carrying. It also has an adjustable sternum strap. The mesh shoulder harness and backpanel give ventilation.
Sunshade – If it’s extremely sunny and hot, we can pull out the sunshade to give Zeke a little shade. As he’s gotten bigger, he doesn’t love the shade so much; he likes to be out in the open. But when he was little, it was a lifesaver.
Storage – There’s a small, removable backpack built into the carrier, as well as a larger bottom storage area. There are also various little pockets, like the hipbelt pockets. We carry things like sunscreen, snacks, diapers, and more. We’ve even stuffed a jacket or two in the pack.
Water Reservoir Storage – There’s a sleeve for a water reservoir, so no need to carry a water bottle if you don’t want to.
Grab Handles – The grab handles make it easy to grab and throw in the car or carry wherever you need it.
Stores well – The carrier itself folds up and stays put, taking up a smaller footprint wherever you need to store it.
Specs of the Poco AG Premium baby carrier backpack/toddler carrier backpack:
Max load, including child, pack, and gear – 48.5 pounds (all 3 carriers).
Weight of the Premium pack is 8.31 pounds; Plus is 7.67 pounds; and Poco AG is 6.9 pounds.
2,380 cubic inches of carrying capacity in the Premium; 1,587 cubic inches in the Plus; and 1,220 cubic inches in the Poco AG.
Extra accessories you may want to consider:
You can buy both a rain cover (perfect for hiking in the mountains where conditions are unpredictable) and a travel cover or carrying case for the Osprey. The travel cover is especially useful for air travel.
Looking for more outdoor gear for kids recommendations?
Kayaking with kids is an enjoyable family adventure that’s great for body and soul. Tips for beginners, including gear and where to get out on the water.
For years, we chatted back and forth about how much we wanted to go kayaking, but then this or that would come up, and the thought would float away.
But kayaking is something we can enjoy when we head back to Big Bend, on a mountain lake in Colorado, on the Gulf Coast waters, on the Jacks Fork River and the Current River in my home state of Missouri, and right here at home in the heart of the Ozarks where lakes and rivers abound, including Beaver Lake and the Buffalo National River.
Everything changed over the course of the past two months as we decided to finally take the leap and just do it.
Before we purchased our kayaks, we did a lot of research about kayaking with kids. We really wanted to experience this new adventure together, as a family; but above all, we needed to make sure everyone would be safe, especially our toddler.
After my initial freak out our first time out (I have a fear of deep dark water, but I’ll write more about that later), I felt myself begin to relax, surrounded by nature. We went again the next day and again the day after that.
I think it’s safe to say, from youngest to oldest, we’re all falling in love with the sport of kayaking. It’s another avenue to nature; and it’s another opportunity, in addition to dispersed camping, to find hidden away places we might not otherwise get to experience.
There are some things we did in the beginning, though, to really get a handle on kayaking with our boys. We wanted them to feel safe and capable before we took them out on open water.
Watch our video to see what it’s like kayaking with kids!
Tips for getting started kayaking with kids
1. Pick out kayaks and paddles. One is just as important as the other.
In the beginning, we thought about renting versus buying. However, with the empty cost of a rental, we decided to just go ahead and get our own. We ordered inflatable kayaks and bought a hardshell for Dan, so Zeke could ride more safely with him.
While inflatables definitely have their place, we pretty much knew our second to third day out, we needed more than just an inflatable. While the boys loved their inflatable kayaks, we felt in order to really explore some of the places we want to go (and the boys really want to do some fishing off their kayaks), we needed hardshell kayaks.
My advice to you: Pick the kayak and paddle that will work for each person in your family. Make sure if you have a toddler, you purchase a kayak with plenty of room for him/her to ride with you.
Go to the store and actually sit in both the sit in and sit on top kayaks; research the stability and read reviews. Try out paddles too because paddles are extremely important, though some kayaks do come with them.
Note: Make sure your kayak has a place to hold the paddle… Pretty important when you’re out on the water and need to be hands free.
Inflatables are a really affordable way to start out and get a feel for whether or not you and your kids even like kayaking. But if you’re wanting to explore various places, are wanting to fish off your kayak, or want the safety net of a hardshell for younger kids, pick the hardshell.
2. Every person needs a life jacket.
Everyone needs a life jacket, regardless of whether or not you wear it. Here in Arkansas, the law is that anyone 12 and under must be in a life jacket.
You can purchase life jackets by size or by weight. They usually range in price from $10 on up.
While Dan and I and even Jacob strap our life jackets within reach onto our kayaks, our younger kids are always in a life jacket when we go out. But we all have one because you just never know; anything can happen.
3. Start out in the pool.
I’m sure our neighbors thought we had finally lost our ever lovin’ minds, but we put the kayaks in the pool and started out there. If you have access to a pool that will allow it, a pool is a great place to get your bearings on a kayak.
While kayaking isn’t hard at all, this step gives everyone a feel for being on the water in a kayak. It may even put your mind at ease, giving everyone a feel for the stability of their kayaks and a chance to learn how to paddle.
Learning how to paddle is key; if you or your kids don’t know how to paddle correctly, you’ll get nowhere fast and could even have an accident. Give everyone an opportunity to practice in a safer environment.
This will also give you a chance to talk about the do’s and don’ts of kayaking together, and practice safety on the water.
4. Move up to an area of calmer water (like a pond or lake).
Stupidly, we went to the river for our first time out on actual open water. Not a good idea.
On a river, you deal with currents and loads of trees. While you have a little current on a lake and some trees, as well, it’s nothing like it is on a river.
Start out on a calmer, hopefully less crowded lake or pond. If your lake is like ours (Beaver Lake), large and pretty busy with happy boaters, find a cove where the water’s a little more calm, quiet, and peaceful. The more peaceful the locale, the better off you’ll be your first time out.
This is yet another great opportunity to learn how to paddle. And if there are boats, it gives everyone a chance to learn how to handle the wake from a boat, which can feel like the waves of an ocean, depending on the boat.
5. Take short kayaking trips.
Those first few trips, keep them short and sweet. Kids don’t always have a huge attention span, especially the younger they are.
Give them a chance to explore, but don’t plan to stay out too long. Maybe give them opportunity to get out near the shoreline and swim a little if it’s safe to do so.
Gradually increase your time on the water. Over time, your trips will get longer and longer, until you may eventually be packing dinner to eat on the water while you watch the sun set.
6. Pack the gear you need for everyone.
Before headed out kayaking with kids, you may need to pack a few things…
While water isn’t usually a huge deal with the hardshell kayaks, it can be a problem; maybe think about getting a bilge pump to pump water out if needed. Ours was a life saver with the inflatables.
Also, you’re going to want pictures. Maybe think about a soft case or a hard case for your phone, so you can still get all the photos and videos you want of your family’s many adventures out on the water.
Find a kayak, explore your world
While kayaking is an initial investment with the purchase of kayaks and life jackets, once you have the gear, it’s really an affordable activity your whole family can enjoy. There’s no need to buy gas (other than to drive to your nearest body of water).
The places you can go in a kayak are limitless. If you’re talking about kayaking with kids, stop talking about it and just do it. You may find yourself falling in love with yet another way to connect with your family in the great outdoors.
This is your complete guide to Big Bend primitive camping, in a National Park full of adventure, rugged beauty, solitude, and spectacular starry skies beyond anything you’ve ever imagined or seen.
A beautiful, rugged, and unforgiving place, Big Bend camping is some of the best camping known to man. With over 801,000 acres, there’s plenty of room for dispersed camping in Big Bend National Park.
While the park is quite rugged and desolate in some places, we found it to be a beautiful paradise away from the rat race of life. And while Big Bend is a fairly popular spring break destination, I’d still add it to my list of amazing spring break road trip ideas.
The only thing is, per Lockcuff family habit, we really didn’t do a whole lot of planning before we went. I take that back… I did make sure to pack our passports because we planned to visit Boquillas, Mexico, while there.
So on the way to this southern point in Texas, I started looking for the best primitive roadside campsites Big Bend has to offer. I quickly found out we really should’ve done our research beforehand.
While Big Bend does have 3 developed campgrounds, backcountry camping in primitive roadside campsites was our first choice. Since we visited in May when it’s extremely hot (true Lockcuff fashion), we had no problem reserving one of the Big Bend National Park campsites.
Which brings me to my next point… Big Bend National Park camping reservations, in person, are a must.You HAVE to reserve your site and purchase a backcountry permitin person during visitor center hours, up to 24 hours in advance. It’s not like your typical dispersed camping experience where you just go out and pick a site; you have to actually pick a site when you get your permit.
So, take it from me… This means even if you arrive at 5:15, and the visitor center closes at 5, you’re out of luck until the next day. Also, cooler times of the year are when campsites really fill up; so you want to arrive early on to reserve a site.
The park has links to each campsite with photos. It was enough for us to just read descriptions, look through photos, kinda research the roads campsites are on, and pick a site that resonated with us.
Looking for more camping options in the USA? Check out how we find the best free places to camp.
What Big Bend Camping Is Really Like
It wasn’t hard for us to pick a site. We knew we wanted solitude and a beautiful view.
Backcountry camping in Big Bend is available for backpackers. Dispersed or primitive roadside campsites are available on what they call “improved dirt roads” and “primitive dirt roads.” Primitive dirt roads require a high-clearance 4-wheel-drive vehicle. The road may get quite rocky, even sandy; and rain can make them impassable.
Of course, we decided on a primitive dirt roadside site, and we set off for Glenn Springs Road, which eventually comes to Juniper Canyon Road. Just to give you an idea of how long it took us to get to our site… From the paved road, we had about a little over an hour’s ride on dirt road out to our campsite at Robbers Roost Big Bend.
While it was a really long, really bumpy ride, the views were worth every single jolt. Of course, a thunderstorm hit on our first night out; but as that thunderstorm passed, we were hit with the most beautiful sunset over the mountains and a very surreal lighting like I’d never seen in my life.
It was so surreal and with storms all around us, it were as if God cleared the clouds over our tent and allowed us a glimpse of His majesty. I’ve never experienced anything so beautiful in all my life.
Primitive Roadside Campsites in Big Bend
Robber’s Roost is way out in the desert, with no one else around for miles. However, the site is really well developed with adequate parking, enough room for 3 tents, and a bear box to store food and anything else with a scent.
It provides amazing views of the Chisos Mountains, beautiful sunrise mornings, gorgeous sunset nights, colorful views of the Texas and Mexico desert, a stargazer’s paradise, amazing sleep, and peaceful desert sounds in those early morning hours.
Every part of me longs to be back in that beautiful desert atmosphere.
Can I Boondock or Camp in a Tent?
While boondocking isn’t allowed in Big Bend, per park rules, roadside camping (with a permit) is allowed, and you can camp in your car or in a tent.
Big Bend offers 64 campsites on backcountry roads, most of them requiring high-clearance 4WD vehicles to reach them. Only a few of these sites can accommodate large RV’s or camping trailers.
Each campsite has rules regarding vehicle length and capacity limits.
How to Reserve or Book a Big Bend Campsite
Online reservations are available online, up to 6 months in advance, for the 34 most popular campsites thru recreation.gov.
Reservations for the remaining 30 primitive roadside campsites can only be attained in person at the Panther Junction Visitor Center, daily from 8:30am to 5:00pm, and the Chisos Basin Visitor Center, daily from 8:30am to 4:00pm. Reservations must now be made 24 hours in advance of your first night’s stay.
Before you head out, follow park regulations and get the required permit. Even though the permit isn’t used to check on your safety, it allows rangers to talk with you, to get an idea of what sites will work for the type of vehicle you’re driving, and make sure you know what you’re getting yourself into, as well as warn you of the dangers.
They use the permits to track how many people use the primitive campsites, as well. And if you get caught without a permit? Not good.
Permits are only $12, and when you get yours, you can extend it out as long as 14 days.
Safety Tips for Big Bend Backcountry Camping
I wish we had a picture of the park sign we saw that read something like, “Please call your family and tell them you don’t have cell phone service so they’re not calling and reporting you missing.” Apparently, this happens a lot at Big Bend.
In all seriousness, it can be a very desolate place, and we learned a few lessons while trekking Big Bend even for the short time we were there this trip.
Here are a few safety tips, as well as tips for how to prepare for your Big Bend adventure…
Tell people when and where you are going and plan on checking in, so they can report you missing if they don’t hear from you; otherwise, the rangers will not know to look for you unless someone calls. Certain visitor centers have Wi-Fi, and there is cell service in some areas of the park, just likely not where you’ll be camping. Stay in touch with your loved ones.
Stay connected by carrying a radio so you can attempt to call someone if you need help.
Carry at least a gallon of water per person, per day, for however long you’ll be there, extra if you plan to use a portable shower for camping. Even if you plan to drive out the next day, carry extra because you never know what will happen, and you need water in order to survive. We consistently reached over 100 degree temps while there.
Carry extra fuel. Gas stations are few and far between.
Carry a map of the park with you at all times.
Carry plenty of spare tires. We have 4. Even the ranger mentioned this to Dan; when Dan said we had 4, he said, “You’ve been down that road, huh?” Yes, we have, 10,000 feet up on a mountainside in Colorado in the dark, and it was not fun.
Wear sunscreen. Even if you don’t plan to be out in the sun long, wear it anyway. Also, wear proper clothing and shoes, especially shoes. There are rattlesnakes, scorpions, etc. Protect yourself and your little ones. Also, a hat goes a long way for shade, because there will be no shade, no shade at all, besides the occasional rock or boulder.
Plan strenuous activities, like hiking in Santa Elena Canyon and other places, for early in the mornings or in the evenings when it’s cooler; be sure to pack a good hiking carrier for little ones.
Cactus is everywhere; it is a desert environment. While it’s beautiful, it can also be quite attractive to little ones. Zeke found out the hard way that cactus hurts. Watch your kids closely, especially if you’re in the middle of nowhere and a long way from cell service or help.
Stay low during a thunderstorm. Also, keep things tied down well. Keep all loose items stored when you’re not at the campsite; strong winds can come up quickly in the desert.
Campfires are banned. Even charcoal grills were not allowed while we were there. It’s so dry, and all it takes is one spark.
Keep food put away and closed up; bear boxes are provided because bears and javelinas are pretty prevalent in the park.
Plan for the most beautiful starry nights you’ve ever seen in your life. Whether it’s camera equipment you want to bring along to capture those night time images, or a map of the constellations, make sure you’re prepared for night time skies in Big Bend.
Pack it in, pack it out, including all trash. Leave no trace.
Gas is available at Panther Junction and Rio Grande Village. Diesel and limited groceries are also available at Panther Junction; and you can find propane at Rio Grande Village.
As for more supplies, you can find convenience stores at Rio Grande Village, the Chisos Basin, and at Castolon. They carry basic supplies like camping supplies, some groceries, and souvenirs too.
What’s the Best Time of Year to Visit Big Bend?
It really depends on the reason for your visit. For example, if you’re floating the river, you may want to visit in the summer months when the weather is hot hot hot.
If it’s hiking and land adventure you’re after, fall, winter, or early spring may be a good time. March can be crowded with spring break travelers, but the temperatures are just about right with warmth thru the day and cooler temps at night. Early spring also brings wildflowers to the park, so that is something to think about when planning your trip.
Keep in mind winter in the park brings freezing temps at night; and holidays can get quite crowded, about like spring break.
We can’t wait to go camping in Big Bend National Park again, likely in the cooler weather of spring or fall. We fell in love with this beautiful, wild, rugged park and everything it has to offer.
It’s one of those national parks you can spend days and weeks exploring and still not see everything there is to see. Next time maybe we’ll go kayaking on the Rio Grande.
If it’s not camping you want but lodging instead, Park Ranger John has all the details on Big Bend Lodging.
Can You Bring Pets to Big Bend?
Big Bend has a lot of rules and regulations around pets in the park. While they can come in the park, they can’t be on any trails; in fact, they can only go where your car can go.
There are no kennel services in the park either. So it stands to reason that it’s probably better not to bring pets into the park, unless you’re camping in a campground and they’d be safe to stay in the camper.
Video of our Camping Adventure at Robbers Roost Big Bend
Prepare for your next trip with a complete camping supplies list, from the shelter you need to kitchen essentials and hygiene items. It’s printable too!
As we pack up for another camping trip, I’m reminded of how often I’ve thought of creating a camping checklist for packing. Too many times to count, that’s for sure, yet here I am again.
When it comes to packing, some people like to take everything but the kitchen sink. Others like to keep it simple and pack only the basics.
This is meant to be a comprehensive list of tent camping essentials, but it’s also perfect for car camping, RV camping, and even backpacking (though you’d carry much less, as well as lighter equipment). Keep in mind, though, that some of the items on this tent camping checklist are geared more toward dispersed camping.
As you look down through the list, use it to your specific advantage. What I mean by this is, pack the things that make the most sense for you and your family; then forget the rest.
While we don’t carry everything that’s on this packing list for camping, it definitely gives us goals for our future camping endeavors. And if you’re camping on a really tight budget (we’ve been there), there are a lot of things you can go without, or find ways to improvise.
Below are a few different categories of gear and supplies you may want to think about packing. My hope is that this list makes it easy for you to check off items or even print if you want.
Be sure to check out our list of campfire cooking equipment for all your kitchen basics. It contains pretty much everything we take on a typical camping trip. Here are a few things from that list.
Musical instrument – Jacob likes to take his guitar and serenade us.
Miscellaneous Camping Supplies and Equipment
Hiking Carrier – This is hands down the BEST thing we could have ever gotten for our baby/now toddler. We’ve used it so many times. Read our review of our favorite baby carrier backpack.
This camping checklist will have you on your way to being well prepared for your next camping trip. You may find more helpful ideas in our list of 12+ awesomely useful cool camping gifts under $20.
And remember… Packing is the hardest part. When it’s all done and you’re ready to hit the road, you’re ready to create some pretty amazing memories with your family.
All Set for a Fun Camping Adventure
Looking for somewhere to actually go camping? We’ve got all the details on where to find the best free camping spots in the USA.
This is the ultimate guide to what is dispersed camping, along with tips, rules, and the gear you’ll need. You’ll also get a peek into why my family loves this style of camping so much.
When you say the word camping, it evokes an authentic mental image for each individual person. For us, camping has meant something pretty special for a long time, and though we used to call it primitive camping, it’s also known as dispersed camping.
The word camping may not always mean the same thing to everyone. Some people think of an RV, others a tent, others backpacking with a sleeping bag under the stars.
For us, it means an escape away from civilization. And while the preparation, camping supplies, and all that may not be free, we like to think of it as free camping. Free in a money sense, but free in a ‘wild and free’ sense, as well.
Dispersed camping allows our family to travel and experience everything this beautiful amazing country has to offer. Like kayaking, it gives us the opportunity to explore places we might only have dreamed of exploring otherwise.
According to the Forest Service, “Dispersed camping is the term used for camping anywhere in the National Forest OUTSIDE of a designated campground.” It’s National Forest camping at its best.
The official dispersed camping definition or meaning is that of camping away from any sort of designated campground, paved roads, or people (although others may camp in the vicinity), out in the wild and on your own. No facilities, no running water, no trash removal, etc.
It can mean finding campsites off a forest service road, camping on BLM land, backpacking and camping along the trail, etc. Camping dispersed is our kind of camping.
Why Do We Love Camping Dispersed?
Well, do you ever feel the need to get away from the world? No cell service, no chatter, no other people around sometimes for miles.
Dispersed camping, primitive camping, free camping, whatever you want to call it… This type of camping allows a family to explore roads less traveled, to explore places and parks most people may never have the opportunity to see, to camp in places one can only dream of, like…
In the heart of the Gila National Forest, where wolves wake you up in the night with their howls.
The list could go on and on, from Kansas to Wyoming, Colorado, the deserts and forests of New Mexico, Texas, Arkansas, Missouri… Think of the places you can explore.
No cars, besides the few vehicles that pass by looking for another campsite nearby, no voices, just complete and utter silence, save the crackling fire and the sounds of nature all around. It’s complete and utter relaxation at its very best, in its most beautiful state.
As the makers of our tent would say… Camp is where you park it. And it truly is.
You can also find places to camp in wilderness areas.
BLM lands are another great option.
Occasionally, National Parks will have designated places for primitive camping or roadside camping. For example, Big Bend primitive camping is available in the desert backcountry of Big Bend National Park.
On a roadtrip to Colorado, we camped all over Colorado and New Mexico in various National Forests and Wilderness areas. We’ve also enjoyed camping in Arkansas.
What are the Rules for Dispersed Camping?
Usually, there’s no fee or permit required, meaning you will probably camp for free the entire time! You just have to check with each area you’re planning to enter.
Rules are posted online, and you can usually find signs with specific rules and updates for each area you’re visiting upon entering that particular area.
We’ve also stopped at ranger stations to ask questions, get maps, and find out more information about the area we’re exploring.
Some of the Rules and Regulations You May Encounter
It’s important to stay on existing roads, whether paved or unpaved.
While some roads are 4-wheel drive only roads, there are roads that allow campers and RV’s. That way, dispersed camping is possible for everyone.
Fire danger conditions are a very important factor. Check to make sure that it’s ok to have a campfire, given the current conditions in that particular area.
Most sites have a fire ring, and it’s usually a rule that you don’t create new campsites. You’ll know a campsite by its existing fire ring.
It’s also important to carry enough water that you can drown your fire before going to bed and before leaving.
Speaking of campfires, only use dead wood when starting a fire. Please don’t ever chop a live tree to build your fire. There’s usually plenty of dead wood all ’round. And you can use this DIY fire starter to help you get your fire going.
Always camp at least 100 feet away from any stream or other source of water.
And finally, National Forest camping usually has a limit as to how long you can stay in the same site. Usually, it’s 14 days, and you can’t return to that exact campsite for 1 whole year. So if you find a good site, you may wanna stay and enjoy it for as long as possible.
How Do You Prepare for Dispersed Camping?
While you’ll spend a fair amount of time packing all your gear, you won’t have to worry about reservations, fees, or exact dates to be there and leave.
Most of your preparation will involve making sure you have a good road atlas for the journey, as well as packing up your gear and making sure you have something to actually stay in, like a tent.
When it comes to maps, we’ve used the DeLorme Atlas & Gazetteer for states we’ve visited, including the following:
Let’s talk about just a few of the things you’ll need to pack for your wild camping trip.
First Let’s Talk Accommodations
For most people who love this style of roadside or backcountry camping, a tent is the way to go.
We decided to invest in a Mt. McKinley rooftop tent from Cascadia Vehicle Tents. It gives us the option to either have the tent on our vehicle or on top of a trailer that also holds all our camping supplies. Most of all, it gives us the option to camp just about anywhere we like.
We give the inside scoop on what it’s like camping with a roof top tent vs. ground tent because a good tent really is an investment into your family’s outdoor life.
Facilities… Ahem…
A game changer for some people (I’m just not sure why, because the pros of wilderness camping are so worth it and there are options) is the lack of facilities. No toilets, no showers… But like I said, there are options.
You can choose to take a camping shovel and dig a hole for your waste (not my cup of tea either, but I’m not above it; been there done that); or you can actually buy a portable toilet and carry it with you, emptying it at RV stations, which you can find at some gas stations.
We have a really handy setup with a portable toilet inside its own little pop-up tent, giving us a chance to do our business in private. Though I will confess to having to go really super bad one night and setting it up without the tent, praying no one else was around to see my dairy air (it was dark out on that open prairie).
As for the shower situation, I make up a batch of camping body wipes for every trip, and we use them to freshen up most days.
We also have a portable shower bag, which can come in quite handy. Chelsea from Someday I’ll Learn told me about the perfect shower for camping, and we decided to purchase it. It’s been very helpful, especially for washing hair while out in the middle of nowhere.
If you’re really desperate for a hot shower, you can usually find paid showers in nearby towns. But I’ll admit that just taking the time to freshen up and change clothes most mornings makes me feel like a whole new woman.
Potable Drinking Water
Water is the most important thing you’ll need to carry with you. We drink a lot of water when spending time outdoors. And it’s necessary for things like washing dishes, washing hands, putting out fires, as a part of our campfire cooking equipment, and more.
You need to carry your own potable water OR treat the water that you drink, either by boiling or with water purification tablets or filter. We keep several 5-gallon portable water jugs with us at all times, replenishing at gas stations and campgrounds as needed.
Cleanup and Hygiene
Speaking of cleanup… Campsuds. I can’t say enough about this stuff. When camping in the wild, you need a good, biodegradable cleanser to carry with you.
We carry Campsuds with us every single trip; and while we use it over and over again, we hardly make a dent in the bottle. It lasts forever, it cleanses and suds up really nicely, and most importantly, it’s biodegradable. You can use it for dishes, hair and body, and dirty clothes.
Of course, you have to carry the necessary supplies, but don’t go overboard. Sure, you need enough food for however long you’re planning to stay; and I also highly recommend carrying a first aid kit with you on every trip.
But really think about what you need and pack accordingly. Pack enough clothes, but remember that most of the time when you’re in the mountains, you’ll be dressing in layers. You may not need as many clothes as you think because you may be able to re-wear certain things.
When thinking about what you’ll eat, also remember that bears are active in National Forests, and all food and trash will need to be locked up at night, either in a bear box, a hard-sided vehicle, or hanging from a tree out of reach.
You’ll find our camping checklist helpful when figuring out what else to pack. And if you have a camping enthusiast in your life, here are 12 ideas for cool camping gifts under $20.
Leave No Trace. Carry Out What You Carry In.
This should be a given, but we find trash at almost every campsite we visit. Leave no trace means leave nothing behind. Make it look as though you were never there.
And here is where I go on just a tiny rant… We’ve seen so many aspen trees and pine trees marked up with names, initials, and axe marks from human beings who’ve felt the need to leave their mark. It’s called leave no trace for a reason.
Dispose of trash properly by carrying it out with you. Don’t try to burn it in the campfire, leaving behind pieces of cans and foil or worse, dirty diapers. This will help to keep the campfire ring clean for the next campers who stay there.
Dispose of any waste the right way, again by using a shovel and digging a hole at least 6 inches deep and far enough away (at least 100 feet) from any water source, like a stream or pond.
Keep the campfire, if allowed, inside the existing campfire ring, so you’re not disturbing or harming other parts of the campsite.
Stay on existing roads or trails. Also, try to camp far enough away from others so they and you can get the full experience of what dispersed camping really is all about.
So, who’s ready for an adventure?! We’ve got a lot of exploring to do, and the fact of the matter is, I’m just ready to go camping!
Laurel Falls Trail in Great Smoky Mountains National Park is a moderate waterfall hike with beautiful mountain views and plenty of forest shade. A piece of heaven on earth for nature lovers who hike.
Smoky Mountain waterfalls include beautiful Laurel Falls, an upper and lower waterfall accessible by a moderate hike perfect for families who love hiking. Roundtrip, the trail is a 2.6 mile hike that winds through the forest and gives incredible views of the Great Smoky Mountains.
It’s no secret that we love to hike; in fact, it’s probably at the top of our list of favorite things to do together. When we took a camping trip to the Smokies and hiked this particular hike about 6 years ago, Jaden was only 4, just old enough to be getting his hiking legs underneath him.
I think the thing we love most about hiking is the sense of anticipation, the feeling that we’re headed toward something beautiful, and the end result is going to be so worth the hike to get there. Of course, it might be the peaceful spots and quiet moments we find along the trail; and Laurel Falls Trail has plenty of quiet, peaceful spots.
Our experience hiking Laurel Falls Trail in Smoky Mountains, Tennessee
As mentioned above, this trail is a 2.6 mile moderate hike roundtrip. When we arrived, we had to park quite a ways down the road, along the edge of the road; parking areas were all full.
The trail itself is paved. After reading more about it, I learned that the trail was initially paved in the 1960’s to help stop erosion.
It has a lot of uphill stretches, and it seemed like we kept winding up and around for a very long time. There were markers along the way, motivating us further along the trail.
The views at certain vantage spots are so beautiful and so amazing. We’d stop every so often and just admire the Smoky Mountain vista.
At one point, almost all the way to the falls, we came upon a little spring in the side of the mountain. It was almost like a small cave opening with a spring trickling out, but the cave itself didn’t lead anywhere.
The kids enjoyed stopping and climbing around on rocks, exploring nature at its best. There were areas of the trail where we really hung on extra tight to Jaden; steep dropoffs and signs warning us to hang onto children were enough to make us just a bit nervous.
For the most part, the trail seemed quite safe, though. There were people all along the trail coming and going, so we were never really alone.
Smoky Mountain Waterfalls – Laurel Falls
Upon arrival at Laurel Falls, we realized it was much more popular than we’d thought. There were a LOT of people, making it more difficult to take a good photo with the 80-feet high waterfall. However, it was so worth the hike.
There are two levels to the falls, both a top and bottom section. Visitors can cross between the top and bottom falls via a walkway, known as Laurel Falls Bridge.
Looking up, we could see light shining through the trees from the sky above and water just pouring over the side of the mountain. It was stunning, so much so that pictures just don’t do it justice.
What I believe was mountain laurel, lined the cliffs along the edge of the falls. It had big white flowers set against a backdrop of dark forest green leaves.
It was a steep hike down to the bottom of the falls but again so worth it. The bottom falls had a much more narrow stream of water pouring down through the rocks.
Things to know before you hike Laurel Falls Trail
Before you set out to hike the trail, here are a few things to keep in mind…
Parking may be scarce, and you may want to go during non-peak times so you’re not having to hike just to get to the trail itself.
Carry plenty of water bottles with you, as well as snacks. Trail mix makes a great snack.
Plan for 2 to 3 hours of a moderate hike.
Be aware there are bears in the area, so take the necessary precautions.
There are no restrooms on the trail.
Pets are not allowed on the trail. Neither are bicycles.
Strollers and wheelchairs are not recommended, mainly because of certain steep parts and rough pavement.
Be warned that climbing around on rocks near the waterfall is dangerous and prohibited, and many people have been injured, some even killed; it’s important to be cautious and sensible. There really is no guard rail between the top and bottom falls; so hang onto your little ones, and pay attention to signs.
Finally, leave no trace. Carry out what you carry in. Protect both the park and wildlife by doing this.
For a developed campground, Cosby Campground in Great Smoky Mountains National Park in Tennessee is one of the best. Sites tucked in the trees allow for quiet, peaceful camping with a secluded feel.
Cosby Campground is a “home away from home” in the Great Smoky Mountains, Tennessee. We prefer camping in the middle of nowhere; but for a developed campground, Cosby really does have quite the secluded feel with many campsites tucked back into the trees.
There’s absolutely nothing like waking up in a tent, listening to the birds sing and wildlife chattering. It’s the very definition of peace and tranquility, a way to truly get away from the world and unplug.
Of all the Smoky Mountain campgrounds available, Cosby’s solitude won us over, and we reserved a tent site in the campground. We were really excited to just get away and unplug together.
Where exactly is Cosby Campground in the Great Smoky Mountains?
At about 2460′ in elevation, Cosby is away from the hustle and bustle of Gatlinburg and away from the main park entrance, but still close enough to enjoy both.
It’s just outside (about 5 miles away from) Cosby, Tennessee, where you’ll find simple conveniences like showers, gas, and supplies. The bigger mountain town of Gatlinburg, where you’ll find shopping, food, activities, and family attractions, is about 20 miles away.
What’s the campground like?
Cosby Campground has around 165 total sites, including only 26 reservation sites; all the rest are first-come first-served. Sites are mostly tent sites, a few RV sites, and a few group sites.
A beautiful 5 minute drive leads campers through the forest toward the campground entrance. The campground has multiple trails and a river flowing through. Only 3 miles away is the Appalachian Trail, and outside the campground is a trail to Hen Wallow Falls.
When we arrived, we picked up our reservation tag at the Ranger Station and drove on in. The campground appeared quite empty, a surprise to us with it being June and vacation season. We noticed right away the overall secluded feel of the campground.
We were excited to get to our site and check it out and were ecstatic with its location. It was absolutely beautiful and hands down the best and the most private developed campsite we’ve ever had.
We parked parallel on the road and climbed steps up to our site, which was surrounded by trees. The only neighbors we could see were directly across the road from us and even then, we could barely see them; cars were parked blocking the view.
It was a magical place and perfect for the quality family time we needed together.
I can only imagine what it’d be like when spring has sprung and all the trees are budding and blooming. Talk about an awesome spring break vacation idea!
Our Great Smoky Mountains National Park Camping Experience
We began to set up camp right away, making the campsite our own. With a campfire going that first night, we roasted hot dogs and enjoyed s’mores.
Neighbors were pretty quiet. The only noise we really experienced was a group putting things away late one night (not really bothersome to us), a group of kids having fun late one night, and one morning, waking to the sounds of Slim Shady booming through the campground (apparently, the camper next to the first group was trying to get back at them by making some noise of his own).
To be honest, we have zero complaints, and for the most part, it was beautifully quiet and serene.
The bathroom was right down the road and down a little trail; it took us maybe 2 minutes to walk there and back.
I have to say too, that after our experience camping in another national park that shall remain nameless, this bathroom was so wonderful. The ranger really did a great job of keeping it clean, and there were lights at night (yay!!!).
Of course, you might want to carry your own soap; no soap available. We highly recommend Campsuds.
Water was readily available, including a cold water sink for dishwashing and perfect for washing hair. There were no showers; in order to take a shower, campers have to drive into Cosby, TN (about a 5 minute drive) and pay about $5/person.
Why you should ALWAYS get rid of trash IMMEDIATELY
Wildlife is definitely abundant in Smoky Mountain campgrounds. Our second night there, we experienced quite the thrill.
We’d cooked beef stew with biscuits for supper, and the boys had gone to bed after eating. Dan was still sipping on a bit of stew, so he hadn’t taken the trash down to the car yet.
Note: There are no bear boxes; all food/trash/cooking gear needs to be stowed away either in your car or carried to the nearest dumpster.
We were sitting next to each other, talking and enjoying the campfire. All of a sudden, we heard a crashing sound and twigs snapping, coming from the forest next to the road.
Dan snapped on his headlight, and all we saw was this huge bundle of fur not even 15 feet away. It was a bear, and he’d come for some beef stew.
I freaked out, having never experienced a bear so up close and personal.
Dan immediately ran toward the bear, trying to chase him away from the site. I jumped up on the picnic table with my handy dandy stick, as if the table (or stick) would keep me safe. I wasn’t about to leave the boys unprotected in the tent, but I certainly didn’t want to be on the ground if Dan chased the bear back through the site.
We could hear him over in the woods, wrestling around with the cups that had held our beef stew. Finally, the bear had enough of Dan and went to make the rounds with our neighbors, as well.
Let’s just say it was a long night. He didn’t go away for probably an hour or two… But even when he did finally leave, I was totally worried he was going to come back.
That same night we had owls going back and forth in the trees, hooting and screeching. It was an awesome experience I’ll never forget.
Cosby Campground amenities
We had a great time camping in the Smoky Mountains, so much so that we’re not opposed to staying in the campground when we visit again. It’s an economical alternative to hotels, plus we get the outdoor experience that we so crave.
Campground amenities include the following:
Accessible sites and restrooms with flush toilets
Drinking water
Dump station
Emergency phone (because you won’t have cell service in the campground)
If you’ve never camped before, I highly encourage you to do so. It’s an experience that will definitely change your life for the better, and you may just fall in love with it.
We’ve camped in both traditional campgrounds and in the backcountry. In fact, we give the inside scoop on what it’s like to camp in a roof top tent vs. ground tent.
After camping for quite a few years now, we’re actually hoping to start training for longer backpacking trips, which means more backcountry camping. Camping has indeed opened up a whole new world for us.
Update Notes: This article was originally published on July 17, 2012, but was re-published with bigger photos and more details in March of 2018.
On a typical road trip out West, usually to New Mexico or Colorado, we usually end up driving a lesser traveled road through Oklahoma’s panhandle. From that road we usually dip down to spend the night on the Rita Blanca National Grassland in Northwest Texas (also stretches into Oklahoma).
While most of the roads to the picnic area are paved, the last stretch is a dirt road, which can get quite muddy when it rains. Both times we’ve stayed, we’ve arrived late at night. And man, is it ever dark out there.
A Beautiful Sky on the Rita Blanca National Grassland
With miles and miles of grassland stretching as far as the eye can see, there are not a lot of lights in this area, which means the stars on a cloudless night are absolutely amazing. I’ll never forget the stunning view of the stars we enjoyed our first night on the grassland. I’ve never seen stars like that in my life… Millions and millions of them in the black of night, just twinkling away from their perch in the heavens.
Of course, if you have a sunny day this also means the sky is just about the bluest blue you can ever imagine. Our last trip was a bit stormy and cloudy but no less beautiful.
What to Expect When You Pull into the Thompson Grove Picnic Ground
Both times we’ve camped in the picnic area, we’ve been alone. It’s definitely a quiet place to park a rooftop tent.
The parking lot is the only place to park and set up a tent. The actual picnic area is separated by a metal rail all around. There are restrooms, but we’ve never used them, so I’m not sure if they’re locked or not. There are also trash cans available.
I will tell you, this last time we stayed we found out the next morning there are warnings for Plague in the area. Not the most comforting thing to see, but basically, you want to be cautious by following a few rules. Don’t camp or rest near animal burrows. Wear insect repellent, and make sure pets are treated for fleas. Avoid contact with the animals they mention on the warning, like prairie dogs, rabbits, mice, squirrels, etc. Steer clear of any dead critters you may happen upon. You get the drill. People live out here, so I wasn’t too worried, but we were cautious nonetheless.
Weather can be balmy and chilly at night but quickly heat up when you wake in the morning. Storms are also common on the grassland. While we felt completely safe in our tent, we did ride out a thunderstorm this last trip. Rain makes for great sleeping weather in a tent, once the thunder and lightning calm.
Explore the Rita Blanca National Grassland
I know most people probably wouldn’t want to go to a Plague infested area. And most probably wouldn’t make it a point to camp in an area like this. I get that.
But we fell in love with the grassland the first time we visited, and it’s become kind of a thing when we travel out West. The land may be flat prairie, but none of us could quite get over the beauty of this vast and endless prairie with its waving grasses.
Gnarly trees with thick trunks and fragile branches… The occasional farm or ranch dotted here and there… A light in the distance in the pitch black of night… Wondrous stars and galaxies overhead at night (bring your telescope)… Night time sounds of wildlife… Waking to a literal symphony of birds and wildlife the next morning… The bluest sky you ever did see… An old corral and broken down windmill nearby… Only the occasional car which may be a sheriff’s deputy checking on you to make sure everything’s ok…
Something about the Texas prairie beckons to us and calls us back each time. It’s like a gateway to the mountains, and a beautiful gateway at that, something for which pictures really don’t do justice.
It’s these off the beaten path places that fill our travels with never to be forgotten memories.
Wanna find more free campsites? We’ve got all the details for you, including apps, tools, and maps to use to find the best dispersed camping in the USA.
Planning a road trip through Texas? Pin it for later!
Once in a great while, you travel somewhere that instantly changes your life. And you can feel that change from the moment you set foot in that place. Marble, Colorado, along with Crystal Mill, is one of those places for us. From the moment we entered that small mountain town in the wilds of Colorado, we knew we would never be the same. We fell in love with the mountains, the culture, and everything about it.
Marble, Colorado, is a small mountain town that sits on the edge of the Maroon Bells/Snowmass and Ragged Wilderness areas. Its beauty is unmatched, and its history is filled with stories of unsung heroes and creepy characters.
There are so many reasons to visit Marble, but let me just start with a few of our favorites…
5 Reasons to Visit Beautiful Marble, Colorado
1. Marble is home to the Yule Marble Quarry. You can even take a piece of marble home with you. I have a piece that sits on my desk so I’m reminded of my favorite place every single day of my life. And an interesting fact… Stone from Yule Marble Quarry was used for the Tomb of the Unknown Soldier in Arlington National Cemetery.
2. Marble is beautiful and peaceful and full of outdoor adventures. We camped all around the area for almost an entire week; there are plenty of nearby opportunities for dispersed camping. A part of the Maroon Bells/Snowmass and Ragged Wilderness areas, you can just imagine how beautiful Marble really is. The mountains are unbelievably beautiful. The town is a peaceful spot to settle down for a nice relaxing vacation. They even have a lodge overlooking a gorgeous mountain lake. You’ll find all sorts of activities, including fishing, canoeing, kayaking, mountain biking, and more.
3. Crystal Mill, Lead King Basin, and Devils Punch Bowl. Take a Jeep tour to Crystal Mill or drive to Crystal Mill on a one lane 4WD road yourself, and explore the area. Crystal Mill and the semi ghost town of Crystal City will forever remain one of my favorite spots in all of Colorado. A guided Jeep tour will not only let you enjoy the scenery, but you’ll hear stories all along the way with bits and pieces of the area’s history. And once you get to Crystal City, you have the opportunity to meet a local author who is full of even more knowledge and stories about the area.Back roads lead to beautiful destinations, and in this case, breathtaking destinations.
4. The people are amazing. In all of our travels, we’ve never met more friendly and helpful people. Our first night there, a local invited us to camp out in his front yard. Granted, he may have been a bit tipsy; but that friendly, helpful nature seemed to be the Marble way. Not uppity in any sense of the word, the town had some of the most down-to-earth friendliest people we’ve ever met. And they had plenty of stories to share and tell.
5. The best BBQ you’ll ever eat. We ate in town, more than once, at Slow Groovin’ BBQ. From their Hillbilly Nachos to their homemade pie, Slow Groovin’ was an amazing place to eat. In fact, our kids have begged to go back just for the bbq.
Are You Ready to Visit Marble?
I’m ready for summer and so ready for a trip back to Marble… Have you ever been?
Whenever we travel, and especially when we go camping, kayaking, or hiking together, we always carry a first aid kit with us. It stays in our vehicle 24/7, even for short day trips, like when we go fishing.
I also keep a stash of first aid supplies in our working pantry in our home.
I started carrying one with us because when Jacob and Jaden were little, there were numerous times they’d need a Band-Aid, and I wouldn’t have one. So, I solved that problem by packing a comprehensive first aid kit that would hopefully get us through any mini catastrophe.
Trust me… With boys (just kids in general), there WILL BE lots of mini catastrophes. It’s come in handy more times than I can even say.
We were given a kit years ago, so I’ve kept a few of the supplies that were in it and added to it over the years. You can buy a first aid kit, or you can put together your own kit. All you need is some sort of container, a small box, or zippered pouch. A zippered lunch box, with a handy dandy handle, is an easy solution.
What to Pack in Your First Aid Kit
If you keep the usual first aid supplies on hand, it’s pretty easy to pack your own kit; it also gives you an opportunity to add in extra things that a regular first aid kit may not have. Here’s a checklist of what to pack in your first aid kit…
Wounds and Injuries
When it comes to bandages and Band-Aids, be sure to pack multiples.
Bandages and Band-Aids (various sizes and types)
Butterfly adhesives
Gauze and/or gauze pads
Compress bandages/dressings
Bandaging tape
Scissors
Elastic bandages with clips
Cold compress – If you’re carrying ice in a cooler, you could take a few resealable plastic bags for ice and use as a homemade cold compress, along with a wash rag.
Did I miss anything? What else would you add to a first aid kit for camping or family adventures?
Disclaimer: Everything I share about essential oils on Adventures of Mel is based on personal experience and has not been approved by the FDA. Please do your own research, and never use essential oils in a way that would make you uncomfortable. Also, take special caution for those pregnant or nursing, as well as infants and children. Read the full disclaimer.
If you’ve ever been to Colorado, you know how beautiful it truly is. Our last trip to Colorado, with no plans and every road an adventure, inspired this collection of roads, by-ways, and 4×4 trails in that beautiful state we love so much. And while it may not be a comprehensive list, these are a few of the scenic roads in Colorado that we’ve discovered, taken, and enjoyed so far.
1. Mount Evans Scenic Byway
The road to Mount Evans is the highest paved road in North America. At the end of the 14 mile trek up the mountain filled with switchbacks and gorgeous, breathtakingly beautiful views, you’ll find yourself at 14,265 feet in elevation. There are no guard rails and hardly any shoulder room. Along the way, you’ll definitely want to stop and take in the Mount Goliath Natural Area and Summit Lake Park. Beware of marmots, Rocky Mountain Bighorn Sheep, and Mountain Goats, all of which are absolutely beautiful in their natural habitat.
2. Independence Pass via Highway 82
The highest paved mountain pass in Colorado, Independence Pass is filled with incredible mountain views, switchbacks, and steep climbs. Closed in the winter, the road is also closed to oversized or overweight vehicles, so you may want to re-think taking that camper up the pass. Keep your eyes peeled for the beauty of Twin Lakes, Mount Elbert, the old ghost town of Independence, and the Roaring Fork River. It’s a drive worth taking!
3. Medano Pass Primitive Road
Medano Pass Primitive Road winds through the eastern part of Great Sand Dunes National Park, through Great Sand Dunes National Preserve, through a canyon, and up over Medano Pass at 10,000 feet in elevation. The road meets Highway 69 in the Wet Mountain Valley. This road is for high-clearance, four-wheel drive ONLY! Part of the road is sand, and tire pressure may need to be dropped until you come to the rocky portions of the road, in which case you need your own air compressor to air your tires back up. There are 21 roadside campsites in Great Sand Dunes National Preserve, a few of which are more secluded than others, making for some really amazing dispersed camping opportunities. Not only do you get amazing views of the eastern side of the sand dunes and the mountains (along with less crowded places to walk to the creek and the dunes), but the canyon itself is quite beautiful with several creek crossings and wildlife. Mud holes are abundant, but drivers really do seem to watch out for each other. You can check road conditions through the National Park Service.
4. Million Dollar Highway – U.S. Route 550
U.S. Route 550 is referred to as the Million Dollar Highway. I’ve read that it’s called that for 2 possible reasons: 1) the million dollar views afforded on every bend and turn of this amazing road or 2) you couldn’t pay some drivers a million bucks to drive this route again. After driving this route with my family, I can see why some might feel that way; it’s a little scary at times! But is it ever worth the drive. The road winds through valleys and mountains from Montrose, Colorado all the way down through Durango into New Mexico, taking you through towns like Ouray and Silverton. And if you happen to be in Silverton of a morning, be sure to stop in at the Kendall Mountain Cafe for the best breakfast you’ve ever had. The stretch between Ouray and Durango was my particular favorite part of the highway, leaving us with glimpses of old mines and mining shacks, 4×4 mountain roads (one of which we drove to find a campsite for the night in the Lizard Head Wilderness area), beautiful mountain passes, waterfalls, switchbacks, and more.
5. Crystal River Road
Outside the town of Marble, Colorado (one of our favorite places on earth), is an unpaved shelf road that follows the Crystal River through the Crystal River Canyon. Photos just don’t do this beautiful area on the edge of the Maroon Bells-Snowmass Wilderness, justice.
The road is an old mining road that’s accessible only by high-clearance, four-wheel drive vehicles or ATV’s during the summer. Along the way is the beautiful Crystal River, Lizard Lake, gorgeous mountain views, waterfalls, Crystal Mill, and the ever so peaceful town of Crystal, Colorado, where you can buy a few books, browse through a gift shop, meander through the semi-ghost town, and maybe even rent a cabin for the night.
There’s no electricity, but there is a small stream to keep your bottled drinks cold. Crystal River Jeep Tours in Marble operate daily tours in the summer, giving you the option to visit Crystal, ride the Lead King Basin Loop, and Devils Punchbowl. Or you can make the drive yourself; we made the drive to Crystal Mill and had a blast!
Oh, and if you’re in Marble for lunch or dinner? Be sure to stop in at Slow Groovin’ BBQ, the BEST (and maybe the only) restaurant in town. I’m tellin’ ya, it’s good stuff.
6. West Elk Loop Scenic Byway
Upon leaving Carbondale, traveling through Redstone, and exploring the Marble area, the West Elk Loop winds its way over McClure Pass through orchard valleys, canyon country, the Curecanti National Recreation Area, and back up into the mountains, national forest, and wilderness area beyond Crested Butte. Along the way, be sure to stop at Black Canyon of the Gunnison National Park, a must see place that will take your breath away the moment your eyes take a look over the edge. Stop and take in the waters of the Blue Mesa Reservoir. Beyond Crested Butte, wildflowers await, thousands upon thousands of wildflowers abundant in color and beauty. My favorite part of this road was the unpaved portion beyond Crested Butte through Kebler Pass. At the top of the pass is the Irwin Cemetery. Secluded roadside campsites were abundant amongst gorgeous green ferns and beautiful groves of stately aspens. Though we camped along the route through Kebler Pass, I dream of going back again and camping amongst those beautiful, mysterious groves of aspens.
7. Old Fall River Road
A one way, unpaved road takes you through the mountains of Rocky Mountain National Park up to the alpine tundra. Old Fall River Road is 11 miles long but can take half or day or even a whole day to drive, depending on how many times you stop. The gravel road winds through the mountains from Horseshoe Park to Fall River Pass at 11,796 feet in elevation. Incredible views await, and from the Alpine Visitor Center at the top, it’s ever so convenient to then take Trail Ridge Road back down to the bottom.
8. Trail Ridge Road
Trail Ridge Road is Rocky Mountain National Park’s “highway to the sky,” and it is absolutely stunning! 48 miles long, the road stretches from Estes Park to Grand Lake, winding through the park and climbing higher and higher into the alpine wilderness, eventually crossing over the Continental Divide. Elk are often grazing or resting on the upper slopes along the road, and nestled between the peaks, you may even catch a glimpse of a beautiful blue mountain lake. Other wildlife to keep an eye out for include moose, bighorn sheep, marmots, pikas, and more.
9. Peak to Peak Scenic Byway
The Peak to Peak Scenic Byway, built in 1918, stretches from Estes Park to Blackhawk, Colorado. If you love mining country, mountain views, and quaint mountain towns like Nederland, this is a beautiful road for a drive. We recommend visiting Rocky Mountain National Park’s Wild Basin area, Golden Gate Canyon State Park, Hidee Gold Mine in Central City, and historic cemeteries along the way.
10. Virginia Canyon Road (aka, Oh-My-Gosh Road)
When we visited Idaho Springs one day last summer, we took a gravel road up through the mountains and back over to Central City. At times, I was literally thinking, “Oh my gosh!!!,” because the road is amazing but not gonna lie, a little scary in places. Of course, now that I’ve been on various four-wheel drive roads, it doesn’t seem bad at all. It passes by several old, abandoned mines; we are fascinated with these old mines and mining ghost towns, so we loved taking an off-the-beaten-path route back toward Central City.
11. County Road 265 to FF70 Drive to 71 4/10 Road to 330 to 58 1/2 to 59 to 65 (A bunch of gravel roads through the mountains)
So, this route may seem a bit confusing, but if you can find County Road 265 beyond McClure Pass and follow these directions, you’ll wind through some of the most beautiful country around, what with gorgeous mountains, stunning lakes, beautiful ranches, and more. Be sure to watch out for cows, though; they roam freely through much of the area.
12. Ophir Pass 4×4 Road
This is where we camped off of U.S. Route 550 on our way down to Durango. Ophir Pass Road, or Forest Road #630, is recommended to be traveled by high-clearance four-wheel drive vehicles without a trailer. We found amazing views along this road, though there were signs warning of mine shafts and explosives used for avalanches in the area. We found a little side road, which we took down into a little valley to the river next to an old, abandoned mine. There we found a campsite and set up camp for the night at 10,121 feet in elevation. Part of the Lizard Head Wilderness area, it was one place I’ll NEVER forget.
What roads have you traveled lately? Share in the comments! We always love finding new roads to venture down.
A stay in Colorado last summer led us on the adventure of a lifetime. We knew that Gilpin County was mining country, but we had no idea the vast number of mines that are located there, not to mention the number of shafts all around. As we got to know the area more, we decided to take a mining tour. We weren’t sure which one to take but eventually decided on a visit to Hidee Gold Mine. Let me tell you, it was an experience we’ll never forget.
Panning for Gold
When we arrived, our tour guide, John (or Boomer as my kids affectionately called him… they love the Wilderness Family), led us to where we could pan for gold. Benches and tables were set up with crates of water and pans. He taught us how to pan for gold and what to look for.
They had a setup quite like a miniature town in the Old West, quite the photo opp really.
Tour of the Mine
After awhile, we were outfitted with hard hats and set off on our journey under the ground. The mine was quite slippery in places, so we took it slow, stopping at different “checkpoints” to listen as John recounted stories and other facts about mining and more.
Along the way, we had many a poignant reminder of the dangers involved in mining… Upon entering the mine, just a little ways back in, we came upon a makeshift bench with Tommyknockers, a kind of cross between Irish leprechauns and English and Scottish brownies. Miners believed these spirits mined right alongside them. Some miners were afraid of them; others thought the knocking that came before a mine collapse or cave-in was the work of Tommyknockers, trying to warn them. There was opportunity to leave gifts or favors for the Tommyknockers. There are a lot of stories surrounding these mythical creatures.
As we continued on into the mine, we were introduced to different pieces of equipment, learned all about mining methods and local geology, learned about the dangers of mine shafts all over the mountains (which, I’ll admit, made me a little paranoid the rest of the trip), and also learned a lot about the history of mining and of this particular area. John, a veteran miner, shared so many real life stories with us.
As told by John, most miners would work until they had enough gold to pay for a meal and any other needs or wants… Then they’d head into town, Central City or Black Hawk, both filled with casinos, restaurants, and hotels. Each day’s work would provide just enough gold to get them through to the next.
Mining the Vein
As we neared the 5 foot glittering gold vein, we went down a set of stairs where we picked up mallets or hammers and chisels and set to work mining for gold. This was probably our favorite part of the entire tour. The boys had a blast. We chiseled away at the vein, knocking chunks of gold ore off the floor and walls. If you looked up, you could see all the glittering beauty… I could only stare in awe.
John told more stories and helped us learn the best techniques for harvesting the gold. It was an amazing experience. He had little baggies for our treasures, and he would actually add to the boys’ baggies as we kept on hitting mallet to chisel.
Things to Know Before You Go to Hidee Gold Mine
There are a few things you need to know before you visit the mine.
Take cash or check. We actually had to run back into Central City for cash; thankfully, a casino about a mile away had the closest ATM.
Don’t listen to your GPS. Take the Central City Parkway, and look for the Hidee Gold Mine sign around Mile Marker 6.3. We learned this the hard way… funny story.
You may want a light jacket. It’s a little chilly in the mine, about 45°, not too bad.
Wear long pants and closed-toed shoes with good traction. Parts of the mine can be quite slippery, and if you’re down on your hands and knees with hammer and chisel… you’ll want long pants.
You may want a separate pair of shoes to change into after the tour, just in case. Your shoes will likely get quite muddy.
Check their hours. They’re open for tours June to October.
Tour space is limited, so calling ahead may be a good idea.
Tours are about 1 1/2 hours long.
There’s really not a lot of stooping required. We were able to stand completely upright for most of the tour.
Group tours and reservations are available. Educational discounts are given to school and university groups.
Touring the mine was a really affordable activity for our family of four. We paid right around $70 to $80 altogether, and it was well worth the cost.
They do have a small gift shop on site, as well.
It was one of the most memorable activities from our simple vacation. Upon leaving the mine, we took a few photos together and with John. When we walked away and got back in the car, none of us could shut up about how awesome this was. Mining for gold with a veteran miner equals an experience none of us will soon forget.
Just beyond Denver, outside Idaho Springs, stands beautiful Mount Evans, a 14,265′ beast of a mountain in the Front Range of Colorado. We originally drove the 14 mile trek up the mountain a few years ago, but this year we went back for a second trek up the mountain. This time was far less lonely, as there were plenty of other adventurers exploring right along with us; and we saw so much more wildlife this time than we’d seen on our previous trip. This is one trip I’ve been so excited to share because, like our Crystal Mill, Colorado, road trip, it’s a trip I could honestly do over and over again; the views from the top, including those of the Continental Divide, just never get old.
Imagine a road that leads up a mountain…no guard rails, no walls, and really no shoulder room at all…a road that seemingly leads to the clouds or sits on the edge of Heaven. Long poles stand in the air, showing the direction the road takes in winter when snow covers the road so deep the path is unrecognizable. That road is Highway 5, from Echo Lake to the top of Mount Evans; it’s the highest paved road in North America. The first time we drove this road, I needed a paper bag; I don’t know why I was so scared. Sure, there are sheer rock walls and drop offs that make me think of the road in Arizona we drove where cars were scattered down the side of the mountain, having missed the curve and gone over the side. But all in all, the second time around was so much better; you can ask Dan. Though we were all a bit nervous (it felt like we were taking a risk), we were so excited we could hardly stand it. Mount Evans is a wild, untamed, less explored, off the beaten path, beautiful, amazing place. The road is only open through the summer into usually the first weekend of October; in fact, it’s closed for the season now. But it’s definitely one place that should be on everyone’s Colorado bucket list.
The Road to Mount Evans
You can read a little bit about the history of Mount Evans and how the road was built through the US Forest Service. The road actually opened up for the public to drive in 1931. It travels to 14,130 feet in elevation.
The road is fairly smooth when you enter the gate at the bottom, and it remains pretty smooth until you get closer to Summit Lake. Then the road gets quite rough. Driving through a few parts of the road, some of the edges looked as though they were eroding away, so that made the ole heart skip a beat. There are places to park along the way and get out and explore, though. The views are awe-inspiring, just amazing, views like we had never seen before. The closer you get to the top, the more switchbacks you’ll drive.
Recreational Areas on Mount Evans
Along the way are places to catch a scenic view, get out and explore, hike…there are several trails leading here and there, especially at recreational spots along the way. Mount Goliath Natural Area and Dos Chappell Nature Center is one of the first stops. Explore the nature center, or walk around an alpine garden amongst Bristlecone Pines that are 900-2,000 years old.
Summit Lake Park is probably my favorite stop because it’s just so breathtakingly beautiful. Travelers come to a rather flatter spot nearer the top of the mountain where a lake rests. There are patches of snow here and there. It’s green and gorgeous and reflective and filled with wildlife.
We walked the trail back to where we could also view Chicago Basin. Pictures just don’t do it justice…
At the top of the mountain, once you’ve reached the end of the road, lies the Summit with the ruins of an old restaurant, an observatory, and a short hike to the very top of Mount Evans.
This is where my story becomes a tad bit sad…Jaden and I were hit hard with altitude sickness; oh, let me tell you, altitude sickness is very real. So, we were forced to stay at the Summit while Jacob and Dan walked to the very top, though they also started feeling the effects the higher they climbed. Oh, I was so bummed. But I wasn’t about to let it stop the guys from taking off and finally getting to see the very top; it was something we’d all waited for and looked forward to with anticipation. Finally, they made it to the hallowed benchmark at the very top.
Even without hiking the extra hundred or so feet in elevation, the views from the Summit are spectacular. There are times when you’re above the clouds; this particular day happened to be quite sunny, and the clouds were higher up. The brilliance of the sun shining down through the clouds with mountains all around…views of the Continental Divide. These Rocky Mountains are where my heart truly feels at rest.
Wildlife on Mount Evans
Along the way, we happened upon Rocky Mountain Bighorn Sheep (which we confused with mountain goats).
Marmots played here and there. And the Mountain Goats at the top were just gorgeous! They climbed up on top of the building, all around on the rocks…this was their home. Babies stole my heart when they pitifully bleated for their mamas.
It was such an awesome experience getting to enjoy the wildlife this time ’round, seeing so many different types of wildlife that call Mount Evans home.
Details for Your Trip to the Top of Mount Evans
Again, altitude sickness….My thoughts were that it would take a strenuous hike to get sick. Not so! The drive ascends rather quickly, and it’s easy to start feeling the effects right away. Drink plenty of water and take your time! You’ll want to take plenty of water and a few snacks with you. It also gets pretty cold the higher you go, so pack jackets, and maybe some gloves and hats too. It’s also important to note that just like any other mountain hike or mountain adventure, the weather can change in a snap. Make sure you’re prepared in case the weather should take a turn for the worse. And I think it goes without saying, but vehicles over 30′ long…not wise, just not good (shaking my head vehemently back and forth). Oh, and don’t feed the animals!
Wondering about facilities or accessibility? Vault toilets are available at 3 recreational stops along the way, including the Summit. Summit Lake does offer an accessible trail, as well. If you’re packing a picnic, Summit Lake is a great place to stop and enjoy a bite to eat. Again, though, pack your jacket!
There is a recreation fee to enter the Mount Evans Recreation Area, and you pay as you enter the gate to the road. A regular 3 day pass for 1-12 persons is $10/vehicle. Motorcycles are $3/person. A season pass is only $25. And if you’re like us and hold a Federal Recreation Passport or National Parks Annual Pass, you can enter for no charge at all.
The road does become quite narrow and parts of it are a bit intimidating, but it’s so worth the drive. We wouldn’t hesitate to do it again, and I recommend it to anyone I know who’s going to Colorado. It’s such a beautiful drive and something everyone should experience at least once in their lifetime.
Earlier this year as we waited out the cold winter months, we sat down one day to plan our vacation. We try to go somewhere as a family every year, whether it’s a favorite spot or exploring somewhere new with our kids. Growing up the daughter of a farmer/truck driver, I’d traveled to nearly all the lower 48 states by the time I graduated high school. Travel is in my blood…. and I think it’s safe to say that it’s in my boys’ blood too, especially Jacob who has a list a mile long of places he wants to go next. When we started thinking about where we wanted to go, it seemed like we all had the same goal in mind…. We just wanted something simple, some place we could relax. For us that place was Colorado. Once we knew what we really wanted, that’s when we found Mountain View Chalet; it was as though it was meant to be from the get go.
None of us were quite sure what to expect; we’d read that if you visit the Chalet in the winter months, you for sure need AWD or 4WD. Traveling back a gravel road and then a mile or two back a private drive, we finally arrived at our little cabin in the woods. It was dark, and by dark I mean pitch black, not another soul around. The little gas burning stove in the kitchen was going, and the cabin quickly warmed as we got settled. Though it was dark when we arrived and we were a little cranky at the point of exhaustion, the next morning we woke up to what words can’t even describe…. beauty beyond words. Windows and a skylight lit up the cabin, and I couldn’t help but enjoy the view from every single window.
While the cabin itself had Wi-Fi, good cell coverage, and satellite tv, we were miles from anyone else, and the quiet was almost surreal. Oh sure, I’d sit outside in my favorite spot and listen to the train far off in the distance, and occasionally, I’d hear the purr of a chain saw…. but it was so quiet and peaceful.
We got quite comfy in our little cabin, with Dan and I in the loft and the boys on the futon bed below. Critters walked around outside at night, and the first night there, I may have accidentally scared Jaden with the thought of Sasquatch (bad mama). We had to conserve and watch our consumption of both electricity and water, as the cabin was off the grid with solar power and a water cistern, along with gas. It was actually really good for us to think about these things, and I think we brought home a few new habits from that experience…. good, conserving, money saving habits.
Instead of rushing through breakfast, a picnic table afforded us a spectacular mountain view as we ate. In the distance we could see an old mine (there were mines everywhere, so fascinating), snowy mountains, Devil’s Thumb sticking up off the side of a mountain, other cabins, and miles upon miles of trees. Just about every morning, I’d head out to my favorite spot on the bench or hammock swing (they really had thought of everything when they built this cabin), and I’d gaze out over the mountains. I can still feel the breeze blowing through the aspens, blowing through my hair; I can still hear the click-click-click of the grasshoppers, the squirrels chattering; I can still smell the wonderful scent of pines.
Our boys had the run of the land, exploring to their hearts’ content, playing checkers with stones on the outdoor checker board.
About a half mile walk away lay an old pioneer cemetery. All around were pinecones to pick up, trails and forest to explore. A fire pit lay just up the hill, and of course, we couldn’t not have a camp fire complete with hot dogs and s’mores. The stars…. Oh my goodness, the stars! While we can see the stars really well from where we live now, there’s just something beautiful about viewing the stars from 9,000 feet in elevation, in complete and utter darkness with no lights around. We stood huddled together (either because we love each other or because we were skeered of the dark), pointing out the Space Station, constellations, and planets.
Each day was a gift in and of itself. Each day we’d get up and decide then and there what we wanted to do that day. No plans, no reservations…. just us and the Rocky Mountains. We went fishing at Snowline Lake, free fishing permits provided at 2 fish/day. We spent time exploring old cemeteries, ’cause we’re weird like that. We explored the little mountain town of Nederland, pretty much falling in love with its quirkiness and small town feel, making little trips into town here and there, whether to the little mountain grocery store, the Mountain People’s Co-Op for fresh fruit, the book shop, or the bakery. We traveled up Mount Evans, where I proceeded to get sick as a dog with altitude sickness (altitude sickness is real, people!). We took old dirt roads up through the mountains, driving through old abandoned mining towns, old mines everywhere. We went into Hidee Gold Mine and mined for gold (which we got to carry out with us). We hiked in Rocky Mountain National Park. We spent lazy mornings in the hammock.
We perused the book shelf in the cabin, and I had the fleeting thought that I think I could actually get into birding….
There are so many other things I can’t wait to write about, but for now, let me just say this…. A simple vacation is the best vacation. One day at a time, complete and utter simplicity, a little cabin in the woods, a mountain town nearby…. Simple was everything to us this year.
I could write more of a review of our cabin, but reflecting on the simplicity this cabin brought to our vacation means so much more. As I sifted through photos picking out the ones I wanted to share, Jaden walked by and exclaimed that this was our cabin in Colorado! He started to get a little sad, and frankly, so did I. I can’t really explain it because even though the cabin isn’t ours, I feel a little homesick for it. I’m homesick for a Mountain View Chalet in the middle of nowhere in the Colorado Rockies. Homesick for that precious time we had as a family.
As we were getting ready to leave, I took out the guest book to leave a note, and I felt like I couldn’t thank the owners enough. They’ve created something very special in this hand-crafted cabin, and they’re sharing this special place with so many others. It’s not just a family retreat for them…. it’s the means to a simple vacation for so many others who come to the mountains for a quiet retreat. It’s simplicity at its best…. beauty in all its splendor.
Get all the deets on Mountain View Chalet…. you may find yourself enjoying a simple vacation very soon.
Have you ever enjoyed a simple vacation? Been to a place your family could or maybe does go back to year after year? Tell me about it in the comments.
With spring here and summer just around the corner, I’m starting to feel that little itch to travel and explore.
One of our favorite places to visit is Sanibel Island (and Captiva, of course). Such a peaceful, serene place we have not found anywhere else.
It’s as if, once you cross over the bridge to Sanibel, you enter a whole different world and definitely a different lifestyle. It’s so laid back, which brings me to my main focus…. relaxing at Anchor Inn & Cottages on Sanibel Island.
Last year when we visited Sanibel, we made reservations at this little inn, largely based on reviews via TripAdvisor. The reviews were not wrong; it was a wonderful place to stay.
We rather enjoy the smaller, hole-in-the-wall type of places when we’re visiting different areas or on vacation. It’s always easier to meet interesting people and get to know the lay of the land when staying somewhere authentic.
Rooms at Anchor Inn & Cottages
Anchor Inn & Cottages boast several units, including standard size rooms, one room efficiencies, two room efficiencies, and their historic A-frame cottages.
We chose to stay in a two room efficiency, which was plenty big enough for our family of four. Outside our front door was a small porch area with table and chairs, as well as ceiling fans to keep a breeze blowing.
Our room consisted of a living area with sleeper sofa……..one bedroom…. ….a small dining area, a fully equipped kitchen, and two bathrooms.
The entire unit was quite comfortable and gave us all the room we needed for a quiet stay; the bedroom gave more privacy, as well, from the rest of the unit.
We also had a back door, and outside our back door was a small piece of paradise.
We could go out and sit in chairs, watching the turtles swim and play in the water. Other wildlife was in abundance; all we had to do was look out our back door.
I couldn’t help but imagine an alligator making his way up on the bank…. my imagination likes to get the best of me sometimes. It was such a beautiful place to rest and relax.
Amenities at Anchor Inn & Cottages
Anchor Inn provides several amenities, including a heated pool with patio area.
Other amenities include cable tv, wireless internet, in-room coffee service, free boat and trailer parking, and complimentary beach gear. Towel service is provided, as well; we had only to place our towel bin outside our door every morning, and by the time we returned, dirty towels would have been replaced with fresh.
They also provide several activities, including tetherball, picnic tables and barbecue areas, horseshoes and shuffle board, and bike rentals for the famous 30 miles of bike trails all over Sanibel Island.
The location is really convenient, as well. We were able to walk to a nearby convenience store, and an island grocery store was not far of a drive at all. The bike trail winds right past the front of the inn’s entrance, so basically, you step out your front door…. and there’s the bike trail, amazing.
Would we stay at Anchor Inn again? Most definitely. It’s affordable and clean, and we very much enjoyed our stay. Hotel staff were friendly and helpful. Yes, we would definitely stay here again, and I’d recommend the inn to readers, friends, and family.
I find myself wanting to meander over the bridge again to visit this peaceful island away from it all….
Want to explore more Beach Destinations? Follow my Pinterest board….
Have you ever been inside a real submarine? I’d never been down inside a submarine before a couple weeks ago. We were in Little Rock for the Arkansas Flower and Garden Show, and we were crossing over the Arkansas River, making our way home. As we came to the other side, I happened to look down and see, of all things, a submarine on the banks of the river. Jaden gasped when he saw it. Of course, we had to go check it out! It was one of those spur-of-the-moment roadside stops that we usually like to make when traveling together as a family. Of course, the boys were ecstatic and couldn’t wait to see and explore this awesome military installation right there in the Arkansas River.
As we walked up to the location, we found that this was an actual museum, the Arkansas Inland Maritime Museum, and the submarine we’d spotted was the USS Razorback. Interesting fact: The USS Razorback was, in fact, not named after the famous Arkansas razorback, but rather the Razorback Whale. She was built at the Portsmouth Naval Shipyard in Kittery, Maine. She served in World War II and in Vietnam; she was also active during the Cold War.
During World War II, she patrolled, sunk Japanese ships, captured Japanese POW’s, and rescued American pilots who’d been shot down. I believe our tour guide said that 1 in 6 submarines were destroyed during World War II, and that usually meant no survivors; so, the fact that she and her crew survived is nothing short of a miracle. In fact, if I remember correctly, she didn’t lose a single sailor.
In 1970, the USS Razorback was sold to the Turkish Navy, which is why there’s a Turkish flag flying alongside the United States flag on the sub; however, the city of Little Rock bought the sub in 2004. Visitors can tour the submarine, exploring both the outside and climbing down into the submarine to walk through from end to end. You can read more about her history on the museum’s website.
As we met our tour guide, he told us a bit of the history of the USS Razorback, and then he took us up on the ship itself. We started at the end of the submarine, climbing down in, via a ladder and a fairly skinny hole. Space was tight, and as we got down in the bowels of this huge ship, I couldn’t imagine having to live like that for months at a time or longer. Amazing men, these sailors who volunteered to serve in submarines, because they weren’t forced into this; and only men served in submarines. Yes, the Navy paid them double the wages, but they raised their hand to serve in a sub. Bunks were tight, and just to give you a small picture, this was a top bunk that noone wanted, mainly because there was little space between the bunk and the vent, as you can see. Can you even tell there’s a bunk there?Men shared the bunks, taking triple shifts – meaning they worked one shift, slept another shift, and had “down time” the other shift. As one was rolling out of bed to go to work, another was rolling right into the same bunk to take his place. They called it hot racking.
Because of the heat from the engines, the temperature on the sub stayed in the upper 90’s on into the 100’s. So, you can imagine how hot, sweaty, and stinky these guys must have been. Water was also limited, so they took very few showers and then only 30 seconds at a time. Our tour guide told us that they generally worked in their underwear and flip-flops because of the extreme heat.
As we walked through, we saw the tiny bathrooms, the mess hall, the kitchen, and more. Food was stored wherever possible. The question was asked what would happen if someone died while out to sea. As a matter of fact, the body would be stored in the freezer, right along with the food. The freezer was actually below your feet in the mess hall; there was a ladder that went down to it in the mess hall floor.
The officers’ quarters were a bit more roomy, and we even happened on a few Louis L’Amour books in the Officers’ dining area. The Officers ate the same food but did have a separate kitchen and dishes; they actually used fine china.
Then there was the control room, where all the main action took place. You wouldn’t believe all the buttons and levers….
Of course, my boys were mesmerized by the torpedo room…. ….also with real torpedoes still in the sub, though not active torpedoes. They were both asking questions throughout the tour; they just came alive with everything they were seeing and were soaking it all up.
USS Razorback Hours, Tickets and Info
The museum is open Fridays and Saturdays, 10am-5pm and Sundays from 1pm-5pm. Full admission for adults is $7.50; children under 12, seniors, and military are $5. Museum with no submarine tour is $2. If you are visiting, I recommend ladies wear pants (skirts and ladders just don’t mix in such tight quarters), and closed-toe shoes like sneakers, no flip-flops. Between ladders and making your way through different compartments, it’s just better to be completely comfortable and able to freely move from place to place.
The museum is also available for group events like birthday parties, group tours, school field trips, and something my boys got pretty hyped up about…. a group sleepover in the actual submarine with a real submarine veteran. You can find more info about the overnight stays aboard the USS Razorback here. Prices are very reasonable, in my opinion; this is something we may have to do at some point because sleepover guests get to explore even more parts of the submarine than the general public. The boys would just eat that up. As a homeschool mom, I was also thrilled to find that the museum provides lesson plans and activities on their website, as well. Very cool!
You’ll also find other exhibits at the museum. We definitely need to go back to explore even more.
If you live in Northwest Arkansas or nearby, and you’re looking for a place to pick strawberries, McGarrah Farms has berries ripe for the pickin’. The strawberry crop is a bit late this year, so they’re just now ripening.
Located outside of Pea Ridge, AR, the strawberry patch is easy to get to with signs pointing the way. After leaving Pea Ridge, we turned onto a gravel road and followed the road through the countryside for about a mile before coming to the farm. At the Pea Ridge location, you’ll find a pick-your-own patch, as well as pre-picked berries. The first patch you’ll come to is where you’ll want to stop if picking your own, and the friendly attendant will send you off with crates and flags, so you can mark where you stop picking.
We had a great time. The boys helped us fill 23 quarts of red, ripe, juicy berries. We were excited to hear that they don’t use pesticides, a huge plus! There were quite a few ripe berries, but there were also a lot of green ones, so I can imagine there must be a lot of red berries just waiting to be picked by today. Strawberry pickin’ lends to great photo opps, but not just that…. it’s quality time spent together as a family. I definitely recommend it if you’re wanting something fun to do together. Plus, you get to reap the rewards afterwards.
So, what does one do with 23 quarts of strawberries? Hmmm, so far, we’ve made jam, eaten quite a few, put a few quarts in the freezer, and next is a strawberry pie (stay tuned for the recipe).
McGarrah Farms has a patch in Lowell, as well as the Pea Ridge patch we visited. The Pea Ridge patch is open Monday through Saturday, 7 am-2 pm and Sundays from noon to 5 pm. The patch is smaller, so I’d almost suggest getting there early in the morning; their hours depend on crop availability. Strawberries are $3/quart if you pick your own and $4/quart for pre-picked.
Looking for strawberry recipes to make with fresh berries?
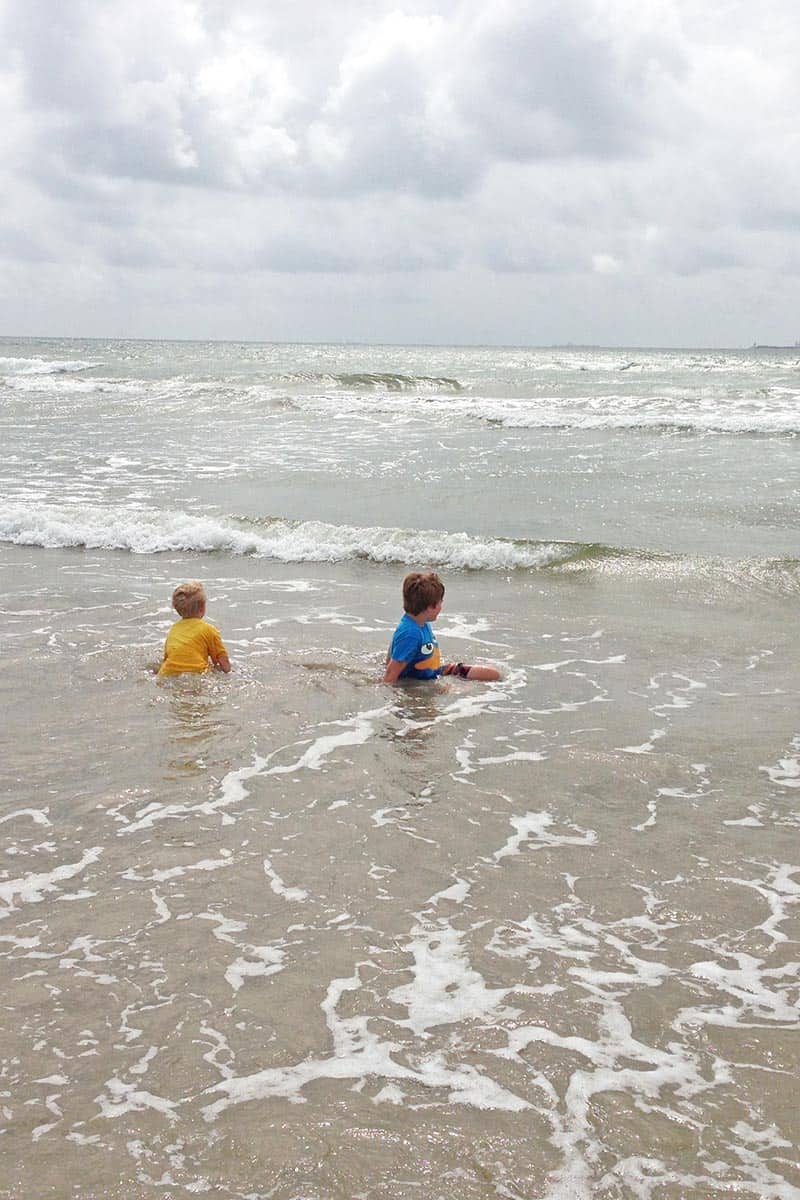
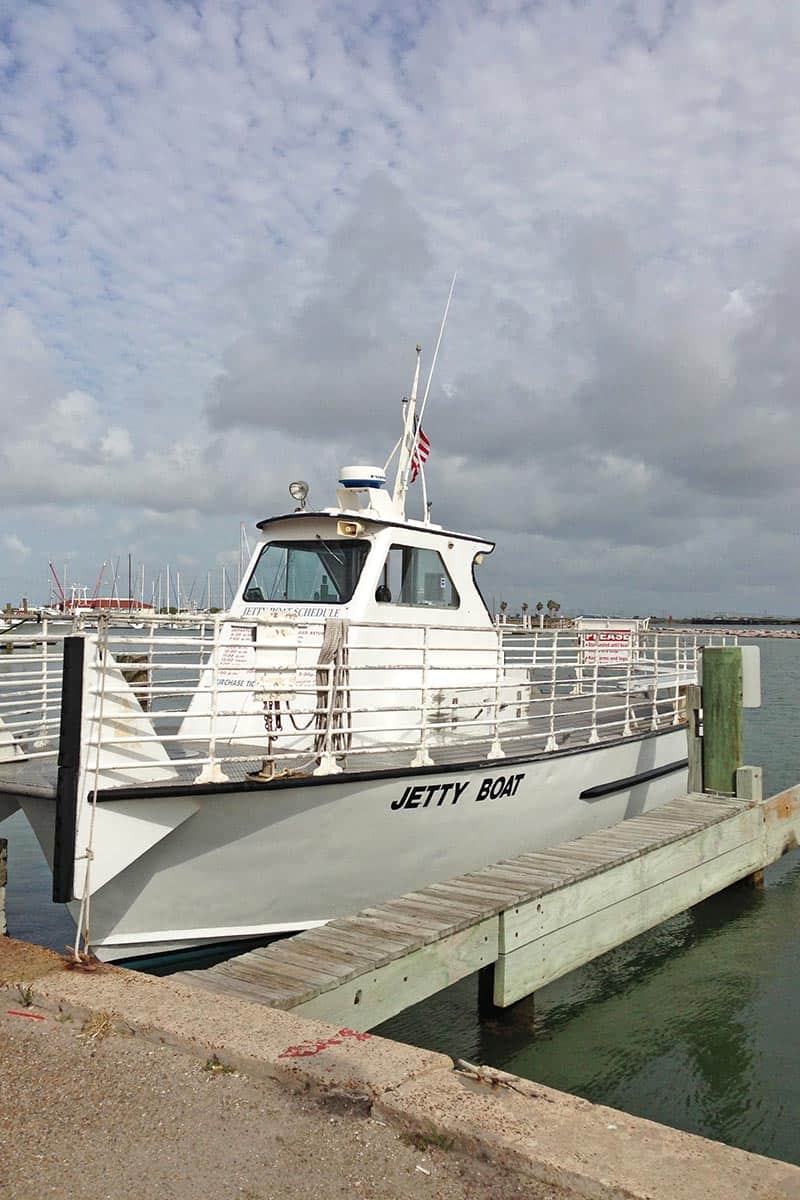
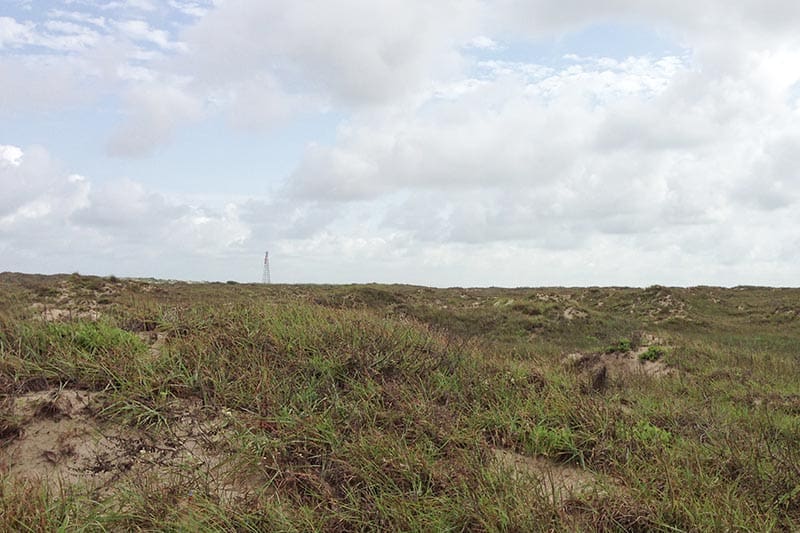
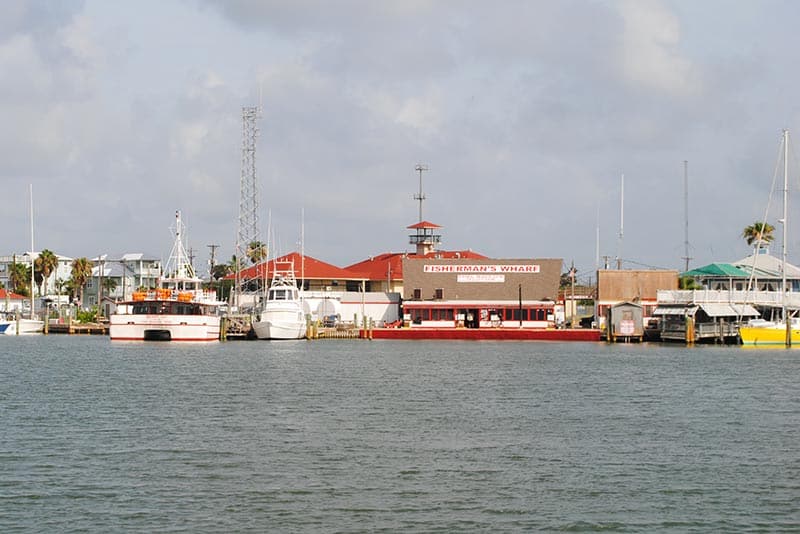
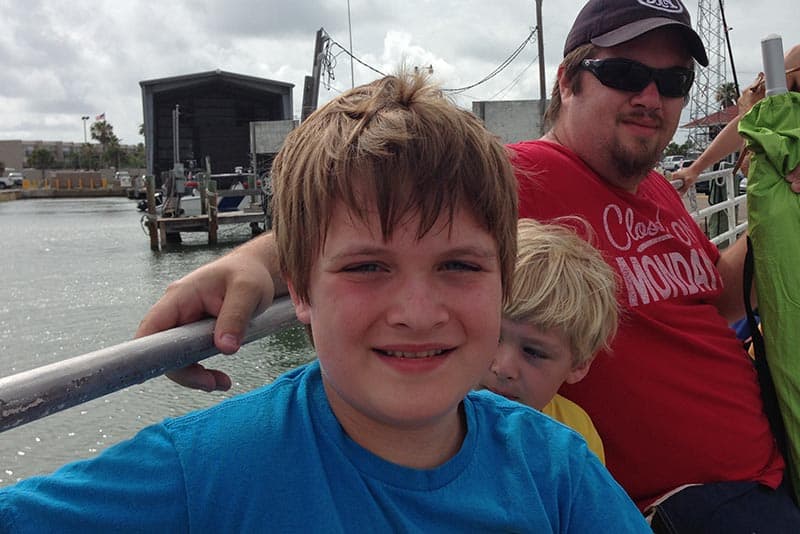
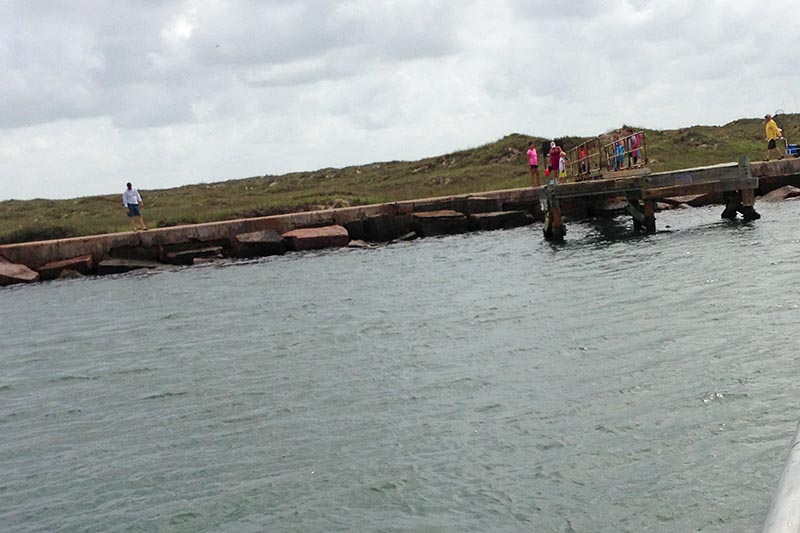
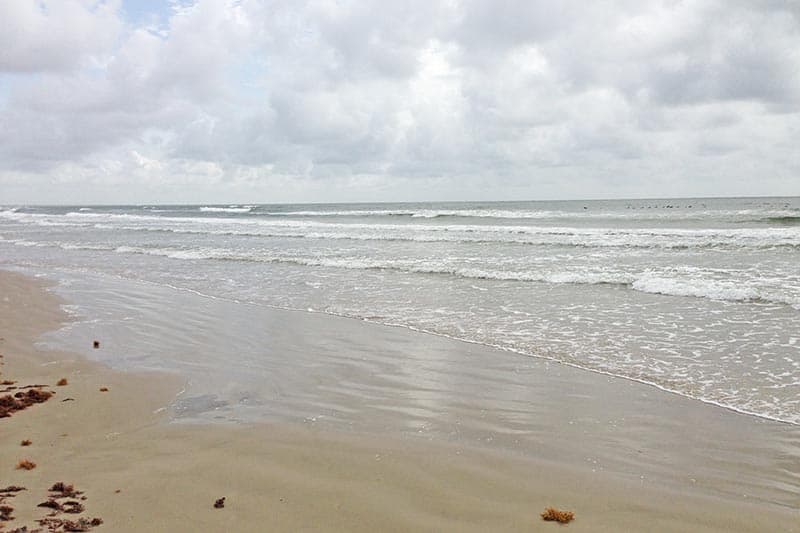
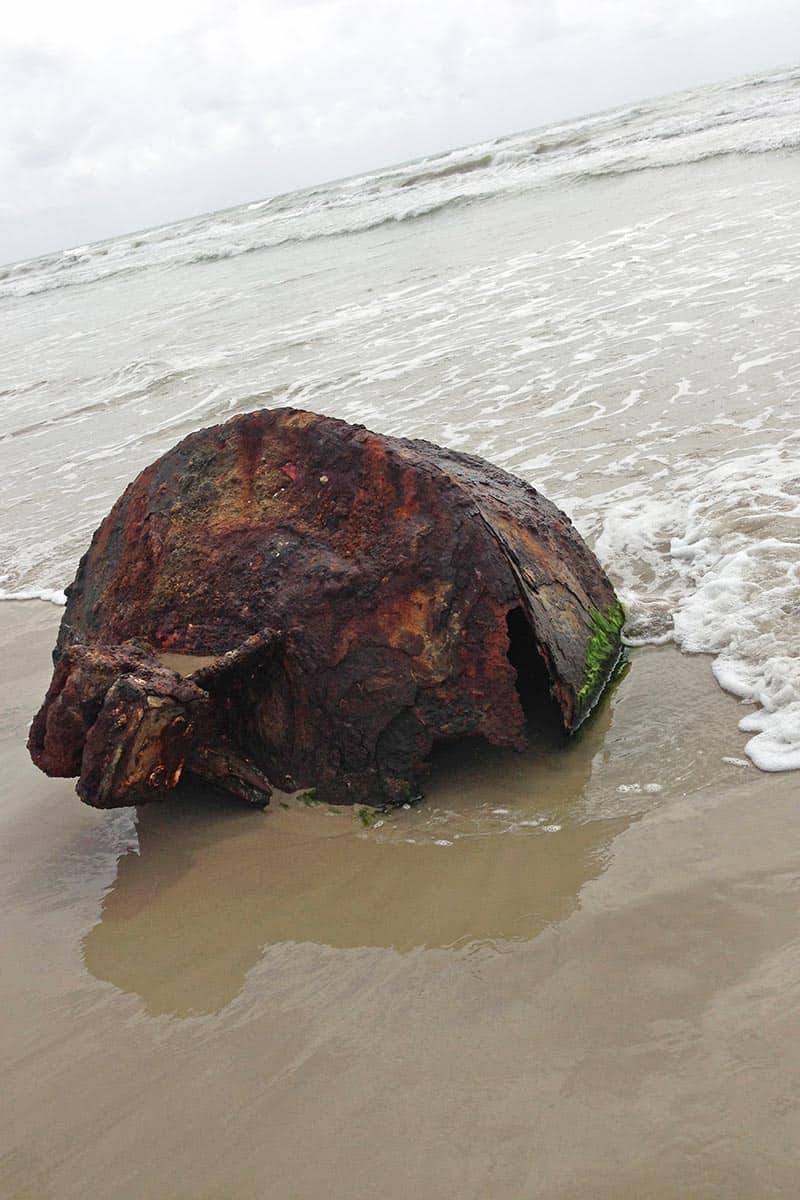
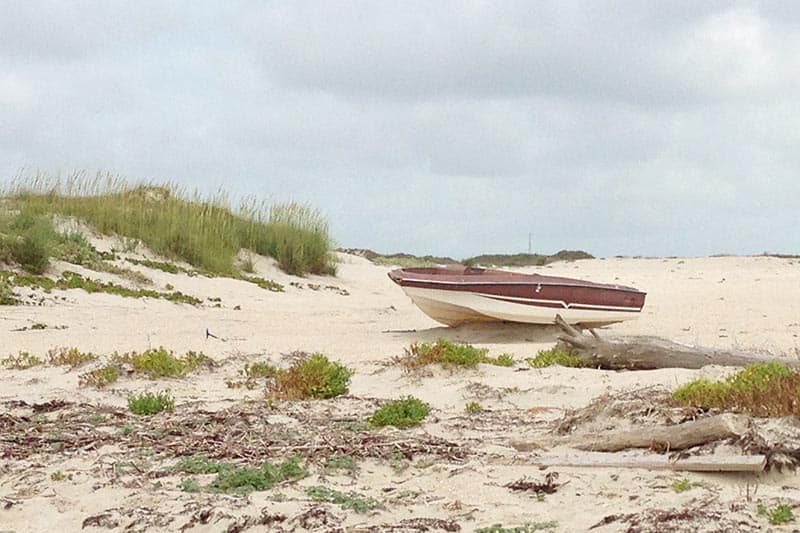
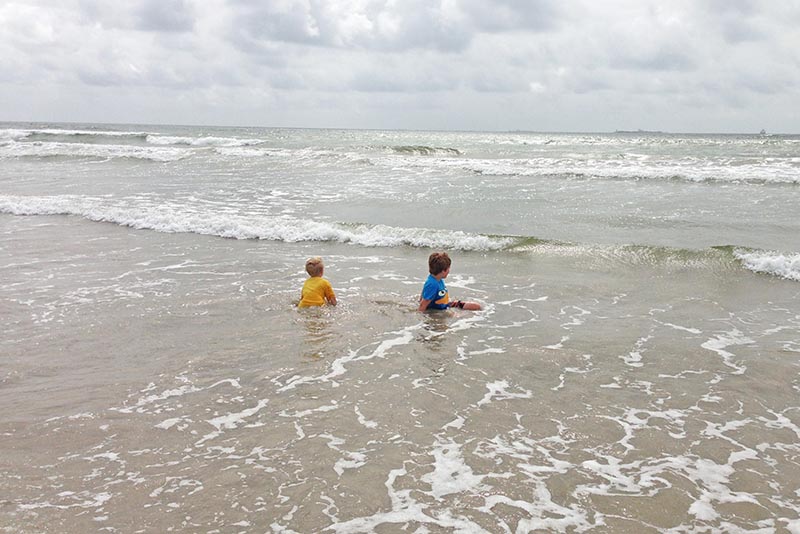

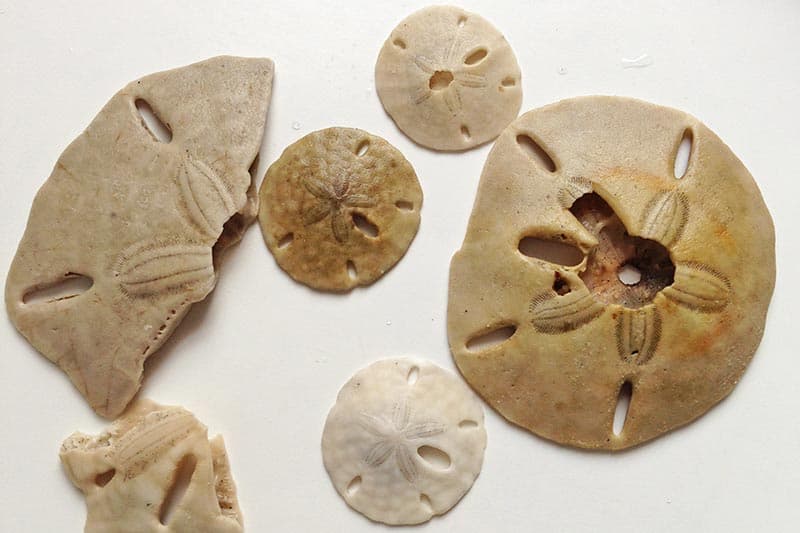
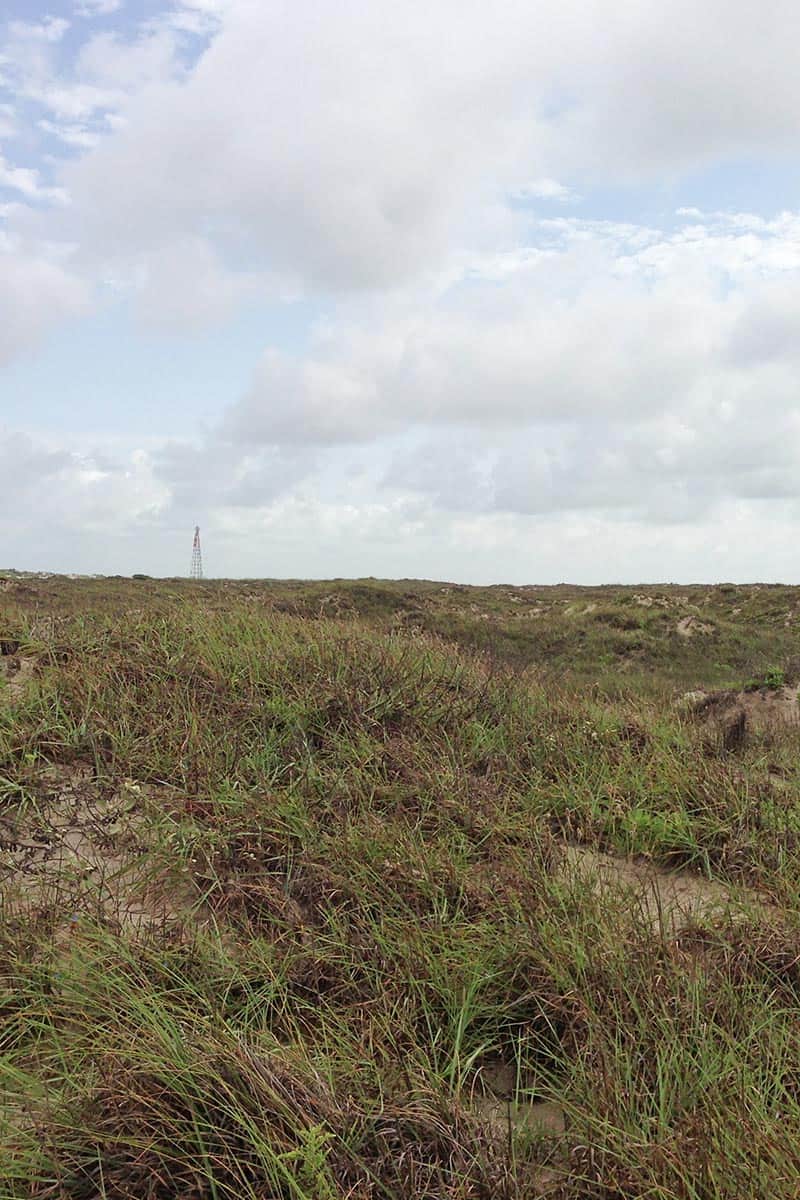
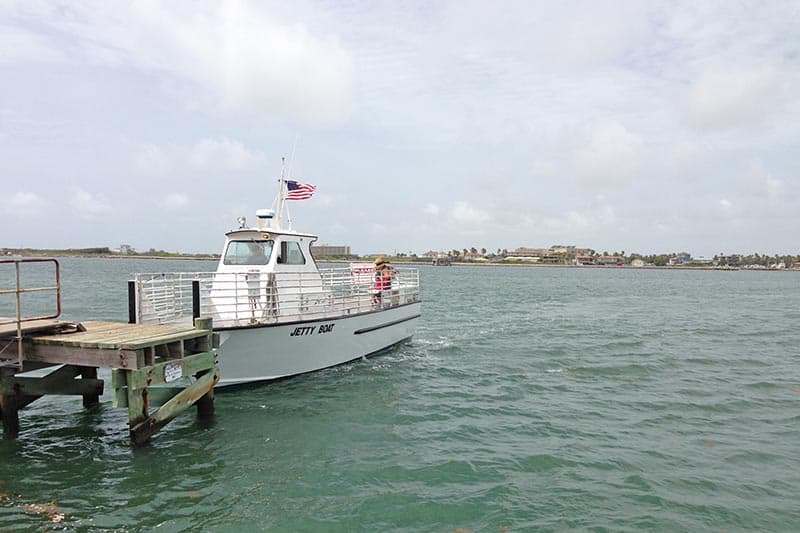
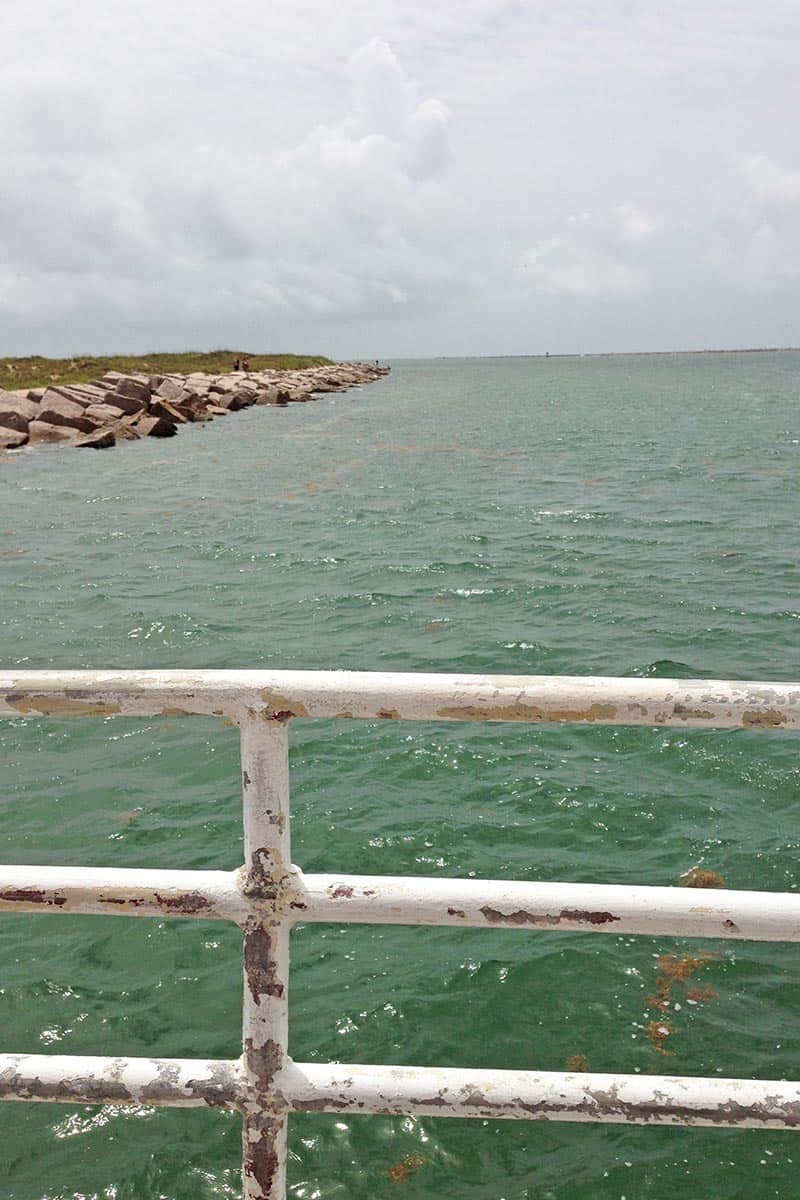

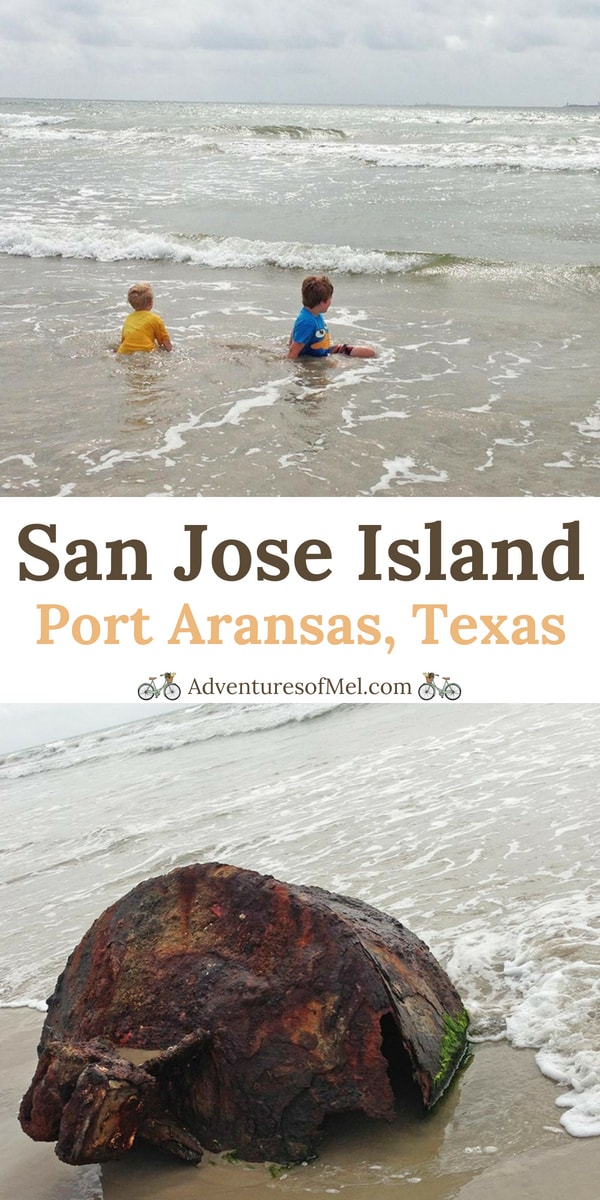
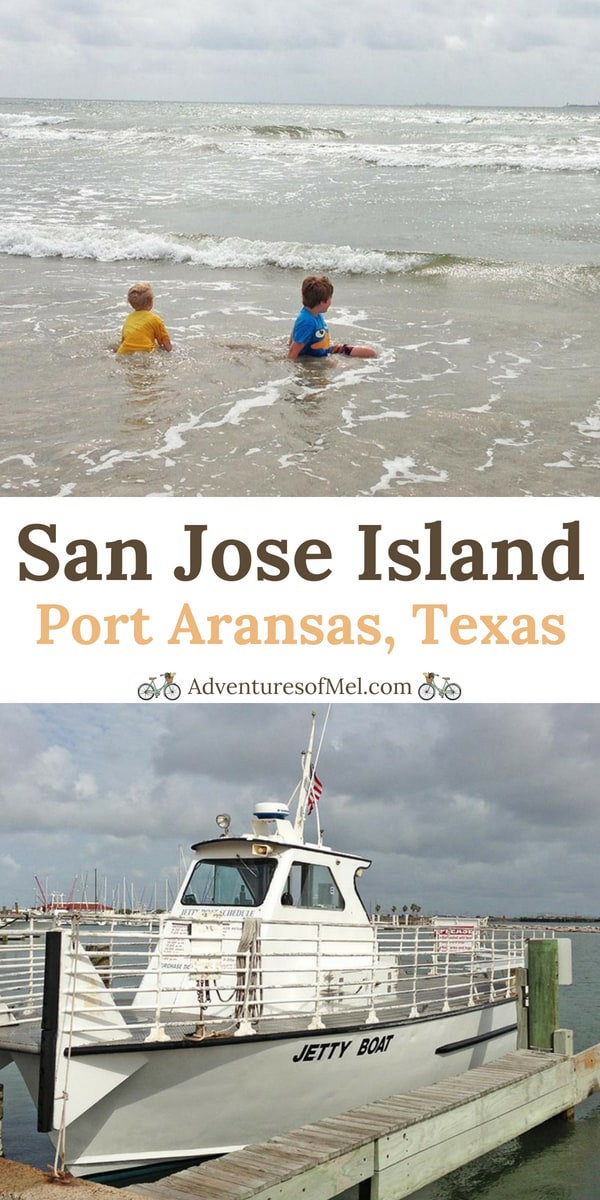
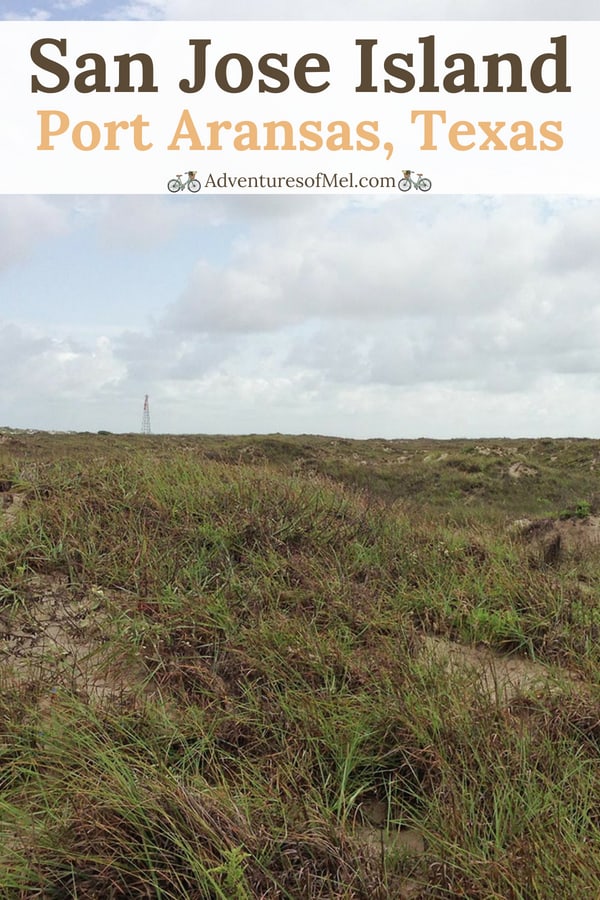
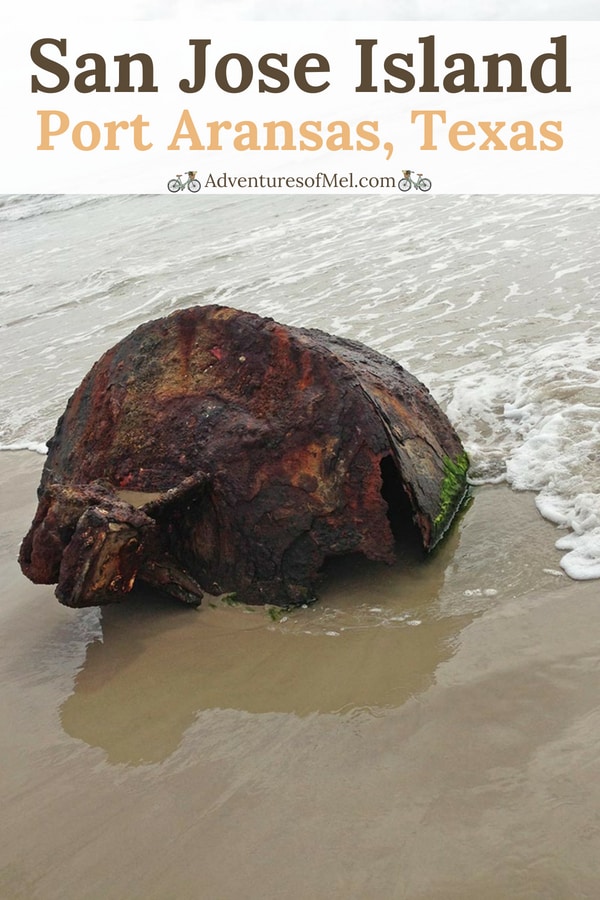
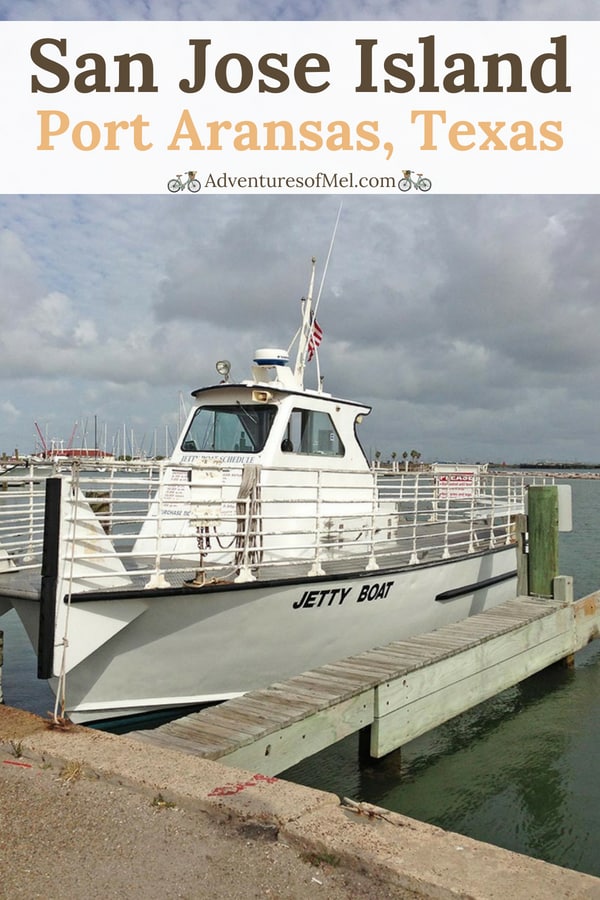
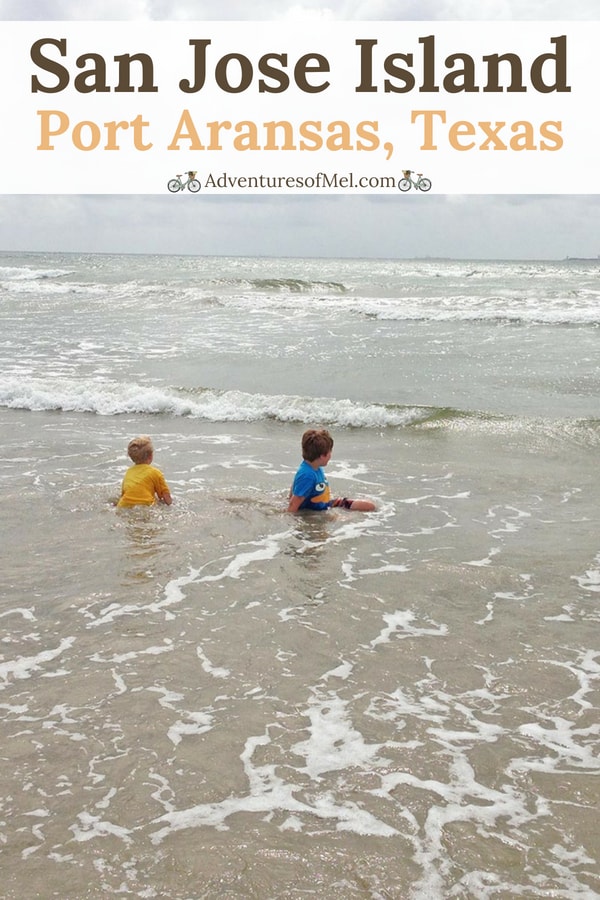
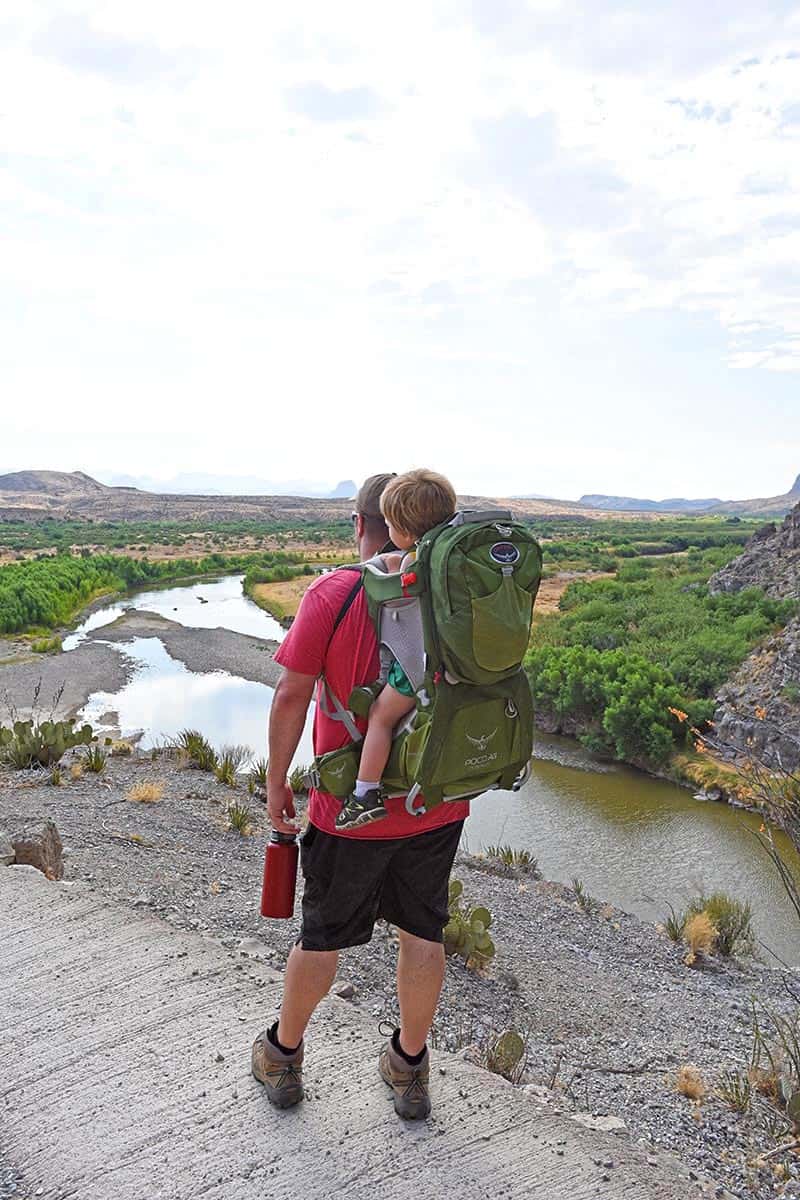
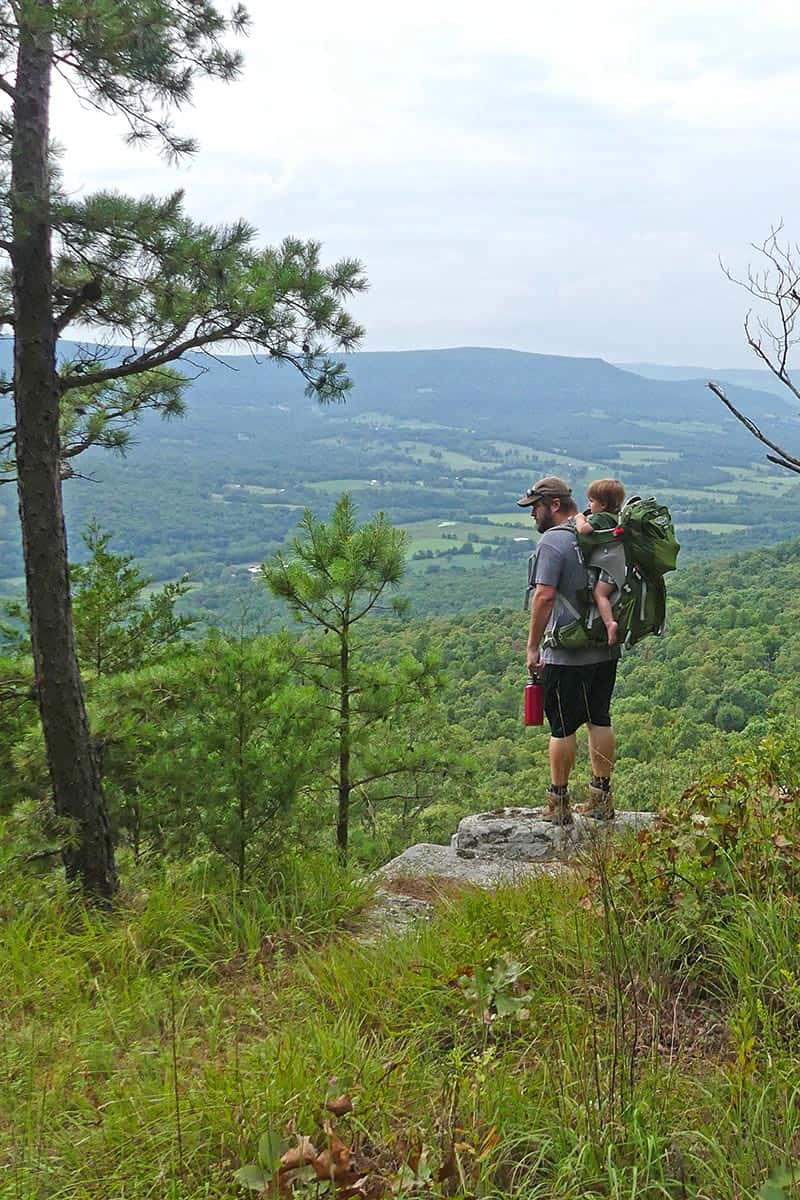
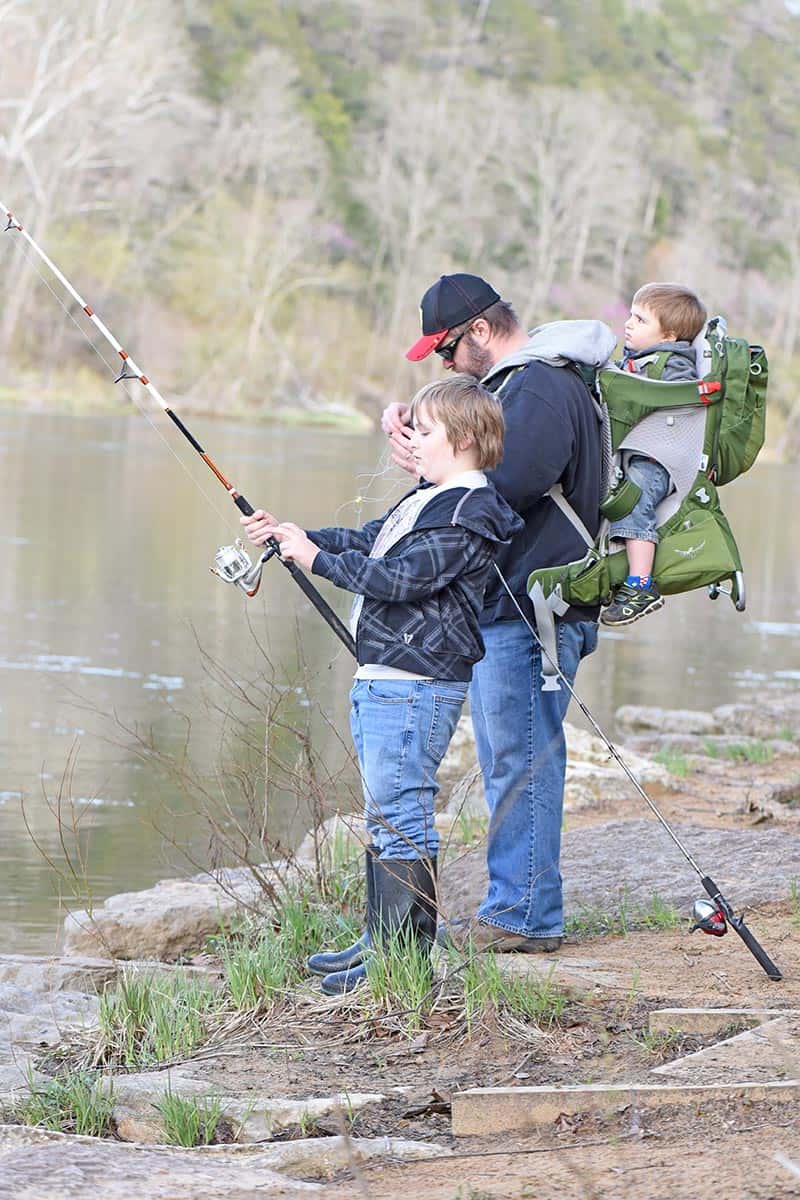
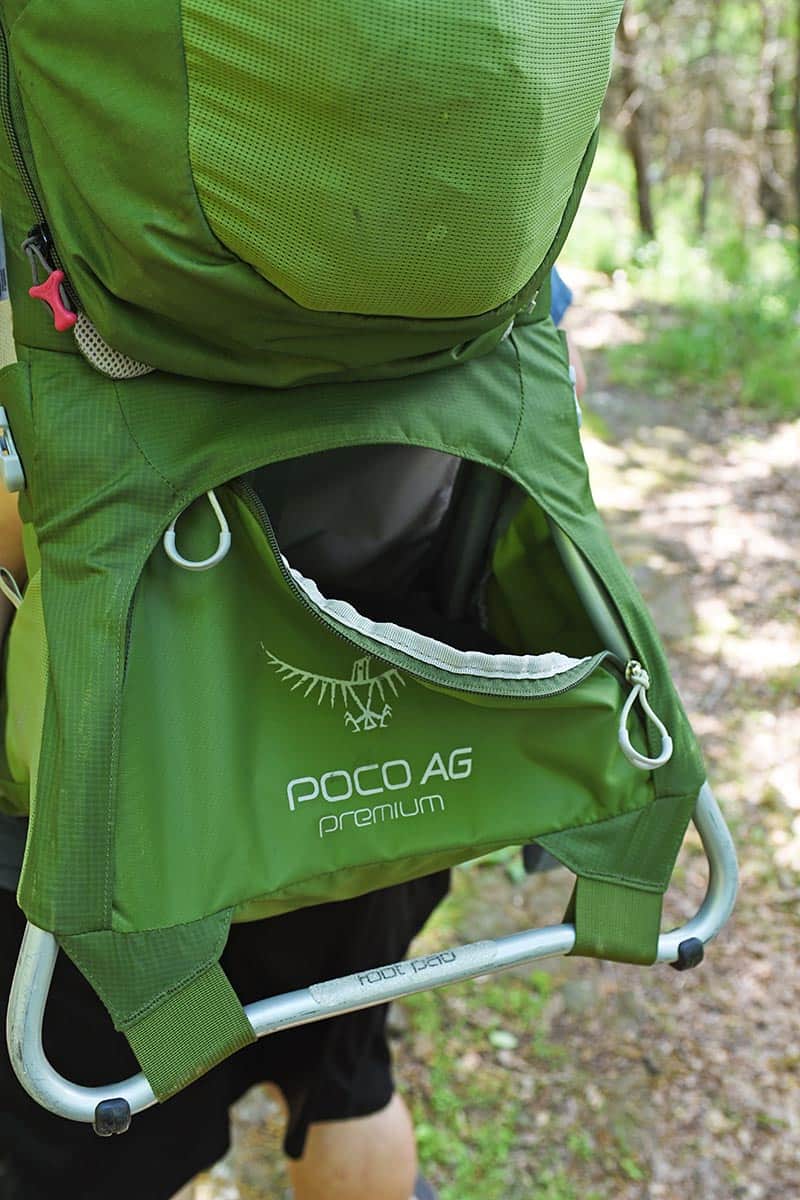
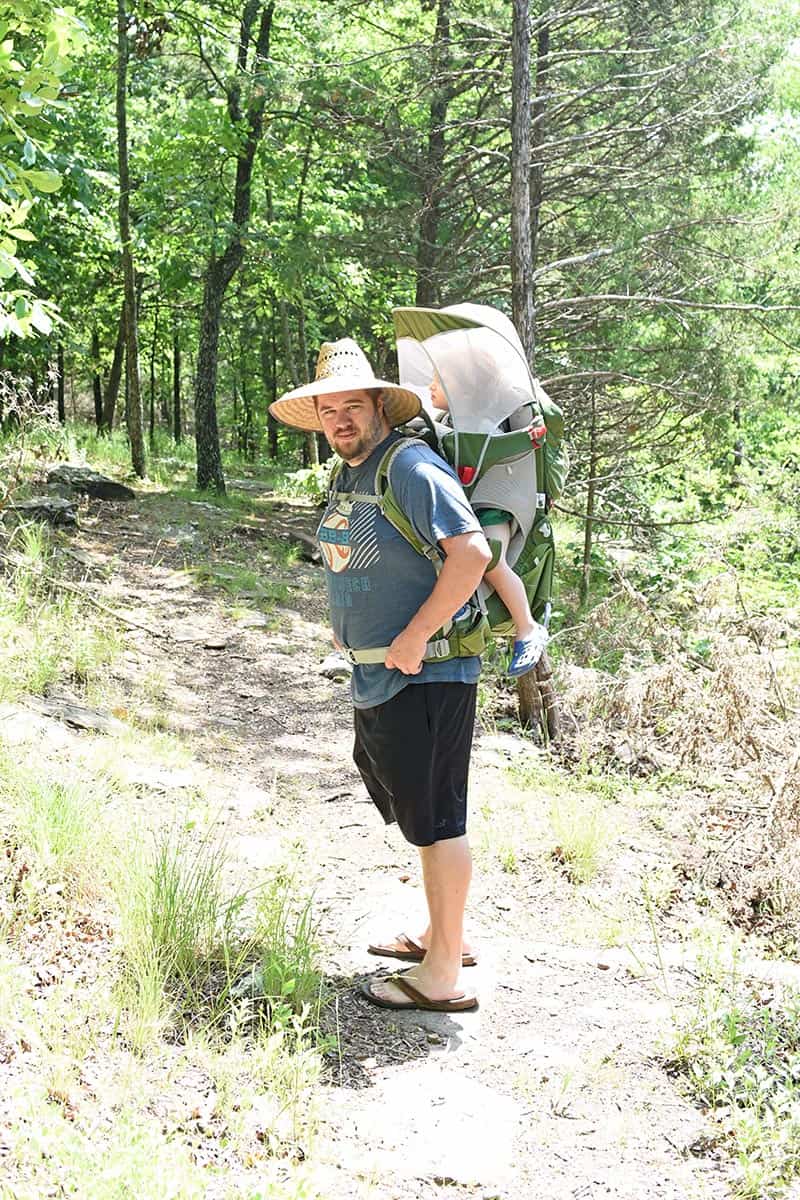
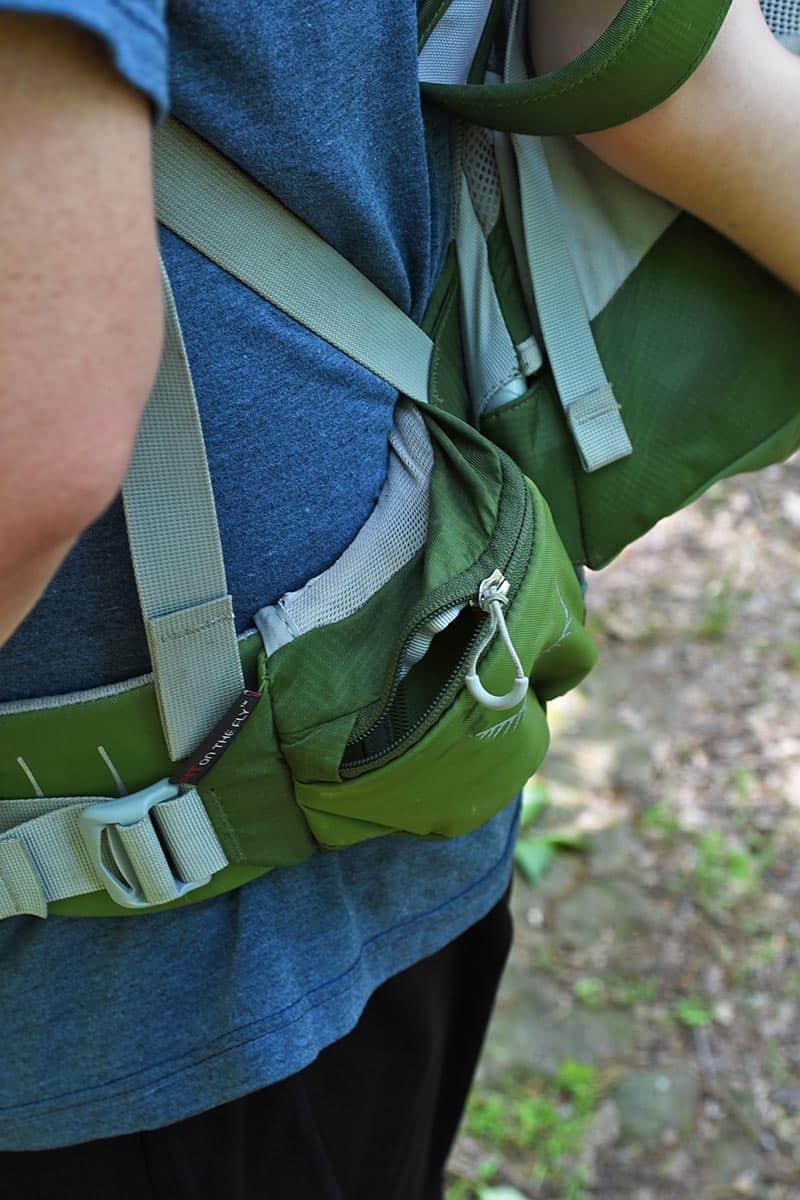
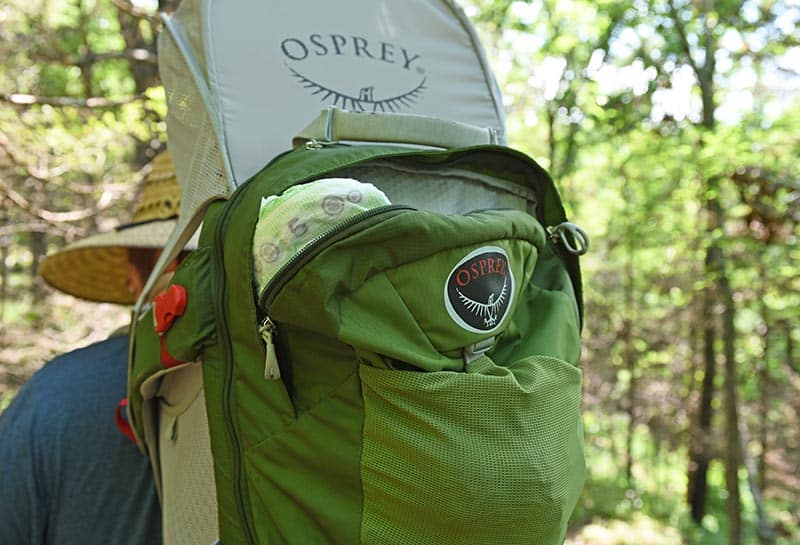
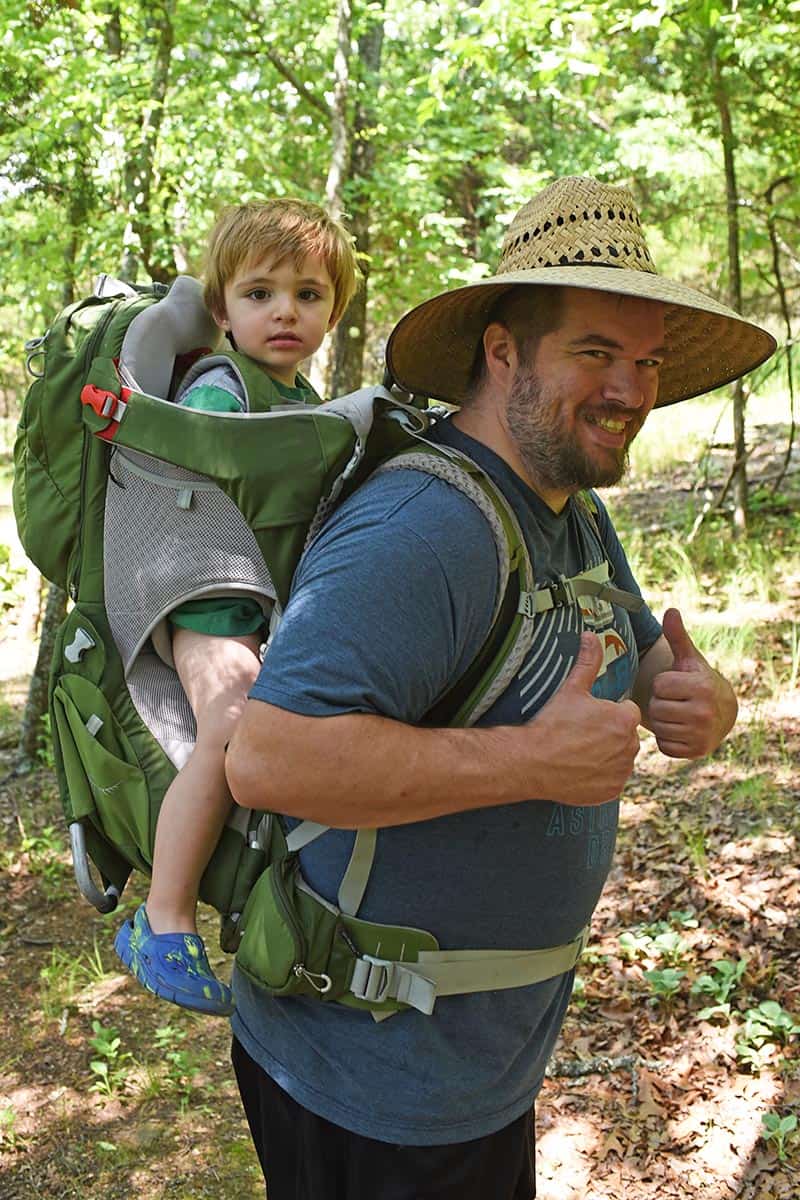
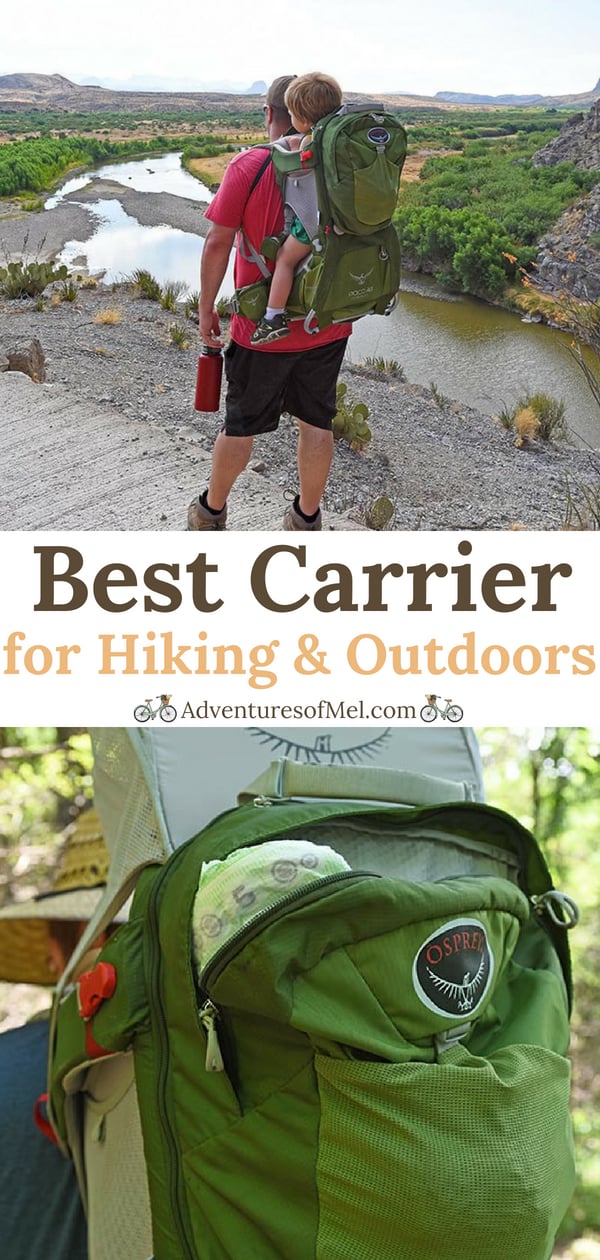

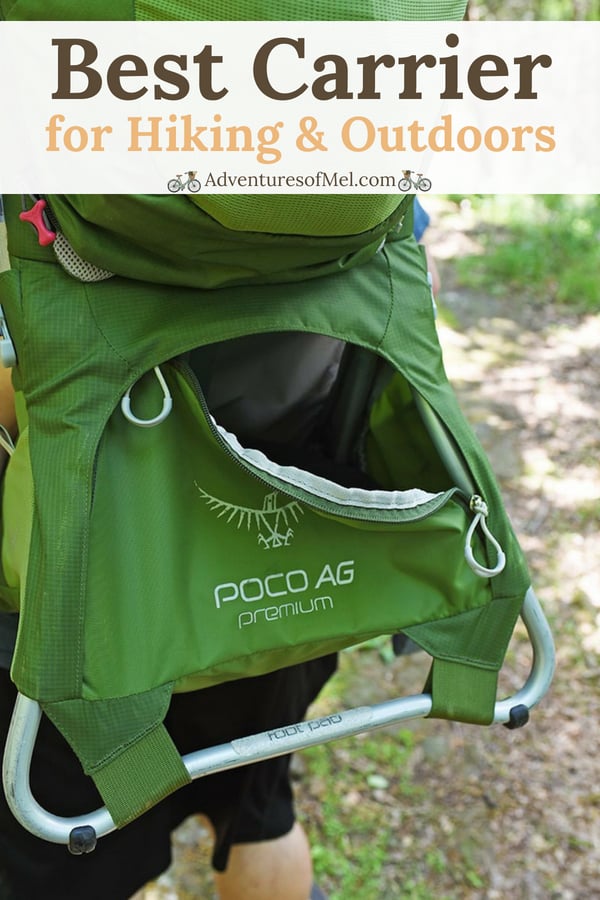
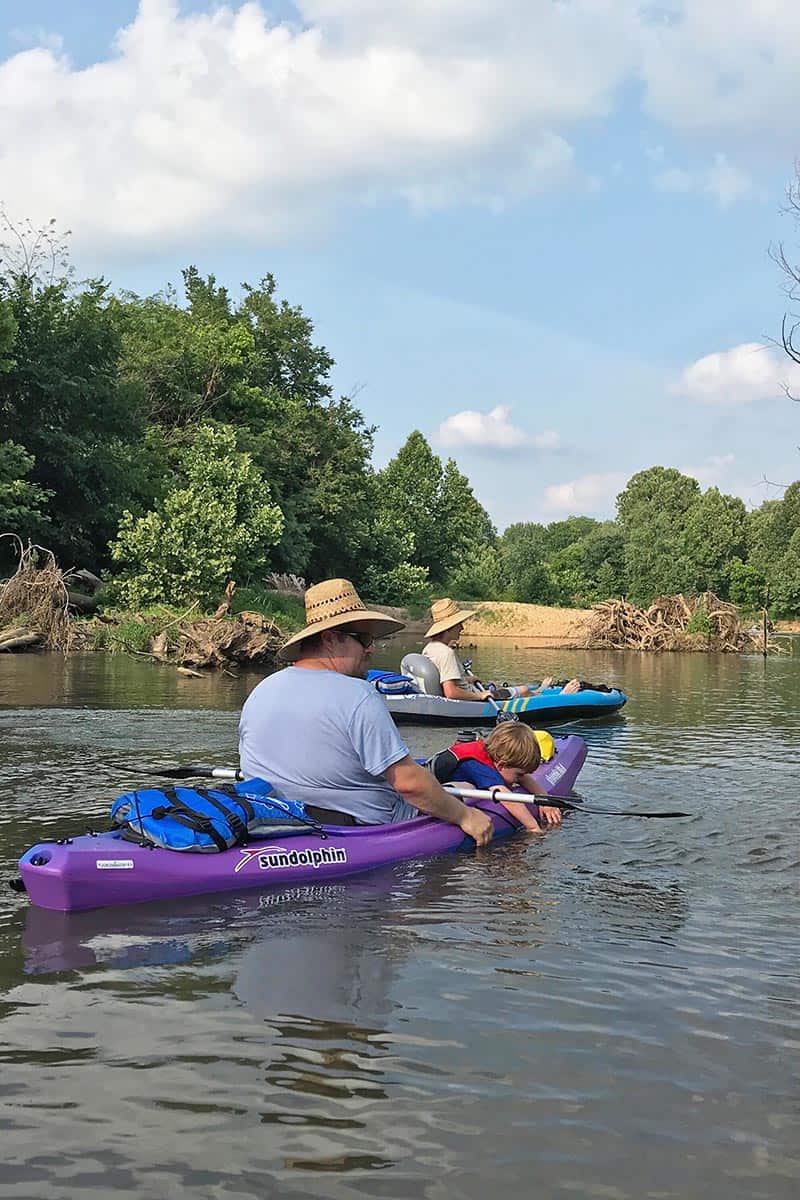

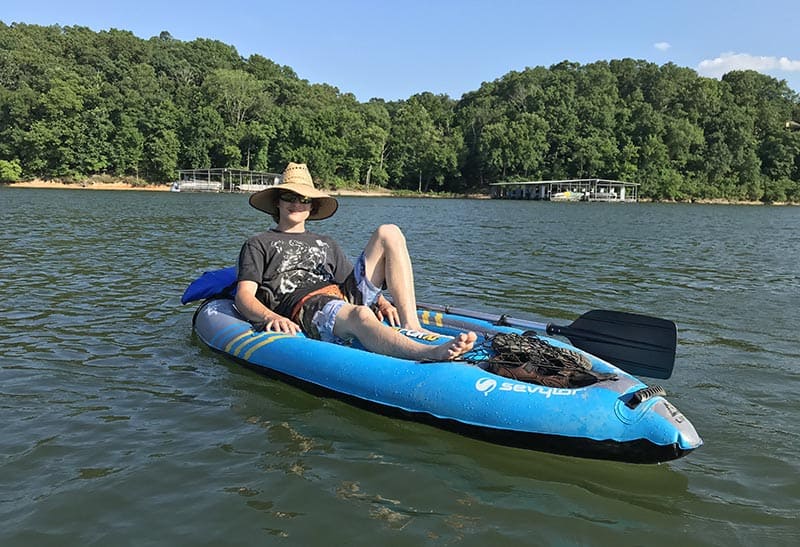
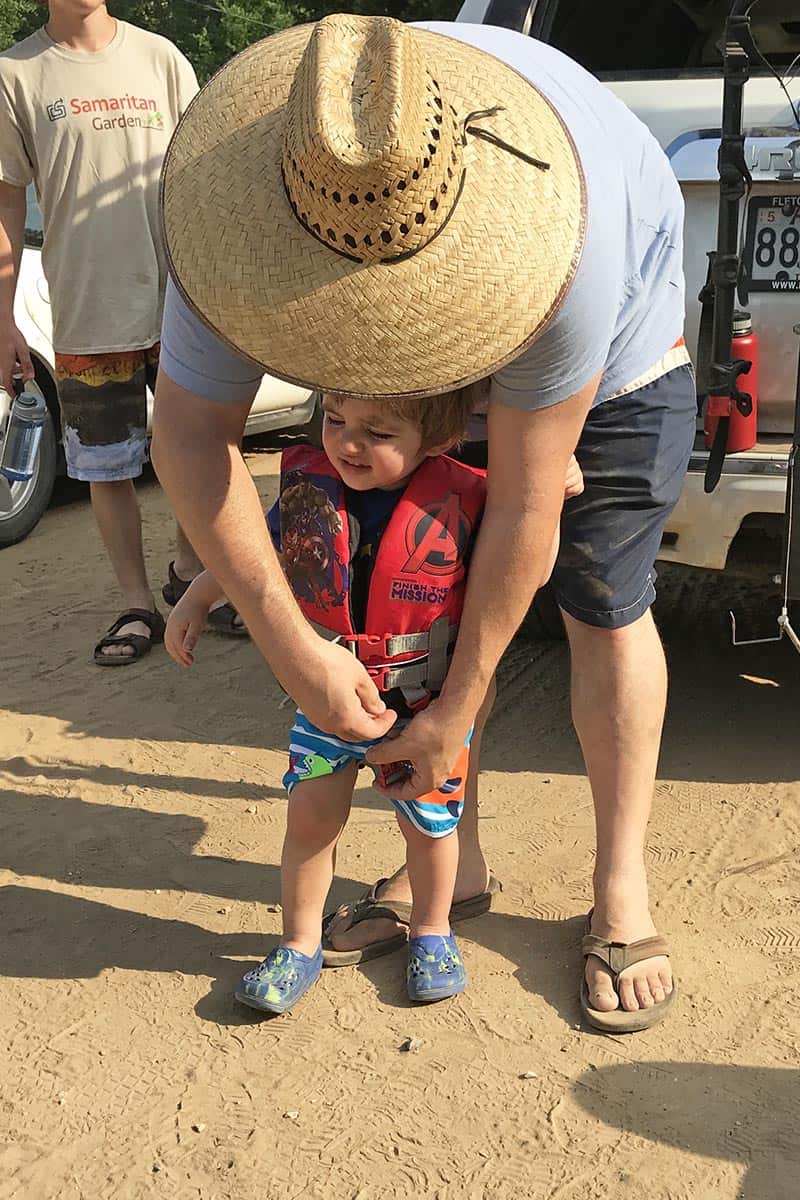
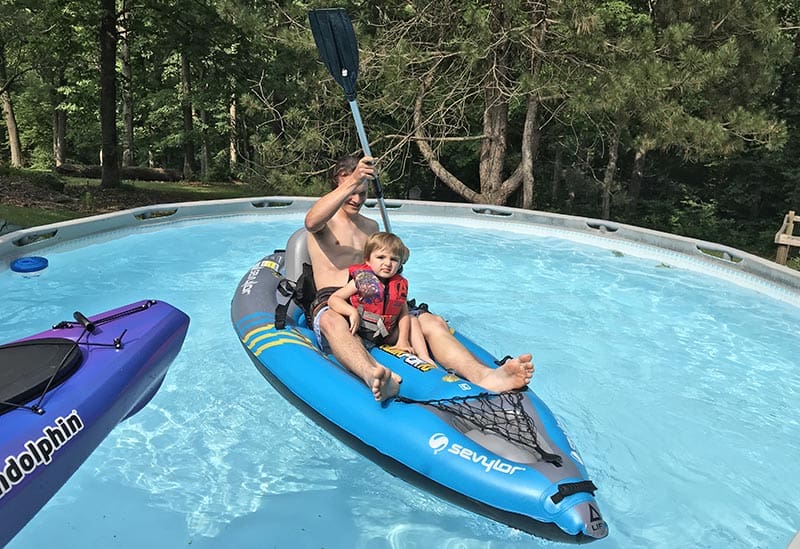

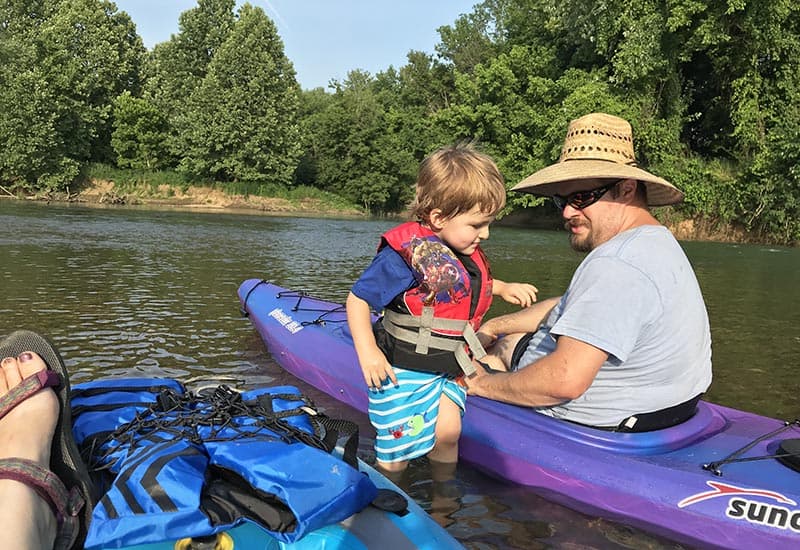
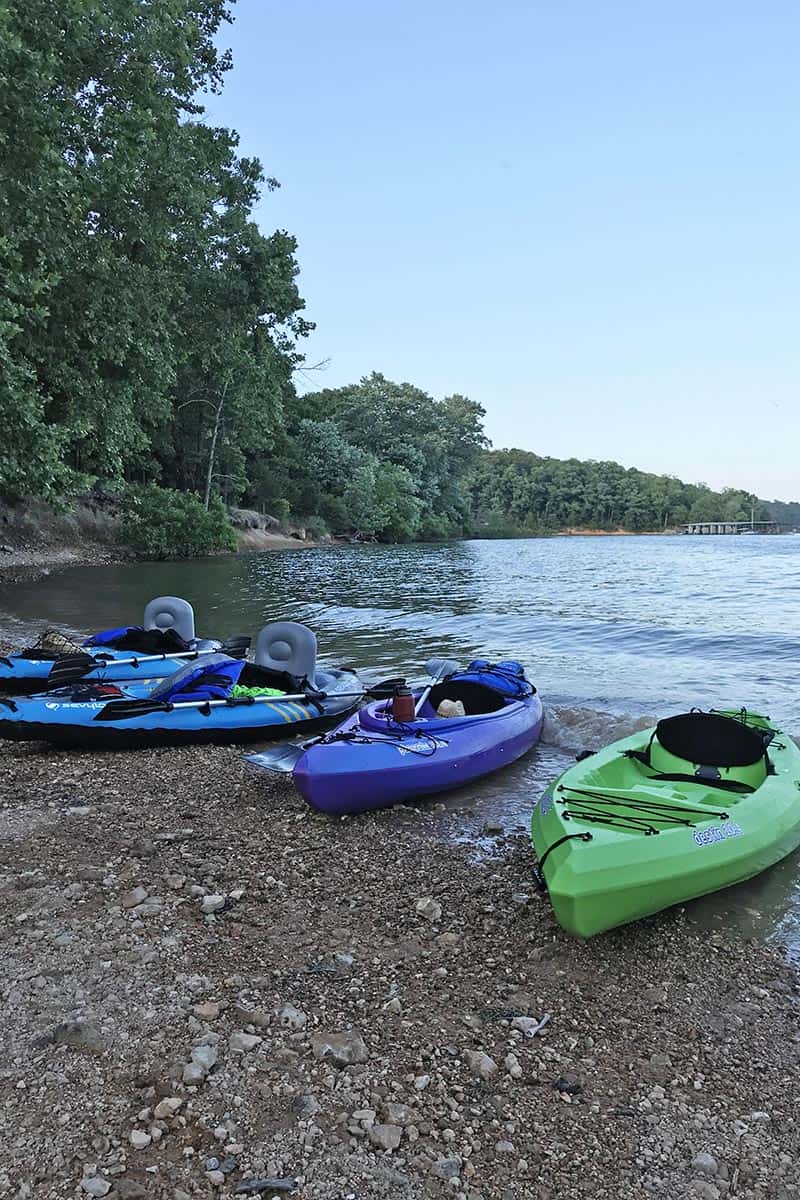
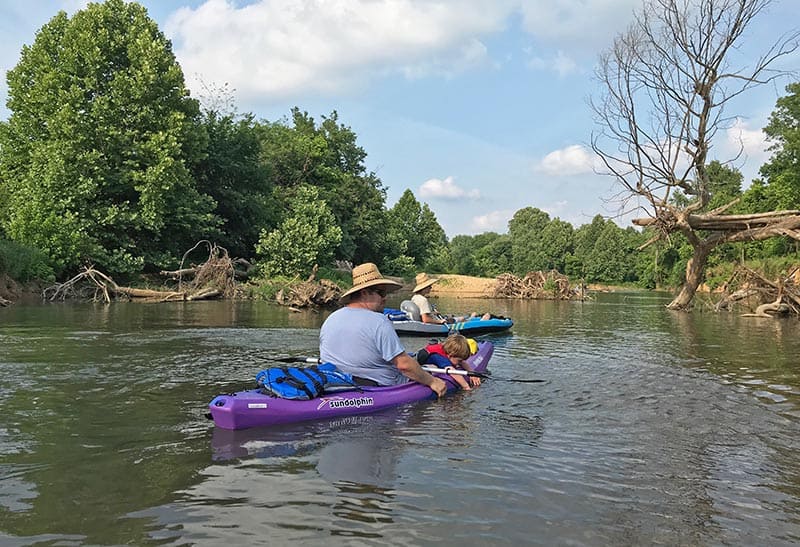
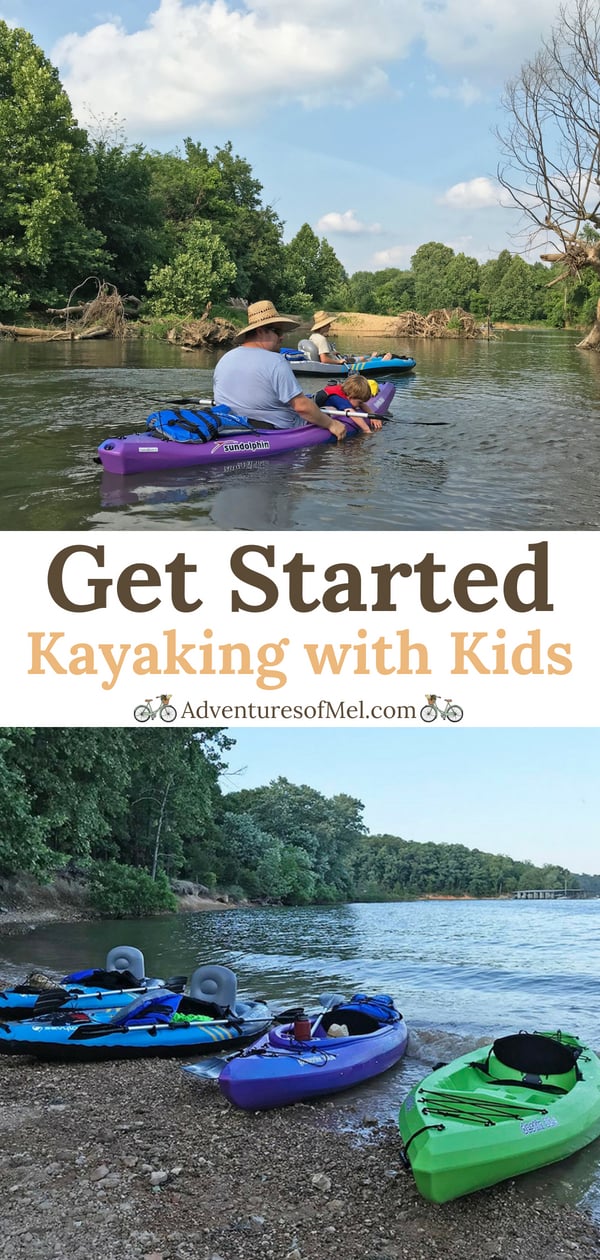
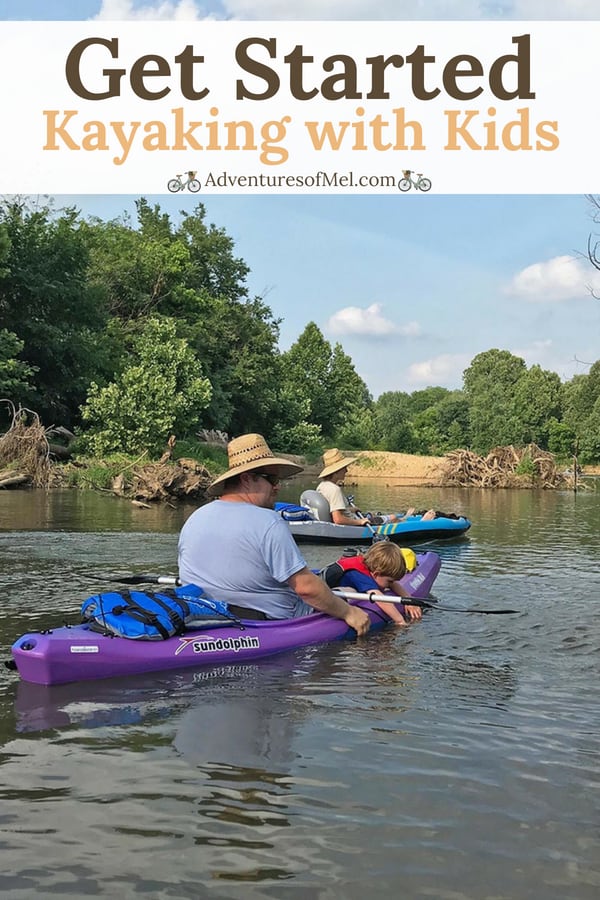

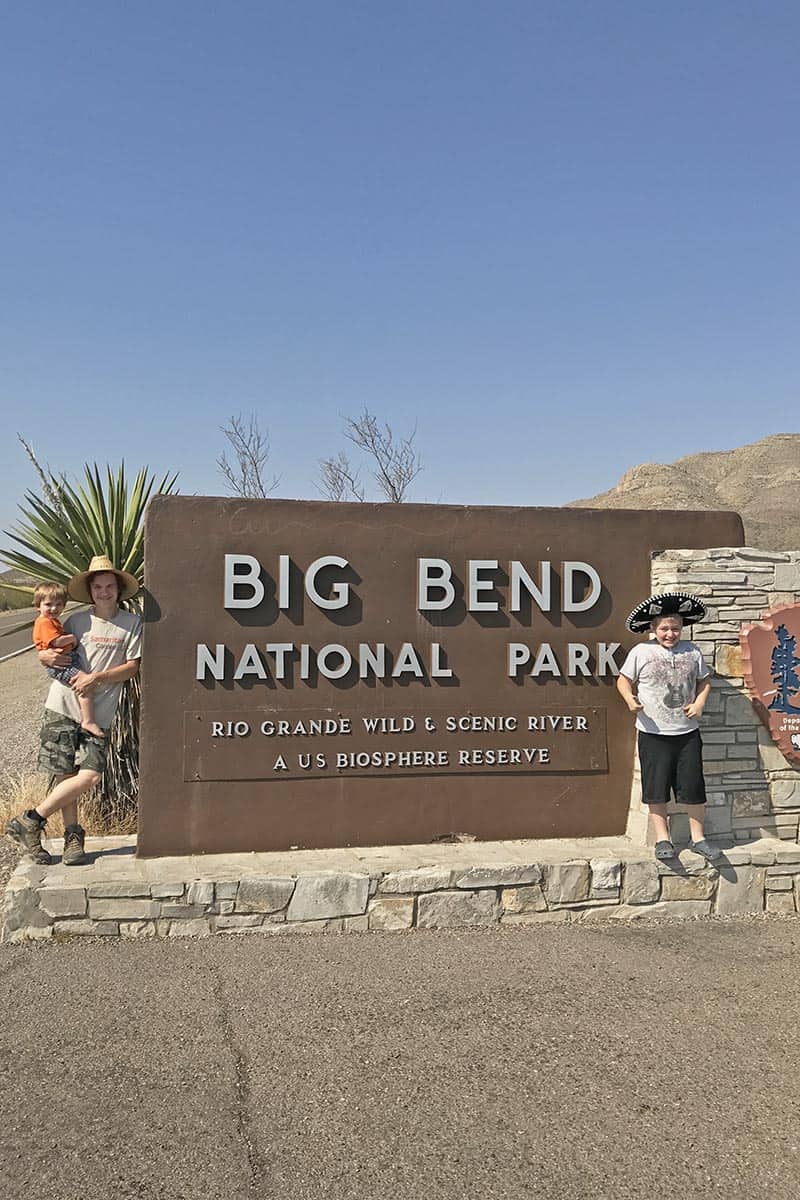
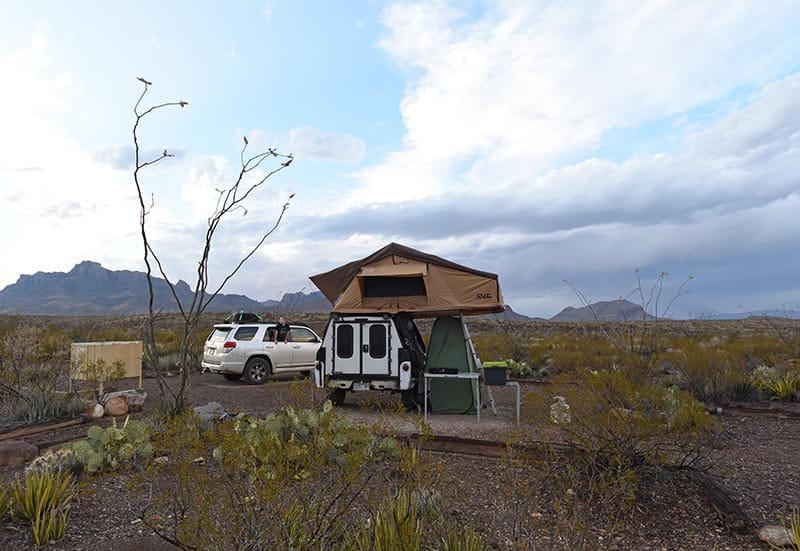
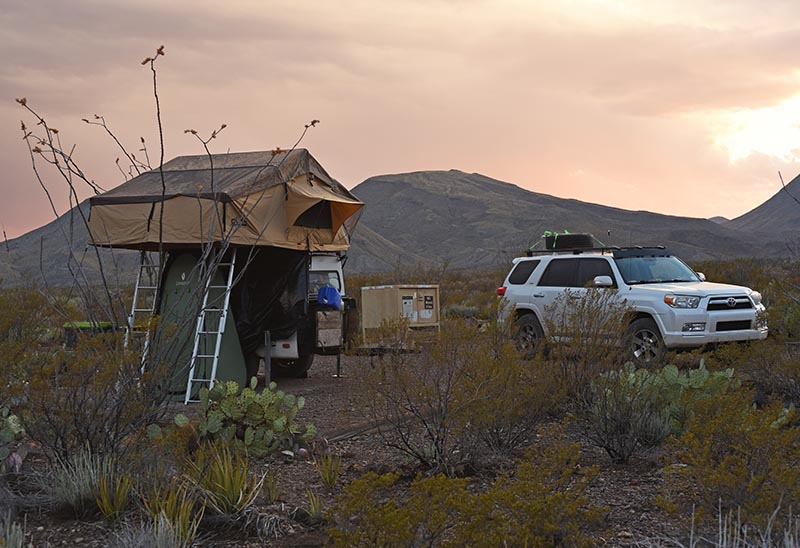
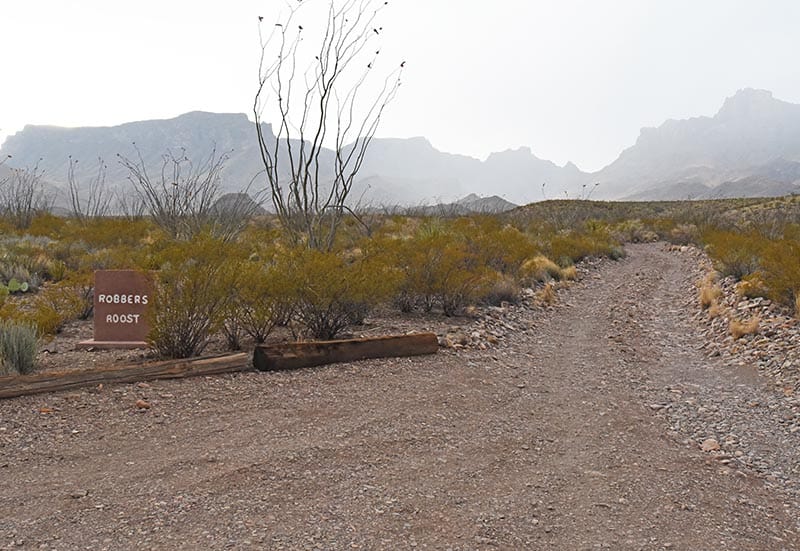
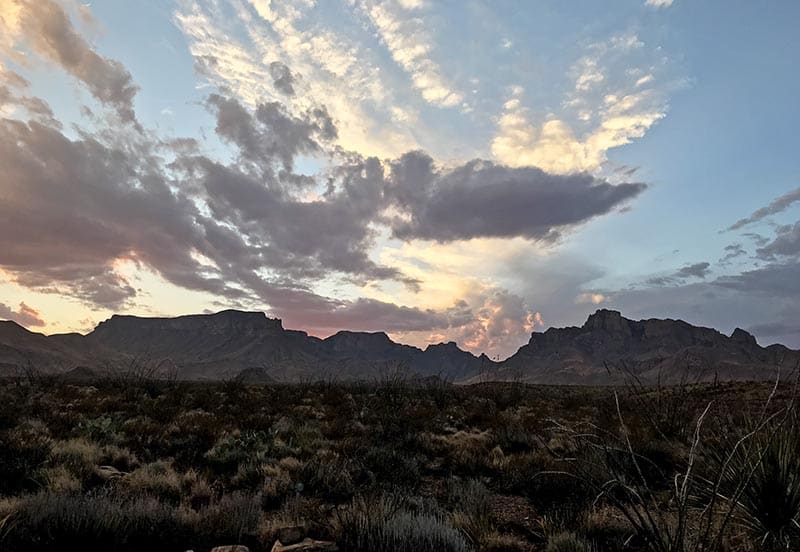
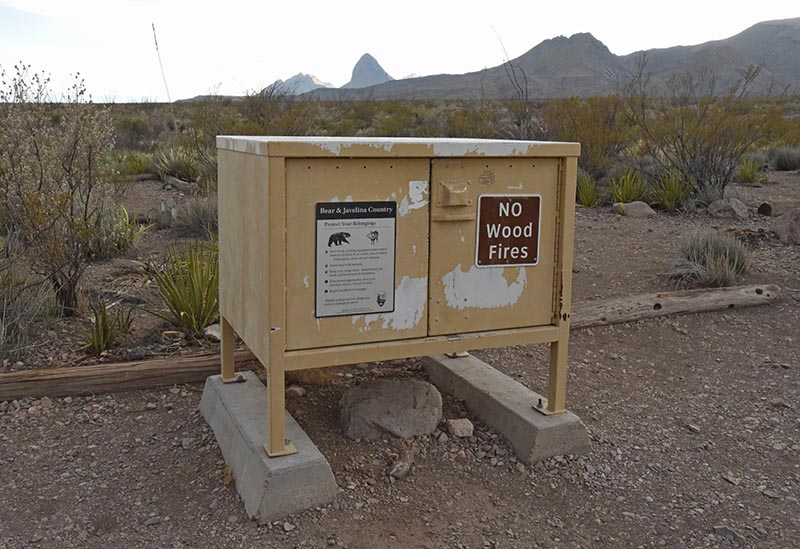
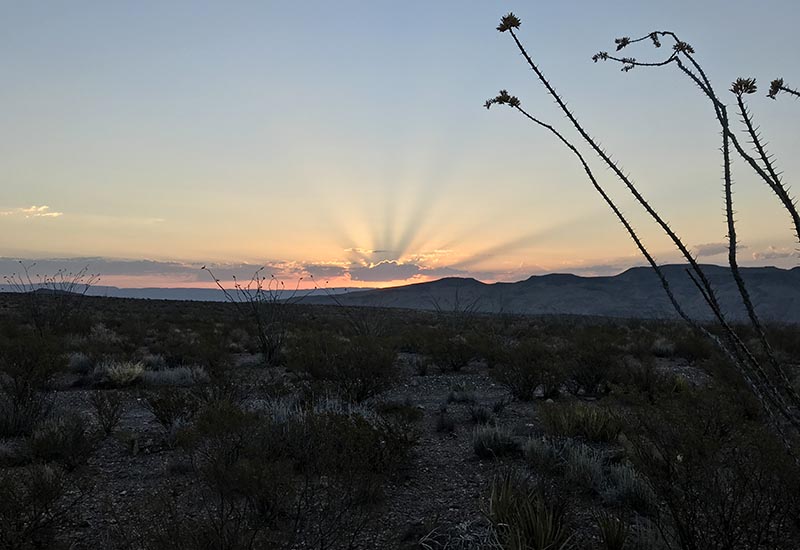

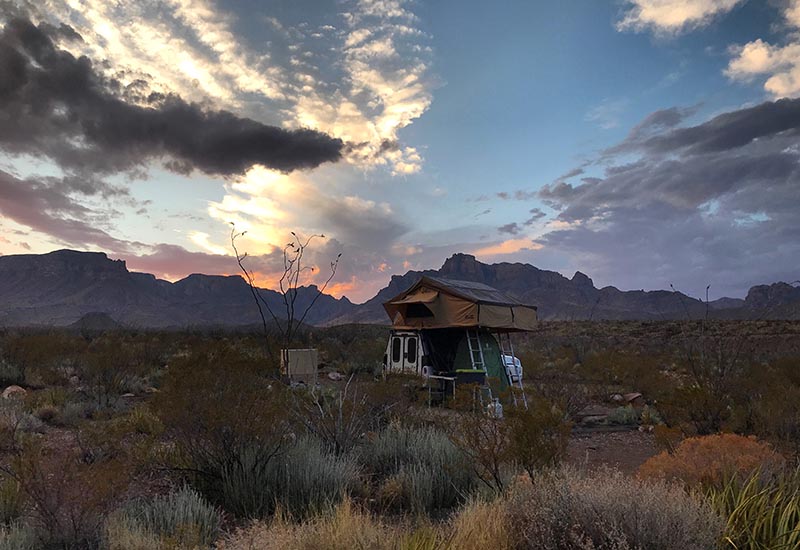
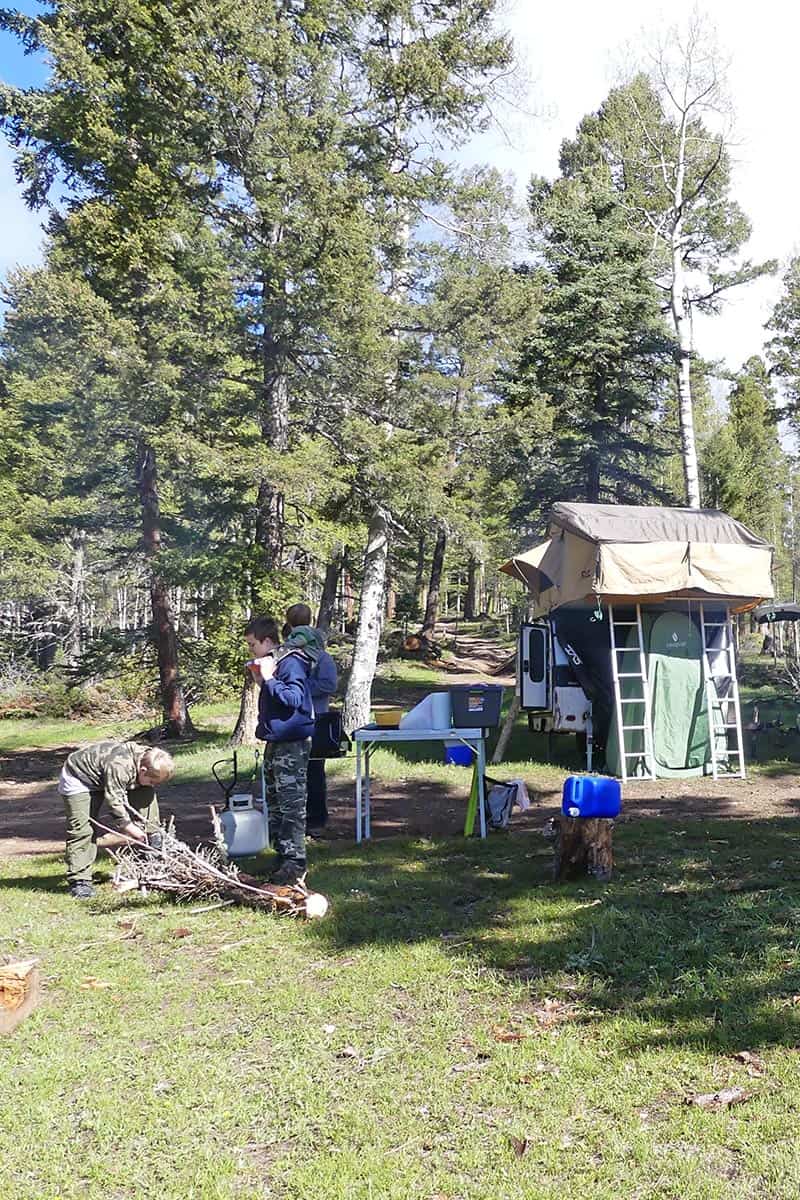
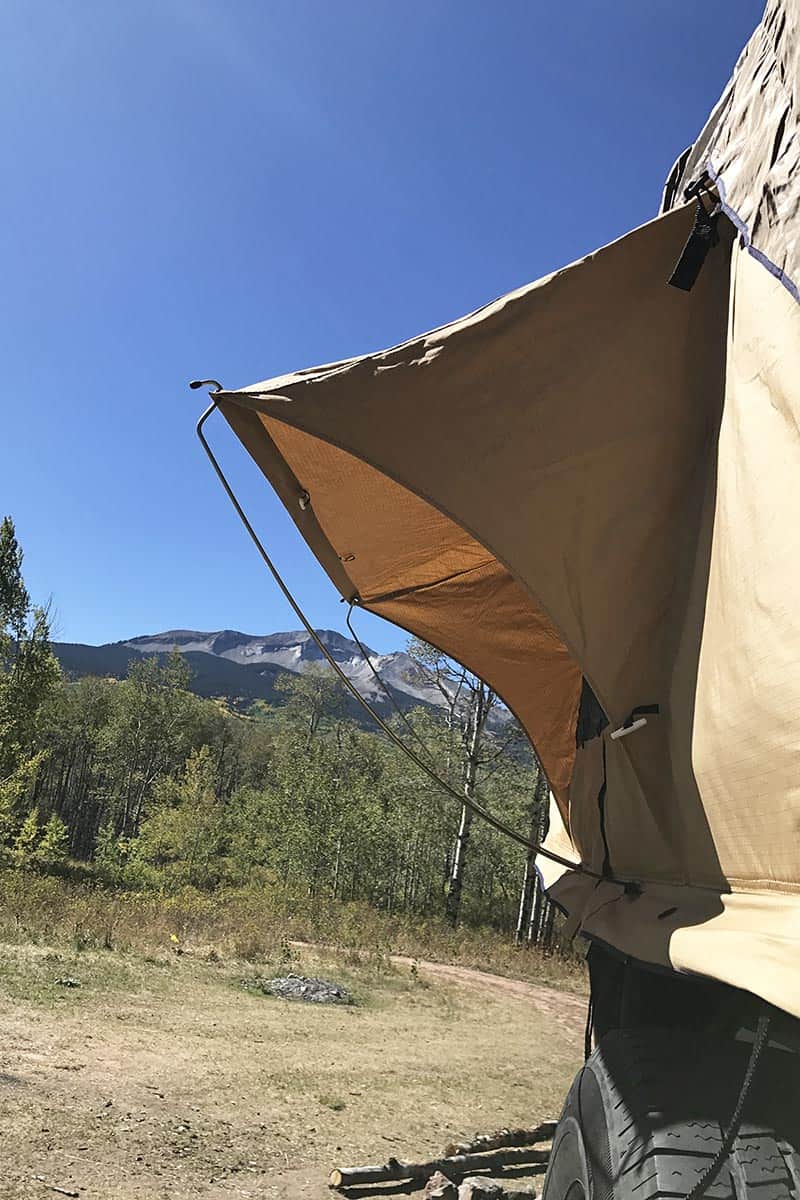
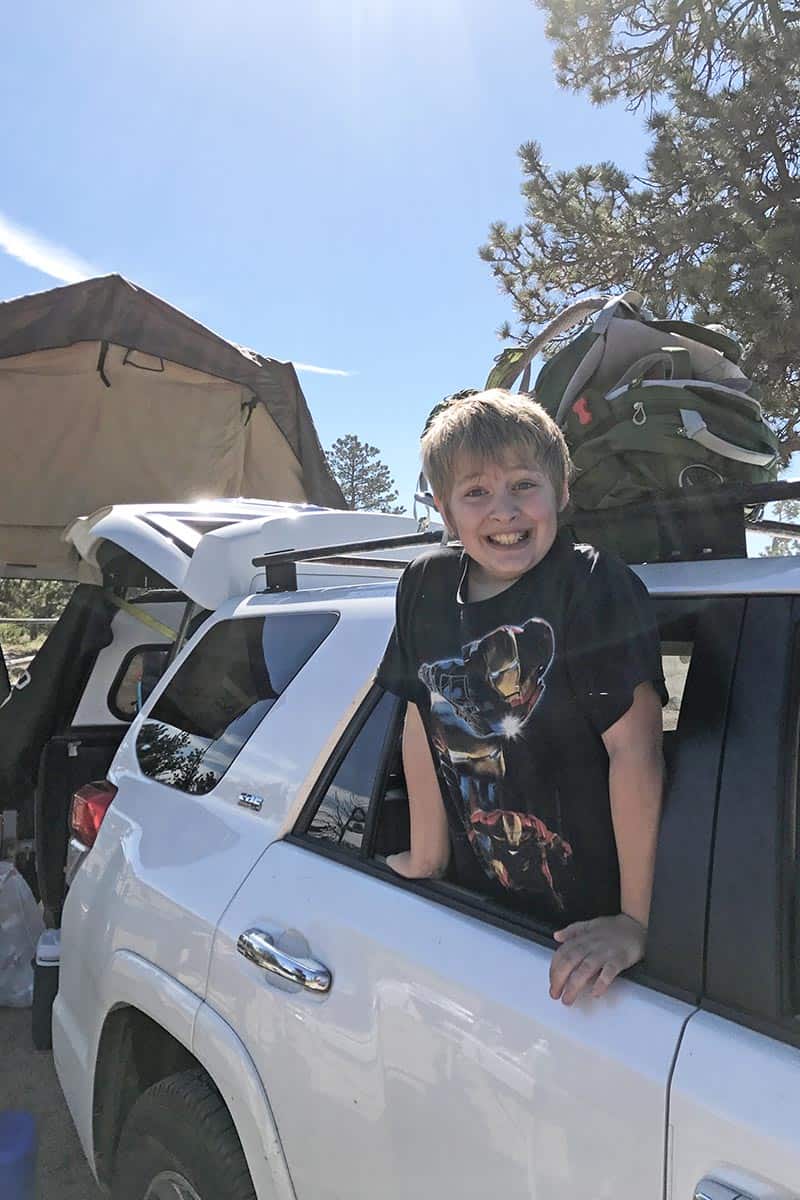
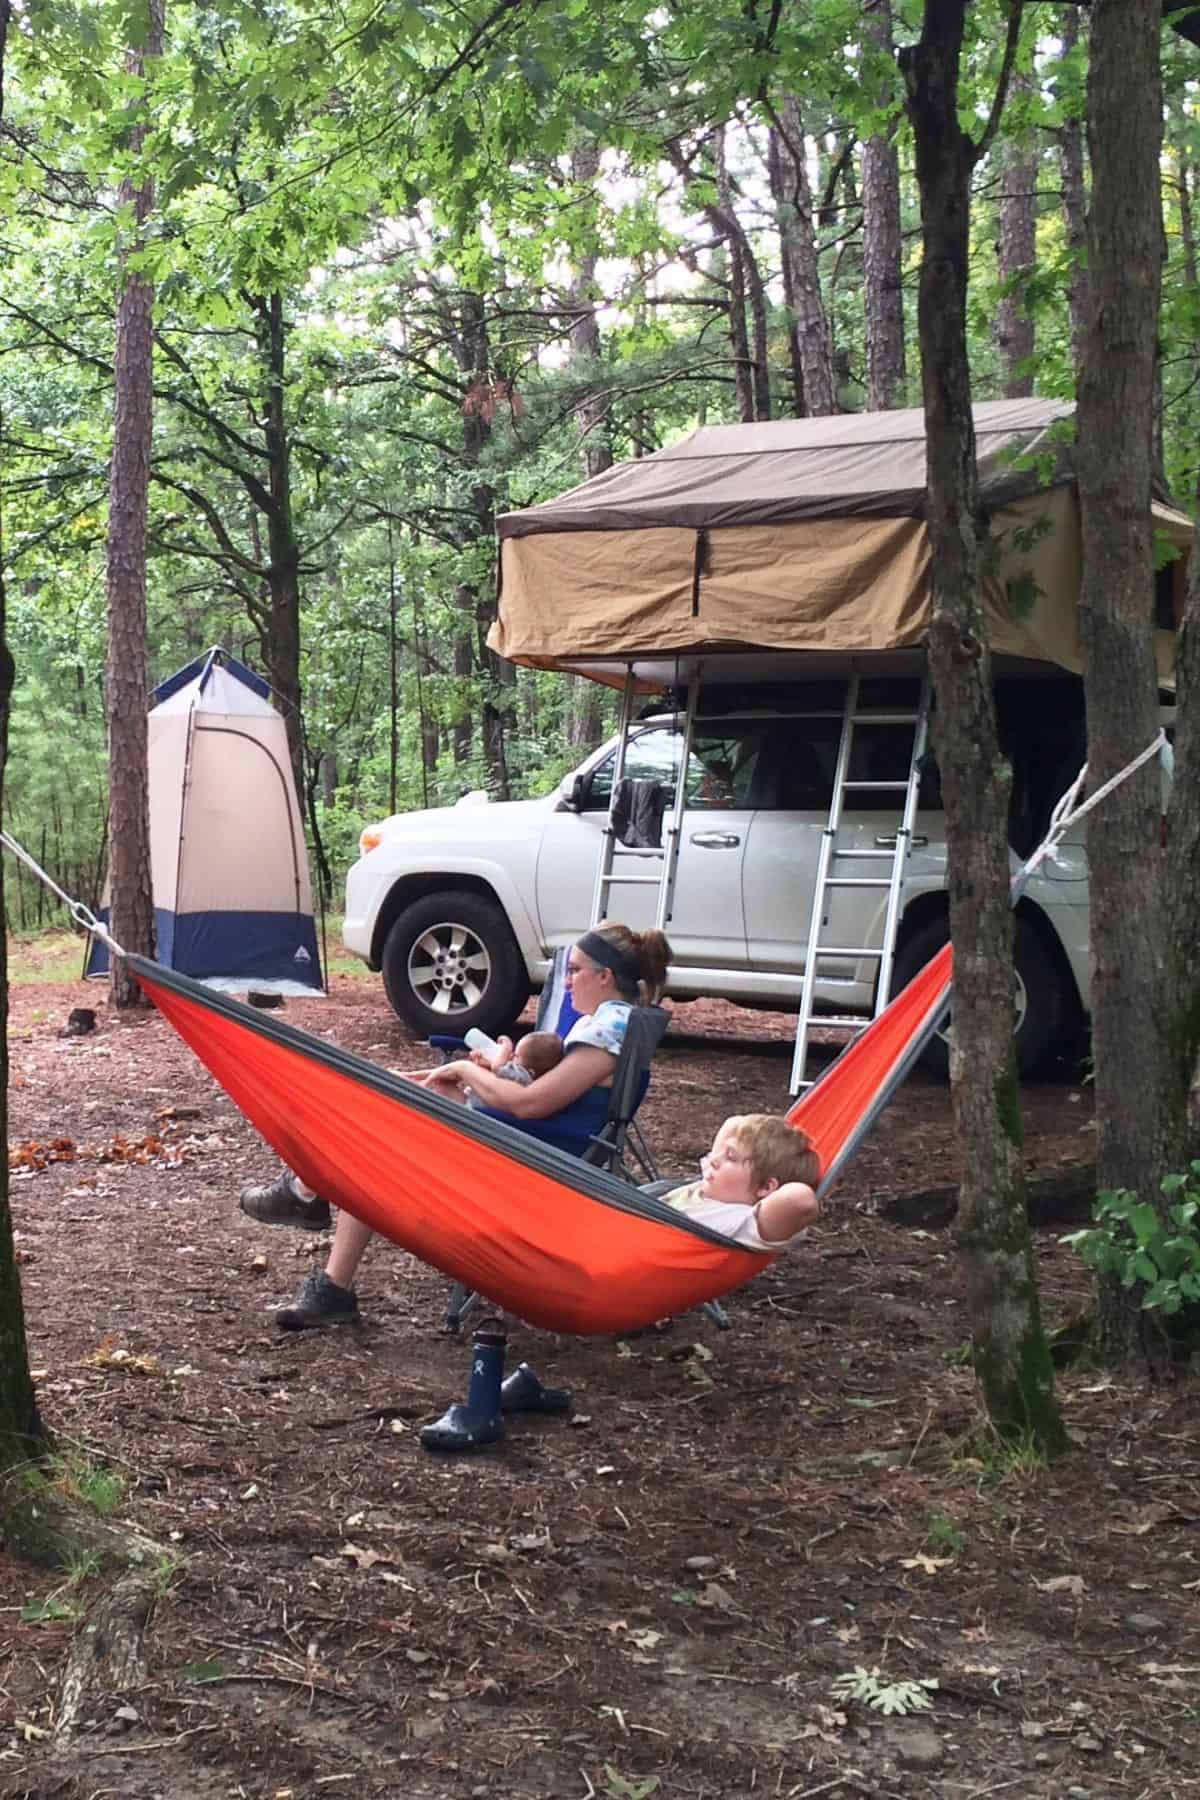
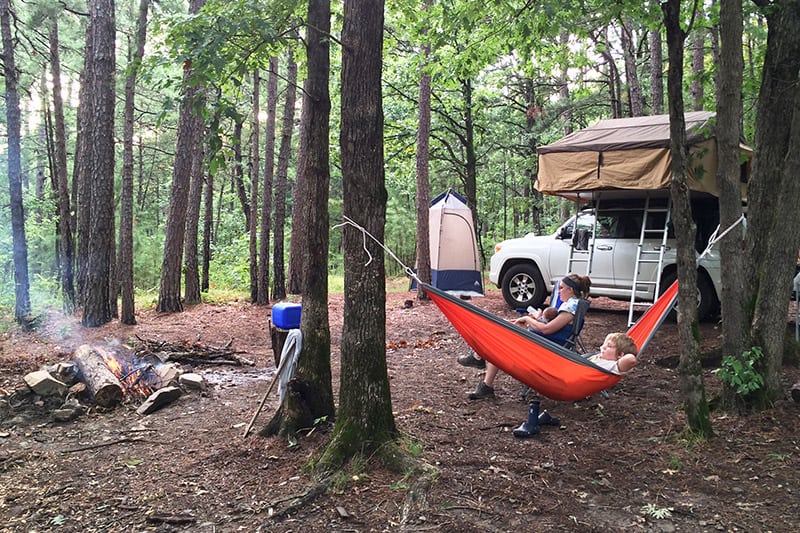
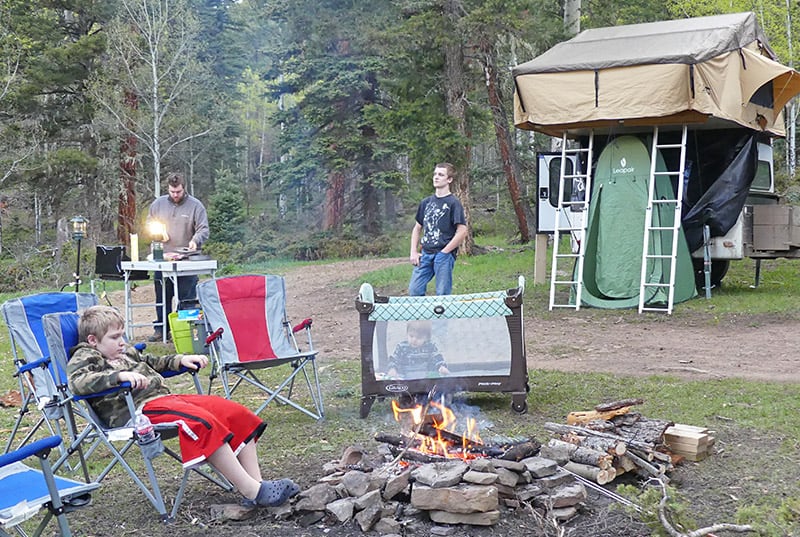
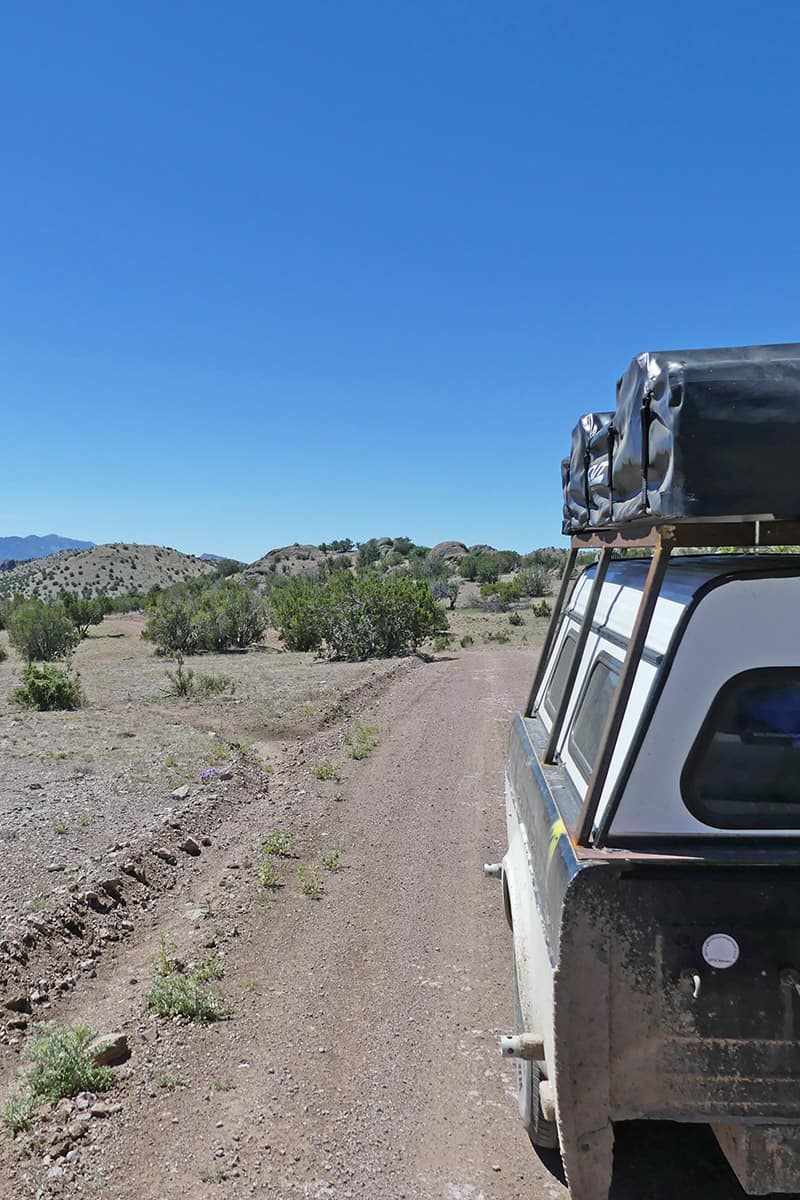
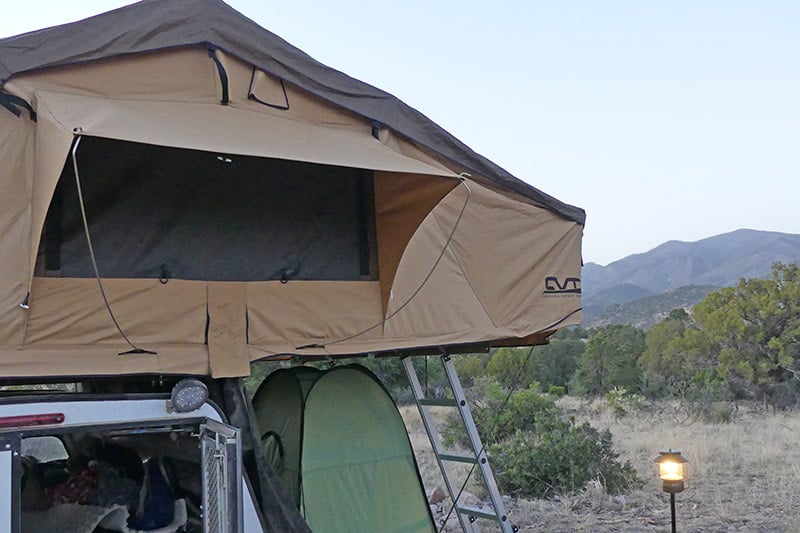
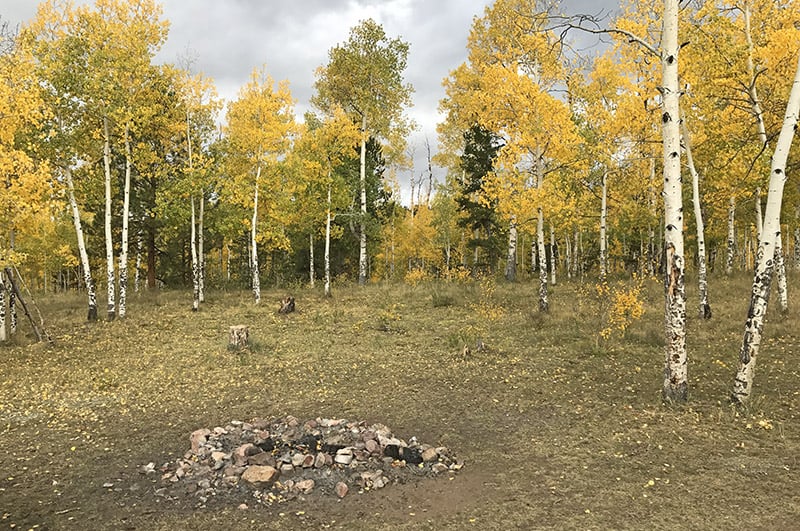
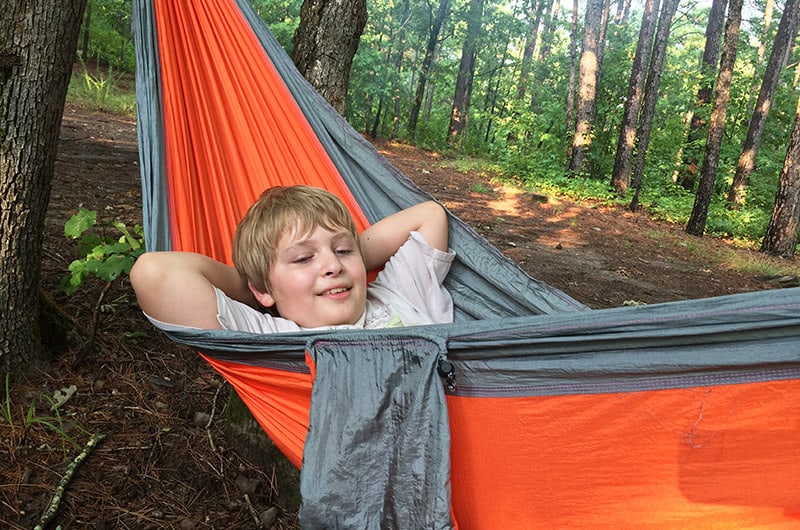
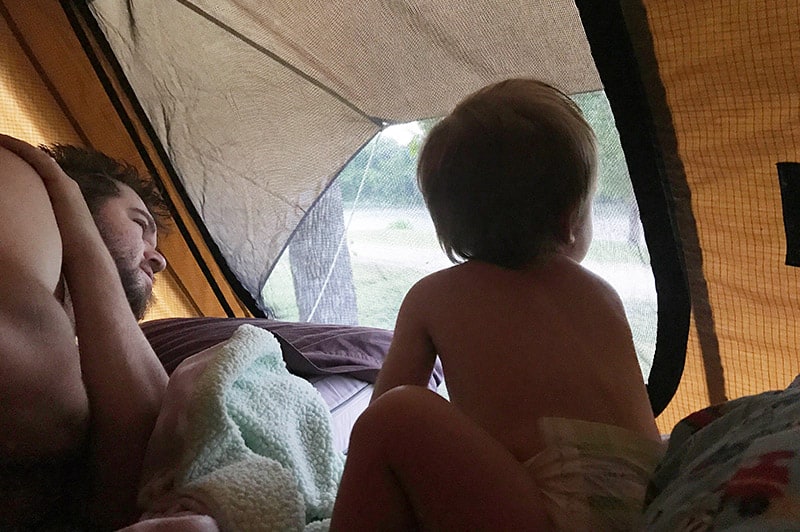
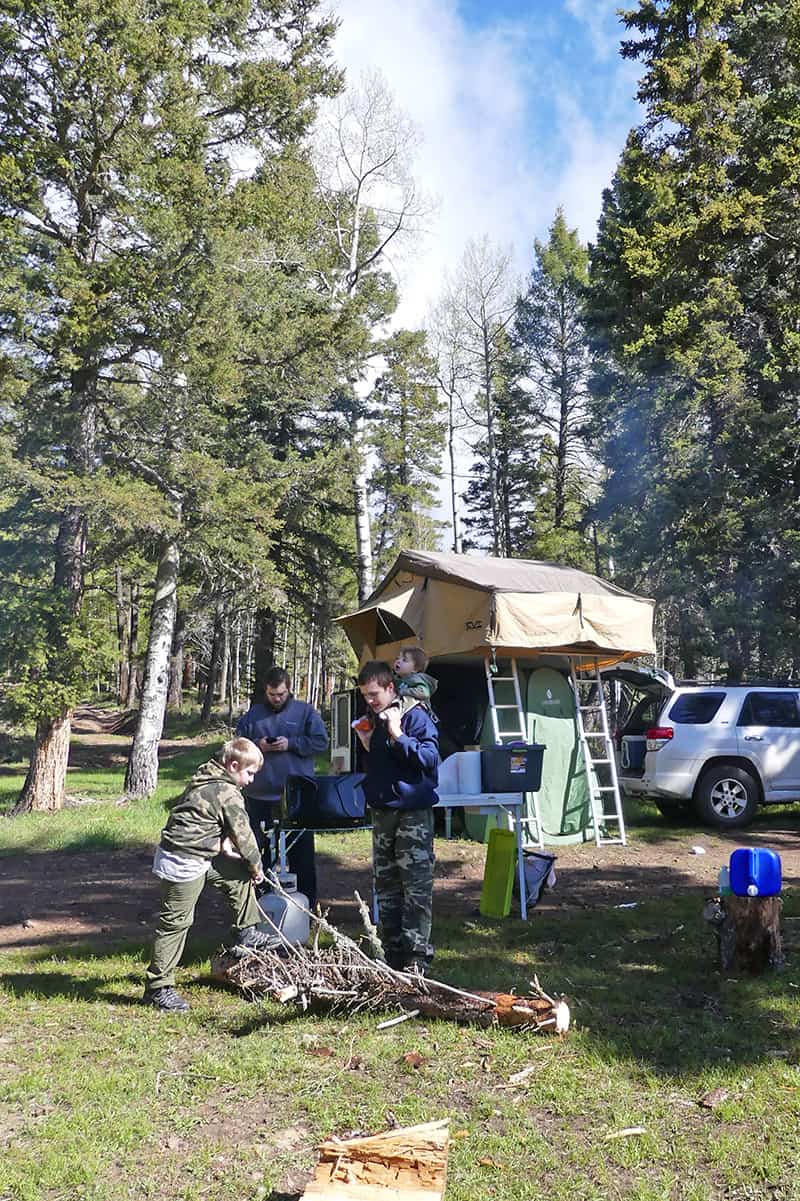
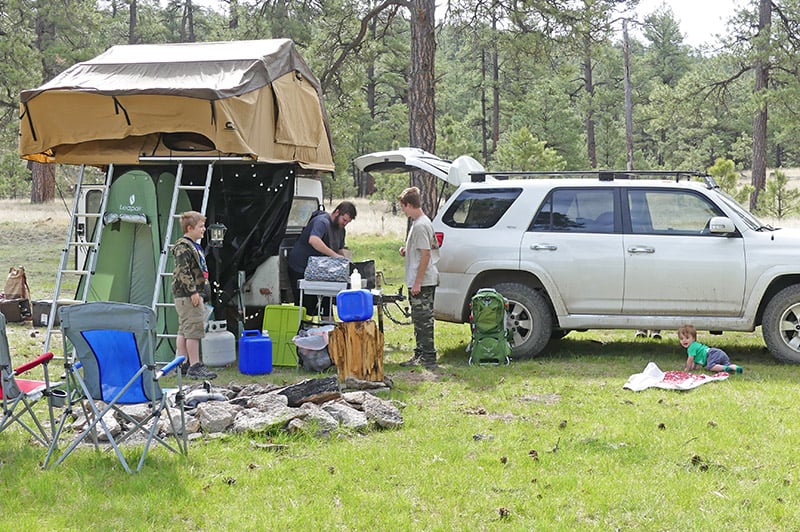


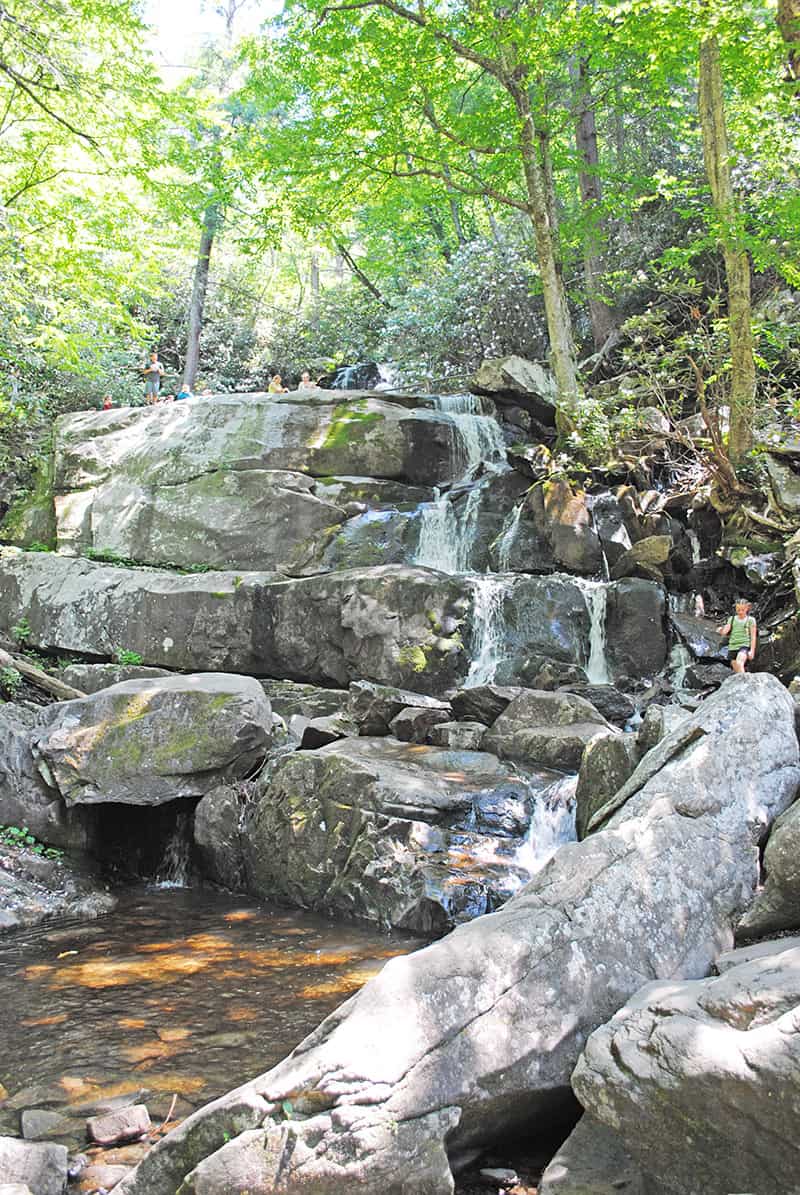
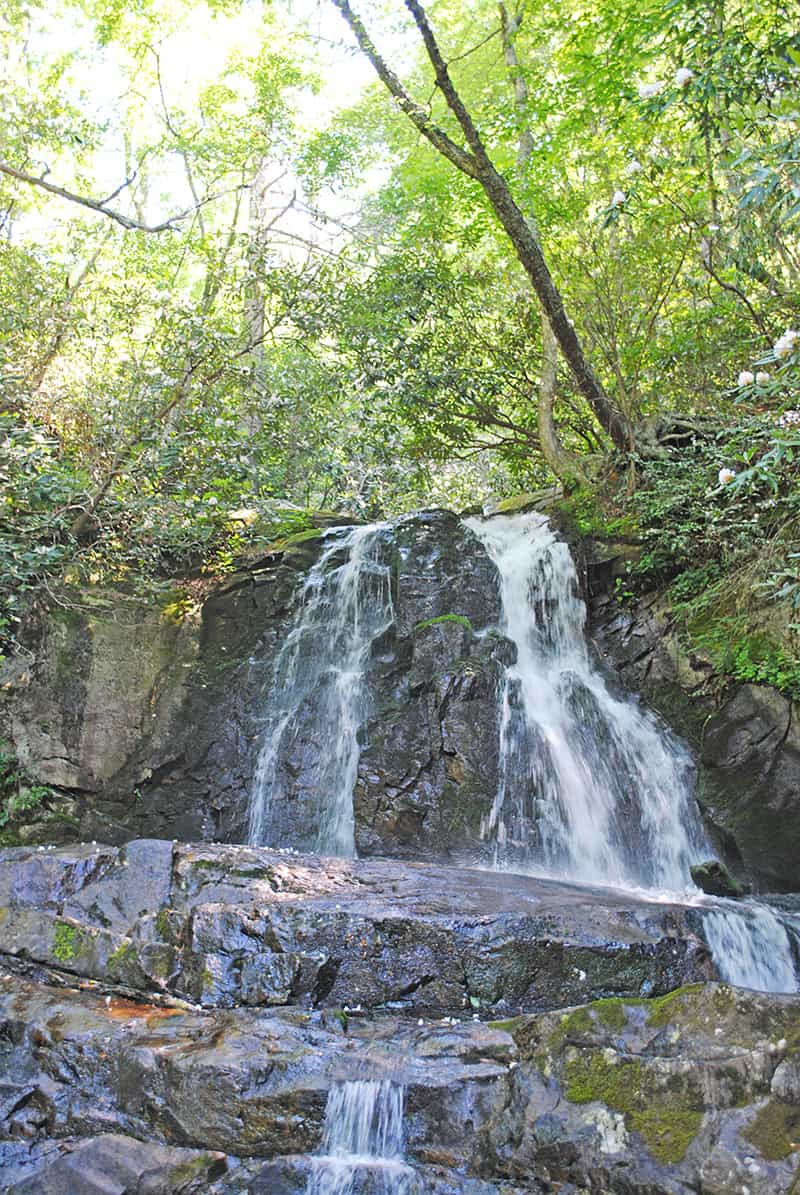 Smoky Mountain waterfalls include beautiful Laurel Falls, an upper and lower waterfall accessible by a moderate hike perfect for families who love hiking. Roundtrip, the trail is a 2.6 mile hike that winds through the forest and gives incredible views of the Great Smoky Mountains.
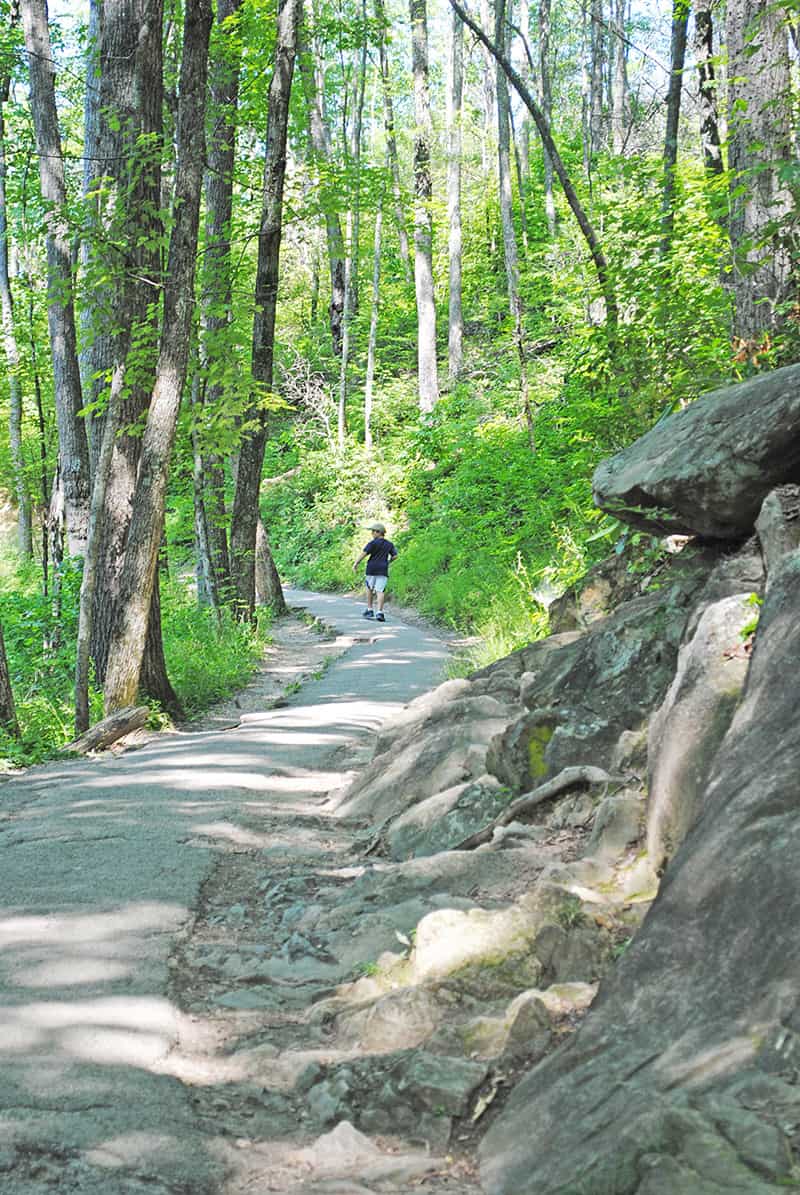
 The views at certain vantage spots are so beautiful and so amazing. We’d stop every so often and just admire the Smoky Mountain vista.
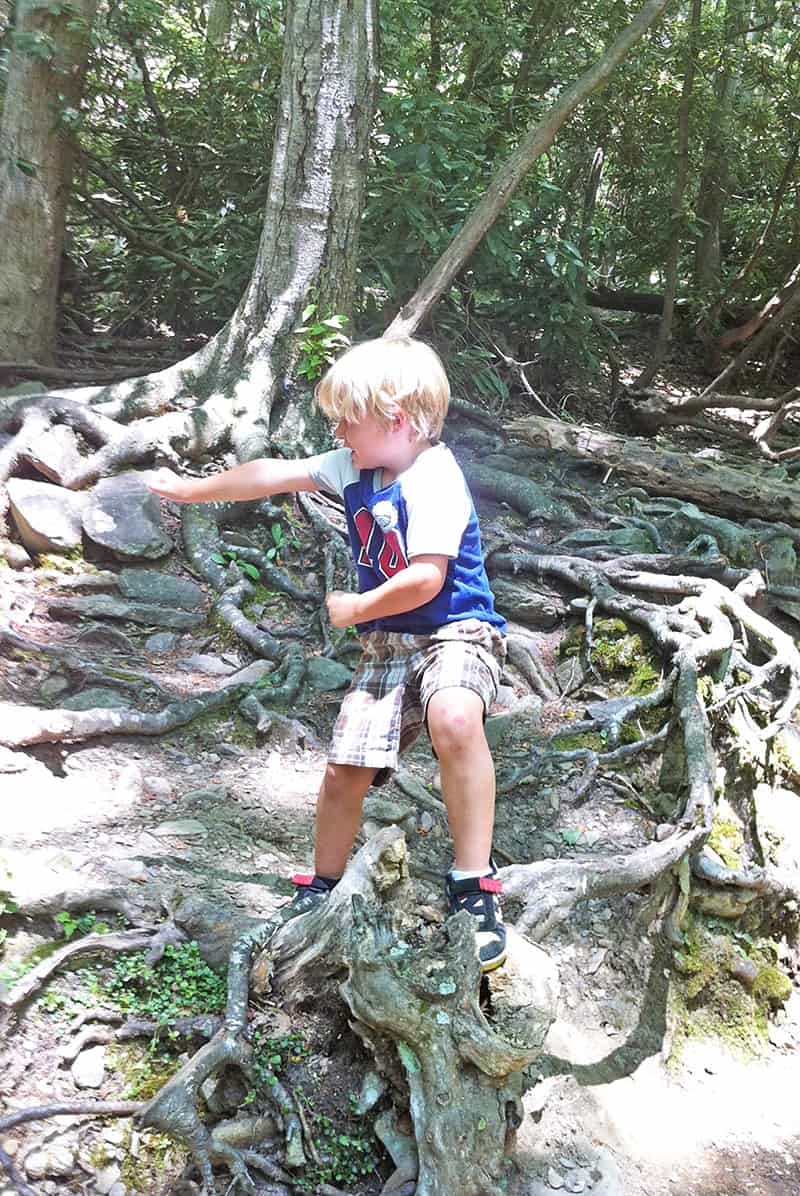
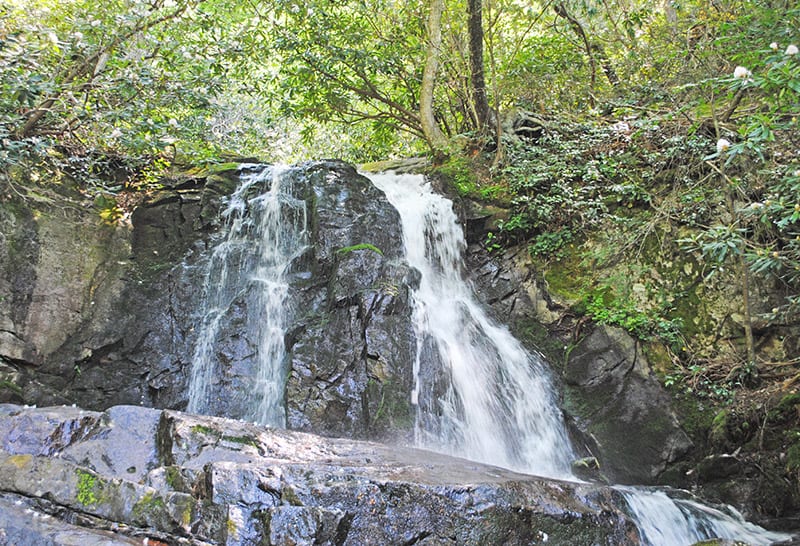
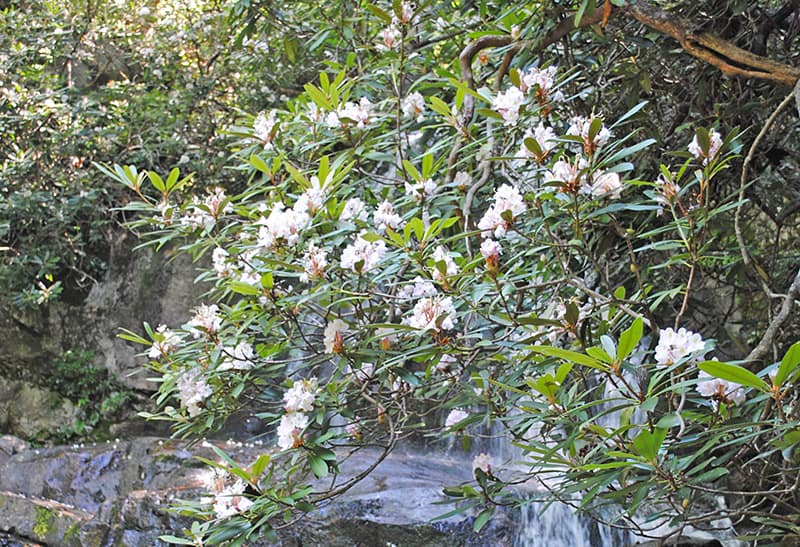
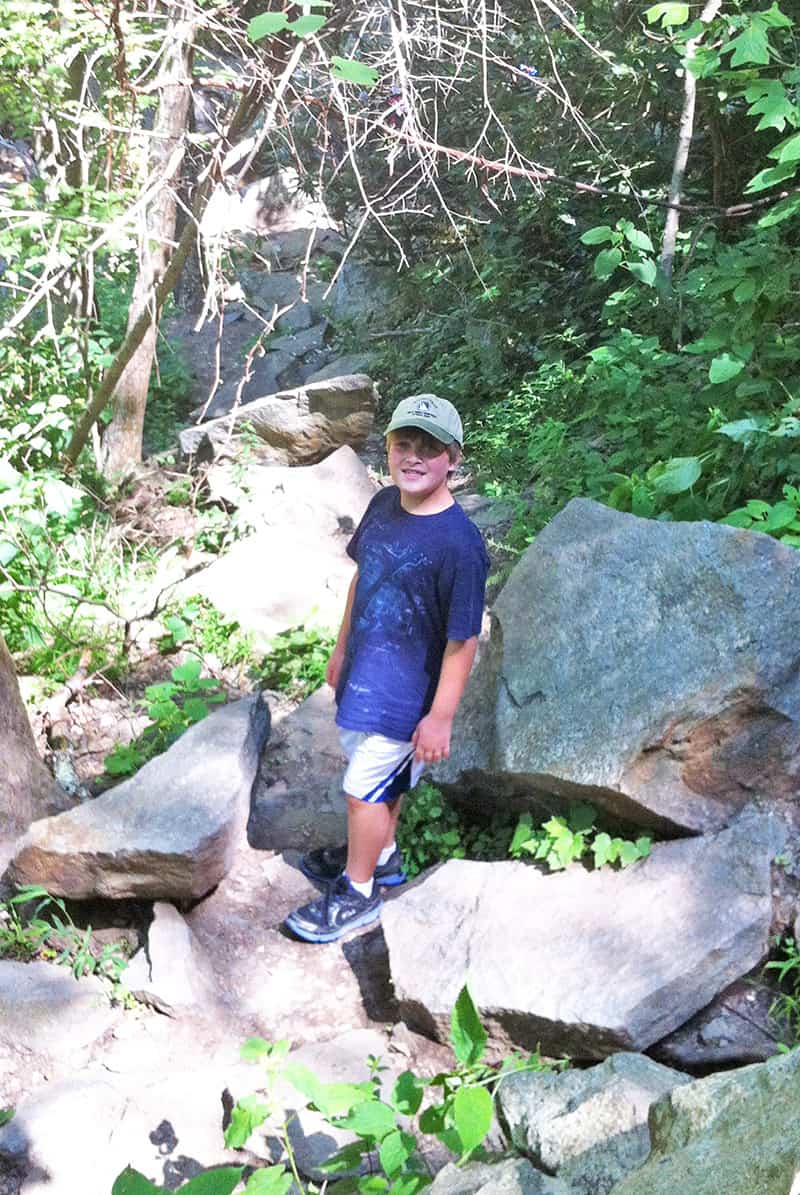
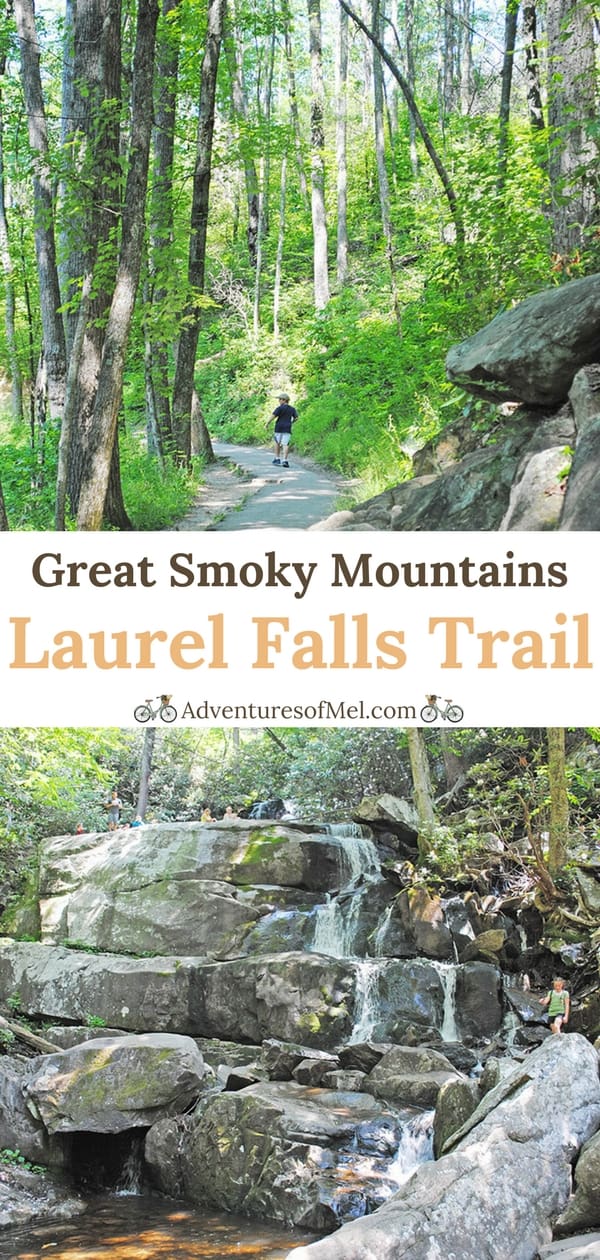
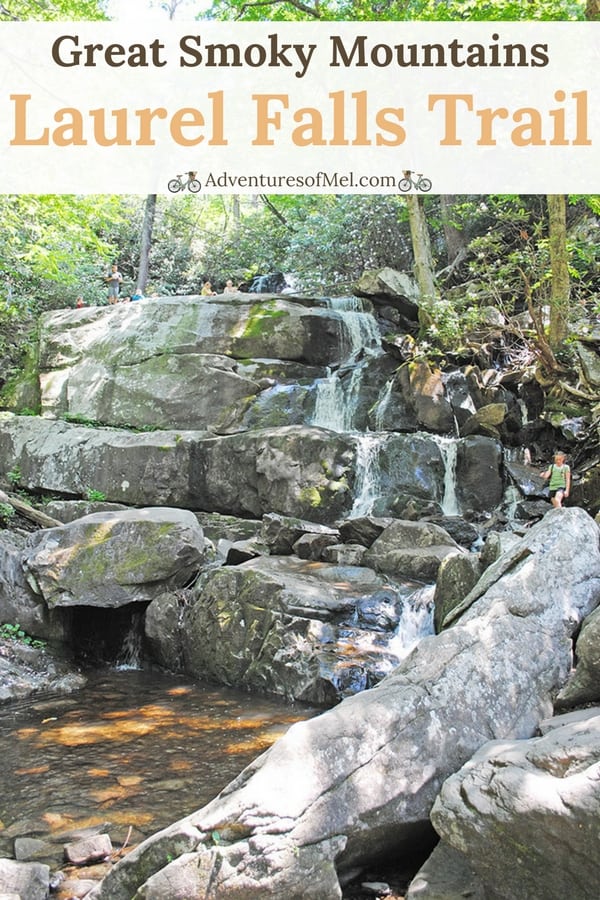
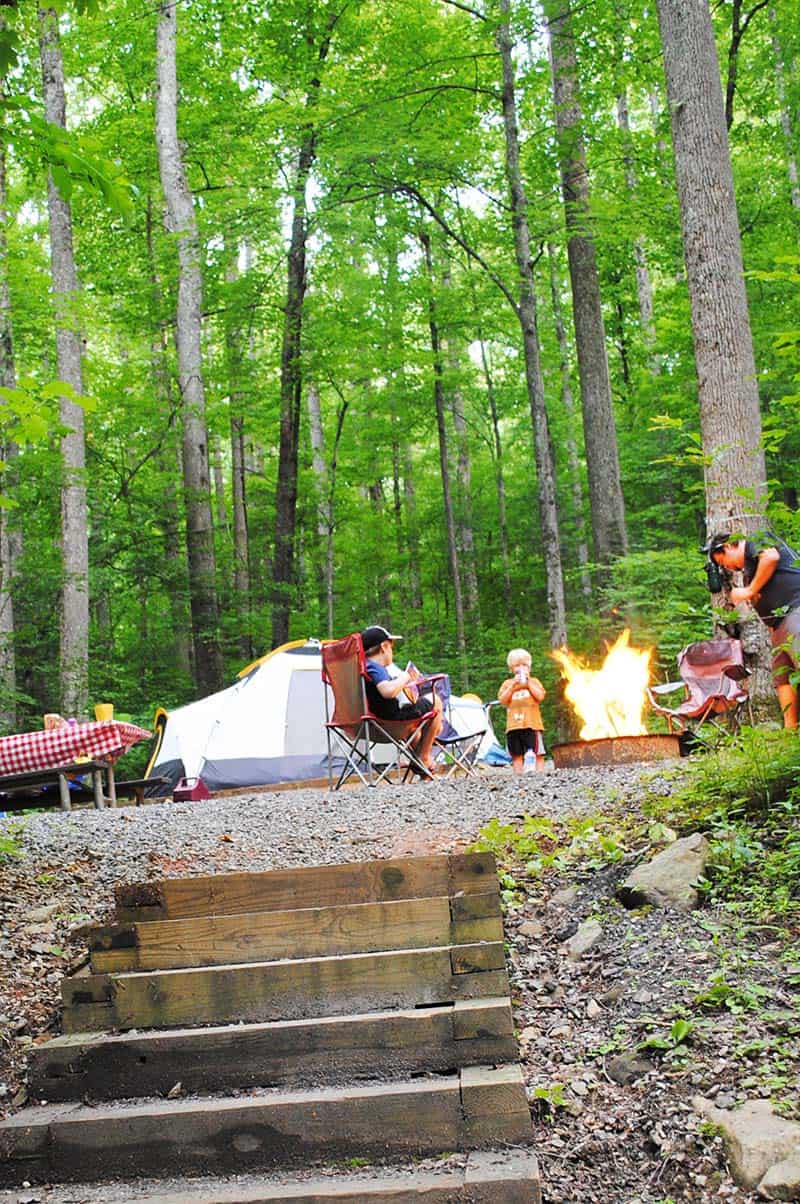
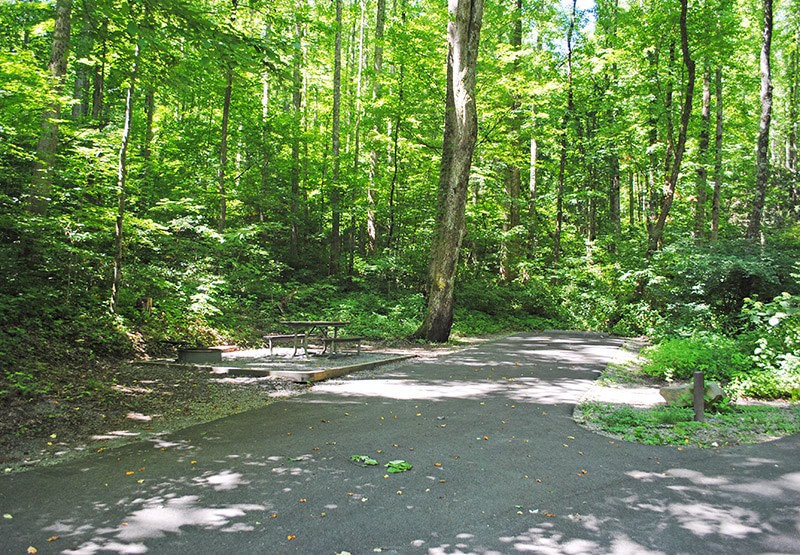
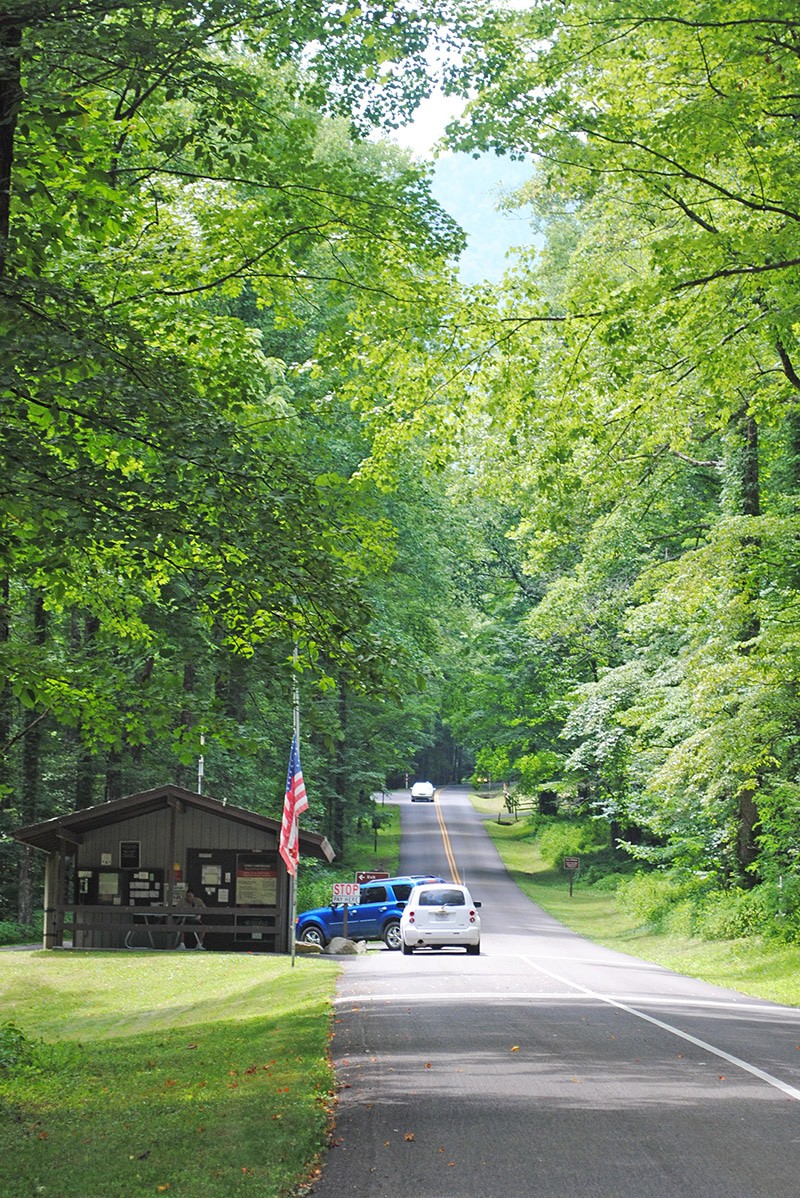
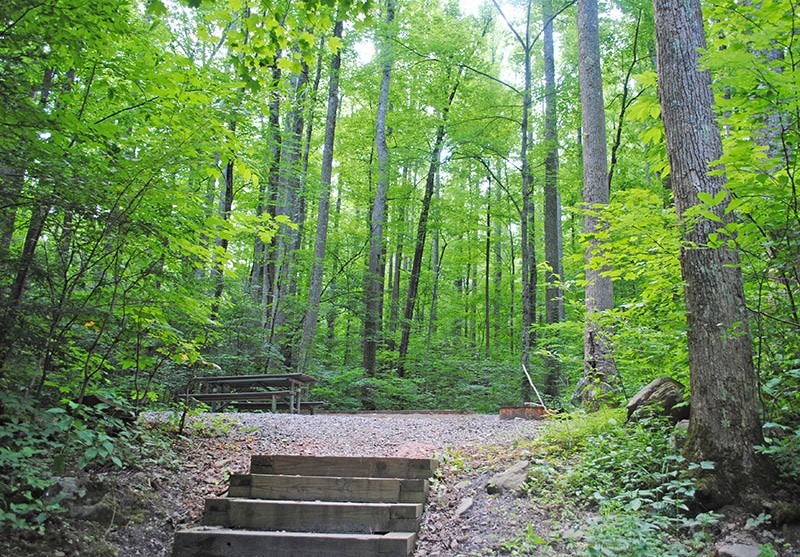
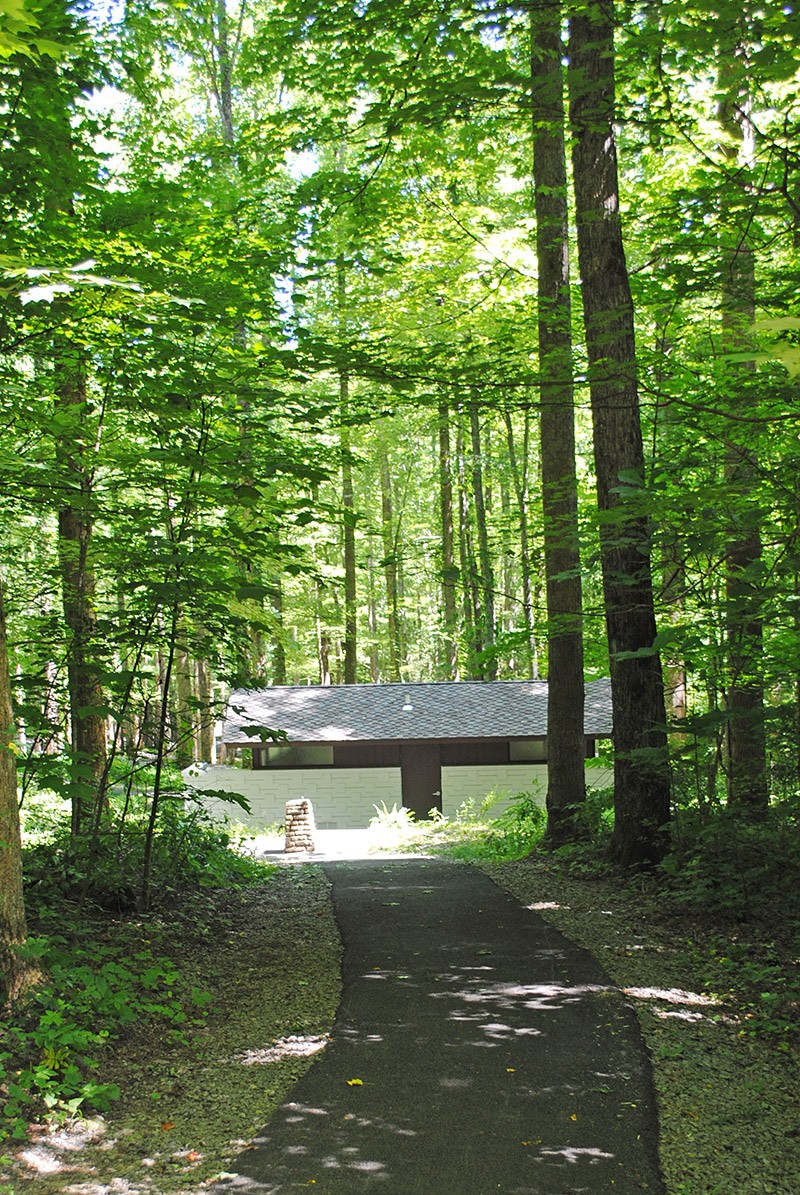
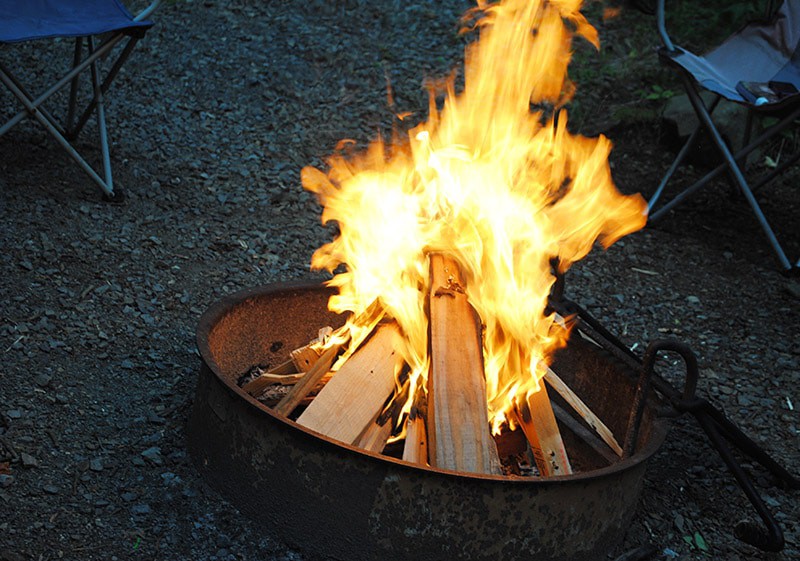
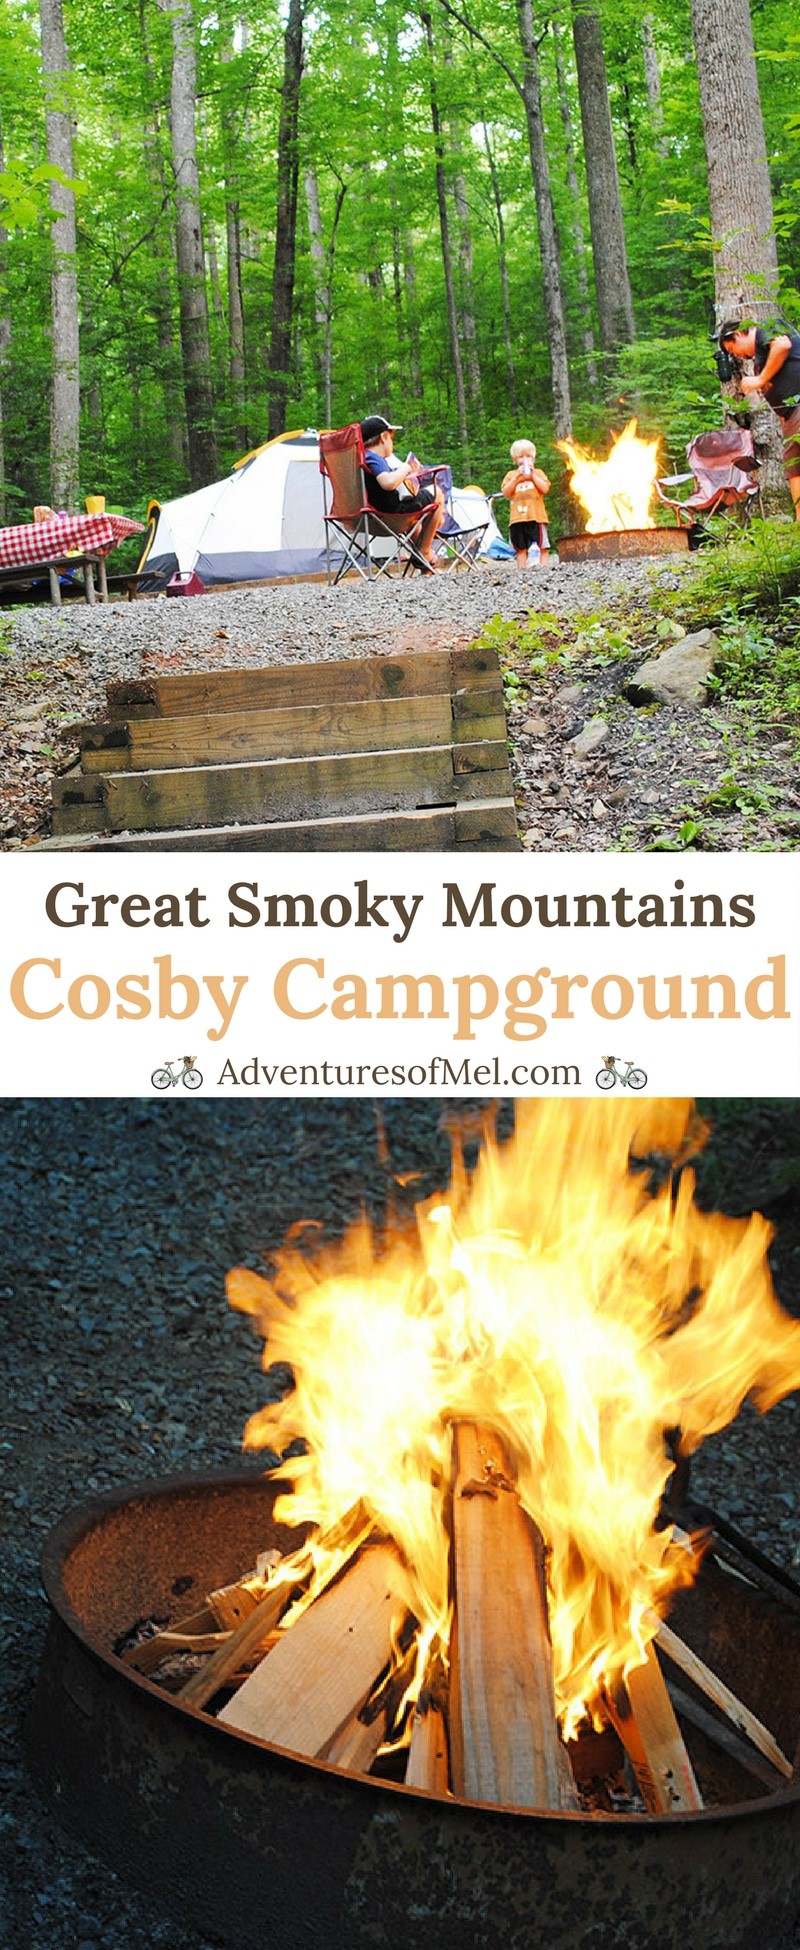
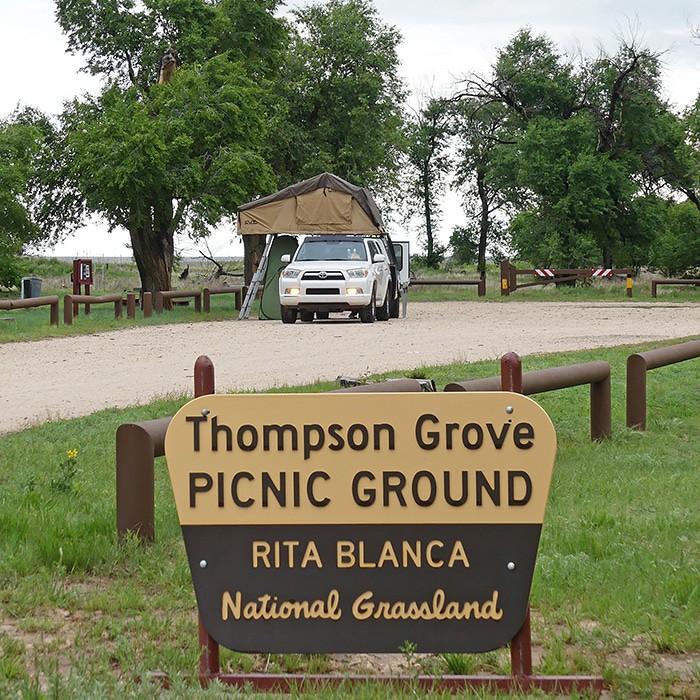
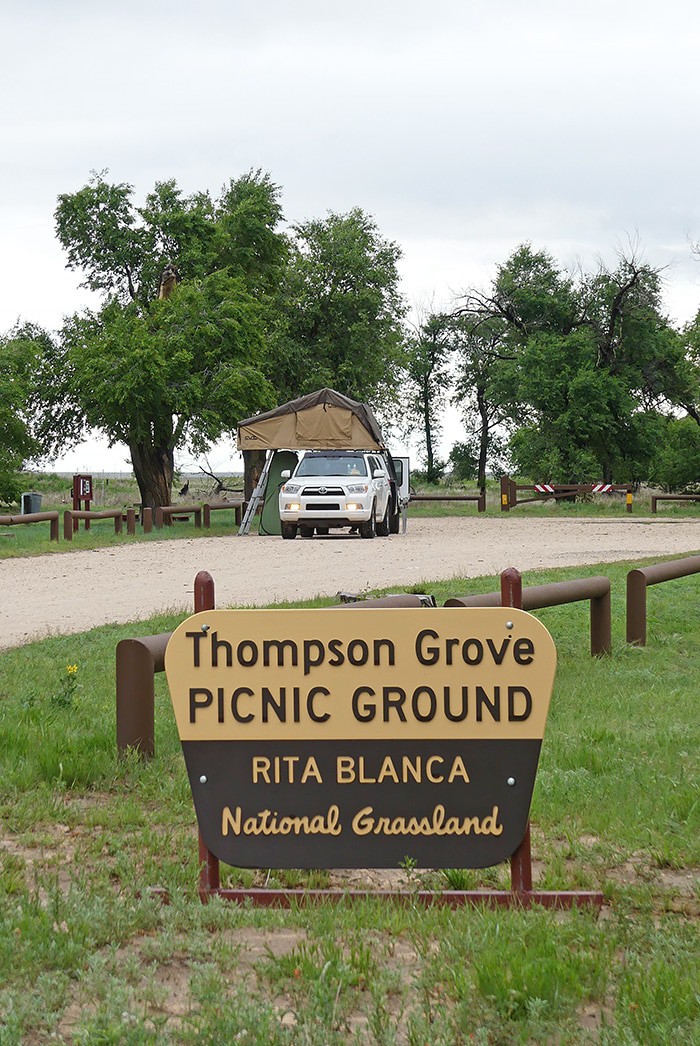
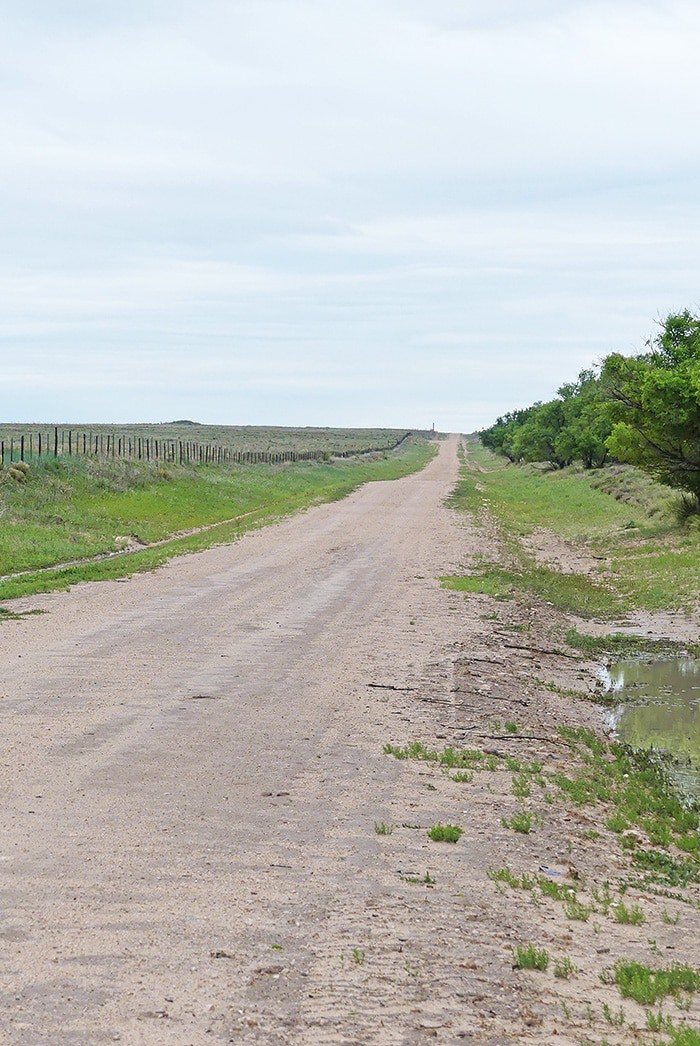
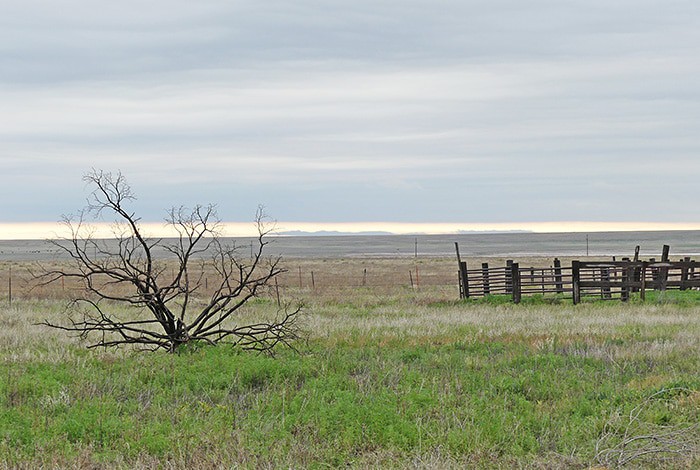
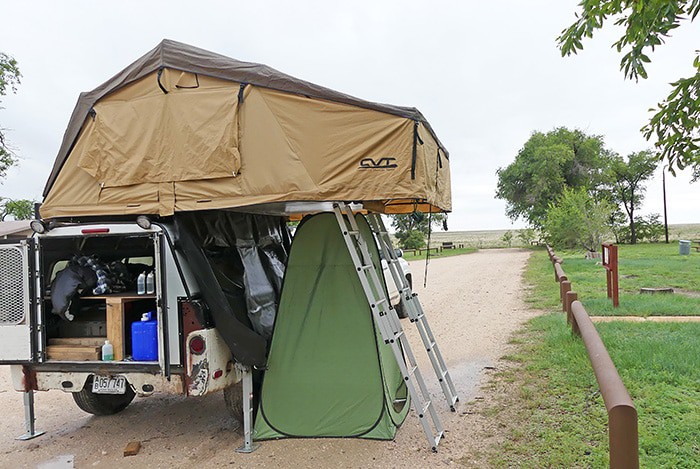
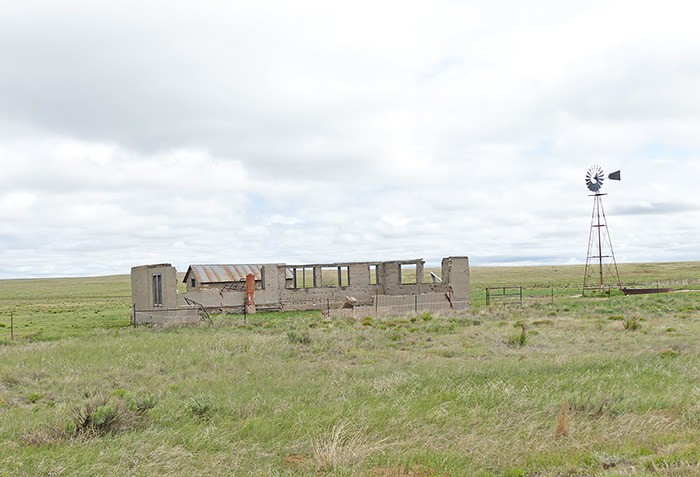
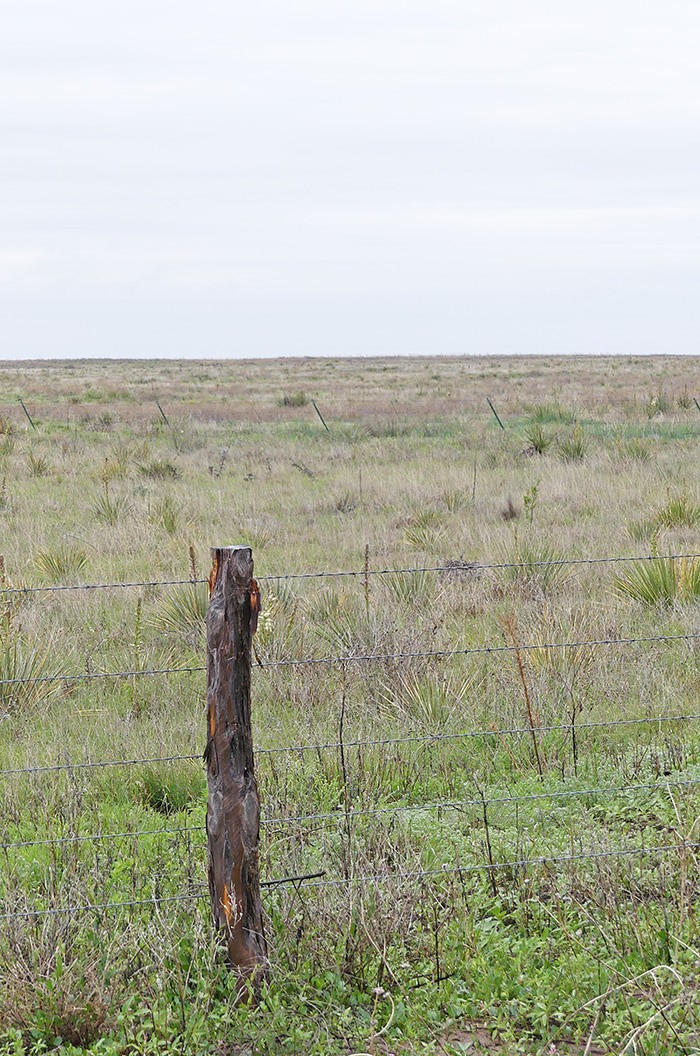
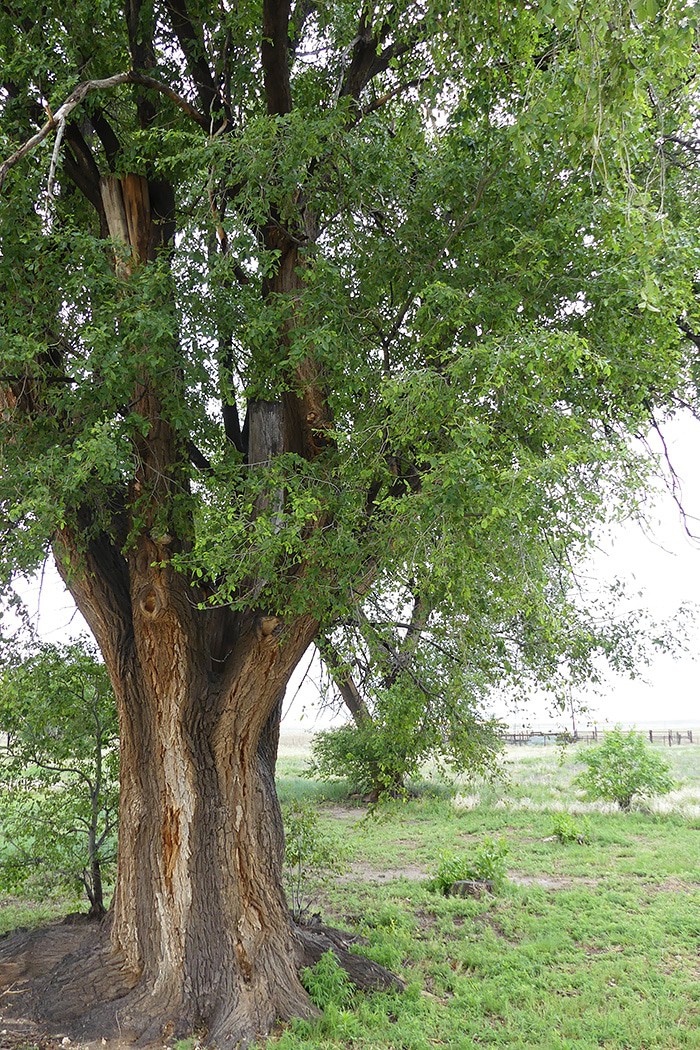
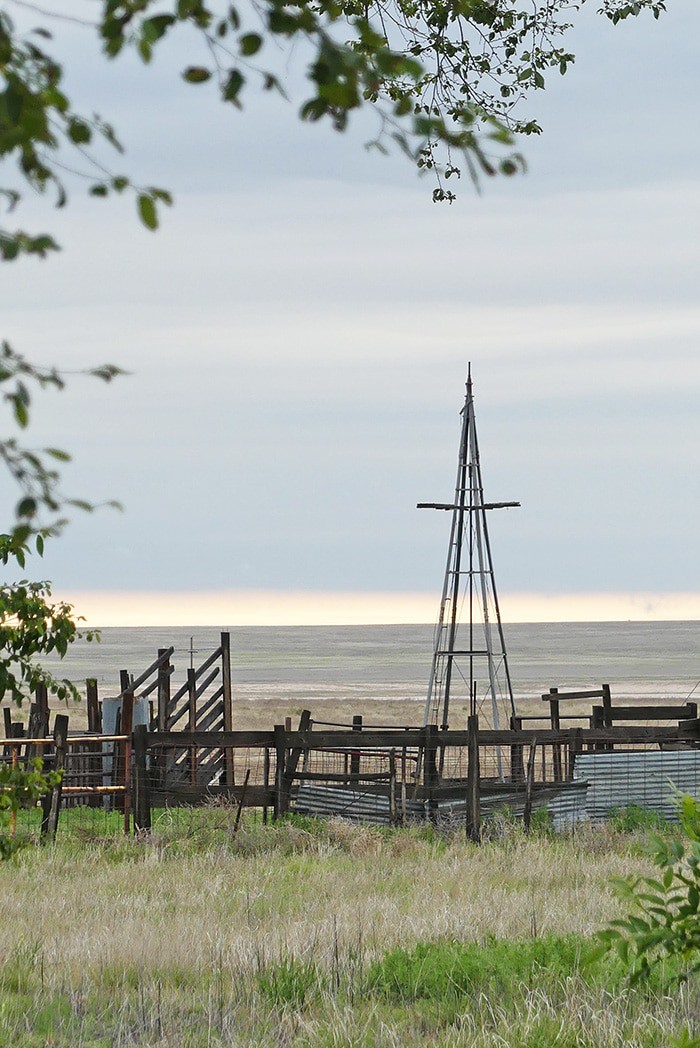

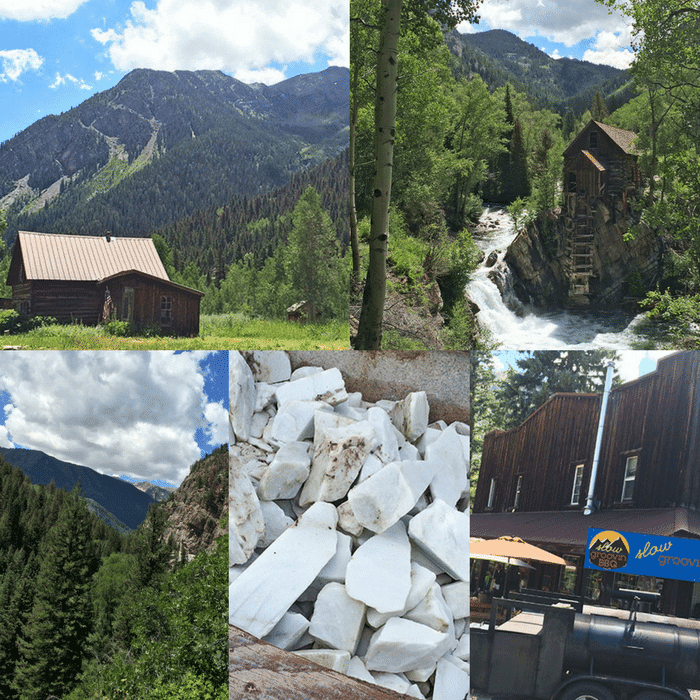
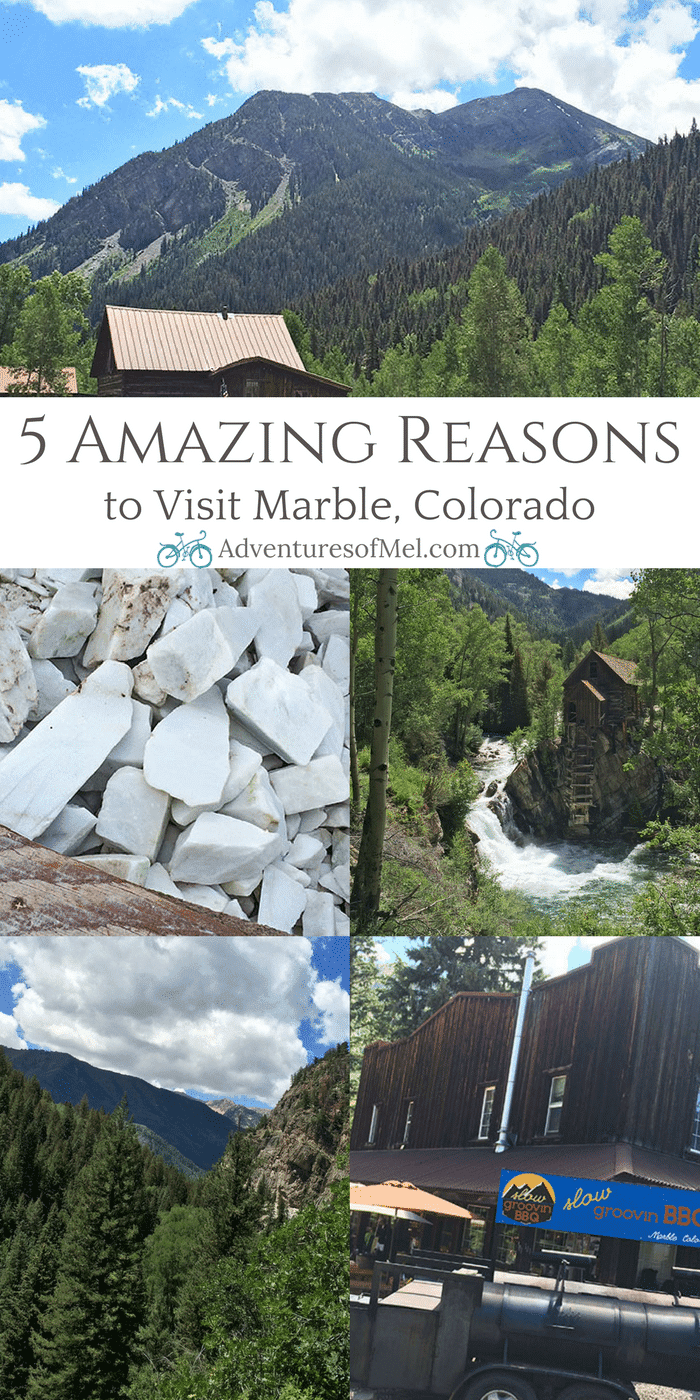
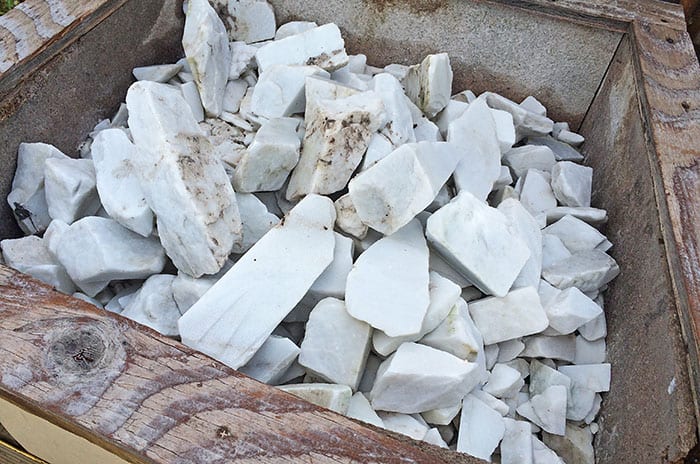
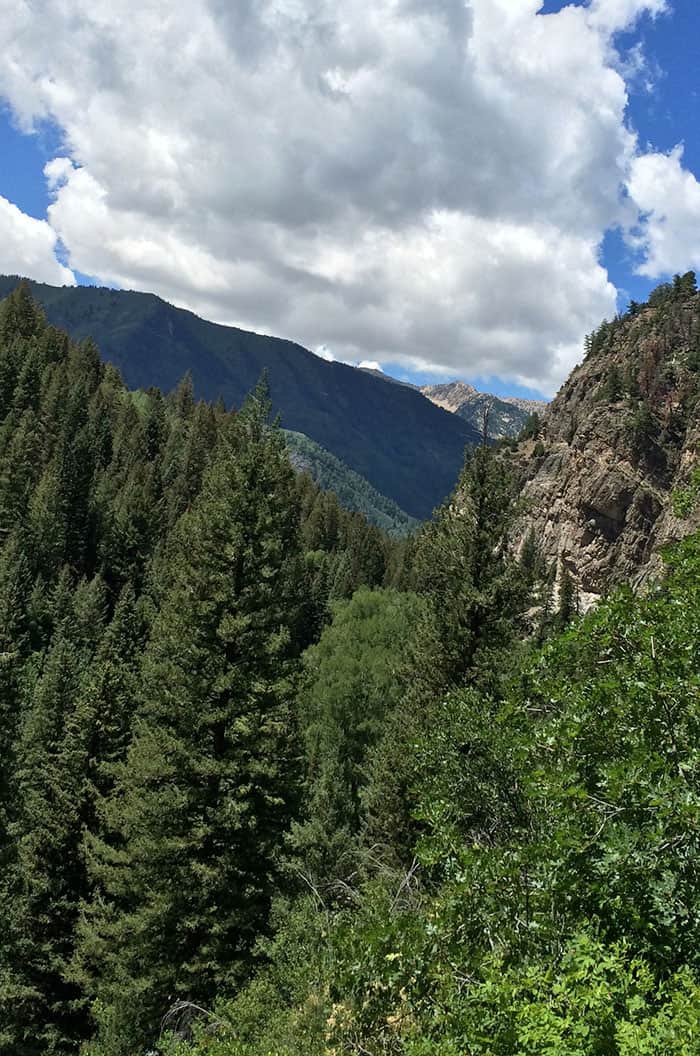
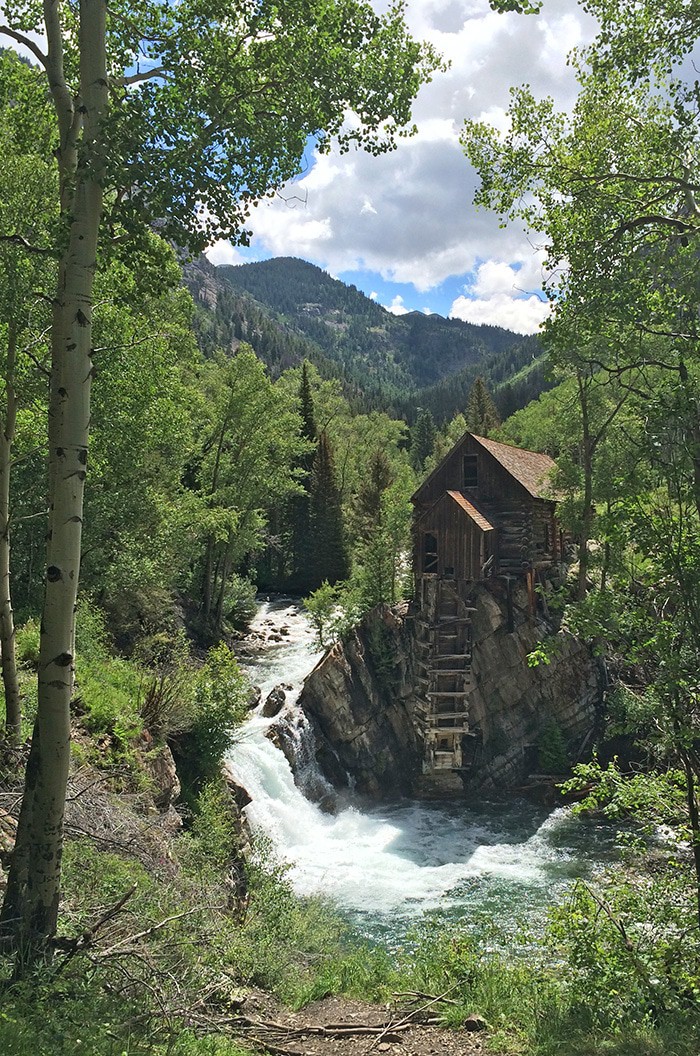
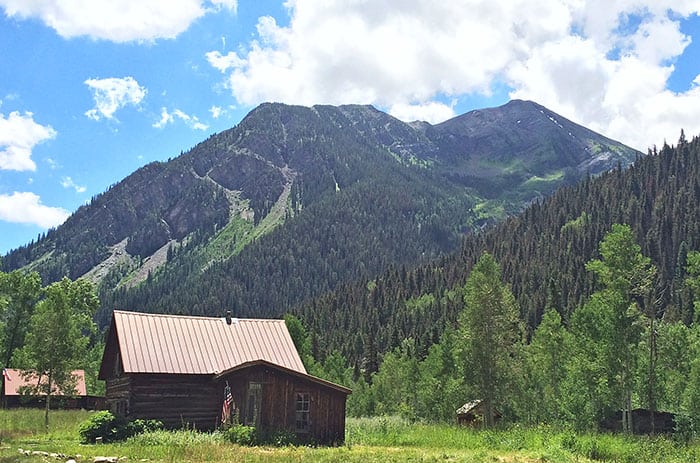
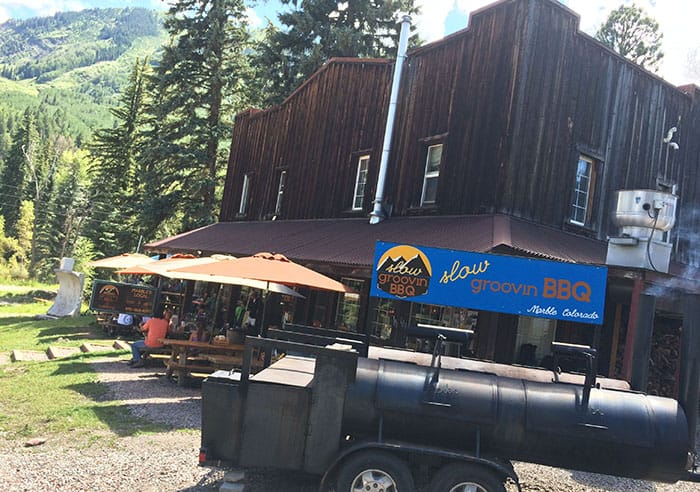
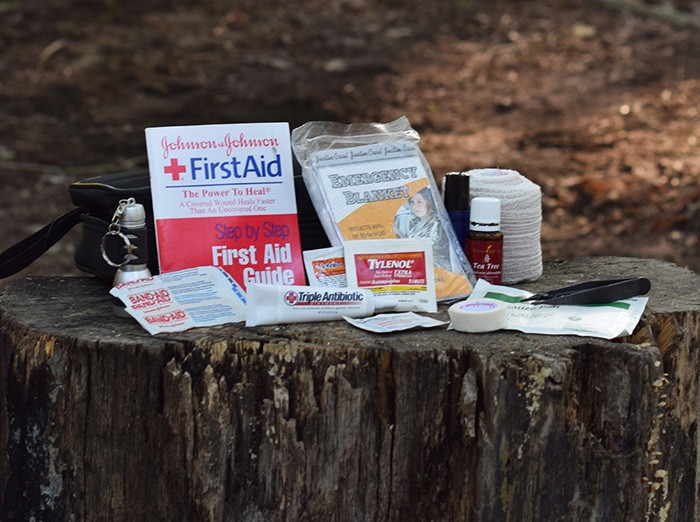
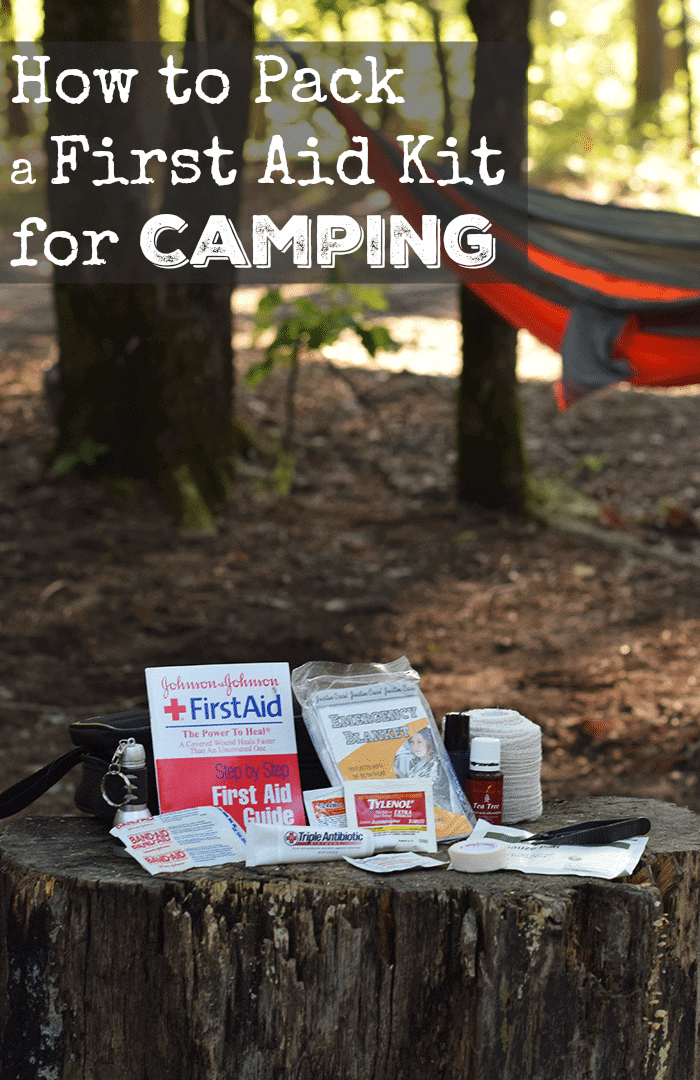
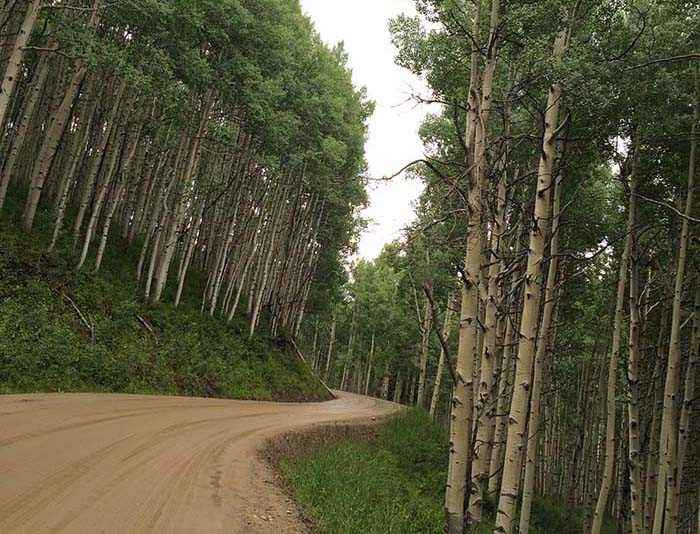
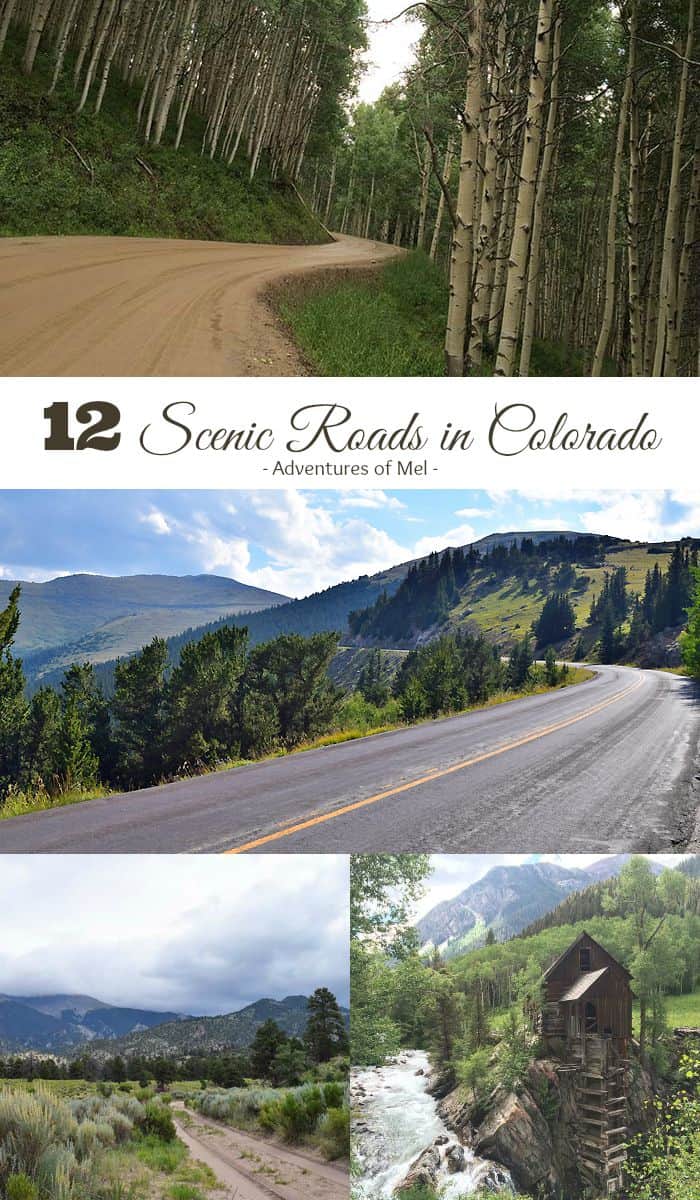
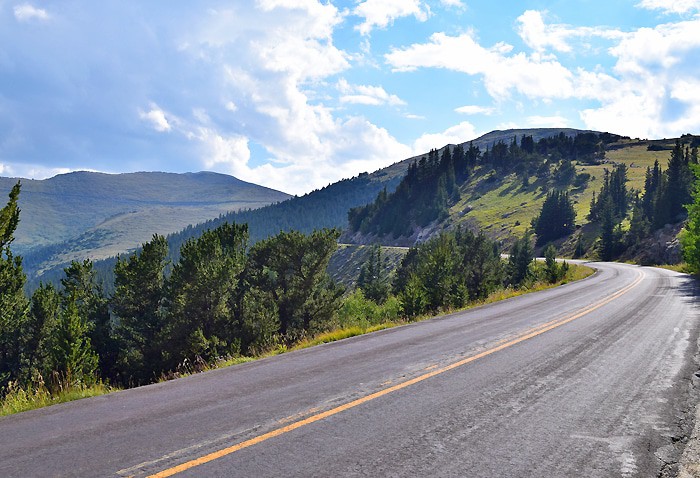
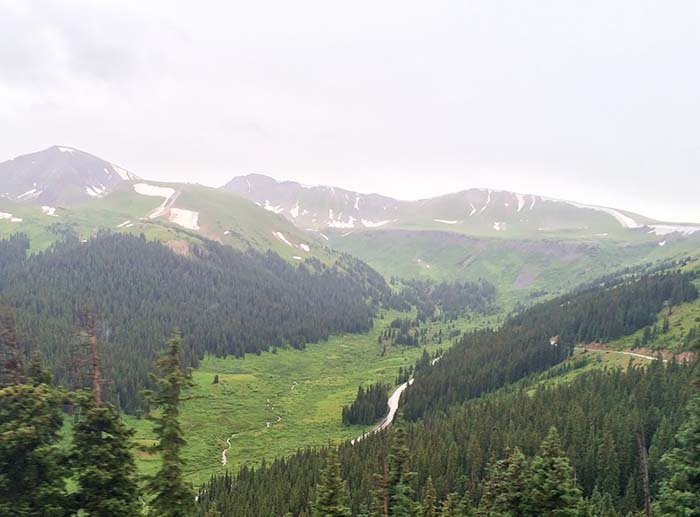
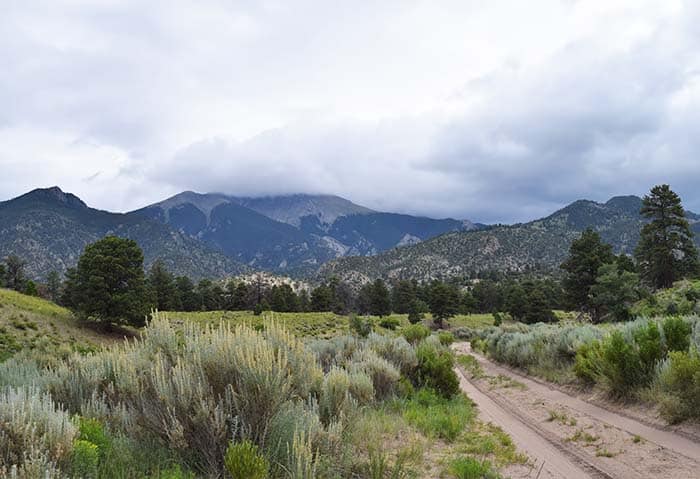
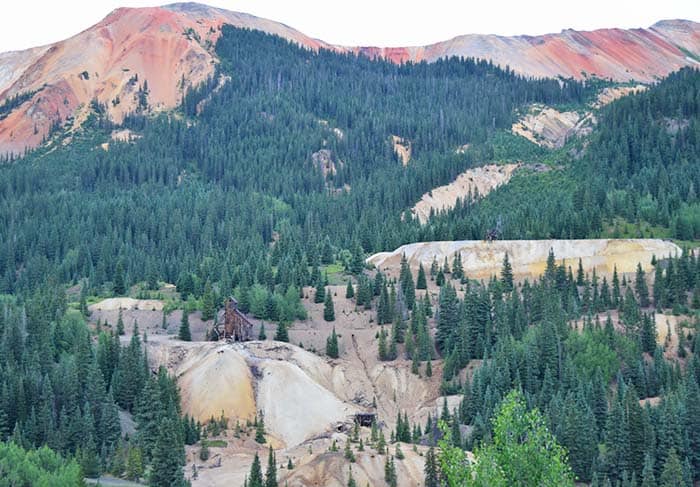
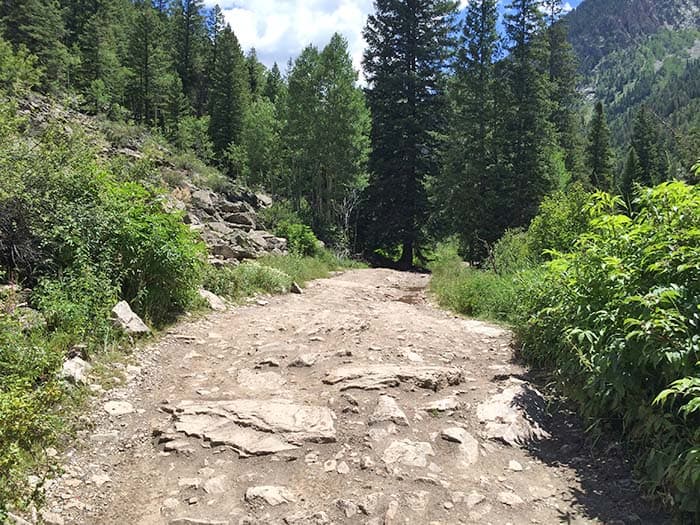
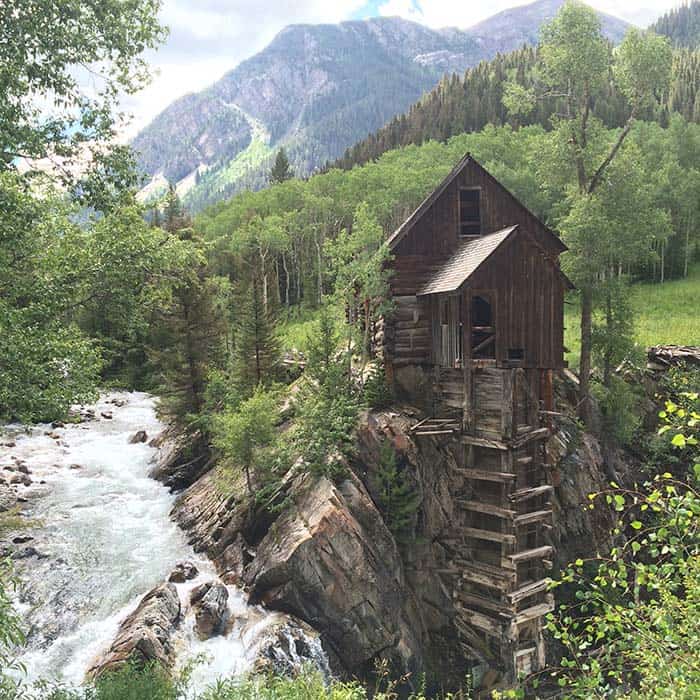
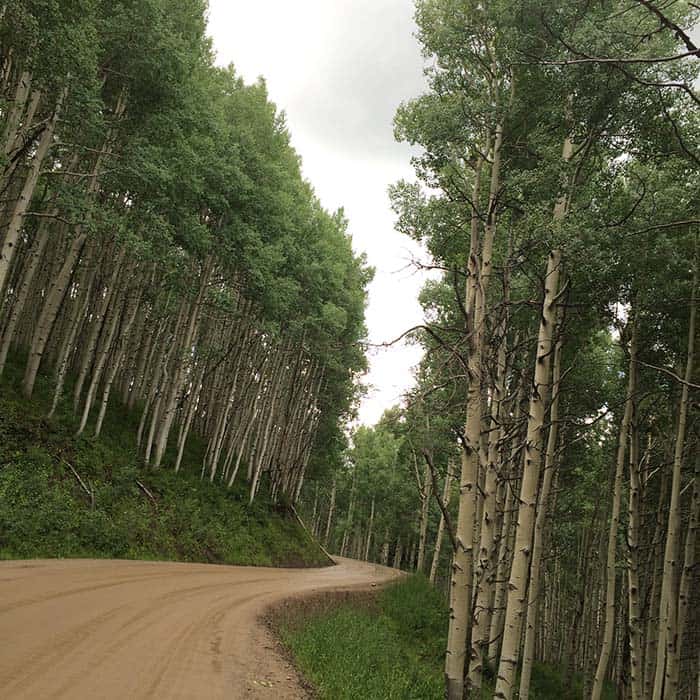
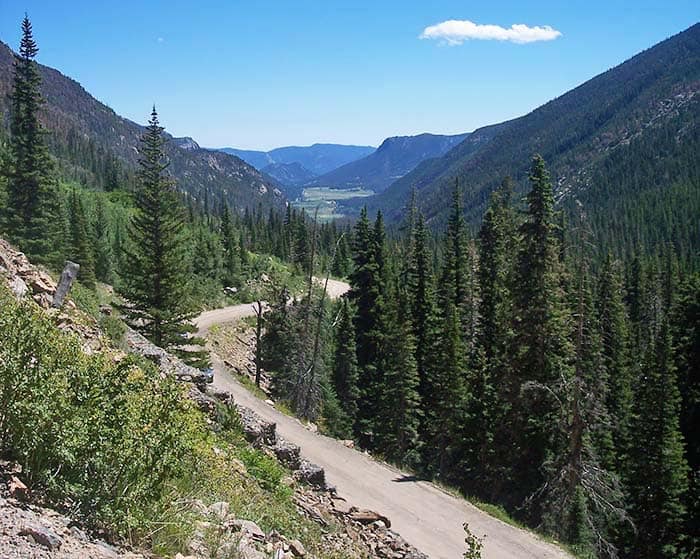
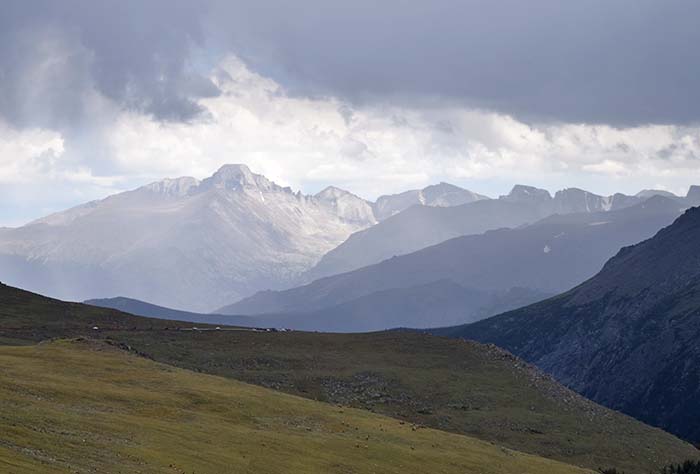
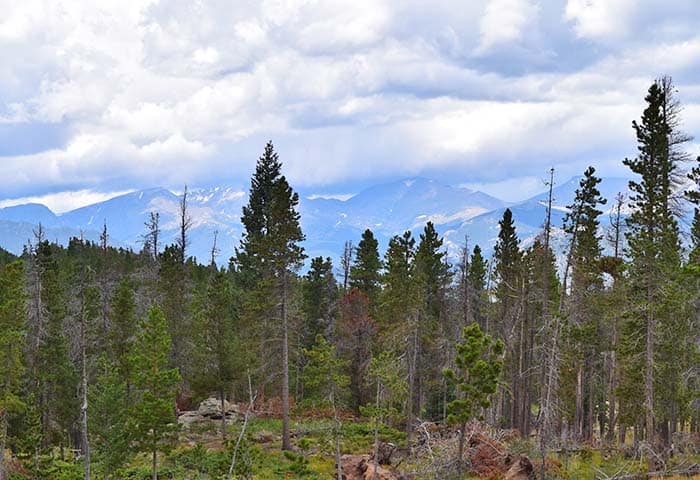
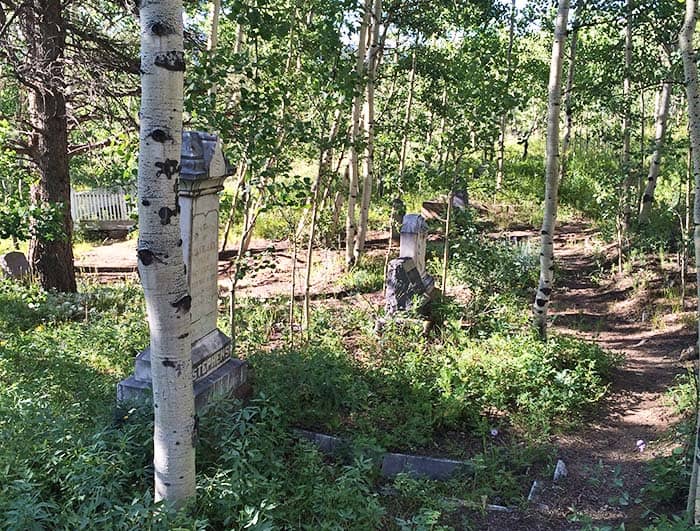
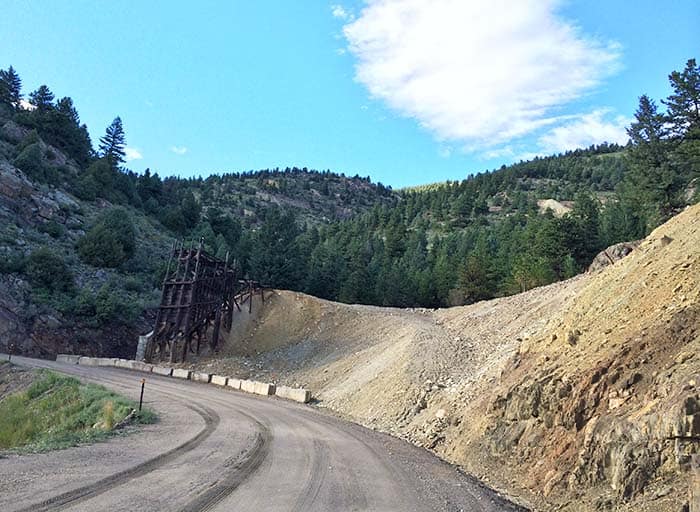
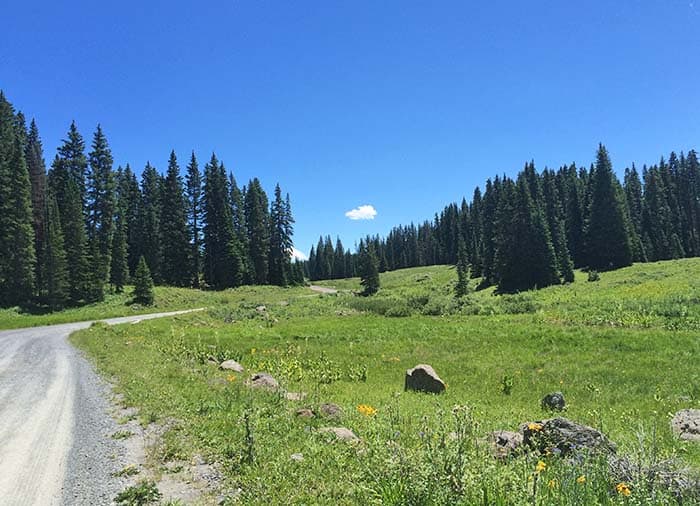
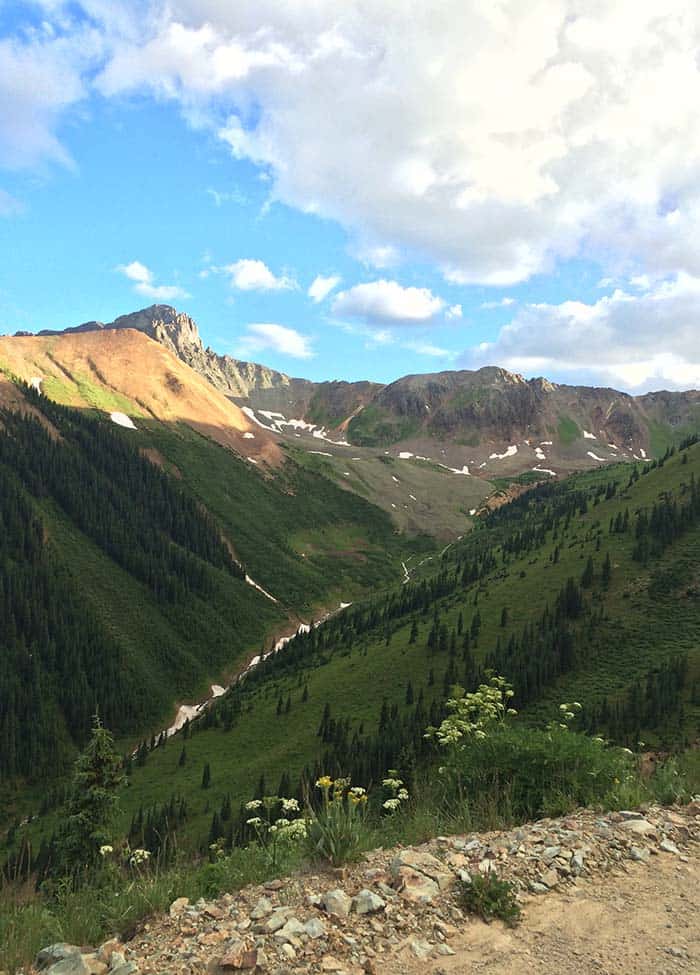
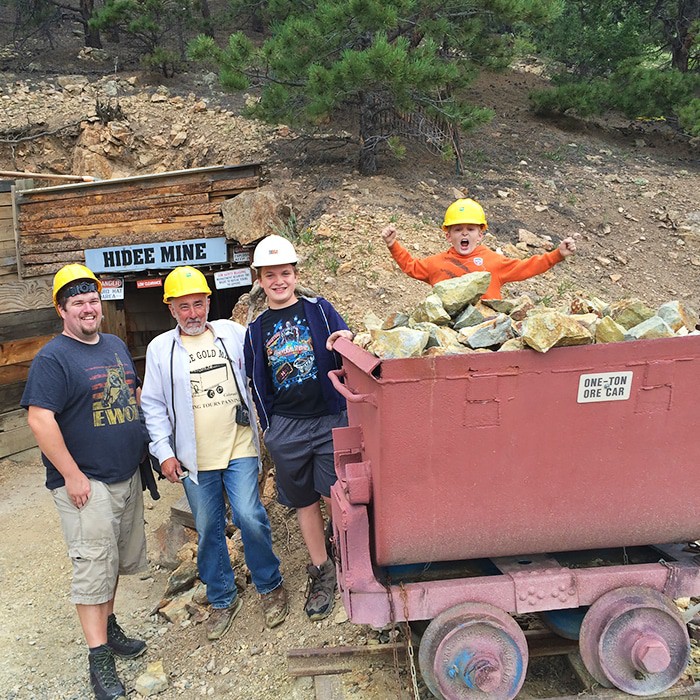
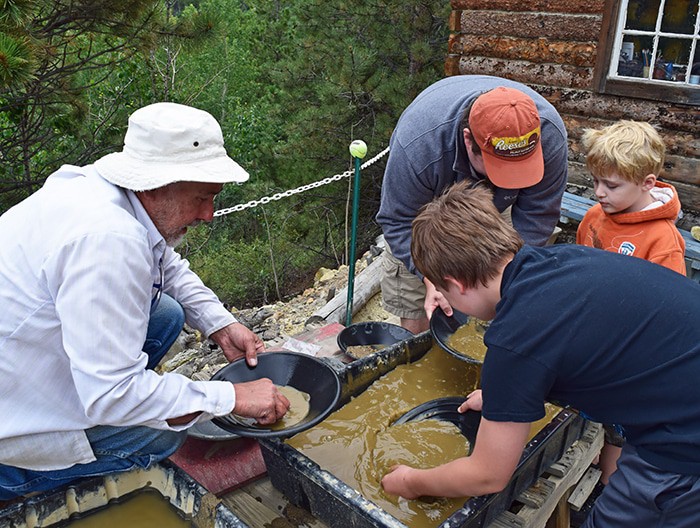
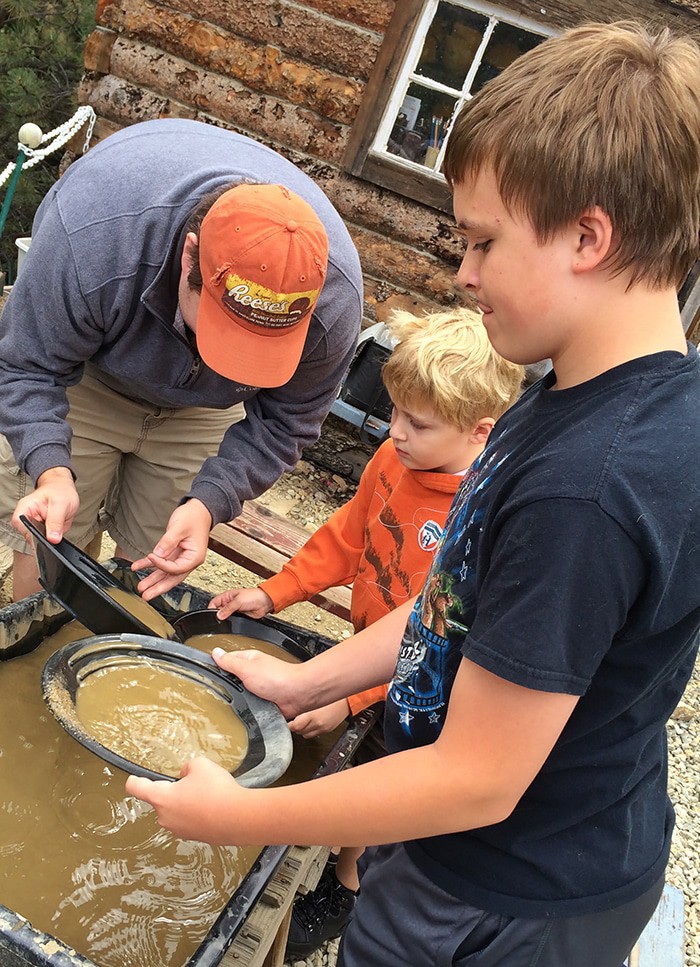

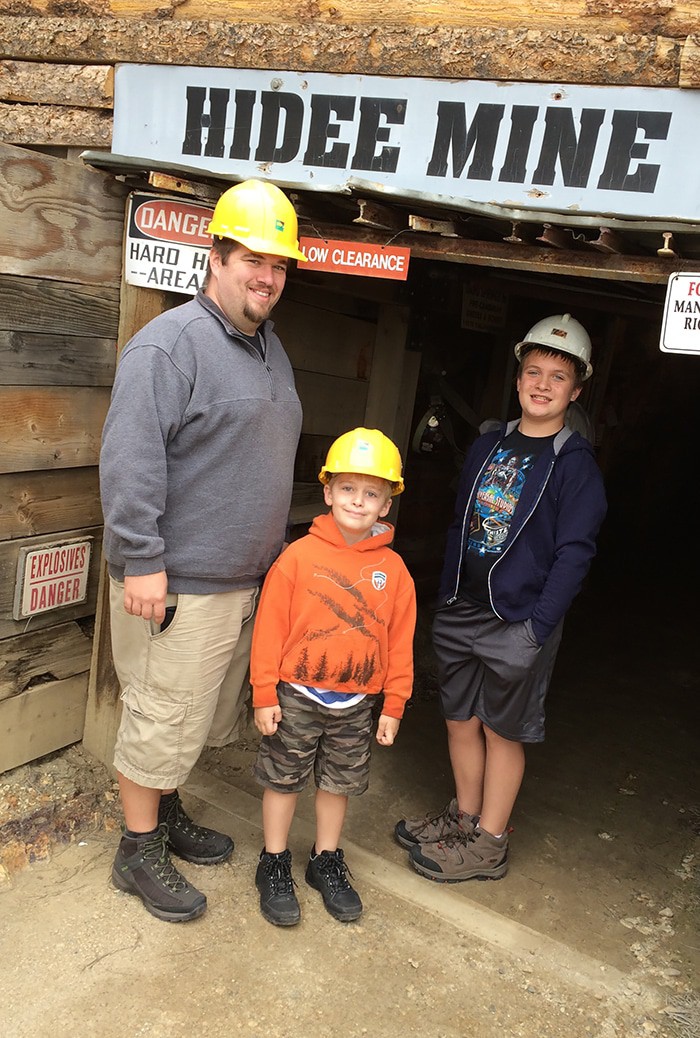
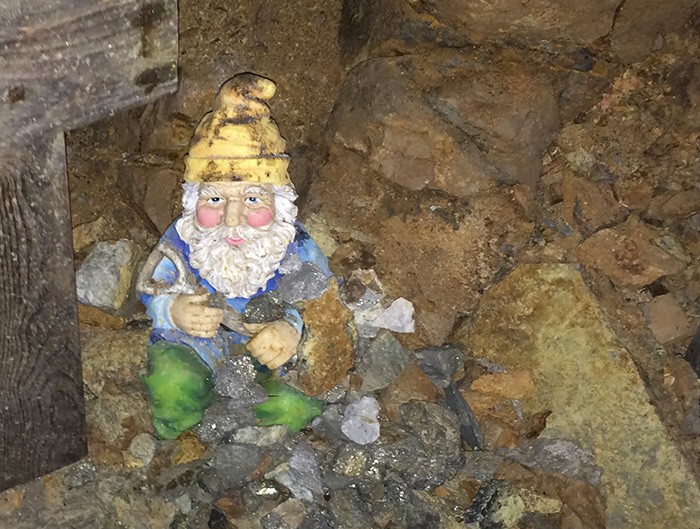
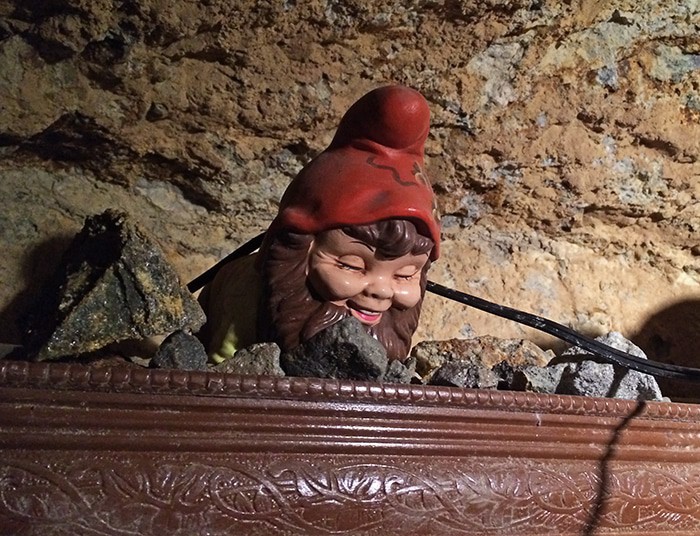
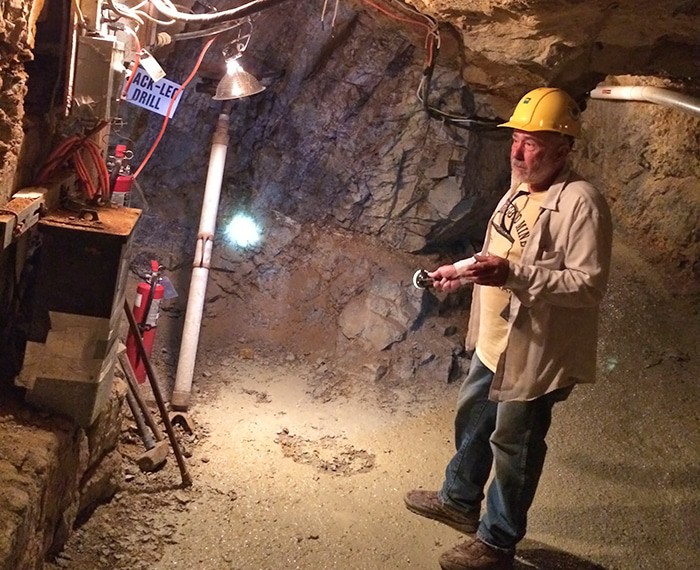
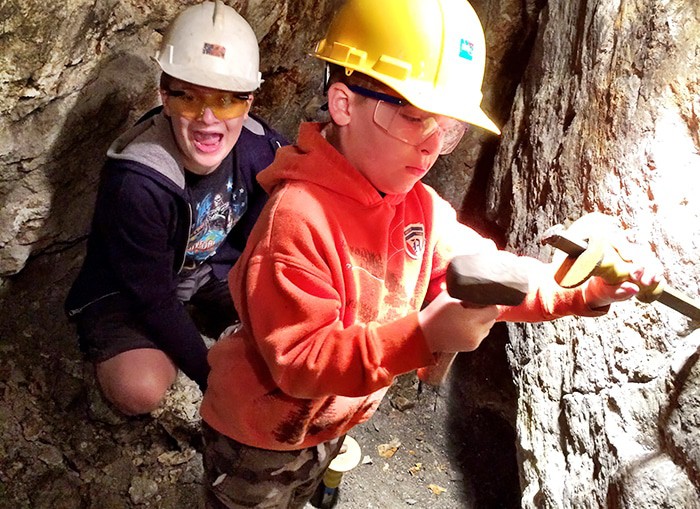
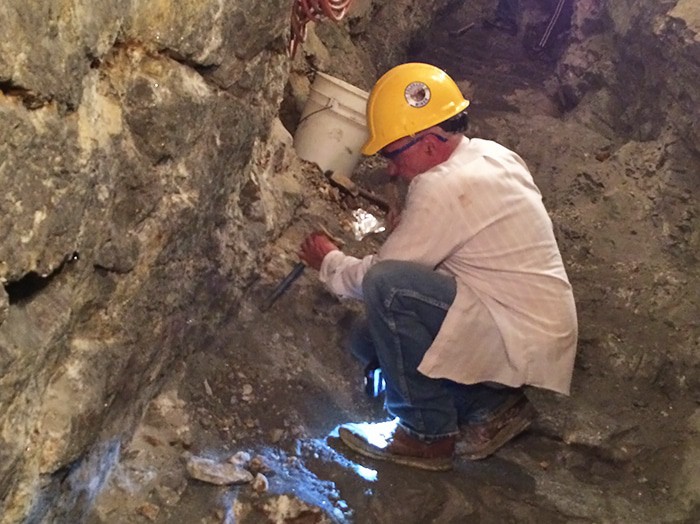
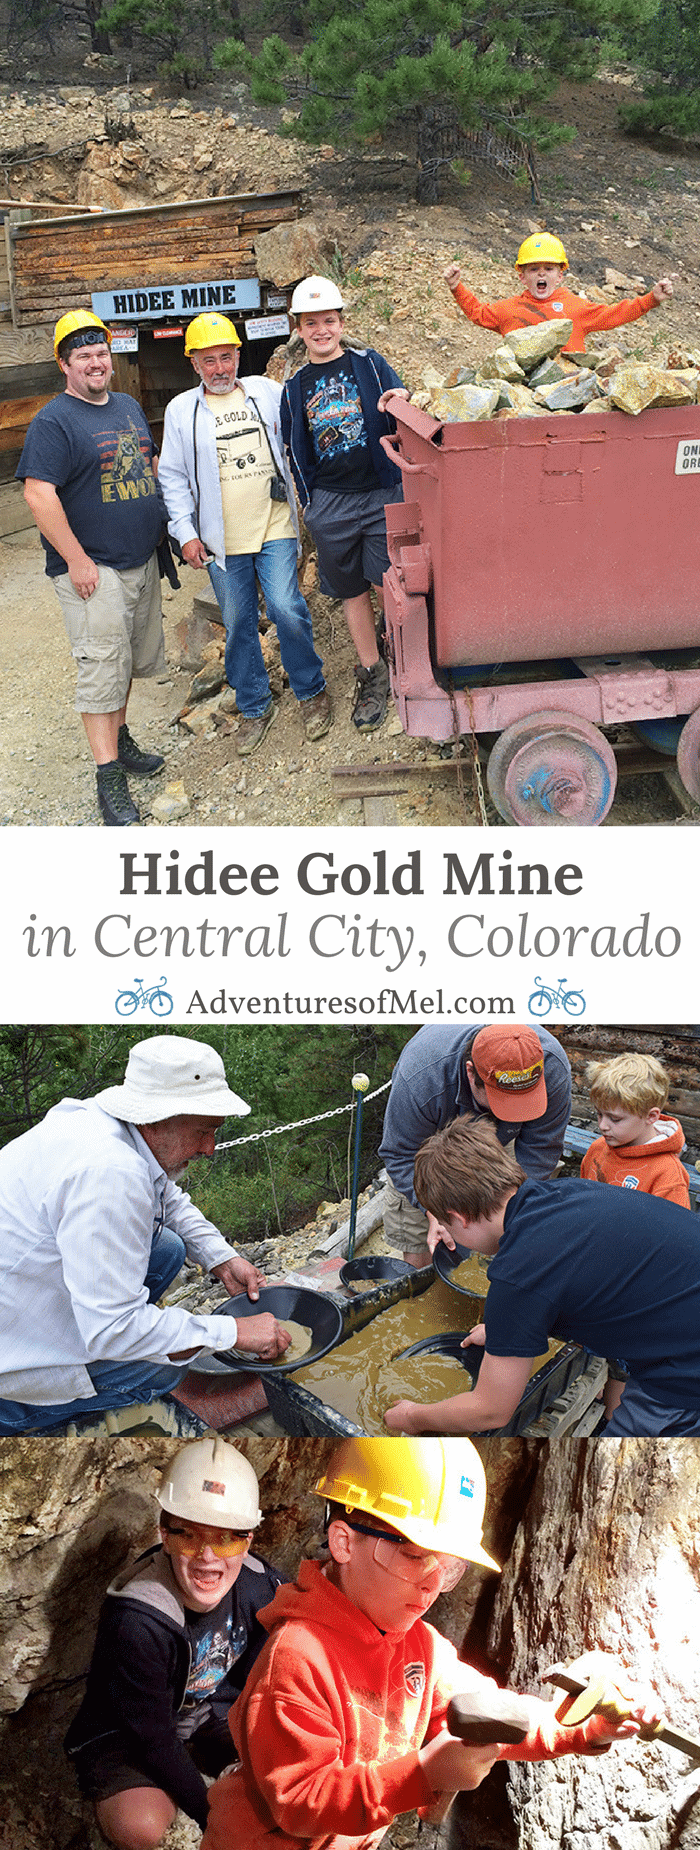
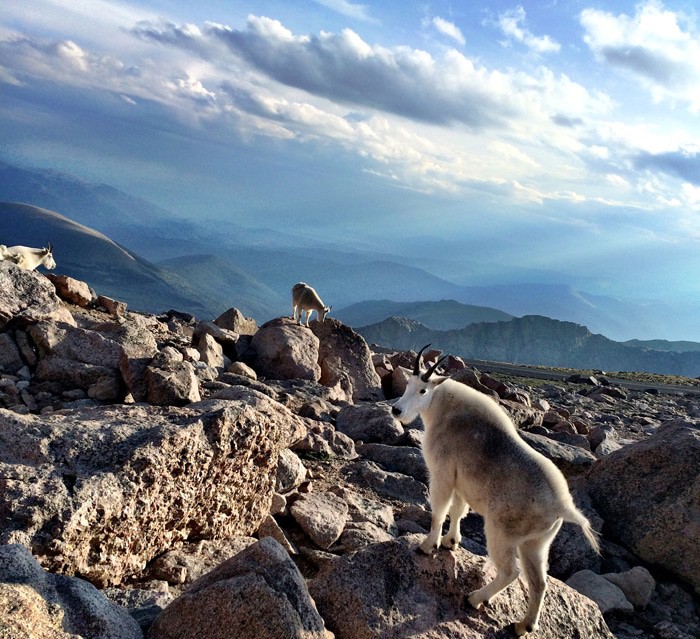
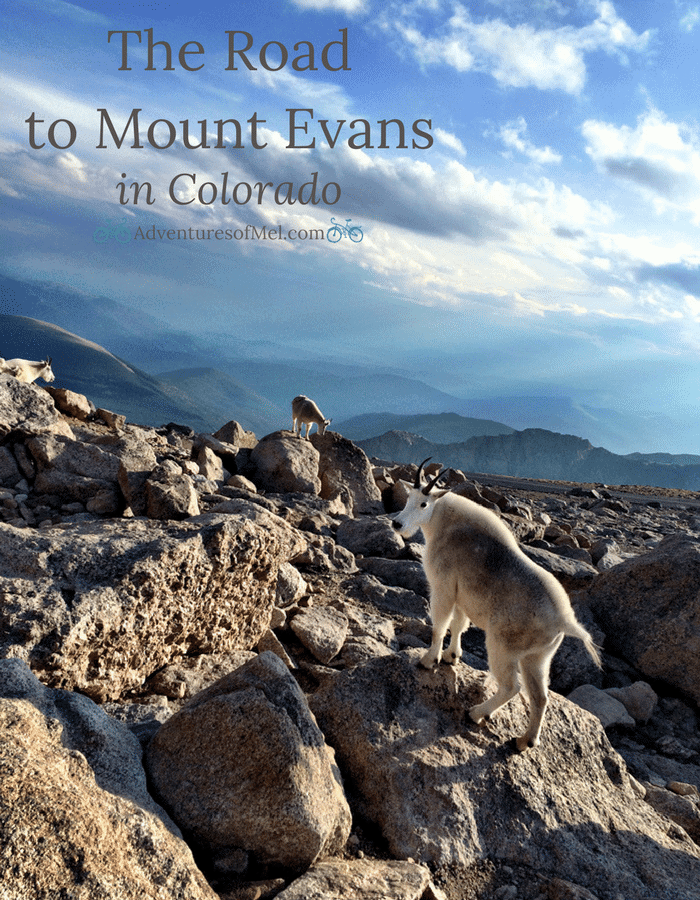
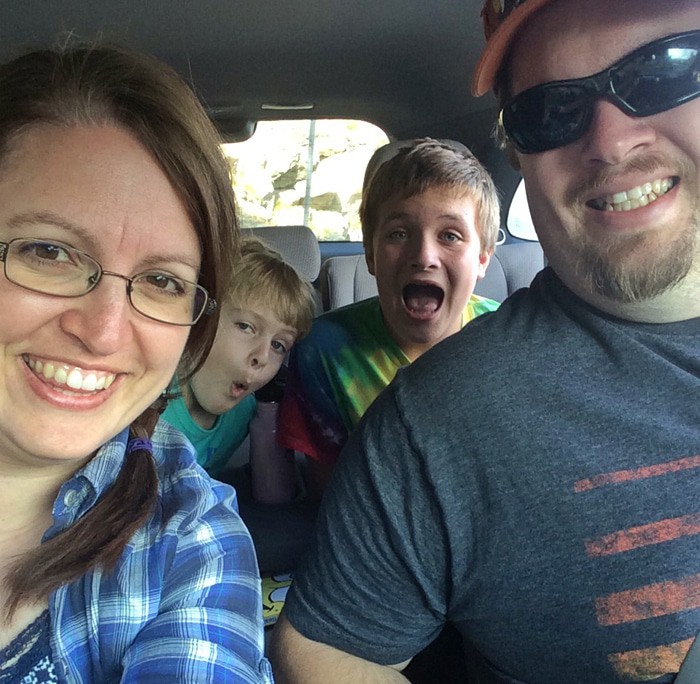
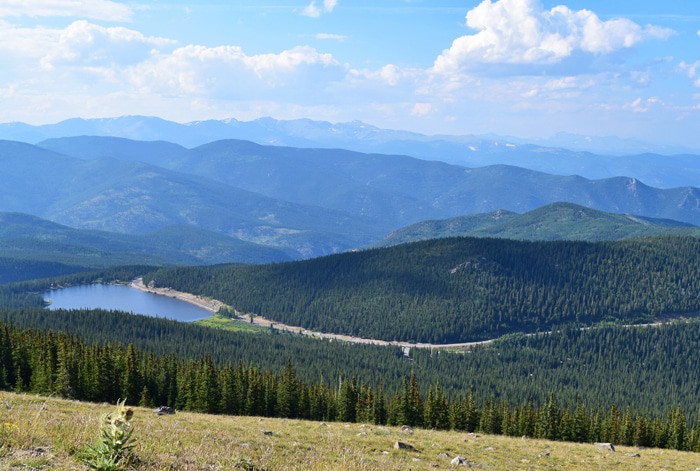
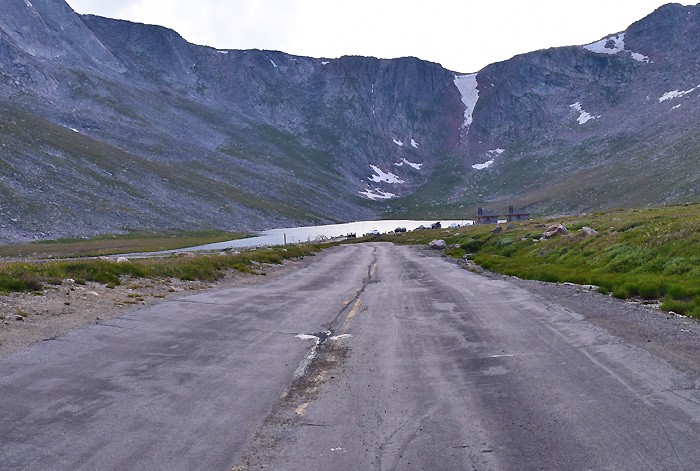
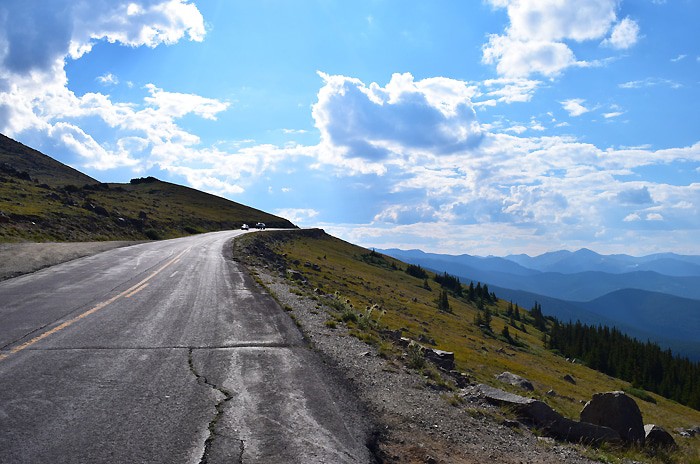
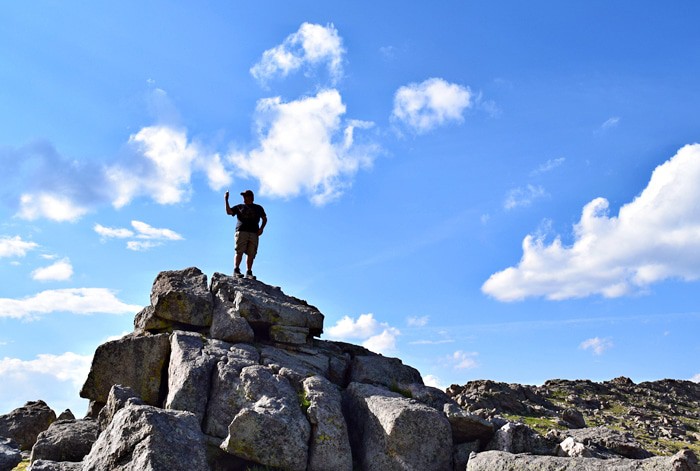
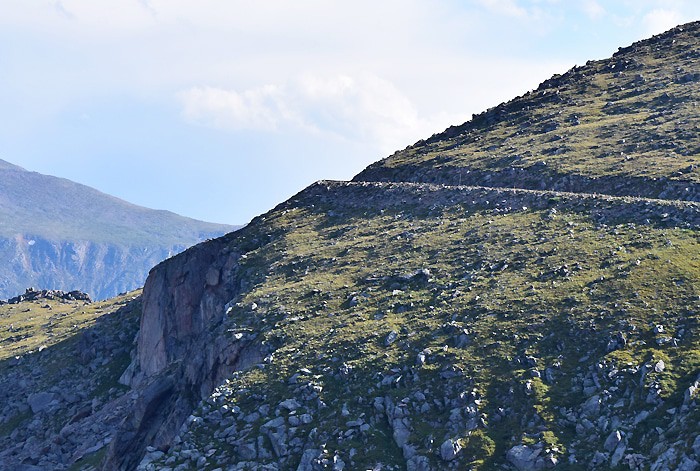
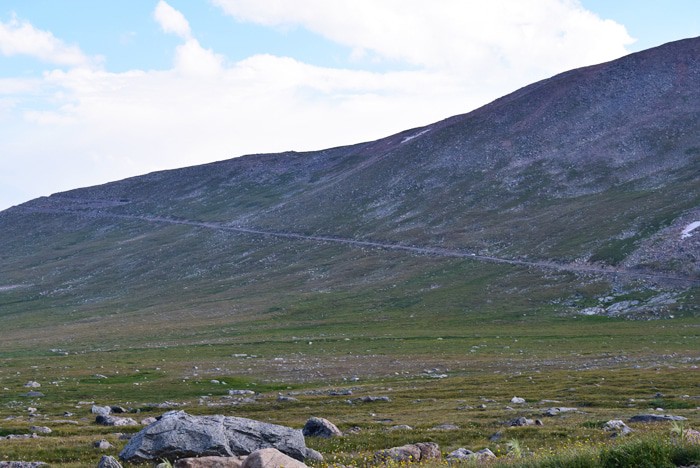
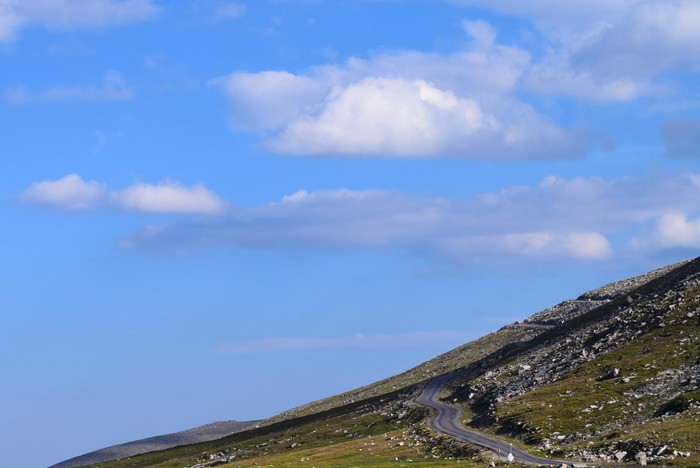
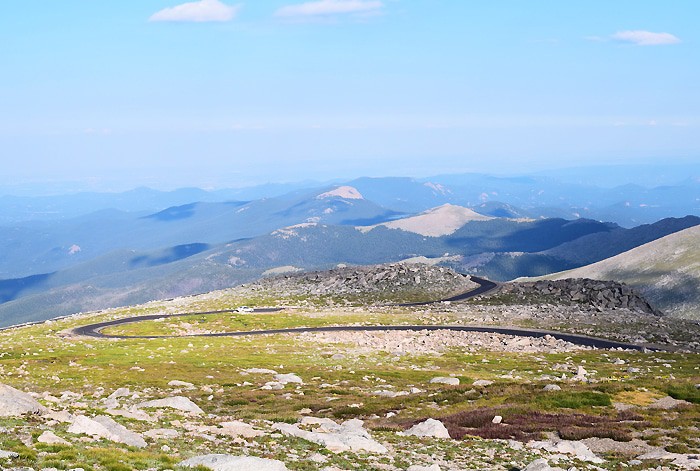
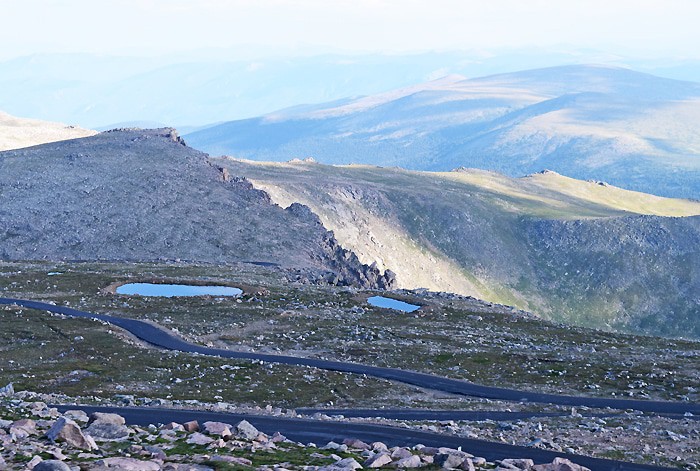
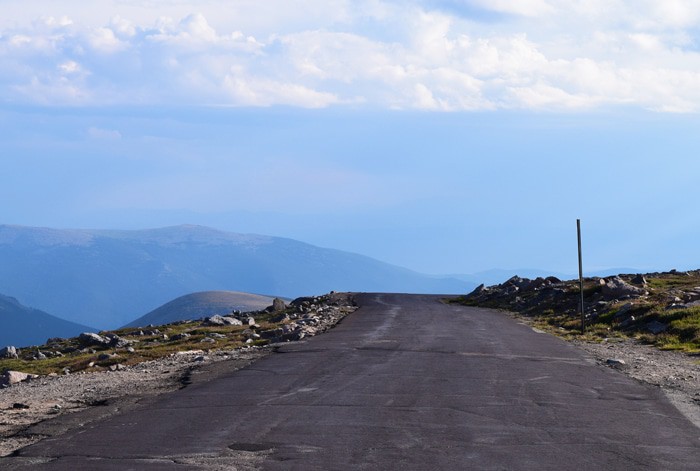
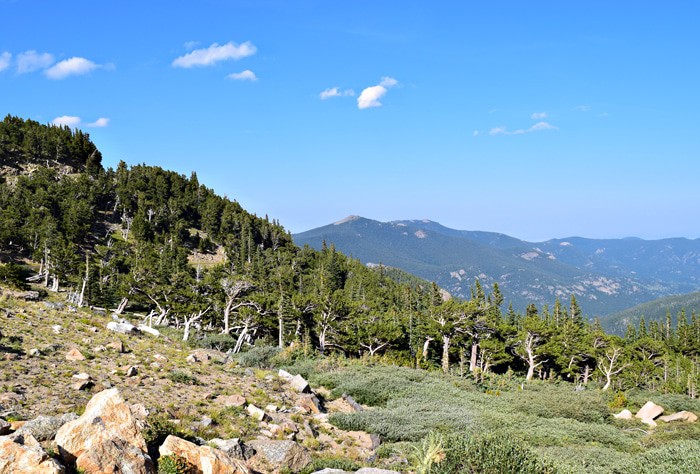
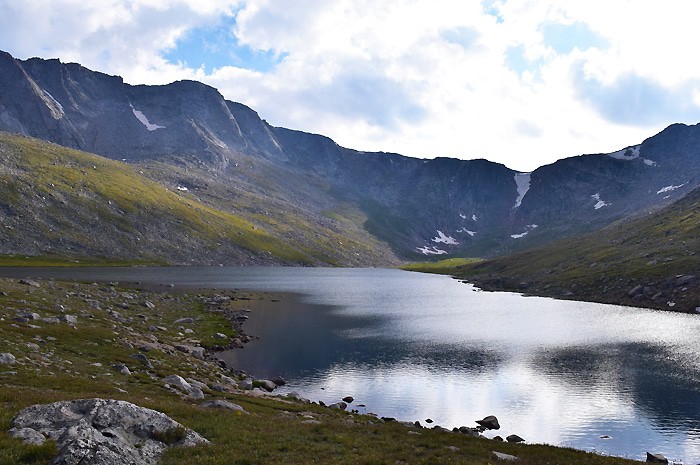
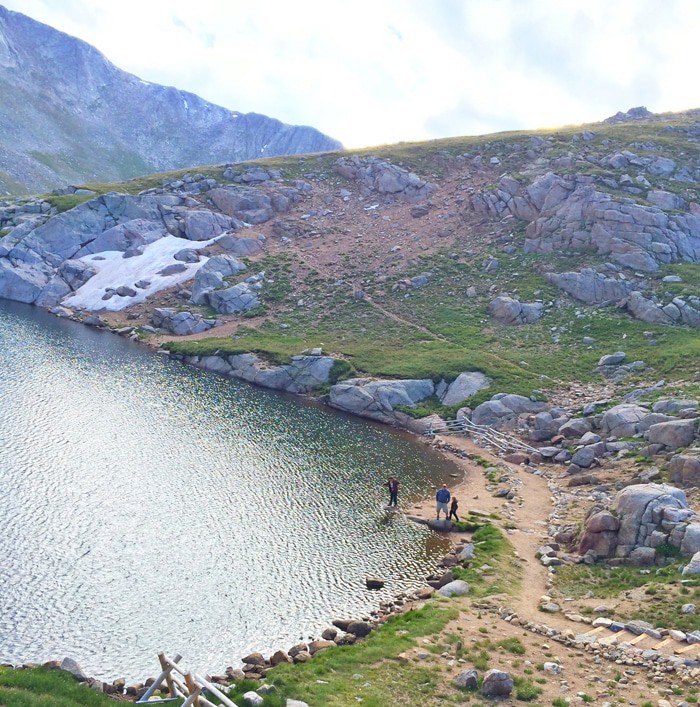
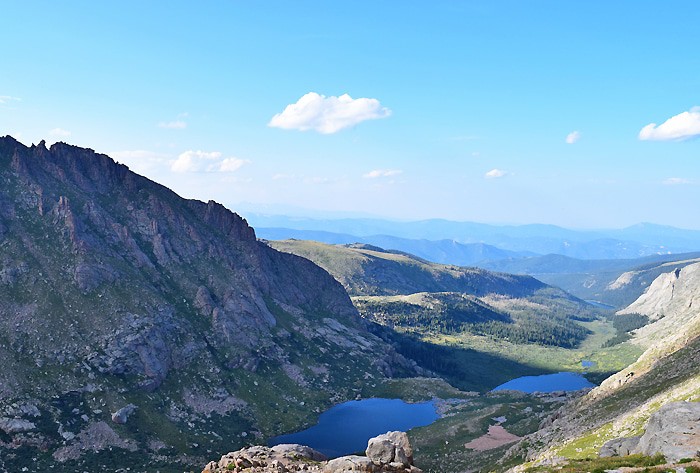
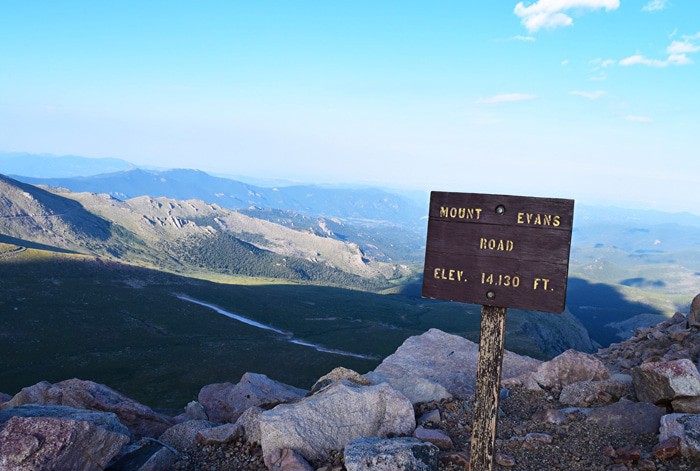
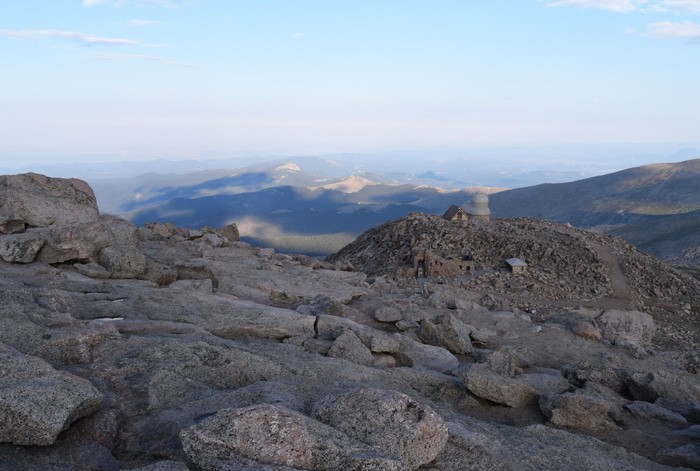
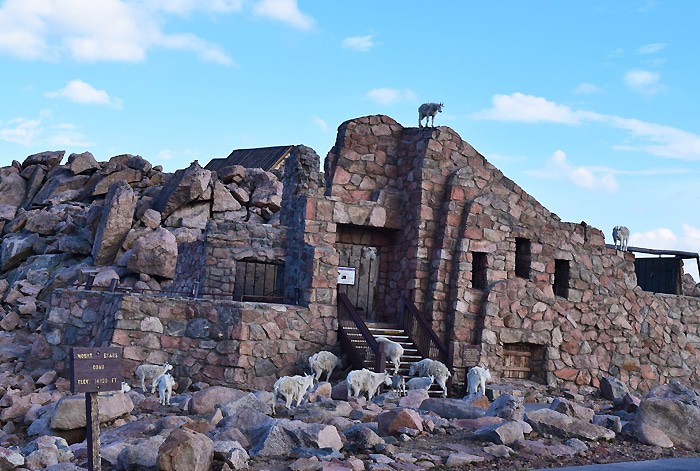
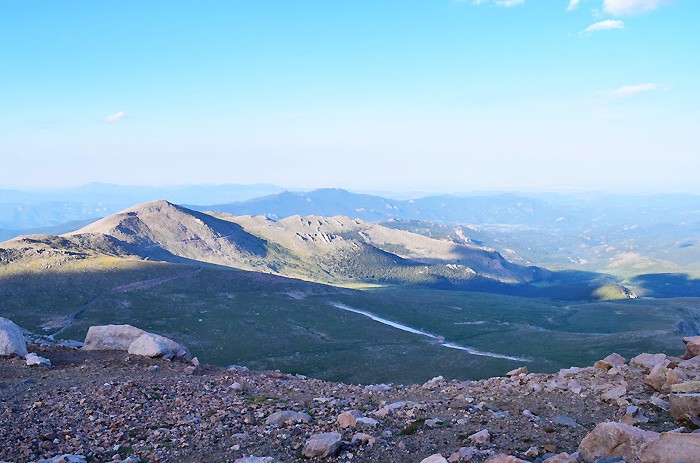
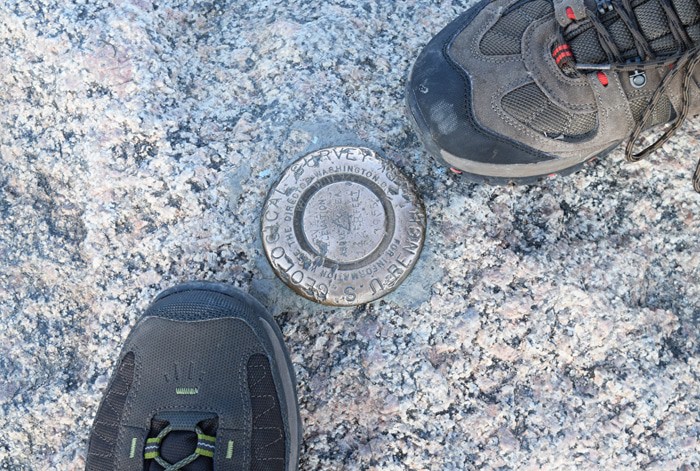
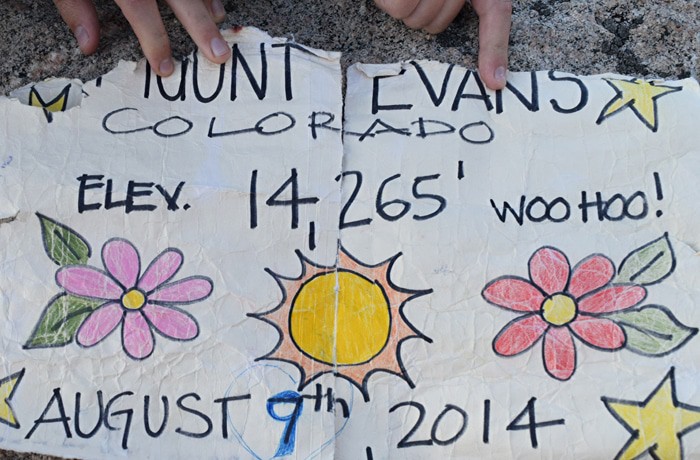
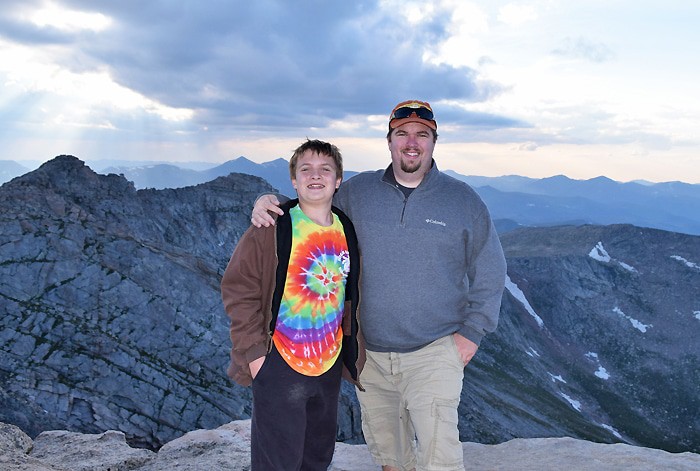
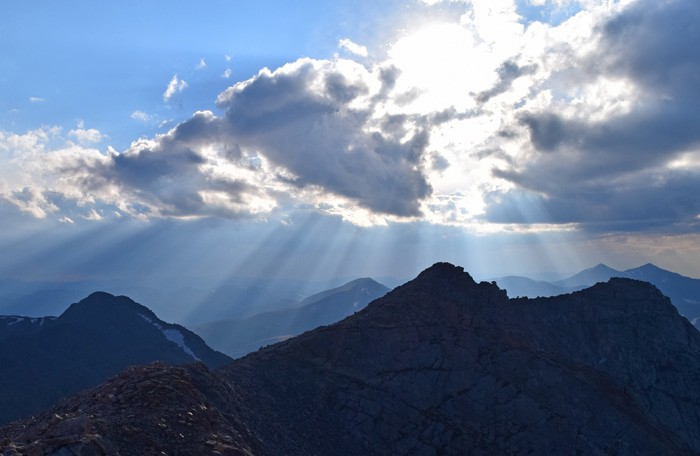
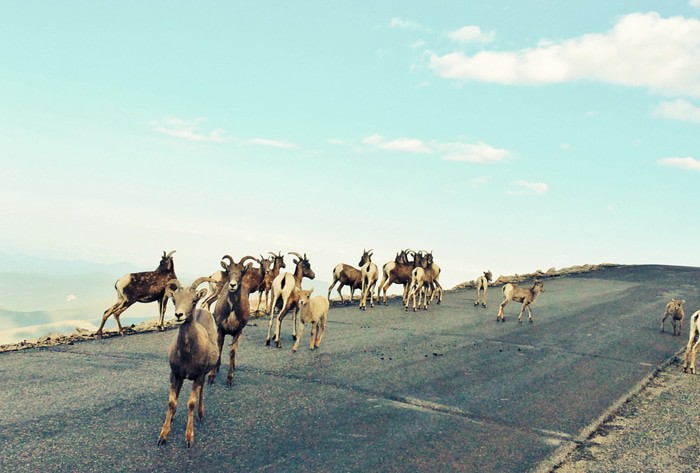
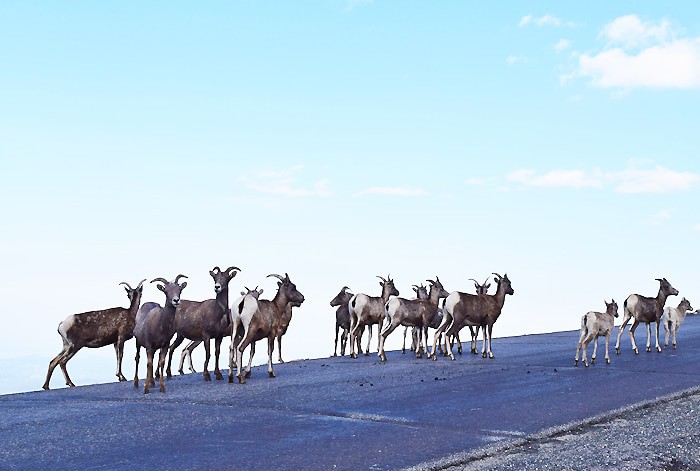
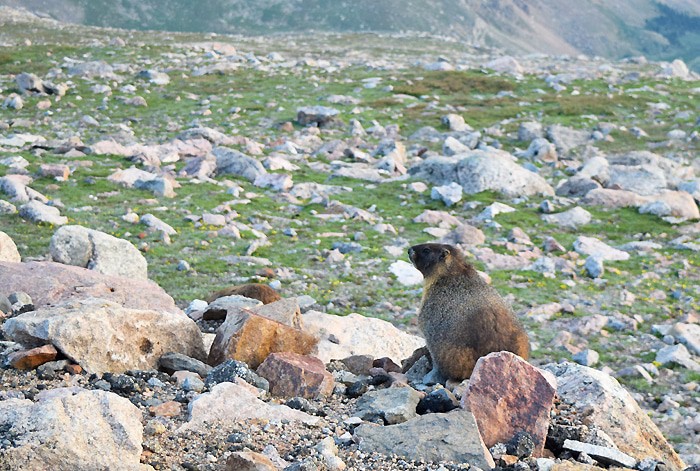
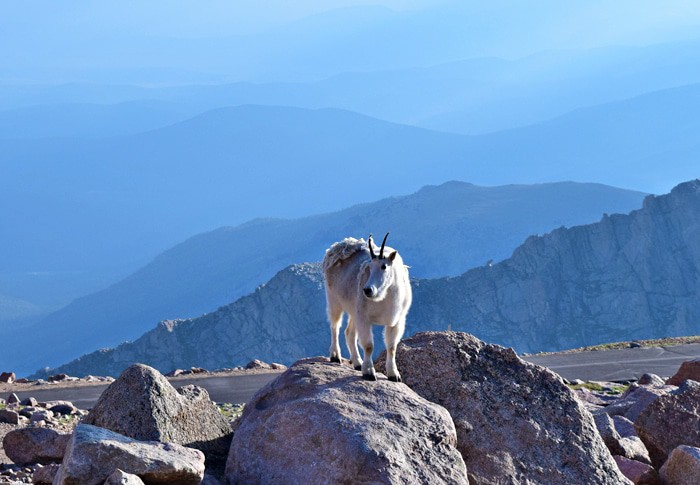
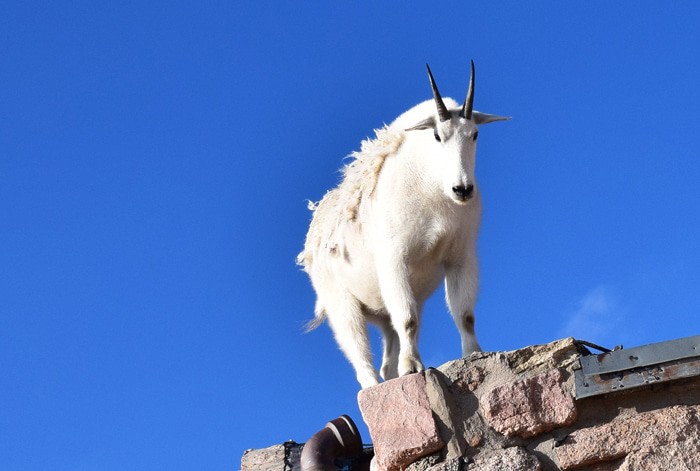
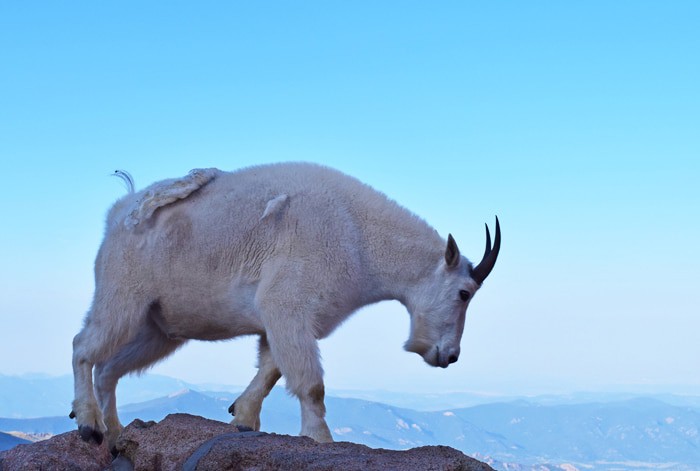
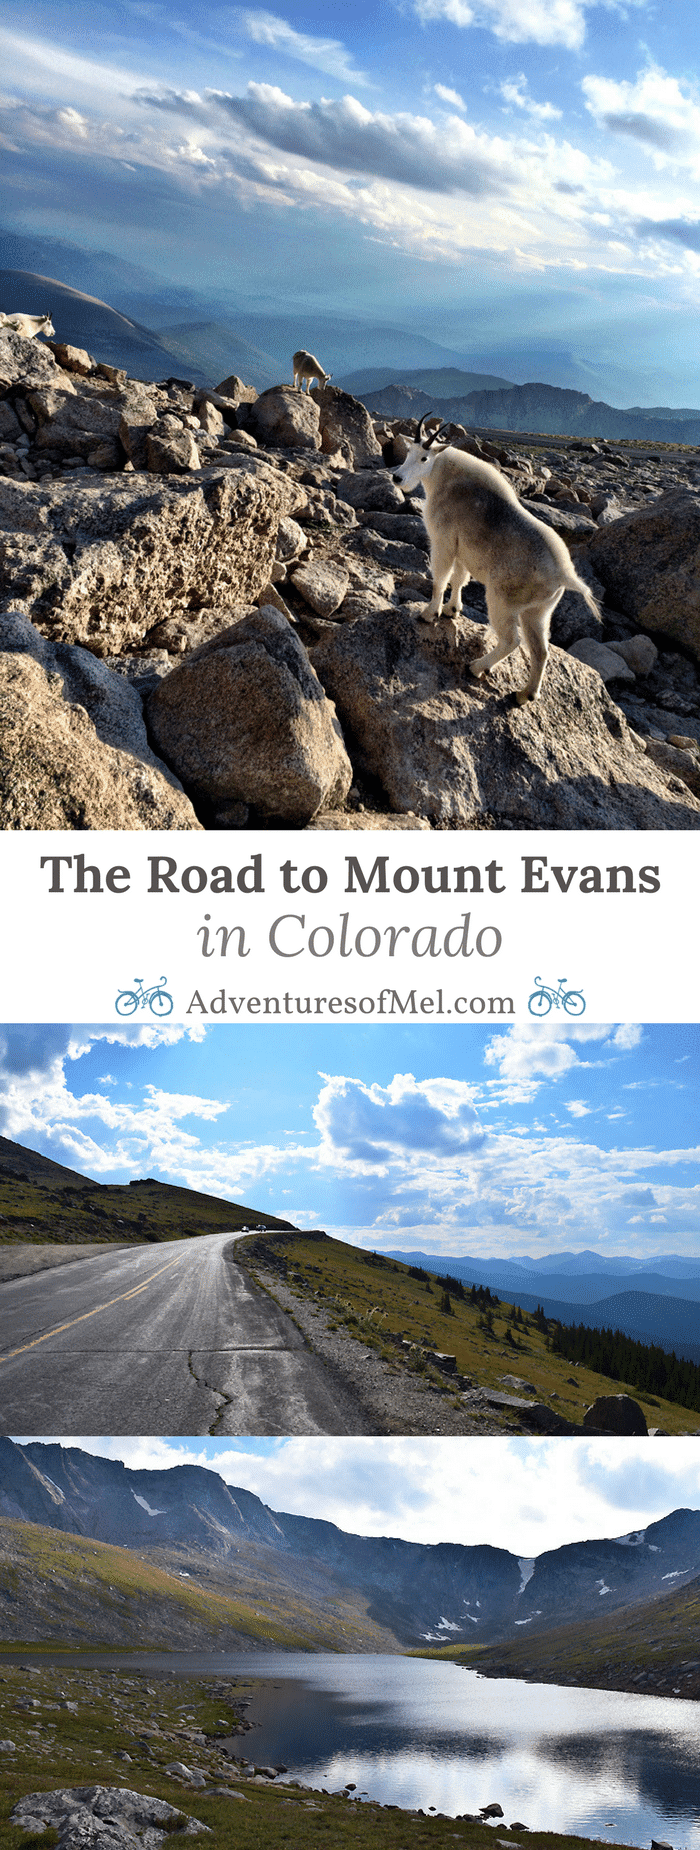
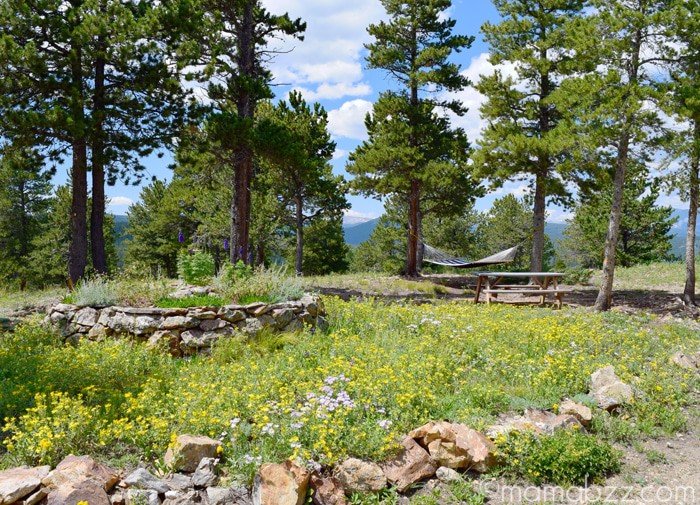
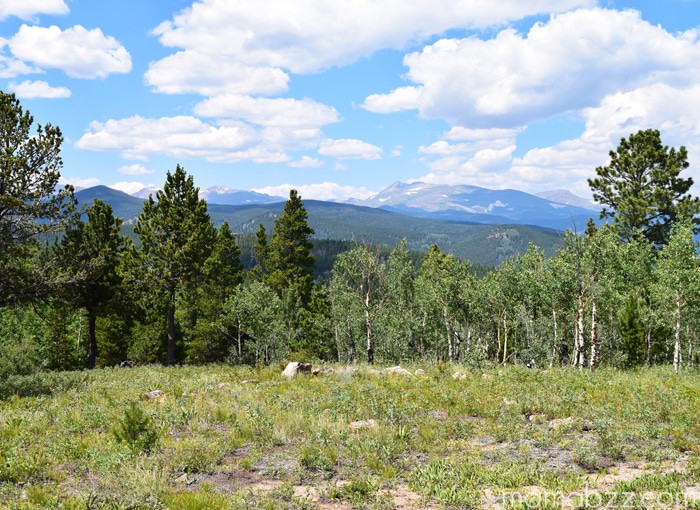
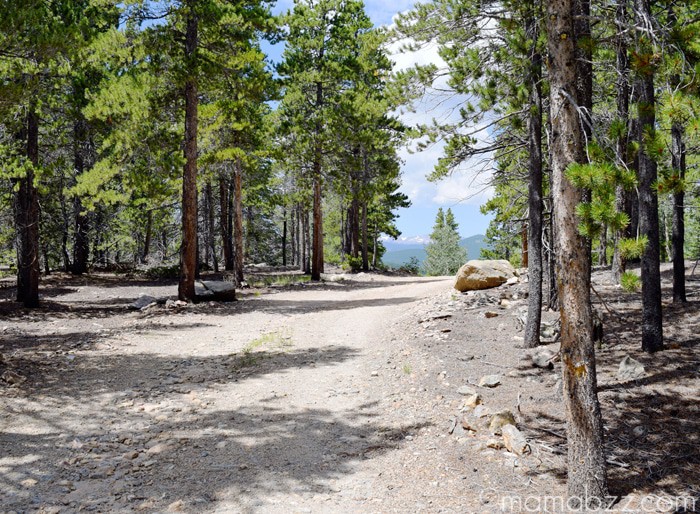
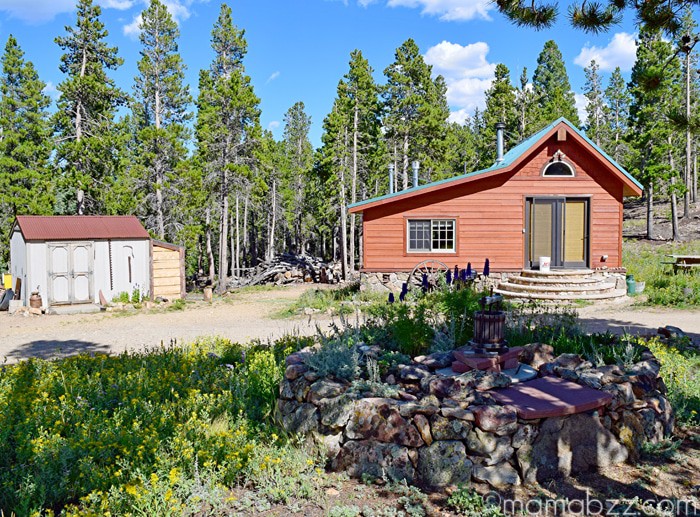
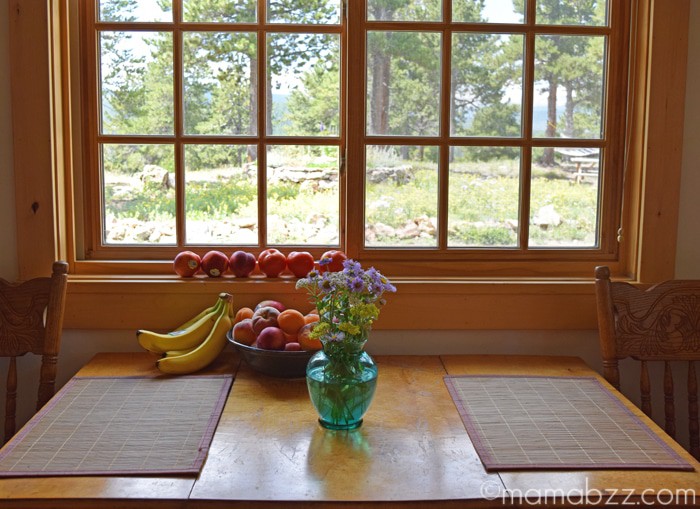

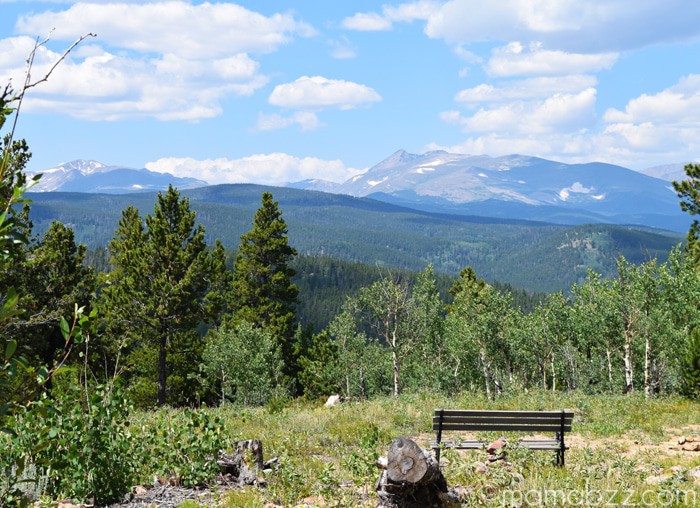
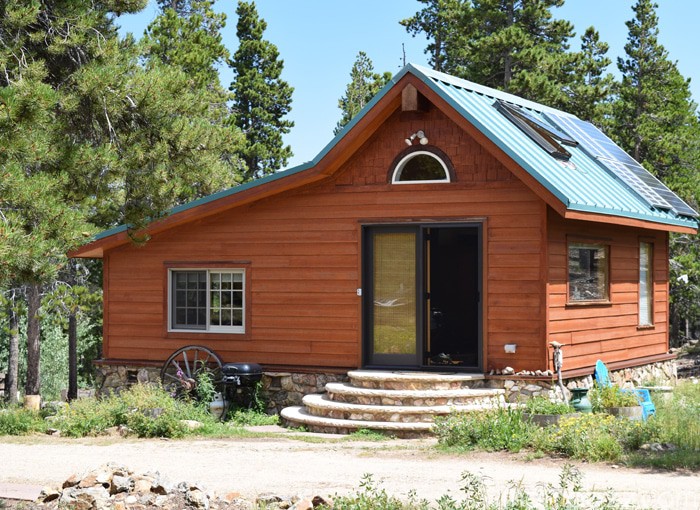
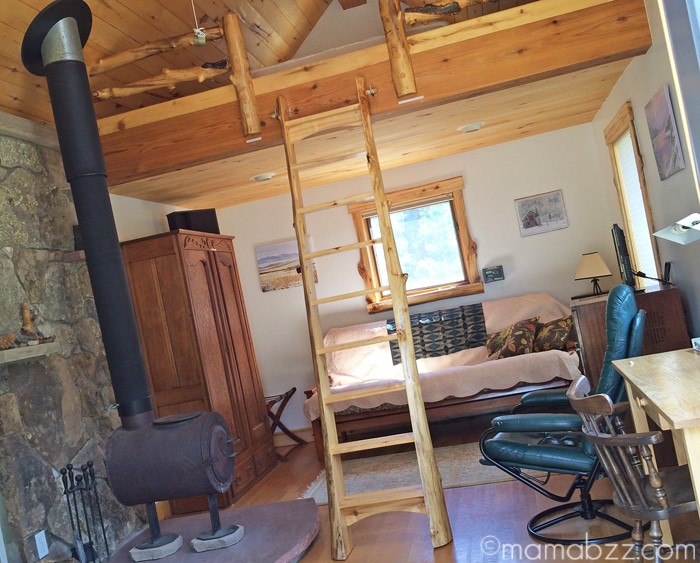
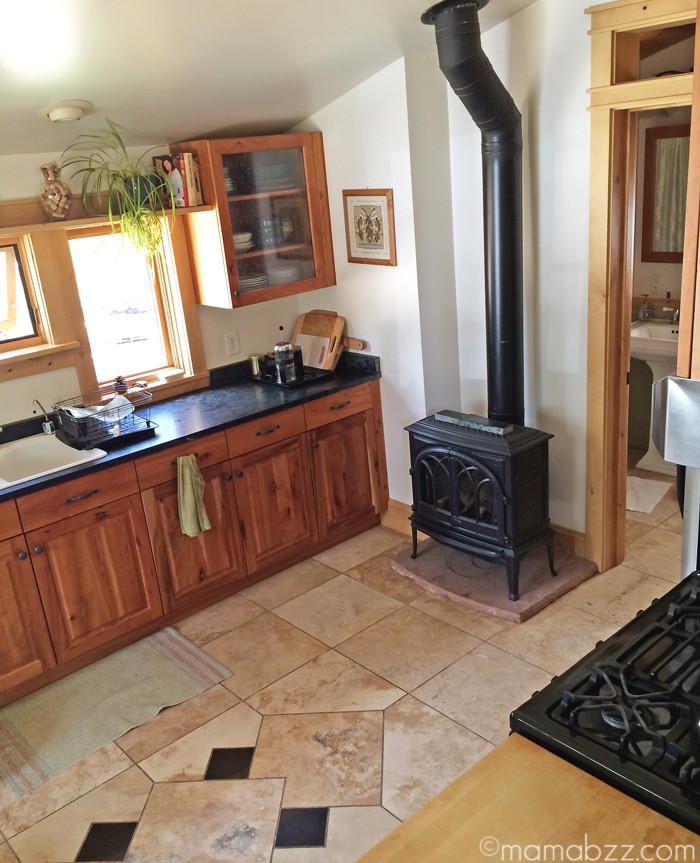
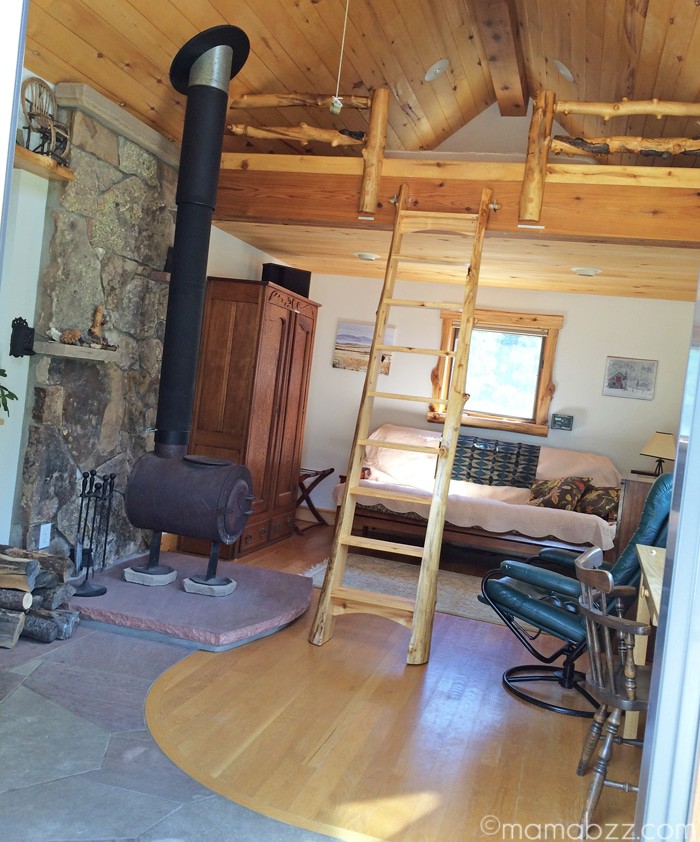
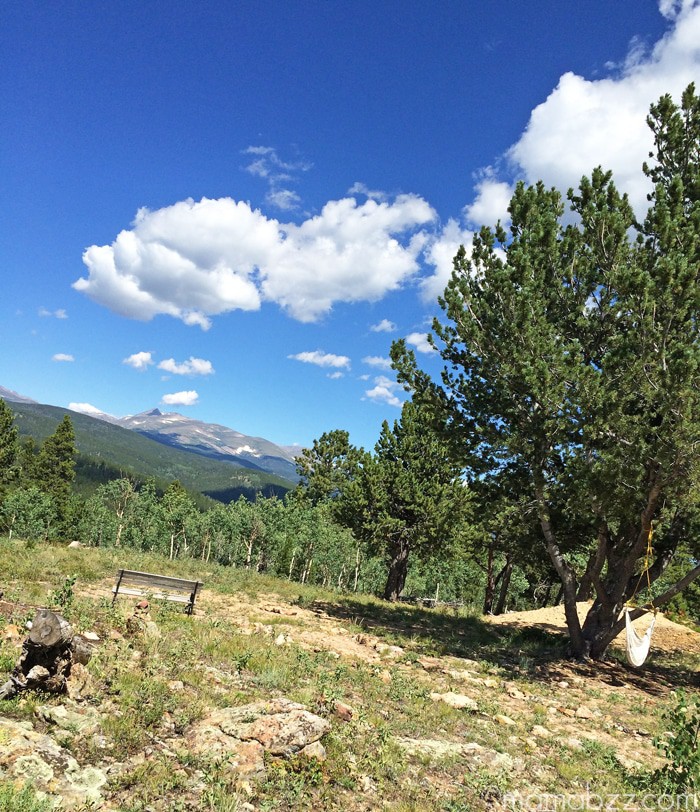
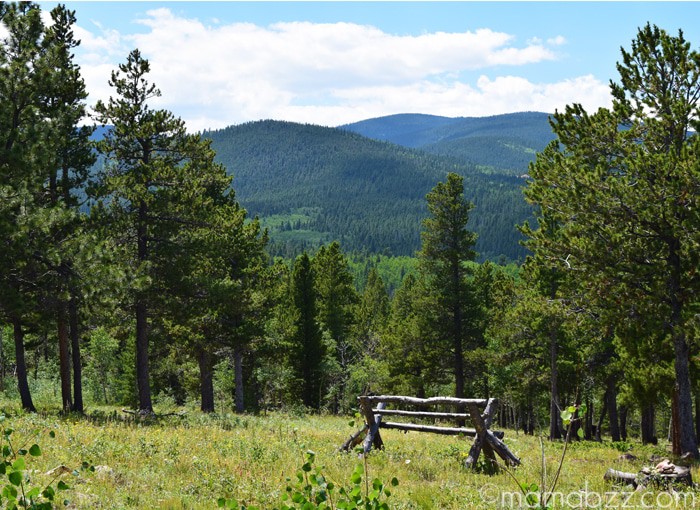
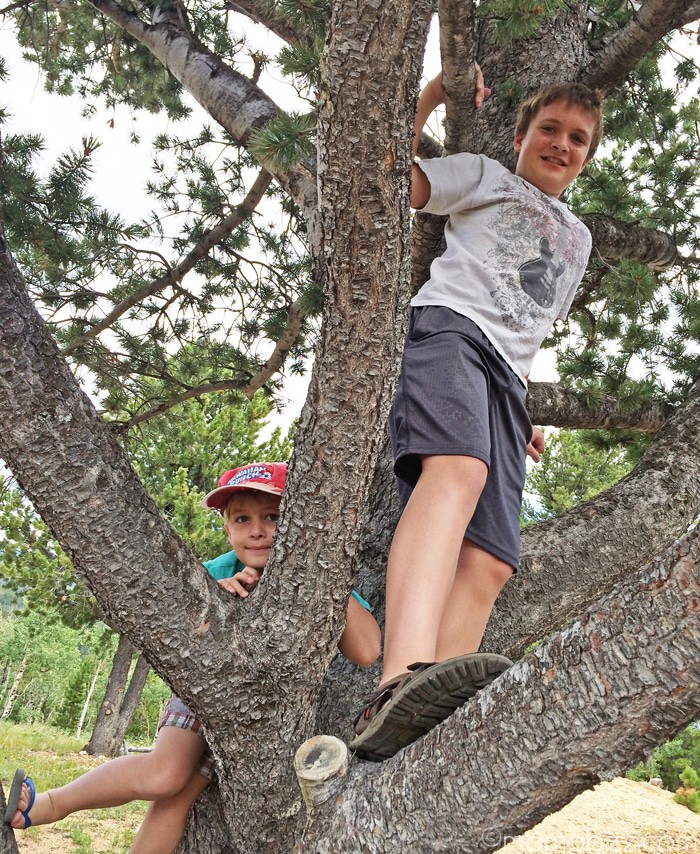

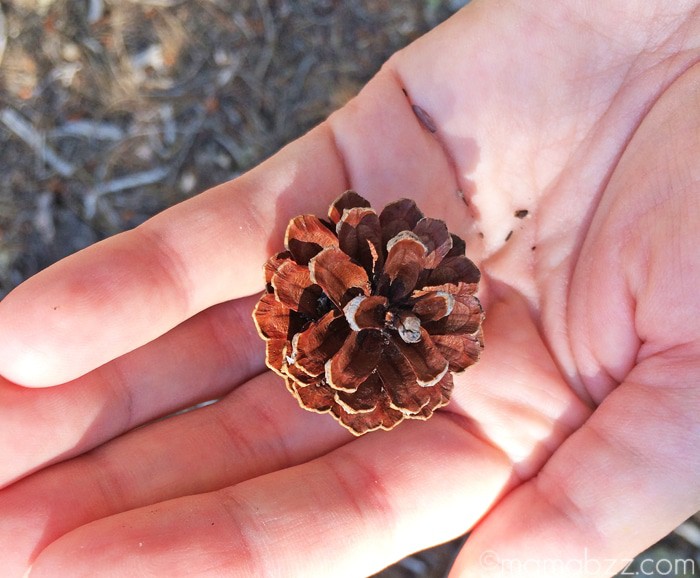
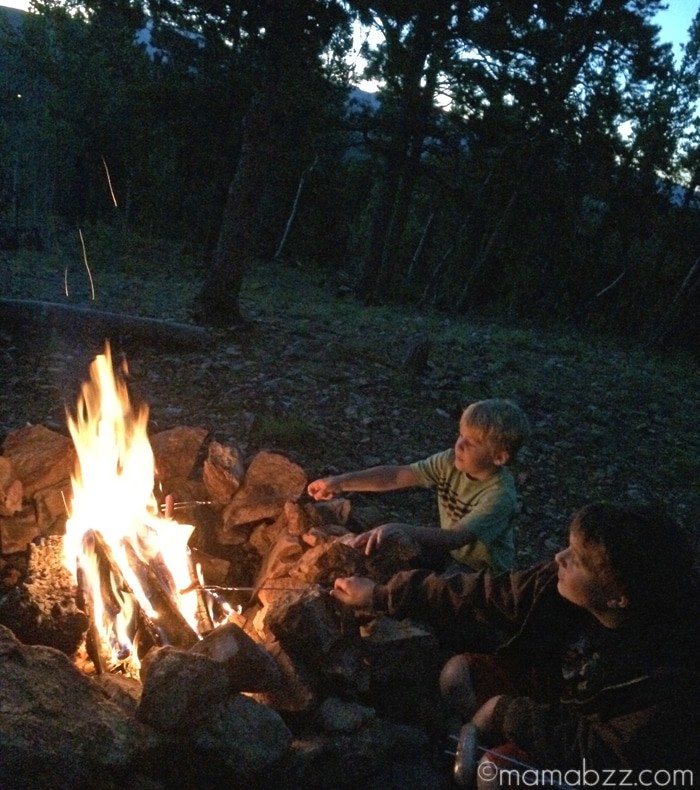
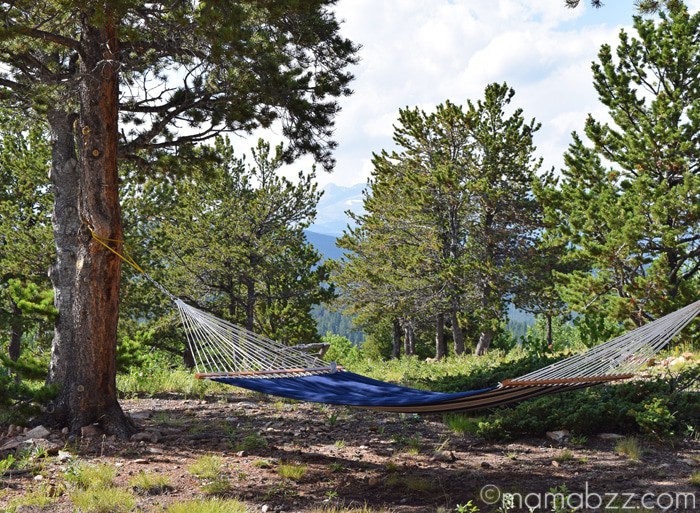
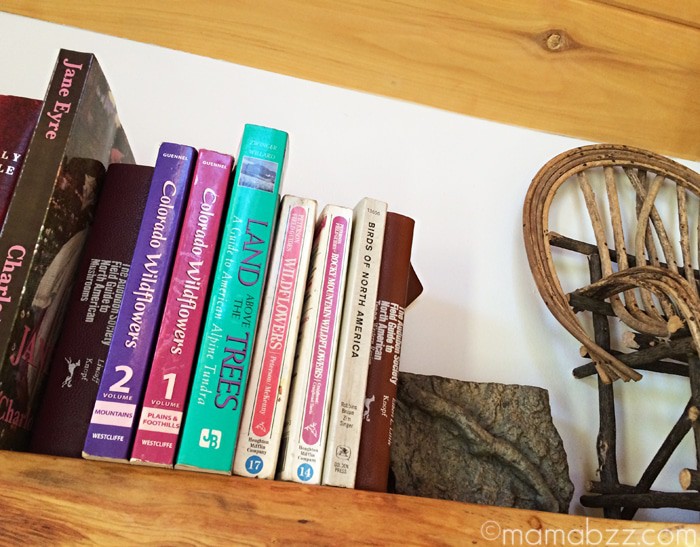

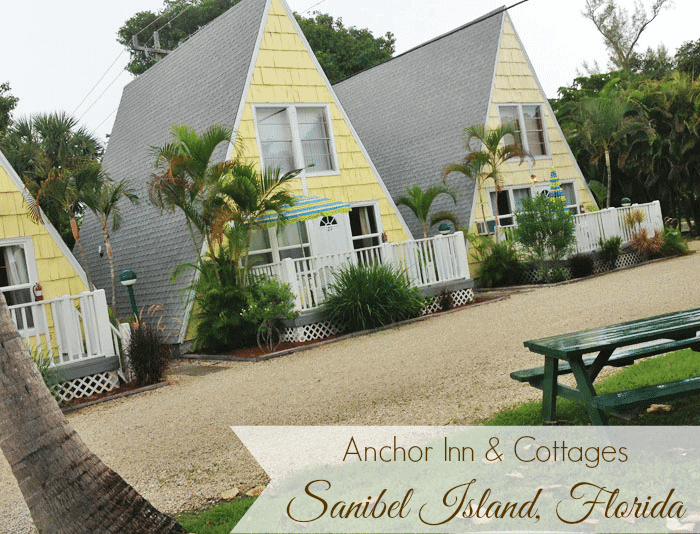


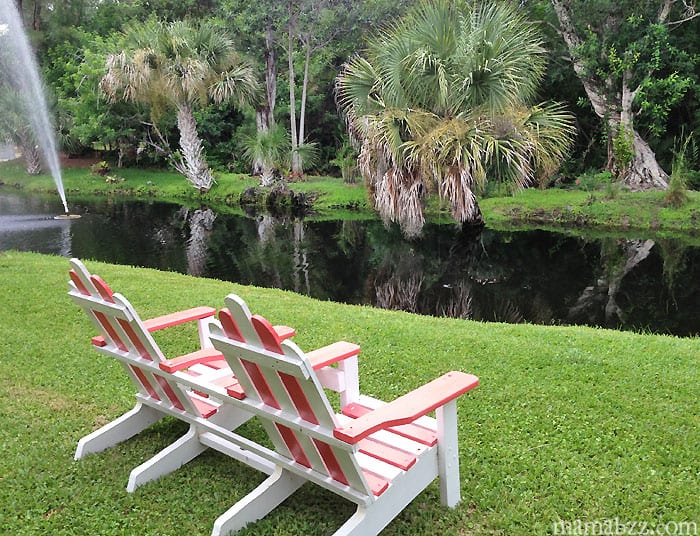
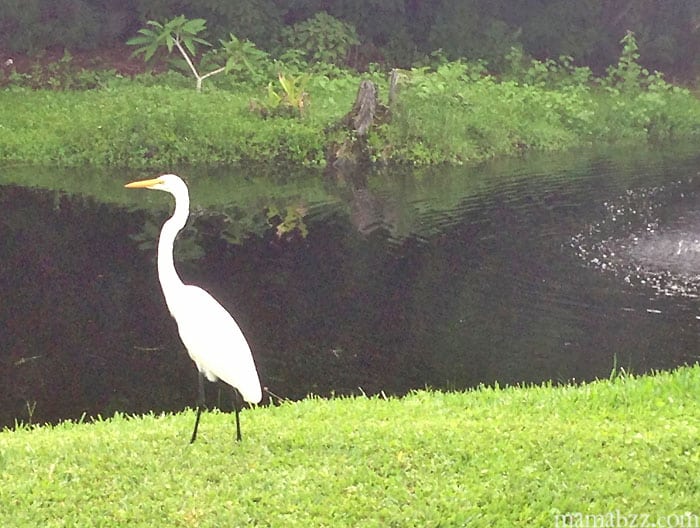
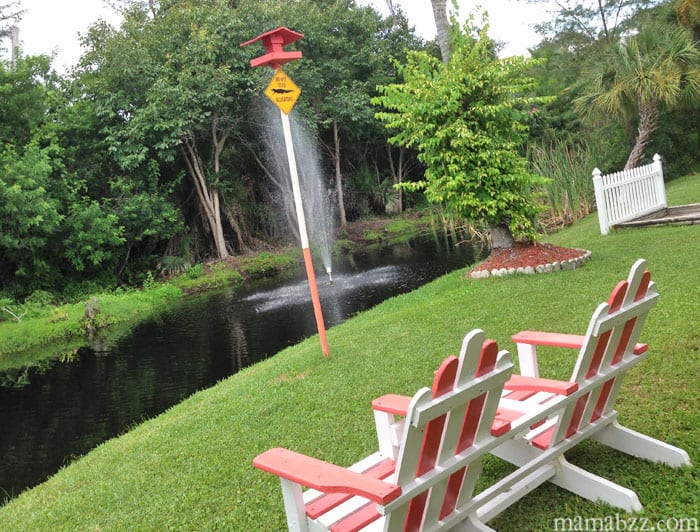
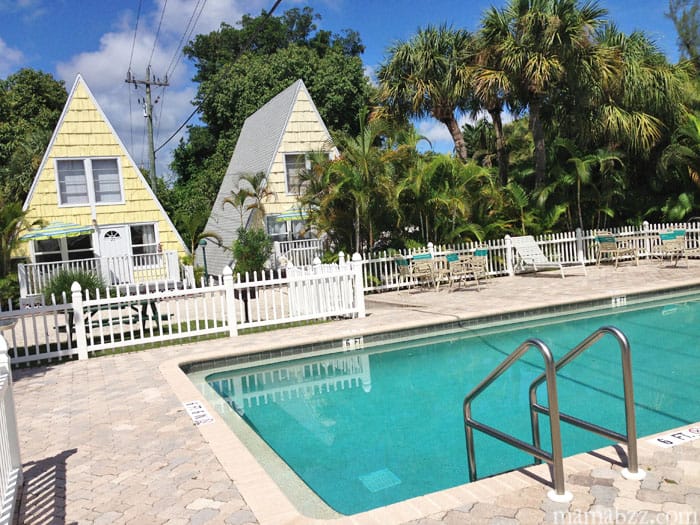
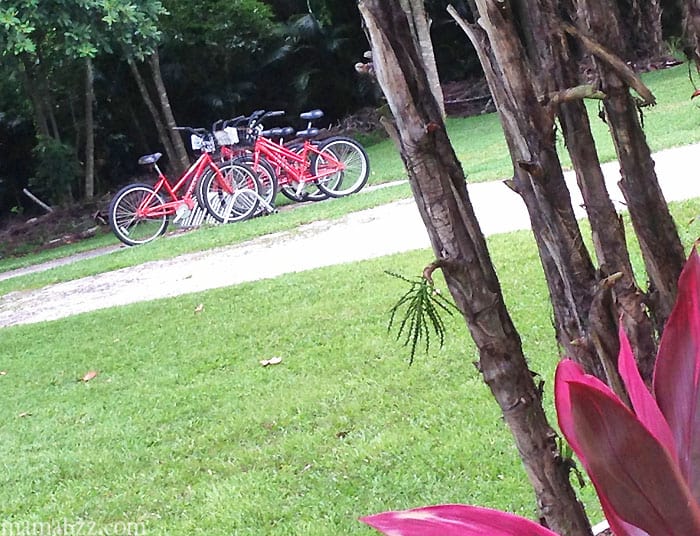
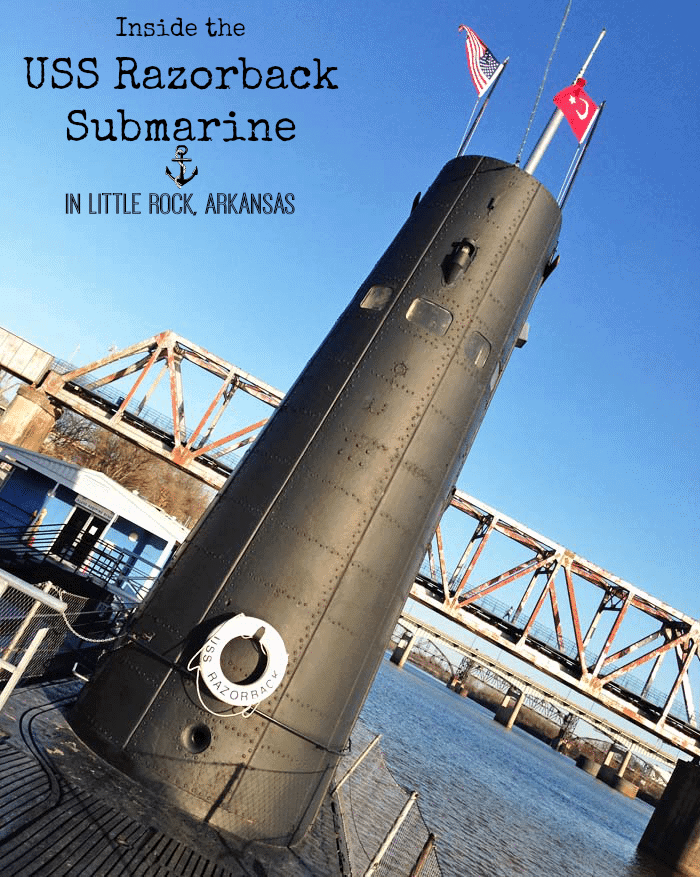
 It was one of those spur-of-the-moment roadside stops that we usually like to make when traveling together as a family. Of course, the boys were ecstatic and couldn’t wait to see and explore this awesome military installation right there in the Arkansas River.
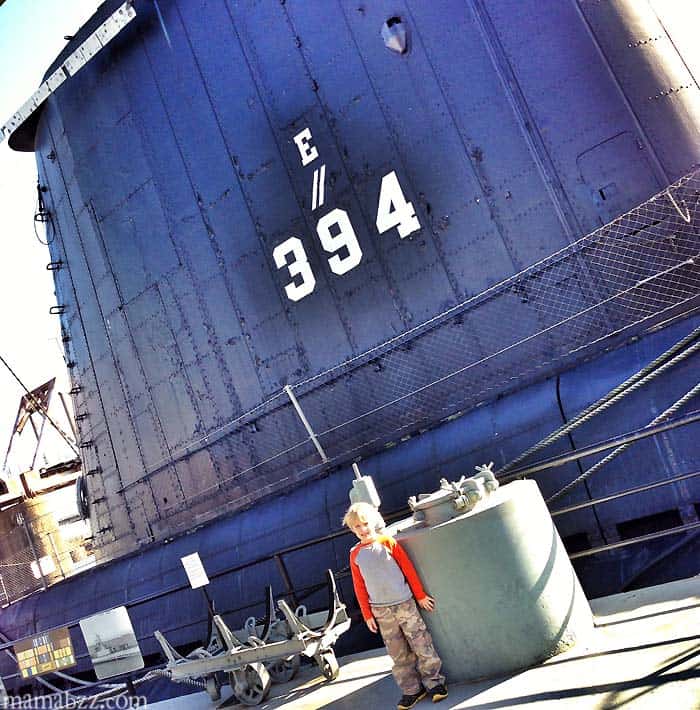
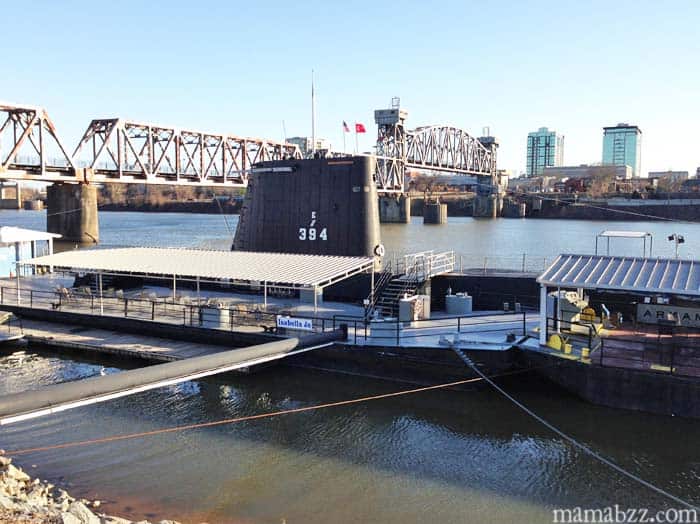 Interesting fact: The USS Razorback was, in fact, not named after the famous Arkansas razorback, but rather the Razorback Whale. She was built at the Portsmouth Naval Shipyard in Kittery, Maine. She served in World War II and in Vietnam; she was also active during the Cold War.
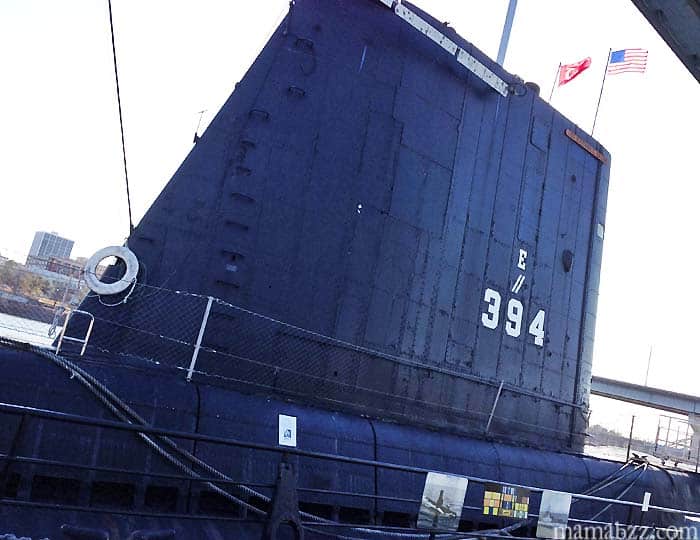 Visitors can tour the submarine, exploring both the outside and climbing down into the submarine to walk through from end to end. You can read more about her history on the museum’s website.
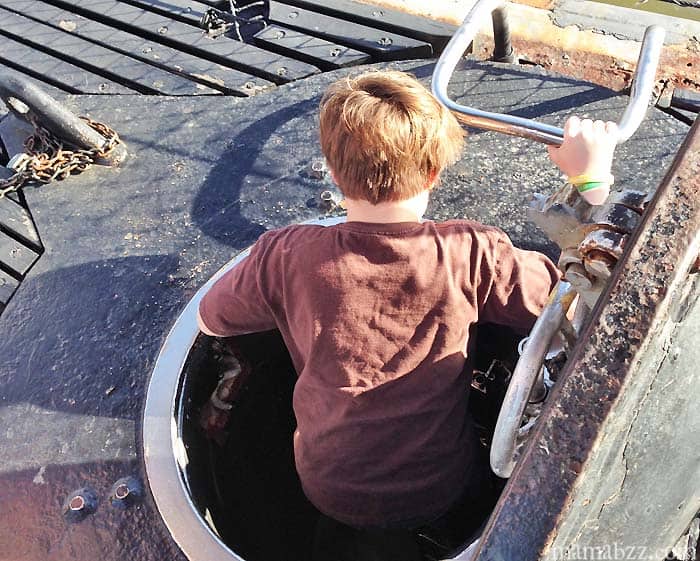 Space was tight, and as we got down in the bowels of this huge ship, I couldn’t imagine having to live like that for months at a time or longer. Amazing men, these sailors who volunteered to serve in submarines, because they weren’t forced into this; and only men served in submarines. Yes, the Navy paid them double the wages, but they raised their hand to serve in a sub. Bunks were tight, and just to give you a small picture, this was a top bunk that noone wanted, mainly because there was little space between the bunk and the vent, as you can see. Can you even tell there’s a bunk there?
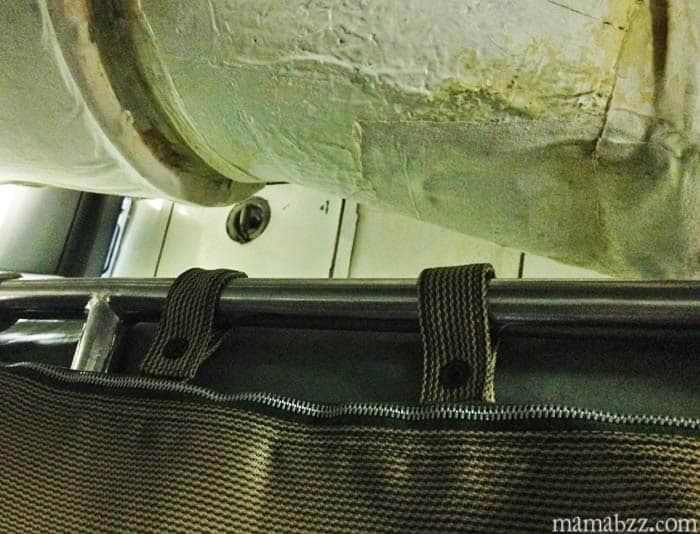 Men shared the bunks, taking triple shifts – meaning they worked one shift, slept another shift, and had “down time” the other shift. As one was rolling out of bed to go to work, another was rolling right into the same bunk to take his place. They called it hot racking.
 Food was stored wherever possible. The question was asked what would happen if someone died while out to sea. As a matter of fact, the body would be stored in the freezer, right along with the food. The freezer was actually below your feet in the mess hall; there was a ladder that went down to it in the mess hall floor.
 The Officers ate the same food but did have a separate kitchen and dishes; they actually used fine china.
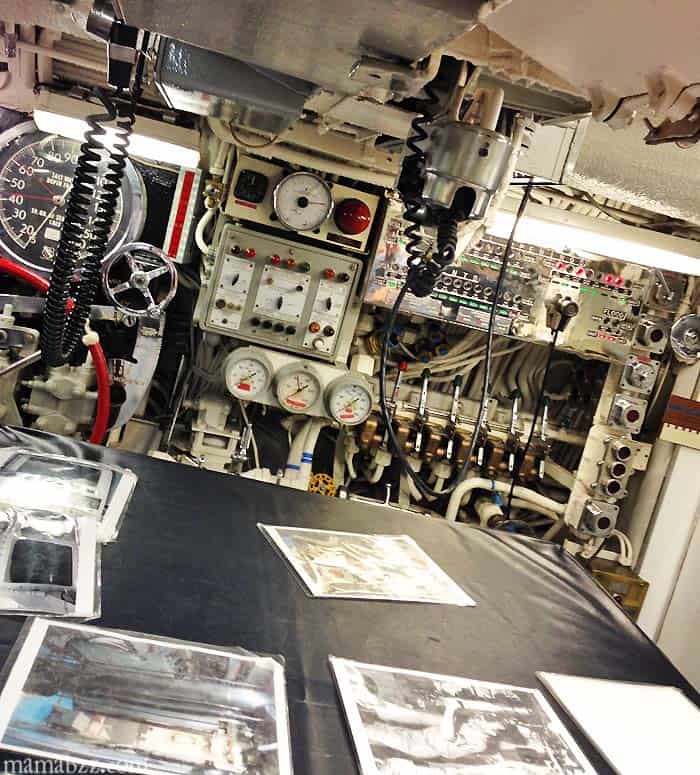
 ….also with real torpedoes still in the sub, though not active torpedoes.
 They were both asking questions throughout the tour; they just came alive with everything they were seeing and were soaking it all up.
 The strawberry crop is a bit late this year, so they’re just now ripening.
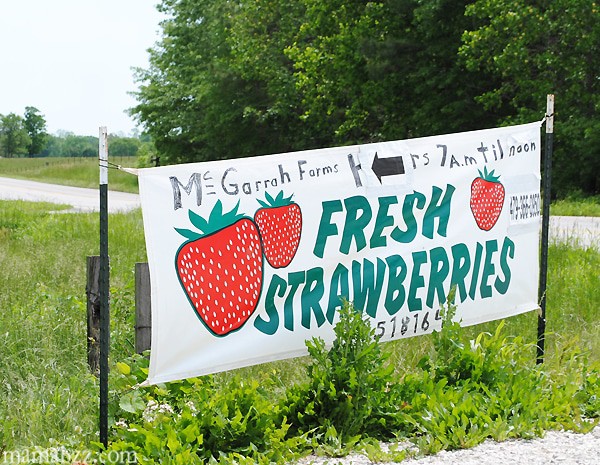 After leaving Pea Ridge, we turned onto a gravel road and followed the road through the countryside for about a mile before coming to the farm. At the Pea Ridge location, you’ll find a pick-your-own patch, as well as pre-picked berries. The first patch you’ll come to is where you’ll want to stop if picking your own, and the friendly attendant will send you off with crates and flags, so you can mark where you stop picking.
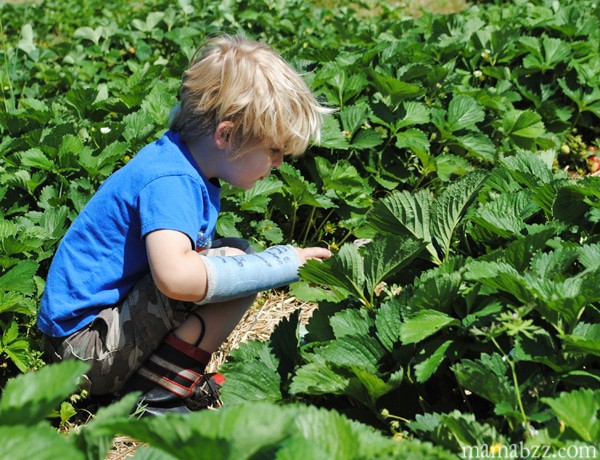
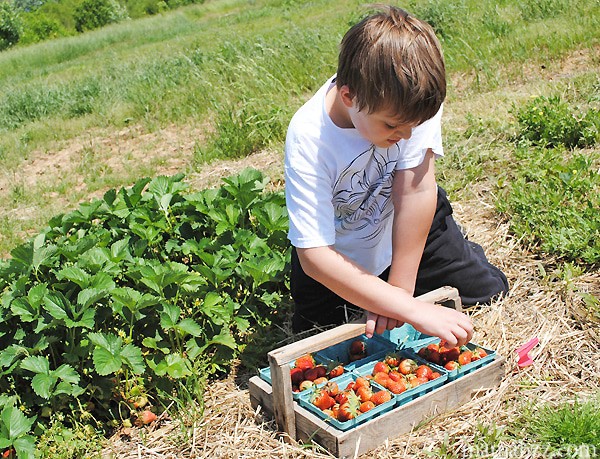 We were excited to hear that they don’t use pesticides, a huge plus! There were quite a few ripe berries, but there were also a lot of green ones, so I can imagine there must be a lot of red berries just waiting to be picked by today.
 Strawberry pickin’ lends to great photo opps, but not just that…. it’s quality time spent together as a family.
  I definitely recommend it if you’re wanting something fun to do together.
  Plus, you get to reap the rewards afterwards.