Category: Cakes & Cupcakes

Whether you’re celebrating a birthday, or just want a special dessert, you’ll find loads of scrumptious cake recipes, cupcakes, and frosting recipes.

Reader favorites include pumpkin spice gooey butter cake, Olive Garden’s white chocolate raspberry cheesecake, this Minecraft grass block cake, easy pineapple cake, and this easy lemon cake.

the best cake recipes, cupcakes, and frosting recipes
  • Simple and Easy Raspberry Chocolate Cake in About a Minute

    Simple and Easy Raspberry Chocolate Cake in About a Minute

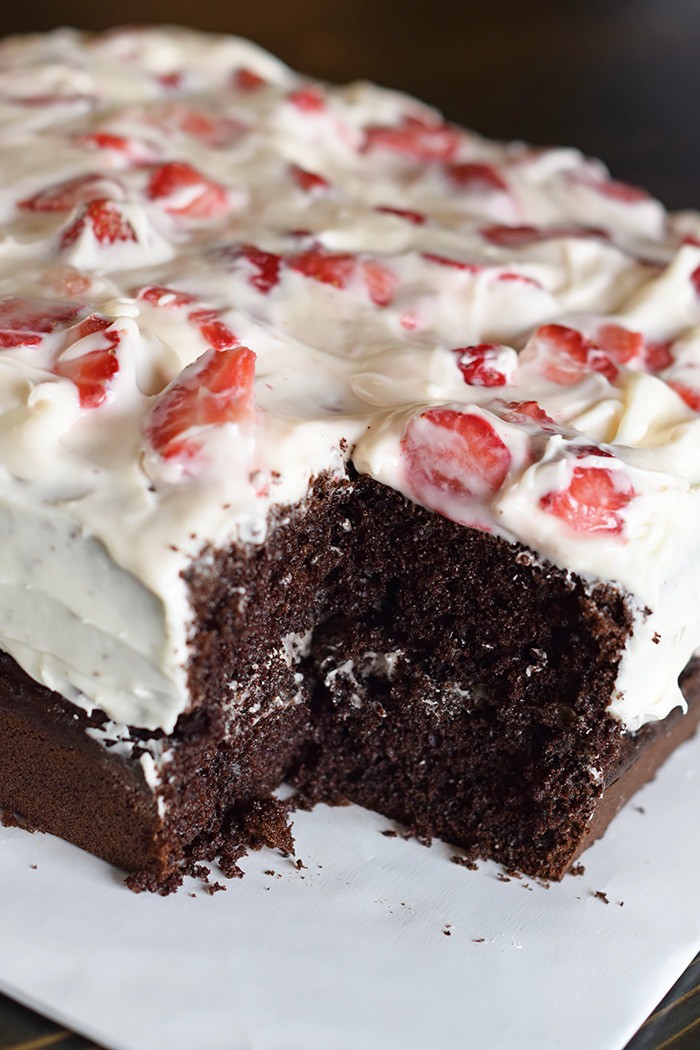
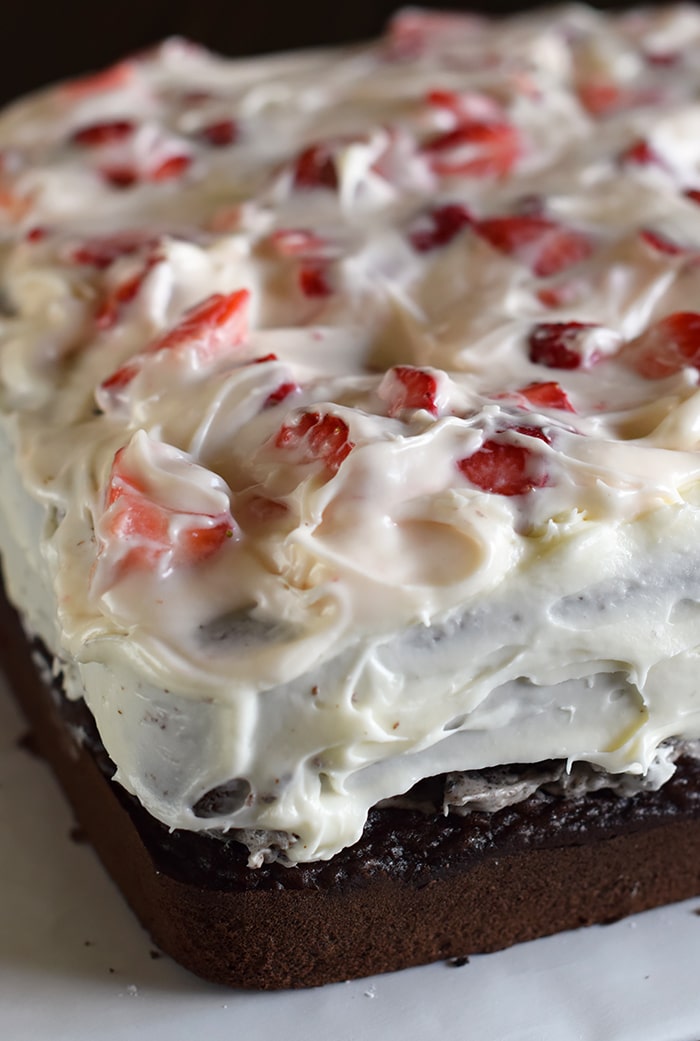
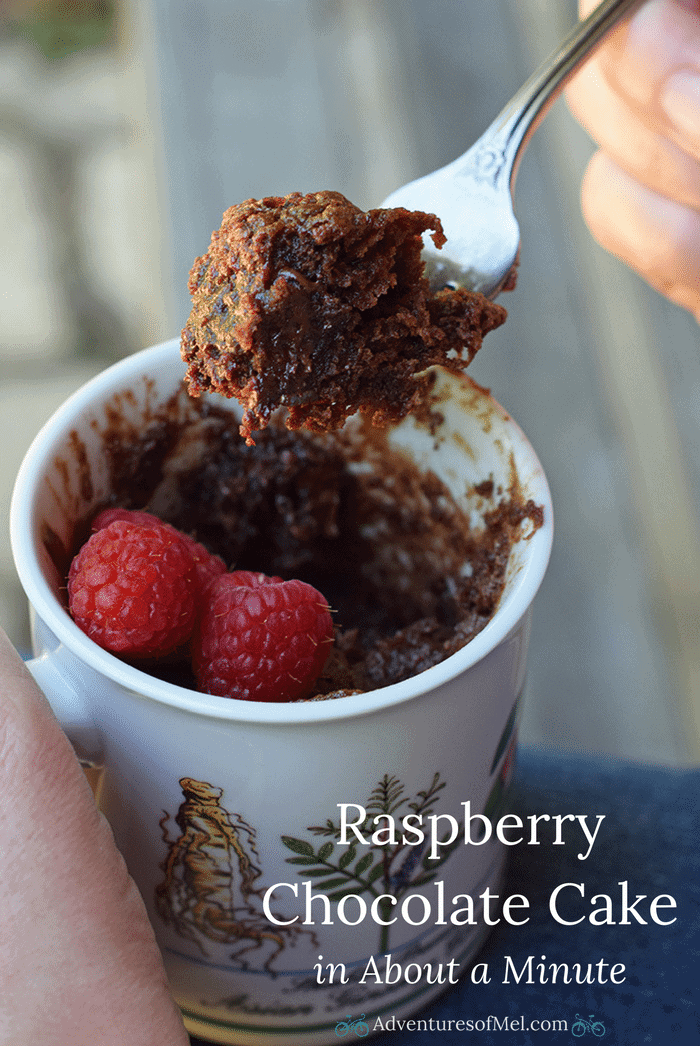
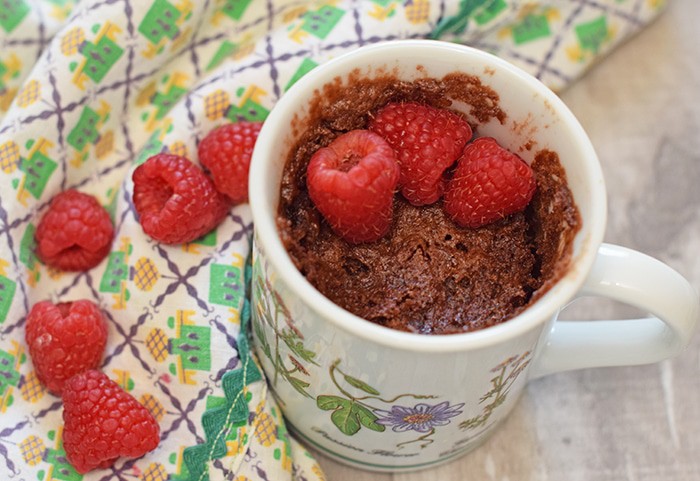
    Craving a simple dessert that will satisfy your sweet tooth but only take about a minute to make? I partnered with Duncan Hines to share this recipe for a simple and easy raspberry chocolate cake.

    Craving a simple and easy dessert that will satisfy your sweet tooth but only take about a minute to make? How to make raspberry chocolate cake for 1 in about a minute. Print the recipe!

    It’s no secret that I love dessert. I especially love dessert when it involves chocolate. Pretty sure my grandma passed her love for chocolate on to me with all the yummy things she used to bake. The truth is, though, I don’t always have a lot of time to bake. There are times when I just want something quick and easy, ya know? If you’re reading this, of course you know!

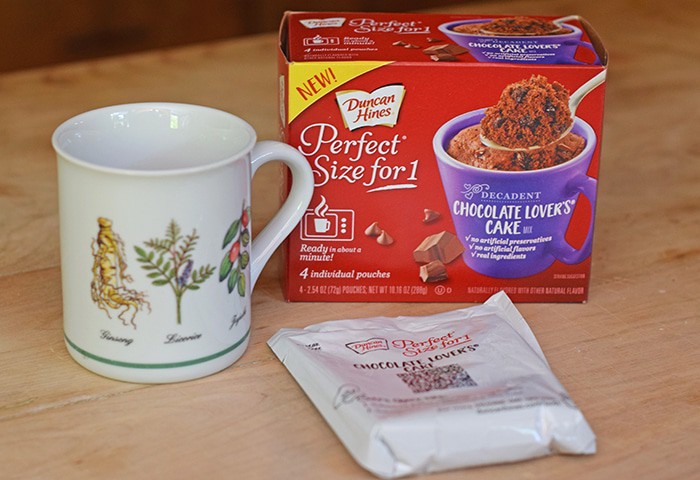
    Enter Duncan Hines with their scrumptious Perfect Size for 1 desserts that are ready in about a minute.

    Craving a simple and easy dessert that will satisfy your sweet tooth but only take about a minute to make? How to make raspberry chocolate cake for 1 in about a minute. Print the recipe!

    Keep reading because I’m going to show you how to customize their Chocolate Lover’s Cake into a delicious recipe for an unforgettable afternoon treat.

    Perfect Size for 1 Warm Treats

    Dessert is especially good right after dinner. But sometimes I love a good afternoon treat because that’s the time when cravings usually seem to hit.

    Perfect Size for 1 comes in 18 different varieties, including flavors like Banana Bread, Lemon Cake, S’mores Cake, Brownie, Carrot Cake, and of course, Chocolate Lover’s Cake. All you need are a mug, a little bit of water (or other liquid), and about a minute. How perfect is that?

    I love that I can enjoy a warm delicious treat just for me without all the work of actually baking a cake.

    Craving a simple and easy dessert that will satisfy your sweet tooth but only take about a minute to make? How to make raspberry chocolate cake for 1 in about a minute. Print the recipe!

    And it’s individually sized so I’m not tempting myself with an entire cake. Another plus is that when the summer heat is here, there’s no need to turn on the oven. There are no dishes, besides my 8-oz. mug; so there’s no mess to clean up!

    The best part is you can customize your treat to your liking, and that’s where the printable recipe below comes in.

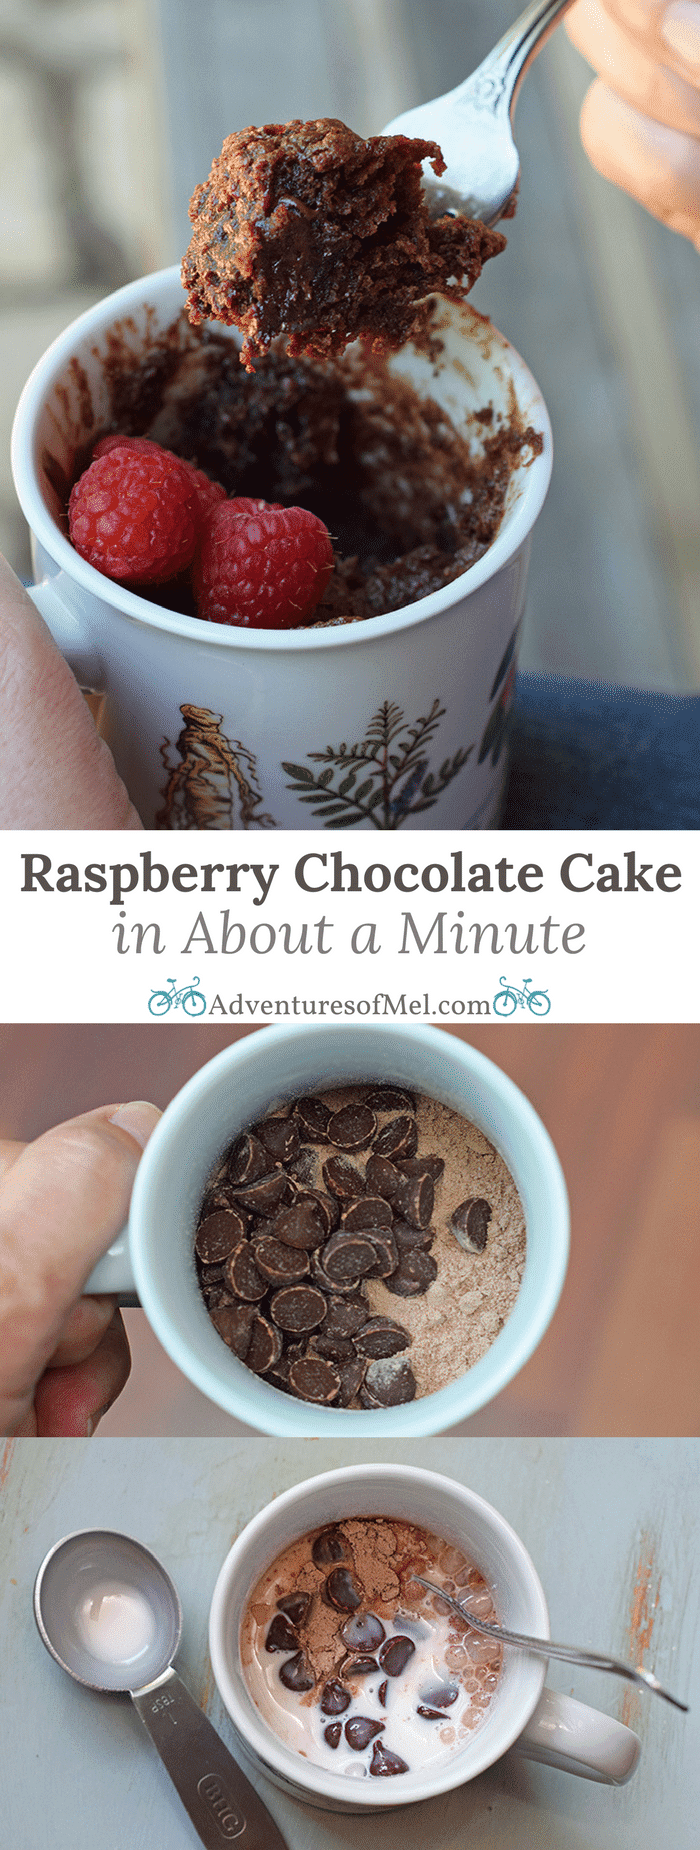
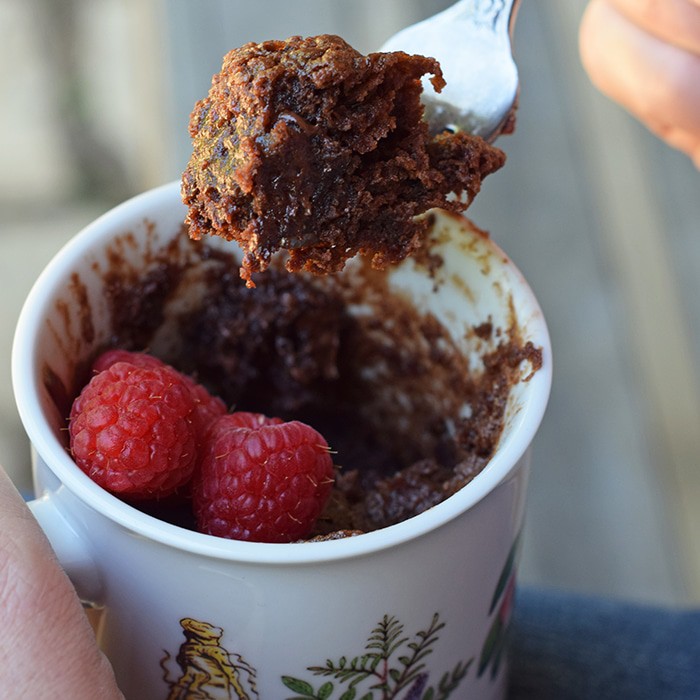
    How to Make Raspberry Chocolate Cake for 1 in About a Minute

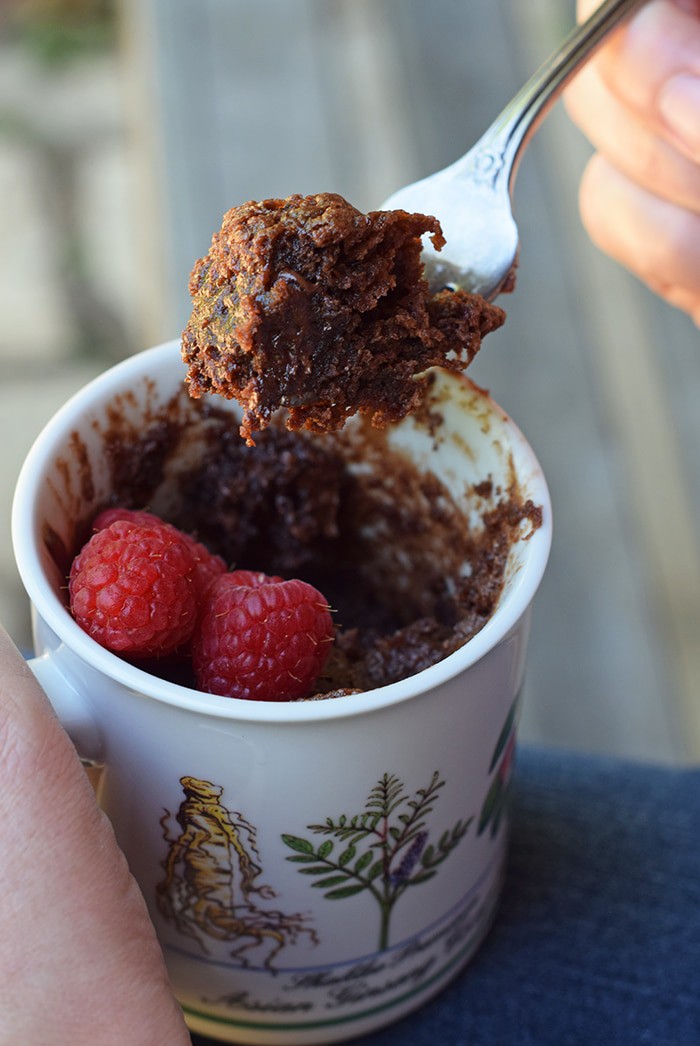
    Ready to make a decadently delicious treat in about a minute? Let’s do this.

    Craving a simple and easy dessert that will satisfy your sweet tooth but only take about a minute to make? How to make raspberry chocolate cake for 1 in about a minute. Print the recipe!

    Empty the contents of 1 cake mix pouch into an 8-oz. or larger coffee mug.

    Craving a simple and easy dessert that will satisfy your sweet tooth but only take about a minute to make? How to make raspberry chocolate cake for 1 in about a minute. Print the recipe!

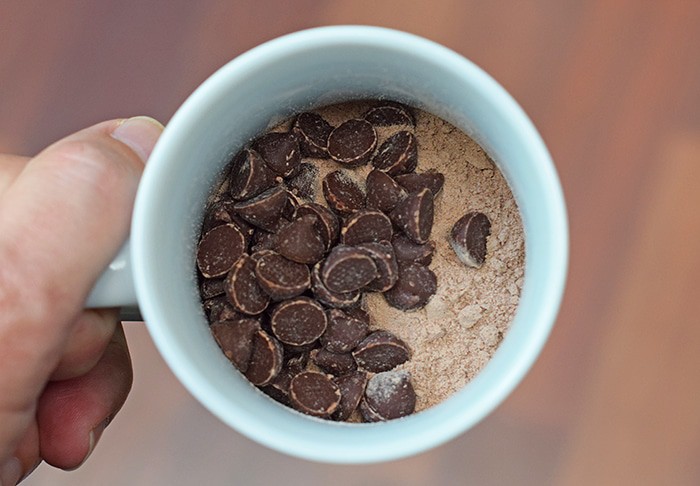
    Add a handful (about 1/4 cup) of semi-sweet chocolate chips to the mixture.

    Craving a simple and easy dessert that will satisfy your sweet tooth but only take about a minute to make? How to make raspberry chocolate cake for 1 in about a minute. Print the recipe!

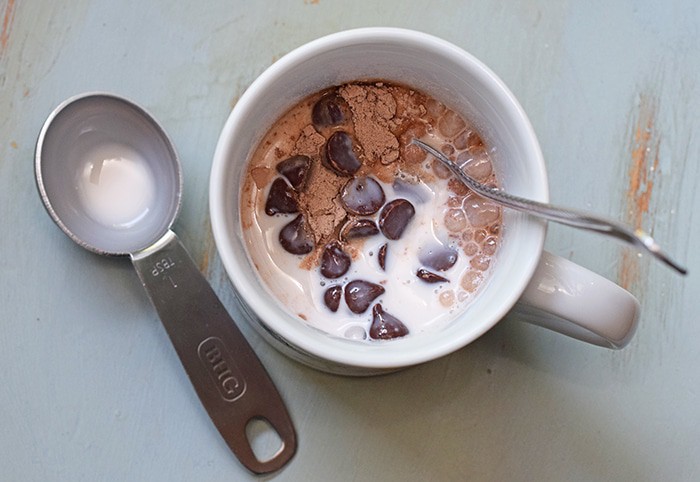
    Add 3 tablespoons of raspberry coffee creamer to the mix.

    Craving a simple and easy dessert that will satisfy your sweet tooth but only take about a minute to make? How to make raspberry chocolate cake for 1 in about a minute. Print the recipe!

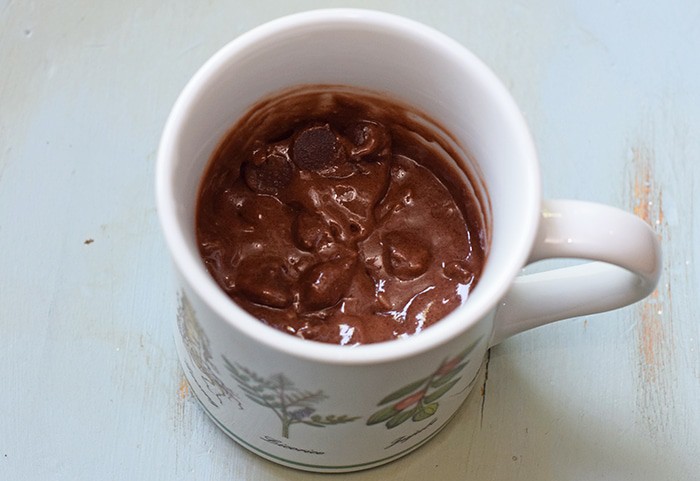
    Stir with a spoon until the batter is smooth, making sure to scrape the sides and bottom of your mug so it’s all mixed in. Cook according to package directions for about 1 minute 10 seconds.

    Craving a simple and easy dessert that will satisfy your sweet tooth but only take about a minute to make? How to make raspberry chocolate cake for 1 in about a minute. Print the recipe!

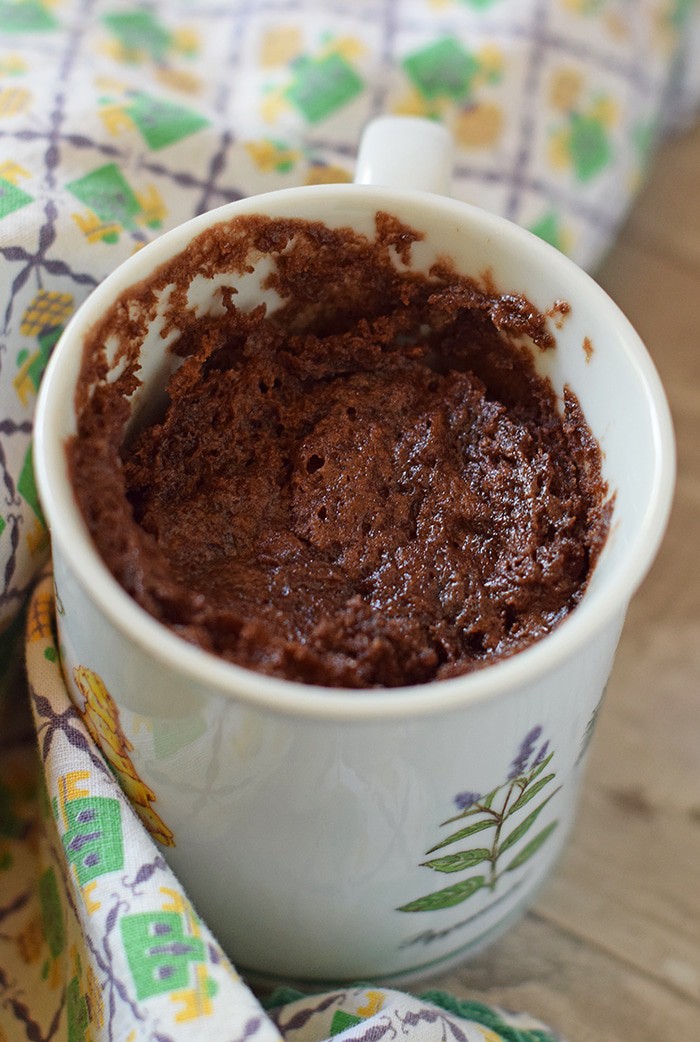
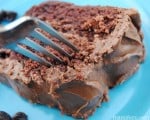
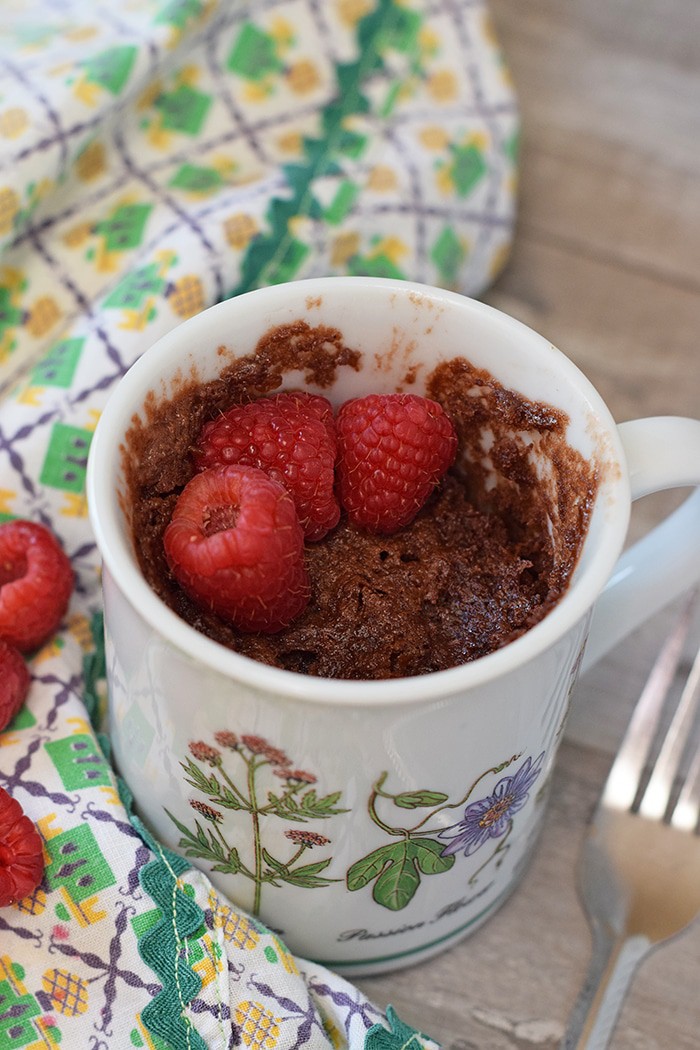
    Cool for another 2 minutes before you devour this delicious dessert!

    Craving a simple and easy dessert that will satisfy your sweet tooth but only take about a minute to make? How to make raspberry chocolate cake for 1 in about a minute. Print the recipe!

    Print the Recipe for Raspberry Chocolate Cake

    Craving a simple and easy dessert that will satisfy your sweet tooth but only take about a minute to make? How to make raspberry chocolate cake for 1 in about a minute. Print the recipe!

    IF YOU LOVE THIS RECIPE, HERE ARE A FEW MORE CAKE MIX RECIPES YOU WILL LOVE:

    Easy Lemon Cake

    Gooey Butter Cake

    Pumpkin Spice Gooey Butter Cake

    Strawberry Jello Cake Flag Cake

    Grass Block Minecraft Cake

    Raspberry Chocolate Cake in about a Minute

    Raspberry Chocolate Cake for 1 in About a Minute

    Craving a simple and easy dessert that will satisfy your sweet tooth but only take about a minute to make? How to make raspberry chocolate cake for 1 in about a minute. Print the recipe!

    • 1 8- oz. or larger coffee mug
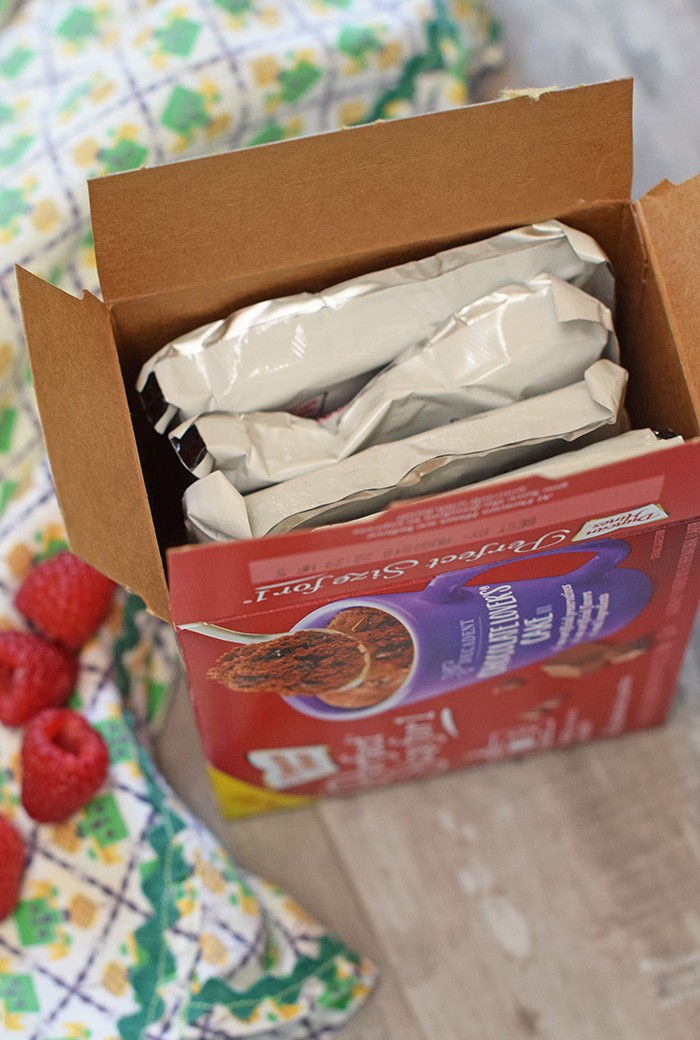
    • 1 Duncan Hines Perfect Size for 1 cake mix pouch
    • 1/4 cup chocolate chips
    • 3 tablespoons raspberry coffee creamer
    1. Empty the contents of 1 cake mix pouch into an 8-oz. or larger coffee mug.
    2. Add semi-sweet chocolate chips to the mixture.
    3. Add raspberry coffee creamer to the mix.
    4. Stir the mixture with a spoon until the batter is smooth, making sure to scrape the sides and bottom of your mug so it’s all mixed in.
    5. Cook according to package directions for about 1 minute 10 seconds.
    6. Cool for another 2 minutes before serving!
    7. Serve and enjoy!
    Cakes & Cupcakes
    American
    chocolate cake, easy chocolate cake, raspberry chocolate cake

    Can’t make it just yet? Pin it for later!

    Craving a simple and easy dessert that will satisfy your sweet tooth but only take about a minute to make? How to make raspberry chocolate cake for 1 in about a minute. Print the recipe!

  • Old-Fashioned Strawberry Shortcake with Grandma’s Biscuits

    Old-Fashioned Strawberry Shortcake with Grandma’s Biscuits

    Don’t you just love berry season? It seems like it came early this year here in our little corner of Arkansas.

    Strawberry Shortcake made with a cream cheese whipped cream, Grandma's biscuits, and juicy red strawberries! Print the recipe for Old-Fashioned Strawberry Shortcake with Grandma's Biscuits.

    Every year around this time I have to make all the things with delicious fresh-picked strawberries, including strawberry cream pie, strawberry freezer jam, strawberry delight, and strawberry shortcake. And fresh strawberries make the ultimate mini fruit pizzas! Because who doesn’t love a good old-fashioned strawberry shortcake, especially when it involves Grandma’s biscuits?

    Strawberry Shortcake made with a cream cheese whipped cream, Grandma's biscuits, and juicy red strawberries! Print the recipe for Old-Fashioned Strawberry Shortcake with Grandma's Biscuits.

    And of course, the star of the show… Red, juicy strawberries.

    Speaking of Grandma’s Biscuits…

    For as long as I can remember, Grandma kept a slip of paper taped to the inside of her cabinet door. That slip of paper held her favorite biscuit recipe, handwritten in her own handwriting. My mom now has that same slip of paper taped to the inside of her cabinet door. And I’m considering writing out the recipe and taping it to the inside of our cabinet.

    Strawberry Shortcake made with a cream cheese whipped cream, Grandma's biscuits, and juicy red strawberries! Print the recipe for Old-Fashioned Strawberry Shortcake with Grandma's Biscuits.
    Strawberry Shortcake made with a cream cheese whipped cream, Grandma's biscuits, and juicy red strawberries! Print the recipe for Old-Fashioned Strawberry Shortcake with Grandma's Biscuits.

    We love making these biscuits. They can be rolled out or dropped. For this particular recipe, I actually grabbed spoonfuls and shaped them by hand, so they were more like drop biscuits. I also added in a teaspoon of sugar just to add a li’l sweetness to the recipe since I planned to use them for strawberry shortcake.

    Gobs of Creamy Whipped Cream

    Strawberry Shortcake made with a cream cheese whipped cream, Grandma's biscuits, and juicy red strawberries! Print the recipe for Old-Fashioned Strawberry Shortcake with Grandma's Biscuits.

    Before I actually created this recipe, I had this idea to add cream cheese to the homemade whipped cream I planned to make. Dan wasn’t sure it would work; frankly, I wasn’t either. But like I’ve said before, cream cheese is one of my favorite ingredients. Ever.

    Strawberry Shortcake made with a cream cheese whipped cream, Grandma's biscuits, and juicy red strawberries! Print the recipe for Old-Fashioned Strawberry Shortcake with Grandma's Biscuits.

    Well, it worked. The whipped cream is so creamy and flavorful. It definitely adds a special touch to the shortcake.

    Strawberry Shortcake made with a cream cheese whipped cream, Grandma's biscuits, and juicy red strawberries! Print the recipe for Old-Fashioned Strawberry Shortcake with Grandma's Biscuits.

    Below is the printable recipe for this scrumptious old-fashioned strawberry shortcake using Grandma’s biscuits. Enjoy!

    Old-Fashioned Strawberry Shortcake with Grandma’s Biscuits

    Strawberry Shortcake made with a cream cheese whipped cream, Grandma's biscuits, and juicy red strawberries! Print the recipe for Old-Fashioned Strawberry Shortcake with Grandma's Biscuits.

    • Biscuits –
    • 2 cups all-purpose flour
    • 3 teaspoons baking powder
    • 1/2 teaspoon salt
    • 1 teaspoon sugar
    • 1/3 cup unsalted butter
    • 3/4 cup milk
    • Whipped Cream –
    • 2 ounces cream cheese
    • 2 cups heavy whipping cream
    • 1 teaspoon vanilla extract
    • 1/2 cup powdered sugar
    • Strawberries (washed and sliced)
    1. For the biscuits, mix together flour, baking powder, salt, and sugar in a medium bowl.
    2. Use a pastry blender to blend flour mixture together with cold sliced butter. Continue until mixture is well blended.
    3. Add milk to mixture, and mix well. You should be left with a somewhat sticky but still manageable dough.
    4. Grab spoonfuls of dough and shape into biscuits about 3/4 inch thick. Place on ungreased cookie sheet.
    5. Bake at 425° for about 15-20 minutes, or until tops are beginning to turn golden.
    6. Meanwhile, wash strawberries.
    7. Mix together cream cheese, heavy whipping cream, vanilla, and powdered sugar to form a whipped cream.
    8. Once the biscuits have cooled, slice a biscuit in half.
    9. Place bottom half of biscuit on plate. Add a layer of sliced strawberries, followed by a generous layer of whipped cream, then another layer of sliced strawberries. Top with the top half of the biscuit.
    10. Add a small dollop of whipped cream to the top, followed by a whole strawberry.
    11. Serve and enjoy!
    Desserts
    American
    old-fashioned strawberry shortcake, strawberry shortcake, strawberry shortcake with biscuits

    Can’t make it just yet? Pin it for later!

    Strawberry Shortcake made with a cream cheese whipped cream, Grandma's biscuits, and juicy red strawberries! Print the recipe for Old-Fashioned Strawberry Shortcake with Grandma's Biscuits.
  • Bunny Tail Cupcakes for Easter

    Bunny Tail Cupcakes for Easter

    Learn how to make easy and adorable bunny tail cupcakes with chocolate cupcakes, frosting, and mini marshmallows. This is a fun Easter dessert kids will love to help make!

    Easter will soon be here, and these little bunny cupcakes are so easy and fun, you’ll want to add them to your traditional Easter dinner menu.

    bunny tail cupcakes on muffin tin

    Why You’ll Love This Easter Dessert

    • This is a fun dessert for kids and young at heart.
    • Perfect recipe for toddlers and working on fine motor skills… Placing the marshmallows on the cupcakes will keep them entertained and busy for at least a little bit.
    • You can make regular sized cupcakes or mini cupcakes. Mini bunny tail cupcake bites are the perfect size dessert if you’re trying to watch what you eat but still want a bit of a sweet treat.
    • They involve chocolate, so that’s a win win dessert right there. Of course, you can make the cupcakes any flavor you like.

    Ingredients and Substitutions Notes:

    You’ll need a few ingredients to make this recipe…

    • Butter and Oil – I like to use salted butter and canola oil for this recipe.
    • Cane Sugar – You can also use granulated sugar.
    • All-Purpose Flour – I make these gluten-free, as well, and use my favorite gluten-free all-purpose flour; they turn out just as fluffy as regular cupcakes.
    • Unsweetened Cocoa Powder – I prefer Hershey’s Cocoa Powder, but you can use any brand you like.
    • Large Eggs
    • Baking Soda
    • Buttermilk – You can use a buttermilk mix, straight buttermilk from the store, or just sour regular milk by adding a tablespoon of vinegar to the measuring cup, then measure out the milk to the line for the amount you need.
    • Vanilla Extract – I love using this Mexican vanilla extract.
    • Powdered Sugar – You’ll need this to mix up the frosting.
    • Marshmallow Cream – This helps the mini marshmallows to stick to the top of the cupcakes.
    • Mini Marshmallows – These help give the appearance of a soft, fluffy bunny tail or bunny butt to the top of the cupcakes.

    How to Make Bunny Tail Cupcakes

    I like to use my grandma’s chocolate cake recipe. I also have a chocolate cupcake recipe that works quite well.

    Another option is to use a cake mix. I’m all for easy, so I totally get it, plus you can make any flavor you want.

    If you decide to make mini cupcakes, you’ll definitely need a mini muffin pan.

    Before you get starting mixing up the cupcake batter, pre-heat the oven to 350° F, and line your muffin pan/s with cupcake liners.

    Mix and Bake the Cupcakes

    1. In a large mixing bowl, whisk together the sugar, flour, and cocoa powder.
    2. In a medium saucepan, bring the butter, oil, and water to a boil.
    3. Then remove the mixture from the heat, and mix together with the flour mixture.
    4. In a separate bowl, dissolve the baking soda in the buttermilk by whisking together for a minute or so.
    5. Then beat the eggs in with that buttermilk mixture.
    6. Add the egg mixture and vanilla extract to the flour mixture in the mixing bowl, and mix well.
    7. Pour the cupcake batter into the prepared muffin pan/s, and bake at 350° for about 15-20 minutes, or until a toothpick inserted in the center of a cupcake comes out clean.
    8. Let the cupcakes cool in the pan for about 10 minutes before removing to a wire rack to cool completely.
    Bunny Tail Cupcake Bites make the cutest Easter treats. And they involve chocolate, so that's a win win Easter dessert right there. Print the recipe with instructions for how to make mini marshmallows look like a fluffy bunny tail.

    Make the Frosting

    While your cupcakes are baking, mix up the frosting.

    1. In a medium mixing bowl, whisk together the powdered sugar and cocoa powder. Set aside.
    2. In a medium saucepan, melt the butter into the buttermilk, but do not boil. Remove from the heat when all the butter has melted.
    3. Then beat in the powdered sugar mixture ’til you have a spreadable consistency for frosting.
    4. Whisk in the vanilla extract, and it’s ready to go.

    How to Decorate Bunny Tail Cupcakes

    1. Once your cupcakes have baked and cooled, frost to whatever thickness you prefer.
    2. Then apply a thin layer of marshmallow cream; it’s ok if the marshmallow cream mixes just a bit with the chocolate frosting. This mixture will allow the mini marshmallows to really adhere to the top of the cupcake without sliding off.
    3. Slice or tear each mini marshmallow in half.
    4. Place the marshmallows all over the top of each frosted cupcake, adding more marshmallow halves ’til the top of each cupcake is covered, resembling a fluffy bunny tail.
    Easter bunny tail cupcake with mini marshmallows on muffin tin

    And that’s it. They are so cute and perfect for the Easter holiday with family and friends.

    fluffy chocolate bunny tail cupcakes topped with mini marshmallows on muffin tin and teal and white polka dot paper

    Expert Tips and Recipe FAQ’s

    How should I store bunny tail cupcakes?

    If you have leftovers, store them in an airtight container in the fridge. They’ll keep better in the fridge, though they’ll likely only last about 3-4 days before going stale.

    Do I have to frost the cupcakes?

    No, you don’t. You can just use marshmallow cream if you want. However, you do need marshmallow cream, no matter what, to help the marshmallows stick to the cupcake tops; I’ve found it works the best to keep them from sliding off.

    bunny butt tail cupcakes made with mini marshmallow topping on muffin tin and green and brown polka dot paper

    More Easter Recipes

    Here are a few more Easter recipes you’ll enjoy…

    If you try this recipe, why not leave a star rating in the recipe card right below and/or a review in the comment section further down the page? I always appreciate your feedback. You can also follow me on Pinterest, Facebook, Instagram, and YouTube. And subscribe to my email list too!

    Bunny Tail Cupcakes

    How to make easy, adorable bunny tail cupcakes with chocolate cupcakes, frosting, and mini marshmallows. Fun Easter dessert kids will love!

    • Muffin Tins
    • Cupcake Liners

    Cupcakes:

    • 2 cups cane sugar
    • 2 cups all-purpose flour
    • 1/4 cup unsweetened cocoa powder
    • 1/2 cup salted butter
    • 1/2 cup canola oil
    • 1 cup water
    • 1 1/2 teaspoons baking soda
    • 1/2 cup buttermilk
    • 2 large eggs
    • 1 teaspoon vanilla extract

    Frosting:

    • 5 1/2 to 6 cups powdered sugar
    • 1/4 cup unsweetened cocoa powder
    • 8 tablespoons salted butter (softened)
    • 1/2 cup buttermilk
    • 1 teaspoon vanilla extract
    • 1 cup marshmallow cream
    • 4 cups mini marshmallows

    Mix and Bake the Cupcakes:

    1. Pre-heat the oven to 350° F, and line muffin tin/s with cupcake liners.

    2. In a large mixing bowl, whisk together the sugar, flour, and cocoa powder.

    3. In a medium saucepan, bring the butter, oil, and water to a boil.

    4. Then remove the mixture from the heat, and mix together with the flour mixture.

    5. In a separate bowl, dissolve the baking soda in the buttermilk by whisking together for a minute or so.

    6. Then beat the eggs in with that buttermilk mixture.

    7. Add the egg mixture and vanilla extract to the flour mixture in the mixing bowl, and mix well.

    8. Pour the cupcake batter into the prepared muffin pan/s, and bake at 350° for about 15-20 minutes, or until a toothpick inserted in the center of a cupcake comes out clean.

    9. Let the cupcakes cool in the pan for about 10 minutes before removing to a wire rack to cool completely.

    Make the Frosting:

    1. In a medium mixing bowl, whisk together the powdered sugar and cocoa powder. Set aside.

    2. In a medium saucepan, melt the butter into the buttermilk, but do not boil. Remove from the heat when all the butter has melted.

    3. Then beat in the powdered sugar mixture 'til you have a spreadable consistency for frosting.

    4. Whisk in the vanilla extract, and it's ready to go.

    How to Decorate Bunny Tail Cupcakes:

    1. Once your cupcakes have baked and cooled, frost to whatever thickness you prefer.

    2. Then apply a thin layer of marshmallow cream; it's ok if the marshmallow cream mixes just a bit with the chocolate frosting. This mixture will allow the mini marshmallows to really adhere to the top of the cupcake without sliding off.

    3. Slice or tear each mini marshmallow in half.

    4. Place the marshmallows all over the top of each frosted cupcake, adding more marshmallow halves 'til the top of each cupcake is covered, resembling a fluffy bunny tail.

    *You can also make mini cupcakes by using a mini muffin pan.

    If you have leftovers, store them in an airtight container in the fridge. They’ll keep better in the fridge, though they’ll likely only last about 3-4 days before going stale.

    Desserts, Easter
    American
    bunny tail cupcake bites, bunny tail cupcakes, Easter cupcakes
  • Little Debbie Valentine Snack Cakes

    Little Debbie Valentine Snack Cakes

    Learn how to make a copycat version of sweet Little Debbie Valentine snack cakes. Heart shaped cakes are layered with a vanilla white creme filling inside and covered with a pink shell on the outside. They’re the perfect treat for a Valentine’s Day party!

    Little Debbie Valentine Cakes… Who doesn’t love these scrumptious little cakes covered in a sweet pink shell?

    copycat Little Debbie Valentine snack cakes on wire rack and white cupcake stand

    Along with Christmas Tree Cakes, these heart snack cakes are one of my favorite Little Debbie treats. I say treat because they are an every once in a while treat, something to look forward to.

    That being said, my boys have been trying to get me to try making more than a few Little Debbie copycat recipes for not just one but a few of our favorite Little Debbie treats. Since Valentine’s Day is right around the corner, what better time to try making Little Debbie Be My Valentine Snack Cakes than now?

    If you’re looking for more heart shaped treats, you’ll love these heart shaped chocolate chip pancakes and heart shaped Rice Krispie treats. Pack up your Valentines in a sweet dinosaur Valentine’s Day box.

    Ingredient Notes:

    Let’s talk about a few of the ingredients…

    • Cake Mix – While I prefer to use cherry chip cake mix because it gives a slightly pink tone to the cakes and I love the flavor of cherry chip, you can use any flavor you want. White cake mix or strawberry cake mix are a couple of yummy options that come to mind. You can even make Little Debbie Valentine chocolate cakes; use a chocolate cake mix or use this homemade chocolate cupcakes recipe for a moist chocolate snack cake.
    • Cream Cheese – I recommend using full fat cream cheese vs. low fat.
    • Butter – Use real salted butter rather than margarine; margarine will change the texture and outcome of your cakes.
    • Marshmallow Fluff – You can use any marshmallow cream, but I love actual Fluff brand. Holy cow, the creamy factor that Marshmallow Fluff adds to frosting is ah-mazing.
    • Candy Melts – If making pink Valentine’s Day Little Debbie cakes, you’ll want pink and white candy melts… Pink for the coating, white for the little decorative dribbles on top.
    Little Debbie Valentine cakes copycats on white cupcake stand

    How to Make Little Debbie Valentine Snack Cakes

    I had to think about this recipe for quite a while before attempting to make it; if you think of it like cupcakes, it’s really pretty simple to make.

    First, Make Heart Shaped Cakes:

    1. Mix the cake mix according to the package directions.
    2. Spray a heart shaped mini cakes pan with cooking spray. Then fill the heart shapes in the pan with batter, about 2/3 of the way full.
    3. Bake according to package directions for cupcakes, or until a toothpick inserted in the center of the cakes comes out clean.
    4. Remove the cakes from the pan and let cool on a wire rack.

    Next Mix the Filling:

    1. Mix together the cream cheese, butter, and vanilla.
    2. Add the powdered sugar, mixing well.
    3. Then add in Marshmallow Fluff, making sure all the ingredients are mixed.
    4. Once the cakes have cooled, slice them in half horizontally, add a layer of creme, and sandwich them back together.
    heart snack cakes sliced in half on white cupcake stand

    Now Coat the Snack Cakes:

    1. Melt the pink candy melts, according to package directions. Note: It can be difficult to shake excess candy coating off the cakes as you’re dipping and rolling, and the coating may need to be just a bit thinner; it may help to add a tablespoon of shortening to it during the melting process.
    2. Gently dip (or roll) the cake sandwiches, one at a time, in the melted candy coating.
    3. Set each dipped cake on wax paper. You may need to spoon a bit of candy coating on top of each cake once you’ve set it on the wax paper.
    4. Once all the heart cakes have been coated, allow them to chill in the refrigerator until the coating has hardened.
    5. Then melt the white candy melts, according to package directions.
    6. Drizzle over the top of each cake in whatever pattern you desire. I used a bottle with a cake tip for this step.
    7. Again, allow to chill until the candy coating has fully hardened.

    These sweet little snack cakes were a hit with my boys, which is really what mattered. The cakes were gone in no time.

    pink Valentine's Day Little Debbie cakes on white cupcake stand and tan countertop

    More Valentine’s Day Recipes

    If you try this recipe, why not leave a star rating in the recipe card right below and/or a review in the comment section further down the page? I always appreciate your feedback. You can also follow me on Pinterest, Facebook, Instagram, and YouTube. And subscribe to my email list too!

    Be My Valentine snack cakes on white cupcake stand

    Little Debbie Valentine Snack Cakes

    How to make a copycat version of Little Debbie Valentine snack cakes, pink heart shaped cakes layered with a vanilla white creme filling.

    • Heart Shaped Muffin Pan

    Cake –

    • 15.25 ounces Cherry Chip cake mix
    • 1 cup water
    • 1/2 cup canola oil
    • 3 large eggs

    Filling –

    • 8 ounces cream cheese (softened)
    • 3 tablespoons salted butter (softened)
    • 1/4 teaspoon vanilla extract
    • 2 cups powdered sugar
    • 1/3 cup Marshmallow Fluff

    Coating –

    • 12 ounces pink candy melts
    • 12 ounces white candy melts

    Cake –

    1. Mix the cake mix according to the package directions.

    2. Spray the pan with cooking spray. Then fill the heart shapes in the pan with batter, about 2/3 of the way full.

    3. Bake according to package directions for cupcakes, or until a toothpick inserted in the center of the cakes comes out clean.

    4. Remove the cakes from the pan and let cool on a wire rack.

    Filling-

    1. Mix together the cream cheese, butter, and vanilla.

    2. Add the powdered sugar, mixing well.

    3. Then add in Marshmallow Fluff, making sure all the ingredients are mixed.

    4. Once the cakes have cooled, slice them in half horizontally, add a layer of creme, and sandwich them back together.

    Coating –

    1. Melt the pink candy melts, according to package directions. See Notes below.

    2. Gently dip (or roll) the cake sandwiches, one at a time, in the melted candy coating.

    3. Set each dipped cake on wax paper. You may need to spoon a bit of candy coating on top of each cake once you've set it on the wax paper.

    4. Once all the heart cakes have been coated, allow them to chill in the refrigerator until the coating has hardened.

    5. Then melt the white candy melts, according to package directions.

    6. Drizzle over the top of each cake in whatever pattern you desire. I used a bottle with a cake tip for this step.

    7. Again, allow to chill until the candy coating has fully hardened.

    8. Store the pink heart snack cakes in the refrigerator until ready to serve.

    It can be difficult to shake excess candy coating off the cakes as you’re dipping and rolling, and the coating may need to be just a bit thinner; it may help to add a tablespoon of shortening to it during the melting process.

    Desserts
    American
    Be My Valentine snack cakes, heart snack cakes, Little Debbie copycat recipe, Little Debbie heart cakes, Little Debbie Valentine cakes, Little Debbie Valentine heart cakes, Little Debbie Valentine snack cakes, Valentine snack cakes, Valentine’s Day Little Debbie cakes
  • Lemon Poke Cake (without the Pudding)

    Lemon Poke Cake (without the Pudding)

    It’s funny, creating this recipe kinda happened by accident. I was actually making my grandma’s lemon poke cake recipe, and I thought I had all the right ingredients. I’d even remembered to pick up the cake mix, which is usually the one thing I forget.

    Not so. This time I forgot to get a lemon pudding mix. Not to be deterred, I decided to make it anyway, only in a slightly different way. My guys ended up loving this lemon poke cake, claiming it’s one of the best cakes I’ve made in awhile. 

    Grab the recipe for a lemon poke cake without any pudding mix. Cake mix recipe inspired by Grandma’s lemon cake. So scrumptious!

    Ok, so I’ll be honest. Any lemon cake, especially this lemon cake, is even better the next day. Aging an extra day suits a good lemon cake. So, if you can hold out, I recommend making it the night before and enjoying the next day. Just my two cents.

    Grab the recipe for a lemon poke cake without any pudding mix. Cake mix recipe inspired by Grandma’s lemon cake. So scrumptious!

    Instead of an instant pudding mix and water, I decided to substitute lemon juice and a lemon extract we had on hand. Now, here I could have kicked myself again because if I’d been thinking clearly, I would have used my Lemon essential oil. But I wasn’t, so extract it was. Hey, it still turned out to be a very scrumptious cake.


    It is a bit of a heavier cake, so a small slice will do. I could have almost made this in a bundt pan, as the texture really reminded me of a pound cake. A regular 13×9 pan will do, though.

    Grab the recipe for a lemon poke cake without any pudding mix. Cake mix recipe inspired by Grandma’s lemon cake. So scrumptious!

    Grab the printable recipe, start mixing, and enjoy!

    Lemon Poke Cake (without the Pudding)

    Grab the recipe for a lemon poke cake without any pudding mix. Cake mix recipe inspired by Grandma’s lemon cake. So scrumptious!

    Cake:

    • 1 yellow cake mix
    • 4 eggs
    • 3/4 cup lemon juice
    • 3/4 cup canola oil
    • 1 tbsp. lemon extract (or you can substitute a smaller amount of Lemon essential oil)

    Icing:

    • 2 cups powdered sugar
    • Juice of 2 lemons (or about 6 tbsp. lemon juice)
    1. Mix cake mix, eggs, and lemon juice, beating for 2 minutes. Add canola oil and lemon extract, and beat for another 2 minutes.
    2. Bake at 350° for about 30-40 minutes in loaf, bundt, or cake pan (I used a 13×9 pan).
    3. While cake is baking, mix up icing.
    4. When cake is done and while still hot, prick with fork all over.
    5. Spoon on icing, spreading over entire cake.
    6. Serve and enjoy!
    Cakes & Cupcakes
    American
    lemon cake without pudding, lemon poke cake

    Can’t make it just yet? Pin it for later!

    Grab the recipe for a lemon poke cake without any pudding mix. Cake mix recipe inspired by Grandma’s lemon cake. So scrumptious!
  • How to Make Truffula Tree Cake Pops

    How to Make Truffula Tree Cake Pops

    Inspired by Dr. Seuss’ The Lorax, make your own Truffula Tree Cake Pops, using cotton candy. Just in time for Earth Day or even a fun snack to add to your list of Dr. Seuss birthday party ideas. Scrumptious too!

    If you’ve watched Dr. Seuss’ The Lorax, you’ve seen those beautiful, colorful, cloud-like Truffula Trees. Well, back when I was in my cake pop making craze, I racked my brain for a creative cake pop idea. That’s when I remembered Earth Day…. and then I thought of The Lorax and how perfect Truffula Tree cake pops would be for this occasion. So, I set out to try to create these whimsical trees, in cake pop form.

    Inspired by Dr. Seuss’ The Lorax, make your own Truffula Tree Cake Pops, using cotton candy. Just in time for Earth Day or even a fun snack to add to your list of Dr. Seuss birthday party ideas. Scrumptious too!

    The process is quite simple, really. Anyone could make these. Below, you’ll find a printable recipe for the chocolate cake pops. The first step was to mix up my cake pop dough and heat up my Babycakes Cake Pop Maker. I chose to go the easy route in actually baking these cake pops, since I wasn’t sure how my process of creating the bushy trees would go.

    You’ll need a few supplies, including the following:
    Inspired by Dr. Seuss’ The Lorax, make your own Truffula Tree Cake Pops, using cotton candy. Just in time for Earth Day or even a fun snack to add to your list of Dr. Seuss birthday party ideas. Scrumptious too!

    • Cake pop dough (follow my recipe below)
    • Pastry bag
    • Candy Melts (I recommend Wilton)
    • Paper Straws
    • Cotton Candy (in as many colors as you can find)

    After mixing the dough, add a bit of dough to a pastry bag, which I’ve found to be the easiest way to add dough to the reservoirs in the cake pop maker. Follow your cake pop maker’s instructions for baking the cake balls. When the cake balls are baked, let cool on a paper towel. Once they’ve cooled, place on a cookie sheet in the freezer for about 10 minutes or until chilled well.

    Now it’s time for decorating. Dip a paper straw in melted candy melts, and insert the straw into a cake ball. Continue to dip the cake pop in the candy melts until coated well.

    Inspired by Dr. Seuss’ The Lorax, make your own Truffula Tree Cake Pops, using cotton candy. Just in time for Earth Day or even a fun snack to add to your list of Dr. Seuss birthday party ideas. Scrumptious too!
    Inspired by Dr. Seuss’ The Lorax, make your own Truffula Tree Cake Pops, using cotton candy. Just in time for Earth Day or even a fun snack to add to your list of Dr. Seuss birthday party ideas. Scrumptious too!
    Inspired by Dr. Seuss’ The Lorax, make your own Truffula Tree Cake Pops, using cotton candy. Just in time for Earth Day or even a fun snack to add to your list of Dr. Seuss birthday party ideas. Scrumptious too!

    Place the cake pop in a stand, and prepare a piece of cotton candy by pulling it and stretching it apart just a bit. Then wrap the cake pop while candy coating is still fresh. The cotton candy will stick to the candy coating and become your very own Truffula Tree. Be aware that the cotton candy will dry out and begin to harden when left out for a longer period of time; so you’d probably want to complete the steps of coating your cake pops and wrapping in cotton candy right before your party or event.

    Inspired by Dr. Seuss’ The Lorax, make your own Truffula Tree Cake Pops, using cotton candy. Just in time for Earth Day or even a fun snack to add to your list of Dr. Seuss birthday party ideas. Scrumptious too!

    These turned out so cute, and my boys absolutely loved them. They’d be perfect for an Earth Day celebration or even that next birthday party.

    Below you’ll find a printable recipe. Enjoy!

    Like this recipe? Go ahead and Pin it!


    Chocolate Truffula Tree Cake Pops

    Inspired by Dr. Seuss’ The Lorax, make your own Truffula Tree Cake Pops, using cotton candy. Just in time for Earth Day or even a fun snack to add to your list of Dr. Seuss birthday party ideas.

    • 1 chocolate cake mix
    • 2 eggs
    • 1 pkg. chocolate pudding mix
    • 1/2-1 cup milk (in place of water on cake mix pkg.)
    • 1 bag candy melts
    • 6 cups cotton candy
    1. Mix all ingredients together, making sure your batter is fairly stiff, about the consistency of brownie batter. Do not add oil to the mixture.
    2. When cake batter is ready, add a little bit at a time to a pastry bag; this will make for easier filling of the cooking reservoirs in the cake pop maker.
    3. Heat up the cake pop maker, and wait for the green light to show that it’s ready.
    4. Give a light coating of cooking spray to each cooking reservoir in the cake pop maker; fill each reservoir with about 1 tablespoon of cake batter, trying not to overfill. Lower the lid on your cake pop maker, latching it shut. Then wait approximately 4-6 minutes per batch of cake balls.
    5. Use a pot holder to lift the lid because it can be quite hot to the touch. Use the provided fork to lift each cake ball out of the maker and onto a place to cool.
    6. Before decorating, place cake balls into the freezer for about 10 minutes.
    7. To decorate your cake balls as Truffula Trees, use candy melts and cotton candy. Melt the candy melts according to the directions on the package. Then remove cake balls from the freezer, and start decorating.
    8. Take a cake pop stick, dip it into the melted candy, and insert into the cake ball.
    9. Then dip each cake pop into the melted candy, coating well and allowing excess candy to drip before placing upright.
    10. Place each cake pop into a cake pop stand.
    11. Wrap your cake pops in cotton candy before the candy coating dries.
    12. Serve immediately after adding cotton candy and enjoy!
    Cakes & Cupcakes
    American
    chocolate cake pops, chocolate truffula tree cake pops, truffula tree cake pops

    Can’t make them just yet? Pin it for later!

    Inspired by Dr. Seuss’ The Lorax, make your own Truffula Tree Cake Pops, using cotton candy. Just in time for Earth Day or even a fun snack to add to your list of Dr. Seuss birthday party ideas. Scrumptious too!
  • Kid Recipes: Easy Minecraft Cake

    Kid Recipes: Easy Minecraft Cake

    That’s right! We have another Minecraft Cake for all you Minecraft fans. Only this time we added Oreos, cream cheese, and strawberries into the whole shebang.

    Hosting a Minecraft party? Celebrating with a Minecraft birthday? How to make an easy Minecraft cake with a simple cake mix recipe that doubles as a fun kid recipe. Add in Oreos, cream cheese, and strawberries. But be warned! It’s such a scrumptious cake, it will vanish into thin air!

    This particular cake is based on Cake from the Minecraft game. Jacob started talking about making it a little while ago, and we began to think about how we’d make this epic cake.

    Between this and the grass block Minecraft cake recipe, this one is my personal favorite. It’s so easy, and it’s so creamy delicious.

    The Oreos and the strawberries really make the cake. And let me tell you, it vanished into thin air.

    How do you make this cake? Well, the good thing is it’s super easy, and you really don’t need any special cake decorating supplies beyond a cake slicer/leveler, a knife for smoothing on the frosting, and (2) 9-inch cake pans, which you can pick up at just about any home or craft store, if you don’t already have them.

    Related Recipes: Minecraft Pig Birthday Cake and Minecraft cupcakes recipe.

    Hosting a Minecraft party? Celebrating with a Minecraft birthday? How to make an easy Minecraft cake with a simple cake mix recipe that doubles as a fun kid recipe. Add in Oreos, cream cheese, and strawberries. But be warned! It’s such a scrumptious cake, it will vanish into thin air!

    Making a Minecraft cake that’s easy to make was super important to me when making this cake. I wanted it to be a non-overwhelming, simple, easy cake that anyone could make in a heartbeat, perfect for a birthday, a Minecraft party, or any celebration. And honestly, you don’t even have to call it a Minecraft cake; for those who aren’t into Minecraft, it’s still really scrumptious.

    How to Make an Easy Minecraft Cake

    We used 2 Dark Chocolate Fudge cake mixes. Just bake both cakes according to the directions on the package.

    Hosting a Minecraft party? Celebrating with a Minecraft birthday? How to make an easy Minecraft cake with a simple cake mix recipe that doubles as a fun kid recipe. Add in Oreos, cream cheese, and strawberries. But be warned! It’s such a scrumptious cake, it will vanish into thin air!
    Hosting a Minecraft party? Celebrating with a Minecraft birthday? How to make an easy Minecraft cake with a simple cake mix recipe that doubles as a fun kid recipe. Add in Oreos, cream cheese, and strawberries. But be warned! It’s such a scrumptious cake, it will vanish into thin air!
    Hosting a Minecraft party? Celebrating with a Minecraft birthday? How to make an easy Minecraft cake with a simple cake mix recipe that doubles as a fun kid recipe. Add in Oreos, cream cheese, and strawberries. But be warned! It’s such a scrumptious cake, it will vanish into thin air!

    For the frosting, we mixed up a simple cream cheese frosting, then divided it in half. Half the icing was mixed with crushed Oreos. The Oreo cream cheese frosting goes between the two cakes as a middle layer of frosting. Add the top layer of cake, sandwiching the cake layers together. After smoothing a bit of the plain frosting onto the top sides of the cake, the other half of the frosting is mixed with strawberries. The strawberry cream cheese frosting goes on top of the cake to mimic the look of Cake.

    Kids can easily make this cake with the supervision and help of an adult. There’s really no neatness or perfection factor to how this cake should look… You can really just have fun with it.

    More chocolate cake recipes you may enjoy:

    Hosting a Minecraft party? Celebrating with a Minecraft birthday? How to make an easy Minecraft cake with a simple cake mix recipe that doubles as a fun kid recipe. Add in Oreos, cream cheese, and strawberries. But be warned! It’s such a scrumptious cake, it will vanish into thin air!

    Grab the printable recipe below and enjoy!

    Kid Recipes: Easy Minecraft Cake

    How to make an easy Minecraft cake with a simple cake mix recipe that doubles as a fun kid recipe. Add in Oreos, cream cheese, and strawberries. But be warned! It’s such a scrumptious cake, it will vanish into thin air!

    Cake:

    • 2 chocolate cake mixes
    • Other ingredients per cake mix box/directions

    Frosting:

    • 2 8- oz. boxes cream cheese
    • 4 tbsp. salted butter (softened)
    • 1/2 tsp. vanilla
    • 4 cups powdered sugar
    • 5-6 large strawberries (washed and sliced/chunked)
    • 12 Oreos (crushed)
    1. Mix cake mixes and bake according to package directions.
    2. When baked, allow cakes to cool completely.
    3. Use cake slicer/leveler to even out top of each cake square.
    4. Mix cream cheese, butter, vanilla, and powdered sugar to make frosting.
    5. Divide frosting in half.
    6. Add Oreos to half of frosting. Mix well.
    7. Add Oreo cream cheese frosting to top of one cake layer and spread evenly.
    8. Top with the second cake layer, so you now have a double-layer cake.
    9. Use a little bit of plain cream cheese frosting to smooth on the top sides of the cake.
    10. Add sliced/chunked strawberries to rest of frosting.
    11. Smooth strawberry cream cheese frosting onto top of cake.
    12. Keep chilled in refrigerator. Serve and enjoy!
    Cakes & Cupcakes
    American
    easy Minecraft cake, easy Minecraft cake recipe, minecraft cake

    Can’t make it just yet? Pin it for later!

    Hosting a Minecraft party? Celebrating a Minecraft birthday? How to make an easy Minecraft cake with a simple cake mix recipe that doubles as a fun kid recipe. Add in Oreos, cream cheese, and strawberries. But be warned! It’s such a scrumptious cake, it will vanish into thin air!
  • Lime Vanilla Poke Cake Cupcakes Recipe

    Lime Vanilla Poke Cake Cupcakes Recipe

    Learn how to make Lime Vanilla Poke Cake Cupcakes, kinda like Jello cake, with buttercream frosting. These scrumptious cupcakes bring just a hint of green for a festive St Patrick’s Day or any day really.

    My mom used to make poke cake, or Jello cake as we called it, every spring and summer. It seemed to be one of her favorite things to make, and all of us loved when she made it, especially when she made lemon poke cake.

    Jello cake (or poke cake) has always been one of my favorites. Learn how to make Lime Vanilla Poke Cake Cupcakes with buttercream frosting. These scrumptious cupcakes bring just a hint of green for a festive St Patricks Day or any day really.

    She’d pour cherry or strawberry Jello over the cake and top it off with whipped topping. Then she’d put it in the fridge and let it get ice cold. It was such a refreshing dessert and so scrumptious!

    With her cake in mind, I decided to kinda take a different twist and make poke cake cupcakes. I think these may become a regular favorite, because even my non sweets loving husband loved these.

    These cupcakes could be made any time of year with any flavor of Jello… though I did purposely use lime, so we could have green for St. Patrick’s Day. They’re super easy to make.

    Looking for more cupcake recipes? You may also enjoy these moist and fluffy chocolate cupcakes.

    I JUST WANT THE RECIPE! TAKE ME TO THE RECIPE FOR LIME VANILLA POKE CAKE CUPCAKES!

    If you’d rather skip all of my cooking tips, important cooking info for this recipe, and similar recipe ideas – and get straight to the scrumptious lime vanilla poke cake cupcakes recipe – just scroll down to the bottom, where you’ll find a printable recipe card.

    Jello cake (or poke cake) has always been one of my favorites. Learn how to make Lime Vanilla Poke Cake Cupcakes with buttercream frosting. These scrumptious cupcakes bring just a hint of green for a festive St Patricks Day or any day really.

    TIPS FOR HOW TO MAKE LIME VANILLA CUPCAKES

    Yes, you can make these homemade, but using a cake mix just saves time; it’s quick and easy.

    Once your cupcakes have baked, remove from the oven and let them sit for 10-15 minutes.

    Then poke the middle of each cupcake with a fork just a few times. Add 3-4 small spoons of Jello over the middle of each cupcake, being careful not to let it run down the sides; it actually will soak into the cupcake if you’ve used a fork to poke holes in it.

    It will give each cupcake a surprise green color in the middle, perfect for St. Patty’s Day.

    Jello cake (or poke cake) has always been one of my favorites. Learn how to make Lime Vanilla Poke Cake Cupcakes with buttercream frosting. These scrumptious cupcakes bring just a hint of green for a festive St Patricks Day or any day really.

    The lime combined with the vanilla is pretty yummy too.

    Finally, when the cupcakes have completely cooled, add the best buttercream frosting for a scrumptiously creamy dessert.

    Jello cake (or poke cake) has always been one of my favorites. Learn how to make Lime Vanilla Poke Cake Cupcakes with buttercream frosting. These scrumptious cupcakes bring just a hint of green for a festive St Patricks Day or any day really.

    Once they’re frosted, chill them in the fridge.

    Jello cake (or poke cake) has always been one of my favorites. Learn how to make Lime Vanilla Poke Cake Cupcakes with buttercream frosting. These scrumptious cupcakes bring just a hint of green for a festive St Patricks Day or any day really.

    When you’re ready for dessert, serve and enjoy!

    Jello cake (or poke cake) has always been one of my favorites. Learn how to make Lime Vanilla Poke Cake Cupcakes with buttercream frosting. These scrumptious cupcakes bring just a hint of green for a festive St Patricks Day or any day really.

    LIME VANILLA POKE CAKE CUPCAKES RECIPE

    If you love this lime vanilla poke cake cupcakes recipe as much as I do, please write a 5 star review, and help me share the recipe on Facebook and Pinterest!

    Jello cake (or poke cake) has always been one of my favorites. Learn how to make Lime Vanilla Poke Cake Cupcakes with buttercream frosting. These scrumptious cupcakes bring just a hint of green for a festive St Patricks Day or any day really.

    CONNECT WITH ADVENTURES OF MEL!

    Be sure to follow me on social, so you never miss a post!

    Facebook | Pinterest | YouTube | Instagram | Twitter

    Sign up to receive my newsletter, filled with delicious recipes and outdoor travel adventures, in your inbox:

    FREE EMAIL SUBSCRIPTION

    Lime Vanilla Poke Cake Cupcakes

    Learn how to make Lime Vanilla Poke Cake Cupcakes, kinda like Jello cake, with buttercream frosting. These scrumptious cupcakes bring just a hint of green for a festive St Patrick’s Day or any day really.

    Poke Cake Cupcakes:

    • 1 French Vanilla cake mix
    • 1 cup water (boiling)
    • 3 ounces Lime Jello
    • 1/2 cup water (cold)
    • 3 cups buttercream frosting
    1. Mix cake mix and bake according to package directions.
    2. When fully baked, remove from oven and let cool 15-20 minutes.
    3. Meanwhile, mix Jello with boiling water; then add cold water, mixing well.
    4. Poke top middle of each cupcake with fork, 4-5 times.
    5. Slowly pour 3-4 spoons of Jello mixture over middle of each cupcake, careful to not let it run over the sides.
    6. Allow cupcakes to finish cooling.
    7. Mix all ingredients for buttercream frosting.
    8. Top each cupcake with frosting.
    9. Chill cupcakes.
    10. Serve and enjoy!
    Cakes & Cupcakes
    American
    Jello cake, lime vanilla cupcakes, poke cake cupcakes
  • Pumpkin Pear Spice Cake Holiday Dessert Recipe

    Pumpkin Pear Spice Cake Holiday Dessert Recipe

    Pumpkin Pear Spice Cake includes just a few of my favorite ingredients.

    The holidays are a joyous time. Family, friends, holiday parties and get-togethers, delicious food, decadent holiday desserts.

    Pumpkin Pear Spice Cake is a scrumptious holiday dessert, perfect for Thanksgiving dinner. Get the recipe for this delicious, easy to make, sheet cake.

    A sheet cake is also a nice alternative to the traditional pumpkin roll or pumpkin pie. It adds a bit of variety, and I’d wager that it’s a bit easier or simpler to make too.

    I’m looking forward to making this again for Thanksgiving.

    Pumpkin Pear Spice Cake is a scrumptious holiday dessert, perfect for Thanksgiving dinner. Get the recipe for this delicious, easy to make, sheet cake.

    My boys have been begging me to make it again. There’s just something about the combination of flavors…

    Pumpkin Pear Spice Cake is a scrumptious holiday dessert, perfect for Thanksgiving dinner. Get the recipe for this delicious, easy to make, sheet cake.

    It’s a scrumptious dessert perfect for the holiday season.

    Below you’ll find a printable recipe. Enjoy and Happy Thanksgiving!

    Pumpkin Pear Spice Cake is a scrumptious holiday dessert, perfect for Thanksgiving dinner. Get the recipe for this delicious, easy to make, sheet cake.

    More pumpkin recipes you may enjoy:

    Pin the recipe for Pumpkin Pear Spice Cake!
    Pumpkin Pear Spice Cake is a scrumptious holiday dessert, perfect for Thanksgiving dinner. Get the recipe for this delicious, easy to make, sheet cake.

    Pumpkin Spice Pear Cake

    Pumpkin spice pear cake is a scrumptious holiday dessert, perfect for Thanksgiving dinner. Get the recipe for this delicious, easy to make, sheet cake.

    Cake:

    • 1 cup cane sugar
    • 2 large eggs
    • 1/2 cup pumpkin
    • 1 teaspoon lemon juice
    • 1/2 cup whole milk
    • 3 cups all-purpose flour
    • 2 teaspoons baking powder
    • 1 teaspoon baking soda
    • 1 teaspoon salt
    • 1 1/2 teaspoons pumpkin pie spice
    • 1 teaspoon ground cinnamon
    • 2 medium pears (washed, peeled, and diced)

    Frosting:

    • 8 ounces cream cheese (softened)
    • 2 tablespoons salted butter (softened)
    • 1/4 teaspoon vanilla extract
    • 1/4 teaspoon caramel extract
    • 2 cups powdered sugar
    • 24 mellowcreme candy pumpkins

    Cake:

    1. Pre-heat the oven to 375° F; grease and flour a 16×10 sheet cake pan.

    2. In a large mixing bowl, mix together the sugar, eggs, pumpkin, lemon juice, and milk.

    3. In a separate bowl, whisk together the dry ingredients, including the flour, baking powder, baking soda, salt, pumpkin pie spice, and cinnamon.

    4. Add the dry ingredients to the wet ingredients, mixing well.

    5. Add the diced pear to the mixture, mixing well.

    6. Spread the batter into the greased sheet cake pan, spreading it evenly in the pan.

    7. Bake at 375° F for 20-25 minutes, or until a toothpick, inserted in the center, comes out clean and cake begins to turn golden.

    8. Remove the cake from the oven, and allow it to cool completely.

    Frosting:

    1. Whisk the cream cheese and butter together 'til smooth and creamy.

    2. Add the vanilla extract, caramel extract, and powdered sugar to the cream cheese mixture, mixing everything together well.

    3. Spread the creamy frosting on top of the cooled cake.

    4. Slice the cake and add candy pumpkins to the top of each slice; then serve!

    Refrigerate the cake when not being served or eaten.

    Cakes & Cupcakes, Desserts
    American
    autumn recipes, cake recipes, cakes, fall recipes, pear cake, pumpkin cake, pumpkin pear cake, pumpkin pear spice cake, pumpkin spice pear cake, spice cake, Thanksgiving, Thanksgiving recipes
  • Moist and Delicious Chocolate Cake Recipe

    Moist and Delicious Chocolate Cake Recipe

    Did you know that today is National Chocolate Cake Day? Homemade chocolate cake has kinda been the bane of my kitchen existence over the past couple of years. You have no idea how many cake disasters I’ve had, trying to get the recipe right.

    This time I finally succeeded in both correctly deciphering Grandma’s recipe and in baking a moist, delicious chocolate cake. National Chocolate Cake Day, chocolate cake recipe, cake recipe, chocolate cake, homemade chocolate cake, chocolate dessert

    As it baked, I’ll tell you, I was a bit nervous; but oh boy, did I succeed this time. I’m really not trying to brag…. I’m just in shock and so excited that it finally turned out the way it should!

    Now, on the other end of things, chocolate cake has got to be one of the hardest things to photograph; I’d venture to say that it even trumps burgers and sandwiches for me in difficulty.

    But oh, does the taste make up for it. Sooooo moist, rich, and delicious, just like my favorite yellow cake. It only takes a little sliver of this bad boy to enjoy the chocolate fix you’ve been craving.

    National Chocolate Cake Day, chocolate cake recipe, cake recipe, chocolate cake, homemade chocolate cake, chocolate dessert, moist chocolate cake

    Grandma has a friend’s name written on this particular recipe, so I imagine Grandma sitting in that person’s kitchen copying down the recipe because she must have loved this cake.

    The recipe card is also well worn and used, signifying that it must have been a favorite.

    National Chocolate Cake Day, chocolate cake recipe, cake recipe, chocolate cake, homemade chocolate cake, chocolate dessert, moist chocolate cake, how to make chocolate cake

    Below you’ll find a printable recipe. This is most definitely one of the most delicious chocolate cakes I’ve made thus far…. it’s a treat to enjoy with family and friends, perfect for that potluck dinner.

    During the holiday season, serve a slice with a dollop of Peppermint Whipped Cream. Enjoy!

    National Chocolate Cake Day, chocolate cake recipe, cake recipe, chocolate cake, homemade chocolate cake, chocolate dessert, moist chocolate cake, dessert recipe

    Looking for more scrumptious cake recipes?

    Carrot Sheet Cake

    Peanut Butter Chocolate Cake

    Pumpkin Pear Spice Cake

    Deliciously Easy Lemon Cake

    Gooey Butter Cake

    Moist and Delicious Chocolate Cake

    Grandma's recipe for a delicious chocolate cake. A treat to enjoy with family and friends, perfect for a potluck dinner.

    Cake:

    • 8 tablespoons salted butter
    • 1/2 cup canola oil
    • 1 cup water
    • 2 cups granulated sugar
    • 2 cups all-purpose flour
    • 1/4 cup cocoa powder
    • 2 large eggs
    • 1 1/2 teaspoons baking soda
    • 1/2 cup buttermilk
    • 1 teaspoon vanilla extract

    Frosting:

    • 8 tablespoons salted butter
    • 1/2 cup buttermilk
    • 6 cups powdered sugar
    • 1 teaspoon vanilla extract
    • 1/4 cup cocoa powder (optional)
    • 1 cup chopped pecans (optional)
    1. Cake: Pre-heat oven to 350°. Grease cake pan/s.
    2. Bring 1 stick butter, oil, and water to a boil. Remove from heat and mix in sugar, flour, and cocoa powder.
    3. Beat eggs with baking soda “dissolved” in buttermilk or sour milk (make sour milk by combining milk with 1 tbsp. vinegar). Add this to mixture above, also adding in vanilla. Mix well.
    4. Pour batter into prepared cake pan/s. Bake at 350° for about 20-30 minutes or until toothpick inserted in center comes out clean. Let cake cool in pan for about 10 minutes before removal, if removing to frost.
    5. Frosting: Melt 1 stick butter with buttermilk or sour milk, but do not boil. Remove from heat.
    6. Beat in powdered sugar to right consistency; add vanilla, cocoa powder, and nuts, if desired.
    7. Once cakes have cooled, frost to desired thickness. Grandma’s recipe says to frost while warm, so I’m wondering if she made this in a bundt pan. I made 2 round cakes, so I waited ’til my cakes had cooled to frost.
    8. Serve and enjoy!
    Cakes & Cupcakes
    American
    chocolate cake

  • Easy Valentine Cake Pops

    Easy Valentine Cake Pops

    Learn how to make easy Valentine cake pops with the Babycakes cake pop maker. These treats on a stick make cute DIY bite-sized desserts, they’re the perfect recipe for kids, and they’re so much fun to make!

    When I started out to make these Valentine’s Day cherry chip cake pops, I wasn’t even sure how to go about making them ’til I did a little research. Now I’m thinking up all kinds of themes and ideas for cake pops, case in point, the Truffula Tree cake pops I made for Earth Day.

    Valentine cake pops in a cup, with a bite out, piping cake batter into cake pop maker, and Valentines cake pop with sprinkles

    There are a couple ways to make cake pops, including this how to make cake pops tutorial over on A Beautiful Mess; their cake pops look absolutely delicious.

    However, while at Michaels one night, I found the Babycakes Cake Pop Maker on sale, so I decided to snatch one up and start making cake pops. I started with these lovely Valentine’s Day cake pops.

    Ingredient and Supply Notes

    The first thing you want to do is gather all your supplies, including cake pop sticks and a cake pop holder.

    Paper straws and string for Valentine cake pop sticks and decoration
    • Cake Mix – You can use any flavor you like; I especially love cherry chip, but you can also make white, yellow, strawberry, chocolate, red velvet, etc. If you want pink or red Valentines cake pops, strawberry, cherry chip, or red velvet are the way to go.
    • Large Eggs
    • Vanilla Pudding Mix – Make sure it’s an instant pudding mix, not the cook type.
    • Whole Milk
    • Cooking Spray – to lightly spray the griddle in your cake pop maker.
    • Candy Melts and Sprinkles – for decorating. I especially love these dye free nonpareils from Watkins.
    • Cake Pop Sticks – You can find an abundance of super cute paper straws on Etsy; they work really well as cake pop sticks.
    • Cake Pop Stand You’ll need a cake pop holder to hold the cake pops while they set up after dipping. Wilton makes an affordable cake pop holder.
    • Babycakes Cake Pop Maker
    Babycakes cake pop maker with fork on wood cutting board

    How to Make Valentine Cake Pops

    There are 2 steps to making Babycakes cake pops… Baking and decorating.

    How to Bake Cake Pops

    1. Mix the cake mix with the eggs, pudding mix, and milk.
    2. Then add a little bit at a time to a pastry bag; this will make for easier filling of the cooking reservoirs in the cake pop maker.
    3. Heat up the cake pop maker, and wait for the green light to show that it’s ready.
    4. Give a light coating of cooking spray to each reservoir in the cake pop maker; then fill each cooking reservoir with about 1 tablespoon of cake batter, trying not to overfill. If you overfill, instead of a round cake pop “planet,” you might end up with “Saturn.” I love using the cake pop maker because it shapes the cake pops for you, as long as you fill the reservoirs appropriately.
    piping cherry chip cake pop batter into Babycakes cake pop maker
    1. Lower the lid on the cake pop maker, latching it shut. Now it’s just a waiting game, about 4-6 minutes per batch of cake pops. Definitely use a pot holder to lift the lid because it can be quite hot to the touch. When done, you should have nice, round cake pops.
    baked cherry chip cake balls in Babycakes cake pop maker
    1. The cake pop maker comes with a fork, so you can easily remove the cake pops and place them in a spot to cool.
    baked cherry chip cake balls cooling on paper towel

    How to Decorate Valentine’s Day Cake Pops

    To decorate your cake pops, use candy melts and sprinkles of your choice. I really like pink and white candy melts for Valentine’s Day.

    supplies and cake balls for making Valentine's Day cake pops on wood table
    1. Before decorating, it’s a good idea to place the cake pops in the freezer for just a few minutes; this helps to dip them easier without a crumbly mess.
    2. Melt the candy melts according to the directions on the package. I usually start at 1 minute, then stir and switch to 30 second intervals, stirring between every interval.
    3. Remove the cake pops from the freezer and start decorating. Take a cake pop stick, dip it in the melted candy, and insert it into the cake pop.
    inserting paper straw into cake ball for cake pop stick
    1. Then dip each cake pop into the melted candy, coating well, and allowing excess candy to drip before placing upright.
    dipping Valentines cake pops into melted white candy melts
    1. Decorate with any type of sprinkles you desire; I use different types of Valentine’s Day sprinkles and colored sugar.You can also alternate colors with the candy melts; I put a bit of the melted candy in pastry bags, so I can add decorative touches, like little swirls, here and there.
    pink Valentine's Day cake pop with tiny heart sprinkles on top
    white swirl decoration on pink Valentines cake pop
    1. Then place each cake pop into a cake pop holder. Let the cake pops dry, and then serve.
    decorated Valentine's Day cake pops in Wilton cake pop holder

    We’re usually not huge cake eaters, but my guys really liked these; each cake pop is such a small serving and makes a nice sweet treat.

    cherry chip Valentines cake pop with nonpareils and bite taken out of it

    Expert Tips and Recipe FAQ’s

    Confessional Tip: On my first try, my batter looked normal, but my cake pops were turning out to look like nipples (I’m not even kidding). So, off to experiment and try again; I eventually learned the batter needs to be almost as stiff as brownie batter. When it’s a stiff batter, it works like a charm!

    Why do you freeze or refrigerate cake pops before dipping?

    Cake pops can be soft and crumbly. So it helps to freeze them prior to dipping, so they dip more easily. It also helps the melted candy to set up faster, so you can decorate more efficiently and quickly.

    How early can you make cake pops before an event or party?

    You can make them a couple days in advance. Like cake, cake pops can lose their freshness, so I’d only make them 1-2 days in advance for best quality, flavor, and texture. They should last for 1-2 days at room temp and 5-7 days in the fridge.

    How should you store cake pops?

    Depending on ingredients used, you can store dipped cake pops in an airtight container at room temperature for 1-2 days. If you’re making them more in advance or with certain ingredients that require refrigeration, they need to go in the fridge; before you put them in the fridge, be sure to layer them on a paper towel or piece of parchment paper, in a single layer, in an airtight container. Then just remove them from the fridge a couple hours before the big event, so they can warm to room temp and soften.

    Valentine cake pops in red cup

    More Delicious Valentine’s Day Recipes

    Valentine’s Day is the perfect time for ideas, desserts, and sweet treats like these…

    These would be great served at a party or a celebration; they’re also fun just to get creative with, maybe share a few with your neighbors. Enjoy!

    If you try this recipe, why not leave a star rating in the recipe card right below and/or a review in the comment section further down the page? I always appreciate your feedback. You can also follow me on Pinterest, Facebook, Instagram, and YouTube. And subscribe to my email list too!

    Valentine Cake Pops

    How to make easy Valentine cake pops with the Babycakes cake pop maker. Cute DIY bite-sized desserts, perfect recipe for kids, fun to make!

    • Cake Pop Sticks
    • Cake Pop Stand
    • Babycakes Cake Pop Maker
    • 15.25 ounces cake mix (any flavor you like)
    • 2 large eggs
    • 3 ounces instant vanilla pudding mix
    • 3/4 cup whole milk (in place of water on cake mix pkg)
    • 12 ounces candy melts (any color)
    • 1/2 cup sprinkles

    How to Bake Cake Pops

    1. Mix the cake mix with the eggs, pudding mix, and milk.

    2. Then add a little bit of the batter at a time to a pastry bag; this will make for easier filling of the cooking reservoirs in the cake pop maker.

    3. Heat up the cake pop maker, and wait for the green light to show that it's ready.

    4. Give a light coating of cooking spray to each reservoir in the cake pop maker; then fill each cooking reservoir with about 1 tablespoon of cake batter, trying not to overfill. If you overfill, instead of a round cake pop “planet,” you might end up with “Saturn.” I love using the cake pop maker because it shapes the cake pops for you, as long as you fill the reservoirs appropriately.

    5. Lower the lid on the cake pop maker, latching it shut. Now it's just a waiting game, about 4-6 minutes per batch of cake pops. Definitely use a pot holder to lift the lid because it can be quite hot to the touch. When done, you should have nice, round cake pops.

    6. The cake pop maker comes with a fork, so you can easily remove the cake pops and place them in a spot to cool.

    How to Decorate Valentine's Day Cake Pops

    1. Before decorating, it's a good idea to place the cake pops in the freezer for just a few minutes; this helps to dip them easier without a crumbly mess.

    2. Melt the candy melts according to the directions on the package. I usually start at 1 minute, then stir and switch to 30 second intervals, stirring between every interval.

    3. Remove the cake pops from the freezer and start decorating. Take a cake pop stick, dip it in the melted candy, and insert it into the cake pop.

    4. Then dip each cake pop into the melted candy, coating well, and allowing excess candy to drip before placing upright.

    5. Decorate with any type of sprinkles you desire; I use different types of Valentine's Day sprinkles and colored sugar.You can also alternate colors with the candy melts; I put a bit of the melted candy in pastry bags, so I can add decorative touches, like little swirls, here and there.

    6. Then place each cake pop into a cake pop holder. Let the cake pops dry, and then serve.

    Confessional Tip: On my first try, my batter looked normal, but my cake pops were turning out to look like nipples (I’m not even kidding). So, off to experiment and try again; I eventually learned the batter needs to be almost as stiff as brownie batter. When it’s a stiff batter, it works like a charm!

    How should you store cake pops?

    Depending on ingredients used, you can store dipped cake pops in an airtight container at room temperature for 1-2 days. If you’re making them more in advance or with certain ingredients that require refrigeration, they need to go in the fridge; before you put them in the fridge, be sure to layer them on a paper towel or piece of parchment paper, in a single layer, in an airtight container. Then just remove them from the fridge a couple hours before the big event, so they can warm to room temp and soften.

    How early can you make cake pops before an event or party?

    You can make them a couple days in advance. Like cake, cake pops can lose their freshness, so I’d only make them 1-2 days in advance for best quality, flavor, and texture. They should last for 1-2 days at room temp and 5-7 days in the fridge.

    Desserts
    American
    Babycakes cake pop recipe, cherry chip cake balls, how to make valentine cake pops, Valentine cake pops, Valentine’s Day cake balls, Valentine’s Day cake pop recipe, Valentine’s Day cake pops, Valentines cake pops

    (Disclosure: I was not compensated or provided product, in any way, for this recipe.)

  • Gingerbread Loaf Recipe without Molasses

    Gingerbread Loaf Recipe without Molasses

    Grandma’s homemade gingerbread loaf recipe without molasses makes moist, soft cake full of the best spiced flavor. This classic quick bread is baked perfect for a holiday dessert!

    When I was a little girl, my mom would make gingerbread loaf, pull it out of the warm oven, and slather it with butter. I barely remember it, but I do remember it being really special, a homemade gingerbread treat.

    sliced gingerbread loaf recipe without molasses on wood cutting board

    One weekend I searched through my grandma’s recipe box, looking for gingerbread loaf cake, and I found just the recipe… A bit tattered, but definitely still readable and so very special because it looks like it’s been used quite a lot.

    slice of gingerbread loaf on wood cutting board beside Grandma's torn and tattered recipe

    What Is Gingerbread Loaf?

    When you think of gingerbread, you probably automatically think gingerbread cookies. This gingerbread loaf is essentially a gingerbread cake recipe without molasses, but in loaf form. Mom used to make it in a 9×13 cake pan too, so it can be either/or.

    Did you know it’s thought that gingerbread actually originated in Greece? There’s also history of it in China and then in Europe… But it was first made in Greece.

    And just for kicks and giggles, gingerbread houses first came along in Germany in the 16th century. Sometimes I find little historical facts like this fascinating.

    Why You’ll Love This Recipe

    There are definitely a few reasons to love this gingerbread loaf recipe without molasses…

    • You can serve it for breakfast or dessert. It’s great for both!
    • It’s delicious sliced with a simple dollop of butter spread into each slice.
    • It’s quick and easy to make, especially perfect for last minute.
    • This recipe makes 2 loaves, so you can eat one and gift the other.
    • When baked, it’s not too sweet, not too strong…. it makes a really delicious breakfast treat or snack.

    Ingredients and Substitutions Notes:

    You’ll need a handful of ingredients, most of which you probably already have in your pantry.

    • Butter – While I prefer to use unsalted butter when baking, you can also use salted. Just know that unsalted allows you to more easily control the amount of salt in the recipe.
    • Cane Sugar – You can also use granulated sugar.
    • Large Eggs – These are better used at room temperature.
    • Light Corn Syrup – While this is a gingerbread loaf recipe without molasses, I do use light corn syrup, which adds to the sweetness and gives a moister texture to the loaf cake. My grandma’s recipe calls for Ribbon Cane Syrup, and it seems to be a darker syrup but not quite as dark as molasses. However if you can’t find any, a good substitute is actually molasses or light corn syrup.
    • Buttermilk – I love using buttermilk for its leavening effect, especially when I’m making a recipe gluten-free. It really helps with rise, no matter what you’re baking. Now… If you don’t have buttermilk, you can easily make a substitute out of milk and vinegar. Just add a tablespoon of vinegar to a glass measuring cup; then fill up to the 1 cup line with milk. Give it a little stir, and allow it to sit for just a few minutes. This makes an excellent substitute for buttermilk.
    • All-Purpose Flour – I prefer to use an unbleached all-purpose flour, like King Arthur. If you’re making gluten-free gingerbread, I recommend using a quality gluten-free flour like my favorite, and add maybe 1/4 teaspoon of xanthan gum, as well.
    • Baking Soda and Salt – I recommend using a good sea salt, like Redmond.
    • Ground Spices – You’ll need ground ginger and ground allspice.

    How to Make This Gingerbread Loaf Recipe without Molasses

    Before you get started mixing up the batter, be sure to pre-heat the oven to 350° F and grease 2 loaf pans.

    1. First cream (which means mix) the softened butter and sugar together in a large bowl.
    mixing batter for homemade gingerbread
    1. Then beat in the eggs.
    2. Next add the corn syrup and the buttermilk, mixing everything together well.
    3. In a separate large bowl, sift or whisk together the dry ingredients, including the flour, baking soda, salt, ground ginger, and ground allspice.
    4. Add the dry ingredients to the creamed mixture, and mix well.
    sifting and adding dry ingredients to ginger loaf batter in mixing bowl
    1. Divide and spread the batter in the prepared loaf pans.
    gingerbread loaf batter in large and mini loaf pans
    1. Bake at 350° F for about 45 minutes, or ’til a toothpick inserted in the center of each loaf comes out clean.

    Serve gingerbread loaf with butter; it’s definitely best while warm.

    sliced ginger loaf with butter on wood cutting board

    We really enjoy this gingerbread loaf recipe. It’s not too sweet, not too strong; it makes a really delicious breakfast treat or snack.

    Expert Tips and Recipe FAQ’s

    How can you prevent dry bread or cake?

    This is the main reason this recipe calls for light corn syrup. It gives it more of a moist texture, rather than a dry, mealy crumb. Also, watch your bake time. Ovens can vary, so your ginger loaf cake may bake faster; it may not take 45 minutes. If over baked, it can turn out dry and crumbly.

    How do you store gingerbread loaf?

    Gingerbread loaf cake can sit out on the counter; there’s no need to refrigerate it. It should keep well for 2-3 days. But good luck keeping it that long, because in my house, it’s usually gone within a day. Gobbled up!

    Can you freeze ginger loaf?

    Yes, you totally can. You can make this ahead of time and freeze it. Just allow it to cool before wrapping in plastic wrap and aluminum foil, and place it in an airtight, freezer-friendly container or freezer bag. Then freeze. It should keep for up to 3 months in the freezer.

    Recipe Variations

    There are a few ways you can tweak this recipe to add more oomph, flavor, different textures, etc. Here are a few of those ways…

    • Put an icing or glaze on top. You can always drizzle a simple powdered sugar icing on top; maybe even add a little citrus flavor to the drizzle by squeezing in a bit of lemon juice or orange juice to the icing. Of course, you can also make a thinner form of cream cheese frosting to drizzle on top, as well. Yum!
    • Add walnuts or pecans to the batter; then sprinkle a few chopped nuts on top before baking.
    • Add chocolate chips to the batter before baking.
    • Mix raisins or dried cranberries into the batter before baking.
    • Add 1/2 teaspoon ground cinnamon to the dry ingredients when mixing.
    • Add a teaspoon or so of vanilla extract to the batter for more flavor.
    sliced gingerbread loaf recipe without molasses on wood cutting board

    More Quick Bread and Muffin Recipes

    And if you’re looking for more holiday recipe inspiration, check out my list of The Best Christmas Recipes for Your Holiday Celebrations.

    If you try this recipe, why not leave a star rating in the recipe card right below and/or a review in the comment section further down the page? I always appreciate your feedback. You can also follow me on Pinterest, Facebook, Instagram, and YouTube. And subscribe to my email list too!

    Gingerbread Loaf Recipe without Molasses

    Grandma's homemade gingerbread loaf recipe without molasses makes moist, soft cake full of the best spiced flavor. Classic quick bread!

    • Mixer
    • Loaf Pans
    • 1 cup unsalted butter (softened)
    • 1 cup cane sugar
    • 3 large eggs
    • 1 cup light corn syrup
    • 1 cup buttermilk
    • 3 cups all-purpose flour
    • 1 teaspoon baking soda
    • 1/4 teaspoon salt
    • 1 teaspoon ground ginger
    • 1/2 teaspoon ground allspice
    1. Pre-heat the oven to 350° F, and grease and flour 2 loaf pans.

    2. In a large mixing bowl, cream or mix together the softened butter and sugar.

    3. Beat in the eggs.

    4. Then add the corn syrup and buttermilk, mixing well.

    5. In a separate large bowl, whisk together the flour, baking soda, salt, ginger, and allspice.

    6. Add the dry ingredients to the creamed mixture, and mix well.

    7. Divide and spread the batter in the prepared loaf pans.

    8. Bake at 350° F for about 45 minutes, or 'til a toothpick inserted in the center of each loaf comes out clean.

    9. Serve while warm with a generous slather of butter.

    Breads & Muffins, Desserts
    American
    ginger loaf, ginger loaf cake, gingerbread cake recipe without molasses, gingerbread loaf, gingerbread loaf cake, gingerbread loaf recipe, gingerbread loaf recipe without molasses, homemade gingerbread
  • Cinnamon Streusel Coffee Cake with Pecans

    Cinnamon Streusel Coffee Cake with Pecans

    Bake up an easy to make cinnamon streusel coffee cake with pecans for breakfast or brunch. This praline coffee cake is moist, buttery, and topped with a crispy cinnamon sugar topping that can’t be beat.

    With holidays throughout the year, coffee streusel cake seems just the right recipe to make. This particular coffee cake recipe is from my grandma’s recipe box.

    slice of cinnamon streusel coffee cake topped with whipped cream on white plate with fork

    This brown sugar coffee cake is so delicious, and the batter is a thick, deliciously rich batter. It’s a delight for the senses as it bakes with its sweet, cinnamon smell wafting through the house, and a taste of heaven when it’s done.

    Why You’ll Love This Recipe

    • It’s super easy to make, and it bakes in about an hour.
    • The cake is buttery and moist, while the cinnamon sugar topping gives a crispy texture to the top of the cake. The cake pairs so well with that delightfully crispy topping.
    • You can eat it for dessert, or make it for breakfast or brunch. It’s perfect for both.
    • It’s an old-fashioned cinnamon coffee cake that’s especially perfect for Easter, Thanksgiving, and Christmas.
    • You can take it to a family get together or a church potluck.

    Why Is It Called Coffee Cake?

    Since the time that coffee was introduced to Europe in the 1600’s, Scandinavians liked to pair their coffee with things like sweet breads and cakes. However, the name ‘coffee cake’ really wasn’t commonly used until the late 1800’s.

    As Dutch and German immigrants came to the United States, bringing their cherished family recipes with them, coffee cake began to be very popular, especially on the East Coast.

    O&H Danish Bakery wrote a very fascinating and interesting history of coffee cake, where you can read more about this sweet breakfast treat and how it came to be.

    coffee cake with pecans and a streusel topping in red baking dish

    Ingredient Notes

    Most of the ingredients you probably already have on hand. Here are a few with notes…

    • Butter – I like to use unsalted butter for the cake and salted butter for the topping. Whatever you do, be sure to use real butter; don’t use margarine, as that will completely change the texture and flavor of your finished cake.
    • All-Purpose Flour – You can make this with regular all-purpose flour or a good gluten-free all-purpose flour. Just be sure if you do make it gluten-free that you also add a little xanthan gum, as well as check all of your other ingredients to make sure they’re truly gluten-free.
    • Evaporated Milk – You can use any brand of evaporated milk you happen to have.
    • Brown Sugar, Cinnamon, and Chopped Pecans – These 3 ingredients, along with the flour and butter, really give the topping the best flavor. In my opinion, they really make the recipe. While I love pecans in this coffee cake, if nuts aren’t your thing, that’s ok; go ahead and leave them out.

    How to Make Cinnamon Streusel Coffee Cake

    Before you get started, be sure to gather your ingredients. Then grease an 8×8 baking dish, and pre-heat the oven to 350° F.

    Also, keep in mind that you can double this recipe and make it in a 9×13 baking dish or a bundt pan, if you’re needing to feed a bigger crowd.

    Let’s Start with the Batter…

    1. Cream or mix together the unsalted butter and sugar in a large mixing bowl. Then add in the eggs and vanilla, mixing well ’til combined.
    2. Sift or whisk together the dry ingredients, including the flour, baking powder, baking soda, and salt.
    3. Mix together the evaporated milk and lemon juice in a liquid measuring cup.
    4. Add the dry ingredients to the butter/sugar/egg mixture, alternating with the milk mixture, beginning and ending with the dry ingredients.
    how to mix up cinnamon streusel coffee cake batter, using mixing bowl, sifter, and liquid measuring cup
    1. At this point, you’ll have a creamy, somewhat stiff, cake batter. Go ahead and set it aside for just a few minutes.
    cinnamon streusel coffee cake batter in KitchenAid mixing bowl with white rubber spatula

    Now for the Topping…

    1. Whisk together the brown sugar, cinnamon, and flour in a large mixing bowl.
    2. Add the chopped pecans and softened salted butter to the mixture, mixing ’til combined.
    3. Your mixture will be a crumbly mixture, perfect for crumbling onto the cake.
    mixing up coffee streusel cake topping in KitchenAid mixing bowl

    How to Layer a Praline Coffee Cake

    1. Sprinkle 1/3 of the topping mixture in the bottom of the greased baking dish.
    2. Cover with half the batter.
    3. Then crumble 1/3 more of the praline topping mixture.
    4. Scoop and spread the remaining batter on top of that.
    5. Finally, sprinkle on the remaining cinnamon sugar topping, and gently press it into the batter with your fingers.
    6. Bake the cake at 350° F for about 1 hour, or ’til a toothpick inserted in the center comes out clean. Let the cake stand and cool for about 10 minutes before serving.
    how to layer praline coffee cake in 8x8 baking dish, baked coffee cake in baking dish

    Expert Tips and Recipe FAQ’s

    What’s the difference between coffee cake and crumb cake?

    Coffee cake is more cake, less topping; crumb cake is more topping, less cake. Crumb cake has a much thicker topping on it.

    How can I keep streusel topping crunchy?

    This particular recipe has a crispy streusel topping. However, if warmed in the microwave, it could grow a bit soggy. I’d recommend re-heating it, covered in foil in the oven for a few minutes, before serving, if you want to serve it warm.

    Why does the streusel sink?

    As your coffee cake bakes, the streusel will sort of meld into the cake… Meaning some of it will actually melt and combine with the top of the cake. It’s made of things that melt together, including the butter, cinnamon, and sugar; and that’s ok. However, the flour is there to keep the whole thing from just melting down into the cake entirely, and that melding together, in my opinion, is what makes this cake taste even better.

    Can I make this cinnamon streusel cake ahead of time?

    Yes, in fact, you can mix up the batter and the topping, throw it all together according to the recipe; then cover your baking dish and place it in the fridge ’til you’re ready to bake it the next morning. If you’re actually baking it ahead of time, I would recommend baking it no more than 1 day in advance. Then just cover it and store it on the counter ’til you’re ready to serve it.

    Can I freeze coffee cake with pecans?

    Yes, you can. Just be sure to store it in an airtight container so it doesn’t get freezer burn.

    slice of brown sugar coffee cake on white plate with fork

    More Brunch Recipes to Enjoy:

    If you enjoy this praline coffee cake recipe, you’ll enjoy these recipes too.

    If you try this recipe, why not leave a star rating in the recipe card right below and/or a review in the comment section further down the page? I always appreciate your feedback. You can also follow me on Pinterest, Facebook, Instagram, and YouTube. And subscribe to my email list too!

    Cinnamon Streusel Coffee Cake with Pecans

    Easy to make cinnamon streusel coffee cake with pecans. Moist, buttery, and topped with a crispy cinnamon sugar topping.

    • 8×8 Baking Dish
    • Mixer
    • Liquid Measuring Cup

    Coffee Cake Batter:

    • 1/4 cup unsalted butter (softened)
    • 6 tablespoons cane sugar
    • 2 large eggs
    • 1/2 teaspoon vanilla extract
    • 1 1/2 cups all-purpose flour
    • 1 teaspoon baking powder
    • 1/4 teaspoon baking soda
    • 1/2 teaspoon salt
    • 1/2 cup evaporated milk
    • 1/2 tablespoon lemon juice

    Streusel Topping:

    • 3/4 cup light brown sugar
    • 1 1/2 teaspoons ground cinnamon
    • 6 tablespoons all-purpose flour
    • 1/4 cup chopped pecans
    • 1/4 cup salted butter (softened)
    1. Grease an 8×8 baking dish, and pre-heat the oven to 350° F.

    Coffee Cake Batter:

    1. Cream or mix together the unsalted butter and sugar in a large mixing bowl. Then add in the eggs and vanilla, mixing well 'til combined.

    2. In a separate bowl, sift or whisk together the dry ingredients, including the flour, baking powder, baking soda, and salt.

    3. Mix together the evaporated milk and lemon juice in a liquid measuring cup.

    4. Add the dry ingredients to the butter/sugar/egg mixture, alternating with the milk mixture, beginning and ending with the dry ingredients.

    5. At this point, you'll have a creamy, somewhat stiff, cake batter. Go ahead and set it aside for just a few minutes.

    Streusel Topping:

    1. Whisk together the brown sugar, cinnamon, and flour in a large mixing bowl.

    2. Add the chopped pecans and softened butter to the mixture, mixing 'til combined. The mixture will be a crumbly mixture, perfect for crumbling onto the cake.

    Layer the Cake:

    1. Sprinkle 1/3 of the topping mixture in the bottom of the greased baking dish.

    2. Cover with half the batter.

    3. Then crumble 1/3 more of the praline topping mixture.

    4. Scoop and spread the remaining batter on top of that.

    5. Finally, sprinkle on the remaining cinnamon sugar topping, and gently press it into the batter with your fingers.

    6. Bake the cake at 350° F for about 1 hour, or 'til a toothpick inserted in the center comes out clean. Let the cake stand and cool for about 10 minutes before serving.

    How can I keep streusel topping crunchy?
    This particular recipe has a crispy streusel topping. However, if warmed in the microwave, it could grow a bit soggy. I’d recommend re-heating it, covered in foil in the oven for a few minutes, before serving, if you want to serve it warm.

    Can I make this cinnamon streusel cake ahead of time?
    Yes, in fact, you can mix up the batter and the topping, throw it all together according to the recipe; then cover your baking dish and place it in the fridge ’til you’re ready to bake it the next morning. If you’re actually baking it ahead of time, I would recommend baking it no more than 1 day in advance. Then just cover it and store it on the counter ’til you’re ready to serve it.

    Can I freeze coffee cake with pecans?
    Yes, you can. Just be sure to store it in an airtight container so it doesn’t get freezer burn.

    Breakfast & Brunch, cakes, Desserts
    American
    brown sugar coffee cake, cinnamon streusel cake, cinnamon streusel coffee cake, coffee cake, coffee cake recipe, coffee cake with pecans, coffee streusel cake, old fashioned cinnamon coffee cake, praline coffee cake, streusel coffee cake recipe