Category: Most Popular

  • Old-Fashioned Homemade Chocolate Ice Cream

    Old-Fashioned Homemade Chocolate Ice Cream

    Learn how to make the best old-fashioned homemade chocolate ice cream (no eggs) recipe. This is an easy, machine churned recipe filled with delicious chocolaty flavor, just like the chocolate ice cream you remember as a kid, only better.

    While I love a good chocolate custard with eggs (like the kind Culver’s makes), since going on A2 dairy, I’ve learned how to make a ton of different ice cream flavors, raw milk chocolate ice cream being one of them, along with butterfinger ice cream, raw milk ice cream, Fruity Pebbles ice cream, and mint Oreo ice cream.

    white bowl with scoops of old-fashioned homemade chocolate ice cream and spoon

    Chocolate ice cream no eggs is easy to make, and it takes me back to that good, old-fashioned chocolate flavor chocolate ice cream used to have. It’s so, so good!

    Why You’re Going to Love It Too

    • Like I said, it’s really easy to make with only 7 ingredients needed, most of which you likely have in your pantry.
    • You can eat it soft serve or firm enough to put in a cone.
    • It’s got that good, old-fashioned chocolate flavor, thanks to good cocoa powder.
    • It’s a quick dessert recipe you can make in 30 minutes or less.
    • There will be leftovers. Unless you’re feeding a crowd, you’ll have plenty left over. I have a family of 5, and I actually make one batch of this to last a few days. Sometimes during the hotter months it goes a lot quicker; but we always have leftovers to store in the freezer and enjoy through the week.
    • You don’t just have to make it into ice cream. If you have a popsicle mold, you can pour the churned, soft serve ice cream into that mold and make homemade fudge bars.

    Ingredients and Substitutions Notes:

    What’s in this homemade chocolate ice cream no eggs version? Actually, the ingredients are really quite simple…

    • Unsweetened Cocoa Powder I like to use Hershey’s cocoa powder, mainly because I like the flavor and because it’s labeled gluten-free. You can also use a Dutch process cocoa powder, or even dark cocoa powder to make dark chocolate ice cream.
    • Cane Sugar – You can also use granulated sugar.
    • Light Brown Sugar This just adds to that good, old-fashioned chocolate flavor.
    • Whole Milk – While I like to use raw milk, you can use store bought milk too. You can use whole milk, 2% milk, or 1% milk. I do, however, recommend sticking with whole milk, because it will make your ice cream more creamy.
    • Heavy Cream – Again, while I use cream I skim off our milk, you can buy heavy whipping cream at the store and substitute that if needed. You could probably also use half-and-half, but just keep in mind, your ice cream won’t be as creamy as it will with heavy cream.
    • Vanilla Extract – My favorite vanilla is this Mexican vanilla. It has superior flavor and makes everything I use it in absolutely delicious.
    • Sea Salt – While you can use regular table salt, I love the flavor and the “real” of Redmond Sea Salt.

    How to Make Old-Fashioned Homemade Chocolate Ice Cream

    Before you start to mix this up, be sure to pre-freeze the ice cream canister that goes with your ice cream maker; if you don’t, your ice cream won’t freeze.

    I usually just wash mine after using, then store it, covered with wrap, in the freezer. That way it’s always frozen and ready to go. (Oh, how I wish Cuisinart would make a lid for our ice cream canisters, don’t you? It’s my one wish for this ice cream maker.)

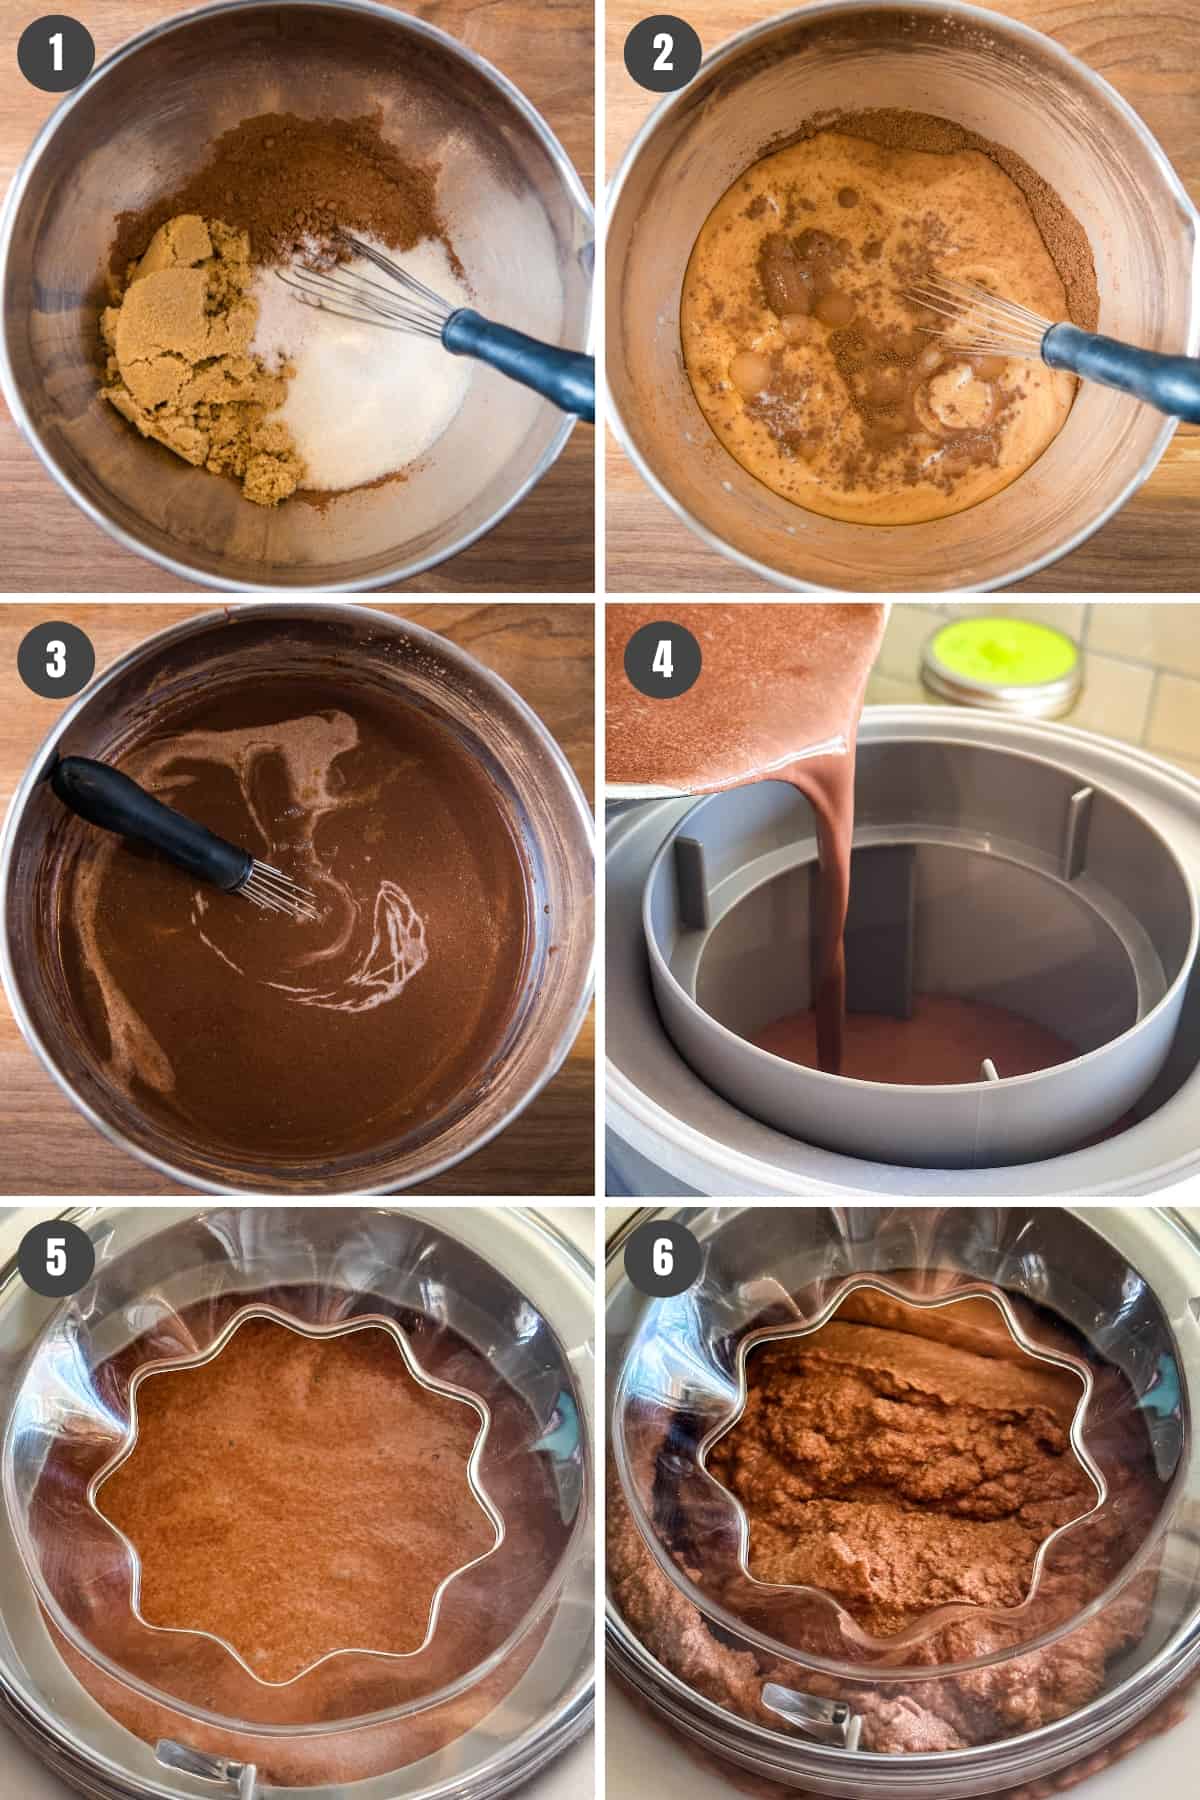
    How to Mix It and Freeze It

    1. In a large mixing bowl, whisk together the cocoa powder, sugar, brown sugar, and salt.
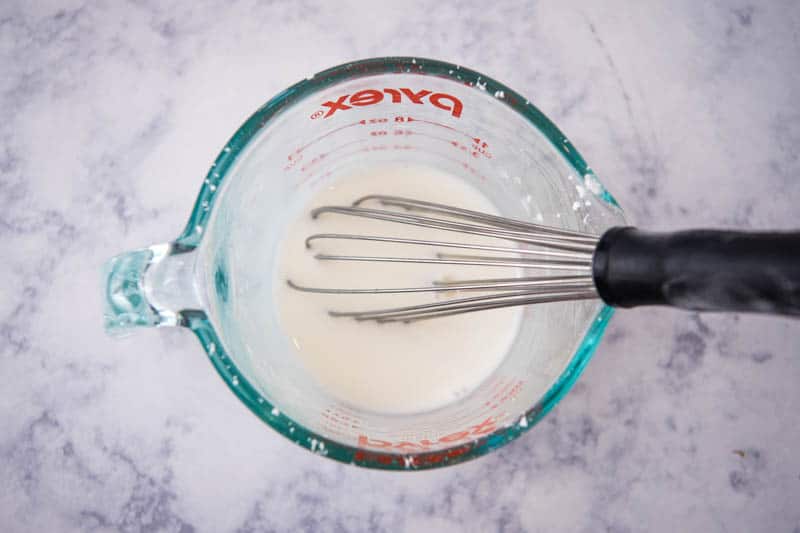
    2. Whisk in the whole milk, mixing ’til the sugars and cocoa powder dissolve, about 1-2 minutes. (This step is important; I usually recommend extra whisking, just to make sure your ice cream isn’t grainy. You want all of the sugars and cocoa powder to dissolve in the milk.)
    3. Whisk in the cream and vanilla extract.
    4. Turn on the ice cream freezer, and pour the mixture into the freezer bowl with the churn paddle in place.
    5. Then place the cover on top, and let it mix ’til it thickens, about 20-25 minutes.
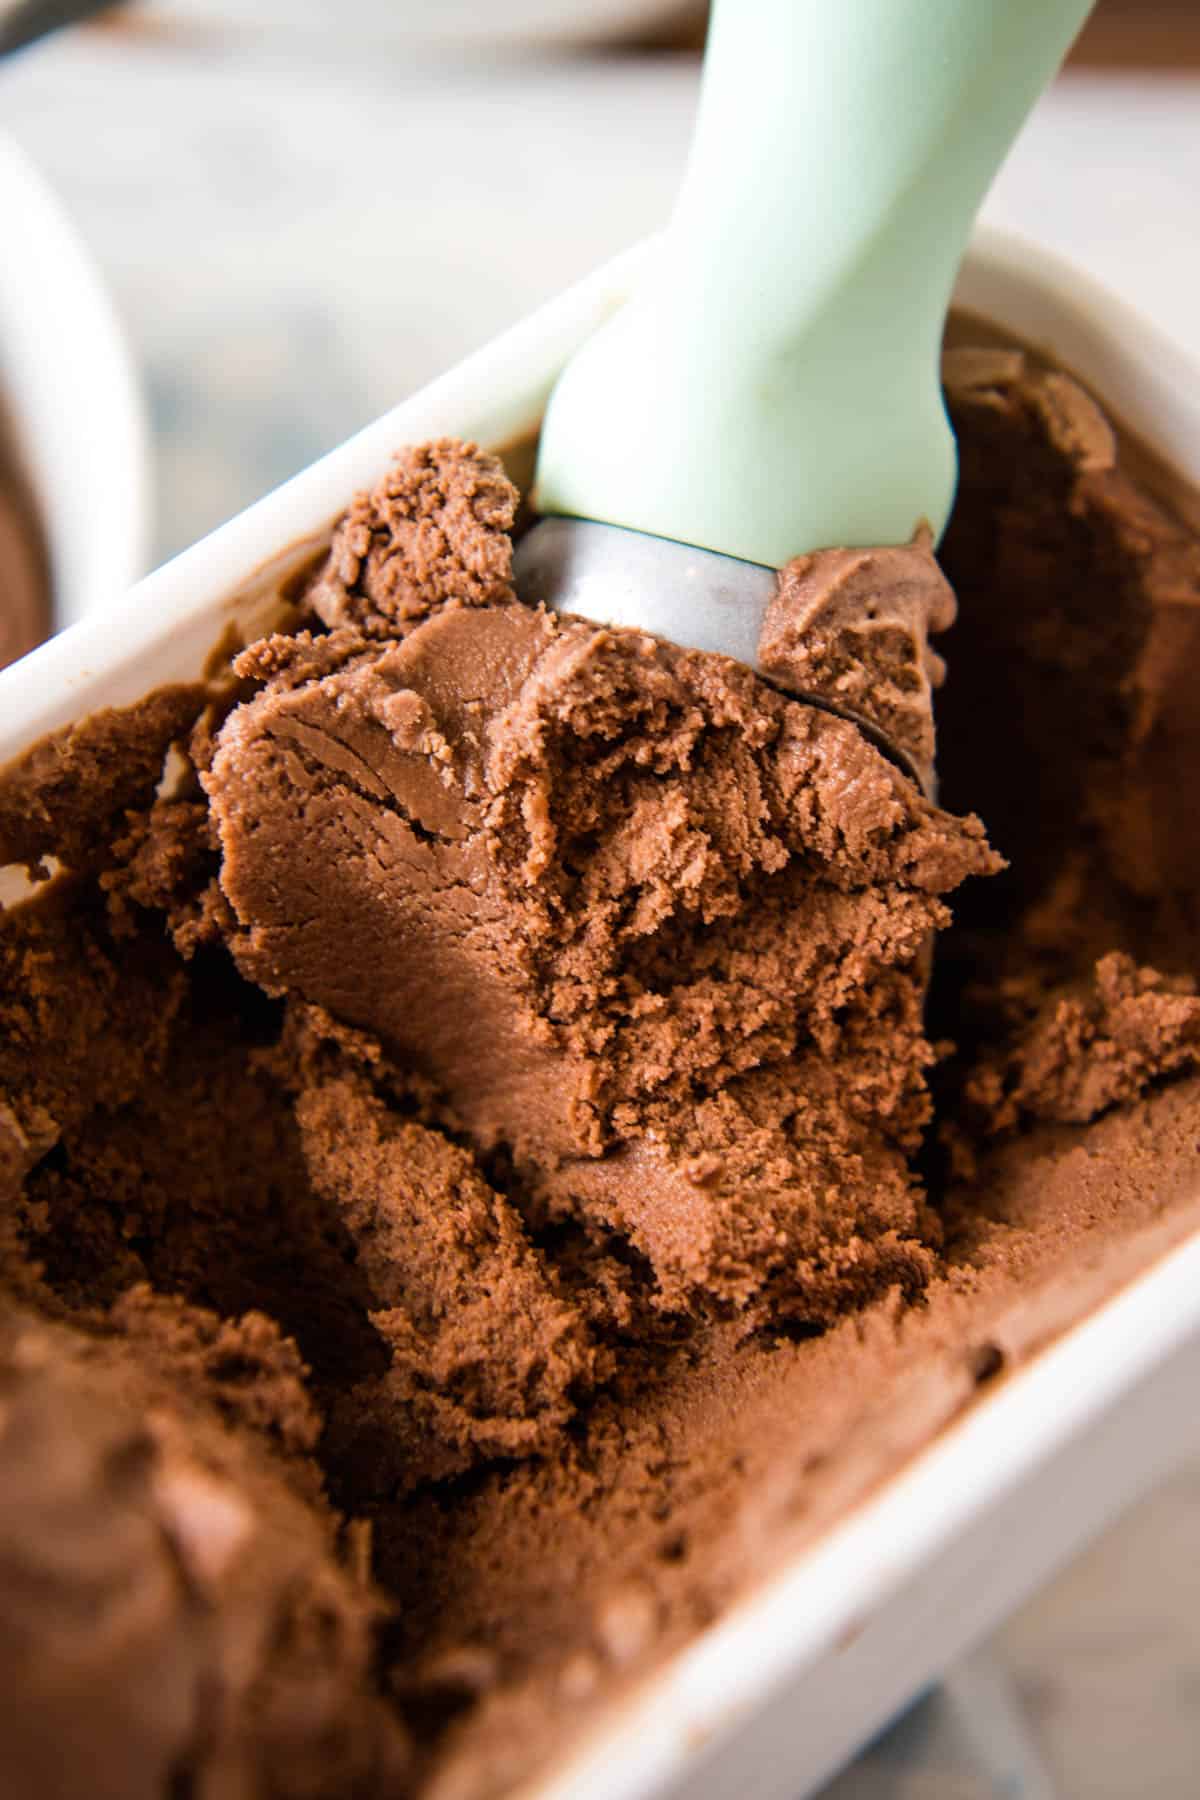
    6. When the ice cream has a soft, creamy texture, it’s ready. Turn off the machine, and scoop the soft-serve chocolate ice cream into bowls for serving; or if desired, scoop it into an airtight container, and place it in the freezer for 2-3 hours to firm up more. Then serve when ready.
    steps for how to mix homemade chocolate ice cream no eggs in mixing bowl and freeze it in ice cream maker

    How to Serve Chocolate Ice Cream

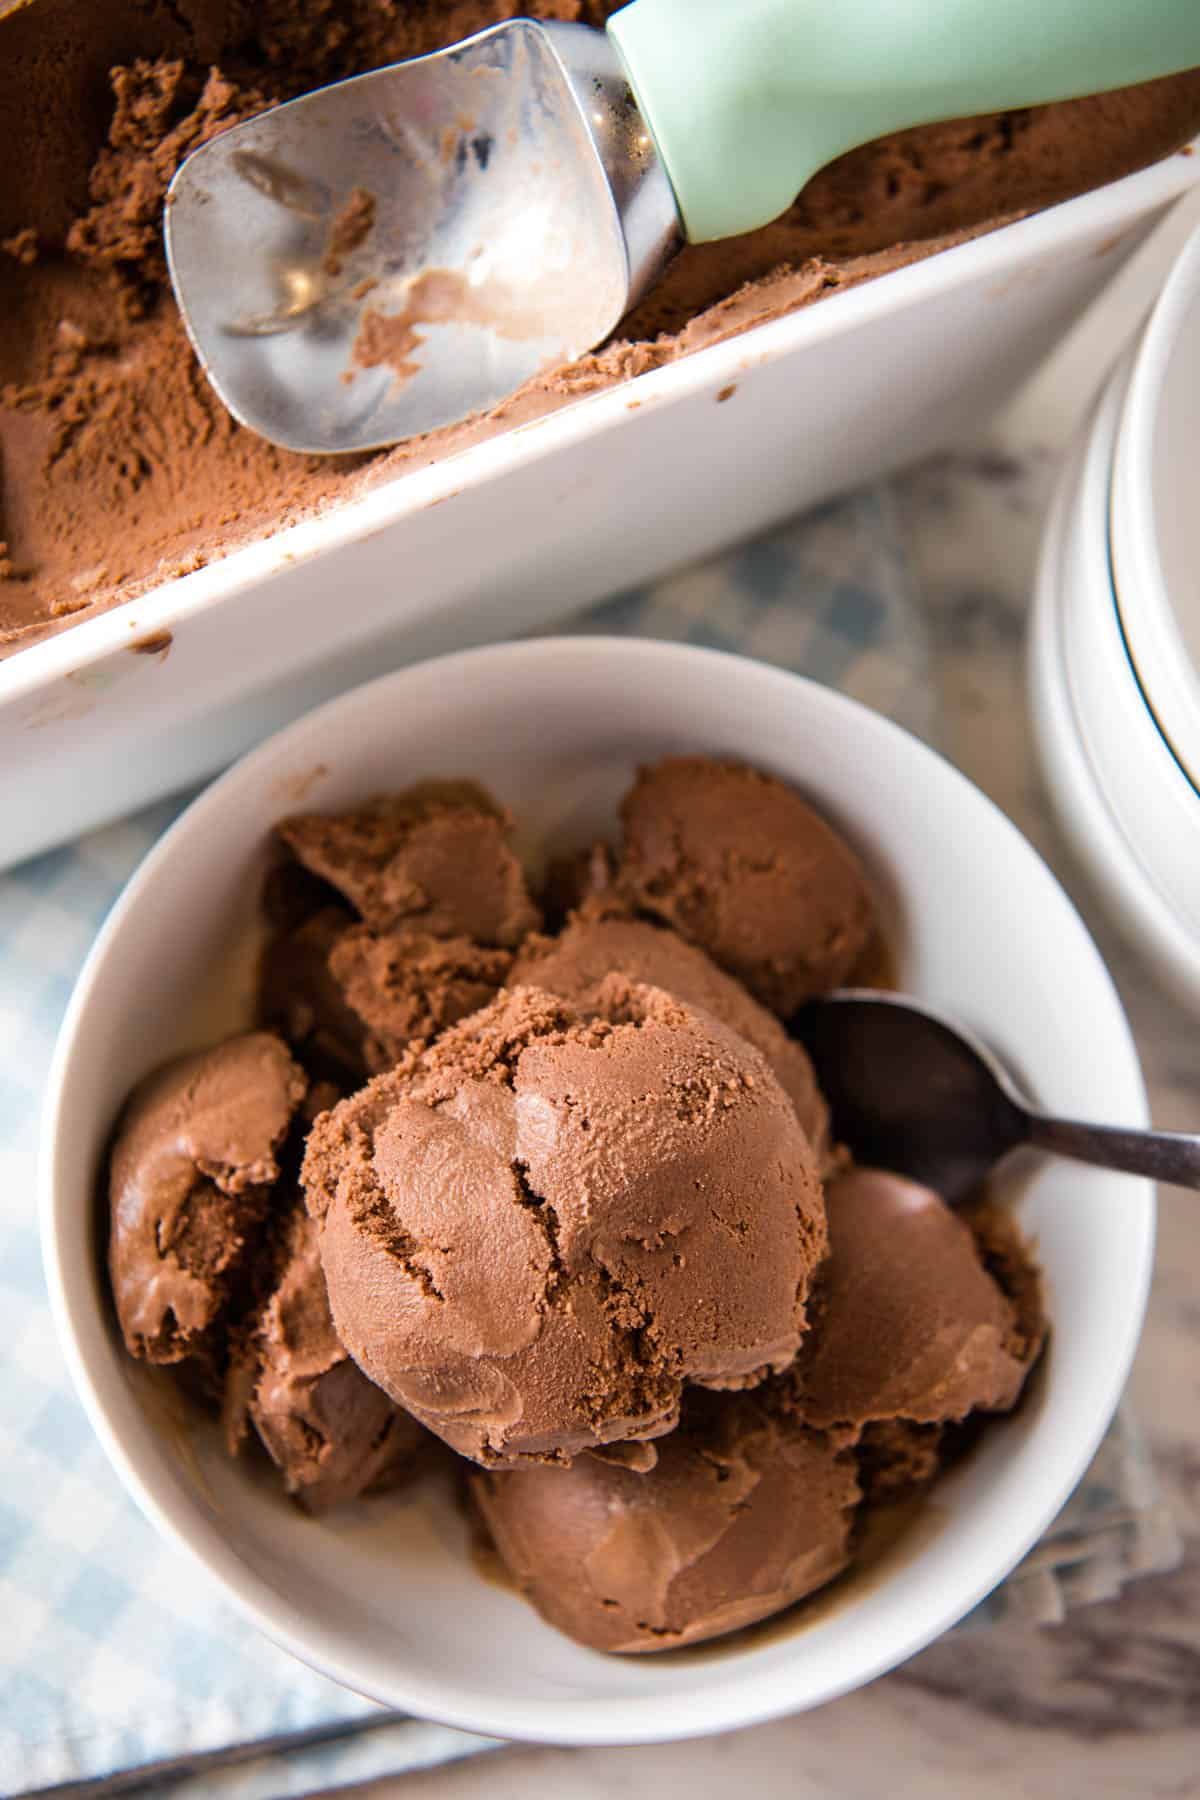
    You can serve eggless chocolate ice cream in a bowl or on a cone. If serving on a cone, I definitely recommend putting it in the freezer to firm up more, so then you can get actual scoops to put on the ice cream cone.

    Here are a few more ideas…

    • Serve it with toppings, like butterscotch syrup, caramel syrup, strawberry syrup, etc.
    • Crumble crushed cookies or candies on top.
    • Put a scoop of chocolate ice cream on a warm chocolate chip cookie.
    • Make gluten-free ice cream sandwiches with a chocolate ice cream filling instead of vanilla.
    • Top scoops of ice cream with whipped cream and sprinkles, or marshmallow fluff and sprinkles.
    mint green ice cream scoop scooping chocolate ice cream no eggs from white ice cream container

    Expert Tips and Recipe FAQ’s

    My expert tips would be to, again, make sure you freeze the ice cream canister beforehand.

    Why is my homemade chocolate ice cream grainy?

    This is where whisking those ingredients together comes in and why it’s so important. When you’re mixing up the ice cream, I recommend extra whisking, just to make sure all the cocoa powder and sugars dissolve in the milk. If not dissolved, this will make your ice cream grainy.

    Should homemade ice cream be so soft?

    When it first comes out of the churn, yes, it will be soft. However, if you put it in the freezer, it will firm up, so much so, you’ll be able to scoop the ice cream into a bowl or cone.

    How should I store leftover ice cream?

    Of course, you’ll need to store it in the freezer. But as far as containers, I found these super cool ice cream containers online, and I have 2 of them, so I can always have 1-2 containers of ice cream in the freezer for the kids. They work great, and they’re easy to wash too. You can find more options in my guide filled with ice cream accessories and tools.

    How long will homemade ice cream last in the freezer?

    I’ve found that it’ll generally last about 3-4 weeks, as long as it’s stored in an airtight container where it won’t get freezer burn.

    Do I need an ice cream maker to make this recipe?

    Yes, you really do. I recommend the one I have, which is this ice cream maker. It’s easy to use, and it makes 2 quarts (1/2 gallon) of ice cream at a time.

    Variations and Mix-Ins to Try with This Recipe

    With this chocolate ice cream recipe with no eggs base, you can do a number of different things to change it up…

    • Add a little coffee kick with a teaspoon or so of espresso powder. My sister ran out of cocoa powder and added a bit of this to hers, and she said you couldn’t even tell it had coffee in it.
    • Add a teaspoon of peppermint extract to make mint chocolate ice cream. You could even chop up some leftover chocolate mint candies to add to the mixture in the last 5 minutes of churning.
    • Make it Rocky Road instead of chocolate. In the last 5 minutes of churning, just add a handful of mini marshmallows and nuts and let it all mix together.
    • Swirl marshmallow cream into the mixture at the last minute to make chocolate marshmallow swirl ice cream.
    white bowl full of raw milk chocolate ice cream with spoon and ice cream scoop in ice cream container

    More Homemade Ice Cream Recipes

    If you love this homemade chocolate ice cream, you’ll love these flavors too…

    If you try this recipe, why not leave a star rating in the recipe card right below and/or a review in the comment section further down the page? I always appreciate your feedback. You can also follow me on Pinterest, Facebook, Instagram, and YouTube. And subscribe to my email list too!

    Old-Fashioned Homemade Chocolate Ice Cream

    How to make the best old-fashioned homemade chocolate ice cream (no eggs) recipe. Easy, machine churned, delicious chocolaty flavor.

    • Ice Cream Maker
    • Ice Cream Container with Lid
    • Ice Cream Scoop
    • 1 cup unsweetened cocoa powder
    • 2/3 cup cane sugar
    • 1/2 cup light brown sugar
    • 1 teaspoon sea salt
    • 1 1/2 cups whole milk
    • 3 1/4 cups heavy cream
    • 1 tablespoon vanilla extract
    1. Before you start to mix this up, be sure you pre-freeze the ice cream canister that goes with your ice cream maker; if you don't, your ice cream won't freeze.

    2. In a large mixing bowl, whisk together the cocoa powder, sugar, brown sugar, and salt.

    3. Whisk in the whole milk, mixing 'til the sugars and cocoa powder dissolve, about 1-2 minutes.*

    4. Whisk in the cream and vanilla extract.

    5. Turn on the ice cream freezer, and pour the mixture into the freezer bowl with the churn paddle in place.

    6. Then place the cover on top, and let it mix 'til it thickens, about 20-25 minutes.

    7. When the ice cream has a soft, creamy texture, it's ready. Turn off the machine, and scoop the soft-serve chocolate ice cream into bowls for serving; or if desired, scoop it into an airtight container, and place it in the freezer for 2-3 hours to firm up more. Then serve when ready.

    *This step is important; I usually recommend extra whisking, just to make sure your ice cream isn’t grainy. You want all of the sugars and cocoa powder to dissolve in the milk.

    Desserts
    American
    chocolate ice cream, chocolate ice cream no eggs, chocolate ice cream recipe with no eggs, eggless chocolate ice cream, homemade chocolate ice cream, homemade chocolate ice cream no eggs, old-fashioned homemade chocolate ice cream, raw milk chocolate ice cream
  • Easy French Toast Casserole Recipe {with Video}

    Easy French Toast Casserole Recipe {with Video}

    Make breakfast simple with an easy French toast casserole baked in one pan. You can make it ahead overnight or the same day. Topped with a cinnamon brown sugar topping, it’s the best recipe to make breakfast or brunch for a crowd!

    Like Crock Pot French toast casserole, this easy French toast casserole recipe is a win win for those special times when we don’t necessarily feel like going to all the work of making traditional French toast. And let me tell you, one of my pet peeves is when the French toast I’ve already cooked gets cold while waiting on the rest to cook.

    slice of easy French toast casserole on white plate with maple syrup and fork

    A good French toast bake pairs really well with eggs and bacon, or better yet, eggs and sausage. So you don’t have to have all sweet for breakfast, but it does add a little sweet treat to a delicious breakfast time.

    While you can make this rich overnight French toast without the topping, it won’t be near as good. The topping is super quick to mix up, and you can just crumble it right onto the casserole before baking.

    Be sure and check out the accompanying video in the post below. It’ll walk you through all the steps of how to make this delicious breakfast bake, so you don’t miss a beat.

    Want more breakfast favorites? My kids’ absolute favorites are brioche French toast casserole and blueberry French toast casserole.

    Why Make This Recipe for Breakfast?

    French toast meets bread pudding. You’ll love this cinnamon French toast bake recipe because it…

    • Takes 30 minutes to make – While it takes longer to chill and bake, it’s super easy and quick to make. And you’re not standing in front of the stove making breakfast while everyone else is having fun or off doing their own thing. Instead you can throw it together the night before, then put it in the oven when you’re ready to eat.
    • Everyone can eat at the same time, and it’ll still be warm – While you can keep French toast warm in the oven, while waiting on the rest of it to cook, this is just so much easier because it’s all in one pan, all baked at the same time.
    • It’s perfect for Sunday morning or a special occasion, like Christmas morning. It makes a great everyday breakfast or holiday breakfast. It’s always a hit and a great option for Mother’s Day too, because it’s pretty easy for kids to make, with a little guidance from Dad or a trusted adult.
    • It’s delicious – I’ve been told this delicious French toast casserole is much like a bread pudding. Oh my word, the cinnamon brown sugar topping on top of the French toast casserole is my absolute favorite. With a drizzle of maple syrup, a slice of this wonderful casserole is just so mouthwateringly delicious.
    • It’s budget-friendly – I usually always make the best French toast casserole with white bread, just plain old sandwich bread. While it does use quite a few eggs, the rest of the ingredients you likely already have in your pantry or freezer. I’d estimate you can make baked French toast for less than $8, depending on the ingredients you already have on hand.
    easy French toast casserole ingredients on white marble countertop

    Ingredients and Substitutions Notes

    Just gather up a few simple ingredients to get started making this easy French toast bake…

    • Sandwich bread – The main decision you have to make is which bread is the best bread for French toast casserole. And to that I’d answer the best type of bread is just a good old loaf of sandwich bread; in fact, I prefer to just use butter bread. Now you can use a loaf of whole wheat bread, sourdough bread, Texas toast, challah bread, crusty French bread, Italian bread, Kings Hawaiian Rolls, brioche bread, cinnamon swirl bread, crescent rolls, or really any other type of fresh baked bread. Any of them will be delicious. But a good French toast bake with white bread is just as good, in my opinion.
    • Pecans – We use chopped pecans. You can also use walnuts, black walnuts, or almonds if you want.
    • Large Eggs
    • Whole Milk You can use 2% milk or skim milk, but I recommend using whole milk, or a mixture of whole milk with half-and-half for an even creamier texture. If you need to make it dairy-free, substitute almond milk, coconut milk, soy milk, or oat milk instead.
    • Pure maple syrup – Be sure to use real maple syrup, not table syrup. There’s a distinct difference, and subbing artificial table syrup will change the texture, flavor, and especially the amount of sweetness in your casserole.
    • Vanilla Extract This is going to add a cozy flavor to the baked French toast casserole.
    • Sea Salt – I prefer to use Redmond Fine Sea Salt.
    • Spices – You’ll need ground cinnamon and ground nutmeg. Of course, if you want a bit more fall flavor to your casserole, you can also substitute pumpkin pie spice.
    • Topping – The topping is, in my opinion, the best part about this overnight breakfast casserole, and it includes butter, brown sugar, and ground cinnamon. Again, if you need to make it dairy-free, you can substitute vegan butter.

    Alternative Ingredients Ideas from Readers

    Readers have given us a lot of creative ideas for ways to really switch up this recipe for French toast casserole and add your own touch to this sweet breakfast casserole.

    • Top with a powdered sugar glaze instead of, or in addition to, the brown sugar topping.
    • Mix some of this apple pie spice recipe into the cinnamon streusel topping!
    • Add raisins or dried cranberries when you add the bread and pecans.
    • Add fresh strawberries, blueberries, or raspberries.
    • Speaking of milk, use eggnog in place of milk, especially around the holidays.
    • Use part heavy cream, part whole milk for an extra rich casserole.
    • In place of pecans, try other nuts, like chopped walnuts or almonds.
    • Add a handful of chocolate chips for melty chocolaty flavor.
    • Try adding bacon… Because everything’s better with bacon!
    • Try baking the casserole in a bundt pan, inverting it after baking, to make it even prettier.

    How to Make Easy French Toast Casserole

    This is a fairly simple French toast casserole with sliced bread. It only takes a few steps to make.

    Make the Casserole…

    1. First cut the bread slices into 1-inch cubes and place it in a greased 9×13 baking dish, along with the chopped pecans. You can layer the bread cubes and pecans so everything’s blended well in the dish. Tip: You can cut the bread into cubes using a knife or a pastry cutter.
    2. Then in a large bowl, whisk together the eggs, milk, pure maple syrup, vanilla, salt, cinnamon, and nutmeg, to make a sort of custard mixture.
    3. Pour the egg mixture over the bread and pecans, making sure all the bread is good and soaked. Then cover the casserole dish with plastic wrap, and chill the casserole in the fridge for a good 4 to 6 hours or more, just to let that custard mixture soak into the bread really well. Overnight is best.
    how to make French toast casserole with white bread in 3 steps, including cubed bread and pecans in baking dish, beating eggs with milk and spices, and pouring egg mixture over bread cubes

    Make the Topping…

    1. Before baking the next morning or the next day, pre-heat the oven to 350° F; then in a small bowl, mix up your topping by combining the butter, brown sugar, and cinnamon with a pastry blender.
    2. Crumble the topping on the top of the casserole as best you can. It’s a really moist mixture, so it’s more like clumps of cinnamon brown sugar.
    mixing French toast bake topping with pastry blender in glass Pyrex bowl and crumbling topping over top of casserole

    Bake It…

    1. Cover the baking dish with aluminum foil, and bake at 350°F for about 25 to 30 minutes. Then uncover and bake it for an additional 15 to 20 minutes, ’til it’s golden brown.
    2. When you remove it from the oven, let it cool for just a few minutes. Then slice into individual servings, and serve with powdered sugar or maple syrup.
    baked French toast casserole with sliced bread in white baking dish, with slice served on white plate with maple syrup

    It also pairs well with flavored syrups like blueberry syrup, whipped cream, fresh berries, fresh fruit, sausage, or bacon and eggs. You’ll especially enjoy a slice of French toast breakfast casserole with your morning cup of coffee or hot tea.

    Expert Tips and Recipe FAQ’s

    Do you really have to chill the casserole overnight?

    While this really is best as an easy overnight French toast casserole, you don’t have to chill it. But let me just say, the flavors and texture of the casserole will be at their best after chilling for at least a few hours. If you’re in a hurry, didn’t have time to plan ahead, and need to make it now, that’s ok. Just mix it up, make sure the bread is moistened well with the egg mixture, add the topping, and bake it. But if you do have time, just cover the casserole dish with plastic wrap or aluminum foil, and chill in the fridge overnight.

    What are gluten-free and dairy-free options for this baked French toast recipe?

    Just substitute your favorite gluten-free bread in place of the regular sandwich bread included in the ingredients. You can also substitute almond milk, coconut milk, soy milk, oat milk, or another non-dairy milk, instead of whole milk; and you can use a dairy-free butter substitute in the topping. Always check all of your other ingredients, as well, to make sure they’re really gluten-free and dairy-free.

    Why is my French toast casserole soggy?

    There can be multiple reasons for this. 1. There may be too much egg mixture to soak into the bread or it may need longer to soak into the bread, in which case you can soak the bread in a separate bowl overnight, then transfer to the baking dish (without all the extra liquid) right before baking. 2. It may not have baked long enough. 3. And if you want to prevent soggy French toast casserole altogether, I’d suggest leaving your bread open the night before, so it can dry out just a bit; stale bread, crusty bread, or day-old bread soaks up the egg mixture more easily and readily.

    Can you freeze French toast casserole?

    Normally, you’ll just store any leftovers in the fridge. But if you wish to freeze it, you can. While I recommend covering it well and freezing it after it’s already been baked, you can also freeze it before baking (though I’d add the topping later before actually baking it). Keep in mind it’ll keep longer in the freezer if it’s already been cooked. Just be sure you have plenty of time for it to thaw and re-heat when taking it out of the freezer. Allow time for it to thaw in the fridge before cooking or re-heating in the oven or microwave.

    How should you store leftovers?

    Store any leftovers in an airtight container in the fridge; they should keep for 2-3 days.

    slice and bite of cinnamon French toast bake with fork on white plate

    More Breakfast and Brunch Recipes for You to Enjoy

    Sometimes on weekends, and especially on holidays and birthdays, we’ll make blueberry buttermilk pancakes or our favorite recipe for cinnamon French toast.

    April J. Harris has a delicious recipe for blueberry bread and butter pudding. And cook up a batch of make ahead stuffed French toast with Mommy Hates Cooking.

    Check out all our breakfast recipes for more easy breakfast ideas, like my grandma’s cinnamon streusel coffee cake.

    Reader Comments and Praise for This Recipe

    This easy baked French toast casserole is a tried and true reader favorite!

    I have made this wonderful and perfect french toast casserole TWICE!!! 💕 The first time I was sad I didn’t make more,lol. The next batch is finishing in the oven for our neighbors. Thanks Mel for posting and showing how easy it really is to make.” – Denise

    I made this today and it was delicious. I prepped it the night before and let the bread sit out to get a little dry and it worked out great. One of my granddaughters said, I can just taste the love you put in this. So thanks for sharing the recipe.” – Mandy

    Best French toast casserole we’ve ever had. This is our new go to for all special occasions. Everyone loved it! Thank you for the wonderful and delicious recipe!” – Jojo

    This French toast casserole was AMAZING! Instead of milk I used eggnog, as you suggested, and it was ooooh so good. Everyone loved it. Is my go-to crowd pleaser now!” – Valerie

    If you try this recipe, why not leave a star rating in the recipe card right below and/or a review in the comment section further down the page? I always appreciate your feedback. You can also follow me on Pinterest, Facebook, Instagram, and YouTube. And subscribe to my email list too!

    Easy French Toast Casserole

    Make breakfast simple with easy French toast casserole baked in one pan. Make ahead overnight or same day. Best recipe for a crowd!

    • Whisk
    • Mixing Bowl
    • 9×13 Baking Dish
    • Pastry Blender
    • Aluminum Foil

    Casserole:

    • 20 ounces sandwich bread
    • 1 cup pecans (chopped)
    • 8 large eggs
    • 2 cups whole milk
    • 1/4 cup maple syrup
    • 1 tablespoon vanilla extract
    • 1 teaspoon sea salt
    • 1 1/2 teaspoons ground cinnamon
    • 1/4 teaspoon ground nutmeg

    Topping:

    • 4 tablespoons salted butter (sliced)
    • 1/2 cup light brown sugar
    • 1 teaspoon ground cinnamon
    1. Grease a 9"x13" baking dish.
    2. Cut the bread into small 1-inch cubes, and layer with the chopped pecans in the baking dish.

    3. In a large bowl, whisk together the eggs, milk, pure maple syrup, vanilla extract, salt, cinnamon, and nutmeg, to make a sort of custard mixture.

    4. Pour the egg milk mixture over the bread and pecans in the baking dish.

    5. Cover and chill for a good 4 to 6 hours or overnight.

    6. When you're ready to bake the casserole, remove it from the fridge, and pre-heat the oven to 350° F.

    7. Using a pastry blender, mix together the sliced butter, brown sugar, and cinnamon in a small mixing bowl.

    8. Crumble or clump the topping on the top of the casserole.

    9. Cover the baking dish with aluminum foil, and bake at 350° F for about 25 to 30 minutes. Then uncover and bake it for an additional 15 to 20 minutes, 'til it's golden brown.

    10. Once it’s thoroughly cooked through, remove it from the oven and let it cool for just a few minutes.
    11. Then slice and serve with powdered sugar and maple syrup.

    *20 ounces is about 22 slices of the butter bread (or white bread) that I use. You can use a loaf of sourdough, Texas toast, challah bread, French bread, Kings Hawaiian Rolls, brioche, cinnamon swirl bread, crescent rolls, or really any other type of fresh baked bread. Any of them will be delicious.

    *Be sure to use real maple syrup. Table syrup will change the texture, flavor, and especially the amount of sweetness in your casserole.

    *While this really is best as an overnight French toast casserole, you don’t have to chill it. But let me just say, the flavors will be at their best after chilling for at least a few hours. If you’re in a hurry, didn’t have time to plan ahead, and need to make it now, that’s ok. Just mix it up, make sure the bread is moistened well with the egg mixture, add the topping, and bake it.

    Store any leftovers in the fridge.

    Breakfast & Brunch, main dish
    American
    baked French toast, cinnamon French toast bake, easy French toast casserole, French toast bake, French toast bake recipe, French toast bake with white bread, French toast casserole, French toast casserole recipe, French toast casserole with sliced bread, French toast casserole with white bread, overnight French toast casserole
  • Easy Chicken Gravy from Bouillon

    Easy Chicken Gravy from Bouillon

    How to make delicious chicken gravy from bouillon, no drippings needed! You can make this easy gravy recipe last minute to go with dinner, and it only takes 6 simple ingredients you probably already have in your pantry!

    My husband introduced me to the world of gravy when we got married. I grew up eating biscuits and gravy; but other special gravies like brown gravy, chicken stock gravy, ham gravy, and turkey gravy were reserved for holidays like Thanksgiving, Christmas, and Easter dinner.

    spoonful of easy chicken gravy from bouillon over white bowl full of gravy

    Chicken gravy without drippings is especially easy to make, so it makes the perfect addition to an Instant Pot whole chicken. You can also pair it with baked chicken drumsticks or whole chicken in the CrockPot. It’s also a fantastic addition to a mashtini bar or baked potato bar if you happen to be entertaining guests or hosting a dinner party.

    Why You’ll Love Making Gravy with Chicken Broth

    • All you need to make chicken gravy from broth are 6 simple ingredients you likely already have in your pantry. 3 of those ingredients are seasonings, just onion powder, salt, and pepper.
    • As I mentioned above, it’s really easy to make and only takes a few minutes.
    • You can make this chicken gravy with bouillon or from broth. Only difference is you’ll need to mix the bouillon into broth before you begin cooking.
    chicken gravy ingredients, including chicken broth from bouillon, black pepper, salt, water, onion powder, and all-purpose flour on white marble countertop with black whisk

    Ingredients and Substitutions Notes:

    To make this chicken gravy recipe, you’ll need 6 simple ingredients. Gather your ingredients and let’s make some delicious gravy.

    • Chicken Broth: Like I mentioned above, you can use straight up chicken broth, including bone broth. Or since bouillon is basically dehydrated broth, you can just mix bouillon into broth and make your gravy with that bouillon broth. You can also use homemade chicken stock to make this gravy.
    • Onion Powder: Here’s a little tip. I haven’t been able to find a gluten-free onion powder in store. You’d think all seasonings are gluten-free, but they are not. So I took a little bit of dried minced onion we had on hand and crushed it into onion powder.
    • Water
    • All-Purpose Flour: I tried making this with corn starch; it did not go well. So my advice is to stick with flour. Flour makes a silky, smooth gravy. And yes, you can use a good gluten-free flour instead.
    • Salt and Pepper: These are really only added to taste. I’ve found it needs quite a bit of salt, but I only add a dash of black pepper.

    How to Make Chicken Gravy from Bouillon

    For this gravy, I prefer to make a slurry over a roux. It’s part of prepping and gathering my ingredients together so I’m ready for each step along the way.

    If I were making a roux, I would melt butter in my pan and then whisk flour into the butter, cooking the mixture. Instead I prefer to just mix my thickening agent, in this case flour, with water before starting the process of cooking the gravy… It works for me, and I know it’ll work well for you too.

    How to Make the Slurry

    To make the slurry, whisk together the water and flour, making sure there are no lumps and no flour sticking to the bottom of your bowl or measuring cup. Then just set your slurry aside ’til you need it.

    chicken gravy slurry in Pyrex glass measuring cup with black whisk

    Making a slurry allows us to add flour to our gravy without adding any lumps, ensuring a lump-free gravy.

    Then Make the Gravy

    1. Add chicken broth to a medium sauce pan, and bring to a boil over medium heat.
    2. Whisk in the onion powder, cooking another 1 to 2 minutes.
    3. Now whisk your slurry mixture into the boiling broth, stirring constantly ’til the gravy thickens; it will start to thicken right away. If, for some reason, your gravy is too thin and not thickening up enough, you can whisk another tablespoon of flour into just a little bit of water (making another slurry), and add that to your gravy to help it thicken up more.
    4. Add salt and pepper, to taste.
    steps for how to make chicken gravy from broth in sauce pan, including boiling broth, adding onion powder, stirring in slurry, and whisking 'til thickens

    Then serve the gravy while warm with your dinner. It’s a good idea to make gravy just before you’re ready to eat.

    Expert Tips and Recipe FAQs:

    How should you store chicken gravy?

    Store in the fridge in an airtight container. Chicken gravy will keep in the fridge for 2-3 days.

    Can you freeze leftover gravy?

    Yes, you can store a flour-based chicken gravy in the freezer for up to 4 months.
    Store in an airtight container or freezer bag. Just be sure to allow enough time to thaw in the fridge before serving.

    How do you re-heat gravy?

    You can re-heat gravy on the stovetop in a sauce pan, stirring frequently until hot. Or you can re-heat in a microwave at 30 second intervals, stirring in between ’til heated. If the gravy is really thick after cooling, you may need to add just a little bit of water to thin it out a bit.

    Can you make gluten-free gravy?

    Yes. Gluten-free flour works like a charm with this gravy. Just make sure to check all your other ingredient labels to make sure they are truly gluten-free, as well, especially seasonings.

    What should you do if the gravy is too thick?

    Add chicken broth or water 1/2 cup at a time until your gravy is the desired consistency. Keep in mind, adding liquid may necessitate adding a bit more seasoning, as well, especially salt and pepper.

    chicken gravy with bouillon poured over mashed potatoes on gray plate with shredded chicken and green peas

    Good Recipes to Make with Chicken Gravy:

    If you love this easy chicken gravy recipe as much as I do, you’ll love pairing it with these dishes…

    If you try this recipe, why not leave a star rating in the recipe card right below and/or a review in the comment section further down the page? I always appreciate your feedback. You can also follow me on Pinterest, Facebook, Instagram, and YouTube. And subscribe to my email list too!

    Chicken Gravy from Bouillon

    How to make chicken gravy from bouillon, no drippings needed! Easy recipe you can make last minute to go with dinner. Simple ingredients!

    • Medium Sauce Pan
    • Whisk
    • Heat-Resistant Spatula
    • Liquid Measuring Cup
    • Gravy Boat
    • 1/4 cup water
    • 3 tablespoons all-purpose flour*
    • 2 cups chicken broth
    • 1 teaspoon onion powder
    • Salt (to taste)
    • 1/8 teaspoon ground black pepper
    1. To make the slurry, whisk together the water and flour, making sure there are no lumps and no flour sticking to the bottom of your bowl or measuring cup. Then just set your slurry aside 'til you need it.

    2. Add chicken broth to a medium sauce pan, and bring to a boil over medium heat.

    3. Whisk in the onion powder, cooking another 1 to 2 minutes.
    4. Now whisk your slurry mixture into the boiling broth, stirring constantly ’til the gravy thickens; it will start to thicken right away. If, for some reason, your gravy is too thin and not thickening up enough, you can whisk another tablespoon of flour into just a little bit of water (making another slurry), and add that to your gravy to help it thicken up more.
    5. Add salt and pepper, to taste.
    6. Then serve the gravy while warm with your dinner. It’s a good idea to make gravy just before you’re ready to eat.

    *You can use a good gluten-free flour instead.

    Store leftover chicken gravy in the fridge in an airtight container. It will keep in the fridge for 2-3 days. 

    You can re-heat gravy on the stovetop in a sauce pan, stirring frequently until hot. Or you can re-heat in a microwave at 30 second intervals, stirring in between ’til heated. If the gravy is really thick after cooling, you may need to add just a little bit of water to thin it out a bit.

    What should you do if the gravy is too thick?

    Add chicken broth or water 1/2 cup at a time until your gravy is the desired consistency. Keep in mind, adding more liquid may necessitate adding a bit more seasoning, as well, especially salt and pepper.

    Condiments, Sauces & Dressings
    American
    chicken broth gravy, chicken gravy from bouillon, chicken gravy from broth, chicken gravy with bouillon, chicken gravy without drippings, chicken stock gravy, easy chicken gravy, gravy with chicken broth, how to make chicken gravy without drippings
  • Easy Chicken Salad Recipe with Eggs

    Easy Chicken Salad Recipe with Eggs

    Let’s make the best chicken salad recipe with eggs you’ve ever had. This is a super simple and easy recipe made with shredded chicken, eggs, apples, and walnuts. It’s one of my family’s all time favorite meals!

    Every week as I plan our menu, our favorite chicken egg salad usually always makes the cut. It’s one of our favorite meals, and I love that we can make it with whatever type of chicken we have on hand, whether it’s fresh, canned, leftover Instant Pot whole chicken or rotisserie chicken. 

    open-faced chicken salad recipe with eggs sandwich with lettuce on white plate

    While we love making Asian chicken salad for appetizers, we’ve pretty much stuck with this easy open-faced chicken salad sandwich for weeknight dinners.

    Why You’ll Love This Easy Dinner

    • It’s got healthy, wholesome ingredients; and, like our favorite roast beef lettuce wraps, it’s fairly low carb (without the bread), so it’s a really healthy option for Dan, who usually eats it on a bed of lettuce or bed of spinach.
    • You’ll love the crisp, tarty flavor the apples bring to chicken salad sandwiches.
    • Like this list of colorful salads, chicken egg salad can serve as the main dish at lunch or dinner; it can also serve as an appetizer with crackers or a side dish at a party or potluck.
    • This is one southern meal that’s easy to make ahead of time or on the fly, especially when your chicken and eggs are already cooked.

    Ingredients and Substitutions Notes:

    You’ll need just a few simple ingredients to make egg chicken salad.

    • Cooked Chicken – You can cook fresh chicken, or you can make this chicken salad recipe using canned chicken or store bought rotisserie chicken from the grocery store. We’ve made this a canned chicken salad recipe many nights when we just didn’t remember to get chicken out of the freezer. Leftover chicken also works well.
    • Hardboiled eggs – Probably the easiest way to boil your eggs is to put them in a saucepan and cover them with water; bring the pan to a boil over medium to high heat on your stove, and once it’s reached a full rolling boil, set a timer and continue to boil for 6 to 8 minutes. Another way you can boil eggs is with an electric egg cooker; this is quite the handy tool for making easy hard-boiled eggs, and I love that it also poaches eggs. Finally, you can also boil eggs in the Instant Pot, which is super easy and simple to do, as well.
    • Celery – I prefer to finely mince this up really well and make it smaller. It adds a lot of crunch to chicken salad.
    • Apple – My grandma used to make her chicken salad with apples and pickles, and it was always so delicious.
    • Green onions – Again, it’s all about flavor. All of these ingredients really meld together to create an amazing flavor to the salad.
    • Mayo and Mustard – If you don’t have mayonnaise, you can use Miracle Whip; but we much prefer the flavor that real mayonnaise gives to chicken salad. Mustard just gives a little extra kick.
    • Chopped Walnuts – These are totally optional, and a lot of times, we’ll substitute chopped pecans instead.
    • Bread – Again, this is optional. The best bread for chicken salad, though, is definitely sourdough. Toasted sourdough makes a delicious chicken salad sandwich.

    Alternative Chicken Salad Ingredients and Variations

    We’ve tweaked this recipe over the years. Sometimes we add things, other times we don’t. Here are a few options for you to think about when mixing up the ingredients…

    • Mince up dill pickles or sweet pickles to add into the ingredients. We love adding in dill pickle. I imagine bread and butter pickles or sweet relish would taste really good too.
    • Swap out the green onions for red onion; it gives a spicy kick to this southern chicken salad.
    • Instead of mayo, you can use Miracle Whip or plain Greek yogurt.
    • Instead of regular mustard, using Dijon mustard or stone ground mustard.
    • In place of walnuts, you can use pecans or almonds.
    • Add chopped up grapes for a yummy chicken salad with grapes.

    However you choose to make this chicken egg salad recipe, it’s sure to be a hit with your family. We usually have zero leftovers with this quick and easy meal. 

    How to Make a Chicken Salad Recipe with Eggs

    Before you mix up your classic chicken salad, you’ll need to shred up whatever type of cooked chicken you’re using and smash the hard-boiled eggs. You can boil, bake, or grill the chicken, ’til it’s fully cooked; then after it’s cooled just a bit, use two forks to shred the chicken.

    Also, wash and chop the celery, green onions, and apple; and chop up the walnuts.

    ingredients for easy chicken salad recipe with eggs, including celery, green onions, apple, hard boiled eggs, and walnuts

    Now Mix up the Salad

    1. In a large mixing bowl, mix together the cooked chicken, hard-boiled eggs, celery, apple, walnuts, and green onions. 
    2. Next, measure out the mayo and mustard, and mix it into the chicken mixture. If you like a “wetter” chicken salad, you can add more mayo.
    3. If you feel like it needs it, you can add in a dash of salt and pepper. Otherwise, it’s ready to eat and enjoy! 
    chicken salad with canned chicken or fresh cooked chicken mixed up in a blue bowl with a wooden spoon

    Then Make It into an Open-Faced Chicken Salad Sandwich

    I like to do the following, but you can change this up to make it your own.

    1. Toast a piece of sourdough bread (or gluten-free bread).
    2. Spread on a little Miracle Whip.
    3. Add a small pile of lettuce, and pile on the chicken salad to make the most delicious open-faced chicken salad sandwich recipe ever. It’s so tasty and so good! 
    chicken egg salad with apples open-faced sandwich on white plate with hard boiled eggs on a small wooden cutting board

    Expert Tips and Recipe FAQ’s

    Should chicken egg salad be cold or warm?

    I’ll answer how to store it in the next question, but you can eat chicken salad while it’s still warm from just making it… Or you can eat it cold from the fridge. It’s delicious either way.

    How should I store chicken salad with eggs?

    It should definitely be stored in an airtight container in the refrigerator. Chicken salad will usually keep for 2-3 days in the fridge.

    Why do you put eggs in chicken salad?

    We add hardboiled eggs to chicken salad because eggs give a little more oomph, a little more protein, a bit of a creamy texture, and a lot more flavor to chicken salad. They’re also very filling. If you are intolerant to eggs or allergic to eggs, you can make chicken salad without eggs. However, just know that it won’t quite be the same; it loses some of the texture and flavor that chopped up hardboiled eggs give to the salad.

    What Do You Serve with Chicken Salad?

    Chicken and egg salad goes great with so many things, but we usually like to eat it with lettuce and other raw vegetables like celery and carrots. We’ll also sometimes add fresh fruit, like grapes or fruit salad on the side, or a helping of potato chips or cheese puffs.

    Personally, I love to eat spoonfuls of chicken salad with tortilla chips; it’s so good!

    chicken salad recipe with eggs and apples on slice of sourdough with lettuce, on white plate

    More Egg and Chicken Salad Recipes:

    If you loved learning how to make this chicken salad, you’ll love these other salad recipes too…

    If you try this recipe, why not leave a star rating in the recipe card right below and/or a review in the comment section further down the page? I always appreciate your feedback. You can also follow me on Pinterest, Facebook, Instagram, and YouTube. And subscribe to my email list too!

    Chicken Salad Recipe with Eggs

    How to make the best chicken salad recipe with eggs. Simple and easy recipe with shredded chicken, apples, and walnuts. Family favorite meal!

    • Cutting Board
    • Chef's Knife
    • Electric Egg Cooker
    • Large Mixing Bowl
    • 2 cups chicken (cooked and shredded)
    • 4 large hardboiled eggs (mashed)
    • 2 stalks celery (minced)
    • 1 large apple (diced or chopped)
    • 1/2 cup chopped walnuts (or pecans)
    • 2 green onions
    • 1/2 cup mayonnaise
    • 1/4 teaspoon mustard
    1. In a large bowl, mix together the shredded chicken, hard-boiled eggs, celery, apple, walnuts, and green onions.

    2. Next, measure out the mayo and mustard, and mix it into the chicken mixture. If you like a "wetter" chicken salad, you can add more mayo.
    3. If you feel like it needs it, you can add in a dash of salt and pepper. Otherwise, it’s ready to eat and enjoy!

    To Make an Open-Faced Chicken Salad Sandwich:

    1. Toast a piece of sourdough bread or whatever type of bread you prefer.

    2. Spread a layer of mayo or Miracle Whip.

    3. Add a small pile of lettuce, and pile on the chicken salad to complete your chicken salad sandwich.

    *You can cook fresh chicken, or you can make this chicken salad with canned chicken or store bought rotisserie chicken. You can boil, bake, or grill the chicken, ’til it’s fully cooked; then after it’s cooled just a bit, use two forks to shred the chicken.

    How should I store chicken salad with eggs?

    It should definitely be stored in an airtight container in the refrigerator. Chicken salad will usually keep for 2-3 days in the fridge.

    Burgers & Sandwiches, Salad Recipes
    American
    chicken egg salad, chicken salad, chicken salad recipe, chicken salad recipe using canned chicken, chicken salad recipe with eggs, chicken salad sandwich recipe, chicken salad sandwiches, chicken salad with apples, chicken salad with apples recipe, chicken salad with canned chicken, how to make chicken salad from scratch, open-faced chicken salad sandwich
  • How to Cook a Ham in the Oven, Baked with Glaze

    How to Cook a Ham in the Oven, Baked with Glaze

    Learn everything you need to know about how to cook a ham in the oven. This baked spiral ham recipe with an easy, simple glaze is perfect for family dinners and holidays like Thanksgiving, Christmas, and Easter.

    Every Christmas and Easter, since I learned how to bake a ham, it’s become our preferred main dish, or centerpiece at the dinner table. We like to have ham, whether we’re having company or not.

    roasted spiral cut bone-in ham in roasting pan for ham

    It’s always a treat, especially when we serve holiday ham with ham gravy (or ham gravy with cornstarch), mashed potatoes, green beans, and Grandma’s homemade dinner rolls. Mmmm, my mouth is watering just thinking about delicious pineapple ham.

    Even sometimes through the year, if prices at the grocery store are cheap enough, we’ll bake a whole ham and cut it up for lunch meat that week. I absolutely love a good ham, almost as much as a good Crock Pot pork roast.

    While baked ham is fairly easy to make, there are lots of things to think about when you’re baking a ham in the oven. Things like how to keep it moist, how long do you cook a ham, and so on.

    Hopefully, I’ll be able to answer all of your burning questions about how to cook a pre-cooked ham. But if you don’t find the answer to your questions, leave me a comment (I check them every so often), and I’ll reply back to you.

    Why You’ll Love Cooking a Ham in the Oven

    • It makes an easy main dish for family dinner or a special occasion like Thanksgiving, Christmas dinner, or Easter dinne.
    • There will be leftovers, lots of leftovers! So that means lunch tomorrow, maybe even dinner, and just maybe lunch the next day too. Or breakfast, if you like ham and eggs.
    • Every bite is delicious, and it pairs well with so many different side dishes and vegetables.
    slices of baked ham on gray plate with serving fork stuck in ham

    Ingredients and Substitutions Notes:

    For this oven-baked ham recipe, you’ll need just 3 ingredients…

    • A pre-cooked ham – My ham in this ham recipe is a 10-pound spiral cut ham. We’ll talk about selecting a ham a little further down.
    • Glaze packet – It usually comes with the ham, and you’ll find it in the packaging.
    • Water

    How to Choose a Ham

    Our grocery stores here make it pretty simple when it comes to selecting the right ham. They don’t offer a whole lot of choices. However, your store may offer an entire selection.

    I’m going to keep it pretty simple here and talk about the basic ham types, so you can easily make a decision as to what kind of ham you’d like to serve.

    Types of Ham

    • Bone-in ham – A bone-in ham is going to give you more flavor and texture. It’s also likely going to be sold as a half ham. It’ll still likely be a fairly large size, but you’ll only get half the ham. It will require carving.
    • Boneless ham – This ham is going to be more processed and have less flavor but a smoother texture. It will need sliced, but it won’t be as much work as carving around the bone.
    • Spiral-cut ham – A spiral-sliced ham is what I used to make this recipe. Spiral-cut hams are bone-in hams, and they sometimes have a glaze already applied. That’s something to think about if you’re wanting to make your own glaze; you’ll want to look for one that comes with a glaze packet instead, so you can opt out of the pre-made glaze.
    • Smoked ham – This type of ham usually has been smoked by the manufacturer.
    • Heritage ham or fresh ham – This type of ham usually comes from a local farmer who raises a heritage breed of pigs. You might even find fresh ham at a local butcher shop.

    If you want to read more, Taste of Home has a really great guide on how to choose the best ham for your next feast.

    How much ham per person do you need?

    The size ham you need depends on how many people you’re cooking for and whether you’re serving a bone-in ham or boneless ham. Remember, the bone adds weight, that isn’t meat, to the ham.

    For a bone-in ham, you’ll probably need about 3/4 to 1 pound per person; for a boneless ham, figure about 1/3 to 1/2 pound per person.

    So, if you’re like me and cooking a 10-pound bone-in ham, you can probably feed 10-12 people. If it’s a 10-pound boneless ham, you can probably feed 15-20 people.

    pre-cooked ham baked in the oven, sitting in roasting pan

    How to Cook a Ham in the Oven

    Baking a fully cooked ham is a pretty straightforward, simple, and easy process. If this is your first time learning how to bake a ham, rest easy, because usually, your package will have all the instructions you need.

    Before you get started, be sure to preheat the oven to 250° F.

    1. Remove the ham from its packaging, and place it face down in the roasting pan for ham. Important Tip: If your package has any juices in it, pour them into the bottom of the pan, along with about a cup of water; this will help your ham to stay more moist.
    2. Cover the ham tightly with foil (all of it but the bottom, so the juices can run out into the pan, and so juices can steam into the ham, keeping it more moist). Then bake the ham according to the instructions in the recipe card below (or according to your package instructions). Usually, you’ll bake it for 12 to 15 minutes per pound. So a 10-pound ham will bake for about 120+ minutes.
    3. About 45 minutes before the end of your bake time, empty the ham glaze packet into a small saucepan, along with the water.
    4. Bring your glaze to a boil over high heat while stirring constantly.
    5. At this point, you’ll need to remove the glaze from the heat. And about 1/2 hour before end of cook time, remove your ham from the oven, take off the foil, and apply the glaze all over the outside of the ham with a basting brush. Then bake it, glazed and uncovered, for another 30 minutes or so.
    6. When the ham is done, you can bring it out of the oven, let it cool just a bit, and use a sharp knife to slice it for serving.
    steps for how to cook a ham in the oven, using roasting pan for ham, and how to glaze the ham with a basting brush

    Baked ham is the highlight of many a Sunday dinner or holiday get together, especially when it’s a juicy ham with loads of delicious flavor.

    slices of glazed ham on gray plate with Italian parsley

    Expert Tips and Recipe FAQ’s

    How long does it take to bake a ham?

    Let’s talk about cooking time and internal temperature when you’re learning how to bake a ham in the oven. Always be sure to look at the packaging instructions for your specific ham, and follow what it says for cook time. This spiral ham came from Aldi, and it said 12 to 15 minutes per pound. So being a 10-pound ham, it needed to cook for about 2 hours (120 minutes) or more, but not too long or it’ll dry out. An 8-pound ham would take about 96+ minutes to bake. A 12-pound ham, 144+ minutes. And so on and so forth. It’s best to have a meat thermometer on hand. According to the USDA, spiral-cut cooked hams that were packaged in processing plants under USDA inspection must be heated to 140 °F as measured with a food thermometer (165 °F for leftover spiral-cut hams or ham that has been repackaged in any other location outside the plant). Cook-before-eating hams or fresh hams must reach 145 °F (with a 3-minute rest time) to be safely cooked before serving. Read more of their Ham and Food Safety instructions.

    How do you cook a spiral ham without drying it out?

    There are a few specific steps you can take to keep a fully cooked ham from drying out while it’s baking…
    – Like I mentioned above, save ham juices from packaging, and pour them into the bottom of the pan; this will help your ham to stay moist.
    – You can put a little less than a cup of water or some kind of stock/broth in the bottom of the pan before baking if you want. This will also add moisture.
    – Covering your ham with foil helps it to retain moisture, as well. Of course, you can also bake it in a roasting bag.

    How do you store baked ham?

    You need to store baked ham in an airtight container in the fridge; it should keep for 3-5 days.

    Can you freeze baked ham?

    Yes, you can freeze a pre-cooked or baked ham. I suggest cutting your ham up into smaller portions and freezing it in airtight containers or freezer bags with aluminum foil; that way it’s easier to get those smaller portions out and re-heat them. When it’s time to re-heat, just make sure you have plenty of time for thawing, especially if you’re thawing a big, huge ham. Keep in mind, according to the USDA, you can store a spiral-cut ham or ham leftovers in the fridge for about 3 to 5 days; and you can freeze them for about 1 to 2 months.

    What to Do with a Ham Hock

    Don’t just throw away that ham hock or leftover bone. Repurpose and make something delicious.

    15 bean soup with ham is a great way to use a ham bone and make something comforting. My mom and grandma always used ham hock to make a big pot of pinto beans, and we’d eat it with cornbread.

    sliced ham on gray plate with Italian parsley

    What to Do with Ham Leftovers

    Here are a few ideas for what to do with all that leftover ham.

    If you try this recipe, why not leave a star rating in the recipe card right below and/or a review in the comment section further down the page? I always appreciate your feedback. You can also follow me on Pinterest, Facebook, Instagram, and YouTube. And subscribe to my email list too!

    How to Cook a Ham in the Oven

    Everything you need to know about how to cook a ham in the oven. Baked spiral ham recipe with an easy, simple glaze, perfect for holidays.

    • Roasting Pan
    • Aluminum Foil
    • Meat Thermometer
    • Small Saucepan
    • Basting Brush
    • 1 spiral cut or half bone-in ham w/ ham juices (*)
    • 1 cup water (*)

    Glaze:

    • 1 glaze packet (*)
    • 2 tablespoons water
    1. Preheat the oven to 250° F.

    2. Remove the ham from its packaging, and place it face down in the roasting pan.

    3. If your package has any juices in it, pour them into the bottom of the pan, along with about 1 cup of water; this will help your ham to stay more moist.

    4. Cover the ham tightly with foil (all of it but the bottom, so the juices can run out into the pan).

    5. Bake the ham according to the instructions in your packaging; usually, it will require you to bake it for 12 to 15 minutes per pound. So a 10-pound ham will bake for about 120+ minutes.
    6. About 45 minutes before the end of your bake time, empty the ham glaze packet into a small saucepan, along with 2 tablespoons water.

    7. Bring the glaze to a boil over high heat while stirring constantly.

    8. Remove the glaze from the heat. About 1/2 hour before end of cook time, remove the ham from the oven, take off the foil, and apply the glaze all over the outside of the ham with a basting brush.

    9. Finish baking the ham, glazed and uncovered, for another 30 minutes or so.
    10. When the ham is done, you can bring it out of the oven, let it cool just a bit, and use a sharp knife to slice it for serving. Store any leftovers in an airtight container in the fridge.

    *I used a 10 pound spiral cut ham for this recipe.

    *I use a little less than a cup of water.

    *The glaze packet usually comes with the ham, and you’ll find it in the packaging.

    How Long to Cook a Ham in the Oven

    Always be sure to look at the packaging instructions for your specific ham, and follow what it says for cook time. This spiral ham said 12 to 15 minutes per pound. So being a 10-pound ham, it needed to cook for about 2 hours (120 minutes) or more, but not too long or it’ll dry out. An 8-pound ham would take about 96+ minutes to bake. A 12-pound ham, 144+ minutes. And so on and so forth. It’s best to have a meat thermometer on hand.

    According to the USDA, spiral-cut cooked hams that were packaged in processing plants under USDA inspection must be heated to 140 °F as measured with a food thermometer (165 °F for leftover spiral-cut hams or ham that has been repackaged in any other location outside the plant). Cook-before-eating hams or fresh hams must reach 145 °F (with a 3-minute rest time) to be safely cooked before serving. Read more of their Ham and Food Safety instructions.

    Ways to Keep a Spiral Ham from Drying Out

    • Like I mentioned above, save the ham juices from the packaging, and pour them into the bottom of the pan; this will help your ham to stay moist.
    • You can put a little less than a cup of water or some kind of stock/broth in the bottom of the pan before baking if you want. This will also add moisture.
    • Covering your ham with foil helps it to retain moisture, as well. Of course, you can also bake it in a roasting bag.
    dinner, main dish, Pork Recipes
    American
    baked ham, Christmas ham, Easter ham, fully cooked ham, glazed ham, ham, ham in the oven, ham recipe, how do you heat a precooked spiral ham, how do you warm up a fully cooked ham, how to bake a ham, how to cook a ham in the oven, how to cook a pre-cooked ham, Thanksgiving ham
  • Easy Philly Cheesesteak Sliders on Hawaiian Rolls

    Easy Philly Cheesesteak Sliders on Hawaiian Rolls

    Make the best Philly cheesesteak sliders on Hawaiian rolls, packed with steak, onion, sliced peppers, and your choice of provolone or Cheez Whiz. It’s the perfect recipe for a party crowd!

    Whether you need a really delicious appetizer or an actual meal, these Philly cheese sliders are the bomb. They’re ooey gooey with melted cheese, the steak is packed with flavor from ingredients like smoked paprika (my new favorite seasoning), and the onions and green peppers have a slightly crispy texture.

    Philly cheesesteak sliders on Hawaiian rolls, sprinkled with Italian parsley, on gray plate with white and blue striped towel

    Not to mention the tops of the rolls are brushed with garlic butter and Italian parsley. Steak and cheese sliders on Hawaiian Rolls are good all by themselves; but when you add the garlic butter… I wish I could put into words how delicious these little sandwiches really are.

    If it’s a slightly healthier alternative you want, cheesesteak stuffed peppers made with ground beef are the recipe for you.

    Why You’ll Love Philly Steak Sliders

    • The meat mixture is the same as my regular homemade Philly cheesesteak, except I’ve added smoked paprika. It gives a little kick to the sliders, and I’ll never make cheesesteaks without it, ever again.
    • Just like my Crock Pot Philly cheesesteak, these cheese steak sliders are perfect for a Game Day crowd, holiday guests, or a party spread.
    • They’re really easy to make. Just cook the meat mixture, layer the sandwiches, and pop them in the oven.
    Philly cheesesteak sliders ingredients on white marble countertop

    Ingredients and Substitutions Notes:

    To make this easy Philly cheesesteak sliders recipe, you’ll need a few ingredients…

    • Sirloin Steak – When it comes to the best meat for a cheesesteak, most people will recommend ribeye steak; but ribeye steak is usually really expensive. Others recommend top round steak. My butcher has always recommended sirloin steak, sliced thinly, for a more affordable option. Sirloin has just enough fat to give the meat a lot of flavor and to make the meat quite tender when cooked. Two things to look for when buying Philly cheese steak meat… 1) You need to be able to slice it thinly, almost like shaved steak. And 2) It needs to be tender, not tough; fat is a good thing for both flavor and tenderness.
    • Garlic Cloves – Or you can do like me and just buy already minced garlic in the produce section at the grocery store.
    • Yellow Onion – I like to use an onion that isn’t sweet, partially because it’s a bit healthier, but also because we get enough sweetness from the bell peppers. Yellow onion helps give a little kick. As an alternative, for more caramelized onions on your sliders, you’d just use a sweet onion; then cook the onions over a lower heat.
    • Fresh Mushrooms – You can use canned mushrooms, if you prefer.
    • Green Bell Pepper – I’ve had a lot of comments from people who say it isn’t a real cheesesteak if it has bell pepper. Thing is, I never claimed this was an authentic cheesesteak. I just enjoy the flavor and deliciousness that bell peppers give to the steak mixture.
    • Smoked paprika – This is my “not so secret” ingredient. Man this spice gives a flavor kick like no other. It really does make a difference.
    • Worcestershire Sauce
    • Hawaiian Rolls – You can use King’s Hawaiian Rolls or generic, or better yet, homemade Hawaiian Rolls for slider rolls! You also have other options, like homemade dinner rolls, brioche slider buns, regular slider buns, potato slider buns, or gluten-free dinner rolls. I find Hawaiian sweet rolls to make the best mini sandwiches.
    • Mayo – When layering the sandwiches, be sure to use real mayo, not that other salad dressing. That other salad dressing has its place, but that place is not the cheesesteak slider.
    • Provolone cheese and/or Cheez Whiz – I leave the choice to you; if it were up to me, I’d do both. When it comes to the best cheese for cheesesteaks, opinion really varies, and it really is a debate if you research it. The traditional consensus says either Cheez Whiz or provolone. Some even say American cheese pairs well with the provolone. While I love provolone, Cheese Whiz won my taste buds over. However, it’s up for debate in our house too because a couple of my guys really love provolone.So I live on the wild side and use both. I add the provolone on the bottom layer of the rolls, and then add Cheez Whiz to the top of the meat mixture.
    • Salted Butter, Roasted Garlic Powder, and Fresh Italian Parsley – All of which will be brushed on the tops of the buns before baking.
    Philly steak sliders, sprinkled with Italian parsley and brushed with garlic butter, on metal baking sheet

    How to Make Philly Cheesesteak Sliders

    Your first steps are to prepare the garlic, onion, mushrooms, and bell pepper. Garlic and mushrooms need to be minced; onion and peppers need to be sliced.

    If you’re not sure how to cut a pepper into strips, I’ve got you covered.

    How to Thinly Slice the Meat and Start the Cooking Process

    1. Slice the steak as thin as possible, slicing it against the grain (to retain tenderness) into thin slices for cooking. Be sure to leave as much of the fat as possible on the meat. Fat gives meat flavor, especially during the cooking process.
    2. Heat bacon grease or olive oil in a large skillet, and sauté the garlic, onion, mushrooms, and bell pepper over medium-high heat for about 10 minutes, or ’til softened. Then set aside.
    3. Add the steak, salt, pepper, smoked paprika, and Worcestershire sauce to the skillet. Cook over low to medium heat until the meat is almost done.
    4. At this point, add the veggies back in with the meat, stir, and simmer ’til fully cooked.
    How to slice steak thinly for cheesesteaks on wooden cutting board and how to cook Philly cheesesteak meat, onion, and peppers in a cast iron skillet

    How to Layer Cheesesteak Sliders on Hawaiian Rolls

    Now for the fun part… Layering your mini cheesesteak sandwiches and baking them.

    Before you get started, slice the Hawaiian Rolls in half, as a whole. You’ll have the top layer of the rolls, and then a bottom layer.

    1. Place the bottom layer of the rolls in a greased baking dish or baking sheet, and spread the bottoms of the rolls with mayo.
    2. Add a layer of provolone cheese.
    3. Now add a layer of meat and vegetables. Tongs work great for this. Go ahead and pile up the meat and veggies, no skimping allowed.
    4. Add a dollop of Cheez Whiz to every single slider.
    5. Now add the top layer of the rolls.
    6. Mix together the melted butter, roasted garlic powder, and minced parsley in a small bowl; then brush the top of the rolls with the garlic butter mixture, and sprinkle with extra Italian parsley if desired.
    layering and making Philly cheesesteak sliders with Hawaiian Rolls, provolone cheese, cheese steak meat and vegetables, Cheez Whiz, and garlic butter on baking sheet

    How to Bake Steak and Cheese Sliders

    1. Cover with aluminum foil to keep your rolls from browning too quickly, and bake at 350° F for about 10 to 15 minutes, or ’til the cheese is melted.
    2. Then uncover and bake an additional 5 to 10 minutes or so.

    And that’s it. Oh my gosh, they are so good! My mouth is watering just thinking about these wonderful beef Philly cheesesteak sliders.

    Cheese steak sliders with Cheez Whiz, sprinkled with Italian parsley on gray plate, on blue and white striped tea towel on white marble countertop

    Expert Tips and Recipe FAQ’s

    Can you make this recipe ahead of time?

    Yes and no. You can totally cook the meat and vegetables and have your meat mixture ready to go. Just store it in the fridge in an airtight container until you’re ready to use it. Then when you’re ready to make your sliders, all you need to do is assemble the sandwiches and bake them. Reason you want to wait to assemble your sandwiches, is you don’t really want them sitting, soaking up all that moisture into the rolls for that long. It will make them a soggy, yucky mess.

    How should you store leftovers?

    Leftover sandwiches should be stored in an airtight container in the fridge. Keep in mind, they may get a bit soggy sitting in the fridge, but they should still be edible for 2-3 days.

    Can I freeze steak and cheese sliders on Hawaiian Rolls?

    Again… You can totally cook the meat and vegetables, then freeze the meat mixture in an airtight container that’s also freezer-safe. You can also freeze the rolls, but separately. Then when you’re ready to make your sliders, all you need to do is get everything out ahead of time to thaw; then assemble the sandwiches and bake them. This will prevent soggy sliders.

    baked Philly steak and cheese sliders on Hawaiian rolls with green bell peppers and onions on metal baking sheet

    What’s a Good Side to Serve with Steak Sliders?

    There are quite a few delicious sides you can serve with sliders. We usually eat cheese steaks with fresh veggies, chips, and/or fruit.

    They pair really well with steak fries or chili cheese fries, French fries, onion rings, tater tots, pasta saladbroccoli cauliflower salad, this vegetable finger salad, and even corn on the cob.

    Philly cheese steaks on Hawaiian Rolls  brushed with garlic butter and Italian parsley, topped with Cheez Whiz, on gray plate with blue and white striped towel

    More Party Favorites Everyone Will Love

    If you love these steak sliders, you’ll love these other party foods too…

    If you try this recipe, why not leave a star rating in the recipe card right below and/or a review in the comment section further down the page? I always appreciate your feedback. You can also follow me on Pinterest, Facebook, Instagram, and YouTube. And subscribe to my email list too!

    Philly Cheesesteak Sliders

    Best Philly cheesesteak sliders on Hawaiian rolls, packed with steak, onion, sliced peppers, and your choice of provolone or Cheez Whiz!

    • Cutting Board
    • Chef's Knife
    • Large Skillet
    • Baking Sheet
    • Tongs
    • Pastry Brush
    • 1 pound sirloin steak (thinly sliced)
    • 2 tablespoons bacon grease (or olive oil)
    • 1 clove garlic (minced)
    • 1/2 medium yellow onion (sliced)
    • 2 ounces fresh mushrooms (minced)
    • 1/2 large green bell pepper (sliced)
    • 1/2 teaspoon sea salt
    • 1/8 teaspoon ground black pepper
    • 1/2 teaspoon smoked paprika
    • 1 tablespoon Worcestershire sauce
    • 12 Hawaiian Rolls
    • 1/3 cup mayonnaise
    • 6 slices provolone cheese
    • 3/4 cup Cheez Whiz

    Garlic Butter:

    • 3 tablespoons salted butter (melted)
    • 1/4 teaspoon roasted garlic powder
    • 1 tablespoon Italian parsley (minced)
    1. Prepare the garlic, onion, mushrooms, and bell pepper. Garlic and mushrooms need to be minced; onion and peppers need to be sliced.
    2. Pre-heat the oven to 350° F.

    3. Slice the steak as thin as possible, slicing it against the grain (to retain tenderness) into thin strips for cooking. Be sure to leave as much of the fat as possible on the meat. Fat gives meat flavor, especially during the cooking process.
    4. Heat bacon grease or olive oil in a large skillet, and sauté the garlic, onion, mushrooms, and bell pepper over medium-high heat for about 10 minutes, or 'til softened. Then set aside.

    5. Add the steak, salt, pepper, smoked paprika, and Worcestershire sauce to the skillet. Cook over low to medium heat until the meat is almost done.

    6. At this point, add the veggies back in with the meat, stir, and simmer ’til fully cooked.
    7. Slice the Hawaiian Rolls in half, as a whole. You’ll have the top layer of the rolls, and then a bottom layer.
    8. Place the bottom layer of the rolls in a greased baking dish or baking sheet.

    9. Spread the bottoms of the rolls with mayo.
    10. Add a layer of provolone cheese.
    11. Now add a layer of meat and vegetables. Tongs work great for this. Go ahead and pile up the meat and veggies, no skimping allowed.

    12. Add a dollop of Cheez Whiz to every single slider.
    13. Now add the top layer of rolls.

    14. In a separate small bowl or glass measuring cup, mix together the melted butter, roasted garlic powder, and minced parsley.

    15. Brush the tops of the rolls with the garlic butter mixture, and sprinkle with extra Italian parsley if desired.

    16. Cover with aluminum foil to keep your rolls from browning too quickly, and bake at 350° F for about 10 to 15 minutes, or 'til the cheese is melted.

    17. Then uncover and bake an additional 5 to 10 minutes or so.

    18. And that's it! Serve while warm and enjoy!

    Two things to look for when buying Philly cheese steak meat…

    • You need to be able to slice it thinly.
    • It needs to be tender, not tough, and fat is a good thing for both flavor and tenderness.

    *While I prefer fresh mushrooms, you can also use canned mushrooms.

    Can I Make This Recipe Ahead of Time?

    Yes and no. You can totally cook the meat and vegetables and have your meat mixture ready to go. Just store it in the fridge in an airtight container until you’re ready to use it. Then when you’re ready to make your sliders, all you need to do is assemble the sandwiches and bake them. Reason you want to wait to assemble your sandwiches, is you don’t really want them sitting, soaking up all that moisture into the rolls for that long. It will make them a soggy, yucky mess.

    Appetizers
    American
    cheese steak sliders, cheesesteak sliders, cheesesteaks, Philly cheese sliders, Philly cheese steak on Hawaiian Rolls, Philly cheese steak sliders, Philly cheesesteak sliders, philly cheesesteak sliders on hawaiian rolls, Philly cheesesteak sliders recipe, Philly steak sliders, steak and cheese sliders on hawaiian rolls, steak sliders
  • Easy 4 Ingredient Buckeyes Peanut Butter Balls Recipe

    Easy 4 Ingredient Buckeyes Peanut Butter Balls Recipe

    How to make dreamy, creamy 4 ingredient buckeyes, peanut butter balls dipped in chocolate. Easy small batch buckeye recipe perfect for the holidays! It’s the quintessential must have Christmas candy and holiday dessert.

    Every Christmas since I was a little girl, I’ve made buckeye candy, or easy chocolate peanut butter balls with a creamy peanut butter center. If you’ve never had homemade buckeyes, they are the #1 must have Christmas candy.

    4 ingredient buckeyes peanut butter balls on ivory plate with blue Christmas kitchen towel

    When I was a kid during the holiday season, we’d store all the Christmas candy, including chocolate-dipped peanut butter balls, in the stairs that led up to my room because there was no heat or insulation. So they’d stay nice and chilled, and they were pretty easy to access on the way to my room.

    It just wouldn’t be the holidays without a small batch of buckeye balls and Ritz crackers with peanut butter. In fact, this small batch buckeyes recipe is one of our family’s favorite Christmas recipes. They’re perfect for Valentine’s Day too, especially if your significant other loves the combination of chocolate and peanut butter.

    Sometimes I like to make them crispy too. Rice Krispie peanut butter balls with Rice Krispies are just the ticket. If you want even quicker and easier (no rolling or dipping), you’ll love buckeye bars.

    Why I Love This Easy Buckeye Recipe

    • Classic peanut butter balls consist of a creamy peanut butter center inside a chocolate coating.
    • This buckeye balls recipe is super easy to make and only requires 4 ingredients.
    • Kids can get in on the fun of making them too, as it’s a very kid-friendly recipe.
    bite out of peanut butter buckeye, yummy easy buckeye recipe

    Is There a Difference Between Chocolate Covered Peanut Butter Balls and Buckeyes?

    Actually, yes, there is. And I didn’t really think it was that big of a deal until a few years ago, when a friend from Ohio (where the state tree of Ohio is the Ohio Buckeye tree) educated me otherwise.

    Chocolate covered peanut butter balls are just that… They’re completely covered in chocolate. Buckeye candy is mostly covered in chocolate but with a bit of the peanut butter uncovered, so to look like actual buckeyes.

    buckeye balls on a white plate

    Ingredients and Substitutions Notes

    You’ll need just a handful of ingredients to make this easy buckeye recipe…

    • Salted Butter – Be sure to give the butter time to soften and come to room temperature before mixing. You can also substitute plant-based or vegan butter if you need to make dairy-free buckeyes.
    • Creamy Peanut Butter – You can also sub crunchy peanut butter. I do recommend using a regular creamy peanut butter vs. a natural peanut butter, where you have to stir in the oil before using, because the chocolate will coat better with less oily peanut butter.
    • Powdered Sugar or Confectioners’ Sugar
    • Chocolate Melting Wafers – You can use any type of melting chocolate, but I do recommend using a higher quality chocolate for better flavor. I have used semi-sweet chocolate chips, but an actual melting chocolate has better flavor, in my opinion.

    How to Make 4 Ingredient Buckeyes Peanut Butter Balls

    1. Your first step will be to soften the butter and adding it to a large bowl. You can soften it by either getting it out of the fridge and letting it sit beforehand or putting it in the microwave for a few seconds.
    2. Add in the peanut butter with the butter.
    3. Finally, add in the powdered sugar.
    4. Mix everything together until it’s blended well.
    how to make buckeye balls by mixing butter, peanut butter, and powdered sugar together in green mixing bowl

    How to Shape the Peanut Butter Balls

    1. At this point, you’ll need to shape all of the dough into creamy peanut butter balls. You’ll take about a tablespoonful or small cookie scoop of the peanut butter mixture and begin to roll it between your hands. Shape it into round 1-inch balls and place each one on a baking sheet lined with wax paper or parchment paper.
    no bake peanut butter balls sitting on cookie sheet
    1. Add toothpicks (for dipping) to each ball.
    hand adding toothpicks to peanut butter balls for dipping

    Once all of the dough is rolled into balls, chill the whole sheet in the fridge or freezer for about half an hour.

    How to Melt Chocolate for Dipping

    While your peanut butter balls are chilling, it’s a good time to melt the chocolate and get it ready to go.

    Depending on the chocolate you decide to use, you can melt it a couple different ways:

    • Melt it using a double boiler on the stove – This is basically a pan inside of another pan with boiling water in the bottom pan. It allows for more even melting without burning, and it also keeps the chocolate warm for dipping.
    • Melt it in the microwave – This is usually the route I go.
    • Use a fondue pot and make it a family affair.

    Also, depending on the type of chocolate used, some people like to add vegetable shortening or paraffin wax to their chocolate as it melts. This allows for a thinner coat and stretches your chocolate a little further. If you use a good quality chocolate, you likely won’t need this step.

    I started using Ghirardelli Dark Melting Wafers a few years ago, and I love them so much better than almond bark. They’re so much easier to work with, and they have fantastic flavor.

    How to Dip the Peanut Butter Balls

    1. Dip the chilled peanut butter balls, leaving the very top part of each undipped, so to resemble an actual buckeye. We’ve used a regular table fork in the past, as well as tongs or toothpicks. You can also use a dipping fork or tool to dip your peanut butter balls into the chocolate.
    dipping peanut butter balls in chocolate in Pyrex measuring cup to make buckeye candy
    1. At this point, you’ll need to chill the buckeye peanut butter balls for about 15-20 minutes in the freezer; then remove all the toothpicks and cover up each toothpick hole with your finger (totally optional).
    fingers smoothing and covering buckeye toothpick holes after dipping in chocolate

    As you can see in most of my pictures, I didn’t really care about the holes being there… But if you do, just smooth it over.

    Expert Tips and Recipe FAQ’s

    For best results, make sure the peanut butter you’re using isn’t a super greasy peanut butter. If it’s too oily, the chocolate may not want to coat the peanut butter mixture.

    Put the melted chocolate in a deeper dish for dipping; I prefer my 2-cup Pyrex measuring cup because I can use it in the microwave, and it’s the perfect depth and breadth for dipping.

    My homemade buckeyes usually have kind of a chocolate ring around the bottom of the buckeyes. You can avoid this by letting excess chocolate drip off the buckeye after dipping; and just lightly press the bottom of the buckeye on a separate sheet of wax paper before putting it back on your cookie sheet.

    Can I use crunchy peanut butter to make buckeye candy?

    If you like to have a little crunch to your peanut butter balls, you most certainly can use crunchy peanut butter. I’ve also used honey peanut butter, which really does make delicious peanut butter balls.

    How do you keep buckeyes from sweating?

    Keep them chilled. Freezing or chilling the dough before dipping, then after dipping, will make the buckeyes sweat if removed from the fridge or freezer. So when not eating, keep them stored in the fridge.

    How should you store buckeye candies?

    As noted above, be sure to keep this candy in an airtight container, lined with wax paper, in the fridge. They can be kept out, but they won’t keep as long as they will if you keep them in the fridge.

    Can you freeze chocolate peanut butter balls?

    Yes, you can. You can freeze them before or after dipping. Just be sure to store them in an airtight, freezer-friendly container to avoid freezer burn. They should keep for up to 3 months.

    freshly dipped chocolate peanut butter balls, made with a family buckeye balls recipe, on a white ivory plate

    More Easy Candy Recipes:

    If you love this small batch buckeye recipe as much as I do, you’ll love these candies too…

    If you try this recipe, why not leave a star rating in the recipe card right below and/or a review in the comment section further down the page? I always appreciate your feedback. You can also follow me on Pinterest, Facebook, Instagram, and YouTube. And subscribe to my email list too!

    Easy 4-Ingredient Buckeyes Recipe

    How to make dreamy 4 ingredient buckeyes, peanut butter balls dipped in chocolate. Easy small batch buckeye recipe perfect for the holidays!

    • Mixing Bowls
    • Baking Sheet
    • Wax Paper
    • Double Boiler
    • Candy Dipping Tools
    • Festive Christmas Tins
    • 3 tablespoons salted butter (softened)
    • 1/2 cup creamy peanut butter*
    • 1 cup powdered sugar
    • 10 ounces dark chocolate melting wafers
    1. In a large bowl, mix up the first three ingredients, including the softened butter, creamy peanut butter, and powdered sugar.

    2. Take about a tablespoonful or small cookie scoop of the peanut butter mixture and begin to roll it between your hands. Shape it into as round of a ball as you can and place it on a baking sheet lined with wax paper or parchment paper.

    3. Continue rolling until all of your peanut butter mixture has been rolled into 1-inch balls.

    4. Add toothpicks (for dipping) to each ball.

    5. Chill the peanut butter balls in the fridge or freezer for about half an hour.
    6. Melt the chocolate according to package directions.*
    7. Once your chocolate is ready to go, you can remove the chilled peanut butter balls from the freezer, and start dipping right away.

    8. As you partially dip each buckeye into the chocolate, using a toothpick or dipping tool, place it back on the wax paper lined cookie sheet.*

    9. Chill the chocolate covered peanut butter balls in the fridge or freezer ’til set, probably about 15-20 minutes.
    10. Then remove all the toothpicks and cover up each toothpick hole with your finger (optional step).

    11. Store them in an airtight container or festive Christmas tin, lined with wax paper or parchment paper, in the fridge.*

    *For best results, make sure the peanut butter you’re using isn’t a super greasy peanut butter. If it’s too oily, the chocolate may not want to coat the peanut butter mixture. You can also use crunchy peanut butter.

    *How to Melt Chocolate for Dipping:

    • Melt it using a double boiler on the stove – This is basically a pan inside of another pan with boiling water in the bottom pan. It allows for more even melting without burning, and it also keeps the chocolate warm for dipping.
    • Melt it in the microwave – This is usually the route I go. I like to use my 2-cup Pyrex Glass Measuring Cup for dipping. Whatever you do, put the melted chocolate in a deeper dish for dipping; I prefer my Pyrex measuring cup because I can use it in the microwave, and it’s the perfect depth and breadth for dipping.
    • Use a fondue pot and make it a family affair.

    Also, depending on the type of chocolate used, some people like to add vegetable shortening or paraffin wax to their chocolate as it melts. This allows for a thinner coating and stretches your chocolate a little further.

    If you use a good quality chocolate, you likely won’t need this step. I started using Ghirardelli Dark Melting Wafers a few years ago, and I love them so much better than almond bark. They’re so much easier to work with, and they have fantastic flavor.

    *My buckeyes usually have kind of a chocolate ring around the bottom of the buckeyes. You can avoid this by letting excess chocolate drip off the buckeye after dipping; and just lightly press the bottom of the buckeye on a separate sheet of wax paper before putting it back on your cookie sheet.

    *They can be kept out, but they won’t keep as long as they will if you keep them in the fridge.

    Can Chocolate Peanut Butter Balls Be Frozen?

    Yes, they absolutely can. You can freeze them before or after dipping. Just be sure to store them in an airtight container or festive Christmas tin to avoid freezer burn.

    Candy
    American
    buckeye balls recipe, buckeye candy, buckeye peanut butter balls, buckeye recipe, buckeyes, chocolate covered peanut butter balls, chocolate peanut butter balls, easy chocolate peanut butter balls, how to make buckeye balls, how to make chocolate peanut butter balls, no bake chocolate peanut butter balls, peanut butter buckeyes recipe, small batch buckeye recipe
  • The Ultimate Mashed Potato Bar with the Best Toppings

    The Ultimate Mashed Potato Bar with the Best Toppings

    Feed a crowd with the ultimate mashed potato bar at your next party, wedding, or celebration. How to create a crowd pleasing buffet with ideas for all sorts of delicious mashed potato toppings. It’ll be the talk of the party!

    There are so many things you can do with a mashed potato bar; the choices for mashed potato bar toppings are endless. Pretty much anything you think up you can use.

    mashed potato bar, including mashed potato cup with bacon, cheese sauce, and chives, with spoon in ready to eat

    It’s the perfect appetizer idea, or side dish, for a wedding or party. I experienced my first mashed potato bar, or rather a mashtini bar, at a blogging conference; I’d never seen such a beautiful thing in all my life.

    It was filled with all sorts of delicious mashed potato toppings, along with all sorts of potatoes, including purple mashed potatoes! The mashed potatoes themselves were served in martini glasses, and you could go right down the buffet line, adding any mashed potatoes toppings you wanted.

    You talk about delicious and one of my favorite things ever. That was hands down the BEST food I’ve ever had at a conference. Comfort food at its best, and man, was it delicious.

    baked potato bar with baked potatoes and baked potato toppings

    Why Create a Mashed Potato Bar?

    When I created my first baked potato bar, I thought it only appropriate to also create a mashed potato bar. Because who doesn’t love a loaded down cup of hot mashed potatoes smothered in cheese and bacon?

    • A mashed potato bar wedding buffet will definitely be a great idea and a favorite with guests.
    • A mash potato bar is also perfect for that big holiday family gathering, like Thanksgiving dinner, Christmas dinner, or Easter dinner.
    • New Year’s is also a great time to put together a mashed potato martini bar. To save on cost, make a big batch of mashed potatoes, and have each guest bring their favorite toppings to add to the ones you provide. Then you get different perspectives, different ideas, and guests get to contribute their favorite topping idea to the mix.
    mashed potatoes with mashed potato bar toppings on gray countertop with white and blue kitchen towel

    How to Make Mashed Potatoes

    I’ve got you covered with this delicious and easy mashed potatoes recipe.

    Ingredient Notes:

    • Potatoes – I prefer to use yellow potatoes, but again, you can have fun with this and use all sorts of potatoes, including yellow, russet, red potatoes, even purple potatoes.
    • Salted Butter – Don’t skimp on the butter; it gives the best flavor.
    • Heavy Cream or Whole Milk – While you can use skim milk, you’ll get the best texture and flavor with whole milk or cream.
    • Sea Salt and Black Pepper – for added flavor.

    Steps for Making Stovetop Mashed Potatoes:

    1. Wash, peel, and chop the potatoes.
    2. Boil the potatoes in a large saucepan on the stove over low to medium heat, until they’re soft enough to easily jab with a fork, about 20-30 minutes.
    3. Drain the water off the boiled potatoes, and leave them in the saucepan.
    4. Add the butter and heavy whipping cream to the potatoes.
    5. Use a hand mixer to whip the potatoes, adding salt and pepper to taste. You can also use a potato masher if you don’t have a hand mixer; your potatoes may just be a little bit chunky.
    6. Once they’re whipped, they’re ready to serve.

    If you’d rather, you can make Instant Pot mashed potatoes instead.

    mash potato bar with mini trifle bowls of mashed potatoes covered in toppings like bacon, cheese sauce, chives, broccoli, sloppy joe meat, and red onion

    How to Set up or Assemble a Mashed Potato Bar

    Gather your ingredients for your potato bar… You’ll need mashed potatoes and toppings. Your main work will be cooking the potatoes and prepping any toppings for your guests to choose from.

    Whether you’re getting together with friends for game night, hosting a family dinner, or setting up a potluck, a mashed potatoes bar is the perfect way to feed and entertain your guests. And it really doesn’t take a whole lot of time and effort on your part.

    Mash Potato Bar Ideas and Expert Tips

    • If you’d rather use sweet potatoes over regular potatoes, you can make Instant Pot sweet potatoes.
    • Prep the toppings, adding each topping to a separate dish or compartment for serving. Prepping may involve cooking, re-heating, or simply chopping.
    • Set everything out buffet style, so your guests can create their very own delicious mashed potato creations.
    • If you’re hosting a smaller gathering, try using a large charcuterie board with small bowls for a variety of toppings all around a large bowl of mashed potatoes.
    • If you’re wondering how to keep the mashed potatoes warm without warmers, you can create a CrockPot mashed potato bar or Instant Pot mashed potato bar.

    The Ultimate List of Mashed Potato Bar Toppings:

    When it comes to what toppings are good on mashed potatoes, including what to put on mashed potatoes besides gravy, this list of toppings will answer that question in a most delicious way.

    broccoli and cheese sauce on mashed potato in small glass trifle dish
    sloppy joe meat and red onions on mashed potato in small glass trifle dish
    bacon and cheese topping for mashed potato bar in small glass trifle dish

    The sky’s the limit on ideas for a mashed potato buffet because there are so many toppings you can add to this list. But this is a great start.

    Recipe FAQ’s

    How much does a mashed potato bar cost?

    Really, this depends. For a small family gathering, if you make your own mashed potatoes and put together just a few simple toppings, you can get away with less than $20. If you’re creating a larger buffet for a large crowd, your cost will depend on how many ingredients and supplies are needed to feed said crowd.

    What potatoes are best for a mash potato bar?

    While I do prefer yellow potatoes or Yukon Gold potatoes, you can use any kind of potatoes you prefer, including Russet potatoes, red potatoes, even purple potatoes if you can find them. I’ve also gone so far as to search for the best mashed potatoes near me, and I found Bob Evans mashed potatoes in my grocery store. If you really don’t want to make mashed potatoes, ready made potatoes could be just the thing.

    Can you make mashed potatoes and toppings ahead of time?

    Yes, you can. You can make mashed potatoes and prep most of the toppings 1-2 days ahead of time. You’ll just need to store everything in airtight containers in the fridge.

    How can you keep the mashed potatoes warm at a party?

    You can either use a buffet server and food warmer. Or you can keep the mashed potatoes in a Crock Pot or Instant Pot on the “Keep Warm” setting.

    How should you store leftovers?

    Definitely store leftovers in airtight containers in the refrigerator.

    More Family Favorite Potato Recipes

    If you love this mashed potato bar and think it’s as much fun as I do, you’ll love these recipes too…

    mashed potato bar toppings with small glass trifle bowls of mashed potatoes

    If you try this recipe, why not leave a star rating in the recipe card right below and/or a review in the comment section further down the page? I always appreciate your feedback. You can also follow me on Pinterest, Facebook, Instagram, and YouTube. And subscribe to my email list too!

    The Ultimate Mashed Potato Bar

    Feed a crowd with a mashed potato bar at your next party, wedding, or celebration. Ideas for all sorts of delicious toppings.

    • Stockpot
    • Hand Mixer
    • Potato Masher
    • Cutting Board
    • Vegetable Cleaver
    • Buffet Server and Food Warmer
    • Serving Bowls
    • Sectioned Serving Tray
    • Mini Appetizer Cups
    • Plastic Martini Glasses

    Mashed Potatoes:

    • 16 medium potatoes
    • 12 tablespoons salted butter
    • 4 tablespoons whole milk (or heavy cream)
    • 2 teaspoons sea salt (to taste)
    • 2 teaspoons ground black pepper (to taste)

    Mashed Potato Bar Toppings:

    • 1 1/2 cups salted butter
    • 1/4 cup salt
    • 1/4 cup ground black pepper
    • 1 1/2 cups sour cream
    • 3 cups cheese sauce
    • 12 ounces extra sharp cheddar cheese (*shredded)
    • 2 cups red onion (minced)
    • 2 cups green onion (chopped)
    • 2 cups chives (chopped)
    • 6 cups broccoli (cooked)
    • 6 cups sloppy joe meat
    • 1 1/2 cups bacon (cooked and crumbled)
    • 4 1/2 cups ham (chopped)

    Mashed Potatoes:

    1. Wash, peel, and chop the potatoes.

    2. Boil the potatoes in a large saucepan on the stove, until they're soft enough to easily jab with a fork, about 20-30 minutes.

    3. Drain the water off the boiled potatoes, and leave them in the saucepan.

    4. Add the butter and heavy whipping cream to the potatoes.

    5. Use a hand mixer to whip the potatoes, adding salt and pepper to taste. You can also use a potato masher if you don't have a hand mixer; your potatoes may just be a little bit chunky.

    6. Once they're whipped, they're ready to serve. 

    Potato Bar Toppings:

    1. Choose and prep your toppings*, adding each topping to a separate dish or compartment for serving. Prepping may involve cooking, re-heating, or simply chopping.

    2. Set everything out buffet style*, so your guests can create their very own delicious baked potato creations.

    * You can use any kind of shredded cheese you prefer. I recommend Extra Sharp Cheddar, Colby Jack, Monterey Jack, Pepper Jack, Smoked Cheddar, Mozzarella, etc.

    *More mashed potato bar topping ideas include cooked cauliflower, chili, beef taco meat, taco chicken, pulled pork, sausage, ground beef, steak, bacon bits, cubed pepperoni, BBQ sauce, Ranch dressing, pizza sauce, turkey gravy, ham gravy, ham gravy with cornstarch, chicken stock gravy, tomatoes, guacamole, salsa, jalapeños, fire roasted green chiles, corn, peas, etc.

    *You may need warmers to keep the mashed potatoes warm; you can also use a slow cooker or Crock pot. Otherwise, you may use a serving platter or serving bowls for toppings.

    Side Dish
    American
    mash potato bar, mashed potato, mashed potato bar, mashed potato bar ideas, mashed potato bar toppings, mashed potato martini bar, mashed potato toppings, mashed potatoes bar, mashed potatoes recipe, mashed potatoes toppings, mashtini bar, potato recipes, toppings for mashed potatoes
    the ultimate mashed potato bar recipe and how-to