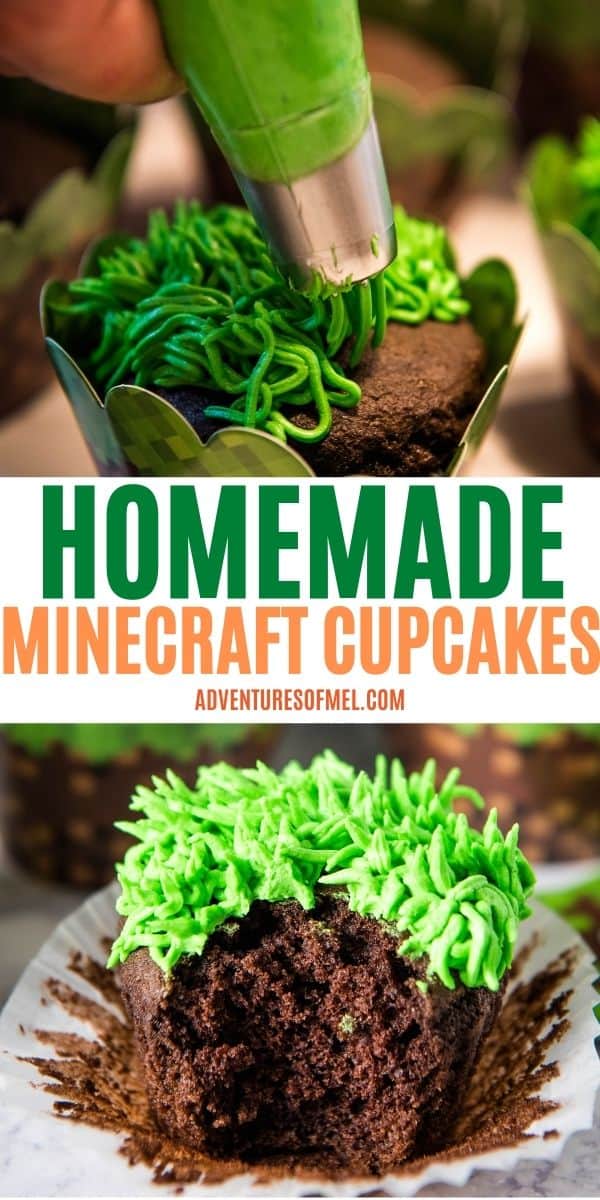
How to make fluffy chocolate Minecraft cupcakes and decorate them with an easy buttercream grass frosting. Ideas for wrappers and toppers too!
I’d be lying if I said I didn’t love these easy Minecraft cupcakes just as much as my boys. And not because of Minecraft, probably more so because they are so soft and fluffy!
I love the green buttercream frosting too, and making grass frosting has never been easier with my handy little secret, which I’ll share with you as you read on.
This recipe makes wonderful Minecraft birthday cupcakes or cupcakes for whatever occasion you’re celebrating. You don’t even have to have an occasion to make them; you can simply make them just because.
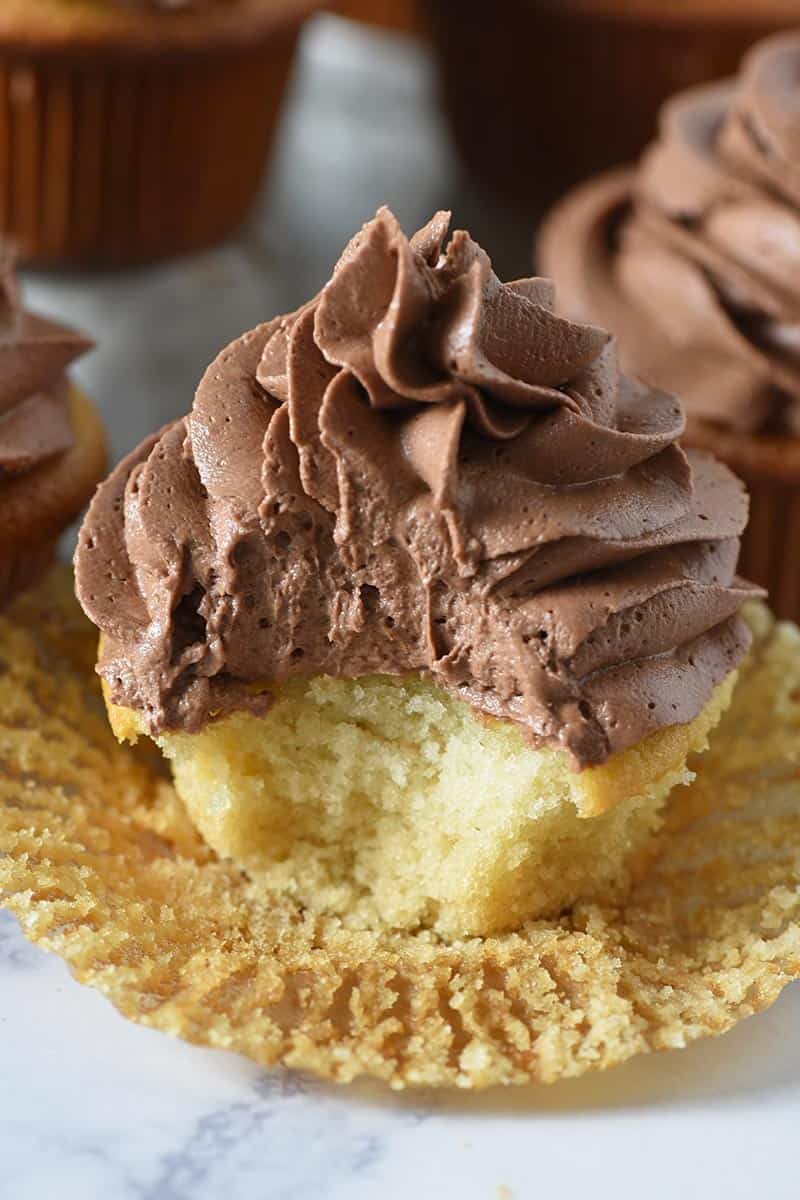
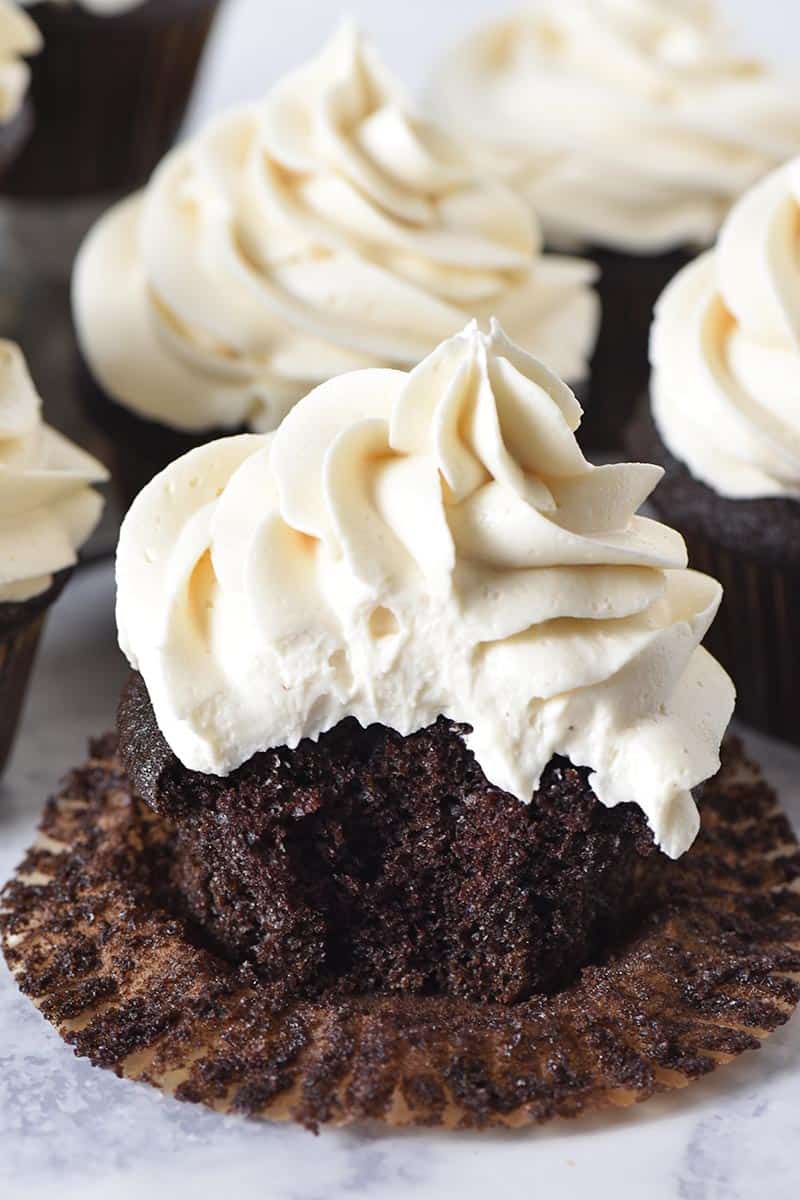
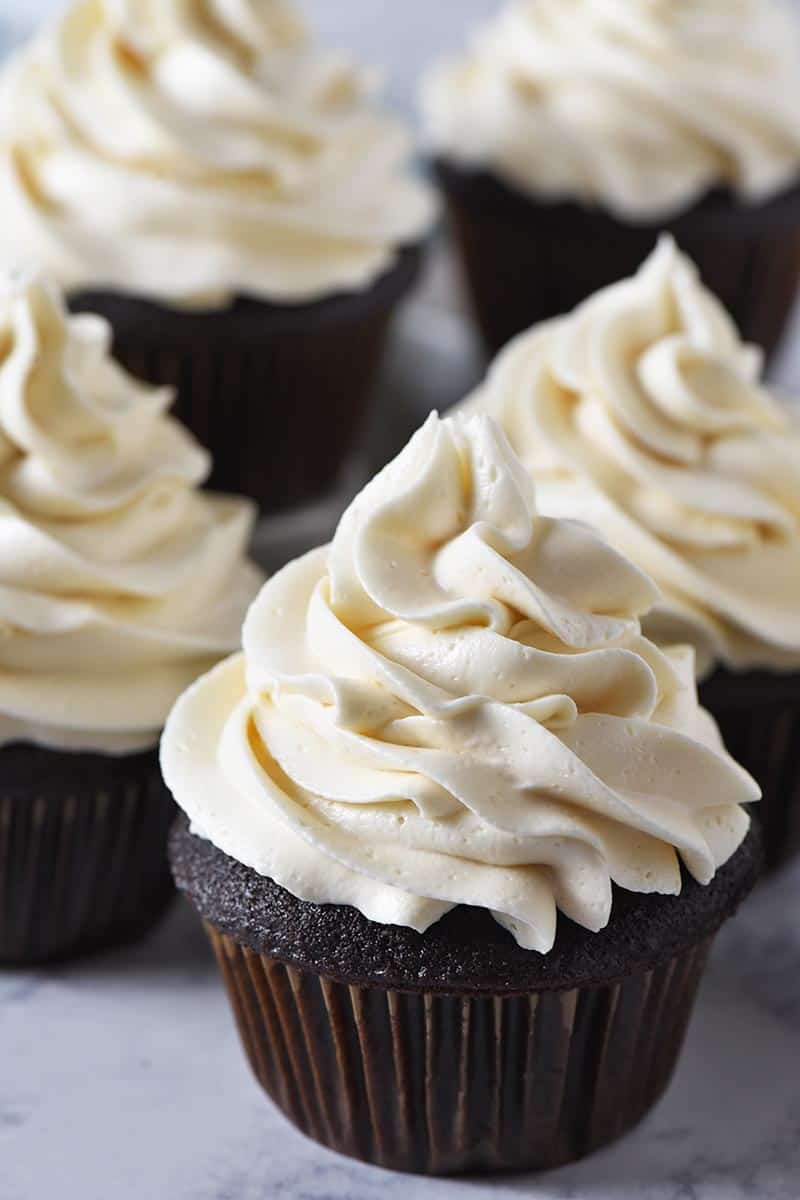
While I like to make my favorite chocolate cupcake recipe with homemade buttercream frosting, you can use a cake mix to make it even easier. I am partial to homemade, though, because they bake up ultra soft and fluffy, with loads of chocolate flavor.
If it’s a Minecraft cake you’re after, I’ve got ya covered with a few simple choices:
- Grass block Minecraft cake (no fondant necessary)
- Minecraft pig cake (again, no fondant needed)
- Actual Minecraft cake (in edible form and you guessed it, without fondant)
I don’t know about you, but I’m ready to make this chocolate Minecraft cupcakes recipe. Let’s get baking!
BENEFITS OF CUPCAKES OVER CAKE
Cupcakes are just easier to make. Simply mix up the batter, pour it into cupcake cups, and bake it!
Whereas big cakes require a little more work. Everything has to be just right, including the cook time, batter consistency, frosting, etc. Cupcakes are simply more forgiving.
If diet is a concern, it is much easier to control your portion size with cupcakes. Believe me, it is easy to pig out on a big cake, eating way more than you should.
However, cupcakes are already portioned out of the oven. This eliminates the temptation to slice off a bigger piece of cake!
As I said before, making cupcakes is far more forgiving than baking a large cake. Because of this, you can often be far more creative with all of the different flavors you have to choose from and try.
INGREDIENTS YOU’LL NEED:
FOR THE CUPCAKES:
- Unsalted butter
- Canola oil
- Pure cane sugar (granulated sugar works just fine)
- Large eggs, separated
- Vanilla extract
- Buttermilk – I’ll show you how to make your own.
- Cake flour – You can use a good gluten-free flour, along with xanthan gum, instead. This is my go to brand of gluten-free cake flour.
- Dark cocoa powder
- Baking soda
- Salt
FOR THE FROSTING:
- Salted butter
- Vanilla extract
- Almond extract
- Heavy whipping cream
- Powdered sugar
- Wilton Leaf Green icing color
FOR DECORATING:
Keep in mind, all of the ingredient amounts you’ll need are in the printable recipe card below.
KITCHEN TOOLS AND EQUIPMENT YOU NEED FOR CUPCAKES:
Mixer – I prefer to use my KitchenAid stand mixer for both cupcakes and frosting.
Egg separator – for separating the whites from the yolks.
Cupcake batter scoop – Makes putting batter into cupcake liners so much easier and less messy.
Muffin tin – I love my 6-cup Wilton cupcake tins. They bake the perfect regular-sized cupcake.
Large grass tip and pastry bag – This is my handy little secret tip for piping grass frosting… I switched to a larger tip for piping grass, and it is amazing! So much more efficient, so much quicker, and so much easier! (Also, I don’t use a coupler because I just don’t see the need.)
We’ll talk specifically about cupcake wrappers and toppers as you keep reading.
HOW TO MAKE MINECRAFT CUPCAKES
Making these cupcakes is fairly simple, and decorating them is even easier. We’ll go through the entire process here.
FIRST LET’S MAKE SOME BUTTERMILK
We almost never buy buttermilk. We just never use it because I know I can make my own when I’m baking.
Just add about a tablespoon of distilled white vinegar to a cup (or two) of milk; I usually use a tablespoon for every 1 to 2 cups of milk. Stir and let sit for 5 to 10 minutes.
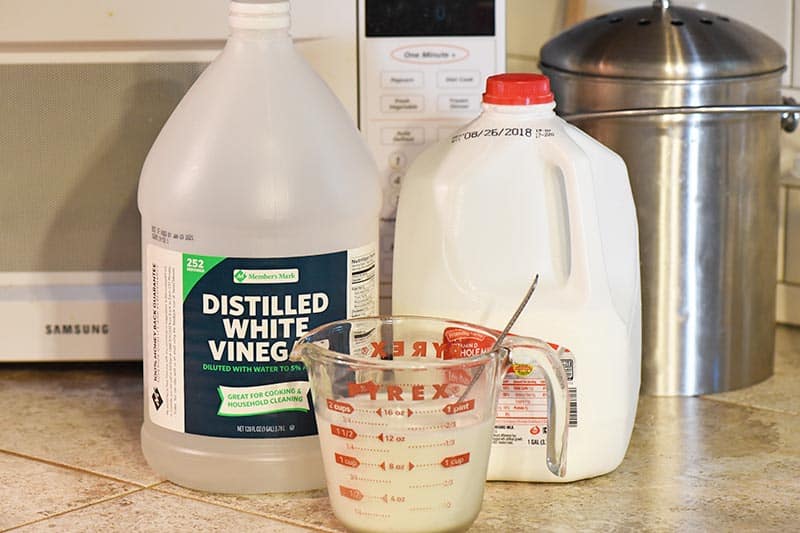
Before you know it, you have sour milk or buttermilk. Works like a charm!
HOW TO BAKE THE PERFECT CUPCAKE
Now we need to mix up our batter, and if you follow these steps to a t, you’ll come out with the softest, fluffiest cupcakes you’ve ever had.
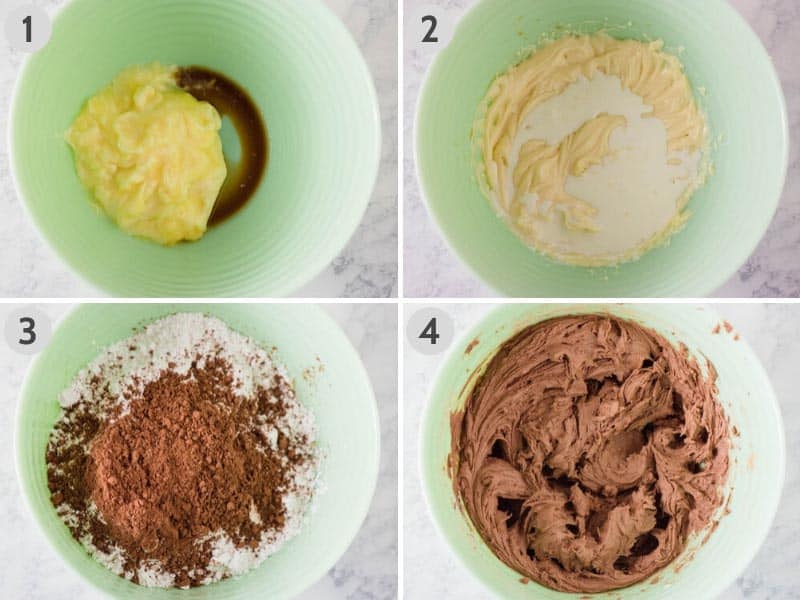
- Cream (or mix) together the butter, canola oil, and sugar for a good 5 to 8 minutes.
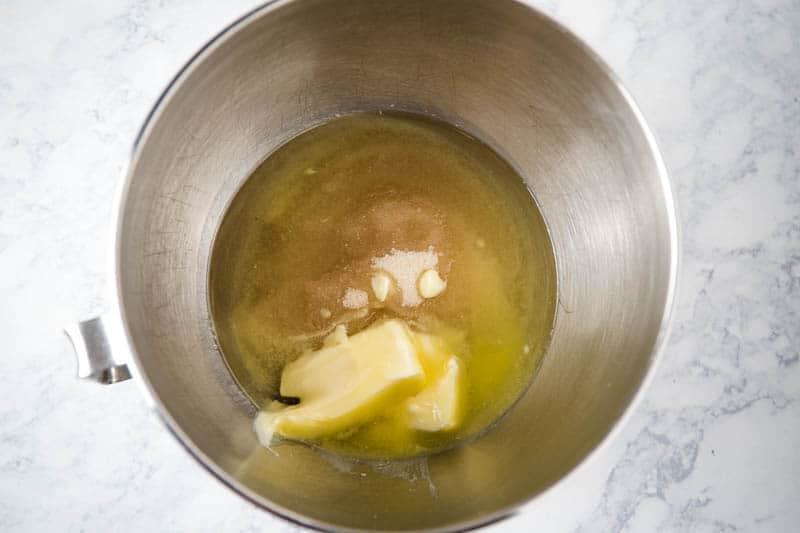
- You should have already separated your eggs at this point, so go ahead and add the egg yolks and vanilla extract in with the sugar mixture, and mix well.

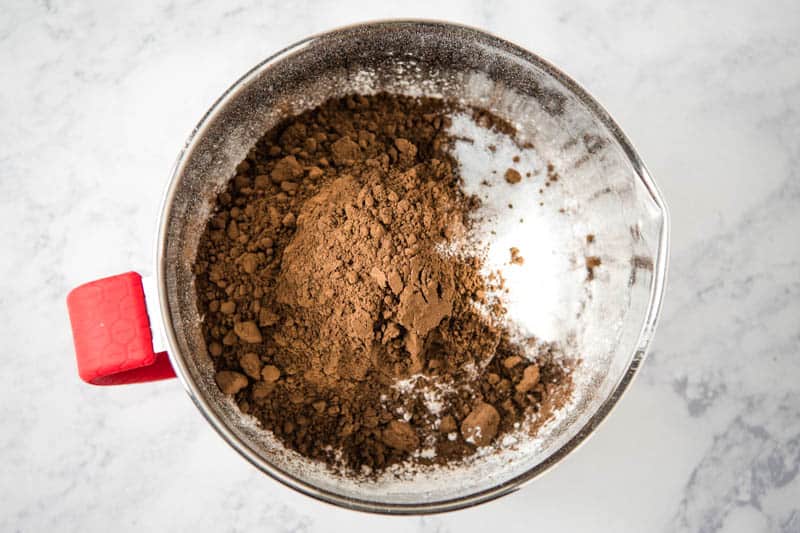
- In a separate mixing bowl, mix together the dry ingredients, including the cake flour, dark cocoa powder, baking soda, and salt.
- Begin by adding a small part of the dry ingredients to your creamed mixture, mixing well.
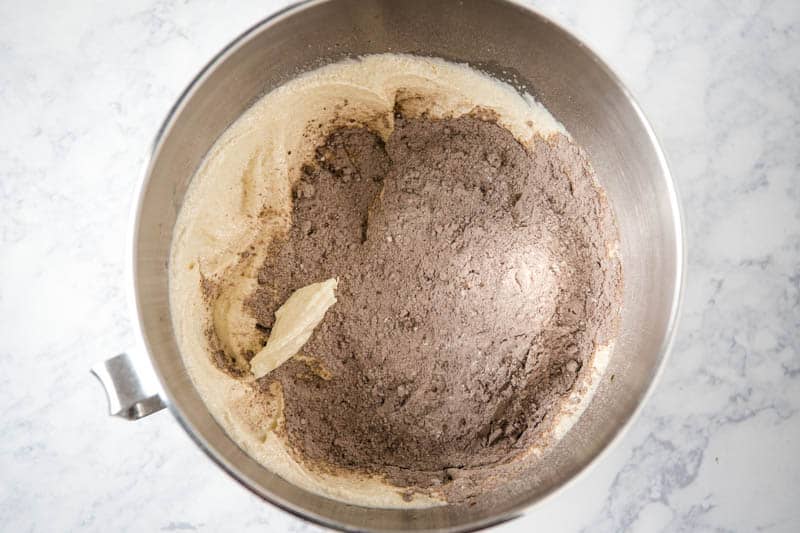
- Then alternate adding buttermilk with dry ingredients, mixing after each addition, and ending with the dry ingredients.
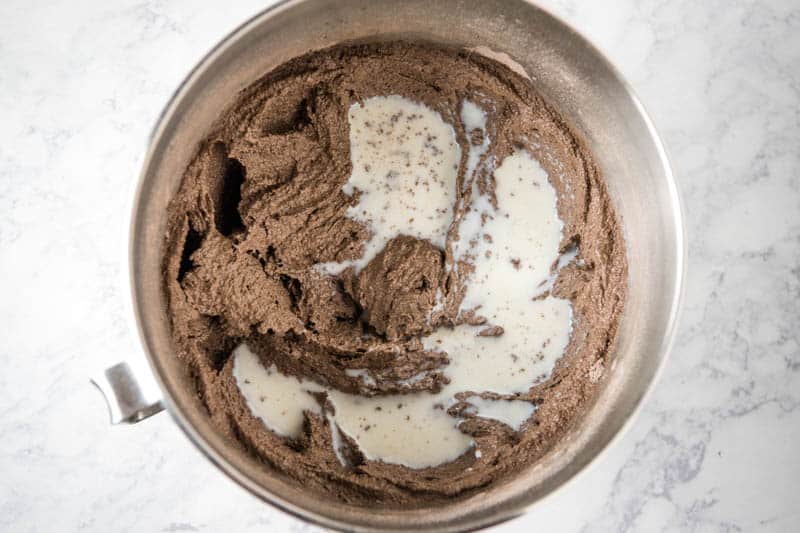
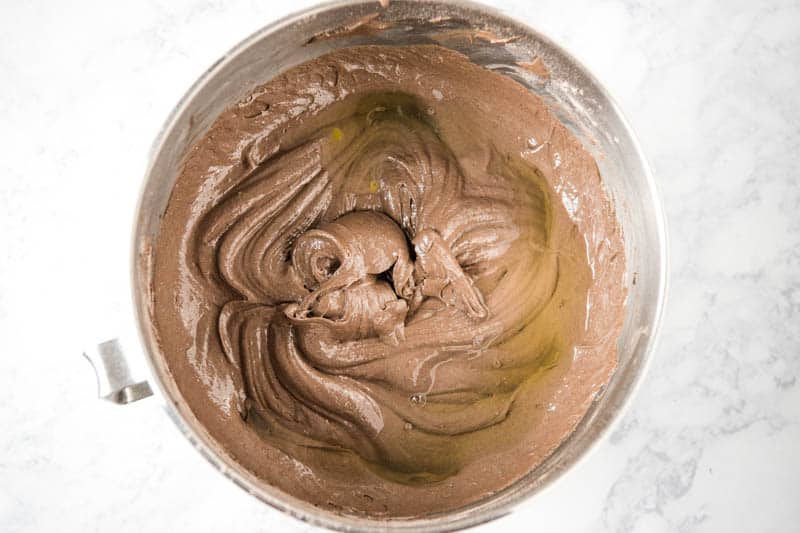
- Finally, when everything is mixed together, fold in the egg whites and mix together just until the batter is blended.
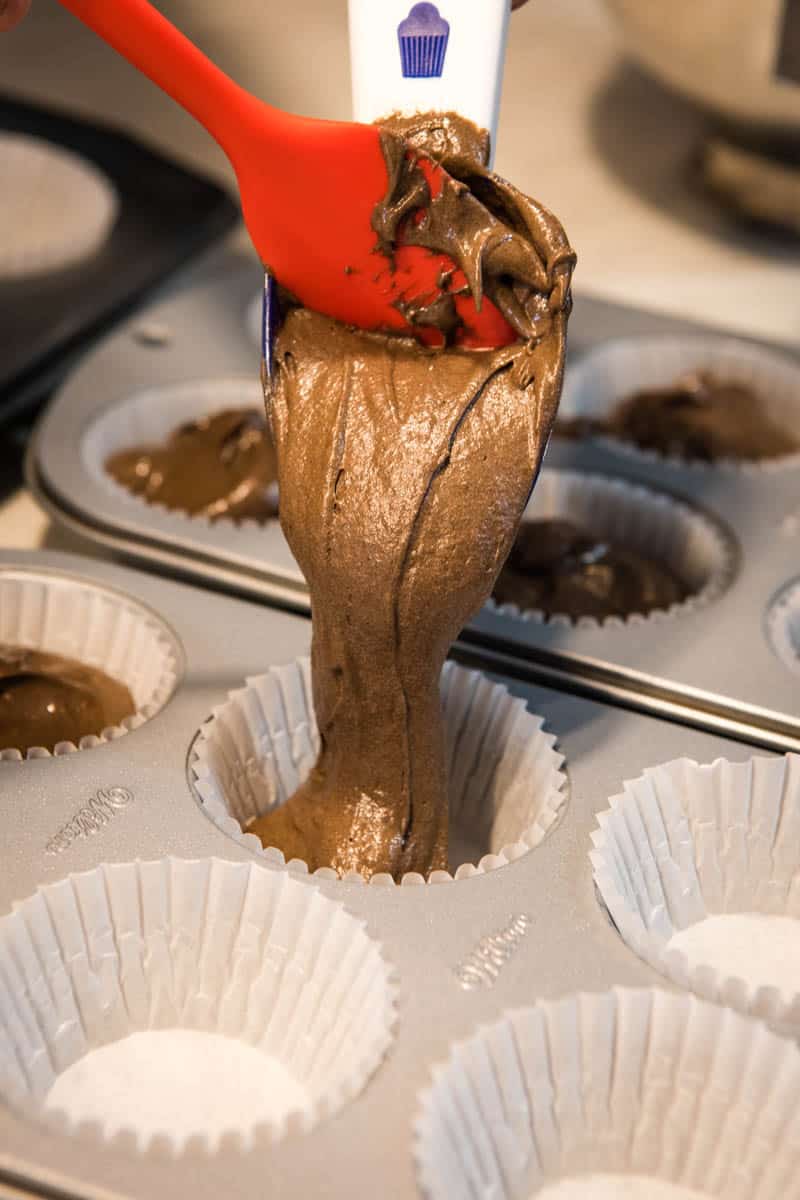
- Add cupcake liners to your muffin tins (you’ll need about 24 muffin cups), and pour or dispense the batter into each liner, filling each cup 3/4 of the way full.
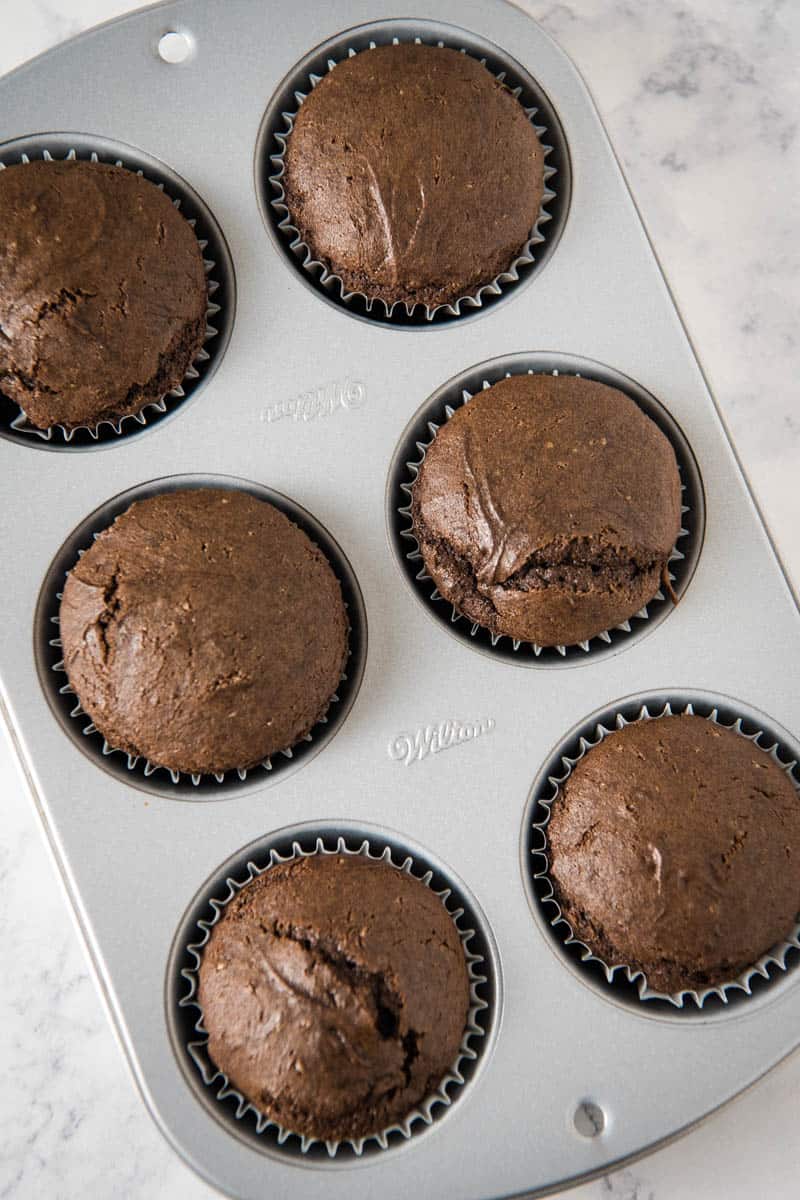
- Bake at 350° F for about 20 minutes, or until a toothpick comes out clean.
- Allow the cupcakes to cool in the pan for about 10 minutes; then remove to a wire rack to finish cooling before frosting.
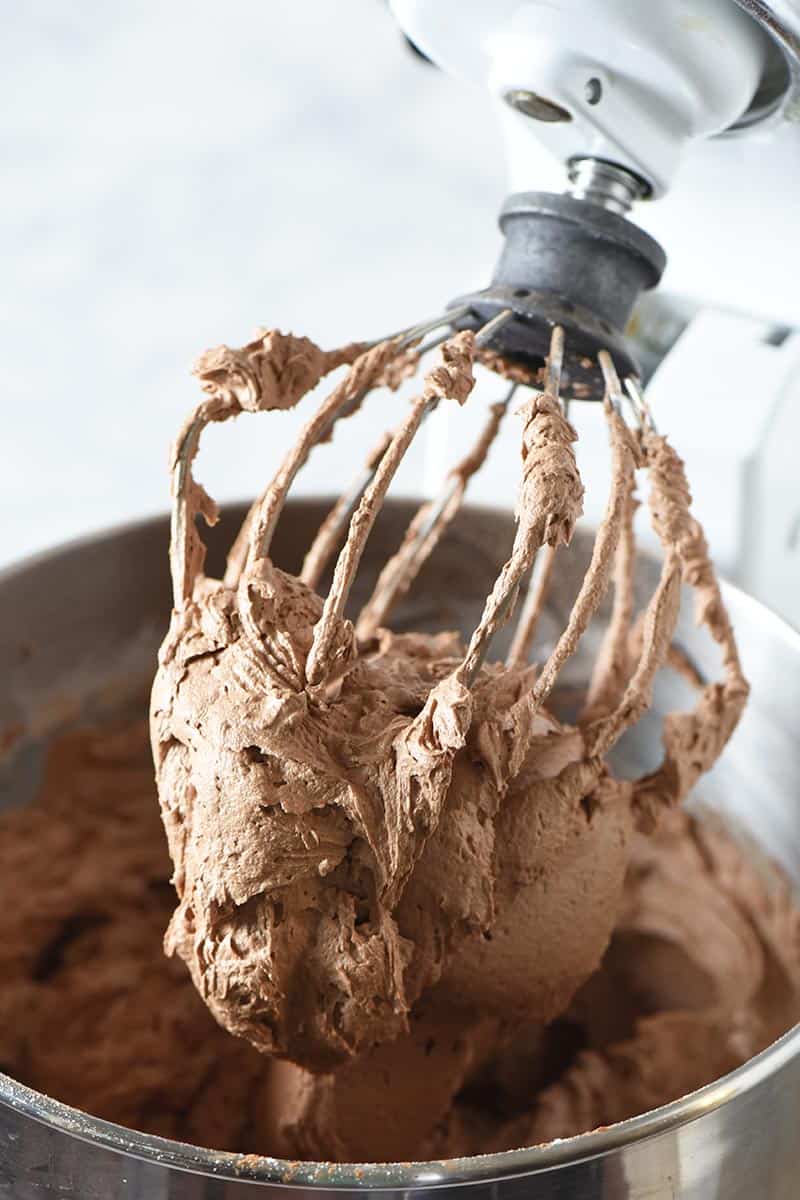
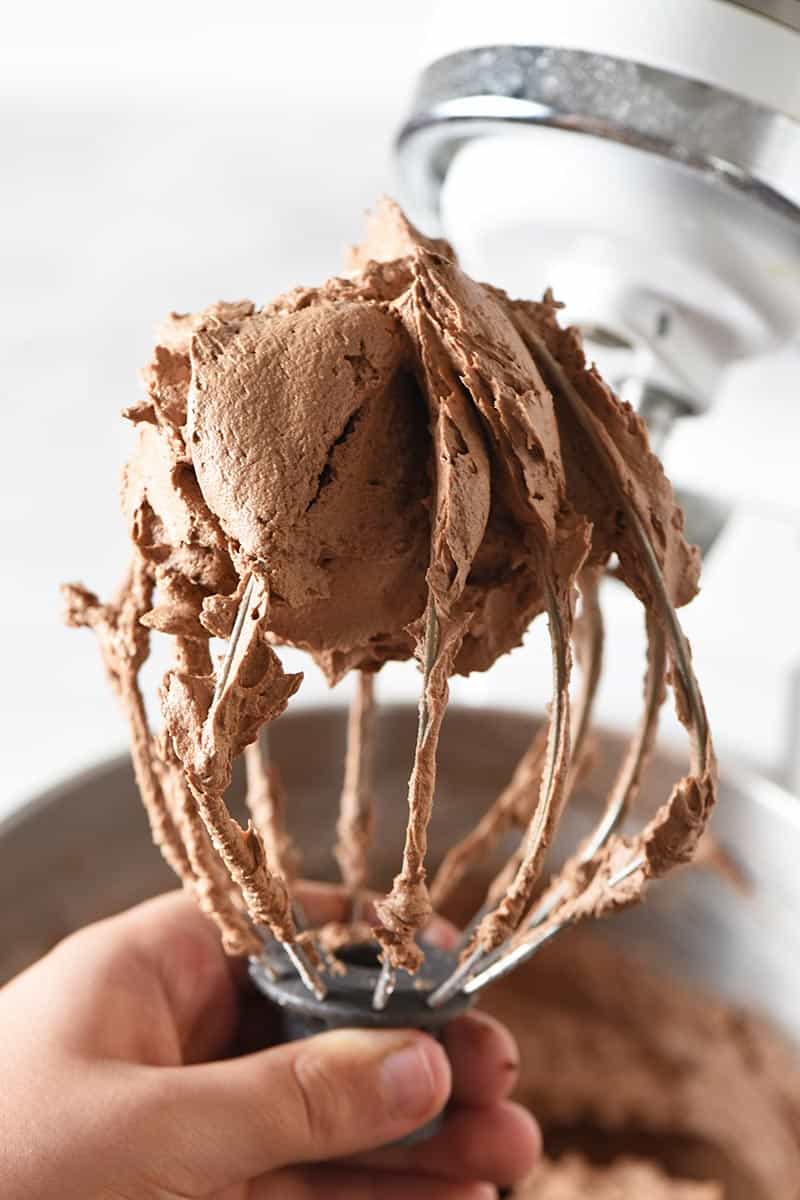
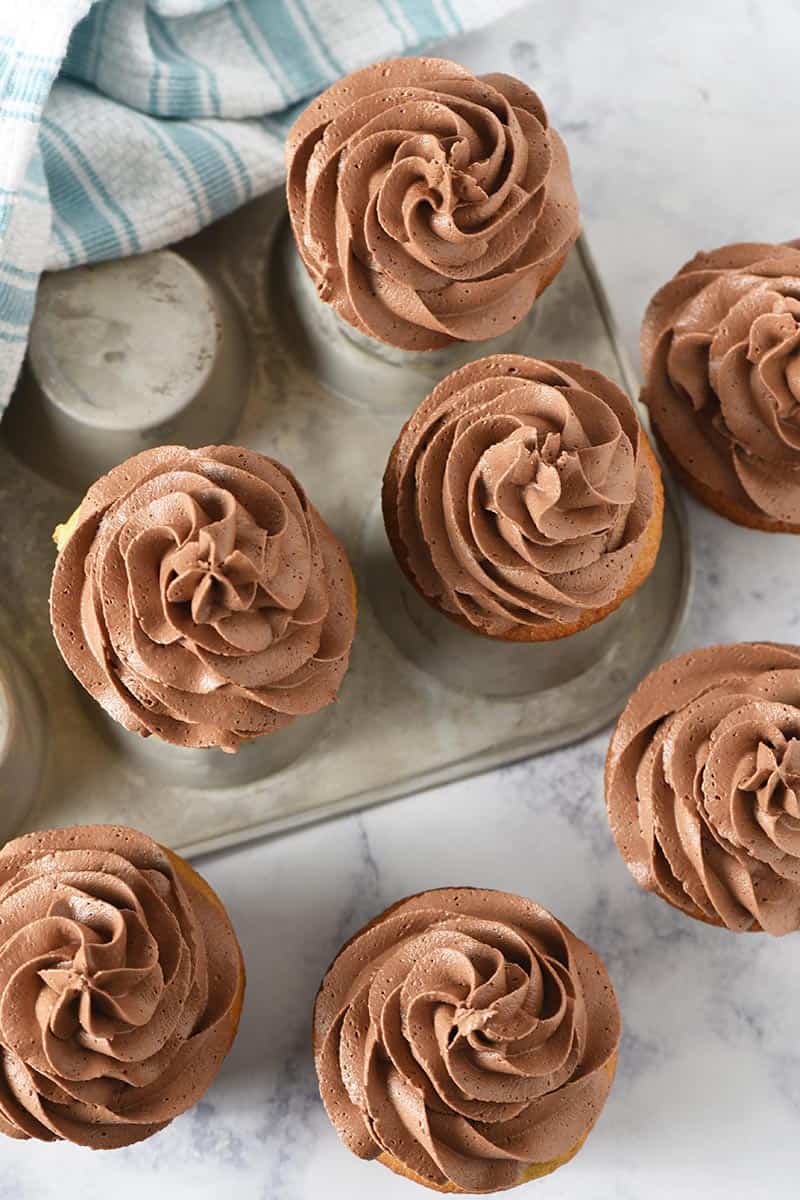
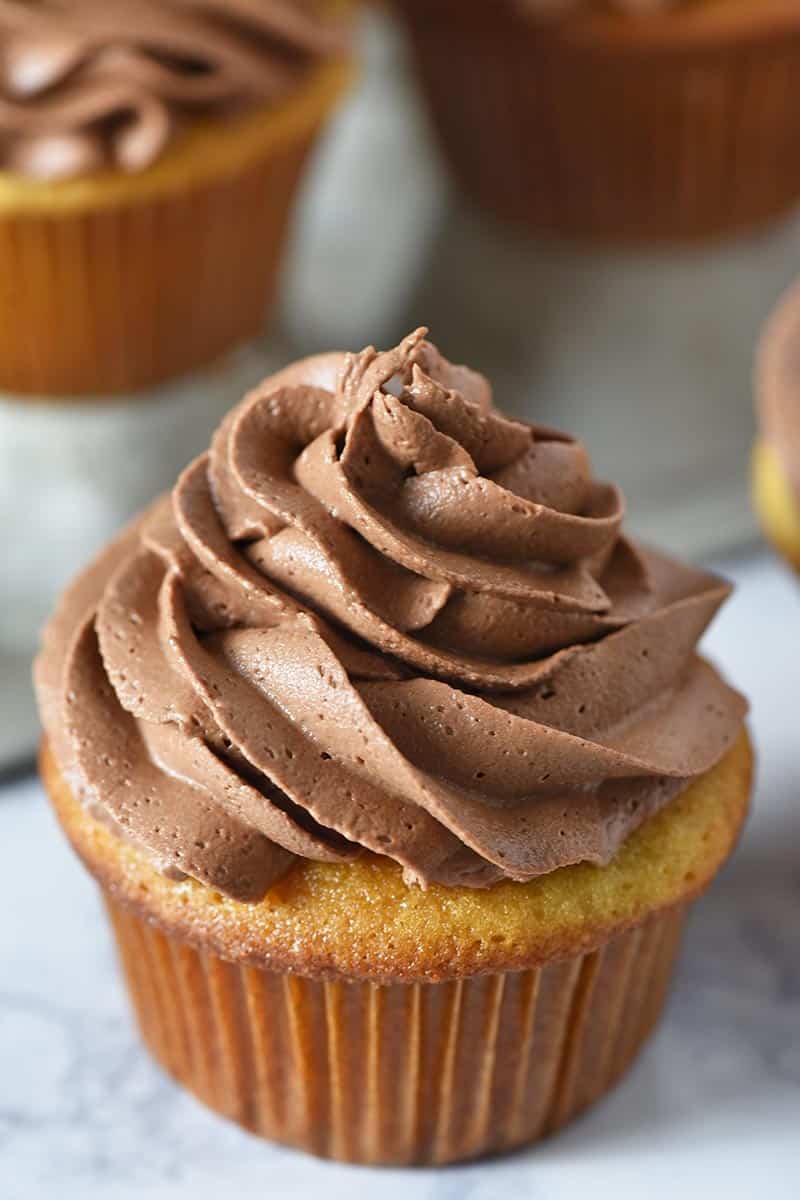
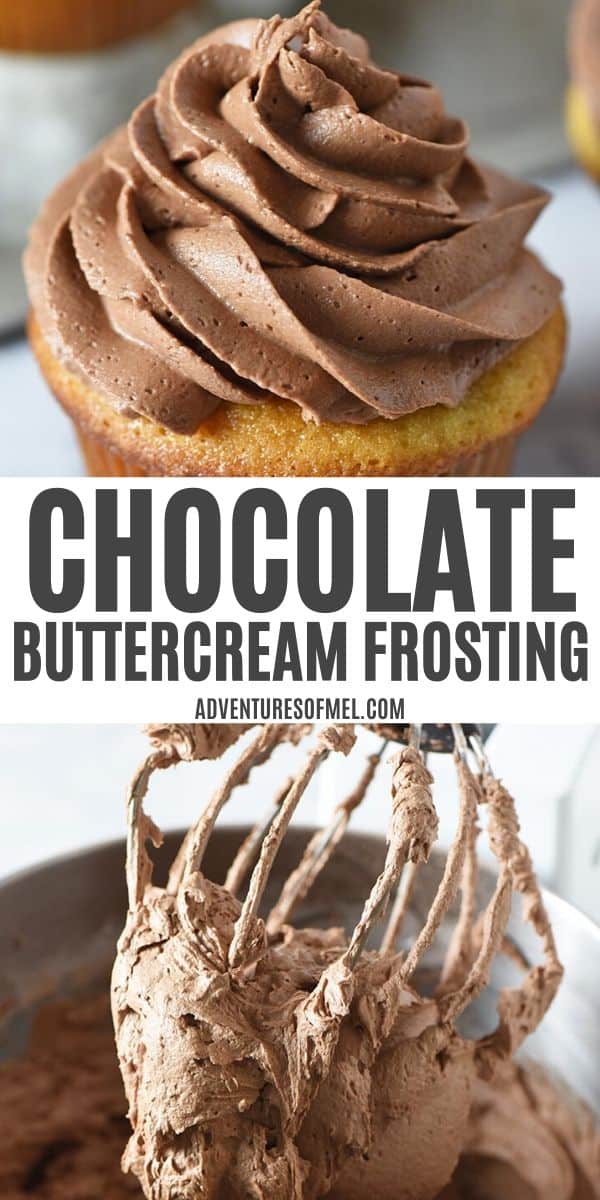
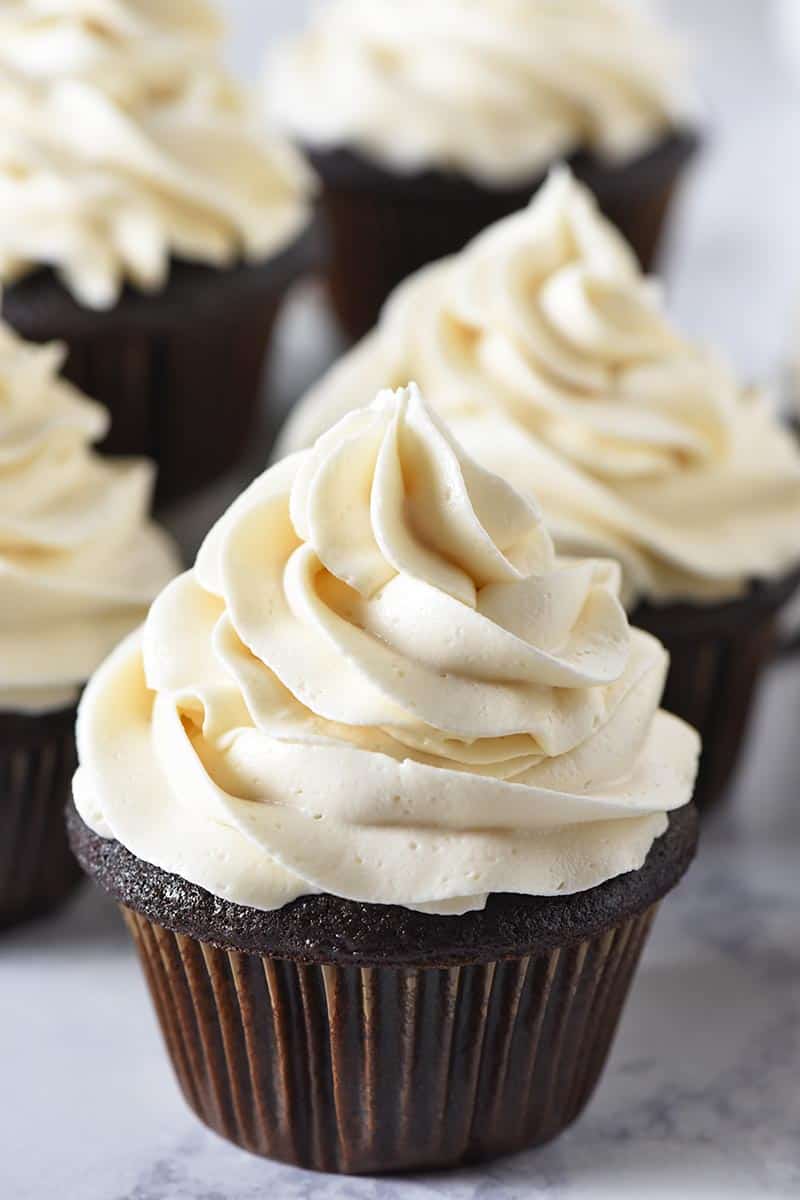
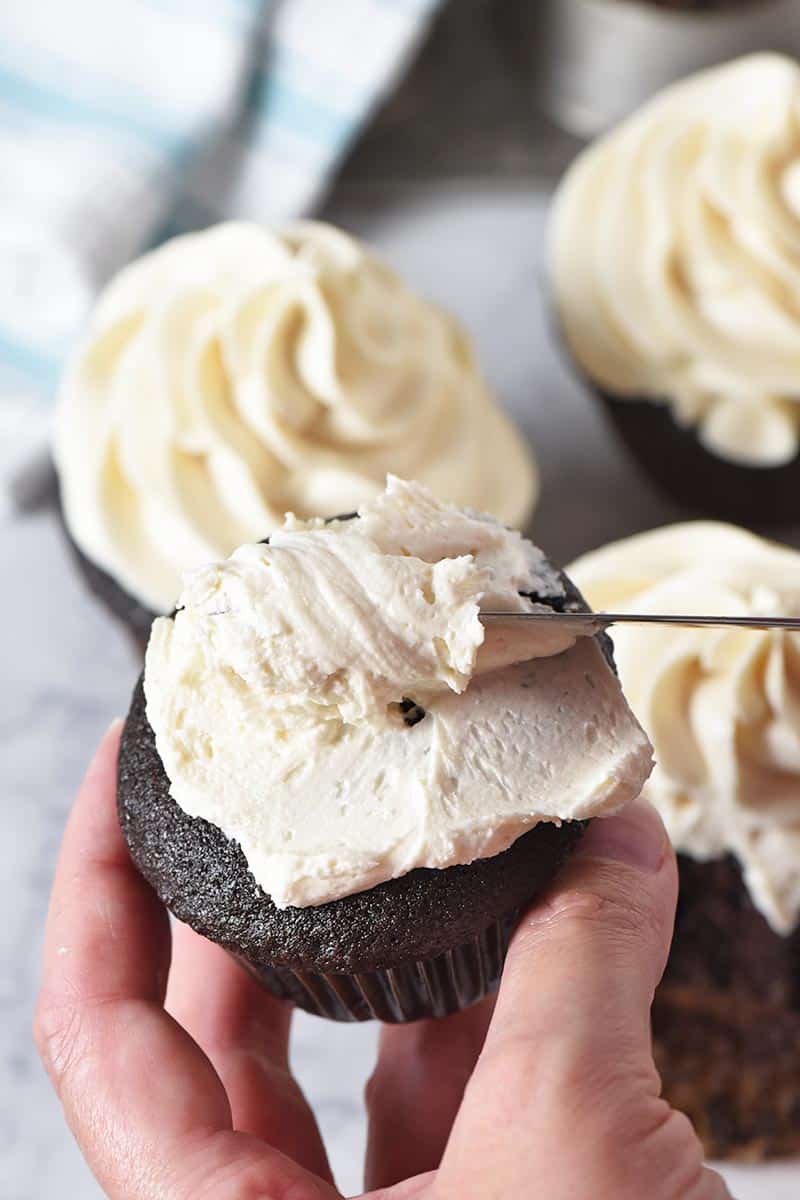
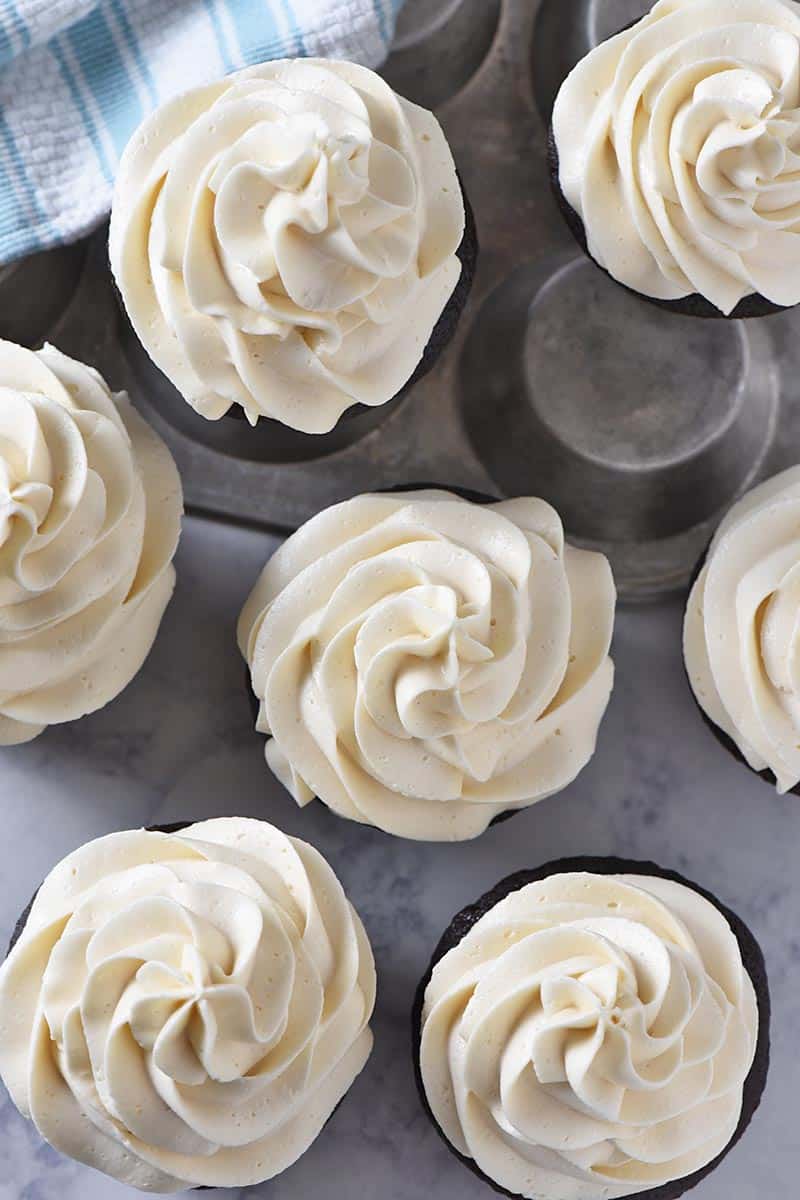
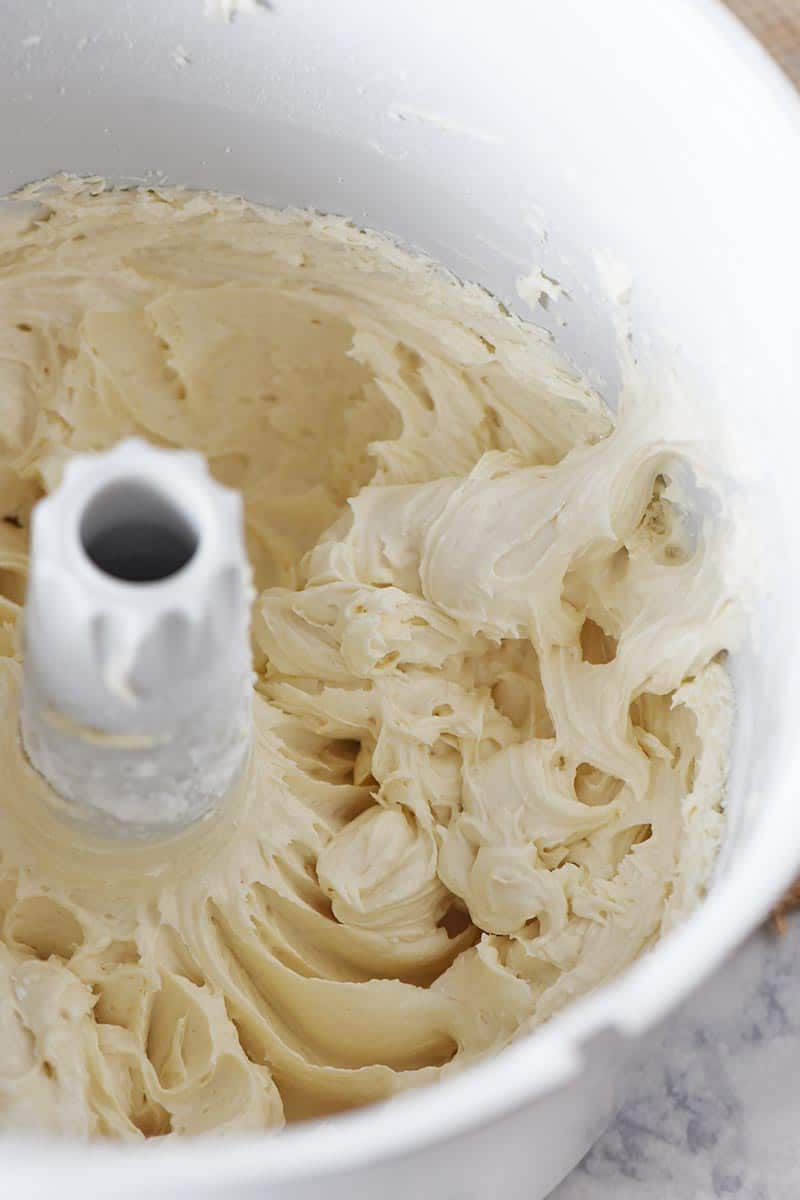
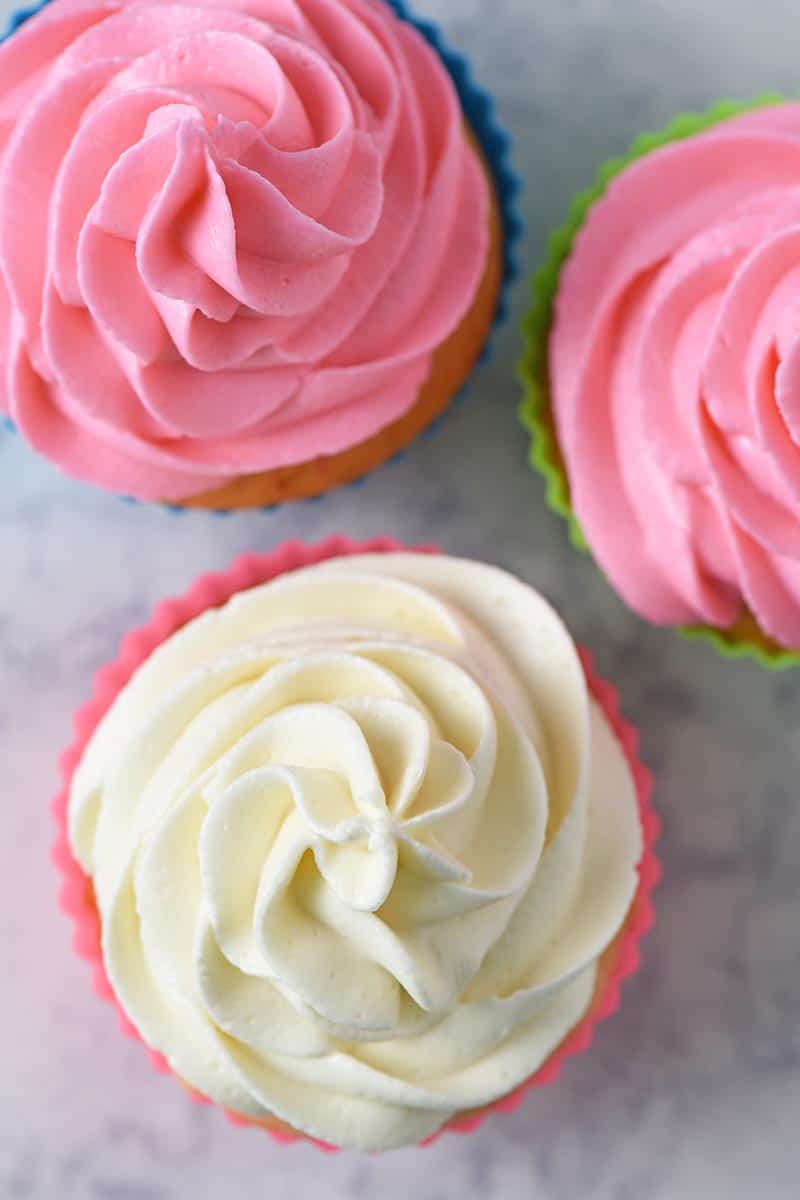
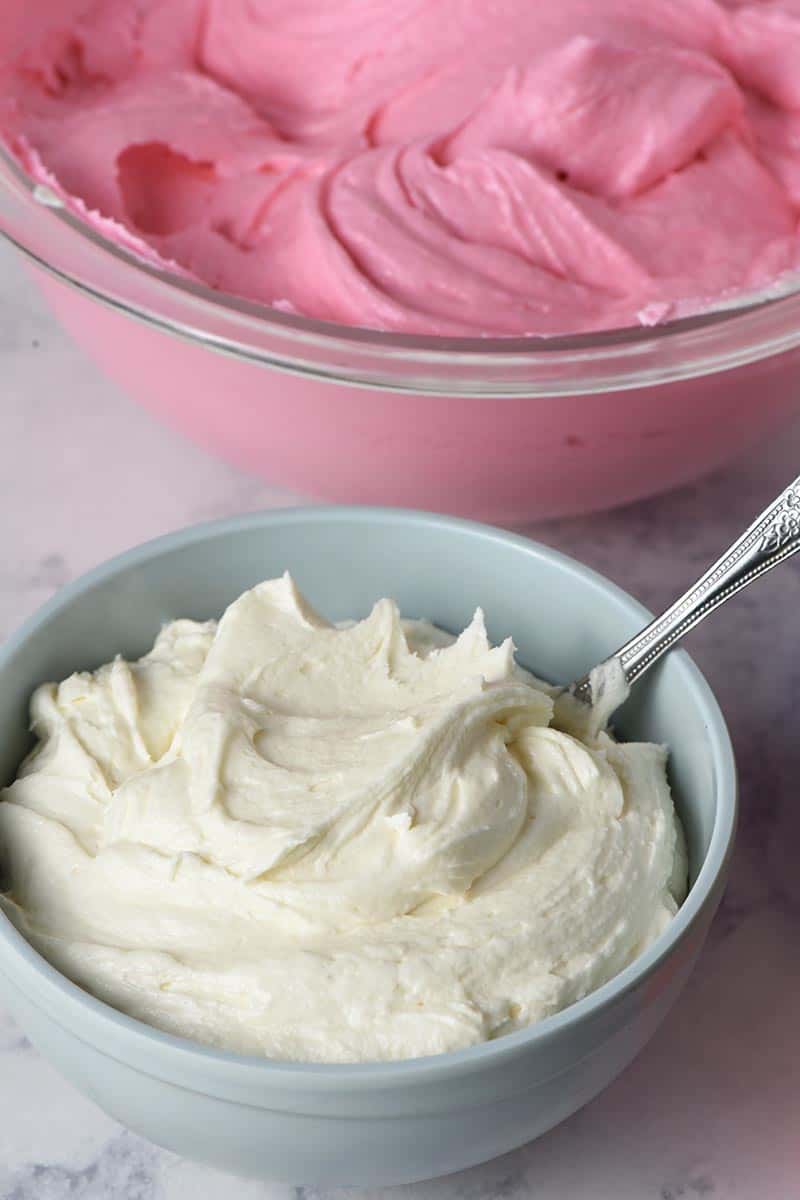
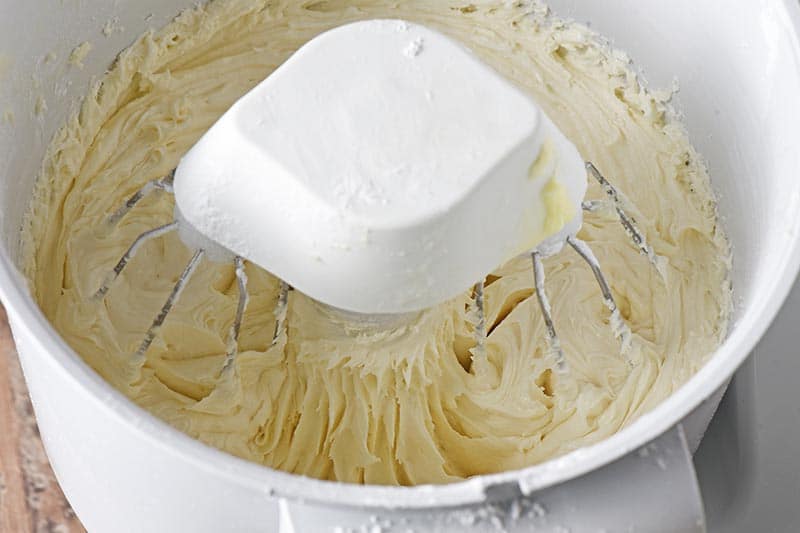
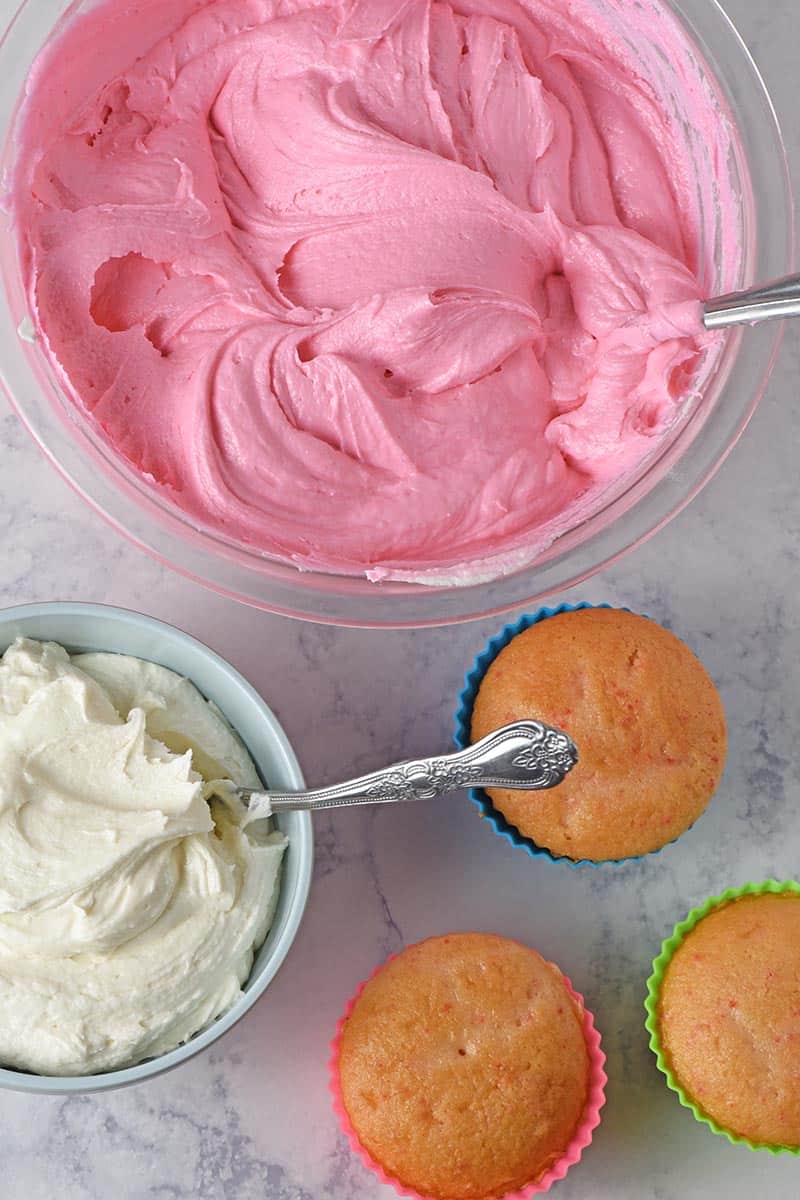
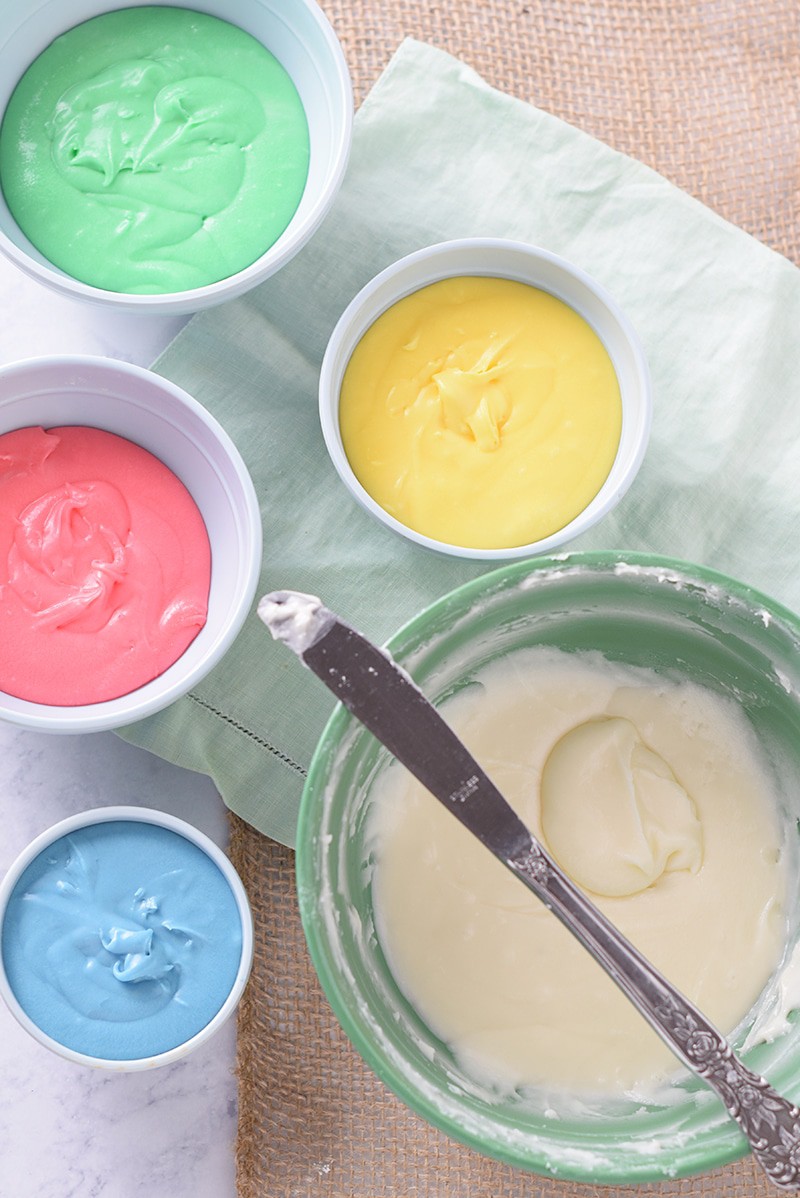
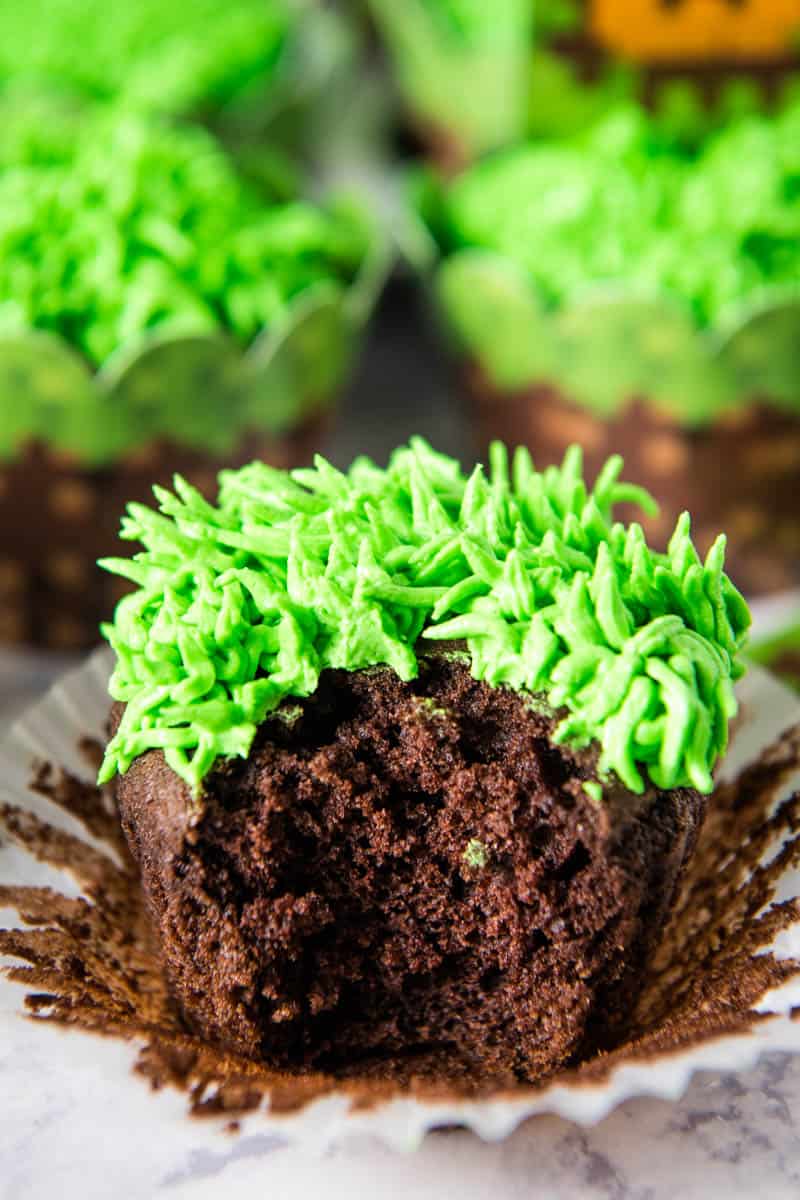
HOW TO MAKE GREEN BUTTERCREAM FROSTING
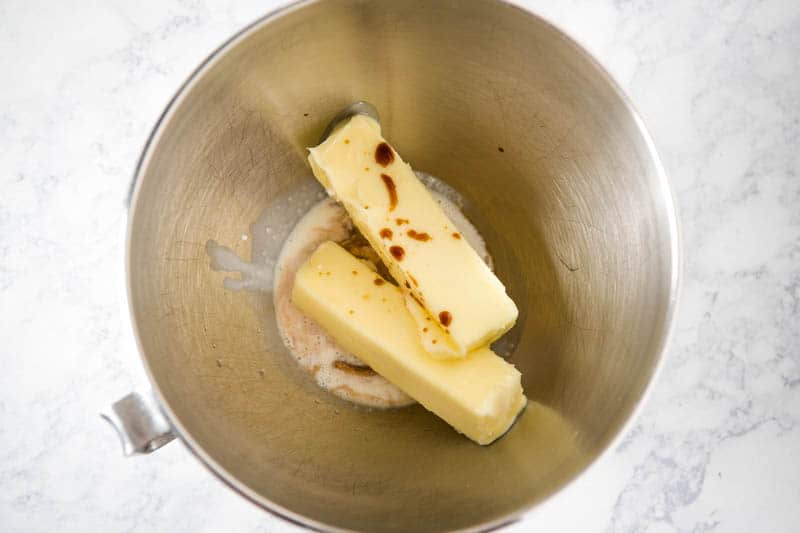
- Mix together the softened butter, vanilla extract, almond extract, and heavy whipping cream.
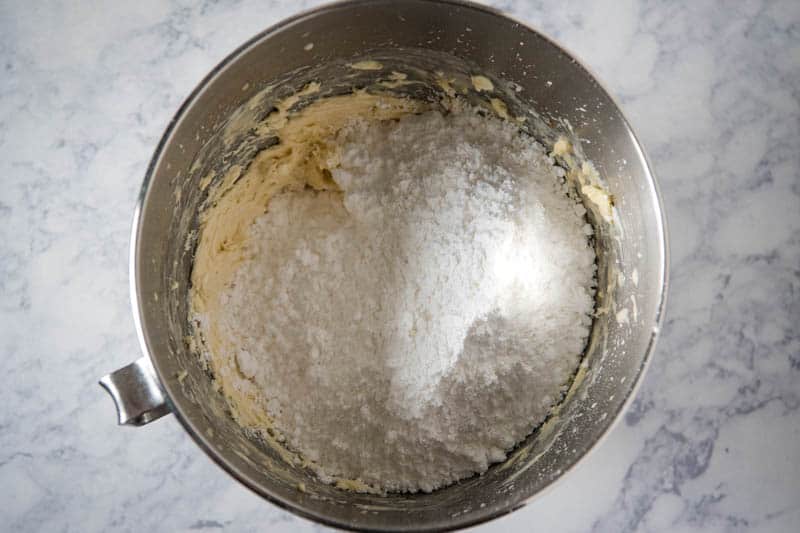
- Add in the powdered sugar, and mix everything together for 2 to 3 minutes, mixing well.
- Using Wilton Leaf Green (or a similar coloring), add green coloring to your frosting, and mix until well blended. Be sure to follow instructions for your specific food coloring.
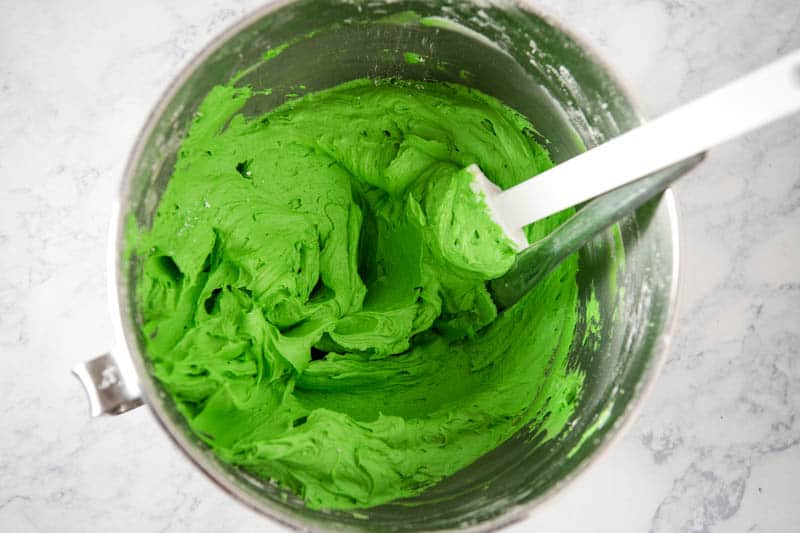
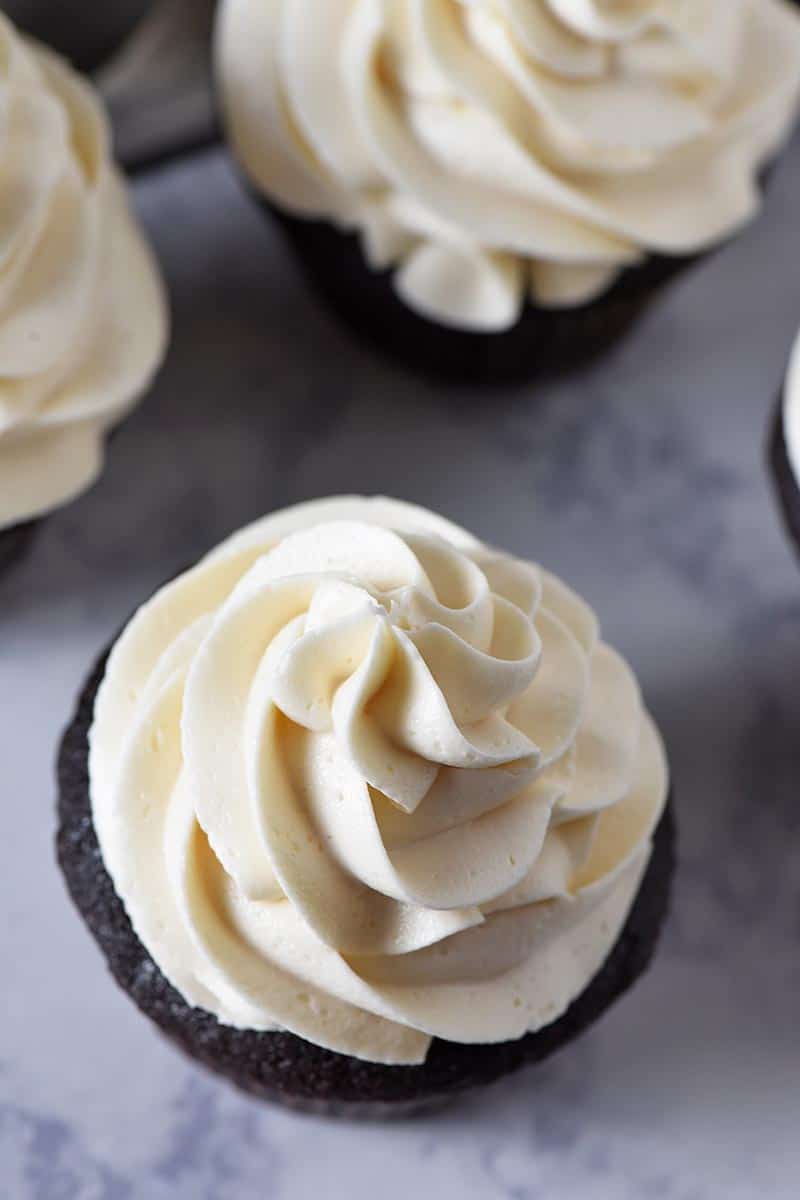
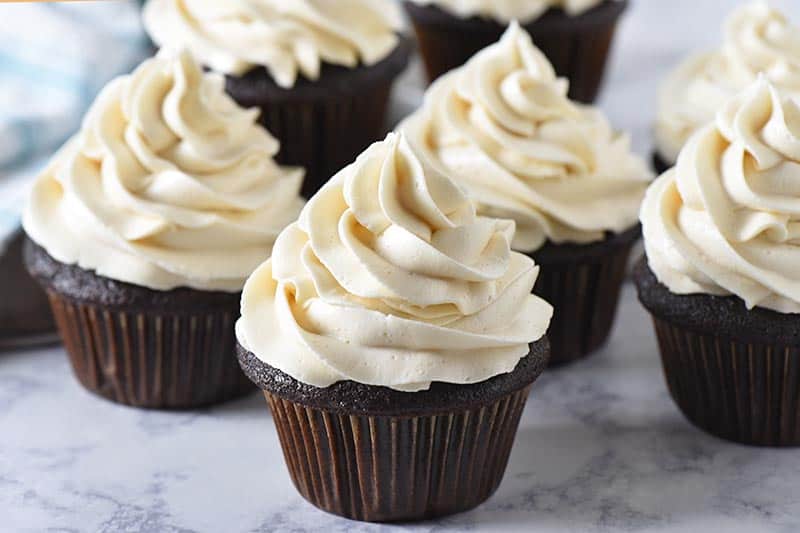
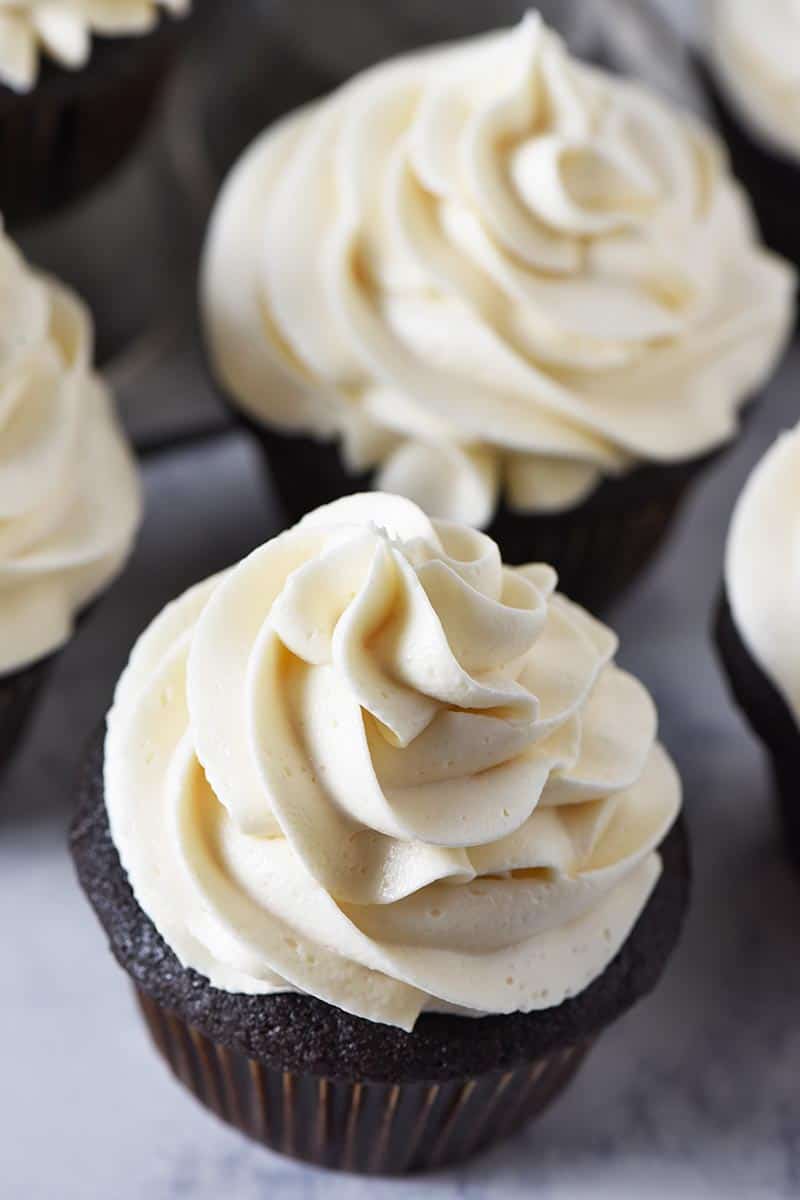
You’ll end up with a smooth, creamy, beautifully green buttercream frosting to use for decorating your cupcakes.
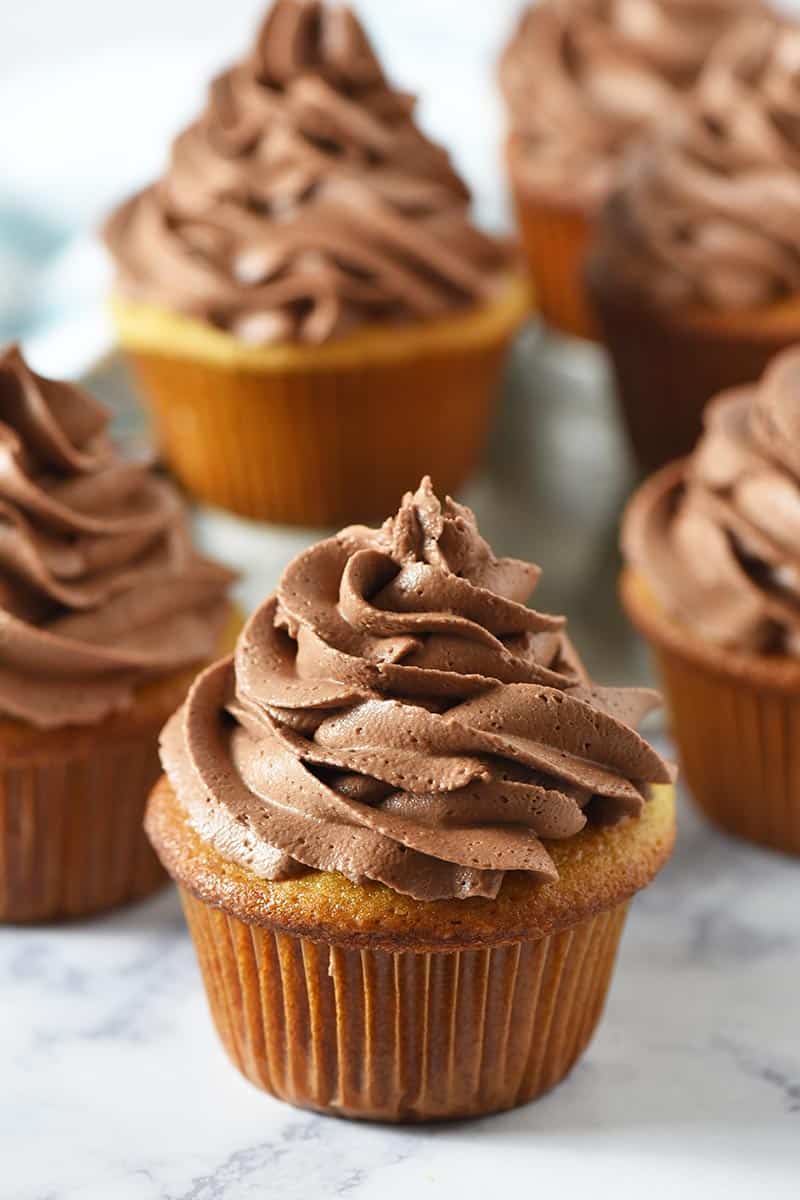
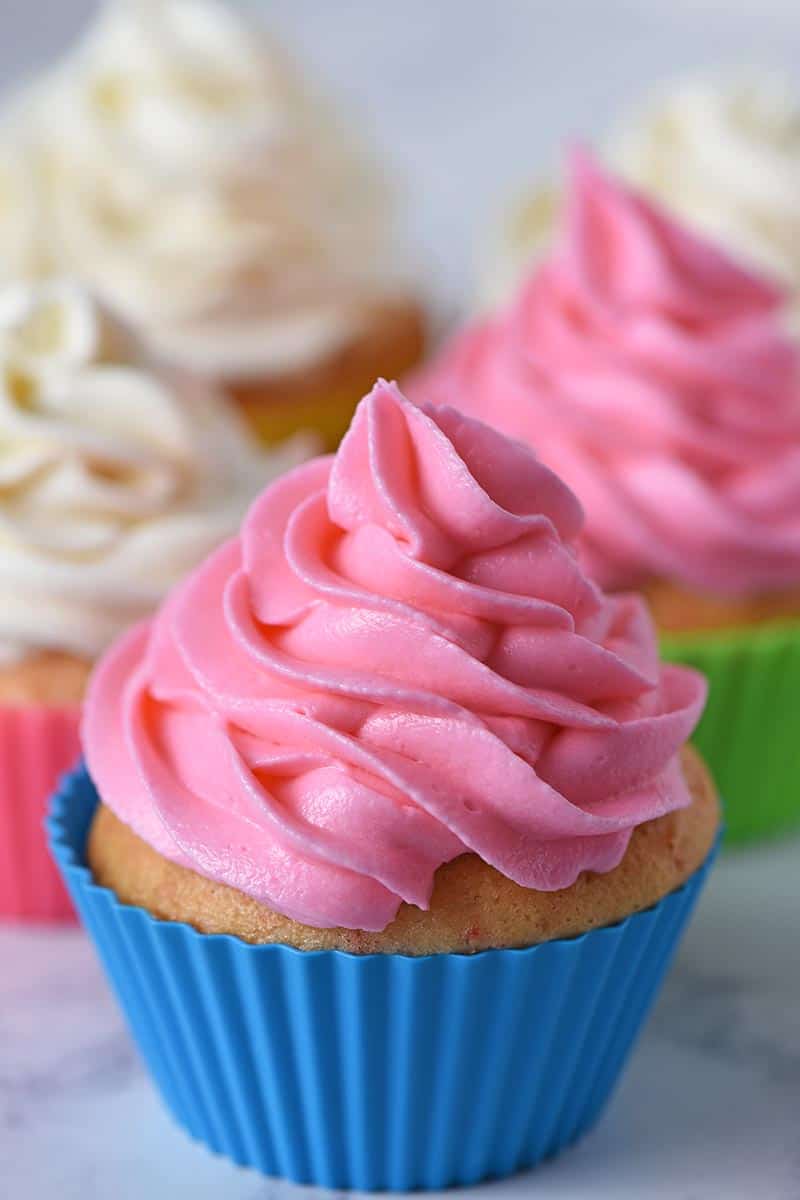
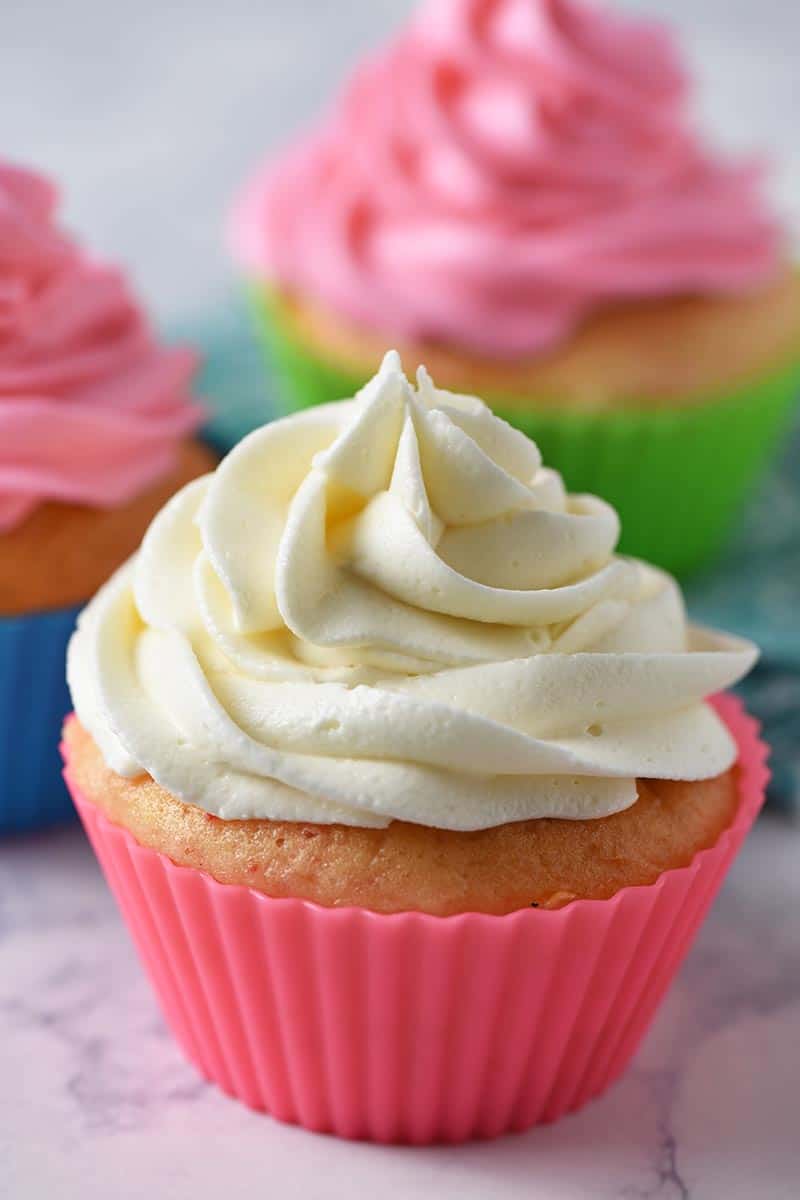
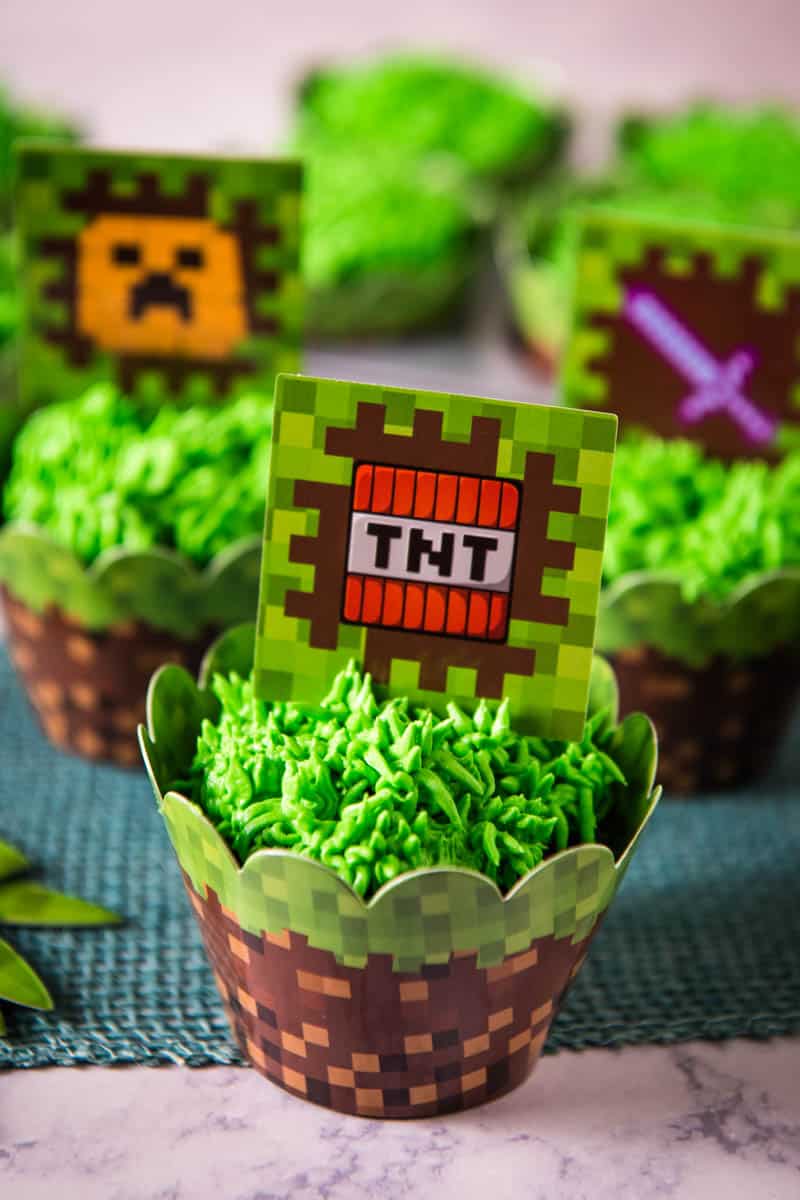
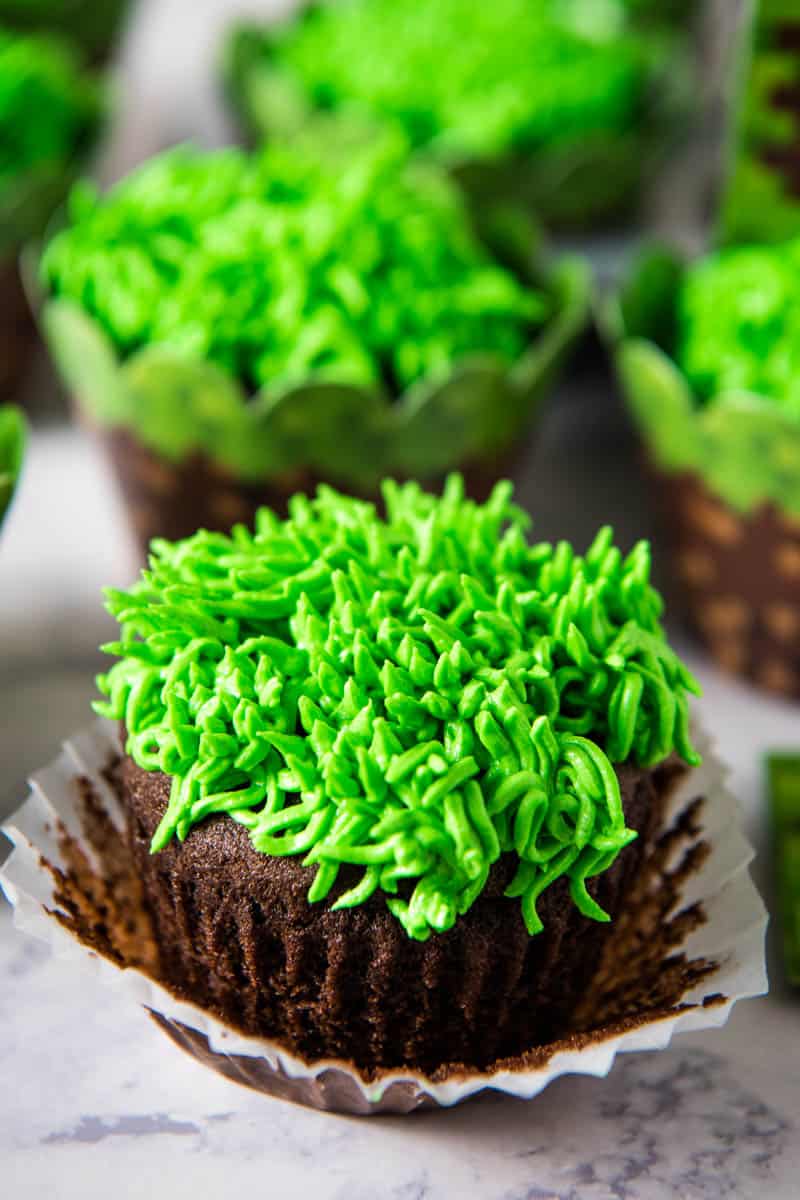
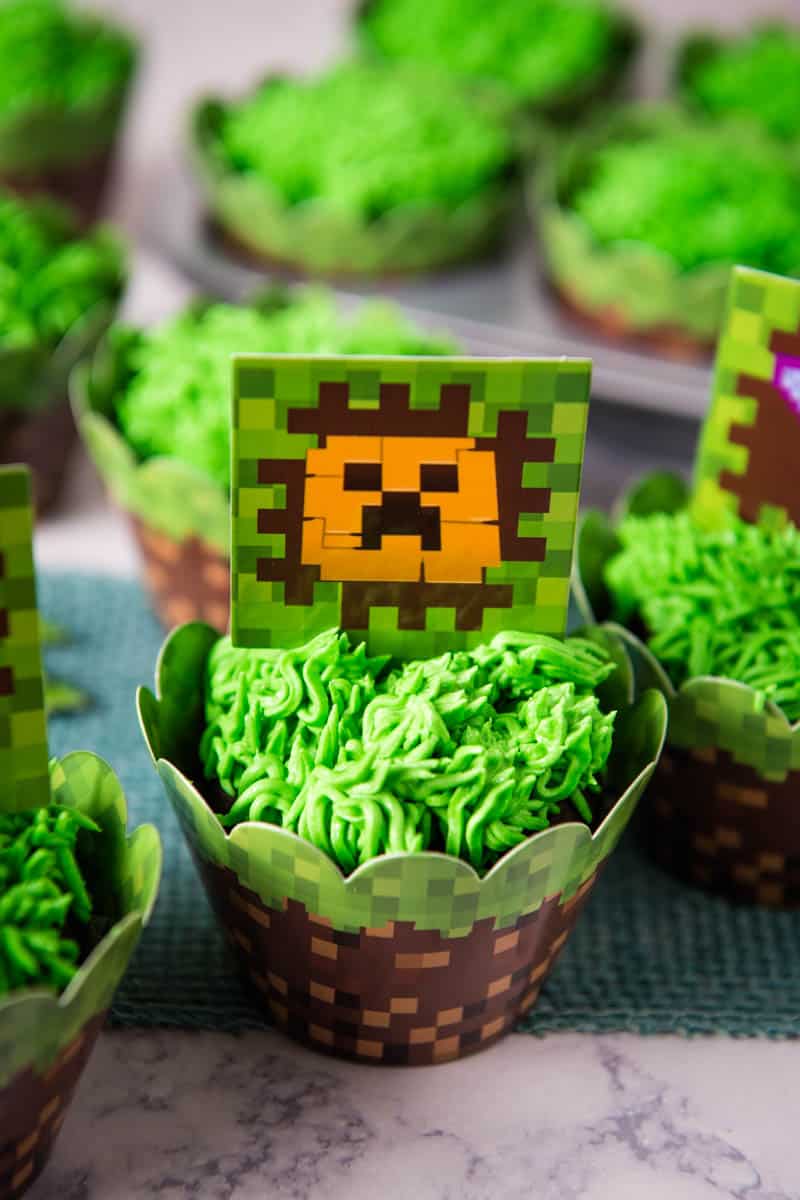
HOW TO PIPE GRASS FROSTING ONTO YOUR CUPCAKES
- Place the cooled cupcakes in the Minecraft liners of your choosing before decorating.

- Using this large grass tip (or a similar grass tip), add grass to each cupcake with your green buttercream frosting. Make sure the icing is thin enough to squeeze through the tip but not so thin it’ll just melt away. Your technique should be to squeeze thru, and pull up or away (see my technique video).
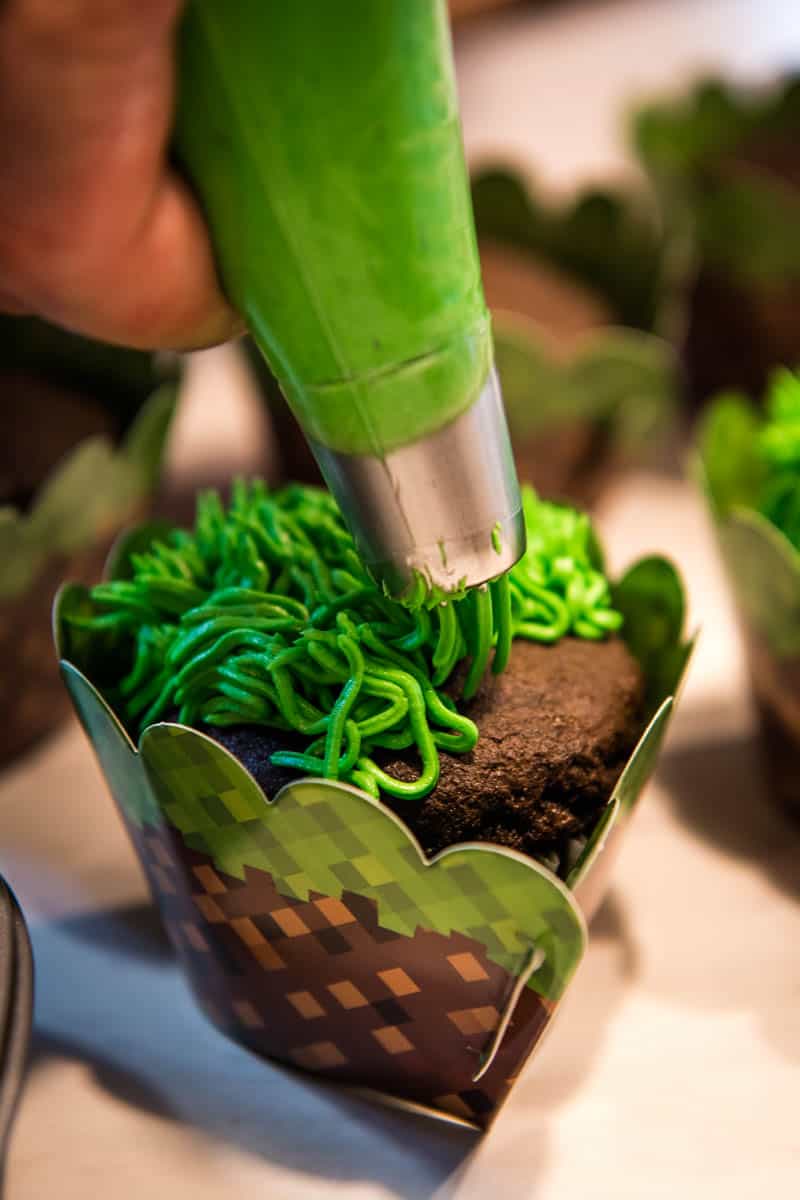
- When finished, plop a cupcake topper into each cupcake if you want.
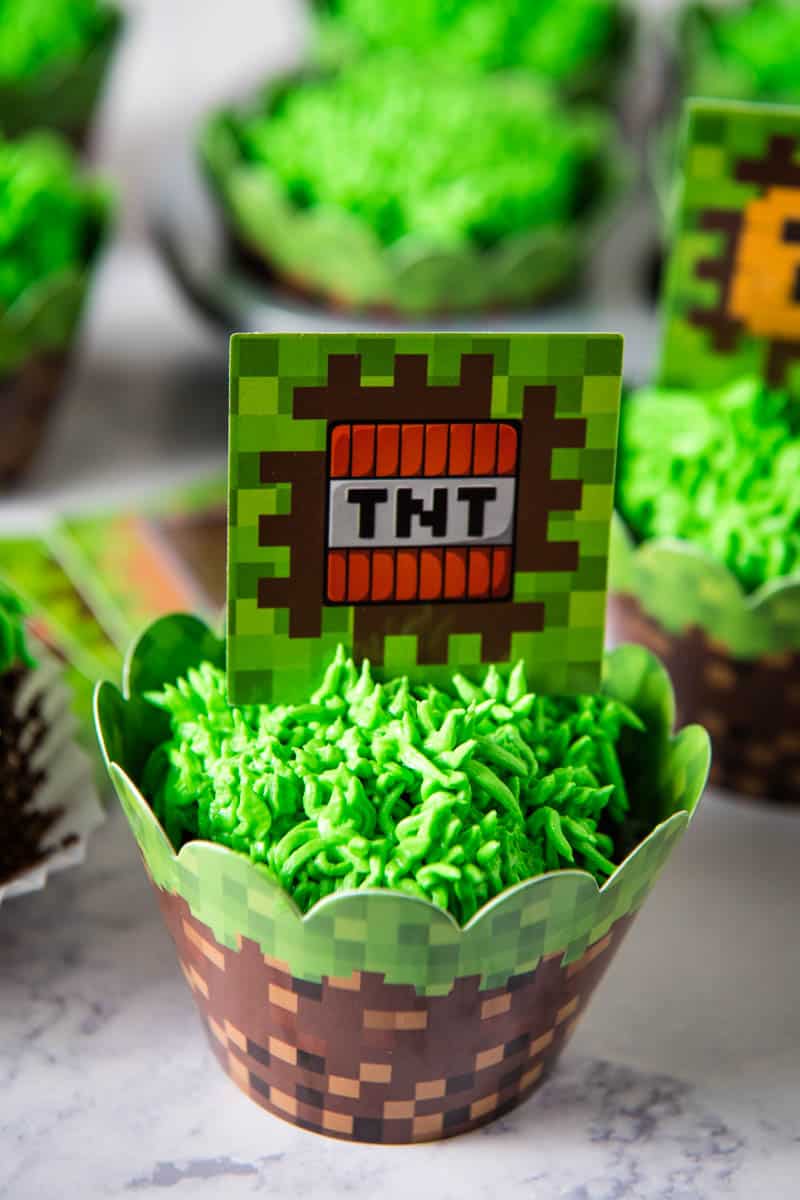
SPEAKING OF MINECRAFT CUPCAKE WRAPPERS AND TOPPERS
I used these cupcake wrappers and these Minecraft toppers. They are affordable and sturdy and worked really well.
Plus my boys love them, so that right there is the real winner.
HOW TO STORE MINECRAFT BIRTHDAY CUPCAKES
Because of the buttercream frosting in this recipe, I recommend refrigerating these cupcakes after they have completely cooled. I think these cupcakes taste better cold anyway!
EASIEST WAY TO TRANSPORT CUPCAKES
This collapsible cupcake carrier (and cake carrier) holds 24 cupcakes, making it easy to transport your cupcakes wherever they need to go. I love that it’s collapsible, so it’s easy to store too.
WHAT CAN YOU PUT IN THE MIDDLE OF CUPCAKES?
- You can try piping frosting into the center of cupcakes. Use a cupcake corer to core the cupcake and pipe frosting, berry jam, or whipped cream into the center. This can be a delicious surprise to anyone who takes a bite!
- Try layering fruit in your cupcake cups before filling them with batter. For this recipe, strawberries come to mind.
- Add small candies to the center, like mini M&M’s or peanut butter cups.
Get creative and have fun with it!
MINECRAFT PARTY IDEAS AND SUPPLIES
- Minecraft Creeper Pizza
- Free Minecraft Potion of Healing Drink Labels Printable
- Zombie Boogers
- Minecraft Nerf Gun Target
- Pixel Miner Ultimate Party Pack
- Pixel Miner Character Wristbands
- Paper Pixel Treat Bags
- TNT Piñata
GET THE PRINTABLE RECIPE
If you love this cupcake recipe as much as I do, please write a 5 star review, and help me share the recipe on Facebook and Pinterest!
CRAVING MORE DELICIOUS RECIPES? Subscribe to my newsletter, and follow along on Pinterest, Facebook, YouTube, and Instagram for all the latest updates!
Minecraft Cupcakes with Easy Grass Frosting

How to make fluffy chocolate Minecraft cupcakes and decorate them with an easy buttercream grass frosting. Ideas for wrappers and toppers too!
- Wilton Recipe Right Muffin Pan, 6-cups
- Collapsible Cupcake and Cake Carrier, 24 Cupcakes, 2 Layer, Easy to Transport
- Miner Themed Pixel Grass Cupcake Wrappers, Set of 24
- Pixel Cupcake Wrappers and Toppers for Minecraft Birthday Party (24 SET)
- Wilton Leaf Green Icing Color, 1 oz.
- Symphony Wire Tips, 3 Pcs Grass Stainless Steel Icing Piping Nozzles
- Wilton Batter Spoons, Set of 3
- OXO Good Grips 3-in-1 Egg Separator
- KitchenAid 5-Qt. Artisan Design Series with Glass Bowl – Candy Apple Red
Chocolate Cupcakes:
- 1/2 cup unsalted butter
- 1/2 cup canola oil
- 1 1/2 cups pure cane sugar
- 2 large eggs (separated)
- 1 teaspoon vanilla extract
- 1 1/2 cups buttermilk*
- 2 cups cake flour*
- 1/2 cup dark cocoa powder
- 1 1/2 teaspoons baking soda
- 1 teaspoon salt
Buttercream Frosting:
- 1 cup salted butter (softened)
- 1 teaspoon vanilla extract
- 1 teaspoon almond extract
- 3 tablespoons heavy whipping cream
- 4 cups powdered sugar
- Wilton Leaf Green icing color
- Cream (or mix) together the butter, canola oil, and sugar for a good 5 to 8 minutes.
- You should have already separated your eggs at this point, so go ahead and add the egg yolks and vanilla extract in with the sugar mixture, and mix well.
- In a separate mixing bowl, mix together the dry ingredients, including the cake flour, dark cocoa powder, baking soda, and salt.
- Alternate adding the dry ingredients with the buttermilk to your creamed mixture, mixing after each addition.
- Finally, when everything is mixed together, fold in the egg whites and mix together just until the batter is blended.
- Add cupcake liners to your muffin tins (you’ll need about 24 muffin cups), and pour or dispense the batter into each liner, filling each cup 3/4 of the way full.
- Bake at 350° F for about 20 minutes, or until a toothpick comes out clean.
- Allow the cupcakes to cool in the pan for about 10 minutes; then remove to a wire rack to finish cooling before frosting.
- To make green buttercream frosting, mix together the softened butter, vanilla extract, almond extract, and heavy whipping cream.
- Add in the powdered sugar, and mix everything together for 2 to 3 minutes, mixing well.
- Using Wilton Leaf Green (or a similar coloring), add green coloring to your frosting, and mix until well blended. Be sure to follow instructions for your specific food coloring.
- Place the cooled cupcakes in the Minecraft liners of your choosing before decorating.
- Using this large grass tip (or a similar grass tip), add grass to each cupcake with your green buttercream frosting. Make sure the icing is thin enough to squeeze through the tip but not so thin it’ll just melt away. Your technique should be to squeeze thru, and pull up or away (see video above).
- When finished, plop a cupcake topper into each cupcake if you want.
*To make your own buttermilk or sour milk, just add about a tablespoon of distilled white vinegar to a cup (or two) of milk; I usually use a tablespoon for every 1 to 2 cups of milk. Stir and let sit for 5 to 10 minutes.
*You can use a good gluten-free flour, along with xanthan gum, instead. This is my go to brand of gluten-free cake flour.
HOW TO STORE MINECRAFT BIRTHDAY CUPCAKES
Because of the buttercream frosting in this recipe, I recommend refrigerating these cupcakes after they have completely cooled. I think these cupcakes taste better cold anyway!
EASIEST WAY TO TRANSPORT CUPCAKES
This collapsible cupcake carrier (and cake carrier) holds 24 cupcakes, making it easy to transport your cupcakes wherever they need to go. I love that it’s collapsible, so it’s easy to store too.