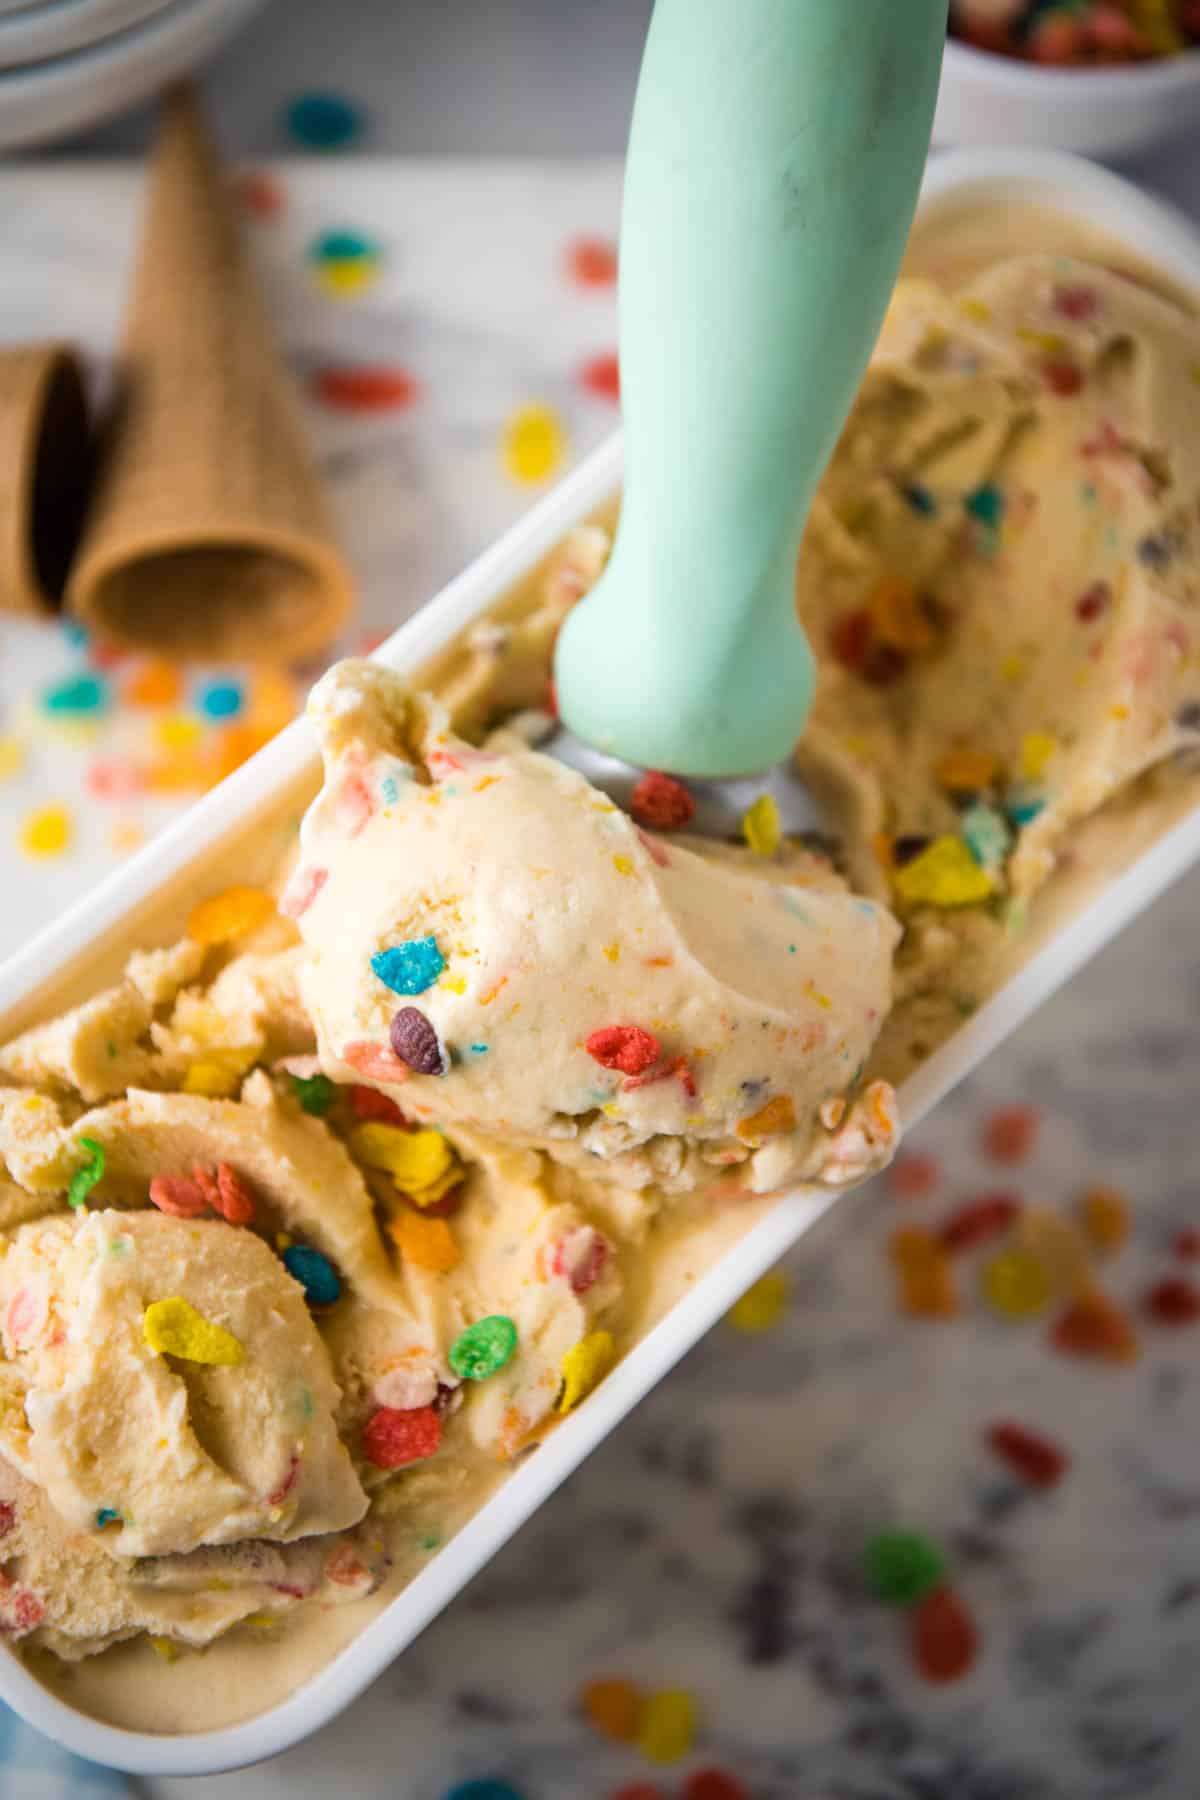
Learn how to make homemade Fruity Pebbles ice cream, infused with a rainbow of flavors. Easy cereal milk ice cream recipe you can make to eat in 30 minutes. It’s colorful, creamy, and oh so delicious!
Fruity Pebbles has long been one of my favorite cereals, ever since I was a kid. It was a rare treat, so that made it that much more special when we actually had a box in the cabinet.
I love the crunchy, fruity flavor of this cereal; and I do have to say, it makes some rather delicious cereal milk at the end of a bowl too.
I’ve made other Fruity Pebbles treats in the past, like these Fruity Pebble Christmas trees. And now I’m excited to share this Fruity Pebble ice cream with you, with my raw milk vanilla ice cream as the base.
Why You’re Going to Love This Ice Cream Recipe
There are a few reasons to love this Fruity Pebbles ice cream recipe…
- It’s super easy to make and takes less than 30 minutes ’til you can actually eat the ice cream soft serve.
- Color! This ice cream is so colorful; in fact, it’s a rainbow of colors!
- You’ll use simple ingredients, so there’s no sweetened condensed milk and no eggs. Just milk, sugar, cream, and a few more ingredients to really infuse all the flavors.
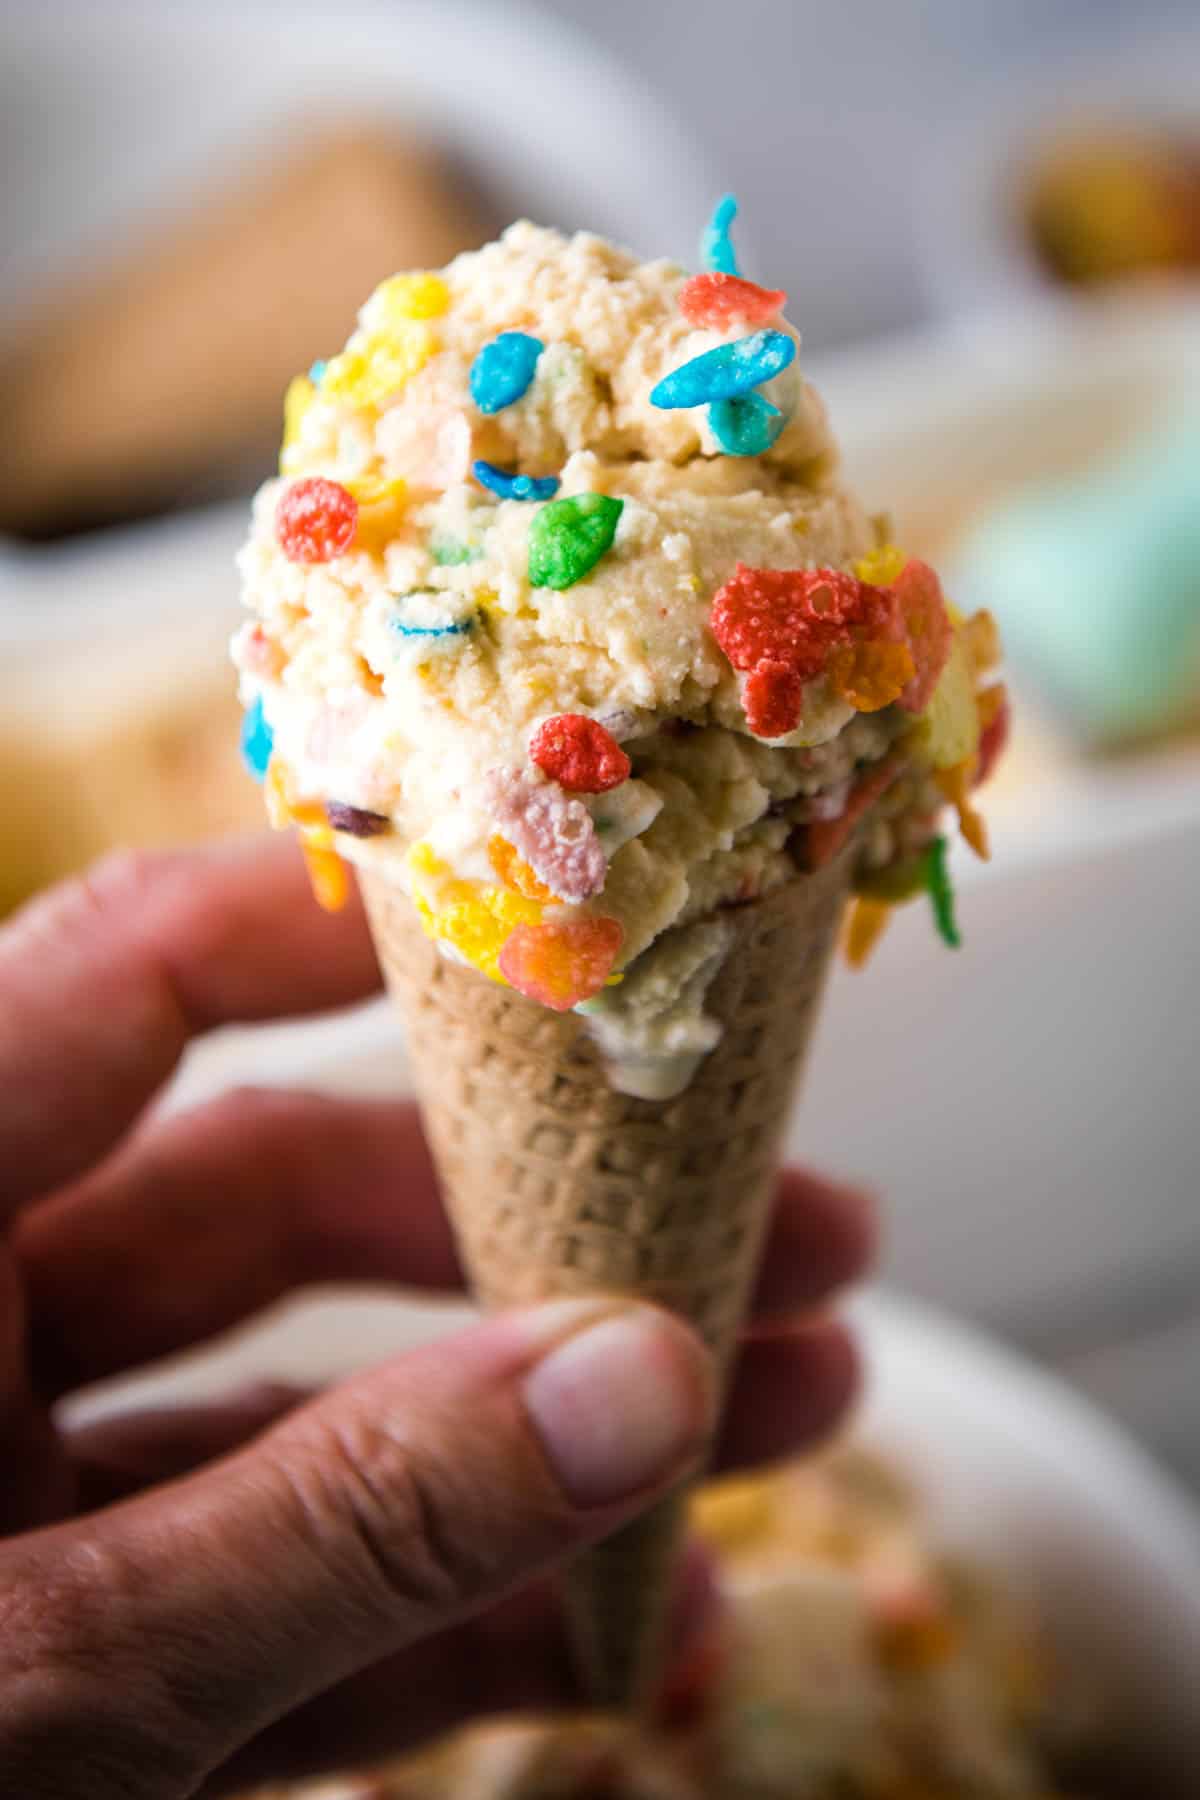
- You can eat it in a bowl or eat it on a cone.
- This cereal milk ice cream tastes exactly like the yummy sweet cereal milk you’re left with at the end of a bowl of Fruity Pebbles.
- There will be leftovers. Unless you’re feeding a crowd, you’ll have plenty left over. I have a family of 5, and I actually make one batch of this to last a few days. Sometimes during the hotter months it goes a lot quicker; but we always have leftovers to store in the freezer and enjoy through the week.
Ingredients and Substitutions Notes
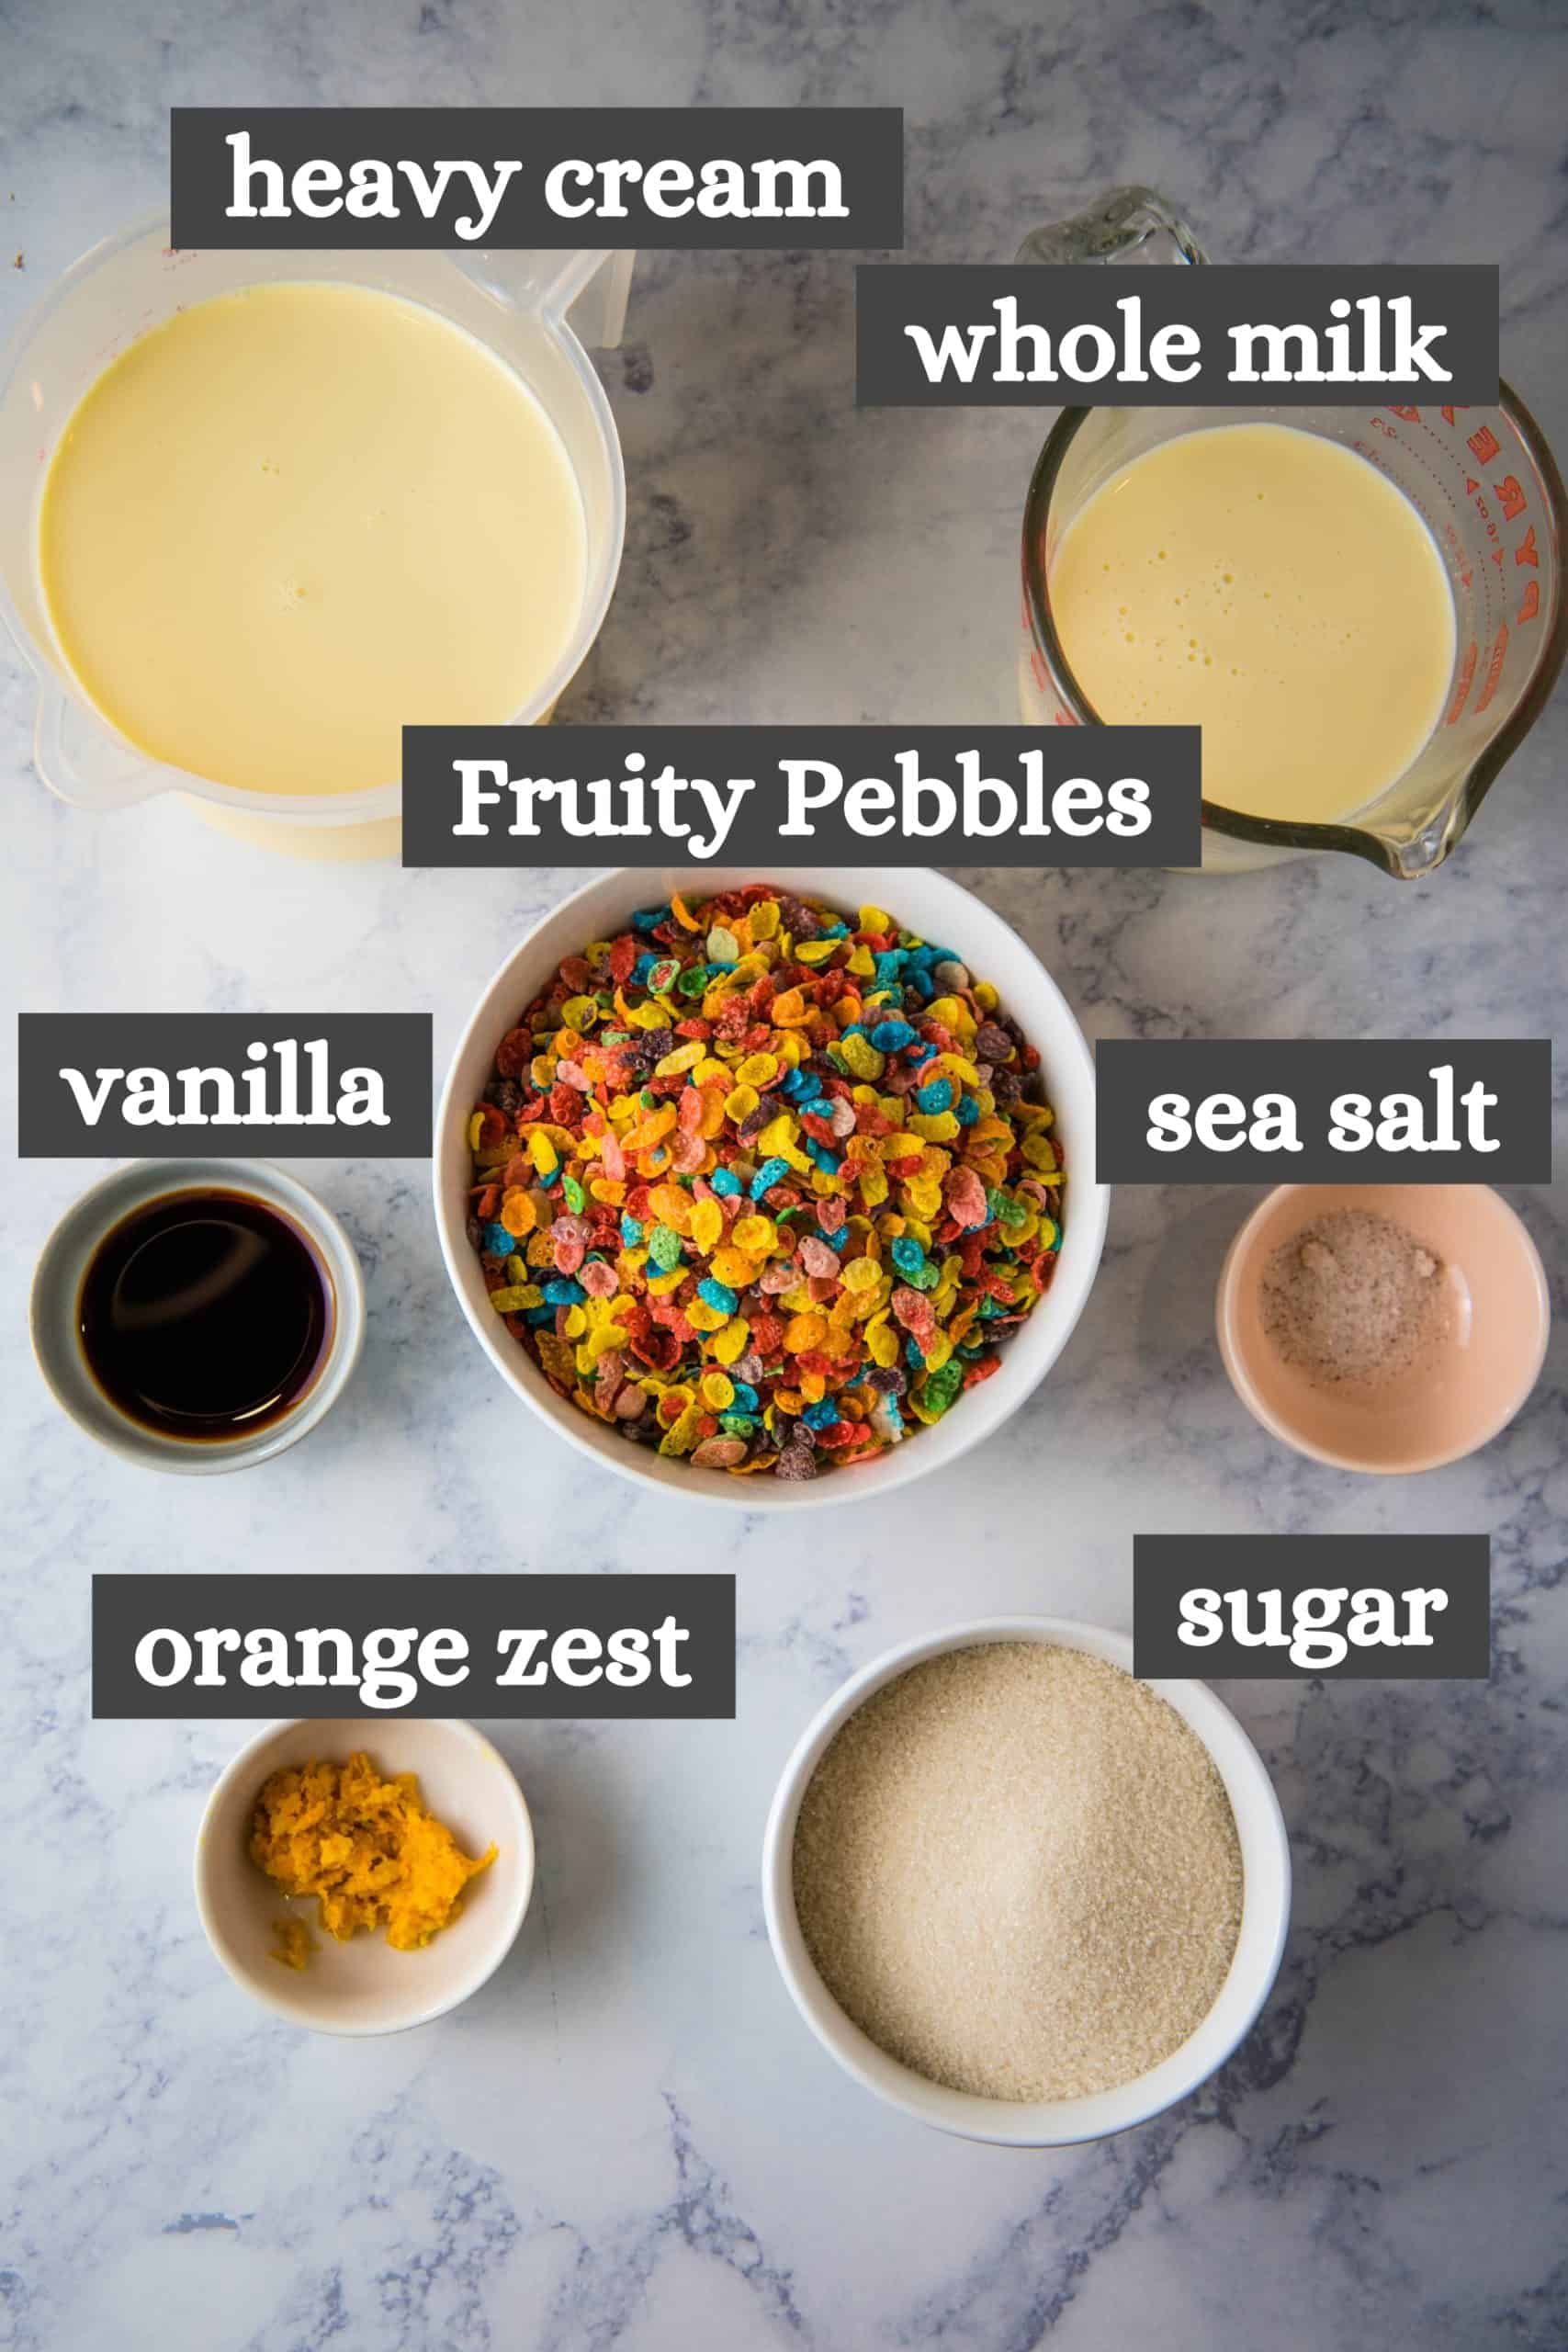
Gather the handful of ingredients it takes to make this ice cream…
- Whole Milk – While you can use 2% or skim milk, your ice cream won’t be quite as creamy as if you use whole milk.
- Cane Sugar – While I prefer to use organic cane sugar, you can also use granulated sugar.
- Sea Salt – This right here is an ingredient you definitely want to include; don’t leave it out. Without the salt, you won’t get near as good a flavor.
- Fruity Pebbles Cereal – You’ll need almost 2 cups of this wonderfully crunchy cereal. We’ll talk about more cereal alternatives further below.
- Heavy Cream
- Orange Zest – I prefer to use orange zest because it gives a stronger orange flavor than juice, and it pairs really well with the fruity flavors in the cereal. You can also add lemon zest if desired.
- Vanilla Extract – Again, this just helps give that flavor a kick.
How to Make Fruity Pebbles Ice Cream
Before you start to mix this up, be sure you’ve pre-frozen the ice cream canister that goes with your ice cream maker; if you don’t, your ice cream won’t freeze.
I usually just wash mine after using, then store it, covered with wrap, in the freezer. That way it’s always frozen and ready to go. (Oh, how I wish Cuisinart would make a lid for our ice cream canisters, don’t you? It’s my one wish for this ice cream maker.)
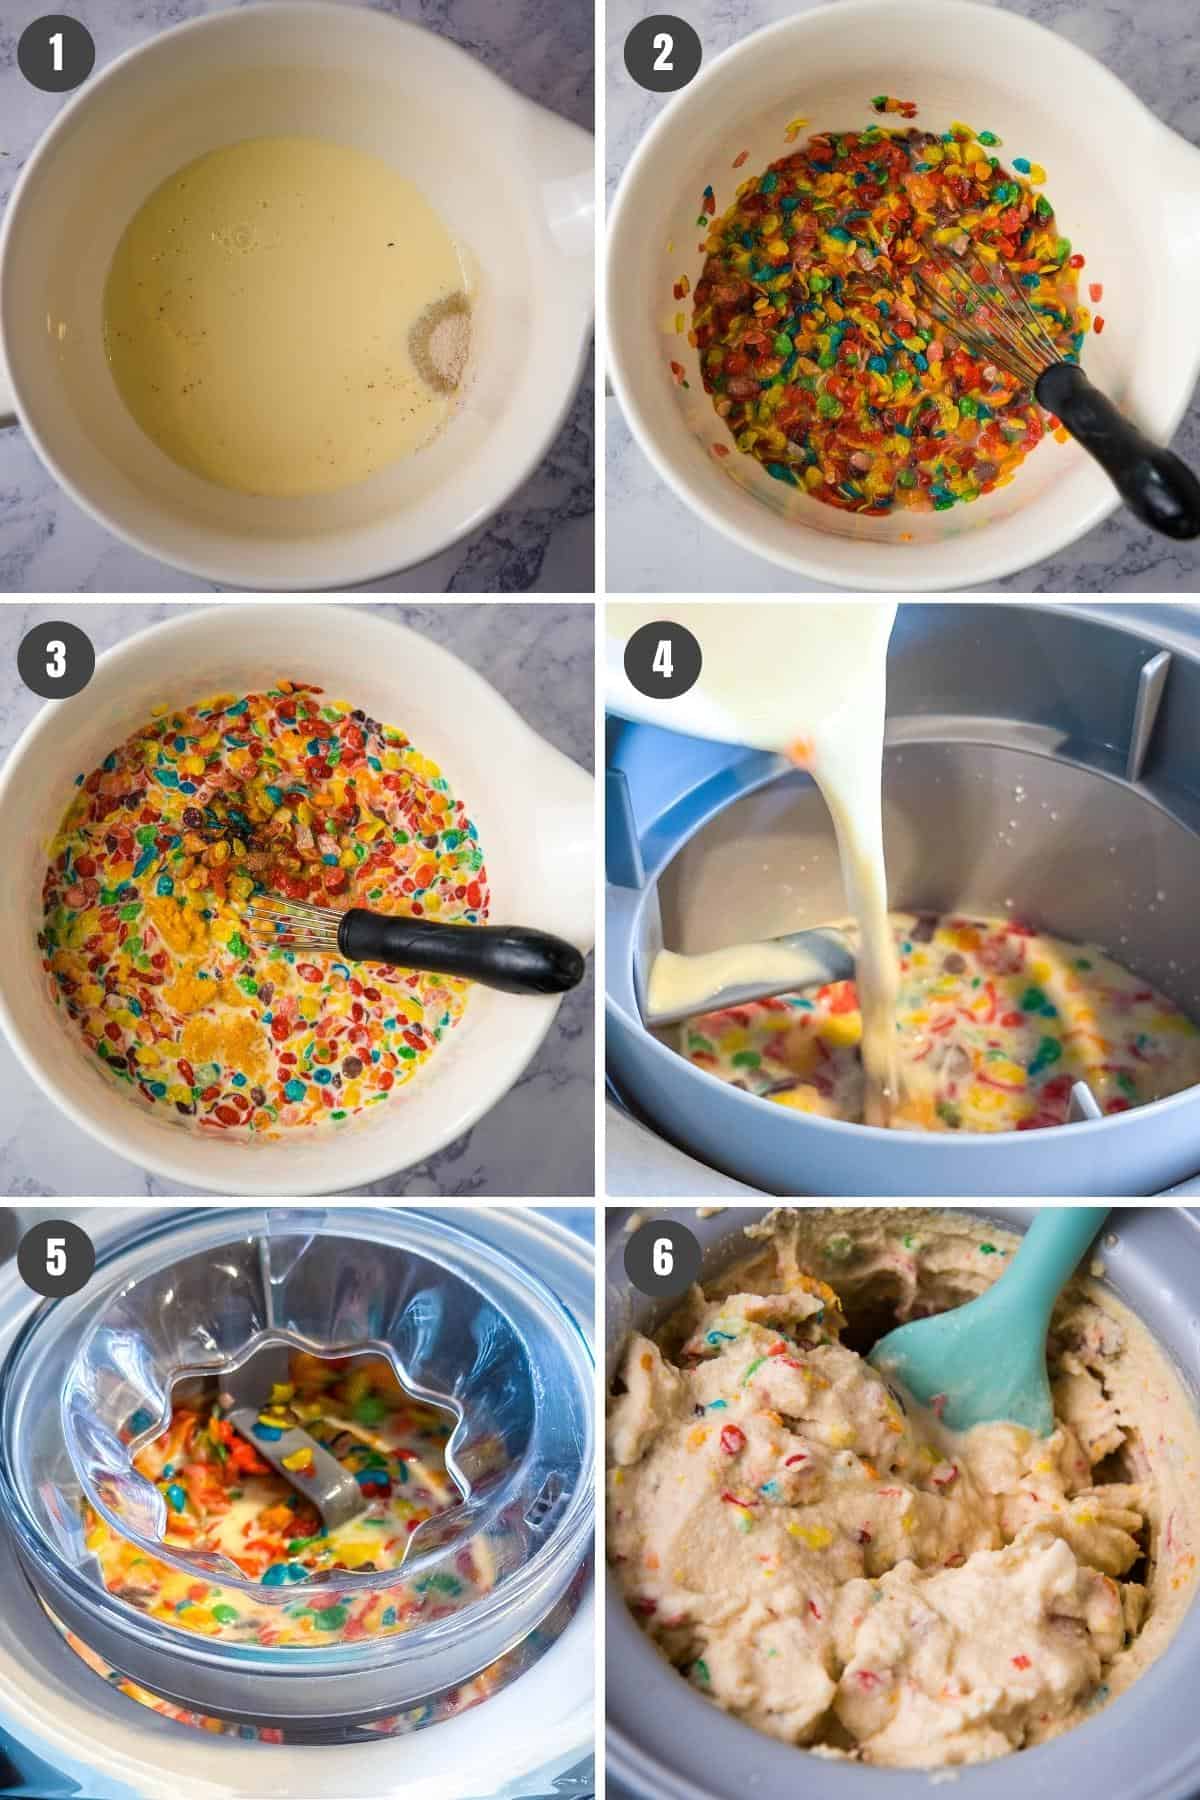
How to Mix It and Freeze It
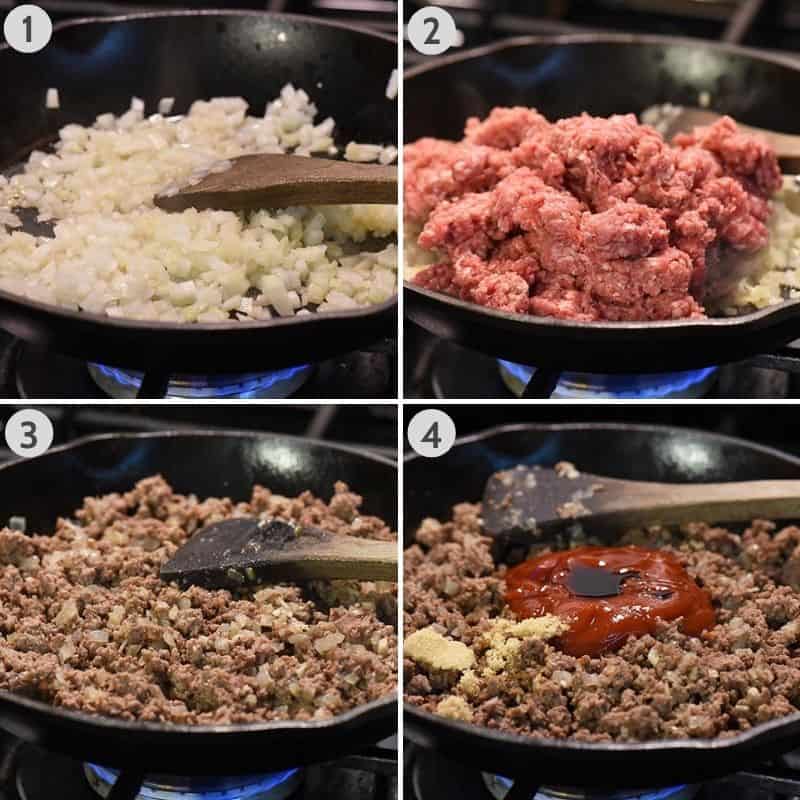
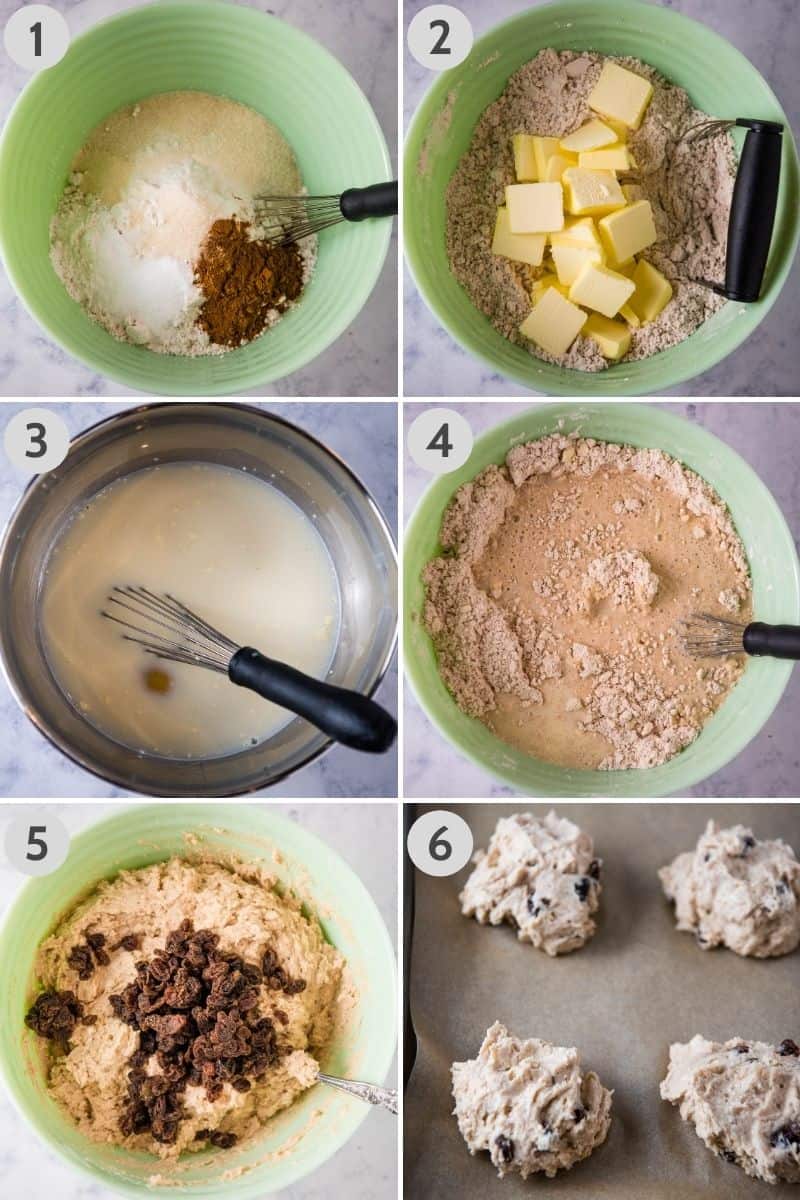
- In a large mixing bowl, combine the whole milk, sugar, and salt ’til the sugar and salt dissolve, about 1-2 minutes.
- Add the Fruity Pebbles to the mixture, and blend ’til combined.
- Whisk in the heavy cream, orange zest, and vanilla extract, mixing well.
- Turn on the ice cream freezer, and pour the mixture into the freezer bowl with the churn paddle in place.
- Then place the cover on top, and let it mix ’til it thickens, about 20-25 minutes.
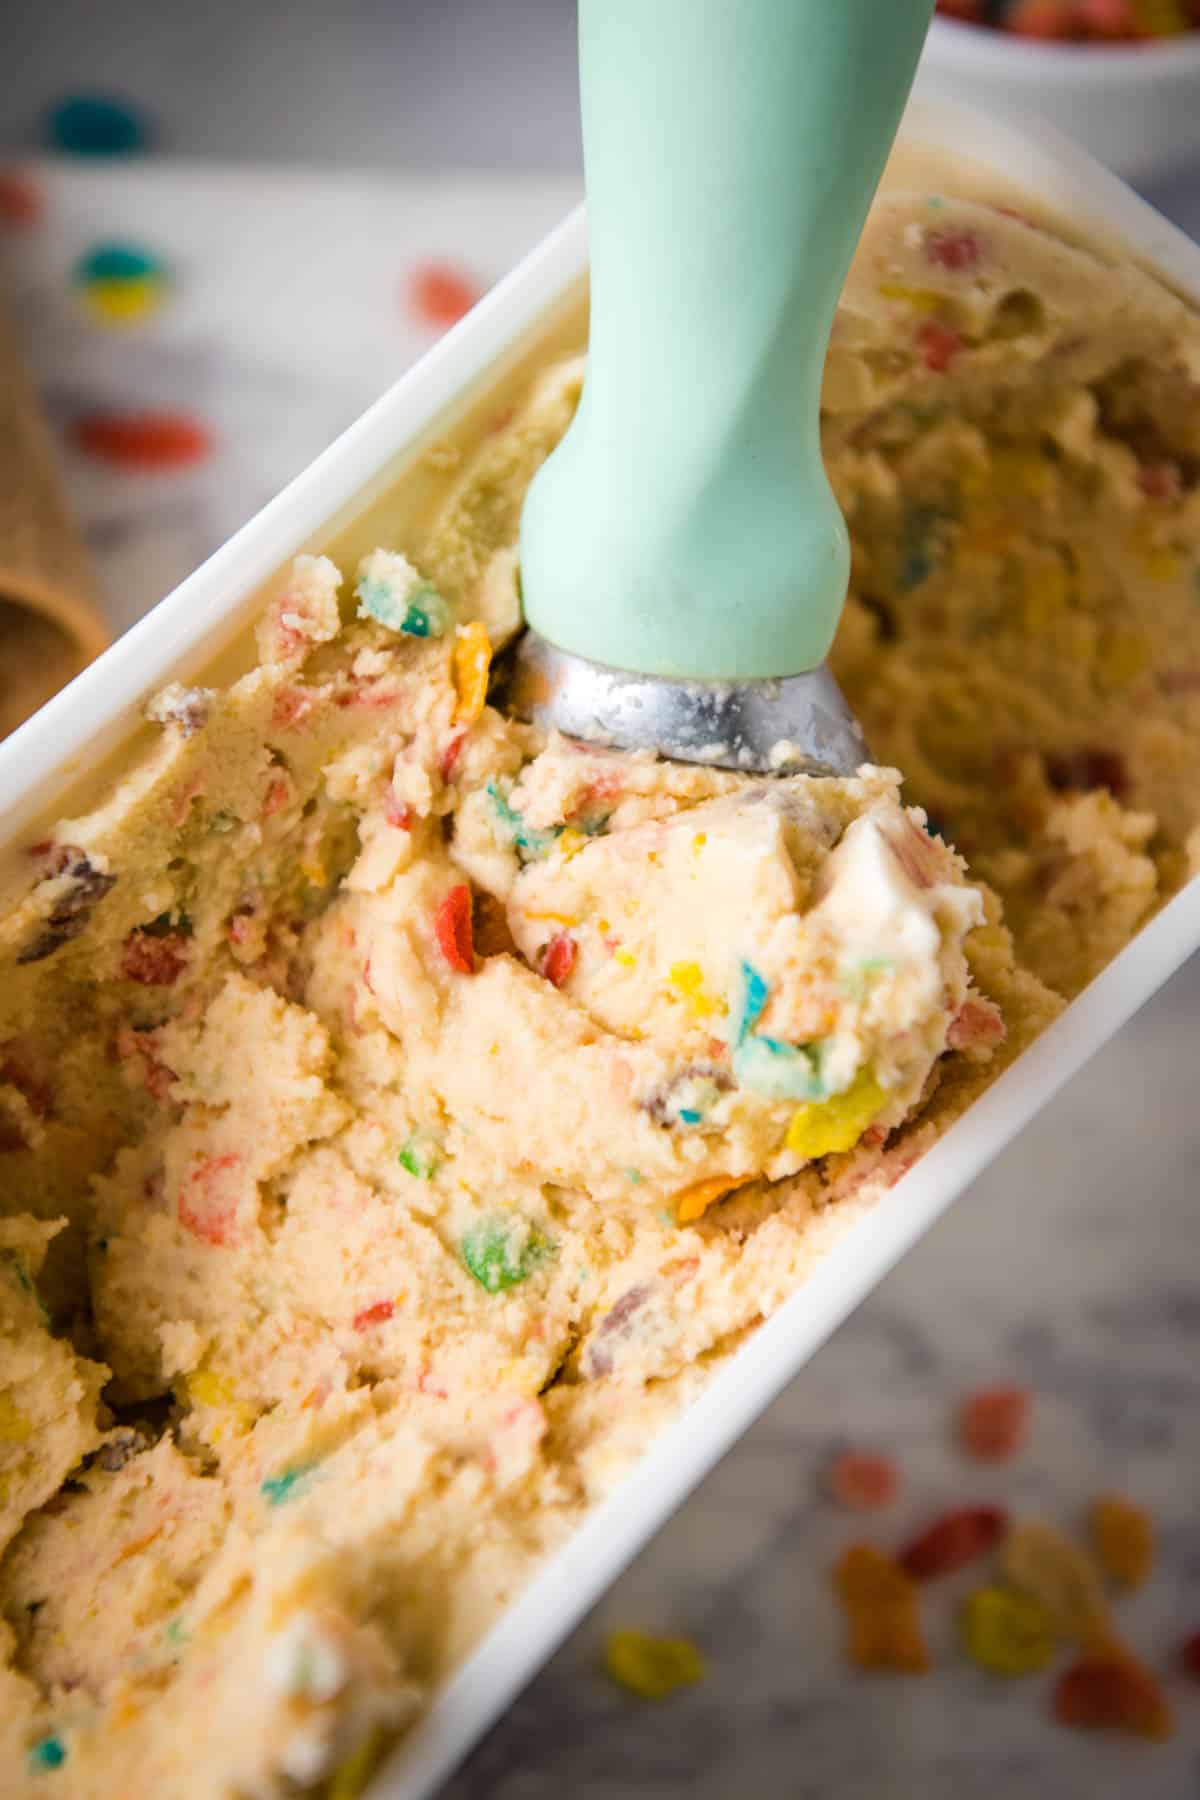
- When the ice cream has a soft, creamy texture, turn off the machine, and scoop the soft-serve ice cream into bowls for serving; or if desired, scoop it into an airtight container, and place it in the freezer for 2-3 hours to firm up more. Then serve when ready.
Expert Tips and Recipe FAQ’s
No, you don’t. If you don’t like the soggy cereal texture, you can either let the cereal infuse into the milk for at least an hour before mixing up the ice cream, then strain it out; or you can crush the cereal into smaller bits and mix that into the ice cream. If it were me, I’d crush the cereal and still let it infuse into the ice cream as it mixes.
Of course! You can make Cocoa Pebbles ice cream. You could also use another other cereal you like, for example, Fruit Loops, Crunch Berries, Cinnamon Toast Crunch, and more. The sky’s the limit!
Store it in an airtight container in the freezer; it needs to be airtight so it doesn’t get freezer burn. It should last up to 2 weeks. I use these super cool ice cream containers, and I have 2 of them, so I can always have 1-2 containers of ice cream in the freezer for the kids. They work great, and they’re easy to wash too. You can find more options in my guide filled with ice cream accessories and tools.
Recipe Variations
Gosh, there are so many things you can add or change about this recipe to switch it up…
- Swirl in a fruity sauce, like strawberry sauce or raspberry sauce.
- Swap out cereals, like we talked about above in the FAQ’s. You can use Fruit Loops, Crunch Berries, Cinnamon Toast Crunch, and more. The sky’s the limit!
- Add mini marshmallows toward the end of the churning/freezing process, or add marshmallow fluff into the mixture to give it even more flavor, sweetness, and texture.
- Add in chunked or chopped fruit, like strawberries, cherries, or blueberries toward the end of the churn process, probably the last 5 minutes.
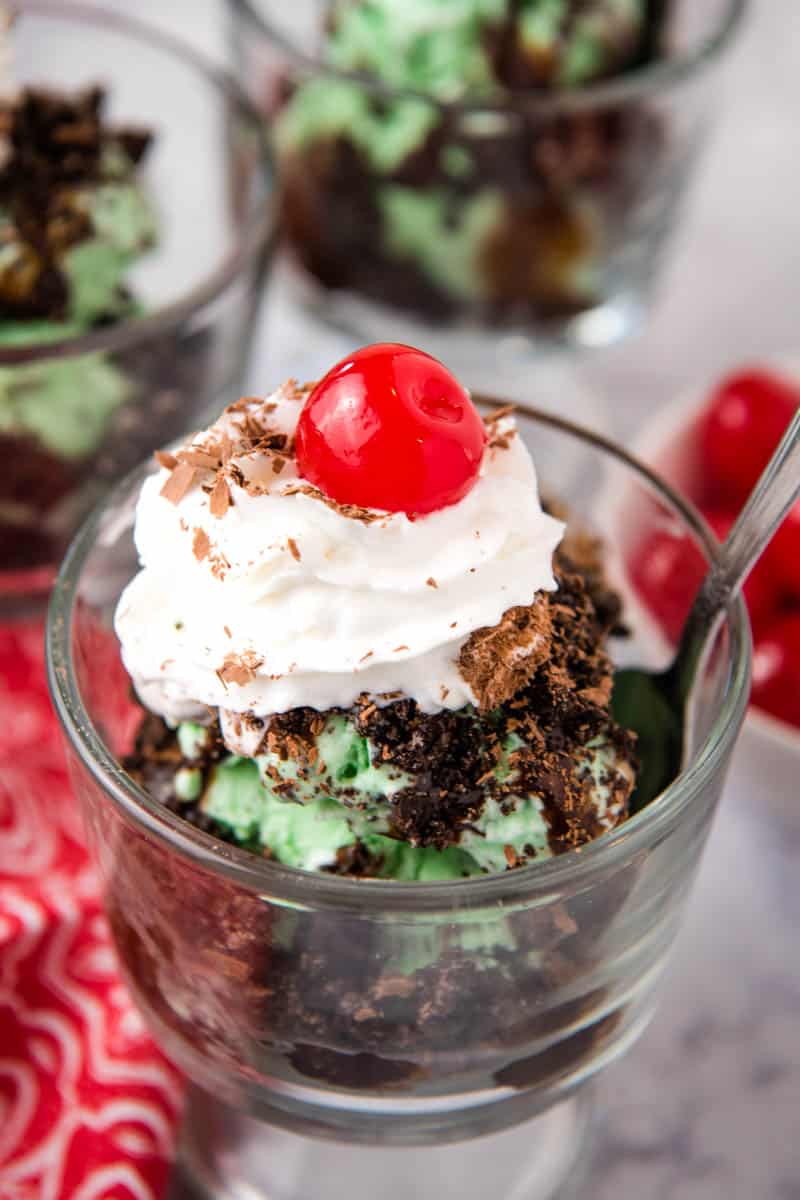
- Make a sundae with syrup and sprinkles (or more cereal sprinkled) on top. Better yet, sandwich this ice cream between sugar cookies or brownies and enjoy a refreshing ice cream sandwich.
More Ice Cream Recipes
If you love this recipe, you’re going to love these flavors too…
- Homemade Butterfinger ice cream
- Homemade chocolate ice cream
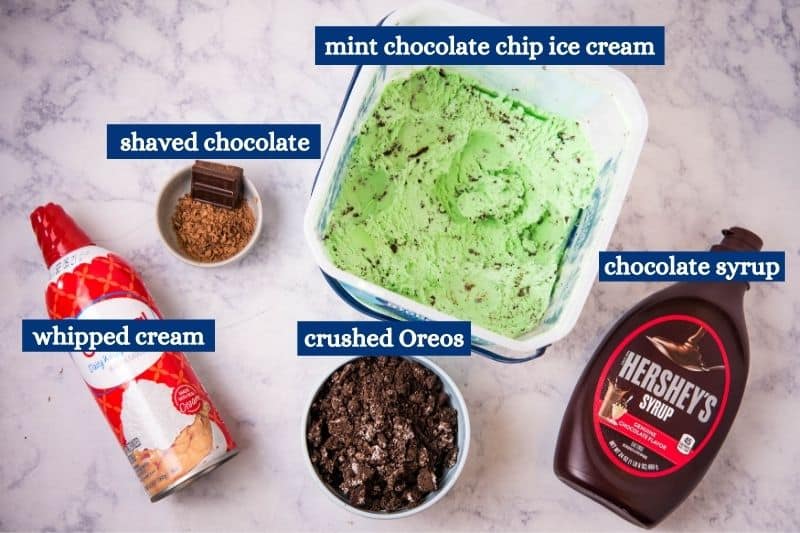
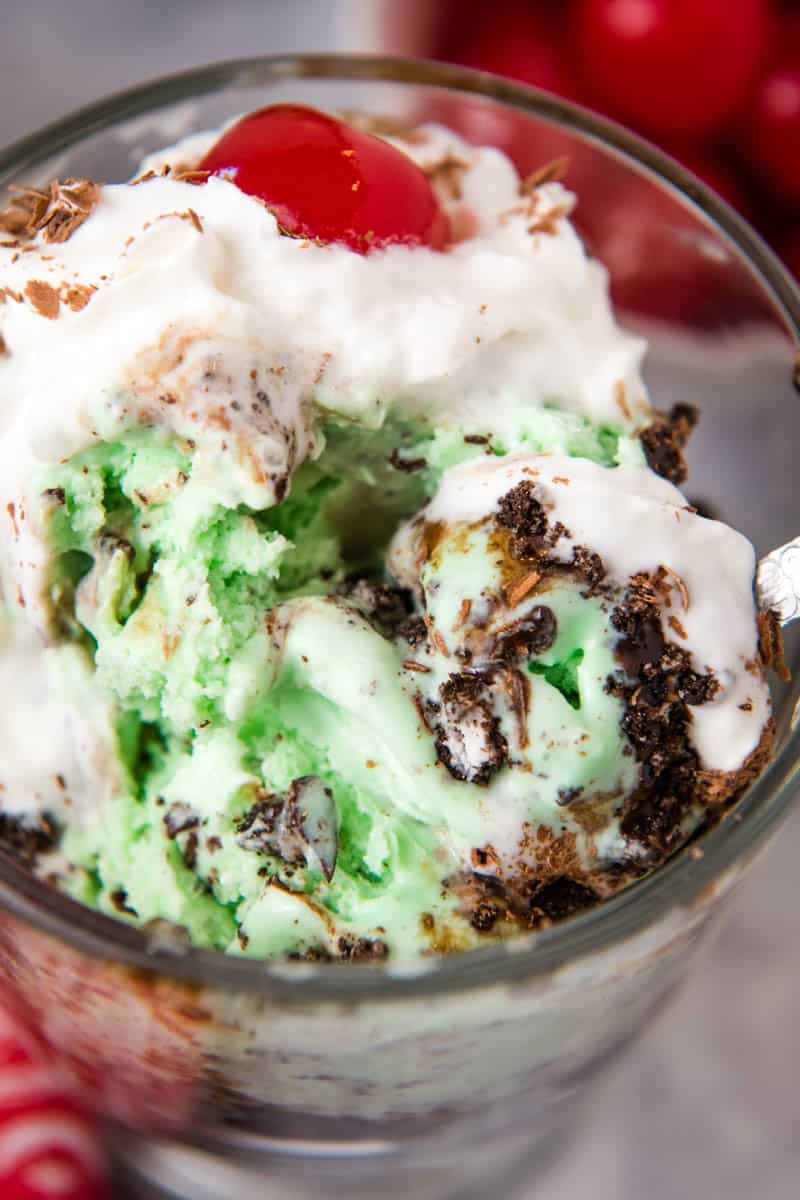
- Mint Oreo ice cream
- Old fashioned homemade ice cream
- Old fashioned strawberry ice cream
- Homemade banana ice cream
If you try this recipe, why not leave a star rating in the recipe card right below and/or a review in the comment section further down the page? I always appreciate your feedback. You can also follow me on Pinterest, Facebook, Instagram, and YouTube. And subscribe to my email list too!
Fruity Pebbles Ice Cream

How to make homemade Fruity Pebbles ice cream with a rainbow of flavors. Easy cereal milk ice cream recipe you can make to eat in 30 minutes.
- Large Mixing Bowl
- Ice Cream Maker
- Ice Cream Container with Lid
- Ice Cream Scoop
- 1 1/4 cups whole milk
- 1 1/8 cups cane sugar
- 1 teaspoon sea salt
- 1 3/4 cups Fruity Pebbles cereal
- 3 cups heavy cream
- 2 teaspoons orange zest
- 1 1/2 tablespoon vanilla extract
Before you start to mix this up, be sure you've pre-frozen the ice cream canister that goes with your ice cream maker; if you don't, your ice cream won't freeze.
In a large mixing bowl, combine the whole milk, sugar, and salt 'til the sugar and salt dissolve, about 1-2 minutes.
Add the Fruity Pebbles to the mixture, and blend 'til combined.
Whisk in the heavy cream, orange zest, and vanilla extract, mixing well.
Turn on the ice cream freezer, and pour the mixture into the freezer bowl with the churn paddle in place.
Then place the cover on top, and let it mix 'til it thickens, about 20-25 minutes.
When your Fruity Pebble ice cream has a soft, creamy texture, turn off the machine, and scoop the soft-serve ice cream into bowls for serving; or if desired, scoop it into an airtight container, and place it in the freezer for 2-3 hours to firm up more. Then serve when ready.
*If you don’t like the soggy cereal texture, you can either let the cereal infuse into the milk for at least an hour before mixing up the ice cream, then strain it out; or you can crush the cereal into smaller bits and mix that into the ice cream. If it were me, I’d crush the cereal and still let it infuse into the ice cream as it mixes.
Store this ice cream in an airtight container in the freezer; it needs to be airtight so it doesn’t get freezer burn. It should last up to 2 weeks.


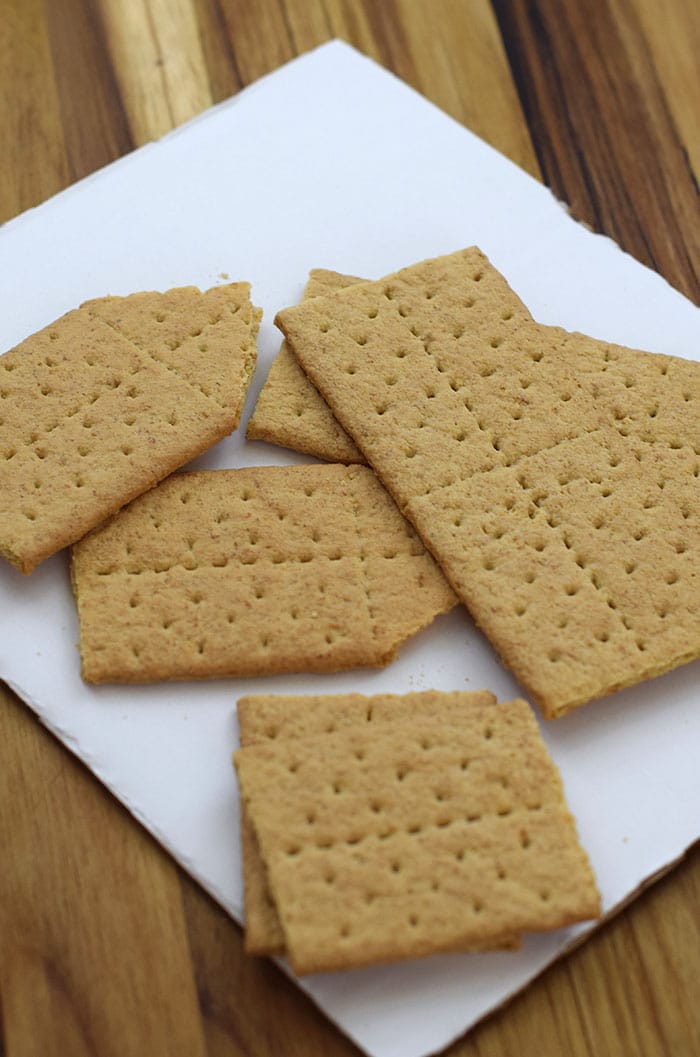 Next assemble your leprechaun house using graham crackers and Decorating Icing.
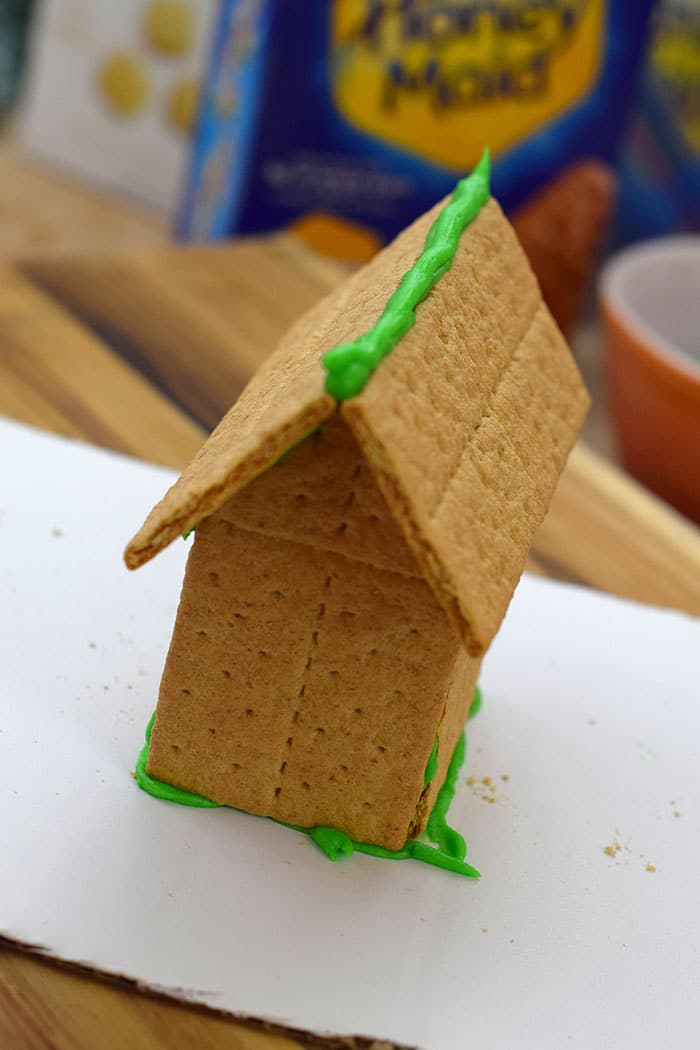 Now here’s where it was a bit tricky for me in the beginning. Everything I’d read said to use Royal Icing, but I’m just going to be real here… I tried that, and it was horrible. It was horrible! A disaster of epic proportions. I’d bought a box kit, and I’m not sure what happened with it, but it just wasn’t for me. I think it had more to do with me than the icing; I just didn’t have the patience for it. But I was lucky that I actually had backup in the form of Wilton Decorating Icing. It worked great! And there was no mixing or hassle with it.
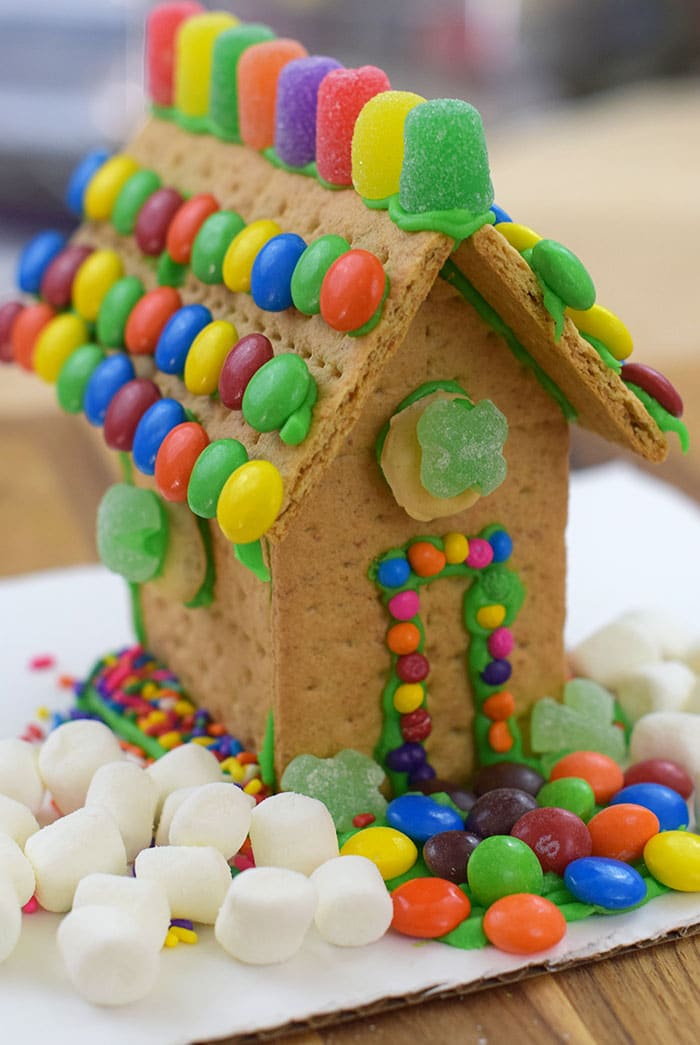 Once your house is constructed and has had a chance to meld together enough that it’s not going anywhere, it’s time for the fun part… Decorating! This is where all your candies and sprinkles come in.
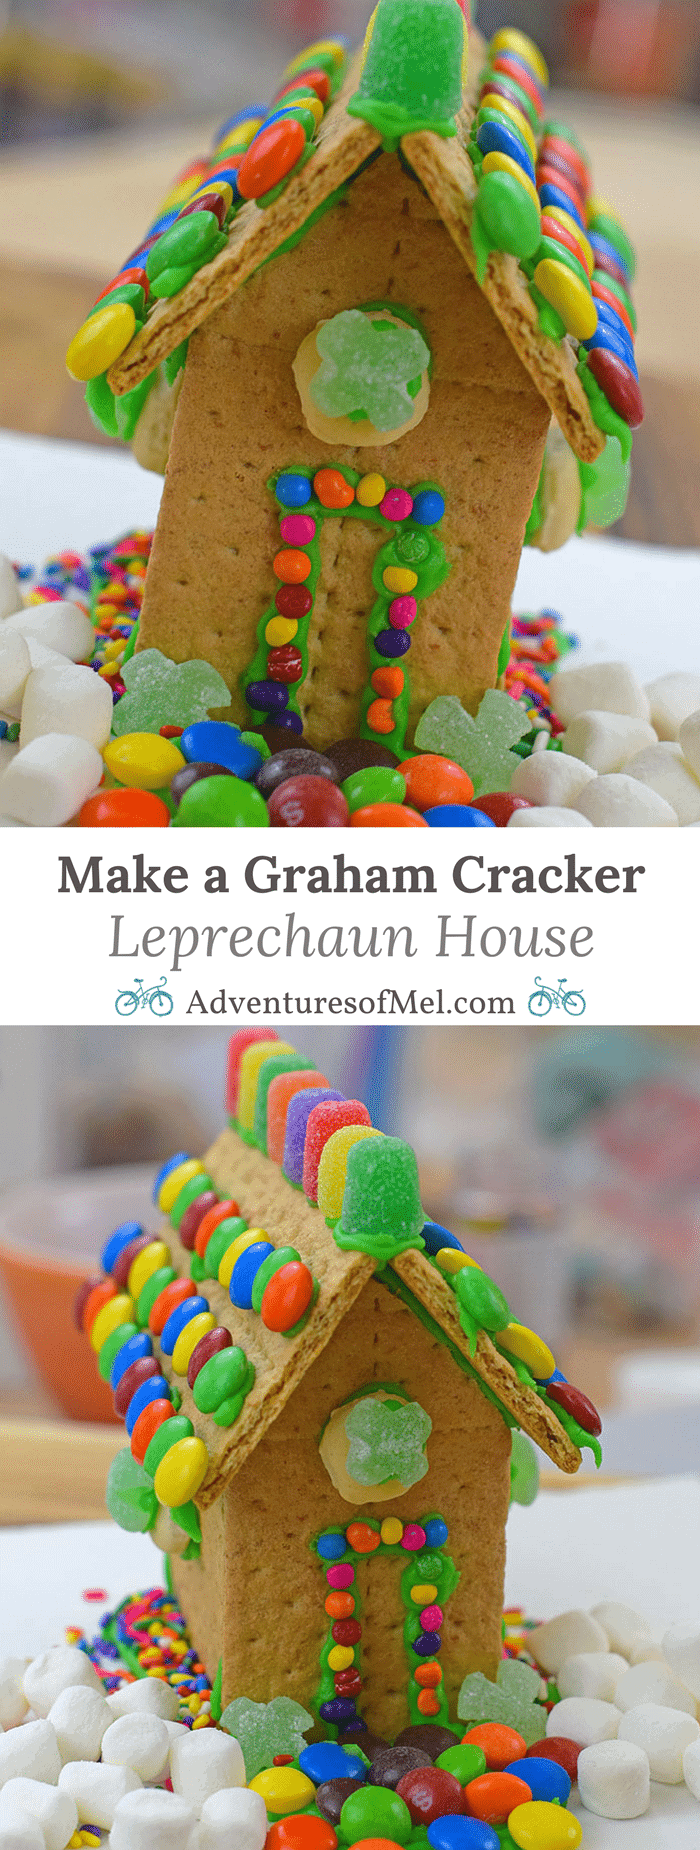
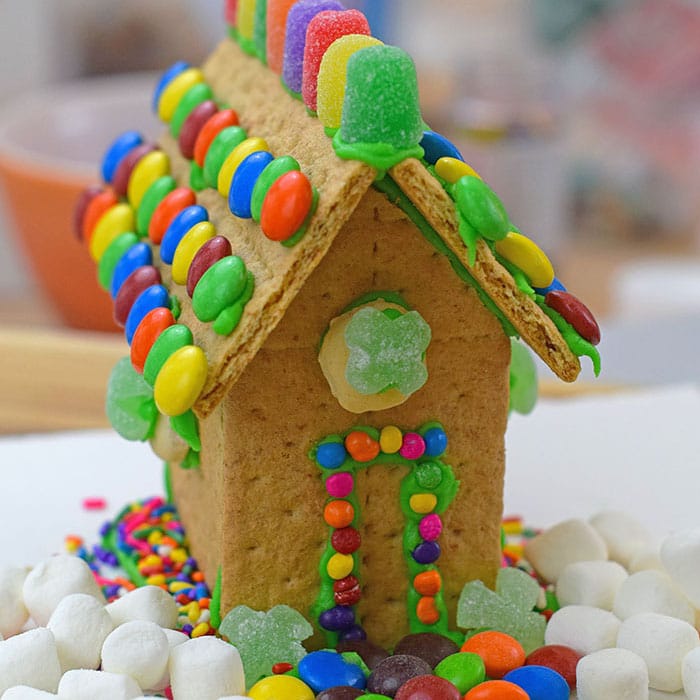
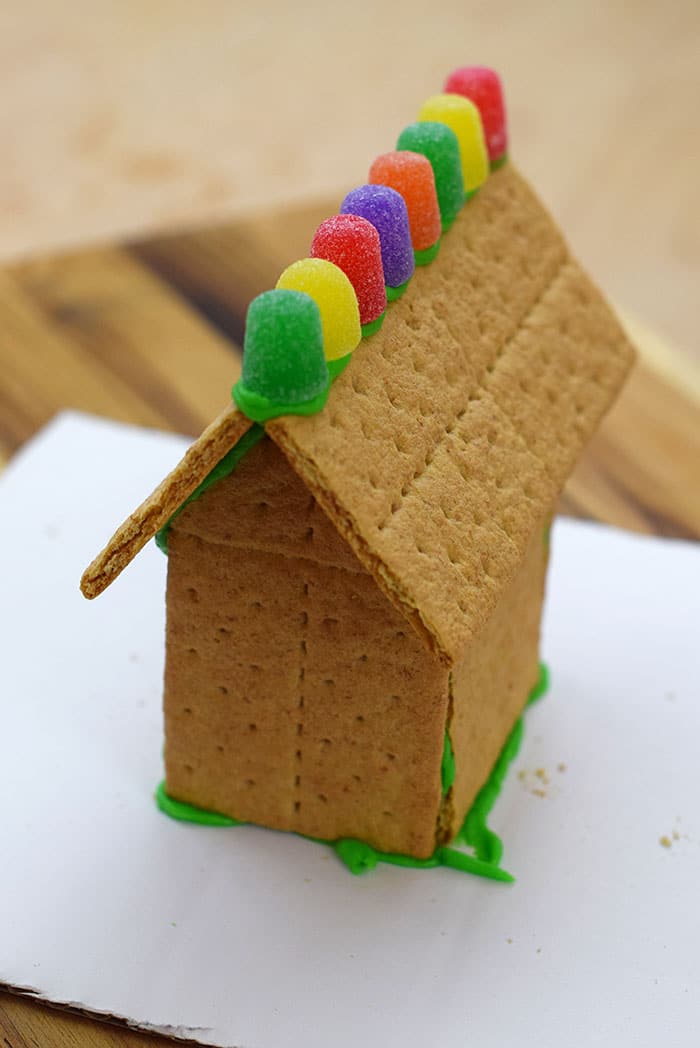 There really is no set way to decorate a leprechaun house.
 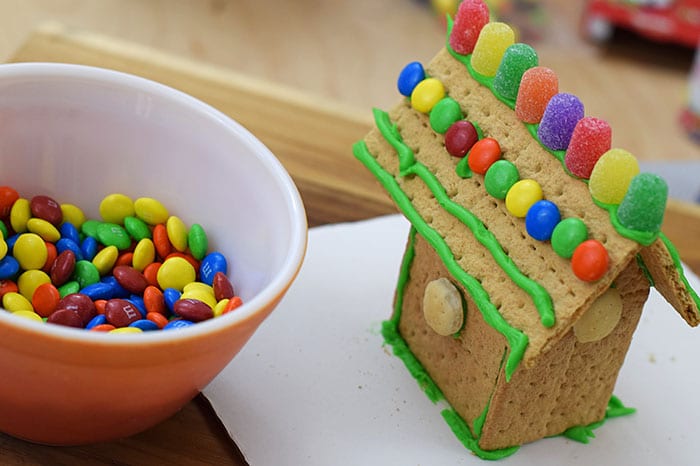 But I do recommend LOADS of rainbow colors, in the form of spice drops (or gum drop candies), M&M’s, Skittles, sprinkles, and more.
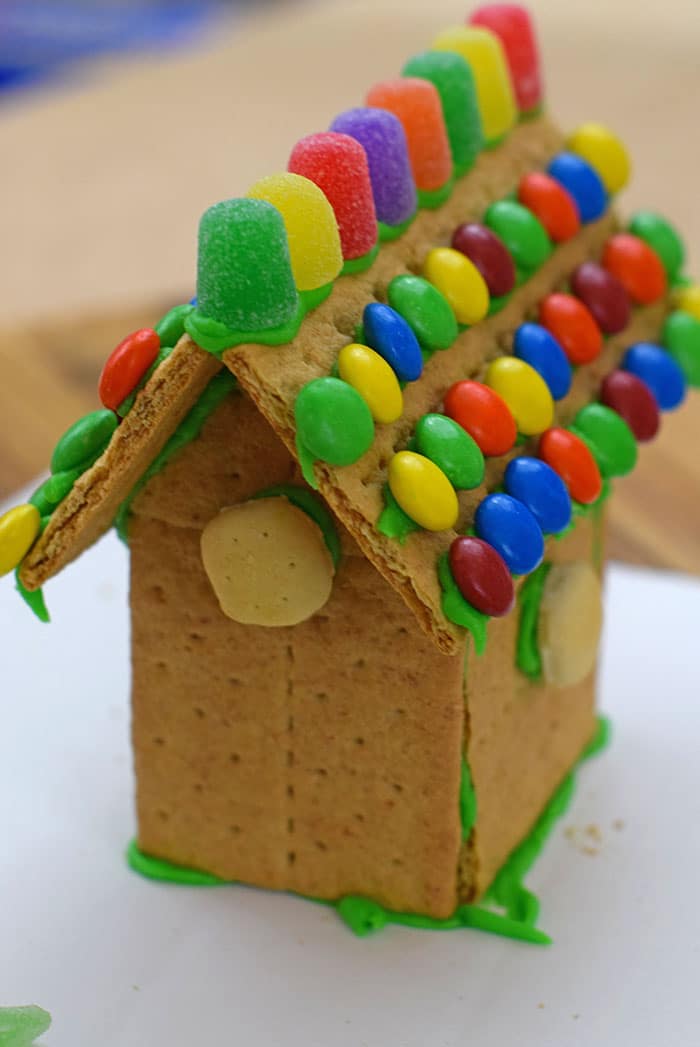 Use your Decorating Icing to attach everything to your house.
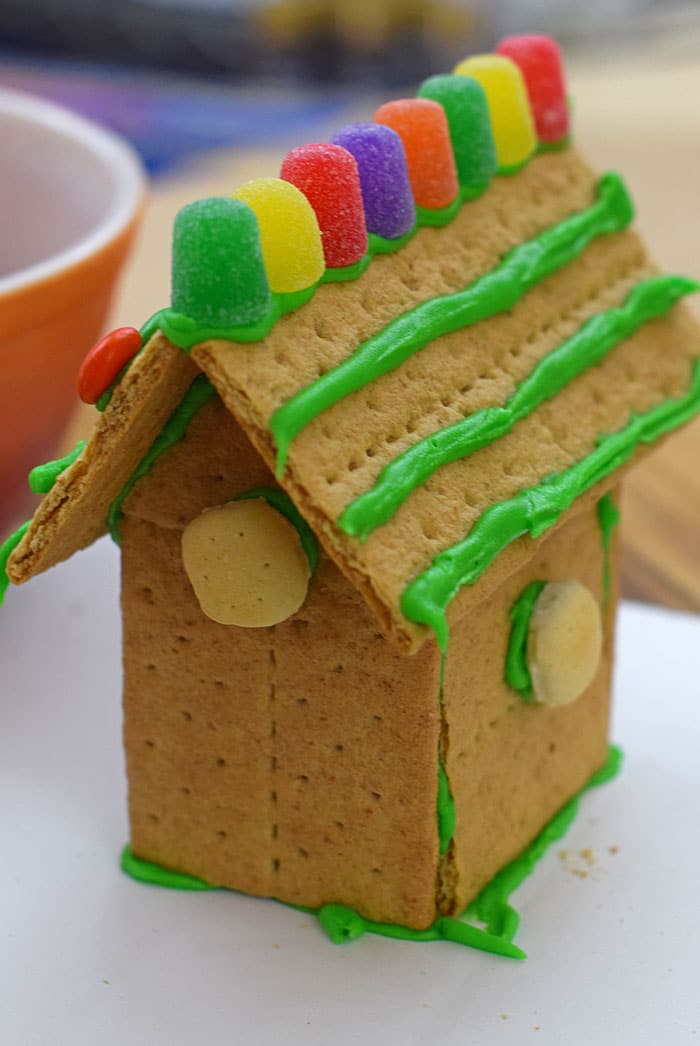
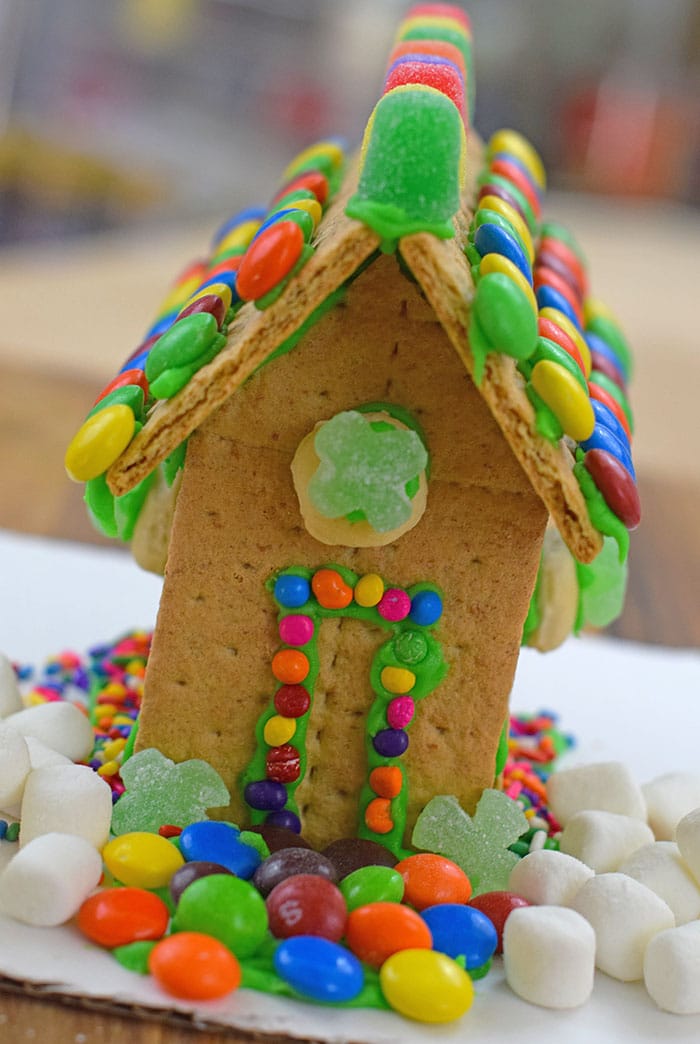
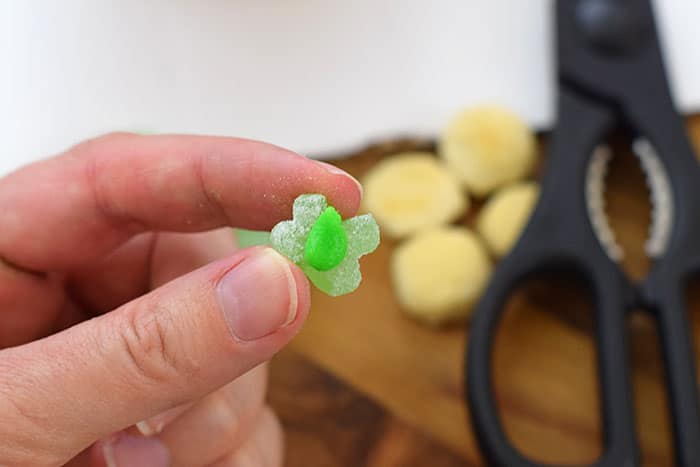 I found small green apple gummies that I actually cut with scissors to hopefully look more like 4-leaf clovers.
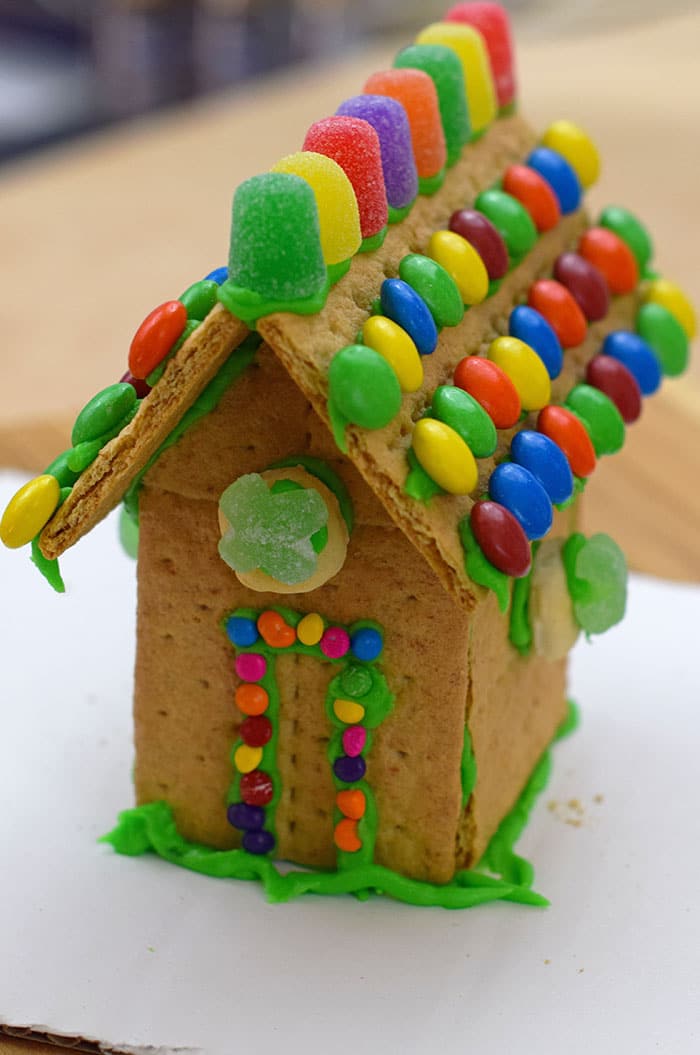
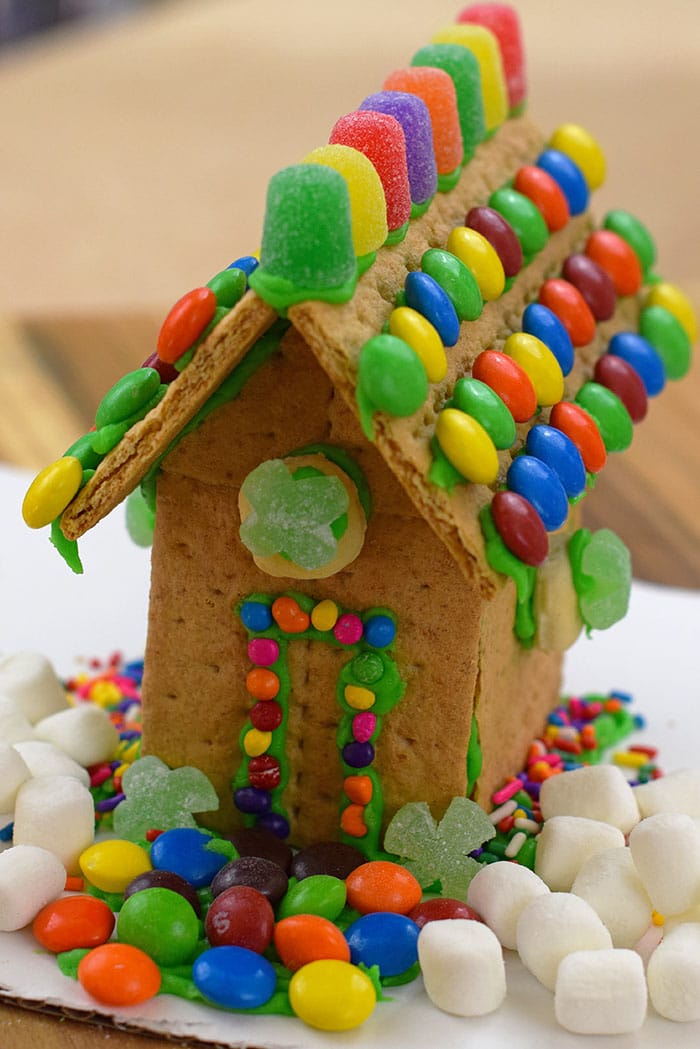 Skittles make a wonderful rainbow path through clouds of mini marshmallows.
 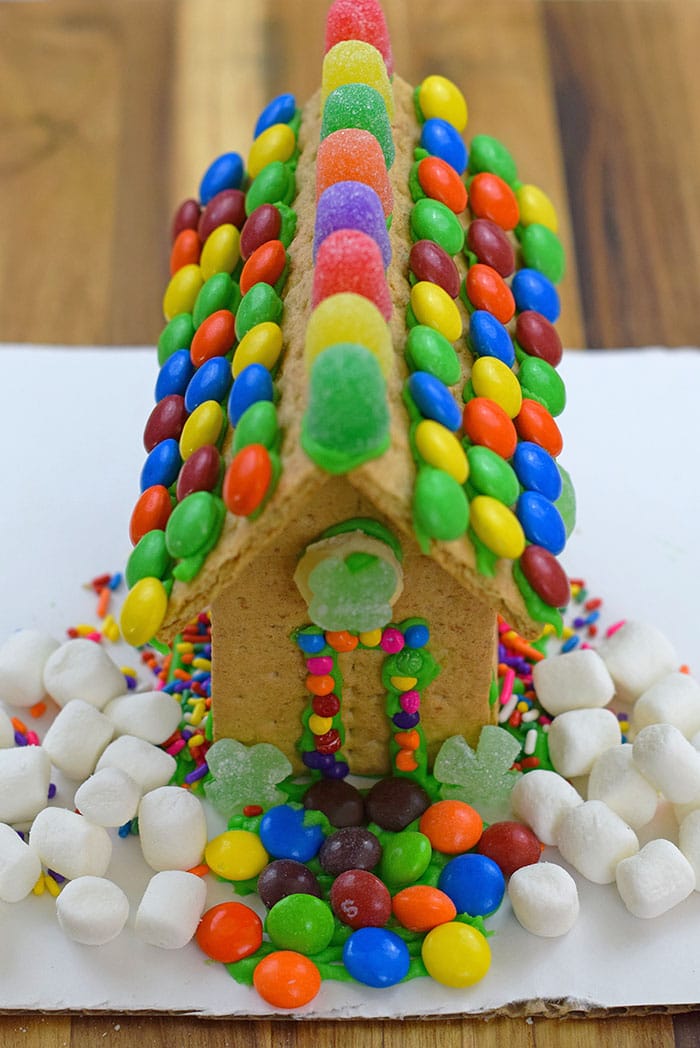 Just be creative and have fun with it! The decorating is especially fun for kids, though they may eat more than they decorate, fair warning.
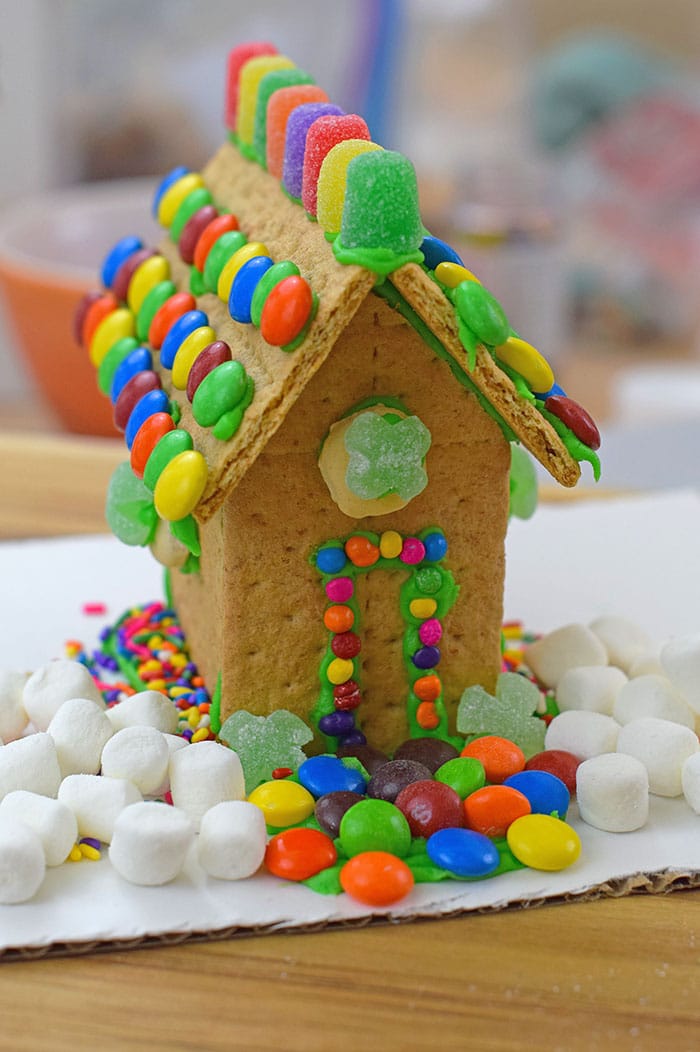 Happy decorating your very own graham cracker leprechaun house this